Week 2
Let's go online !
MOOD OF THE WEEK

This week just started, focused like never before!
First impressions of the week, I realize I'm not used any more to work in a group on a subject I'm not familiar with. In my former job I worked with people, sure, but it was on a conquered field. Not much of a challenge.
This time I'm not the "expert", I have lost a bit of patience when it comes to sit down and learn some coding. But every means to an end, I took on me and eventually got through it !
Actually coding seems to be kinda like riding a bike. It comes back quite easily ! At least at this level and for the need of the assignment. We'll see for the rest !
GOING LIVE BABY !
This week's assignments :
- Build your own website with HTML/CSS
- Follow a GIT tutorial
- Put your website online on Fabacademy.org
- Sign the Fabacademy agreement and put it on your website
WHAT HAVE I DONE ?
Step 1 : Building a website
If you're reading this, apparently yes ! :) Still work to be done, but I'm quite proud of how it looks. I already did some coding back in a former life as I said before, so it took me not so much time to build the pages.
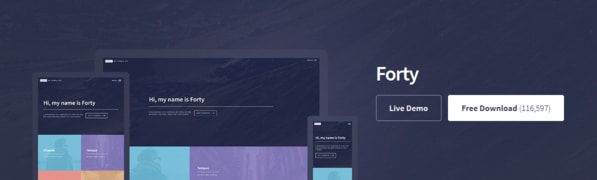
I used a HTML5 Up! Template called Forty : https://html5up.net/forty
It was not an obvious choice, but I'm pretty glad I did. With some adaptations, it turns out to be visual and nice to navigate around. This template uses HTML, CSS and a little bit of Javascript.
You don't know any of those words ? Do not panic ! You can check my Basics page and find there some tutorials I made just for you :) There you'll find everything you need to know about those languages, a bit of history, and even get some tips to practice yourself !
How did I adapt this HTML template ?
Like I said before, to make this website I used a template from the site HTML5 Up called Forty.

What's the difference between a template and a web framework ?
Web frameworks provide a standard way to build and deploy web applications on the World Wide Web. A framework can be composed of different templates.
Why use an HTML template ?
Mainly because I'm lazy ^^ I did not want to invent a design and code my website from scratch. My Fabacademy classmates told me about this website full of nice and responsive HTML templates, that were easy to custom. I found the one that I liked, and here we are :)
"How do I use a template for my website ?" will you ask me
I'm going to show you how to do it step by step :)
Step 1 : purchase an HTML template
There are a lot of those online, you can use one of HTML5 Up (the website I talked about earlier) or find one that you like in another website. I'm gonna show you how I customed the Forty template as a demonstration, since it's the one I used here.
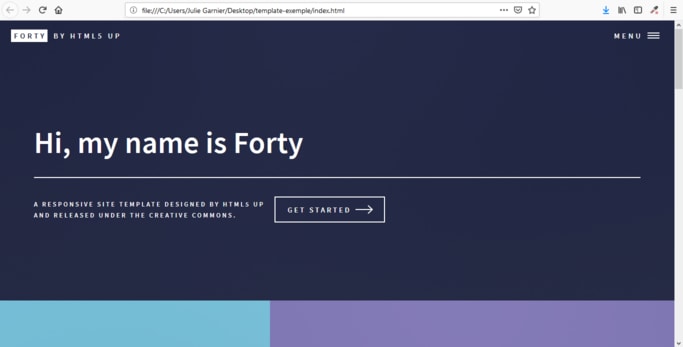
Most template will come in a zip file, so download it and extract it. When you look inside the template's folder, you'll find an "index.html" or "index.htm" file.

Now, open that file up in your web browser. Does it look familiar ? ;)
Step 2 : identify what you want to change
The best place to start is the content of your website, so change the HTML. It prevents you to get drown into the CSS style sheets.
I took a look on the template in Firefox and saw what I wanted to change. On the index page for exemple, I wanted to put
- my name
- a quick line about what this website is about
- a button to go down
- a link to my facebook page
When you have your own list of elements to change, let's move one to the next part :)
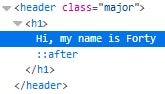
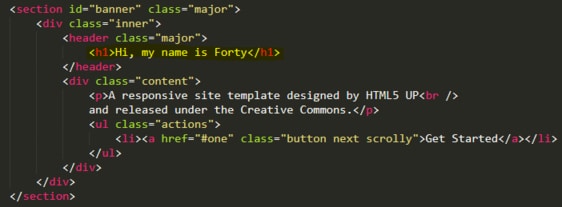
Step 3 : find the tag in the inspector
I'll start with the name. If you want to do it too, right-click on the element you want to change (here the word "forty") and select "inspect". A panel will open in your web browser. This panel gives you an interactive way to look at the code. Hover the line that shows the h1 tags. It should look like this :
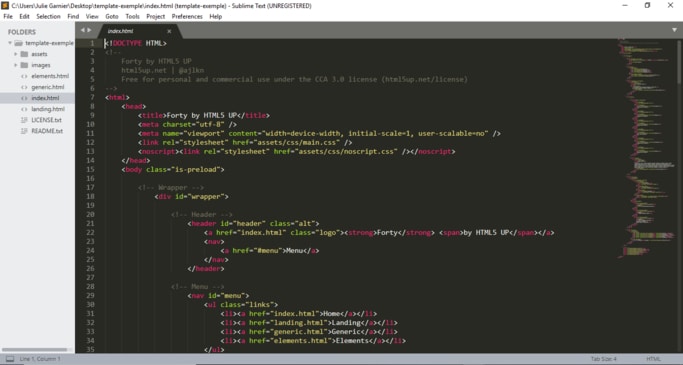
Step 4 : edit the HTML in the editor
It's now time to open your text editor and to edit it ! In my Sublime Text editor, it looks like this :
Scroll through until you find the h1 tags you want to change. Oh there it is !
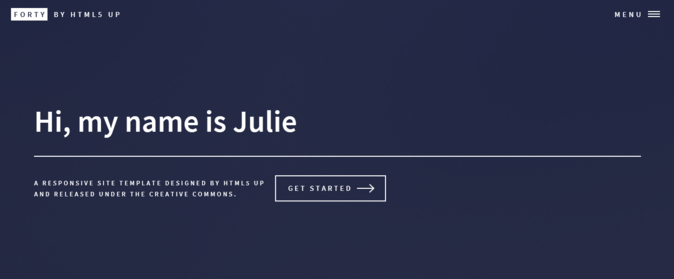
Now I can edit it !

Just have to save the changes and open it in my web browser to see how it looks like. Bingo ! :)
Step 5 : repeat the process as much as needed :)
Here is basic recap of the process :
- Inspect the content you want to change
- Identify the matching tags
- Locate the tags in your HTML file
- Edit the code and save your changes
Is it the same process for the CSS files ?
Yes ma'am / sir ! There's one thing I do that can be also useful to you, is to create a brand new style sheet where you can add your modifications. Sometimes what you code can create conflicts and not seem to work. I find it easier later, if there's a bug, to find what changes should be removed.
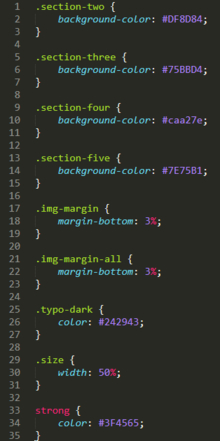
To do so, nothing easier. In the appropriate file, create a "style.css" file and put your modifications in it :) Here is what mine looks like :
Don't forget, no matter how complicated the template you downloaded looks like, it is always the same process ! If there are tags and/or CSS properties you don't understand, don't let it hold you back ! You can find plenty of informations online to help you !
Step 2 : Understand Git, discover Gitlab and put the website online on the Fabcloud
I already knew some Git so I just had to read again the documentation and with help from my Fabacademy mates, here I go again on the road to versioning ! :)
You've never done Git before ? You don't know what I'm talking about when I mention versioning ? Go check my Git Tutorial and you'll know all the basics you need to understand what's coming next :)
Now that we are at the same level of information, let's do it !
Clone the Gitlab repository
The advantage of Gitlab is that there's an interface to use it easily. But since I know some command lines and I'm not afraid by the terminal, let's use it !
Just a reminder : I use windows so what I'm describing next is for ... well windows users ^^
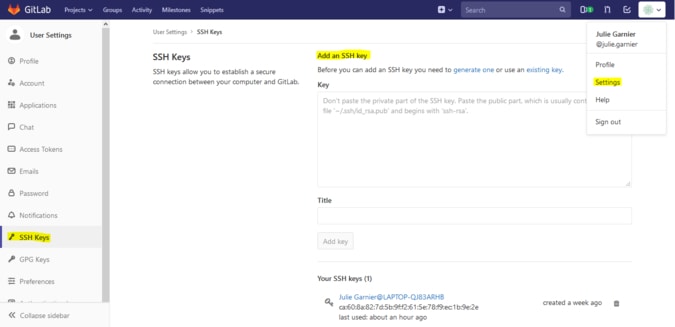
I have to find my SSH key and add it to my Gitlab account (that was previously made by the Fabacademy team, we received our login and password by email).
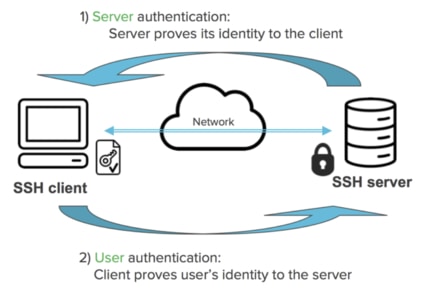
What's an SSH key ? SSH is for "Secure Shell". SSH provides a secure channel over an unsecured network in a client–server architecture, connecting an SSH client application with an SSH server. Here is an illustration so you can understand it better.
In order to find mine, I followed what my Fabacademy mate Madjid told me to do, and went on Git GUI. It comes to your computer when you install it on windows. Here the way to find it : open Git GUI > help > show SSH Key.

Okay now I have my SSH key, I need to add it to my account.
Here I go, now I can add all the things I do on my website :)
Wanna know more about Gitlab commands ? Here is the link to the Gitlab documentation.
Step 3 : Sign the Fabacademy agreement and put it on your website
You can find it on the footer of the home page, a beautiful link where you can click to be redirected to my Gitlab page and read it :)