Final Project
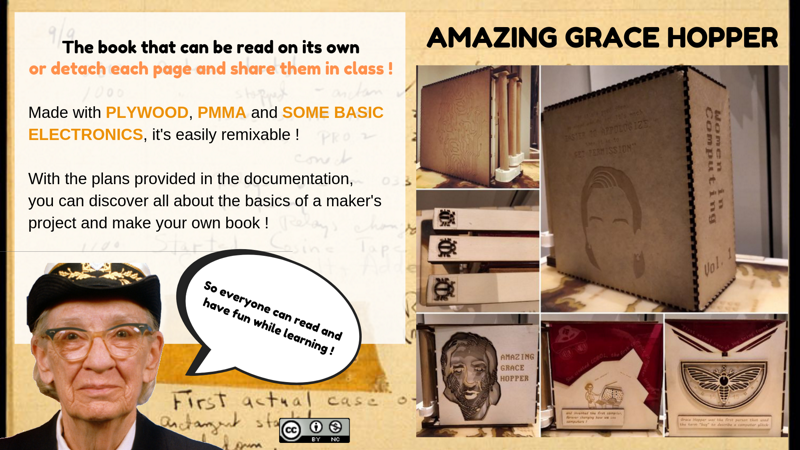
Make-a-book : Amazing Grace Hopper
Step 0 : The scope of my project
What will it do ?
My idea is the following : making a wooden art book, that can be read as it is, but you can also detach the pages so you can share them in class and read it with several different people. And why not make your own book after that ? But let's not get ahead, and let me show you how I made it and how I came to this idea :)
As a first prototype, I'll turn at least one page into an interactive one with a button and some leds, and if I have time I'll make a charlieplexing led circuit too.
How did I get this idea ?
My first idea for a final project was to make an interactive escape game (you'll have the first glimpse of the project in the bonus track of this page) but it was too big of a project for such a short amount of time. I'll keep the idea for after the Fabacademy.
To help me think, I started a todo list of what I want my final project to show :
- Something that can show my skills, and as much possible of what I learnt those past few months
- It has to be fun and pretty, but still people can learn some stuff from it
- Show one or more of my engagements/values in the digital community
This being said, what can I do now ?
I'm pretty engaged about women in tech, I was part of a community called "Ladies of Code" in Paris, I helped creating and animating a 6 weeks program reserved to women where they can learn digital skills and are encouraged to pursue carreers in technical jobs. Lately I also helped reshape a 4 weeks program called "Jump in Tech" for an association, it will take place next july and will teach technical skills to more or less 40 young girls in three different cities around Paris.
I go regurlarly in tech schools to talk about the history of women in tech, it would be nice to have something that I could carry on me and show as a support, or to leave it there for people to see about that subject.
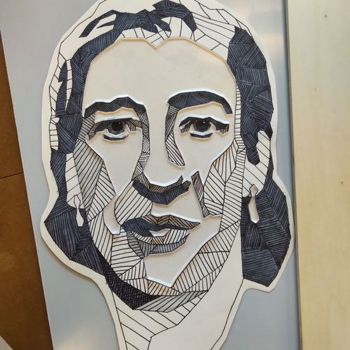
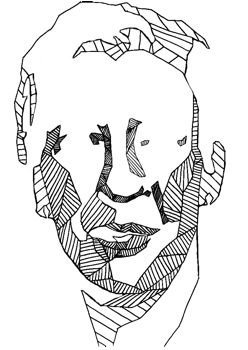
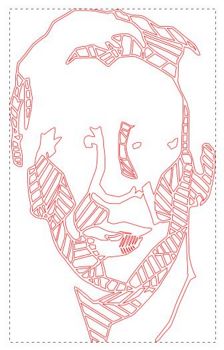
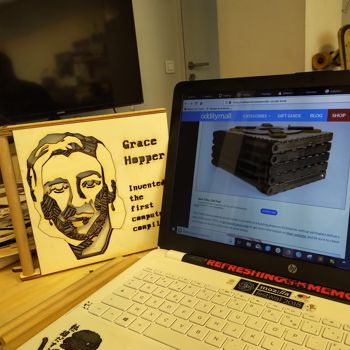
I love drawing, it helps me think. Now that I know what is my subject, let's try seeing what inspires me with some basic pens and paper. I started drawing Grace Hopper, which is an incredible woman I talk a lot about in my different interventions in schools. Okay, let's make someting about her :)
What inspired me ?
I know I want to do something with the laser cutter, since it's my favorite machine in the fablab. As I was looking for inspiration online, here are the two links that helped me shape my project :
| Name of the website | Link |
|---|---|
| Wooden Puzzle Book | https://odditymall.com/wooden-puzzle-book |
| Gabriel Schama | https://www.gabrielschama.com/ |
From my drawing and those two links, I got the idea of the wooden book that can be turned into an art exhibition. Later on I'll do it about more women, but for this final project I'm gonna focus on making an hommage to Grace Hopper :)
I'm mainly gonna use the laser cutter, but the idea is to be able to integrate some 3D printing in one of the page.
How do I plan to be evaluated ?
I can see several points on how this project can be evaluated :
- Is there an input and an output on at least one of the pages ?
- Did I use 2D and 3D softwares to make it ?
My response to those evaluation points is the following :
- Is there an input and an output on at least one of the pages? Yes ! In page 2 of the book, there is a Charlieplexing circuit to light up the little computer illustrated.
- Did I use 2D and 3D softwares to make it ? Yes ! The book was made in Inkscape, and brackets to help the book stay still were made in Tinkercad.
BOM (Bill Of Material)
Here is what I'm gonna use and how much it costed :
| Name of the material | Price |
|---|---|
| 3D printer filament | 1€ (the whole bobin costs 36€, and I used just a little bit of it, so I'm pretty much guessing this part ^^) |
| 1 X ATtiny84 | 0.69€ |
| 1 X ISP | 3.5€ |
| 3 X 470 ohms resistors | 0.021€ |
| 6 X leds (3 white and 3 orange) | 3.18€ |
| 1 X 3mm pink PMMA | 13.37€ |
| 4 X 3mm plywood | 8€ |
| TOTAL COST | 29.771€ |
Step 1 : Making a first prototype
Turning my drawing into something acceptable for the laser cutter
First things first, I have to vectorize my drawing in order to be able to do a first test with the laser cutter. As usual I'll use Krita and Inkscape for this.
don't hesitate to take a look at my Krita-Inkscape vectorization tutorial to understand how I did it in detail. It's not for the same drawing but it's the same process.
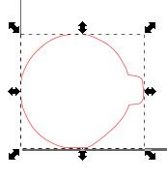
Here is the result after vectorization :

The first page tests
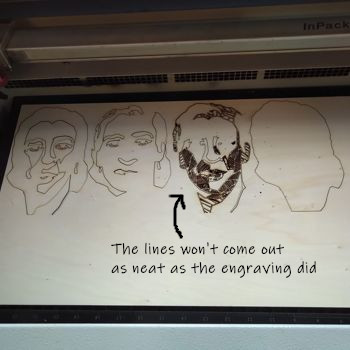
It looks pretty neat ! It will look good engraved, but I'm not sure it will come out as neat in layers, there are a lot of thin lines. Well, let's try at scale and engraved first, and do some tests with wood and plexi to start.
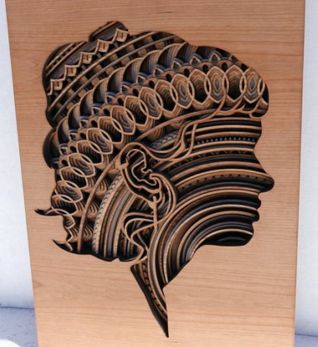
I was right, I really like how it comes out :) Let's go further now !
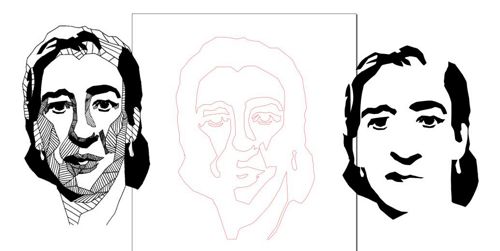
I want to make a portrait made of different layers of plywood. On Inkscape, I took my original drawing and turned it into different vector layers.
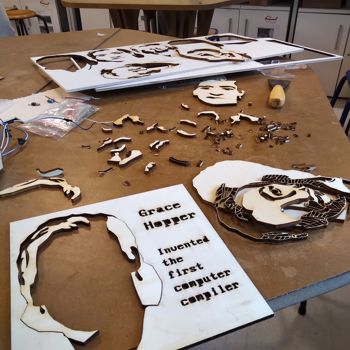
Once I did the drawing and have all my layers, I can try out on plywood to see how it comes out.
I'm not satisfied of what the layers look like, and it still needs a main frame to encaspulate it. But first, I'll redo the layer with the different reliefs. I have to make them bigger so it won't burn and be visible but still thin enough to look nice.
Let's go back on Inkscape !
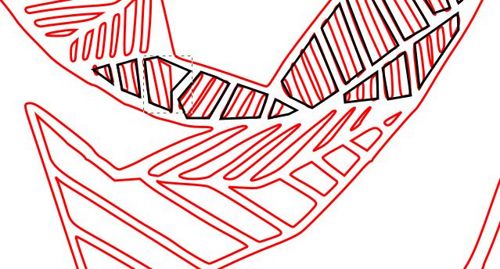
This is the result before and after I redid the different relief parts :
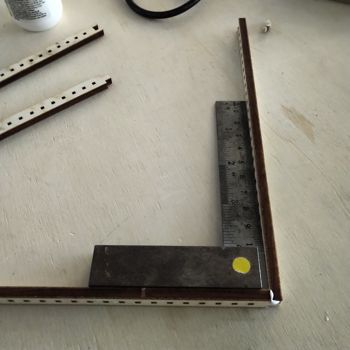
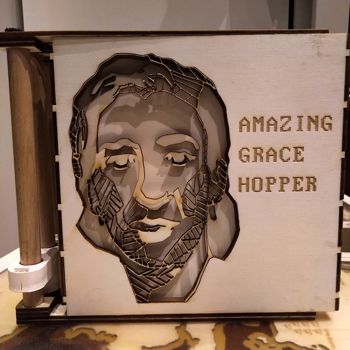
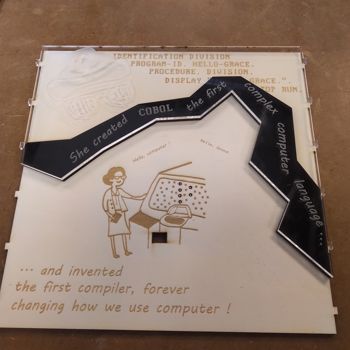
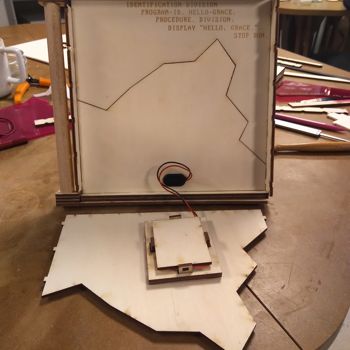
As I'm into Inkscape, I'll try on a frame to encapsulate everything, with a sentence to try and test a typography also. I'll go for a simple pressfit square of 20X20 cm. I went for it in the laser cutter pretty quickly. Here are the results of the process and once it is assembled :
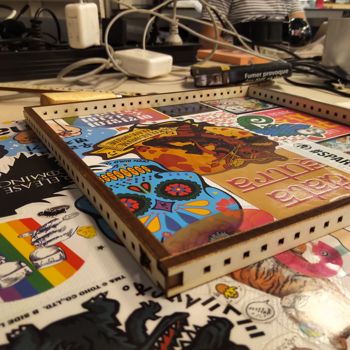
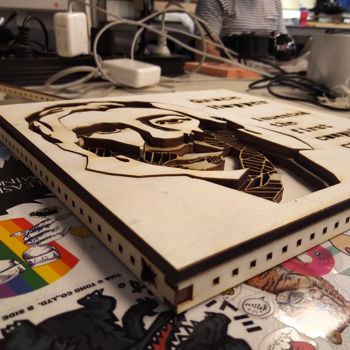
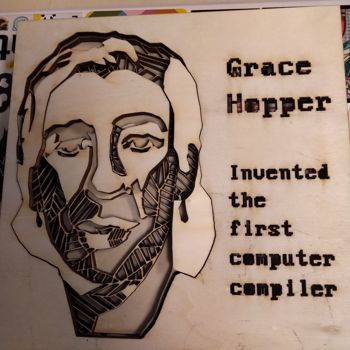
Looking good so far, the idea will be to have the letters light up one by one later, kinda like it's writing on a computer. I have to adapt it now on the way it can be turned into a book. I have to check how the guy on the video did for his wooden book. Let's take a look again :
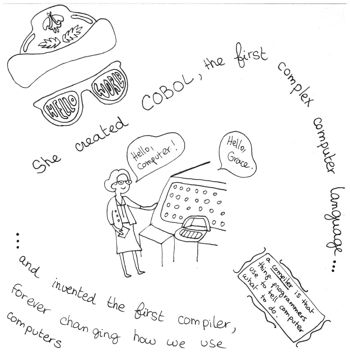
I drew it once or twice before finding the design I want. I'm pretty happy of what I came up with ! Here is the drawing on Inkscape :
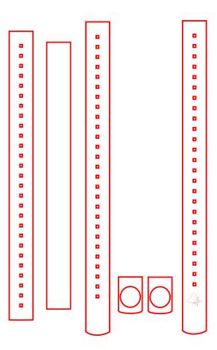
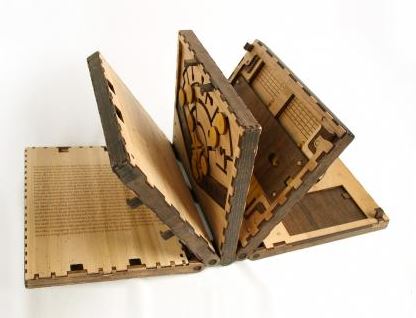
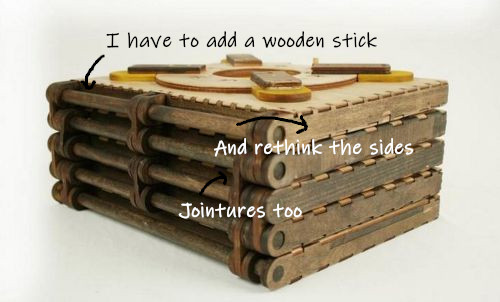
And everything put together. Here it is, the first page of the book ! Now I have to make another page to test the jointures and see if it fits well.
Making a second page
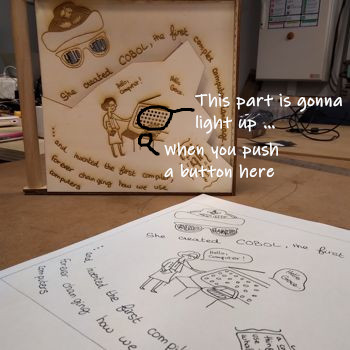
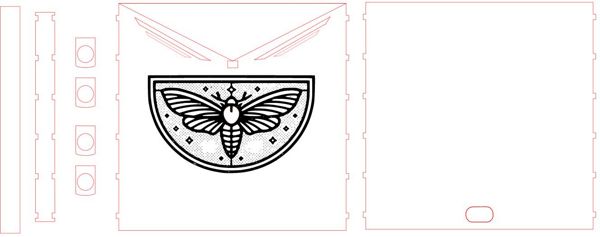
I drew another design for a second page, everything from the drawing to the typography. Here is what my drawing looks like. Not as sophisicated as the other one, but still nice :)
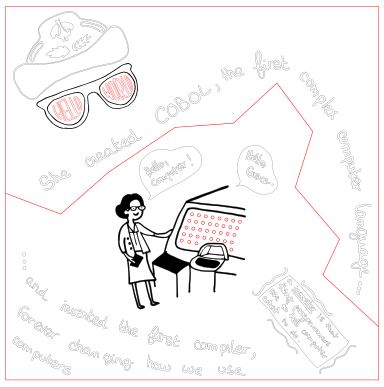
Won't describe the process of the vectorization, you know how it works now as I explained it earlier :) Here is what it looks like on computer !
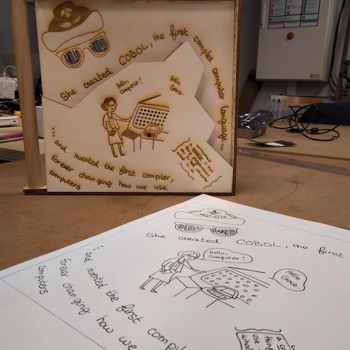
And now assembled next to the drawing, and next to the first page. It starts to really look like something ! :)

I made it as a multiplatform design, I'm gonna add some plexi to make it look better :)
Step 2 : do the final version
Now that I have done my first tests, I can move on and start making my final designs.
Page 1 : the cover page
This one is pretty easy to remake, because there's no electronics in it and I have a first version pretty complete. But still, the first one has not the writing I want and I have to make it a bit thiner, like the other two pages are gonna be. No redrawing on Inkscape, mainly just cutting it again in the proper plywood.
I won't go further into the process since I described it earlier already. But here is a picture of my final first page.
Page 2 : Graceplexing
I'm gonna do some Charlieplexing on the second page of my book. Something simple but efficient. I decided to start with this one.
How does Charlieplexing works ? Do not hesitate to check on my tutorial if you need to understand how this "magic" happens :)
I have to make a todo list of the changes in Inkscape so I won't forget anything :
- Cut the plexi parts
- Make sure they all fit together
- Make sure that they are all readable together
- Make sure there is a spot behind the page for the two batteries
In the look of this todolist, I went on Inkscape again to do some changes. First, make a spot for the batteries.
I found the datasheet of the battery holder I'm gonna use, it's a coin cell holder. I vectorized the drawing so it can be cut by the laser cutter.
On Inkscape, I also made sure my board would fit perfectly into those little holes. I did an image print of my board, put it on Inkscape to superimpose it with my drawing. I also added a place for the button. It seemed a bit laborious but was not so hard to do actually.
Second easy thing to fix, is ... well the rest ^^ And everything looks pretty good :)
Designing and soldering my board
What do I have to take into account when I design my Graceplexing board ?
I need 5 Volts to supply my board. But I only have 3V battery holder, so that's clearly not enough if I put only one. In order to make it work, I have to put 2 batteries and use a regulator to output 5 Volts and not to fry my board.
Here is the datasheet for my regulator : http://www.ti.com/lit/ds/symlink/tl780.pdf
And the link to the library I had to download to have a suitable footprint for Eagle : https://www.diymodules.org/download/eagle-libs/usr/1012210330/conv/_hhn_78xx_79xx_NCV78xx_d2pak_dpak.lbr
What did I use to make my board ?
Materials
I used the following components :
- 1 X ATtiny84
- 1 X ISP
- 3 X 470 ohms resistors
- 6 X leds (3 white and 3 orange)
- 1 X button
- 1 X voltage regulator
As for the machine to mill the board, I used as usual a Roland SRM 20.
Softwares
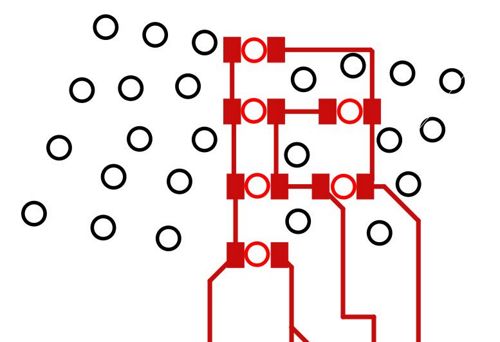
As usual also, I used Eagle to design my board. Here are my schematic and board :
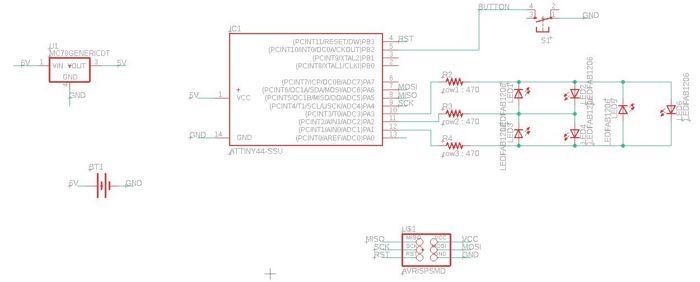
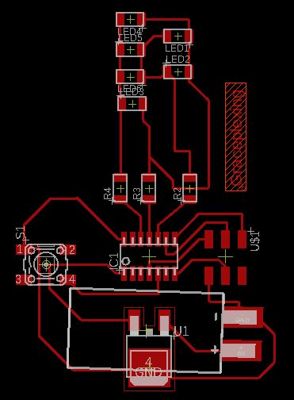
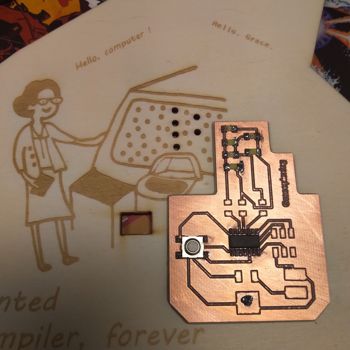
Result
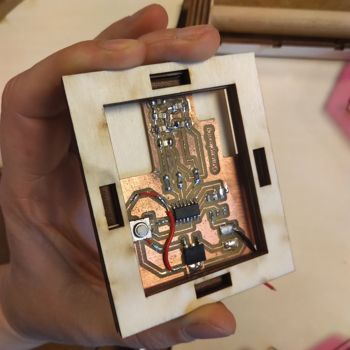
Here is the result once milled !
The result looks nice, but I think there was a problem with my roads, they are too thin. I'm not sure it's gonna work, but when I use the multimeter it seems to be okay. We'll see if it still works with the soldering !
Testing the board
As I said earlier, I'm gonna do some Charlieplexing for this board. What is interesting is that it's a new way to play with the notions of input and output.
To be able to program it, I've powered the board with 6 Volts and used a fabisp. I've been able to put some code into it. Good ! Let's try with the two 3Volts batteries now.
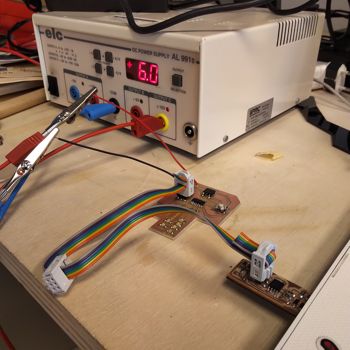
And.... it doesn't work at all ! Why is that ? Because (and I just learned it) batteries don't add up voltages. I have to find another way to power my board !
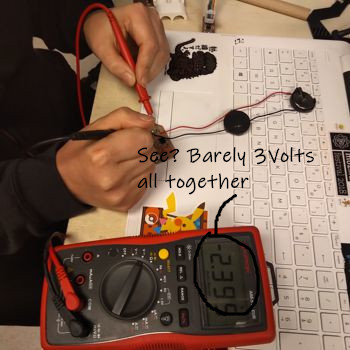
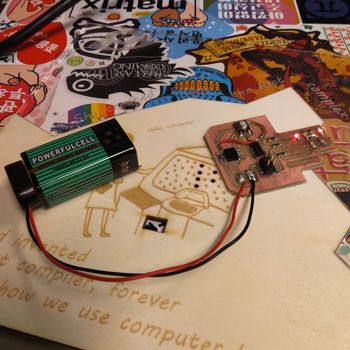
I chose the easy way : just use a 9 Volts battery. And this time it works :)
Programming the board
Do not hesitate to check again the Charlieplexing tutorial to understand better the following code :)
I'm gonna explain my code bit by bit so you can understand it better.
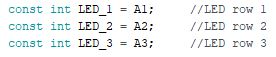
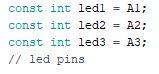
Here, we declare the constant variables of our leds. To know which led corresponds to which pin on your board, check out the ATtiny84 pinout. Here, it is A1, A2 and A3.
We do not declare anything in the setup because we'll do it in the loop individually for each led. In order to light them, we have to play with the HIGH, LOW and OUTPUT, INPUT modes each one can have. Think about it like you're a switchman and you'll direct the current in a direction or another. Due to the configuration of the circuit, you'll play with the different leds.
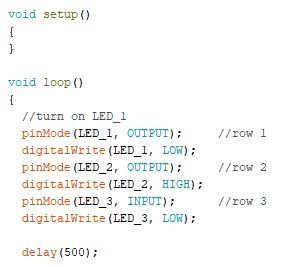
It's kinda fun to do once you've understood how everything works :)
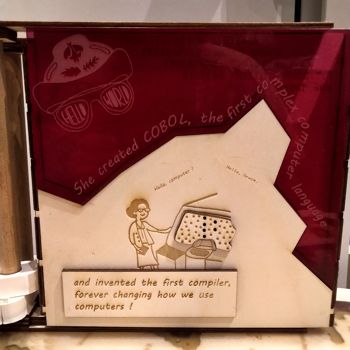
Here is the result of it with the first version of the page, with transparent PMMA. I changed it after for pink PMMA, I thought it looked nicer.
Creating a support for my board
In order to make my board stay still at the right place, I simply designed it on Inkscape. Simple pressfit shapes, some glue for wood and it's done!

Finalising the page
Now that my board is fixed, I can glue everything together.
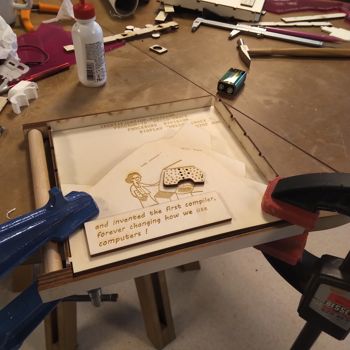
Having a full working page ! :)
I'm pretty proud of how it looks like when working ! (I added some 8mm effect on the video, I think it looks even nicer hehe :) ).
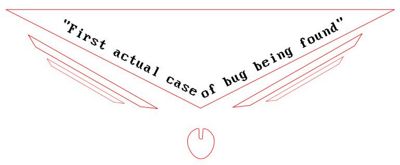
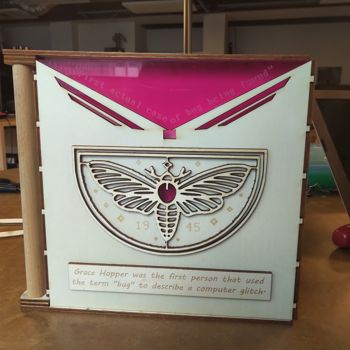
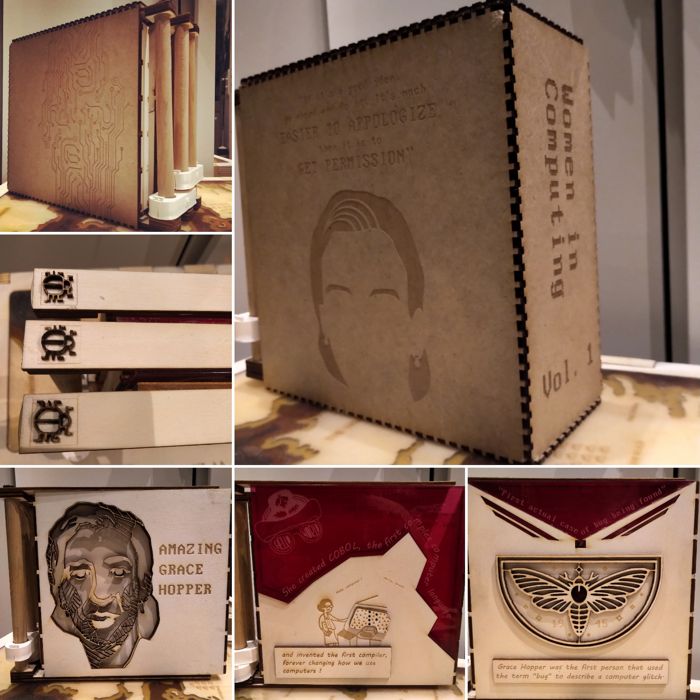
Page 3 : have you said "bug" ?
The third page of the book will represent the "bug" Grace Hopper found, creating the term used in computer glitches nowadays.
Exactly as for the two other pages, I used Inkscape to design my third page. I'll add a small circuit with 3 leds and a button this time.
Designing the page
As for the other pages, I used Inkscape to design my page. Here are the Inkscape designs :

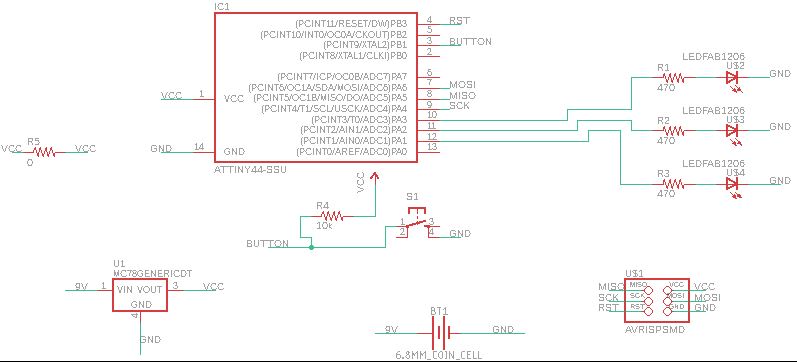
Creating the board
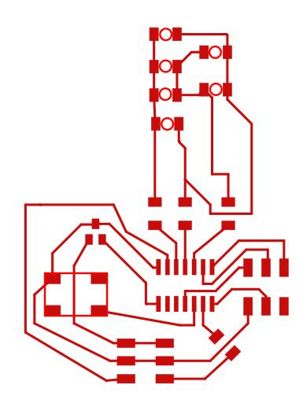
I won't go into details since it's exactly the same process as the previous page. Here is the schematic and the board.
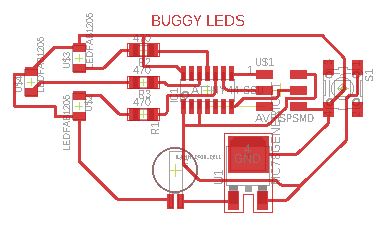
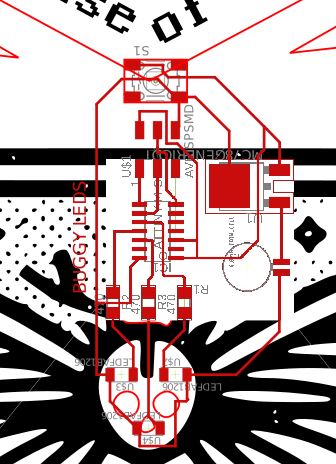
Just like before, I saved an image of my board and place it in Inkscape so I would be sure the circuit would be in its right place once milled and once the page is cut with the laser.
Programming the board
For the code, I got inspired by this tutorial : https://www.youtube.com/watch?v=0BHdPmjteU4
I programmed the board so it would make 4 different light patterns, and a last one that switches it off. Here is the code explained bit by bit.
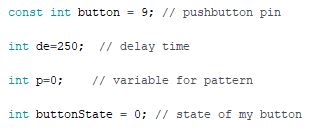
First, as usual, declaration of the different pins used for the leds.
Second, declaration of the pin used for the button. I then declared a variable that stocks the delay I'm gonna use for the different patterns, and then a variable where I'm gonna stock the name of the different patterns (pattern 1, pattern 2, pattern 3, etc).
Third, I declare the setup. I put all the leds in OUTPUT, and the button in INPUT. And then just light up the leds to say the program is initiating, it's easier to see if the board works.

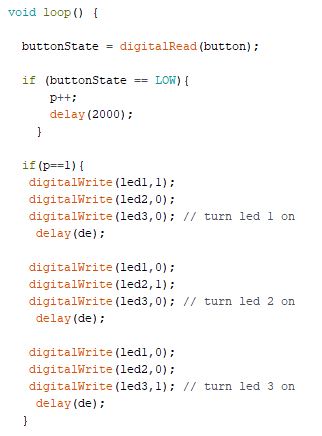
Fourth, here is what's going on in the loop.
I stock in the variable "buttonState" what information it gets, if the button is pushed or not.
I then make a first if statement, that will increment our variable "p" and switch from one led pattern to another.
Then I make the first pattern, telling my board which light to light up or to switch off. And store it into "p==1". I do exactly the same for all the other patterns !
Final result
With everything put together, here is what the page looks like !
Attaching all the pages : creating Grace's straightjacket
To link all my pages together in a way I can unlink them afterwards, I designed two straightjackets.
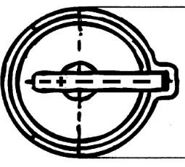
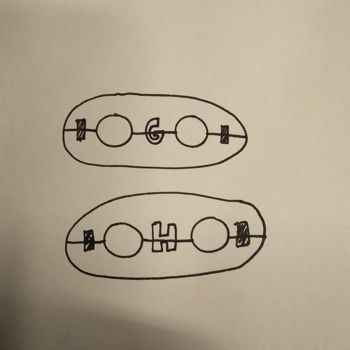
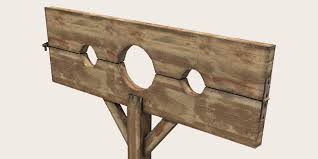
How did I get this idea ? When I was thinking on how I would link those pages but be able to unlink them whenever I want, my first thought was those straightjacket from the middle age. The idea is not to torture my book, but to enclose it properly in a way I can easily unlock it afterwards. Here is a straightjacket so you see what I'm talking about and a drawing I made for the ones for my book.
Designing my straightjackets in Tinkercad
Since it's a really simple object, I'm gonna design it on Tinkercad. It's a software I don't often use since it has not much possibility, but for this one I don't need a complex modeling software so in order to do it quick and well, I'll use Tinkercad.
Here are the different steps of modeling in 3D my drawing :
First, I have to do the main shape and cut it in half so I have two similar pieces.

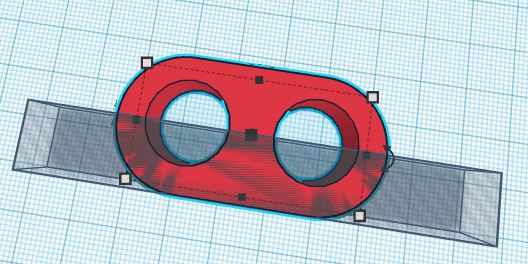

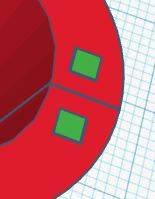
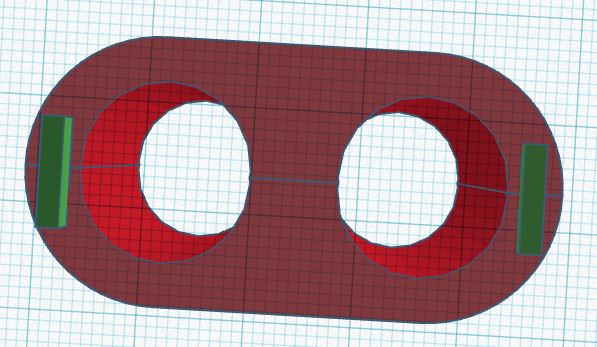
Second, I have to add the small holes so I can add a jointure afterwards, and add also the little letter in the middle of the piece.
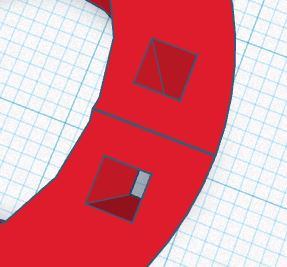

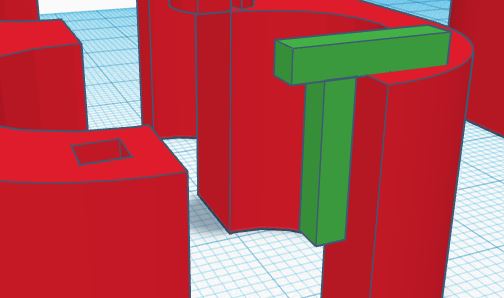
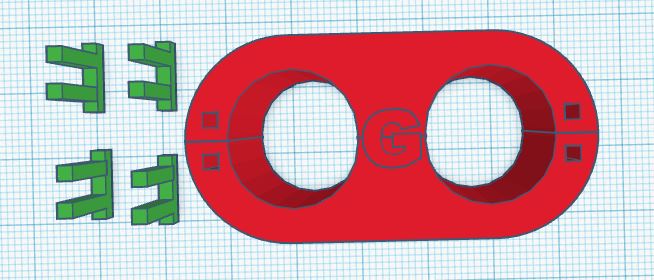
Third, I have to design and add my jointures, and make sure they fit in it. My holes are 20mm square, my jointures 19mm squares so they fit perfectly.
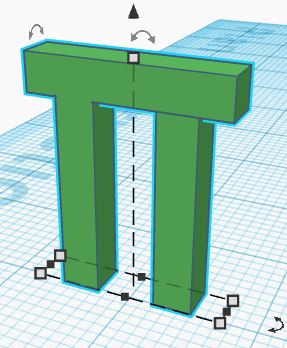
Fourth, here's the whole thing together. I did two of them so I'm sure my book will be strong enough when manipulated. It looks pretty good to me, let's print it and see if it fits !

Here is the Sketchfab of my design so you can enjoy it better :)
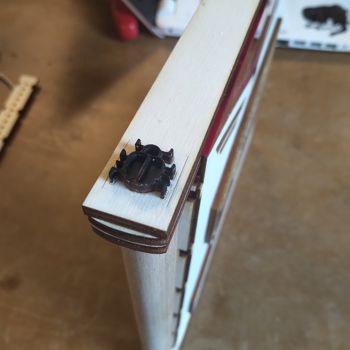
Once printed, here is what it looks like.
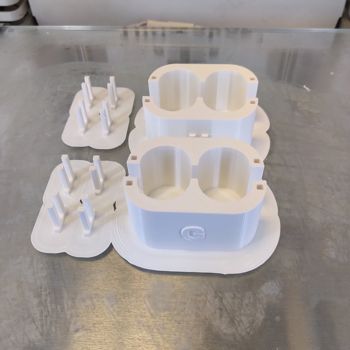
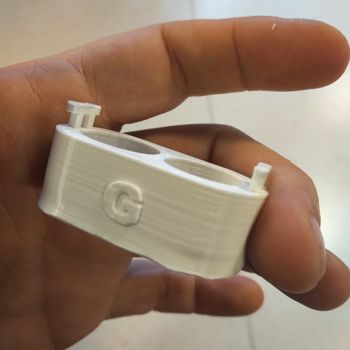
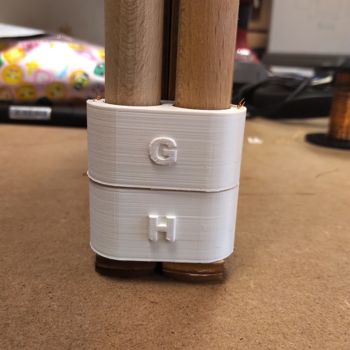
Unfortunately, it doesn't match with my pages. Note that it doesn't fits, but I can't turn them because the space between the big holes is too short, so it blocks the pages. I redesigned it so it will be bigger, and this time it works ! Here the sketchfab of my new design.
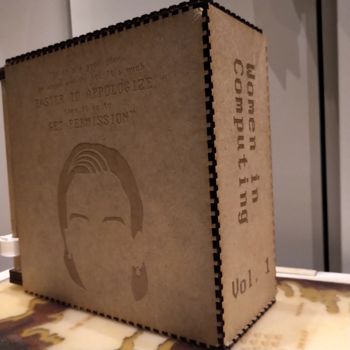
Making a package for the book
I want to do something pretty simple but efficient. I'm gonna make a cover like you can find on some nice book editions.
As usual, Inkscape is my bestie and I used it for my design.
Here is what it looks like on Inkscape :
add inkscape image
And here it is, with the whole project :)
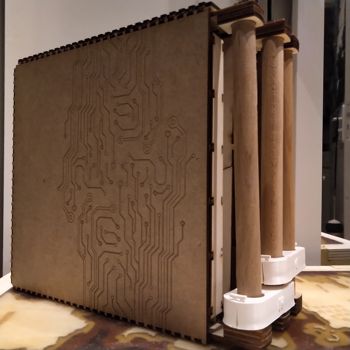
The whole final project :)
Here is the whole book, with the package and everything put together !
To make a summary of my production, here is my presentation video :
Hope you enjoyed reading and maybe wanna reproduce it :)
BONUS TRACK
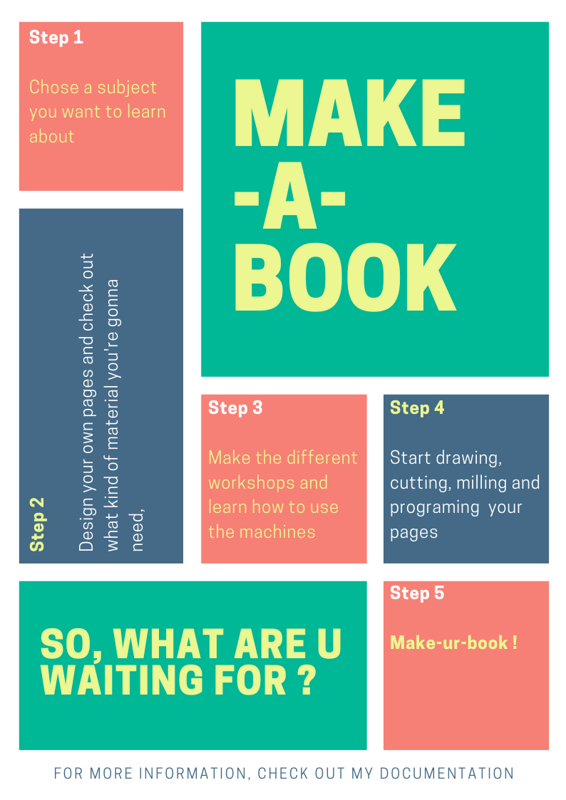
This whole project gave me an idea for a workshop I can propose to schools, where the students chose a subject and they can learn how to make a book all together. Each student is responsible for a page. That way they can learn about the basics of digital fabrication, while learning some new stuff about digital culture and history ! :)
As I want my project to remain open-source, in addition to my documentation here I can make a mooc about how to animate a workshop like this one so teachers or anyone who wants can make it too !
Wanna try by yourslef ?
Here are all the links to my files, feel free to download them :
| Name of the documents | Link to download |
|---|---|
| Inkscape File | Page 1 - zip file |
| Inkscape File | Page 2 - zip file |
| Inkscape File | Page 3 - zip file |
| Inkscape File | Hiding circuit frame |
| Arduino File | Charlieplexing code |
| Arduino File | Led patterns code |
| Eagle File | Charlieplexing circuit board |
| Eagle File | Charlieplexing circuit schematic |
| Eagle File | Led patterns board |
| Eagle File | Led patterns schematic |
| 3D File | 3D pages holder - straightjacket |
Final Bonus Track : Project Valery
This was my original idea for a final project, but never had the time to do it. It's the next thing I want to do after the Fabacademy ! :)
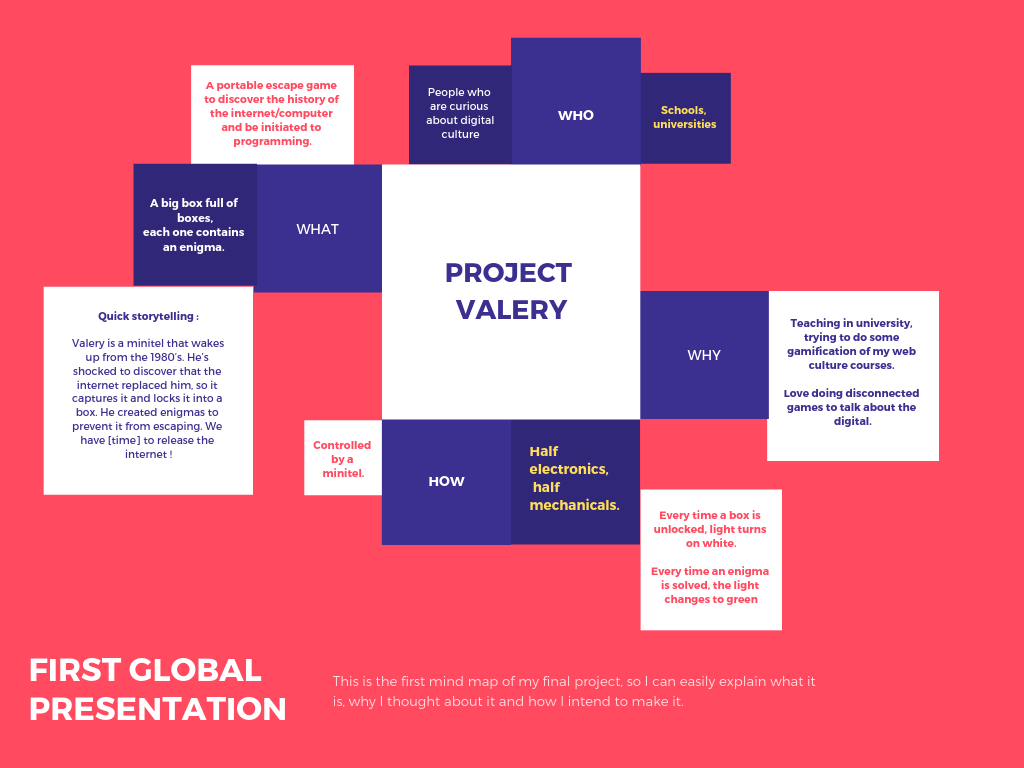
I have this idea since a very long time to make a, interactive escape game as an educational tool, where people could discover programming and some good stories about the history of the internet. Learn and fun ! This is gonna be a project for after the Fabacademy :)
Here is a first glimpse of what I have in mind for Project Valery !
A lil' bit of history to start
Historically, Minitel was a french technology ahead of its time. While in the beginning of the 1990's internet barely emerged in homes around the world, almost all of France was online, buying, selling, gaming, chatting online. And all was thanks to the Minitel.

Minitel is a computer terminal, with a screen, a keyboard and a modem. The only thing missing is a microprocessor. It connected to remote service via uplinks (like a Google Chromebook today). Those terminals were first rent, but than given up for free, to almost every french homes.
It was a huge success. France could connect to more than 25,000 online services long before the world wide web had even been invented.
Minitel was decommissioned in 2012 after 30 years of distinguished service.
So, why do I find it interesting to use a Minitel for this project about internet history ?
Since it's such an important part of french history, and actually internet history, I think it's interesting to base my escape game story on it. Throughout the weeks, I'll find more pieces of history to use in the different enigmas :)
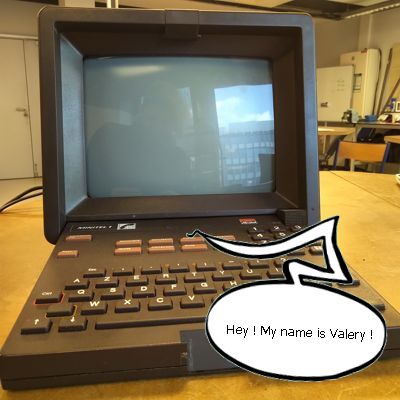
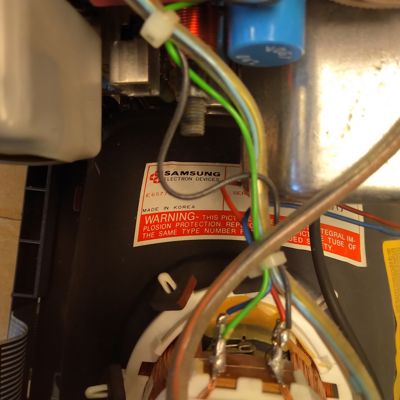
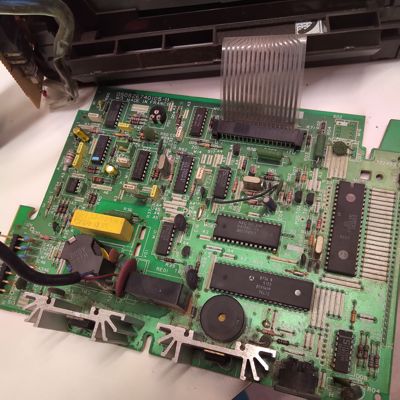
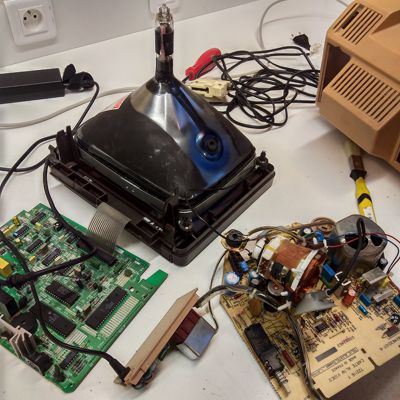
First step : nude pics of Valery
I'm lucky, my parents kept the Minitel we had when I was a kid. First step of my project, trying to understand how it works and to turn it into a proper monitor with a Raspberry Pi !
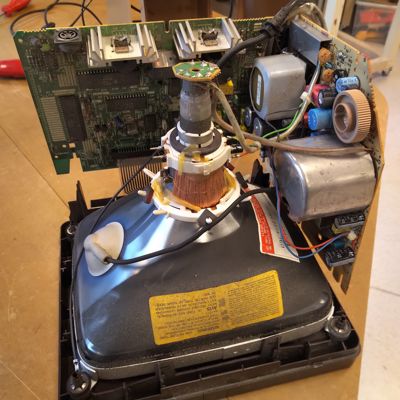
I found some really interesting tutorials that will help me move on in the first steps of my project.
| Name of the sites | Links |
|---|---|
| Bare naked android Minitel | https://www.youtube.com/watch?v=eKnKXKM9_CM |
| Pila's blog : use a minitel as a linux terminal | http://pila.fr/wordpress/?p=361 |
| Pila's blog : minitel as a linux terminal, hardware part | https://www.vim.org/ |
| Minitel as a TV monitor | http://cfp-radio.com/realisations/rea48/minitel-01.html |