Week 9
Embedded programming
MOOD OF THE WEEK

This week was really hard for me, coz I didn't succeed (again) in doing anything. Fortunately I worked on it a bit later and finally made it. It wasn't painless but it finally works, that's all that matters :)
Embedded programming
This week's assignments :
- Group assignment
- compare the performance and development workflows for other architectures
- Han Solo assignments :
- read a microcontroller data sheet
- program your board to do something, with as many different programming languages and programming environments as possible
Group Assignment
Here is the link to our documentation for the group assignment :
Han Solo Assignment
Reading the Datasheet
This week we have to dive into the (not very) pleasant world of datasheet. I made a tutorial on how to read it, to help me through this tough time ^^
From this datasheet, I found out that the ATtiny44 is okay to use for serial communication, so I can use it for this input assignment. From this, I also found out which pins I have to use to commincate in serial with my component (analog pins) and where they are on the ATtiny44.
Programming a board
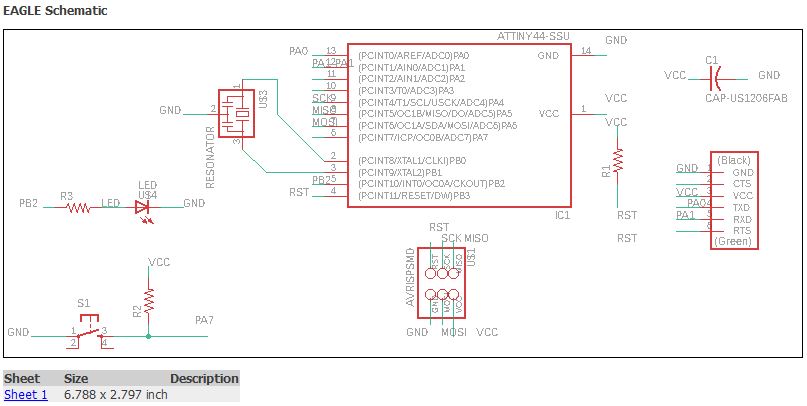
This week we have to use the PCB we did two weeks ago and put some code in it. Since I didn’t succeed to make mine at that week, I did it again in a more traditional way this time, using Eagle [follow my Eagle tutorial to know how it works].
Here is what it looks like now :
The schematic
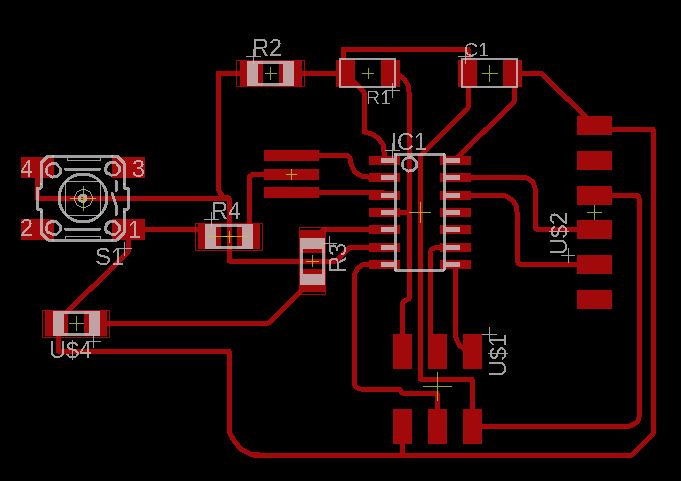
The board
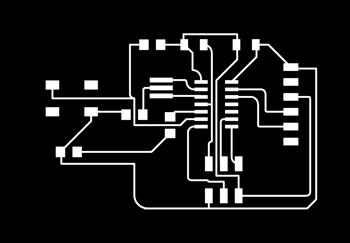
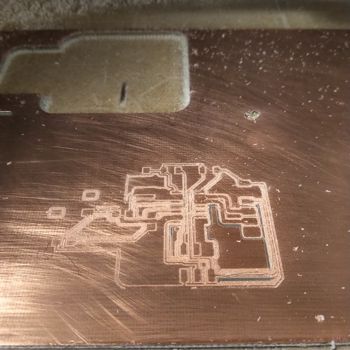
The PNG result

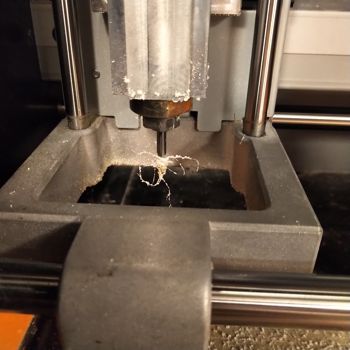
Step 2 : Milling the PCB…
Not all my fails but some of them…

Step 3 : Try again controlling the board with Arduino
[I didn’t realised yet that my connections were not good when I wrote this, but still I learnt some stuff so I share it with you ^^]
Last time I couldn’t install properly Attiny44 in my Arduino library and so I couldn’t use my computer to inject programs to my board.
Let’s try again !
First problem : I succeeded in installing the Attiny card in my Arduino IDE
If you have this problem, follow those steps to solve it :
- Click the link on the line after File > Preferences > More preferences can be edited directly in the file: - this should open a folder named something like Arduino15 (the exact name depends on your OS).
- Delete all files in that folder except preferences.txt. Please be very careful when deleting files on your computer. When in doubt back up!
- Open Boards Manager again to see if the download error still occurs. Normally it should work ! At least it did for me :)
Went back on my board manager and finally the attiny appeared :) yeah !
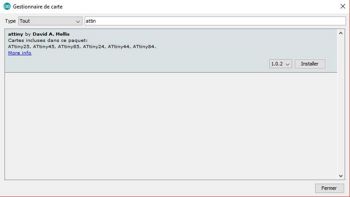
Than you just have to go to the list of board, and the Attiny44 will appear :)
The actual issue appears to arise from mixing up the ISP sketch for the ATmega with the blink sketch for the ATtiny.
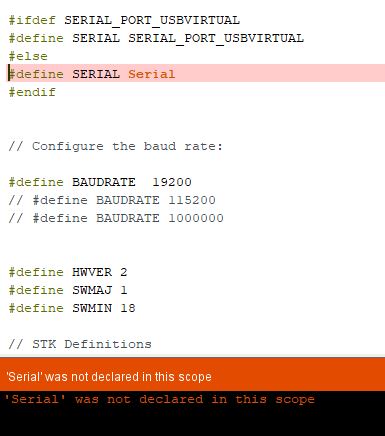
Second problem : uploading the ArduinoISP example code to my Arduino Board
I couldn’t upload the ArduinoISP exemple code to my Arduino, I kept having the same error message : “‘Serial’ was not declared in this scope”. I remember I had the same problem last time and I didn’t find a solution.
After drowning in various forums on the internet, and Christian spending half an hour trying to understand where the problem was coming from unsuccessfully, I decided to do one last attempt of research before giving up for the moment.
Good for me, I finally found the solution. I had set my Arduino Board too early on “Attiny 24/44/ 84”. I had to set it back to “Arduino Uno” and it worked ^^’
Third problem : finding part of a solution for the error message ‘programmer is not responding’ when launching the bootloader
This error was kinda common and I found a lot of proposition of solutions to overide it.
- alimentation problem : FTDI
- baud rate : have to set a lower baud rate in the code, setting it to 5 in the avrdude command
[Saw this and put it here, but couldn’t test it coz I had to redo the board but just in case it is useful to you :)]
Something that can help when you test your board : adding three leds to see what happens between your programmer and the Arduino
In the ArduinoISP Arduino exemple code :

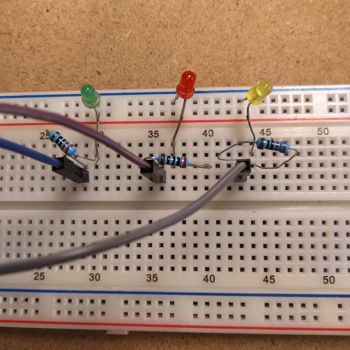
- What led up when I launched my bootloader :
- red : showed there was an error
- yellow : in communication with the slave
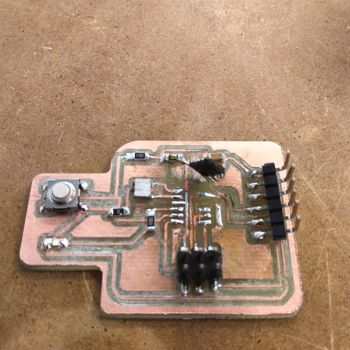
UPDATE : IT WORKS YOUHOU !
You'll find the right and functionnal schematic and board design on week 7.
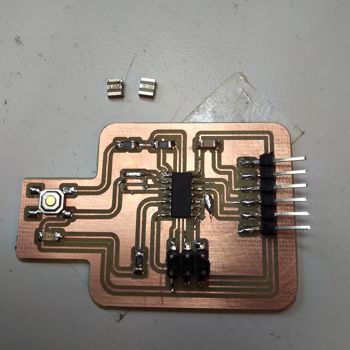
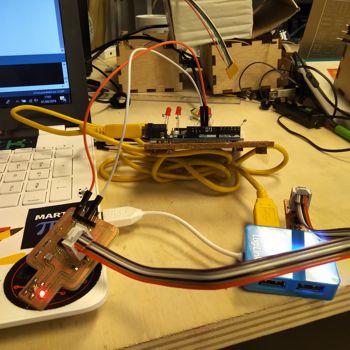
I soldered all the components on it, and succeeded in programming it with Arduino and the FabISP. Here's two weeks in one ! I'll write down what I did in the weeks associated.
I succeeded but it was not effortless. I had some trouble connecting my board with Arduino. I just wrote a simple blinking program and tried to upload it on my board.

I found out why it wouldn't work.
I did some errors on the soldering with my Attiny and my ISP, and got my crystal wrong... Had to review some basic primary math program : apparently 8mhz is not the same as 20mhz ^^
Just have to connect my FabISP and board, and upload some code !
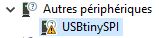
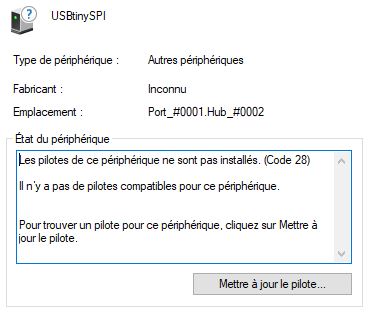
A little tip for Windows Users : when you use the FabISP, you have to install a driver so your computer can be able to read it :) Here's a link : AdaFruit Drivers
I then made it simply blink, and then work with the button and light the led when the button is pressed.
Here is the video of it working with the simple blink :)
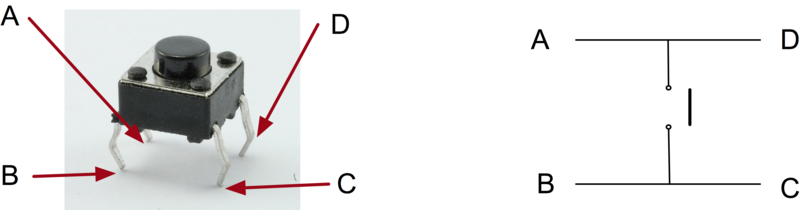
How does a push button works ?
My Hello Board contains a push button that I can use to make my LED blink. How does it work ?
It's acutally pretty simple to understand. When you press the button, they connect two contacts together so that electricity can flow through them.
Here is the code I used to make it work :
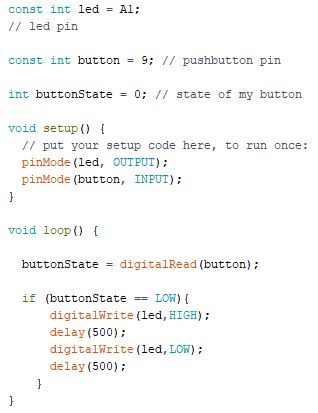
Yeah, it works ! :)

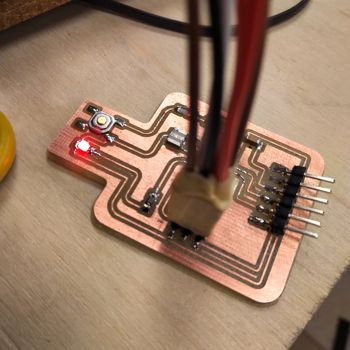
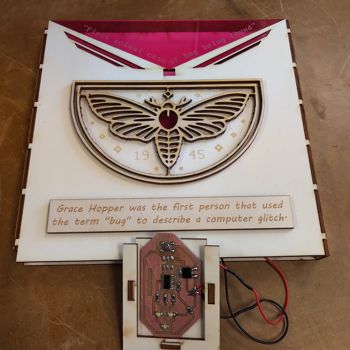
UPDATE 2 : Using the same button process to launch led patterns in my final project
One of the pages of my final project contains a button and several leds that I programmed to make a pattern. To find out more about it, don't hesitate to read my documentation about it :)
Here is a picture of the board with the page.
Here is a video to see it work :)
Another proof I can do embedded programming, here are some videos of the projects illustrating it :) There's the video of the RGB I made blink on week 12 and the charlieplexing circuit I did also for my final project.
Wanna try by yourslef ?
Here are all the links to my files, feel free to download them :
| Name of the documents | Link to download |
|---|---|
| Arduino File | Blinking program file |
| Arduino File | Button blink program file |