Week 3
CAO this me up !
MOOD OF THE WEEK

Hum, thought I had it right for my week's assignements, but I didn't documentate enought what I did to build my website. Some more work to do this week !
BUT, I already started without knowing a part of this week's assignment and started pretty well documenting it. So I have some advance for this, which is a good news :)
Computer aided-design, here I come !
This week's assignments :
- model (raster, vector, 2D, 3D, render, animate, simulate, ...) a possible final project
- post it on your class page
- DOCUMENTATION
What will I draw in 2D and 3D ?
I might as weel use this week's assignment to move forward with my final project. I'll then use it to draw and build one of my first enigma : a wooden safe, that can open only if you find the right password !
First step to Project Valery : building a wooden safe
For my final project, I decided (as you know) to do an escape game in a box, which means I have to create a scenario and some enigmas for people to solve.
I have a list of most of the types of enigmas I want to build, a safe with a 4 digits password is one of the most common ones in escape game and it will be fun to do :)
Inspiration
I found this video of Mini Gear, where he shows how he builds a safe out of cardboards. Really useful for my escape game project ! What I change from the original video : my safe won’t be in cardboard but in wood, and with a four digit password (so it can be a date).
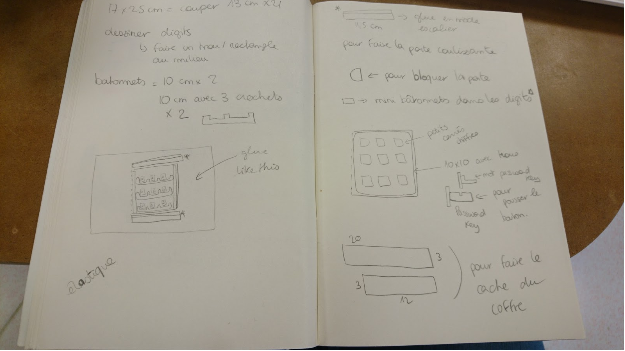
Step 1 : taking notes
First step, looking at the tutorial and take notes, so I have all the components of the project on paper (mesures, size, etc). It also helps me really understand how everything works, as I have to write it down while I watch the video.
I found this video of Mini Gear, where he shows how he builds a safe out of cardboards. Really useful for my escape game project ! What I change from the original video : my safe won’t be in cardboard but in wood, and with a four digit password (so it can be a date).
So, what do we need ?
| Description | Sizes (cm) | Nb of pieces |
|---|---|---|
| Wooden board | 3 x 12 | 2 |
| Wooden board | 3 x 20 | 2 |
| Wooden board | 10x10 | 1 |
| Wooden board | 12.5 x 20 | 2 |
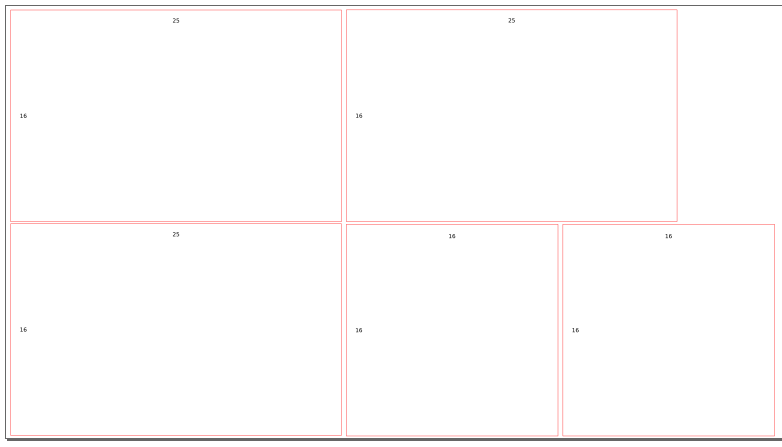
| Wooden board | 15x25 | 2 |
| Wooden board | 16x16 | 2 |
| Wooden board | 17x25 | 2 |
| Wooden square buttons | 2x2 | 9 |
| Wooden square buttons | 2x2 | 9 |
| Tipcats | 10x1 | 2 |
| Tipcats | 10x1 (with 3 hooks) | 3 |
| Tipcats | 11.5x1 | 4 |
| Steal stick | 12 | 1 |
You'll also need rubber bands and sewing thread.
Step 2 : Drawing in 2D
Thanks to Inkscape, I was able to draw all the components of the safe.
I found out that there was two tricky things to draw in this project :
- Kerf bending techniques, so the door of the safe would open properly
- The notched boxes, so I don’t have to use glue to assemble all the parts together
Didn't quite succeeded yet in doing neither of them, but here are some links that I found useful
| Kerf bending techniques | Links |
|---|---|
| Tips for laser users : bending techniques | https://www.troteclaser.com/en-us/knowledge/tips-for-laser-users/bending-technique/ |
| Instructables : curved laser bent wood | https://www.instructables.com/id/Curved-laser-bent-wood/ |
| Core 77 : adventures in laser kerf bending | https://www.core77.com/posts/36481/Adventures-in-Laser-Kerf-Bending |
| Notched boxes | Links |
|---|---|
| Tutorial for an Inkscape plugin | https://fabmanager.simplon.co/#!/projects/fabriquer-une-boite-a-encoches |
| Notched boxes generator | https://www.festi.info/boxes.py/ |
I’m a pen and paper girl, so I started by drawing the door of the safe on paper. It was the one I had the most difficulty to really find the proper mesures just by looking at the video.
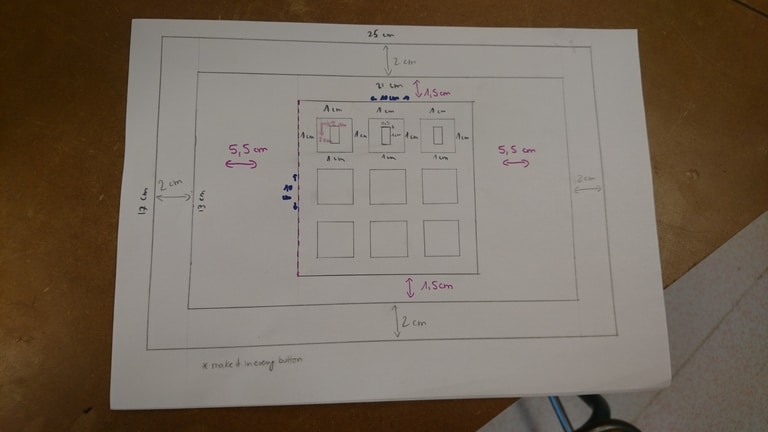
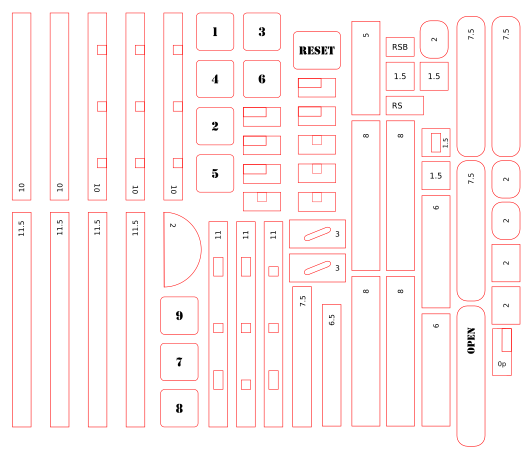
Then, frame by frame, I had to count and draw all the small components that hardly had mesures in the video. Hope it will work well !
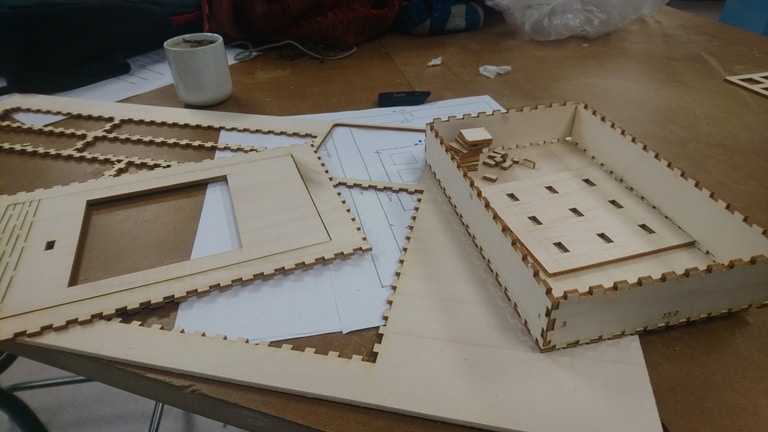
You can see the results of my first design (without notches) right above this paragraph. Since there’s a lot of pieces, I added the engraving of the mesures on most of them. That way we can recognize them easily once they're cut.

Step 3 : first cuts
And it was… not a disaster but a great failure ^^
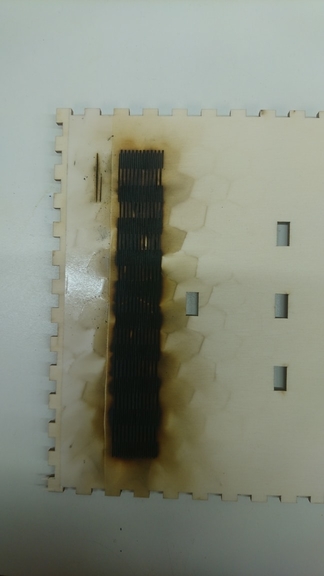
I tried to cut the panel n°2. The box that is supposed to hide the mecanism is too big, and the notches are too tight. The door won’t open and I forgot to turn black the square around the digits, so it cut it instead of engraving it.
At least I know how to improve my box ! Not quite back to square one but I have some work to do. And I that thought I would have all finished by today ! How a naive young maker am I ^^
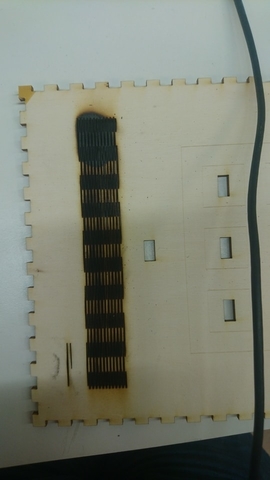
The second try was not better. The kerf bending part is more difficult than I thought, and I actually set my wood board on fire. ^^'
Step 4 : Draw in 3D, discovering OpenScad
Maybe I'm not doing this the right way. Before burning anything else, let's try drawing this safe in 3D to get ideas in order.
I started with Fusion360 but my computer doesn't seem to like it because it's lagging all the time. And actually I'm not fond of it also, I'll try another software.
I had an initiation to OpenScad when I was doing my web developer training a few years back. It may seem scary because it's code, but I find it acutally easier to manipulate than Fusion360 ^^
It’s a peculiar 3D software because you have to draw… with code !
There’s a cheat sheet you can find online : http://www.openscad.org/cheatsheet/
Since it’s open source, it’s really well documented !
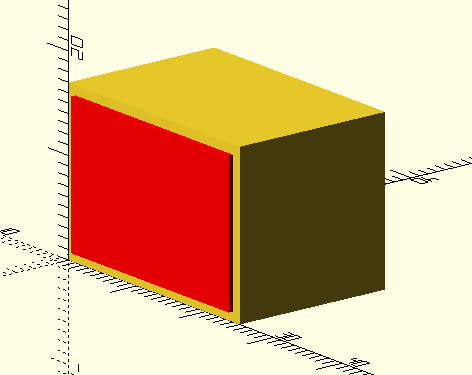
Draw the chest
First, we’ll draw a cube. Here is the command :
cube (size = [x,y,z]);
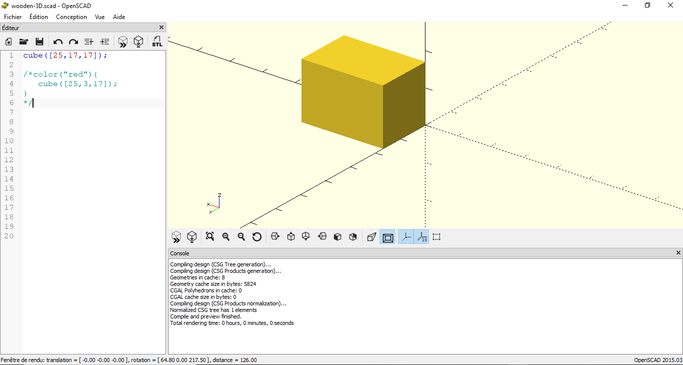
I don’t want to center my cube, I just have to add my dimension : cube([25,17,17]);
Here is the result :
Draw the door
I’ll then add my door. So I can recognize it, I’ll color my element in red. It’s written this way :
color(“color name”){…}
Here is the code for my project : color("red"){cube([23,3,15]);}
But I want to center it in my cube. In order to do it, I just have to add a “translate” instruction :
translate([x, y, z]){…}
Here’s the code applied to my chest :
translate([1,-0.5,1]){color("red"){cube([23,3,15]);}}
And here's the result :
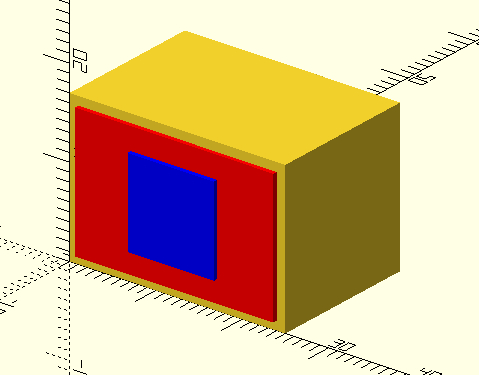
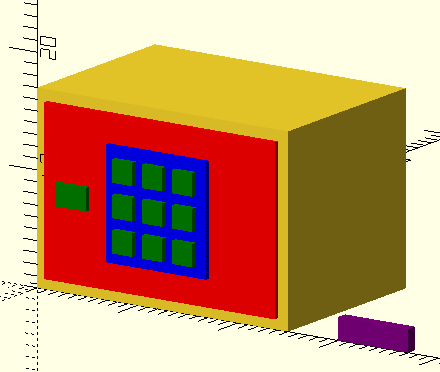
Draw the 9 digits panel
Step 1 on 2 : draw the panel
I’ll draw this one in blue. Easy to center with a bit of code, I just have to follow the original pen and paper plan. It’s supposed to be 7.5 cm away from the right and left borders and 3.5 cm away from the top and bottom borders.
Here’s the code and the result : translate([7.5,-1,3.5]){color("blue"){cube(10);}}
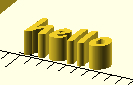
Step 2 on 2 : draw the digits buttons
So I won’t have to draw each digit individually, I’ll use some old developer trick : a loop ^^
Why ? Because it will repeat the form I want to do (here a simple cube) and place them exactly where I want them to be.
After some lookings on the internet, it seems that the one I need is the for loop.
This one is a bit trickier to understand, so I’ll explain it in detail.
Here is what I say to OpenScad :
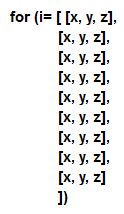
Which means in proper words : for i (like iteration) = all those positions, one for each different cube
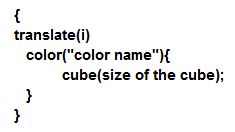
Which means in proper words : translate the cube I described right below
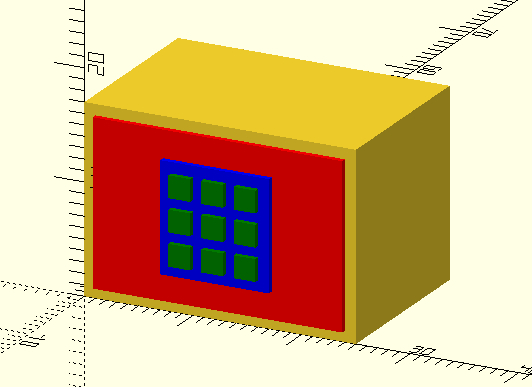
With the proper parameters, here’s the code :
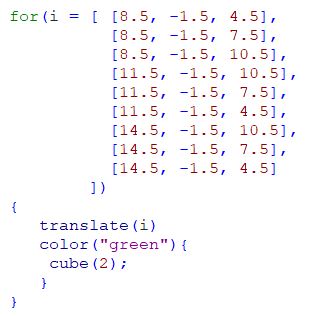
And here's the result :
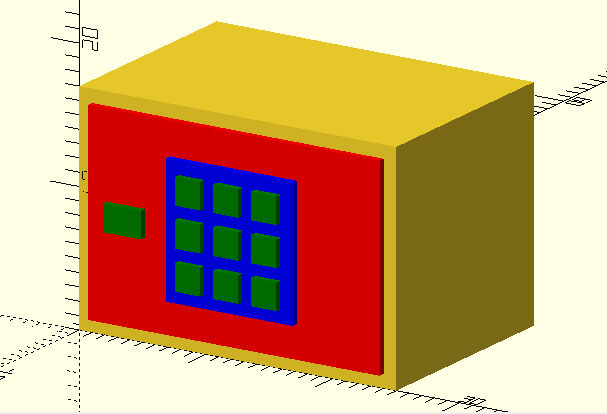
Draw the reset digit and the door opener
Pretty simple code for the reset digit :
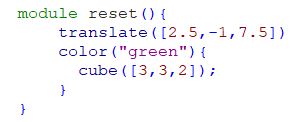
And here's the result :
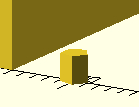
Now more tricky, the door opener. I’ll use a simple rectangle to start, and place it close to my safe, so I can manipulate it easily.
Then I’ll try to transform it and add rounded angles (why do easy when you can do difficult ^^).
I followed this tutorial to help me : https://www.youtube.com/watch?v=gKOkJWiTgAY
I’ll first create a module doorOpener, so I can put all the concerned code in it. I’ll add some dimensions parameters that I’ll create after.
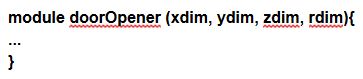
I’ll then call my module on my code and add the parameters, so it can appear when I’m finished.
doorOpener (7,1,2,1);
Which means : x=7, y=1, z=2, dimension of the rounded angle = 1
In my module, I’ll create a cylinder :
I’ll duplicate my cylinder four times :
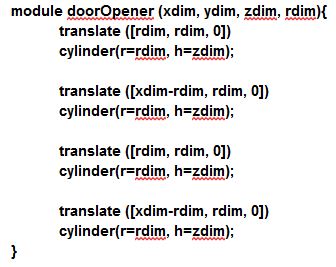
To that I’ll add a hull function, that will automatically create my form.
To make the rounded angles cleaner, I added this simple piece of code : $fn = 64;
$fn is used for subdividing the curved path segments provided by freetype.
My final code and piece looks like this :


Just perfect ! :)
Add characters on the digits, button and door opener
Step 1 on 2 : discovering the text function
I need to engrave some letters on components of my safe : the digits (numbers), reset button (“reset”) and door opener (“open”).
I used that tutorial to help me : https://www.youtube.com/watch?v=4ca5ghmwWqw
The code to write letter is pretty simple. Let’s try to write “hello” as a start : text("hello");
In the software, you can find a list of fonts, just click on the “help” menu and “list of fonts”. A window will open.

If you want to change from the default font, just pick one on the list and add this code to the previous one :
text("hello", font="name of the font");
I changed to a font I downloaded on my computer (polsyh).
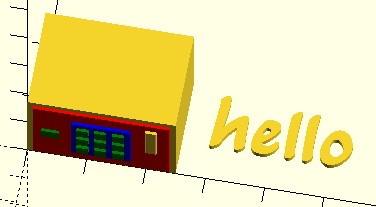
Those letters are too big, let’s change their size.
text("hello", font="name of the font", size=5);
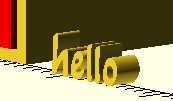
Those letters are a bit flat. Let’s extrude them so they really become in 3D ! Nothing easier, just add before your text code :
linear_extrude(height=2)
I now need to rotate my letters to the vertical, so they can appear on my different components. Again, you dreamt it OpenScad did it !
rotate([90,0,0])
Drawing my digits and letters on buttons and door opener
I wanna try a function I didn’t try before, that will simulate the engravement on my components :
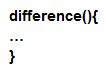
There seems to be a problem, the difference function won’t work ! After some googling (or any search engin of your choice) I found what went wrong. I have an Intel Graphic card that is not recognized by OpenScad. Fortunately, it’s an easy to fix problem.
I just have to got to Edit > preferences > advanced > force Goldfeather
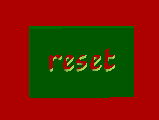
Here is the code for the reset button :
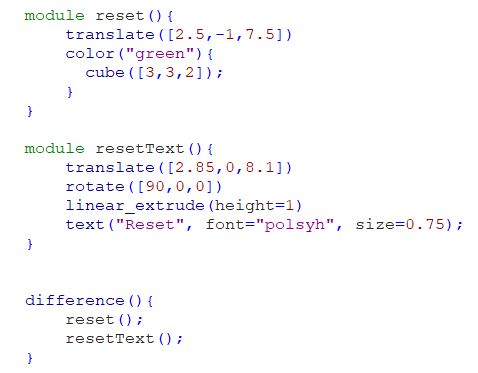
And the result :
Let’s try something new for the door opener. Instead of making a difference between two elements, let’s try to unite them.
I’ll have to use the union function. Here is the complete code :
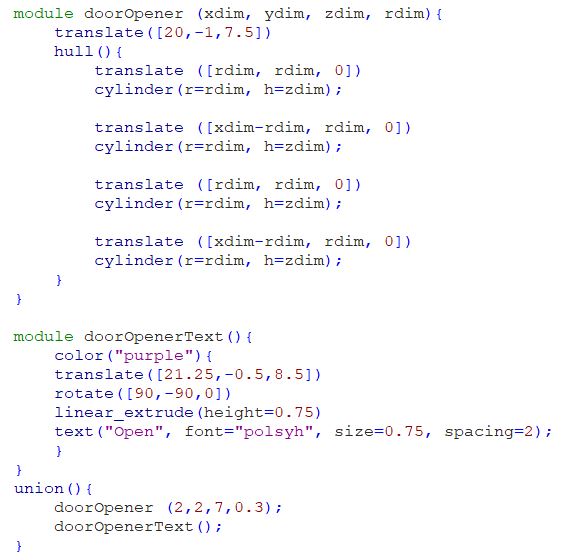
Here's the result :

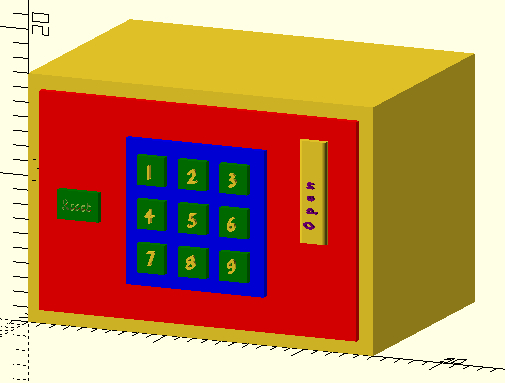
The only thing left, is the digits number on the box. We already know how to do it, I created a module digitsText, put all my numbers in it and voilà :)
There, I finished my safe !! Here’s the final result !! :)
Wanna try by yourself ?
Here are all the links to my files, feel free to download them :
| Name of the documents | Link to download |
|---|---|
| OpenScad file | 3D Wooden Safe |
| Inkscape file | Inkscape Wooden Safe |
| Inkscape file | Inkscape Wooden Safe |
| Inkscape file | Inkscape Wooden Safe |