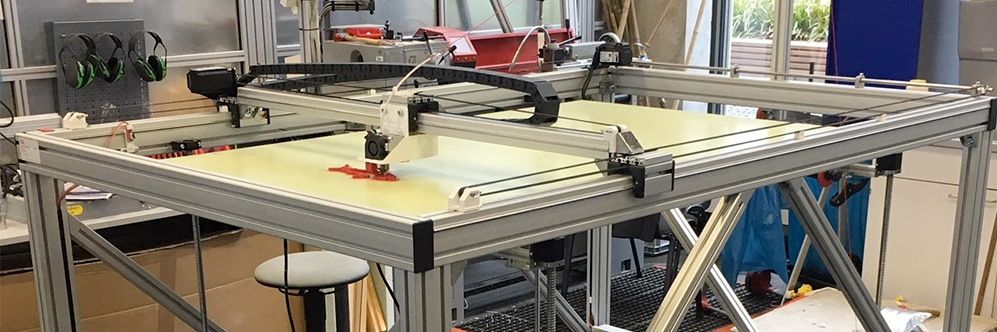
Big 3D-Printer
With a maximum volume of 150 x 90 x80 cm
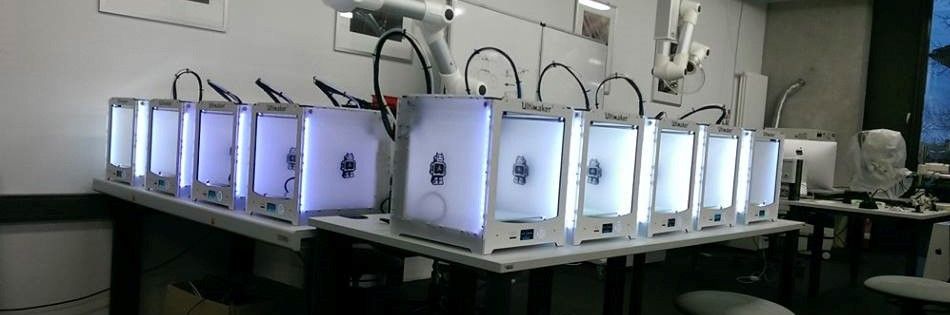
Some of our Ultimaker
We´ve got more than 25 3D-Printer of diffrent types
Greeting
Our best employee in HRW FabLab
Assignment 5:
3D scanning and printing
Task:
- test the design rules for your 3D printer(s) (group project)
- design and 3D print an object (small, few cm) that could not be made subtractively
- 3D scan an object (and optionally print it)
Work
All the following test are made with our Ultimaker 3D-Printer. In Our Lab we have got more than ten types of Ultimakers, some Ultimaker Go, some extended and one with a additional extruder. All of them are the second version and we upgraded them to "2+". That makes the maintenance quite more easy. So lets start with the first testSetting Tests
Before I started with my own test I startet a test print. This is useful to take a look at the calibration and if everything works well. I got this test-cube at Thingiverse, da huge platform with 3d dates. See in the pictures below the process of the printing and the final result.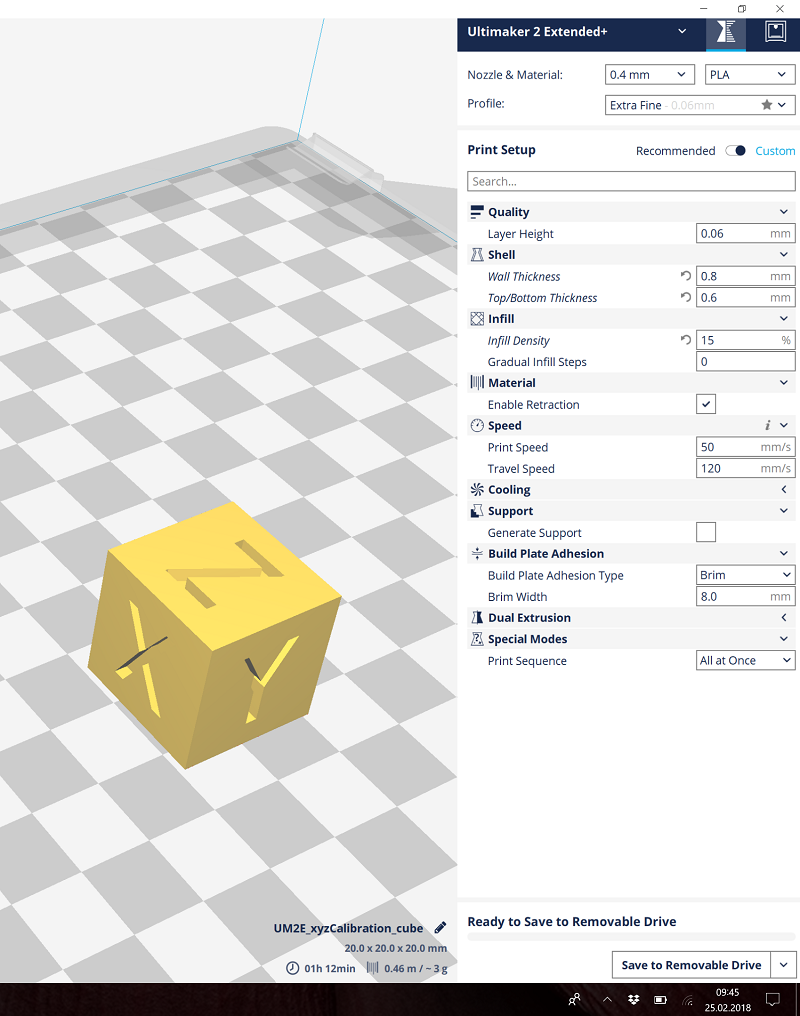
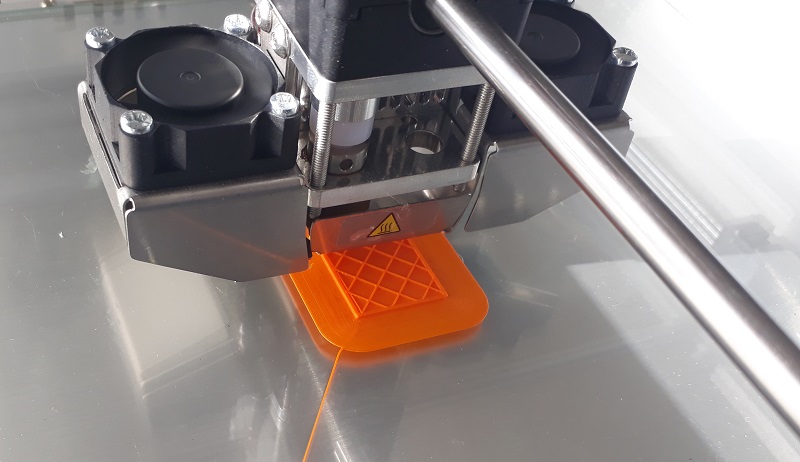

As you see the result is with the chosen settings very good. The edge and the surface is plane and the letters are clearly readable. With a size of 19,9 x 19,9 x 20,1 mm it fits to the .stl data with 20mm. So let´s start with the real test.
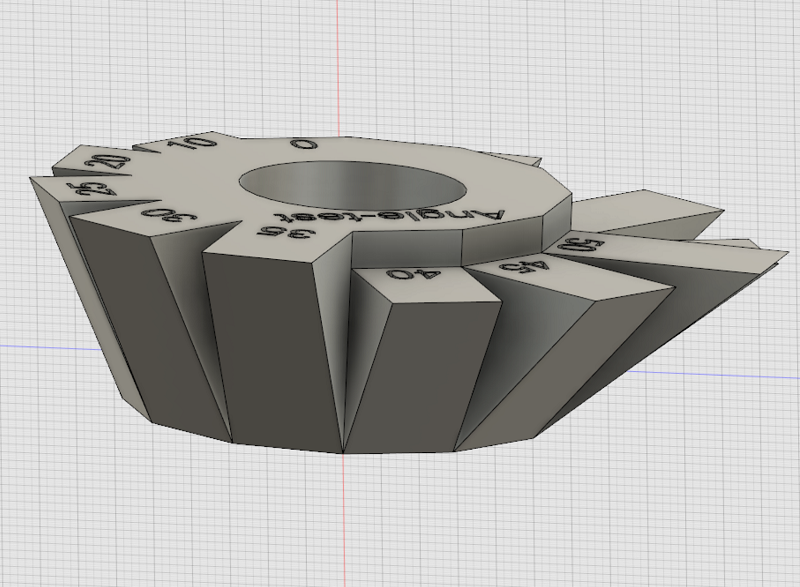
The FDM-technology has a problem with overhangs of objects. There is no natural support so if there is a to high angle of the overhang you need to generate a support structure you have to remove after the print. That decreases the surface quality. So I wanted to try how large the overhang angle can be to get a good quality. Therefore I designed the following angle-test with different overhang degrees from 0 to 65 degrees.

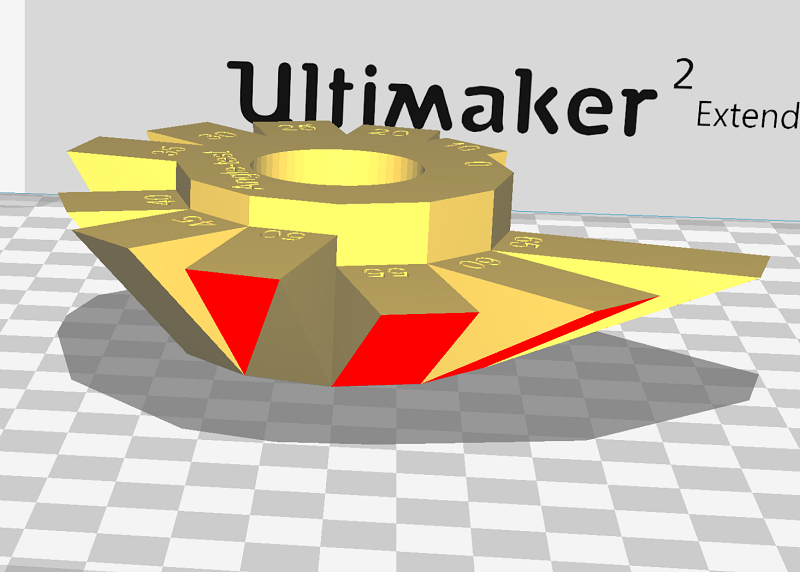
In the next step I used the ultimaker software cura to set the correct setting. See the setting below. Notice the missing point at “Generate Support”. As you see n the site-angle with more than 45 degrees cura notice a critical overhang and try to generate a support (red surface). But lets try it without the support.

During the print I always take a look at the printer to abort the print if there is any critical point. As you see the end of the overhang with the higher angle doesn´t look stable but the material doesn’t fall down.
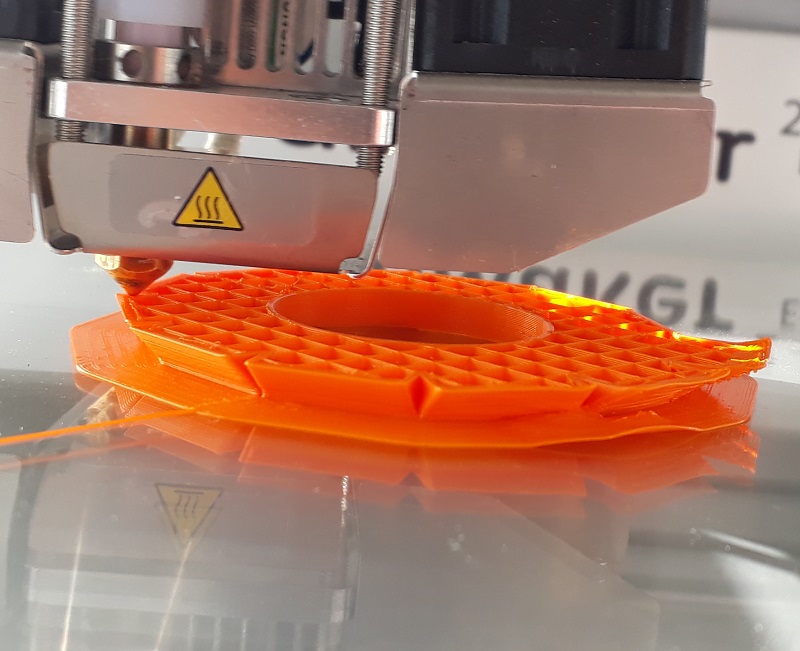

The print could finished without any problems so lets take a look at the result:

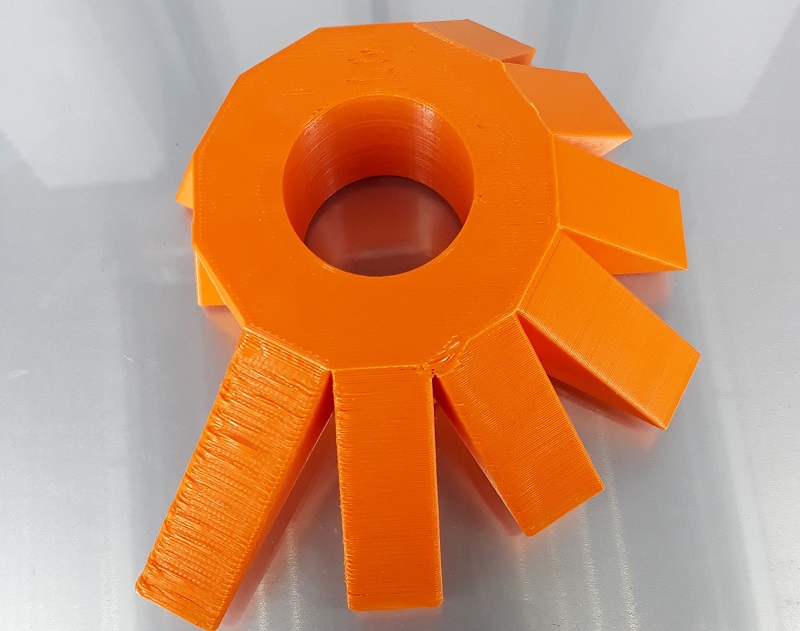
The test print looks quite good, all overhangs had been printed completely. So it is possible to print up to 65 degrees without support, but as you see in the second picture below, the quality of the surface decreases with any degree. Also the tip of the upsite isn´t really good quality. All in all I think with this setting is is possible to print overhangs with up to 65 degrees. At the end it depends on the needed surface quality if you need a support or not.
3D-Design and Print
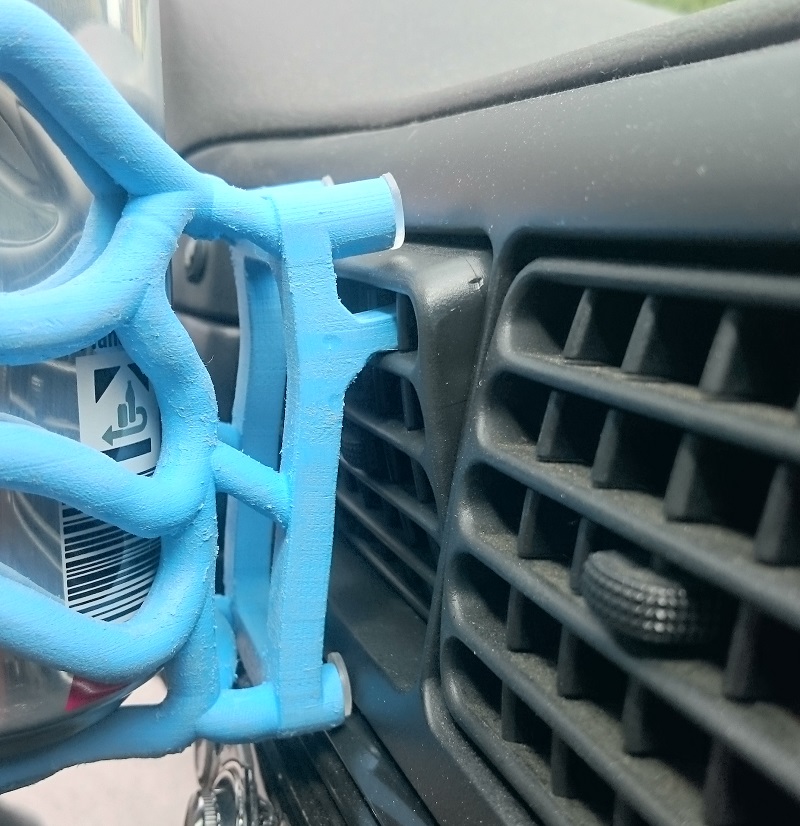
I wanted to solve with my 3D-desinged a problem a had for years. In my car – a VW Polo 6N – there is no holding for a bottle or something like that. There are also no additional holdings at the market so I decided to design my own holding. Because there is no space at all I decided to construct a hitch for the air condition.
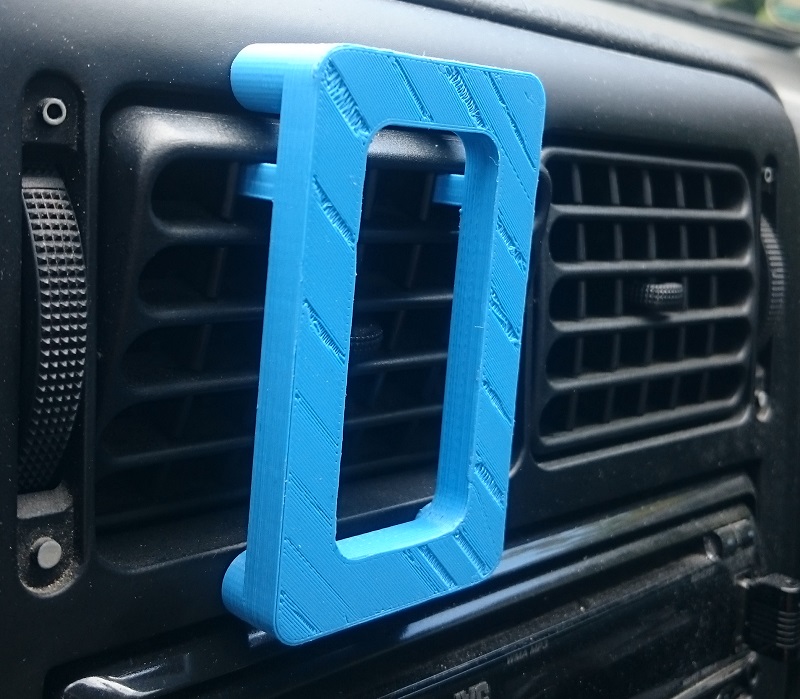
So the first step was to measure some distances and design the hitch and print a prototype. As you see in the picture below it fits perfect.
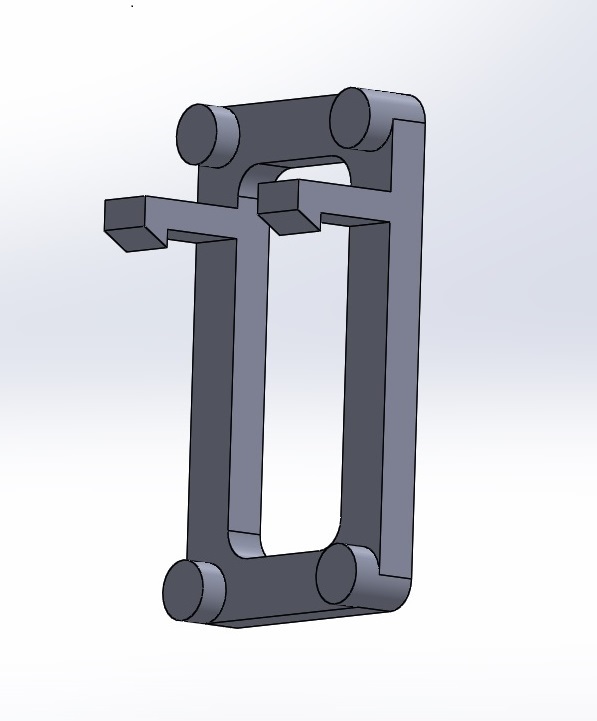
I wanted a dynamic design so I generated a surface and sketched single 3D-splines on this surface. I added some lines for orientation.
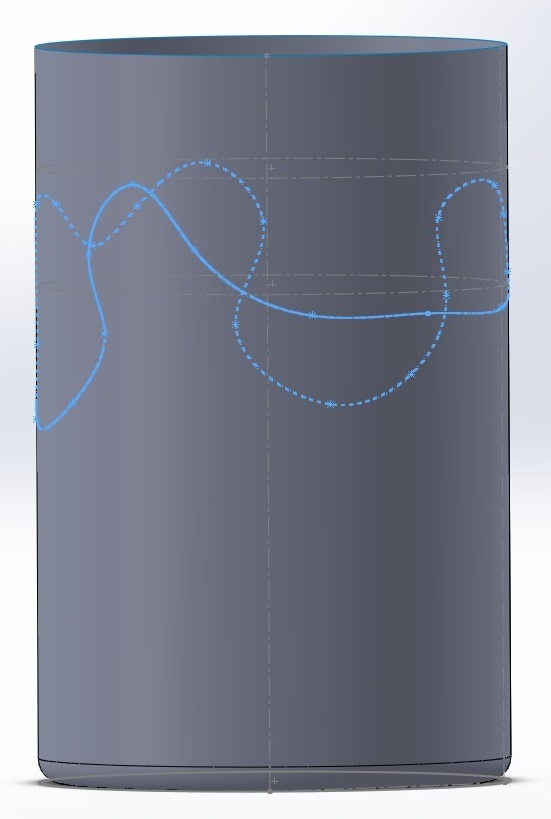
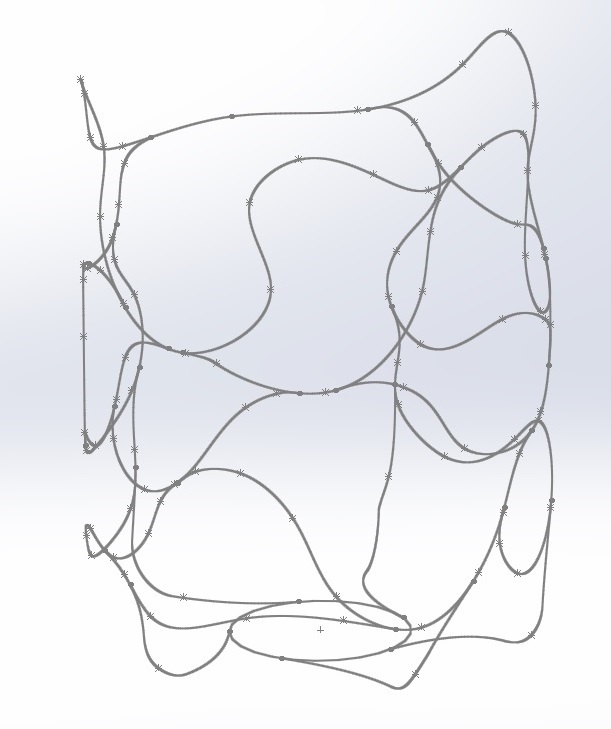
With this splines I created a complex net. The next step was to generate a circle and extrude it along the splines. So I get a volume body.
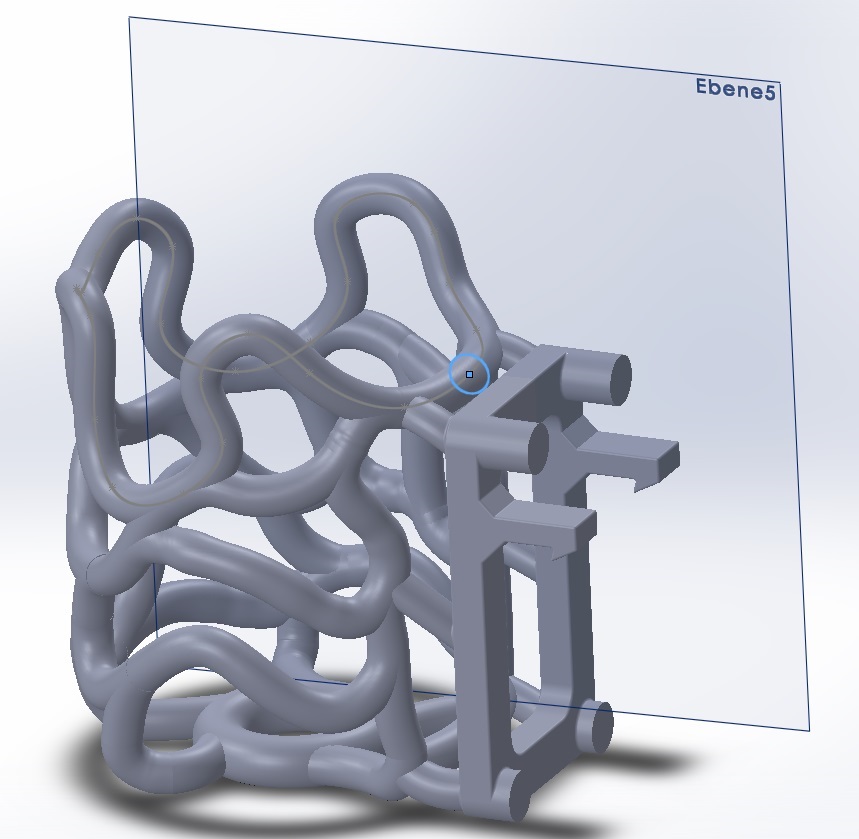
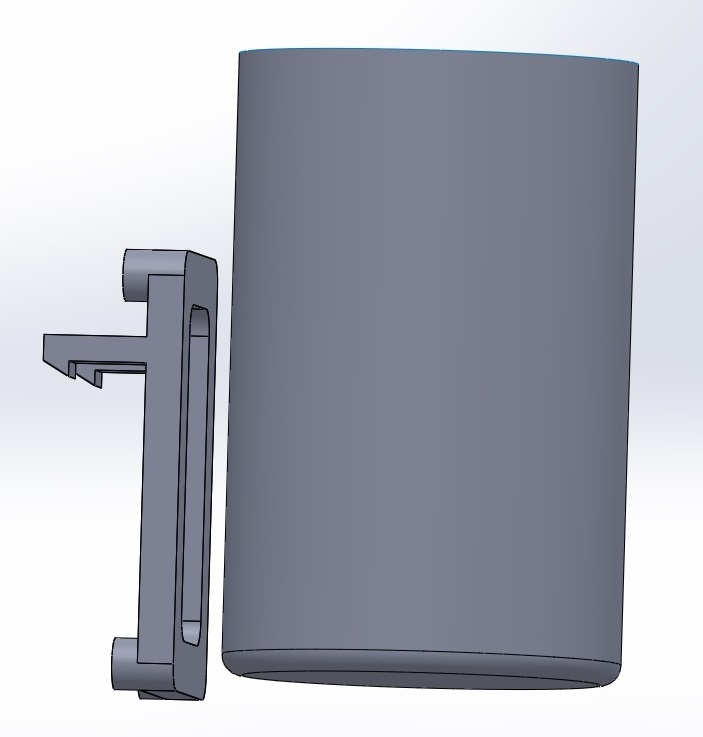
In the final step I had to connect the net with my hitch. This worked the same way as before.
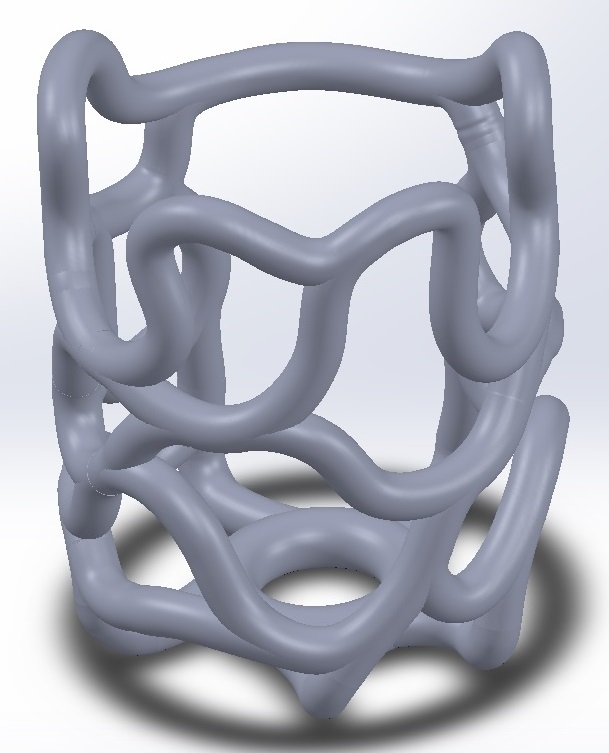
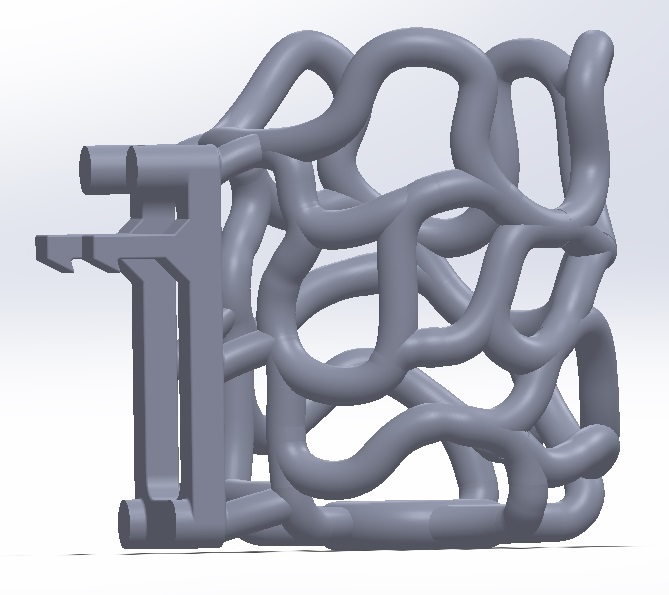
See my finished product:

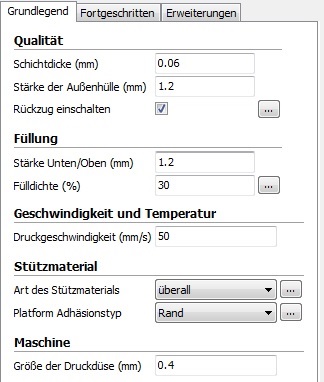
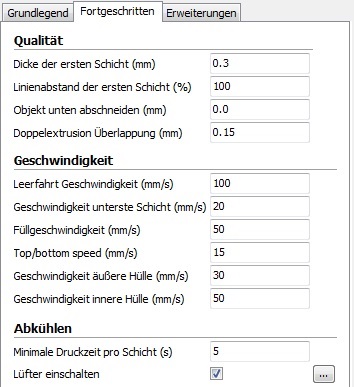
In the final step I had to connect the net with my hitch. This worked the same way as before. In the next step I set the setting for this complex object. To generate the high quality surface I decided to generate support and chose a small layer height. See the complete settings below.
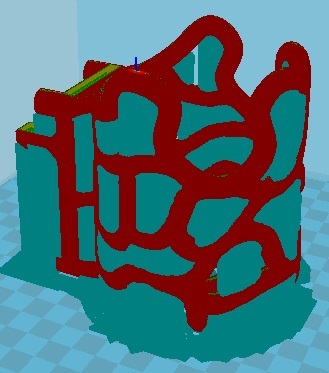
As you see there is a great need of support. So during the print it looks nearly solid.
see here my finished product. I had to spend a lot of time for the rework but i think the final desing looks pretty cool. And as you see it is also functional.
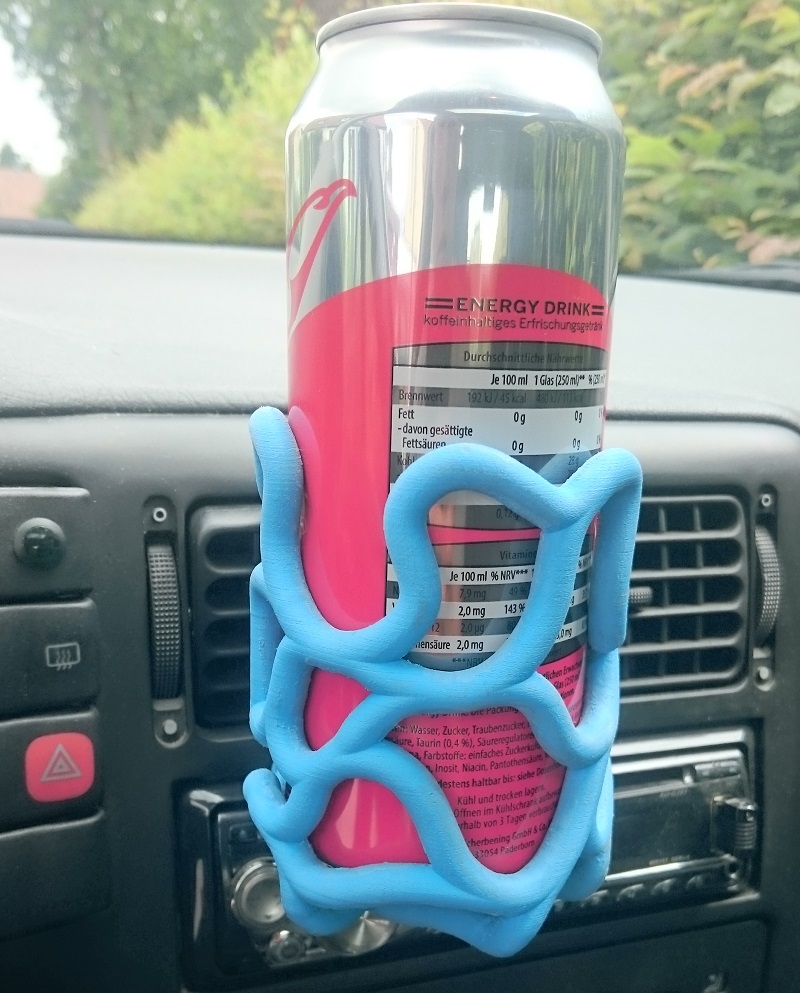
But after some days in use, I noticed that the air out of my heating is too warm for the material and it starts to deform. So next time I had to use another material of i´ve to look for another place.
3D-Scan and Print
During this step I wanted to learn more about our hightech scanner. We have it for a few years but no one really used it because the results were quite bad for a 20k scanner. It is a Artec Space Spider. For a first try I wanted to scan my rubber duck because it has not a complex form but some small details to notice the accuracy of the scanner.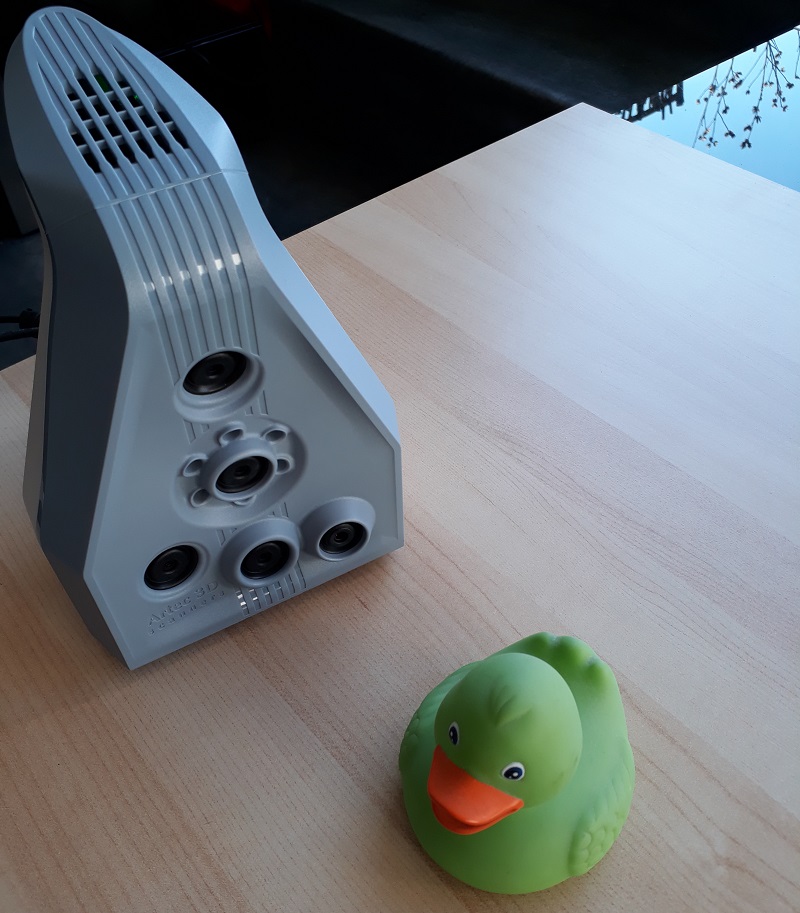
At first I had to install the software. You have to buy the licenses and they aren´t cheap at all. But there are some tutorial videos included to learn the first steps. In the videos it looks quite easy and I didn´t see any problem with the duck. But they used a rotation-table to rotate the object. I tried to one too, but it was always to instable so I tried it on my way. The process is quite simple. Connect the scanner with your computer, start the software and click on the scan tool. The next step is to wait….because the scanner works the best at 55 degrees Celsius and needs nearly 30 minutes to warm up. But than you can start with the scan. You have to move the scanner slowly and there is only a small range (170-300mm distance) in which the scanner detects a object good. You need more than one scan to scan the whole object. See my scans below.
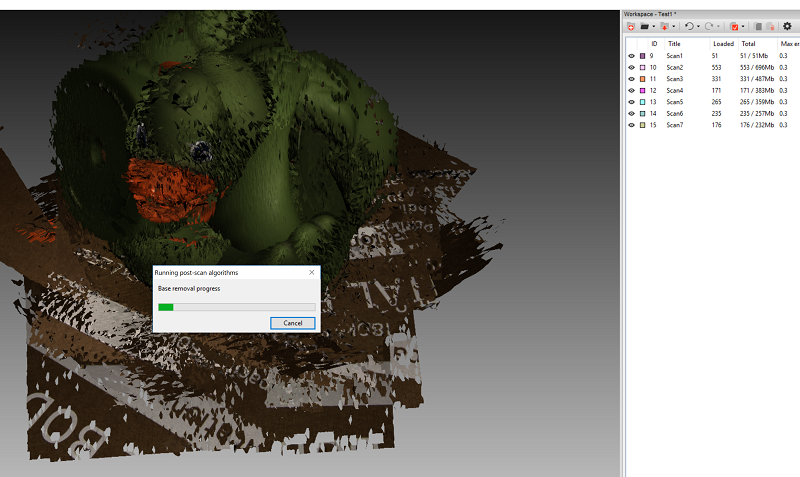
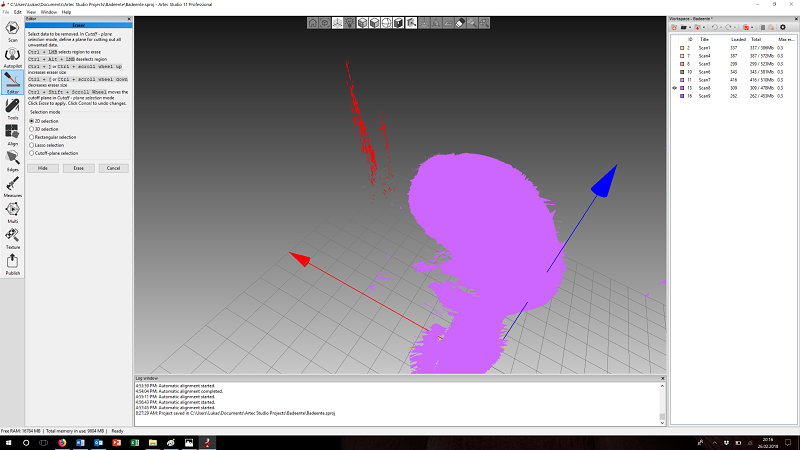
When you finished your scan there is a “autopilot” available which work step by step. Normally it should generate a finished object but in my test he has a lot of trouble to combine the single scans. See his result of the “alignment” below:
So I had to edit the single scans. My first try was to erase unnecessary and wrong points in the scan. But also with the clear scans the autopilot can´t generate a complete alignment.
So I hat so align the single scans manually. First you can rotate single scans an make them more fitting. The next step is to generate pairs of pints on each scan which fits together. And after this you can generate the complex alignment. So I committed the scans step by step. Some of them wasn´t usable, because there were to many failures in the point-cloud.
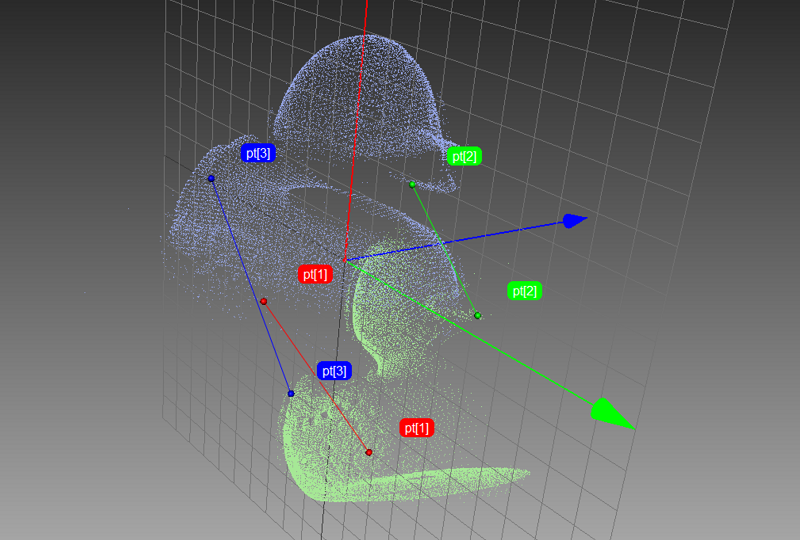
See the finished alignment of three scans. After this step I erases again some wrong points.
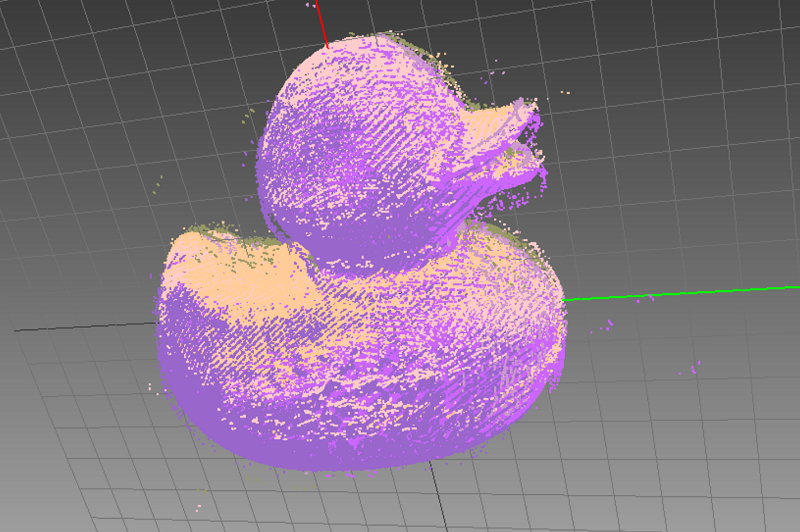
With this pointcloud the software could generate a 3d model which I exported as .stl.
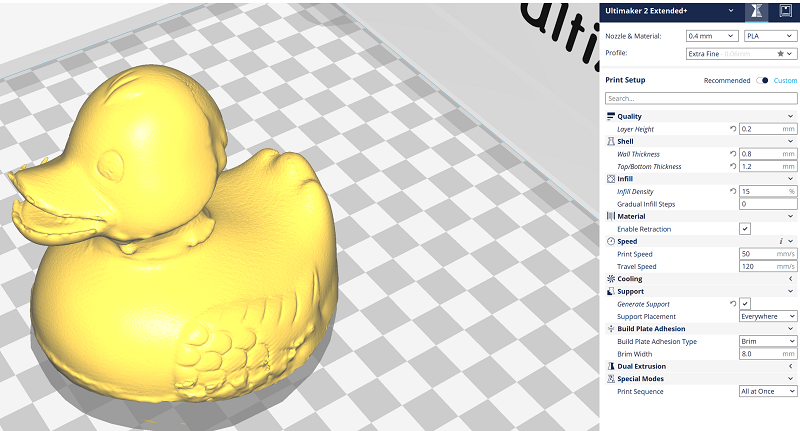
See the used settings above. As you see the model isn´t perfect but a great first step.
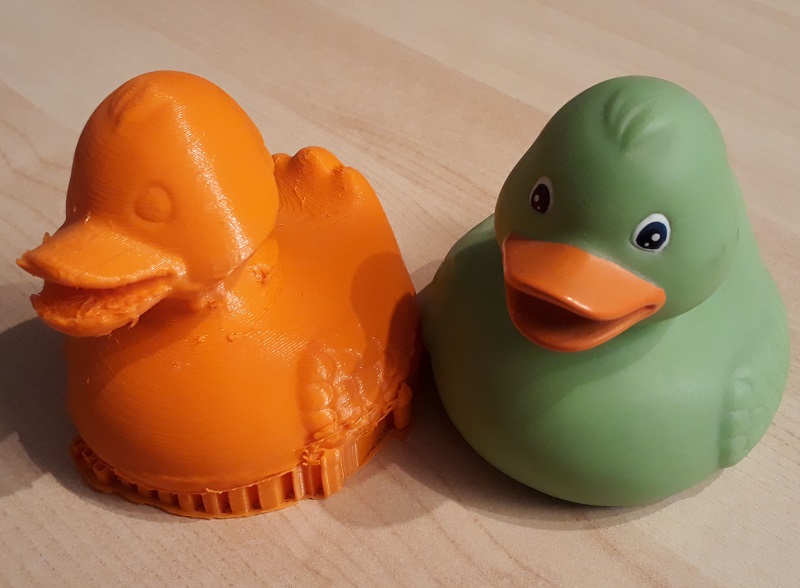
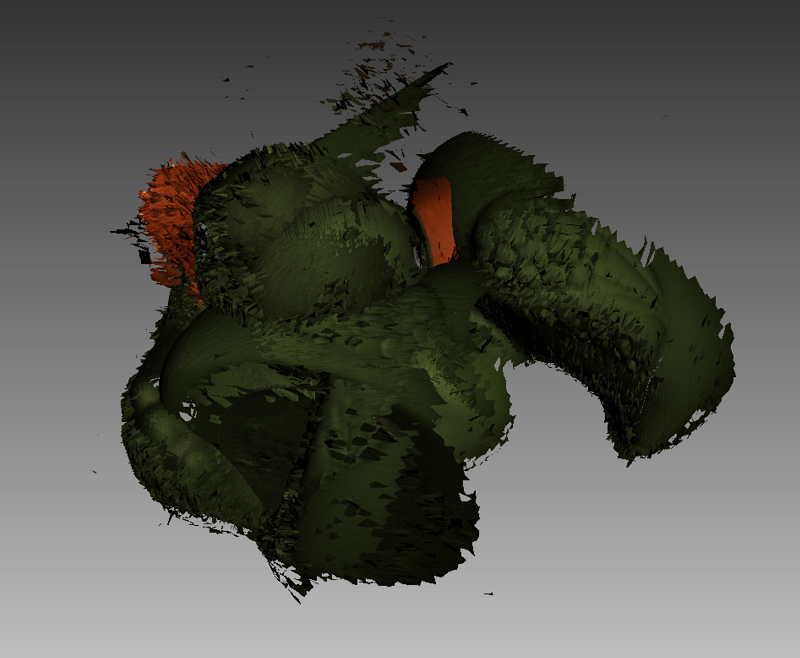
See here the finished print. The bottom of the print isn´t good at all but you can see the details in some parts. Also the spout made problems and has a lot of spikes looking like teeth.
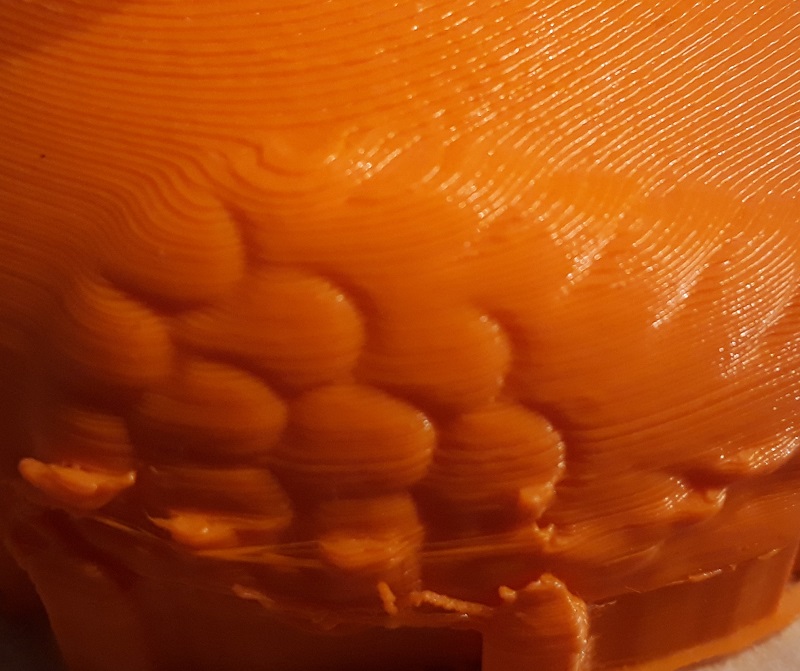
Here you can see the details of the surface. So the scanner is able to scan quite precise but it is a lot of work to get these results. In the next step I have to test more settings and a turntable. Maybe that works better.
Additional Design
.In addition to my holding I played a little bit with the official fablab logo and designed a cube out of the logo. Hope you like it.Downloads
| Angle-Test | download |
| Bottle-holding | download |
| Duck-Scan | download |
| Bottle-holding_CAD | download |
| 3D-FabLab_Cube | download |
