Final Project - Zakkerni
Assembly & Testing
After completing the design and manufacturing phases, we will focus on assembling the components and testing the final product's functionality.
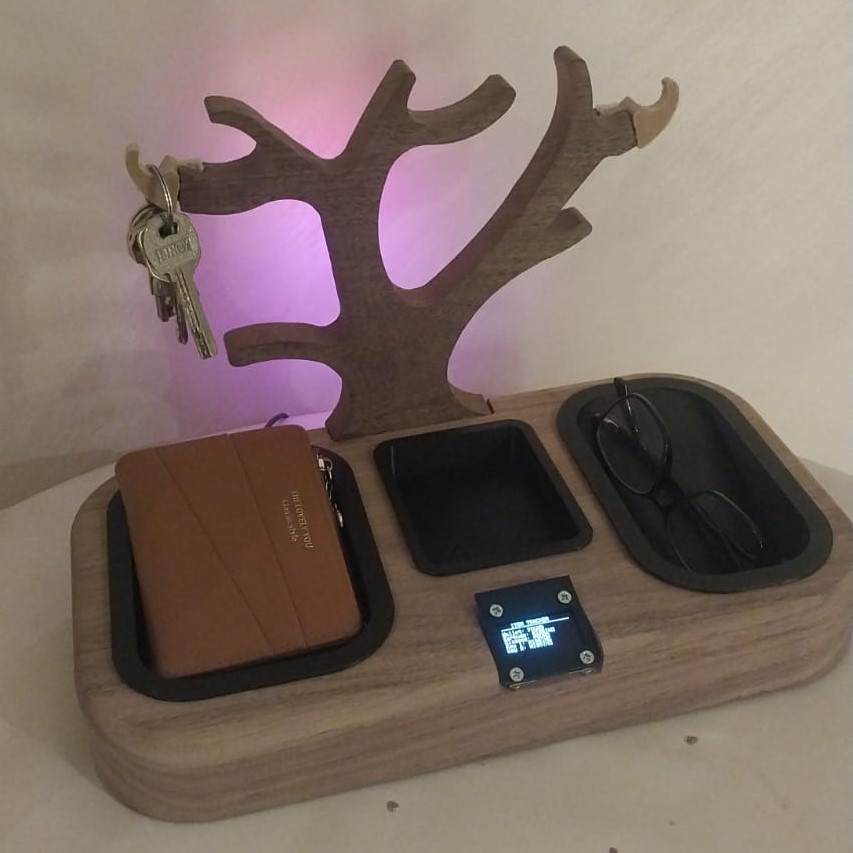
Materials
The system is built using a Seeed XIAO ESP32-C3 microcontroller, ultrasonic sensors, IR sensors, push buttons, LEDs, jumper wires, a power adapter, and 3D-printed components for the organizer structure. Most required components are available in the laboratory; any additional parts can be purchased from local electronics stores.
Bill of Materials — Zakkerni
Smart organizer · ESP32-C3 based
| # | Component | Description | Category | Source | Price per Unit | Qty | Subtotal |
|---|---|---|---|---|---|---|---|
| 1 | Seeed XIAO ESP32-C3 | Main microcontroller with Wi-Fi & BLE | MCU | Fab Inventory | $5.00 | 1 | $5.00 |
| 2 | Ultrasonic Sensor (HC-SR04) | Item presence detection | Sensor | local store | $3.53 | 2 | $7.06 |
| 3 | IR Sensor | Secondary item detection | Sensor | local store | $2.82 | 1 | $2.82 |
| 4 | Push Button | User input / manual trigger | Input | local store | $0.21 | 2 | $0.42 |
| 5 | NeoPixel strip | Light Effects | Output | lab storage (available on Amazon) | $13.00 | 1 | $13.00 |
| 6 | OLED Display 1.3 inch | Visual feedback on organizer | Output | local store | $8.46 | 1 | $8.46 |
| 7 | XH2.54mm Bend Pin Header Connector | connections | Misc | local store | $0.28 | 8 | $2.24 |
| 8 | JST XH 2.54mm | connections | Misc | local store | $0.63 | 8 | $5.04 |
| 9 | USB cable and adapter | Main power supply | Power | lab storage (available on Amazon) | $10.00 | 1 | $10.00 |
| 10 | ON/OFF Power Switch | Power control | Power | local store | $0.85 | 1 | $0.85 |
| 11 | DC Power Supply Plug Connector + Female Jack | Power connection | Power | local store | $0.92 | 1 | $0.92 |
| 12 | Walnut 62cm | Manufacturer | Manufacturer | Lab Storage | 1 | $42.31 | |
| TOTAL | $107.54 |
Soldering
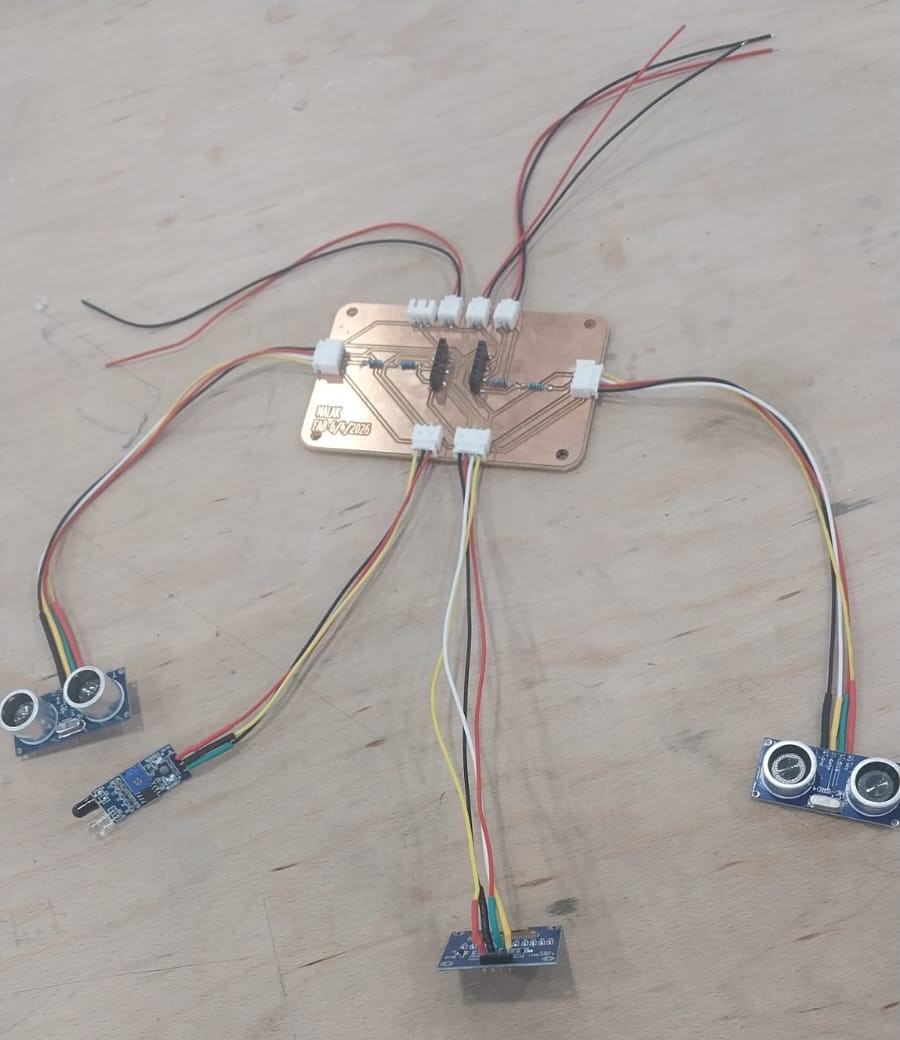
After manufacturing the PCB, the next step is to solder all the electronic components onto the board according to the schematic.
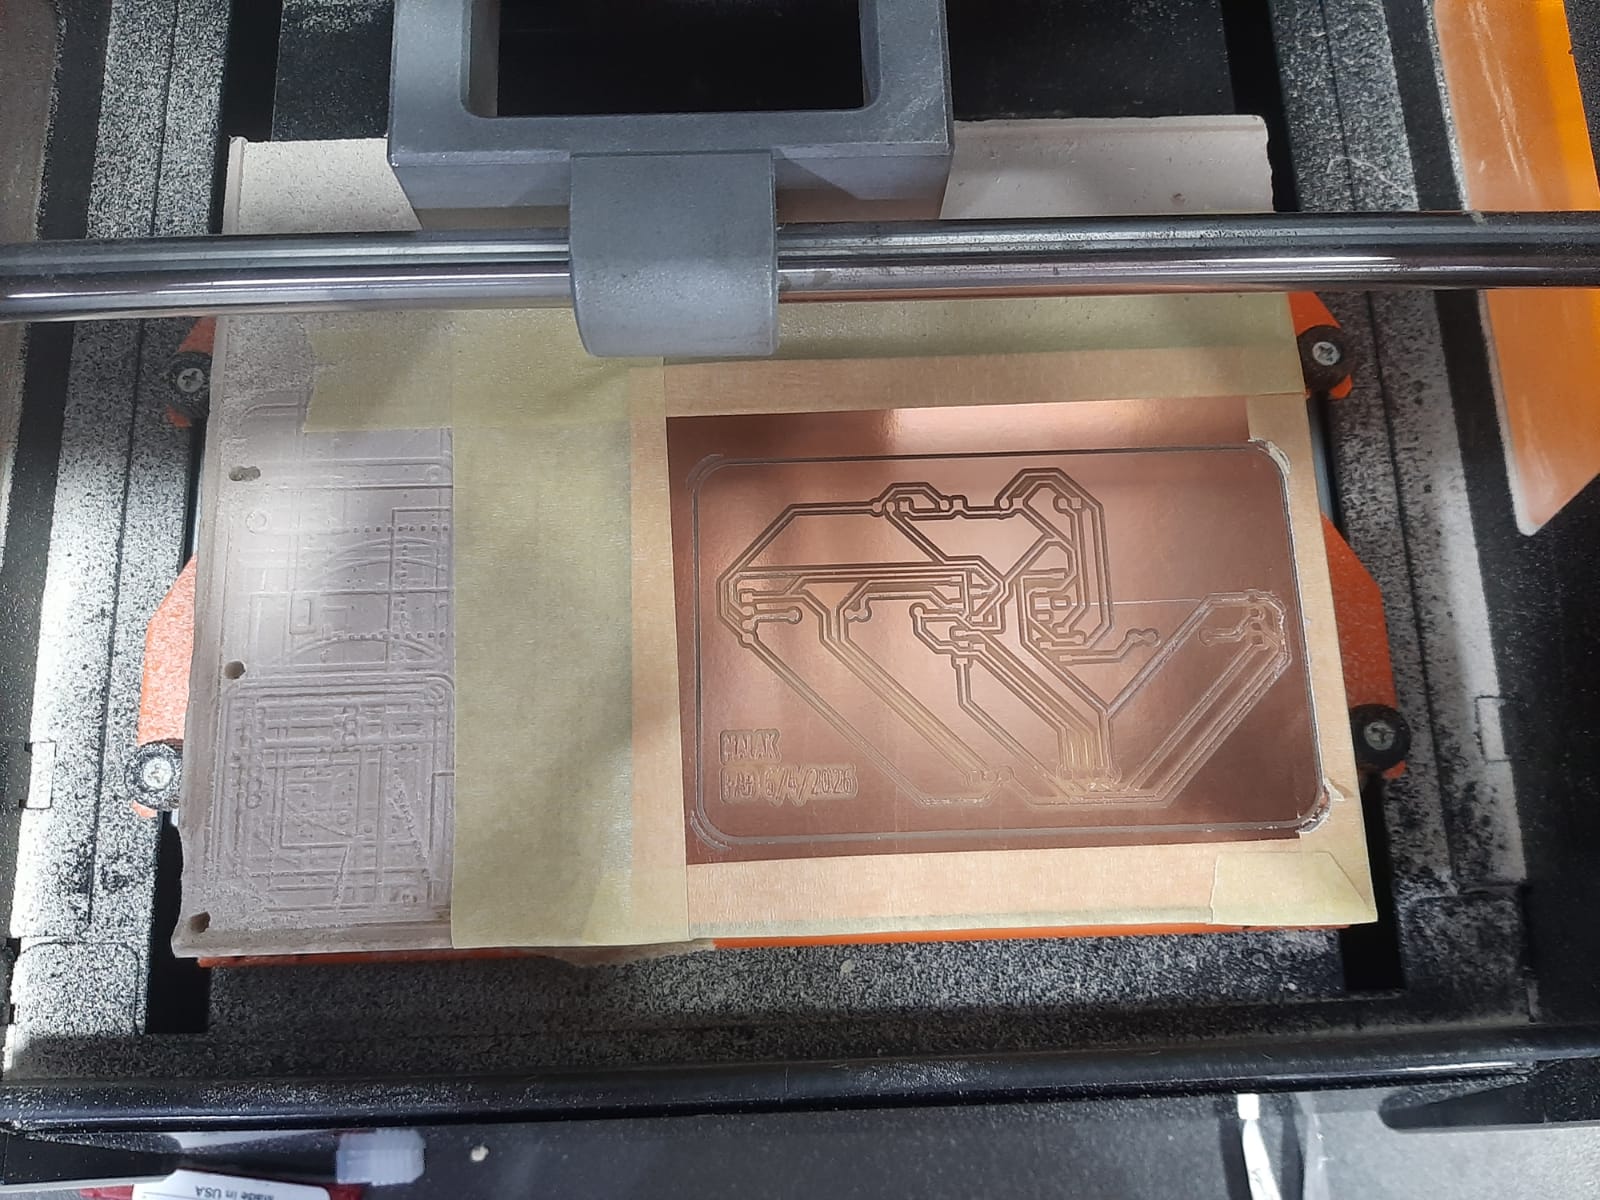
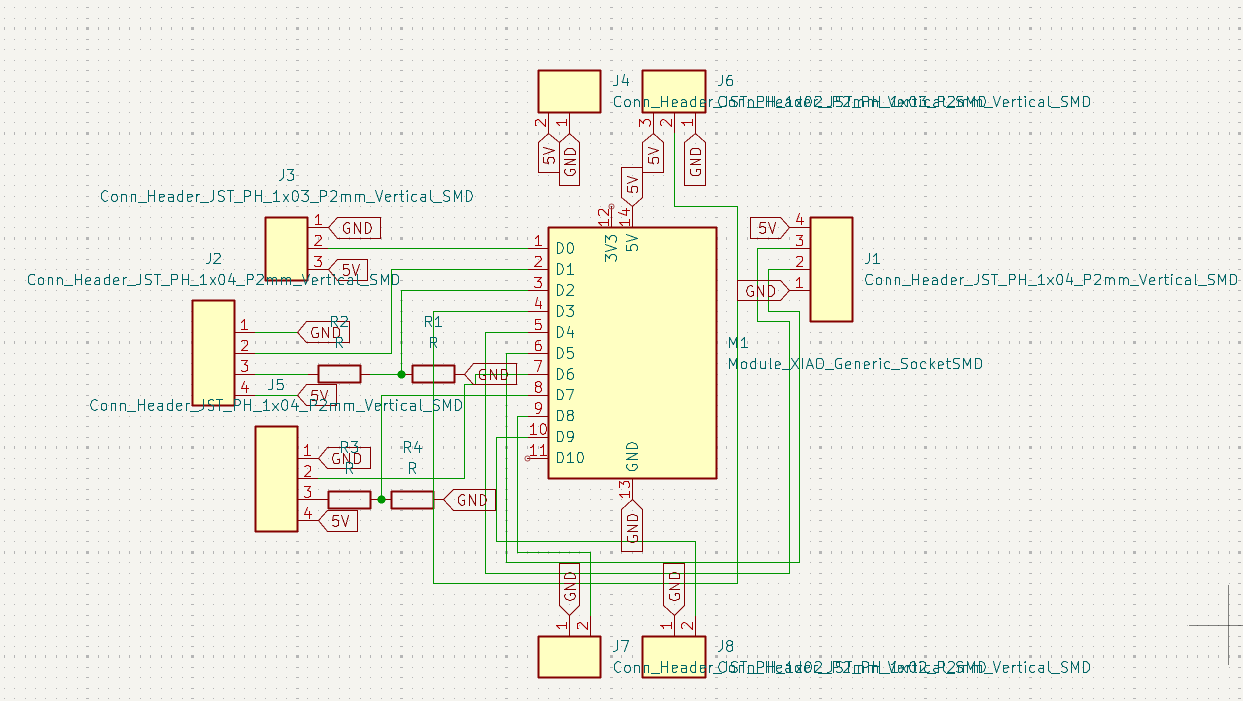
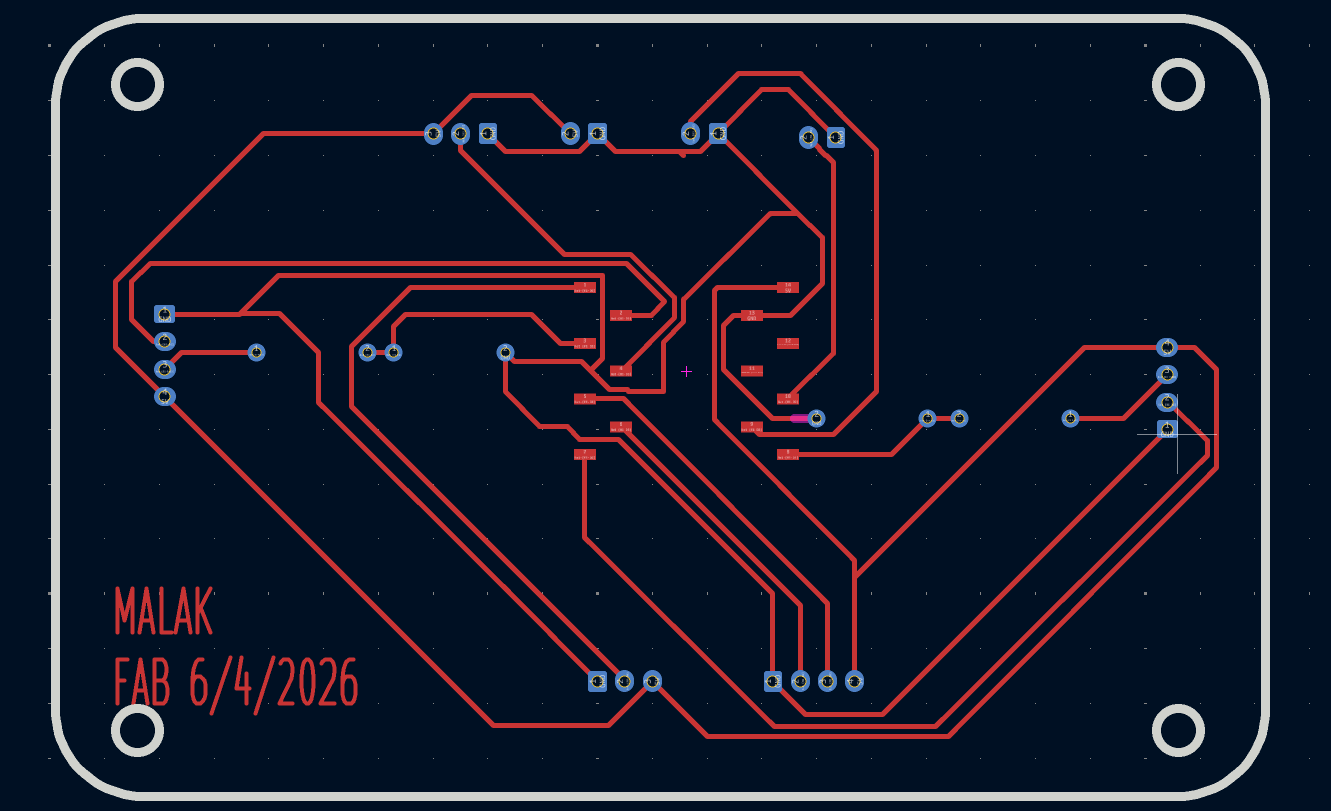
Here are Kicad files for the project: Download Kicad Files
Here is the soldering process:
After soldering, the PCB is ready for assembly with the other components, here is the final assembly:
Assembly
Attached PCB
The PCB is attached to the bottom of the main structure using screws and nuts.
Add 3D Printed Parts
The 3D printed parts are attached to the main structure either via spicial slots , screws, or glue.
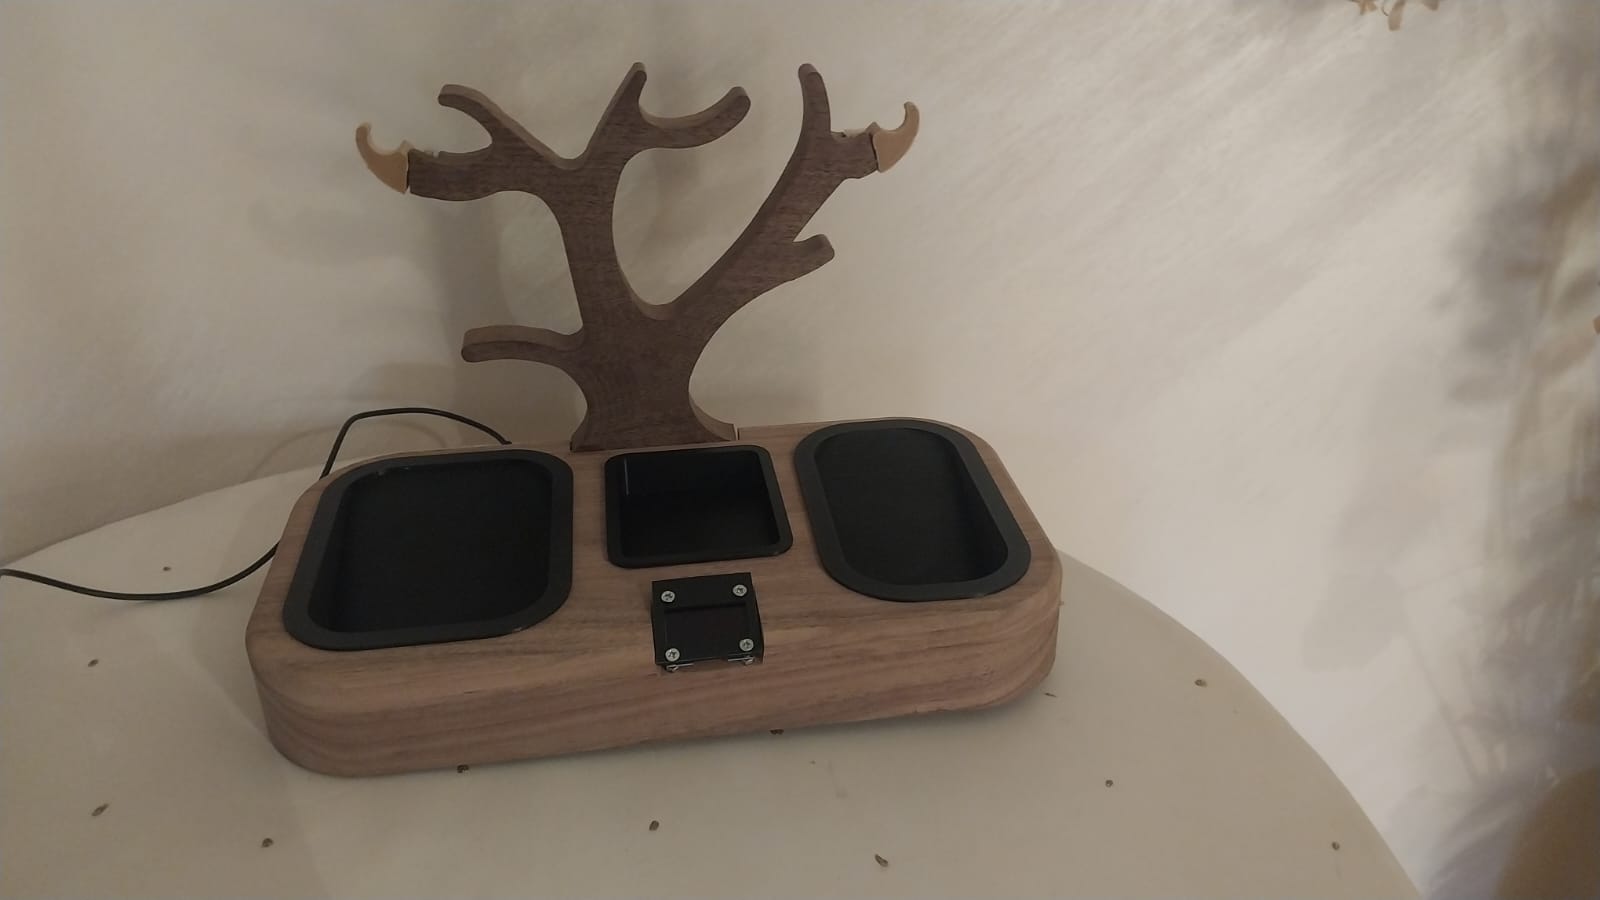
- Slots placed at their positions
- OLED Screen Holder attached via screws
- hooks attached via glue with the tree back body at thier specific locations
Here is the final assembly of the front side of the tree:
Other Assembly
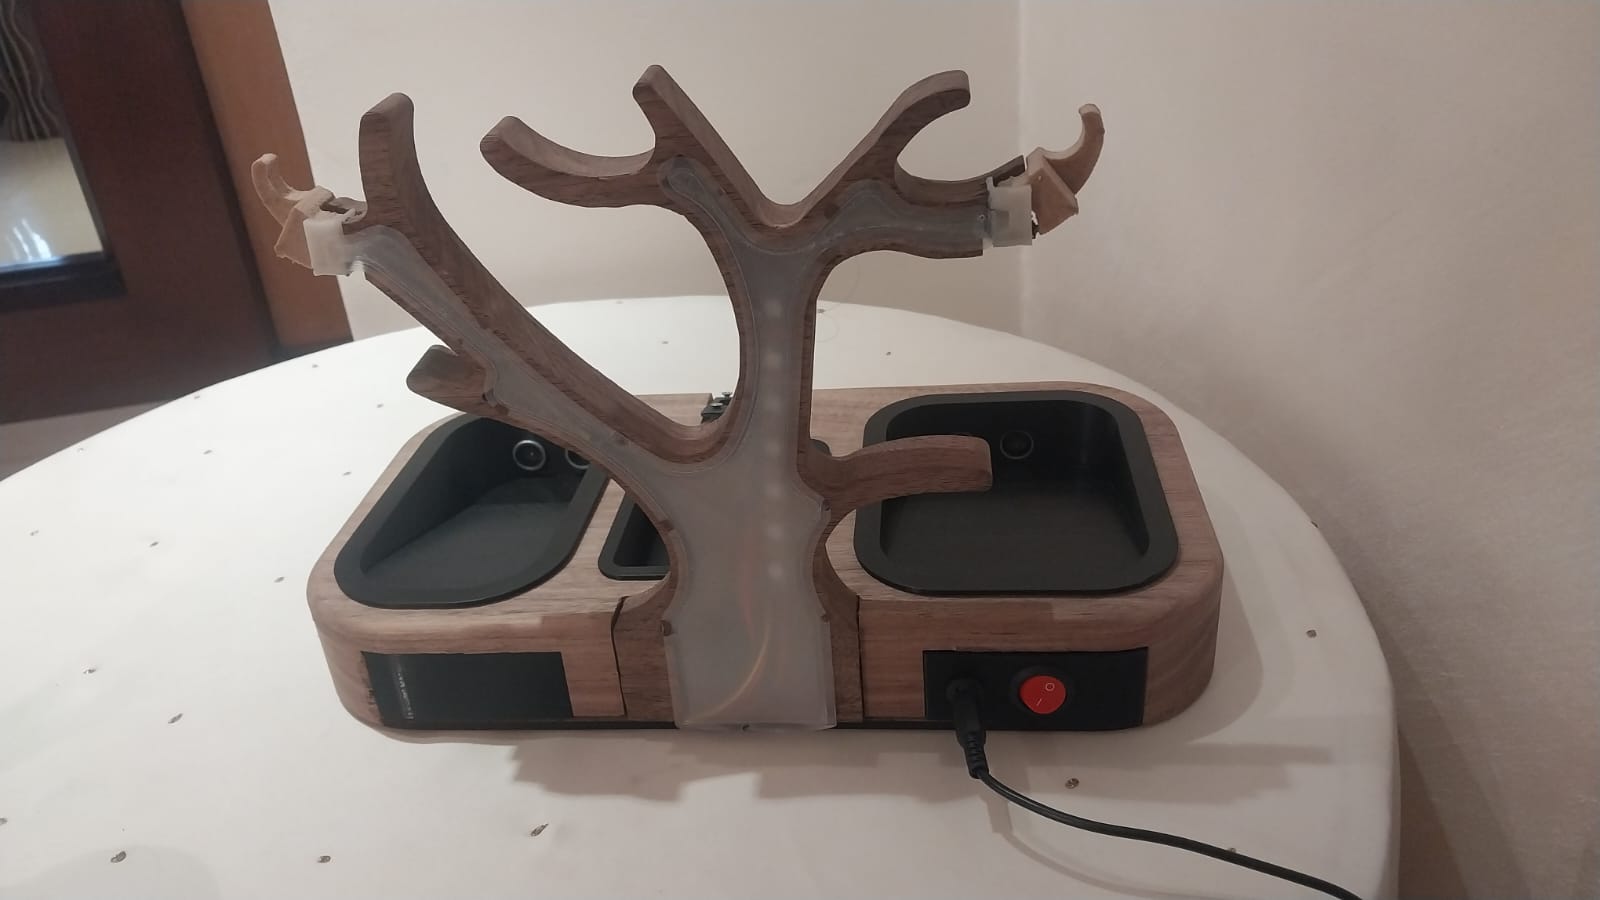
The back side assembly is completed by attaching the power switch, power jack, and the XT also attached to the back of the tree using glue.
the bottom laser cut part attached to the main structure using screws
Code
After completing the assembly, the next step is to upload the code to the microcontroller and test the functionality of the system. The code is written in Arduino IDE and can be found in the attachments.
Here is the project's code: Download Code
For Blynk, I used the same approach as in week 15.
Code Description
an OLED display, NeoPixel LEDs, Wi-Fi connectivity, and the Blynk IoT platform The firmware for Zakkerni was developed using the Arduino IDE and runs on the Seeed XIAO ESP32-C3 microcontroller. The program integrates multiple sensors, an OLED display, NeoPixel LEDs, Wi-Fi connectivity, and the Blynk IoT platform to create a smart reminder system for personal belongings.
The system continuously monitors the presence of items using two ultrasonic sensors, an IR sensor, and two push buttons. Each sensor is assigned to a specific object, such as a wallet, glasses, earbuds, or keys.
The ESP32-C3 also operates in Wi-Fi promiscuous mode to detect the MAC address of the user's phone. When the phone is detected, the system assumes the user has arrived home and sends a welcome notification reminding them to return any missing items to the organizer.
If the phone disappears for a predefined period, the system assumes the user has left the house. Before departure, it checks whether any belongings remain on the organizer and sends a notification listing the forgotten items. If no items remain, a simple goodbye message is sent instead.
The OLED display continuously shows the status of all monitored items, while the NeoPixel LEDs provide visual feedback through a smooth color animation. The system state is also synchronized with the Blynk cloud to enable remote monitoring and notifications.
Code Flow
Here is a flowchart illustrating the main logic of the code and what Zakkerni does. This flowchart was created with Cloud:
Testing
Sensor & Oled Testing
Here is a video showing the testing process and the final functionality of the system:
Blynk Testing
Here are videos showing the testing process and the final functionality of the system with blynk in both scenarios:
Power Testing
Conclusion
In conclusion, the Zakkerni project successfully integrates multiple sensors, an OLED display, NeoPixel LEDs, and Wi-Fi connectivity to create a smart reminder system for personal belongings. The system effectively monitors the presence of items, provides visual feedback, and sends notifications through the Blynk IoT platform. The assembly and testing phases confirmed the functionality of the system, demonstrating its reliability and effectiveness in helping users keep track of their essential items. Overall, Zakkerni serves as a practical and innovative solution for managing personal belongings, showcasing the potential of IoT technology in everyday life.