Week 2: Computer-Aided Design
This week, I explored different 2D and 3D design tools. I created one raster graphic, one vector graphic, and two 3D models using different software for each type. Below are the details of the tools I used and the work I created.
1. 2D Design Tools
There are two primary types of 2D design tools: raster and vector. Raster graphics are made up of pixels, while vector graphics are made up of paths defined by mathematical expressions.
Here is a comparison table that highlights the key differences between raster and vector images:
| Raster Image | Vector Image | |
|---|---|---|
| FORMATS | .jpg .png .tif .gif .bmp | .ai .eps .svg |
| COMPOSITION | Pixels (small squares of color) |
Mathematical equations that define points, lines, and curves |
| SCALABILITY | Images appear blurry or jagged when enlarged | Images can be scaled infinitely with no loss of quality |
| BEST USES | Photographs, images with intricate shading and tonal variations | Logos, icons, typography, simple illustrations |
| FILE SIZE | Typically larger, especially when the resolution is high | Typically smaller, since data is mathematical rather than pixels |
For more details about this topic, check out this link.
Raster:
Examples of raster graphics software include Adobe Photoshop, GIMP, and Corel Painter. These programs are ideal for editing photos and creating detailed images with complex color gradients. Raster graphics are resolution-dependent, meaning that they can lose quality when scaled up or down. Common raster file formats include JPEG, PNG, GIF, and BMP.
I used GIMP for my raster graphics work.
GIMP Interface Overview:
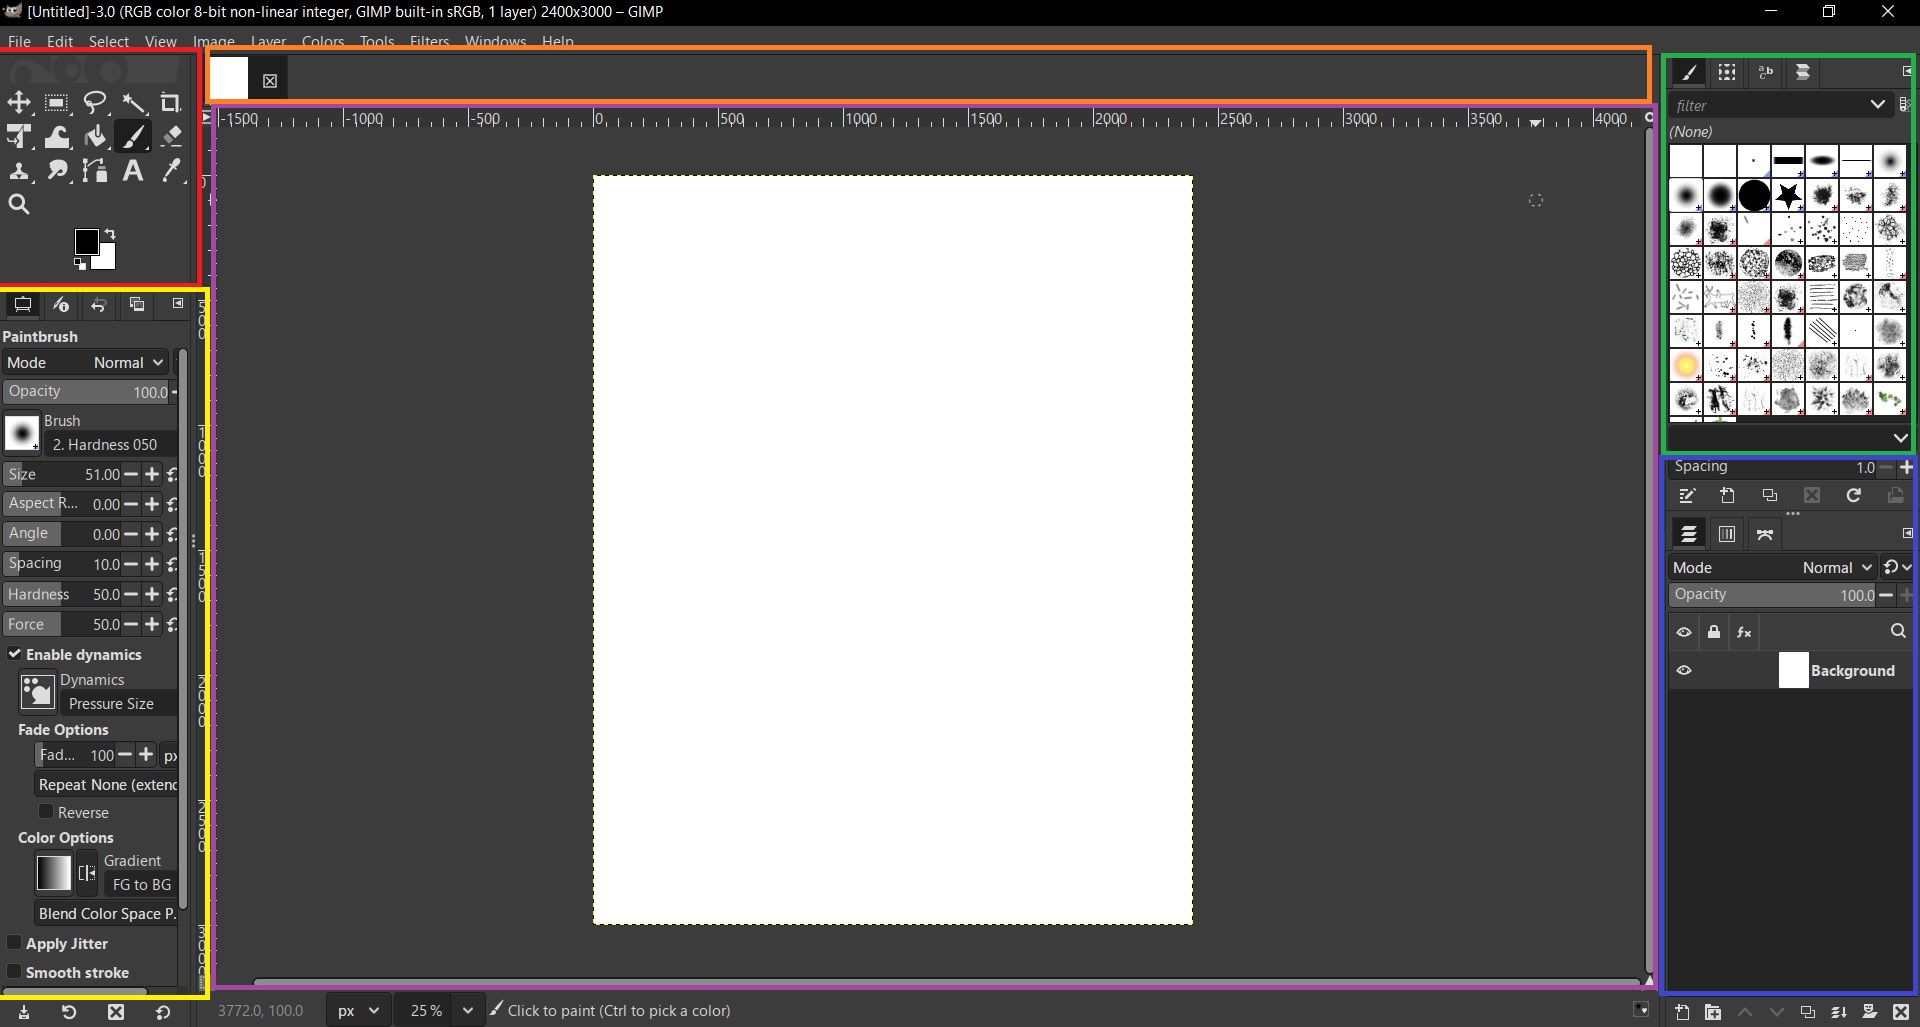
Toolbox (Red Box):
The Toolbox is your primary station for selecting the core manipulation tools.
- Selection Tools: These tools allow you to select specific areas of your image for editing. Examples include the Rectangle Select, Ellipse Select, Free Select, and Fuzzy Select tools.
- Paint Tools: These tools are used for painting and drawing on your image. Examples include the Brush, Pencil, Airbrush, and Eraser tools.
- Transform Tools: These tools allow you to manipulate the size, shape, and orientation of your image or selected areas. Examples include the Move, Scale, Rotate, and Perspective tools.
- Color Tools: These tools are used for adjusting the colors in your image. Examples include the Color Balance, Hue-Saturation, and Levels tools.
Tool Options (Yellow Box):
This context-sensitive panel is perhaps the most important for precision. It displays the specific settings for whichever tool is currently selected in the Toolbox.
- Brush Settings: Adjust the size, hardness, and opacity of the brush tool.
- Dynamics: Control how the tool behaves based on pressure, speed, or other factors.
- Mode: Change the blending mode for the tool, affecting how it interacts with the colors beneath it.
Image Tabs & Menu (Orange Box):
This area manages your global file navigation.
- Image Tabs: If you have multiple images open, they will appear as tabs here. You can switch between them by clicking on the respective tab.
- Menu Bar: This is where you can access all of GIMP's features and functions, organized into categories such as File, Edit, Select, View, Image, Layer, Colors, Tools, Filters, Windows, and Help.
Canvas / Image Window (Purple Box):
The central area where your actual image resides.
- Canvas: This is the main workspace where you can see and edit your image. You can zoom in and out, pan around, and apply various tools directly to the canvas.
- Rulers: The rulers along the top and left edges of the canvas help you measure and align elements in your image. You can change the units of measurement (pixels, inches, etc.) by right-clicking on the ruler.
- Navigation: Use the navigation tools to move around the canvas and view different parts of your image.
Brushes, Patterns, and Fonts (Green Box):
This dockable dialog allows you to select the "texture" of your tools.
- Brushes: Choose from a variety of brush shapes and sizes to paint with.
- Patterns: Apply repeating designs to your image for a textured look.
- Fonts: Select from a range of available fonts for text rendering.
-
Layers, Channels, and Paths (Blue Box):
This is the most critical panel for non-destructive editing. It allows you to manage the different layers of your image, which can be thought of as transparent sheets stacked on top of each other.
- Layers: Each layer can contain different elements of your image, such as background, text, or specific objects. You can adjust the opacity, blending mode, and order of layers to create complex compositions.
- Channels: Channels represent the color information of your image. You can edit individual color channels (Red, Green, Blue) or create alpha channels for transparency.
- Paths: Paths are used to create precise selections and shapes. They can be converted to selections or filled with colors or gradients.
💡 Note: Pressing Tab hides all docks to give more room on the canvas.💡 Note: These panels can be detached or moved by dragging their tabs.2. My Work:
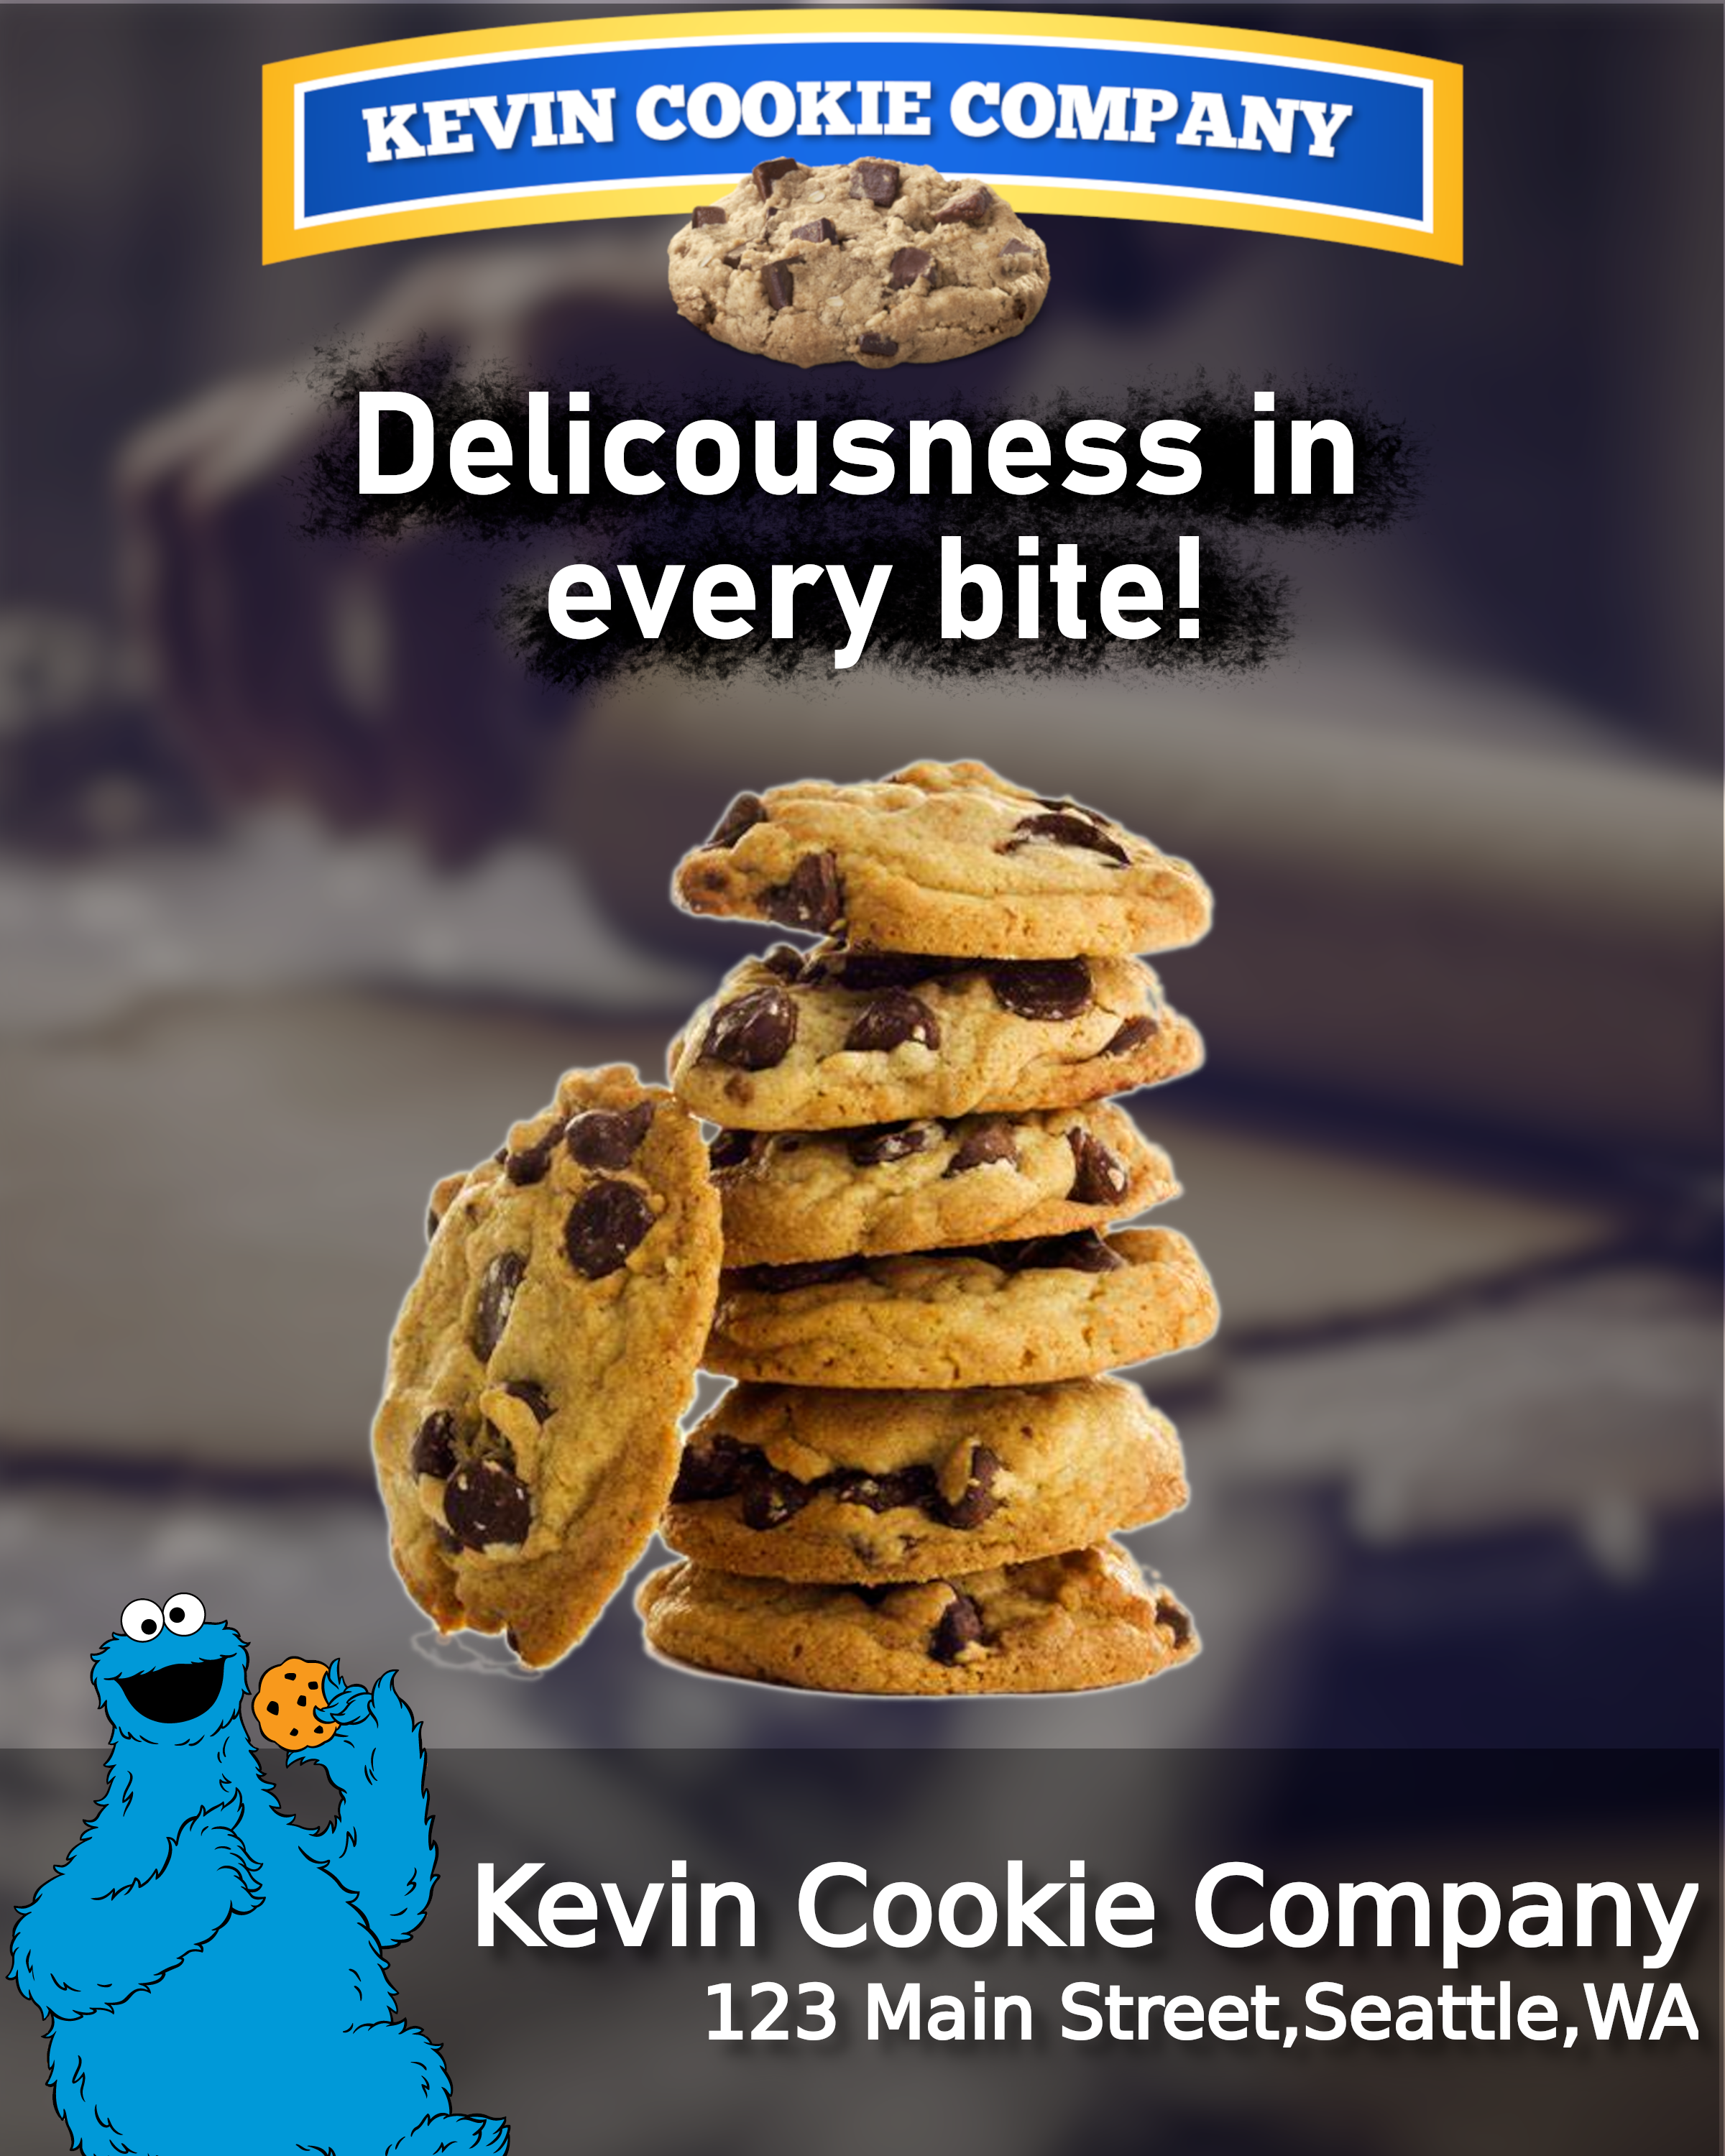
I created it by following this tutorial.
Here is my GIMP work: Download.
Vector:
Examples of vector graphics software include Adobe Illustrator, Inkscape, and CorelDRAW. These programs are ideal for creating logos, icons, typography, and simple illustrations. Vector graphics are resolution-independent, meaning that they can be scaled up or down without losing quality. Common vector file formats include AI, EPS, SVG, and PDF.
I used Inkscape for my vector graphics work.
Inkscape Interface Overview:
Toolbox (Red Box):
Located on the far left, this contains the creation and editing tools.
- Selection & Transform: The black arrow (top) is your most-used tool for moving and scaling objects.
- Node Editing: The tool directly below the arrow allows you to reshape paths by manipulating individual points.
- Shape Tools: Dedicated tools for creating rectangles, circles, stars, and 3D boxes.
- Drawing Tools: Includes the Pen (Bezier) tool for precise paths and the Pencil tool for freehand drawing.
Menu & Tool Controls Bar (Yellow Box - Top):
This area is split into two functional levels.
- Menu Bar: Standard access to File, Edit, and Path operations (crucial for vector logic).
- Tool Controls Bar: This bar changes dynamically. It provides specific numerical inputs (X, Y coordinates, Width, Height) and settings for the tool currently selected in the Toolbox.
Canvas & Rulers (Green Box):
The main stage for your vector artwork.
- The Page: The white rectangle represents the printable area or the exported image boundary.
- Rulers: Used for precise alignment and for "dragging out" guide lines to help with layout symmetry.
Dialog Docks / Layers (Blue Box):
This is where your functional panels live.
- Layers & Objects: As seen in your image, this panel manages the stacking order of your elements.
- Fill and Stroke: Usually docked here, this is where you control the color, gradient, and border thickness of your shapes.
Commands Bar (Yellow Box - Right):
A vertical strip of shortcuts for common global actions.
- File Operations: Quick buttons for Save, Print, and Import/Export.
- Object Actions: Fast access to Grouping, Ungrouping, and the Alignment dialog.
Color Palette (Pink Box):
The quick-access bar for applying colors.
- Swatches: Clicking a color set the Fill of a selected object.
- Stroke Tip: Holding Shift while clicking a color sets the Stroke (outline) color.
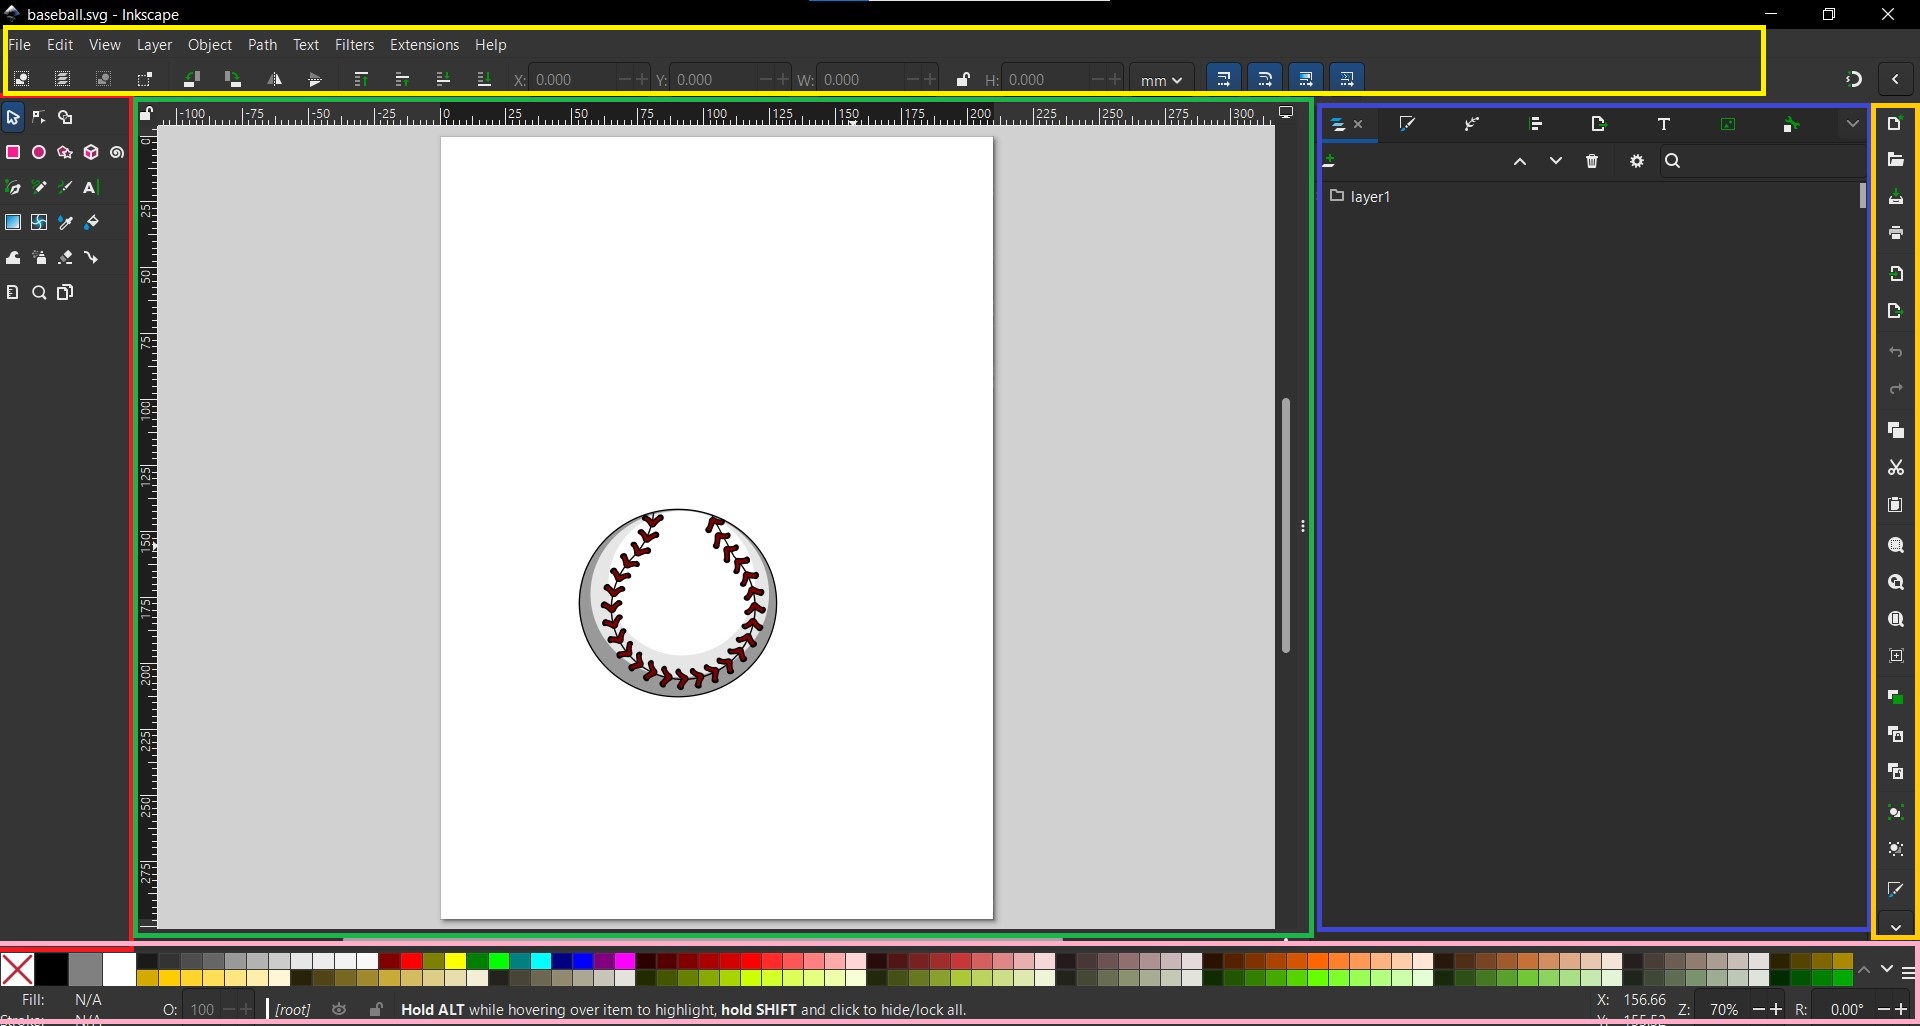
2. My Work:

I created it by following this tutorial.
Here is a video of the process I followed to create the vector image:
Here is my Inkscape work: Download.
2. 3D Design Tools
3D design tools are software applications used to create, modify, and visualize three-dimensional objects and environments. Examples of 3D design software include Creo and Fusion 360. These programs allow users to create complex 3D models, animations, and simulations for various applications such as video games, movies, product design, and architecture.
Fusion 360:
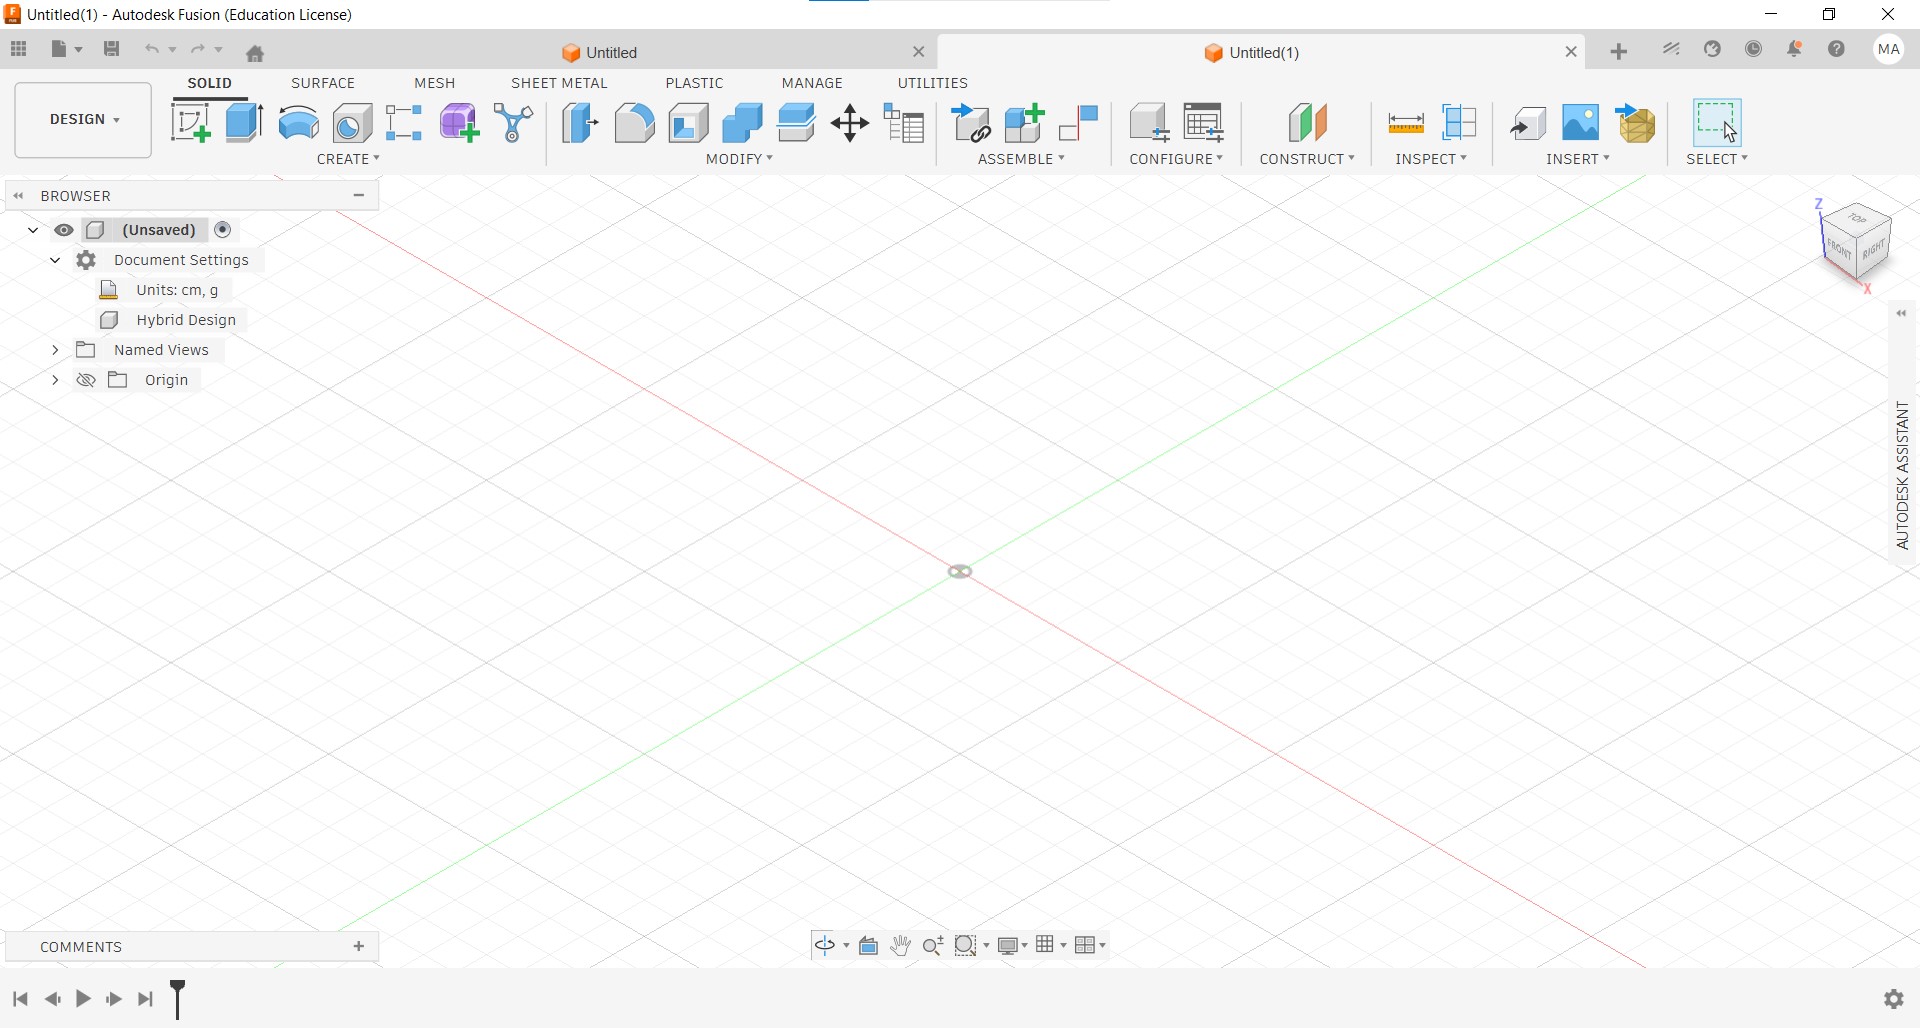
Fusion 360 is a cloud-based 3D design software developed by Autodesk. It offers a wide range of tools for 3D modeling, simulation, and collaboration. Fusion 360 is popular among engineers, product designers, and hobbyists for its user-friendly interface and powerful features. It supports parametric modeling, which allows users to create models that can be easily modified by changing parameters.

To download .f3d file, click here.
To download .stl file, click here.
I created it by following this tutorial.
Here is my 3D model of a bottle created using Fusion 360:
Creo:

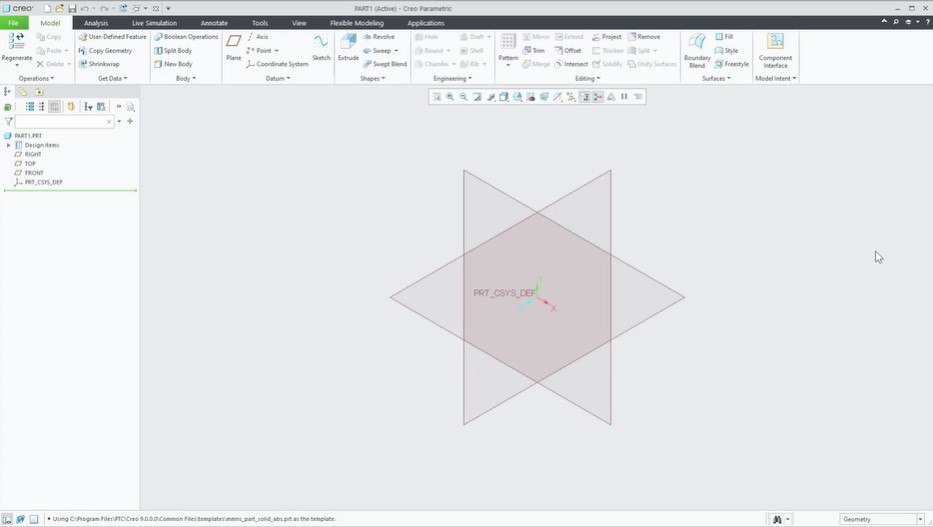
Creo is a 3D CAD software developed by PTC. It is widely used in the engineering and manufacturing industries for product design and development. Creo offers a comprehensive set of tools for 3D modeling, simulation, and analysis. It supports parametric modeling, which allows users to create models that can be easily modified by changing parameters. Creo is known for its robust features and is often used for complex product design projects.
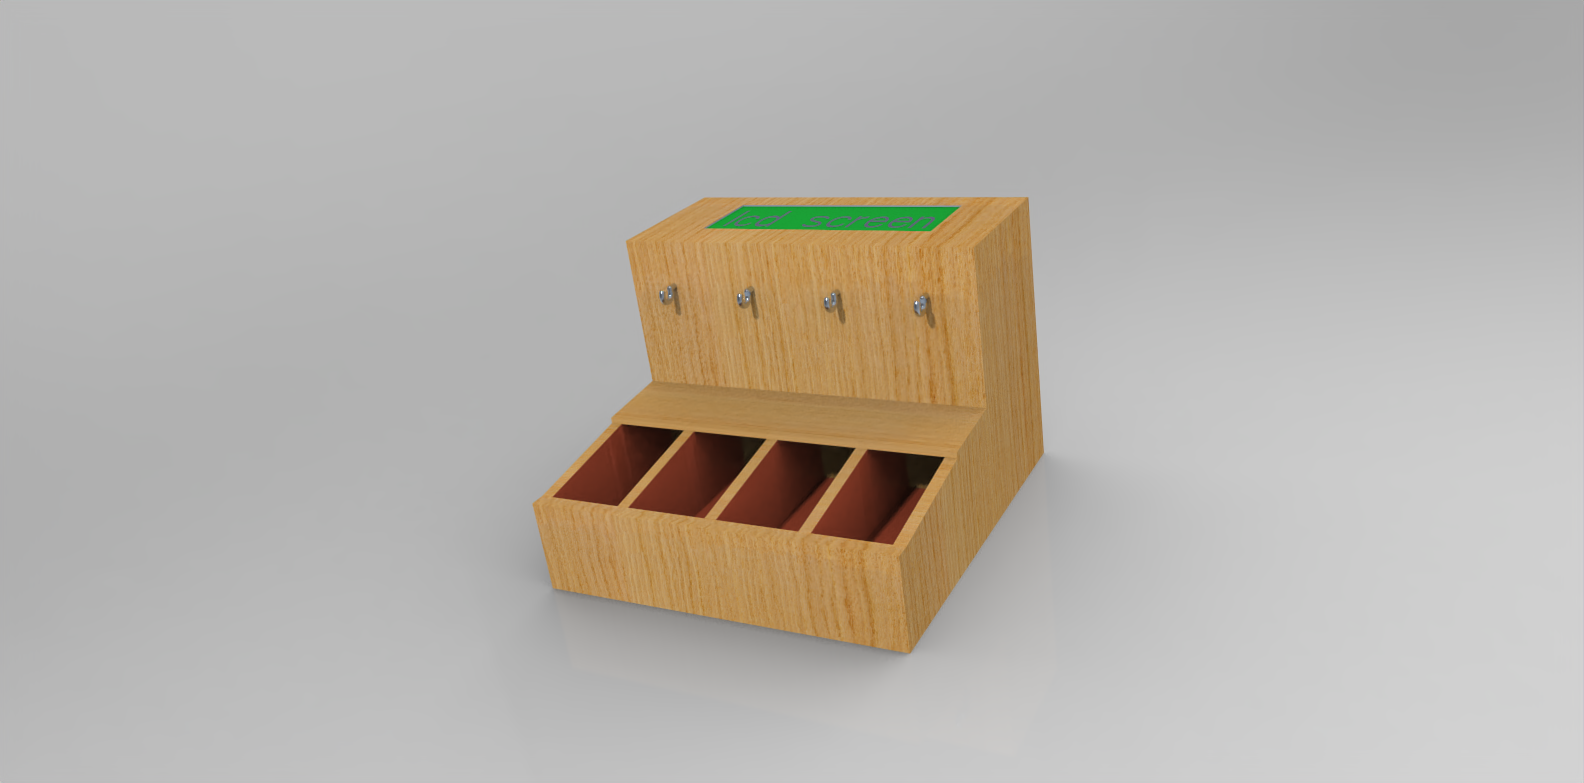
I used Creo for my initial 3D design for the final project.
To download the 3D model file, click here.
Here is the initial 3D model for my final project, created using Creo:
Creo vs. Fusion 360
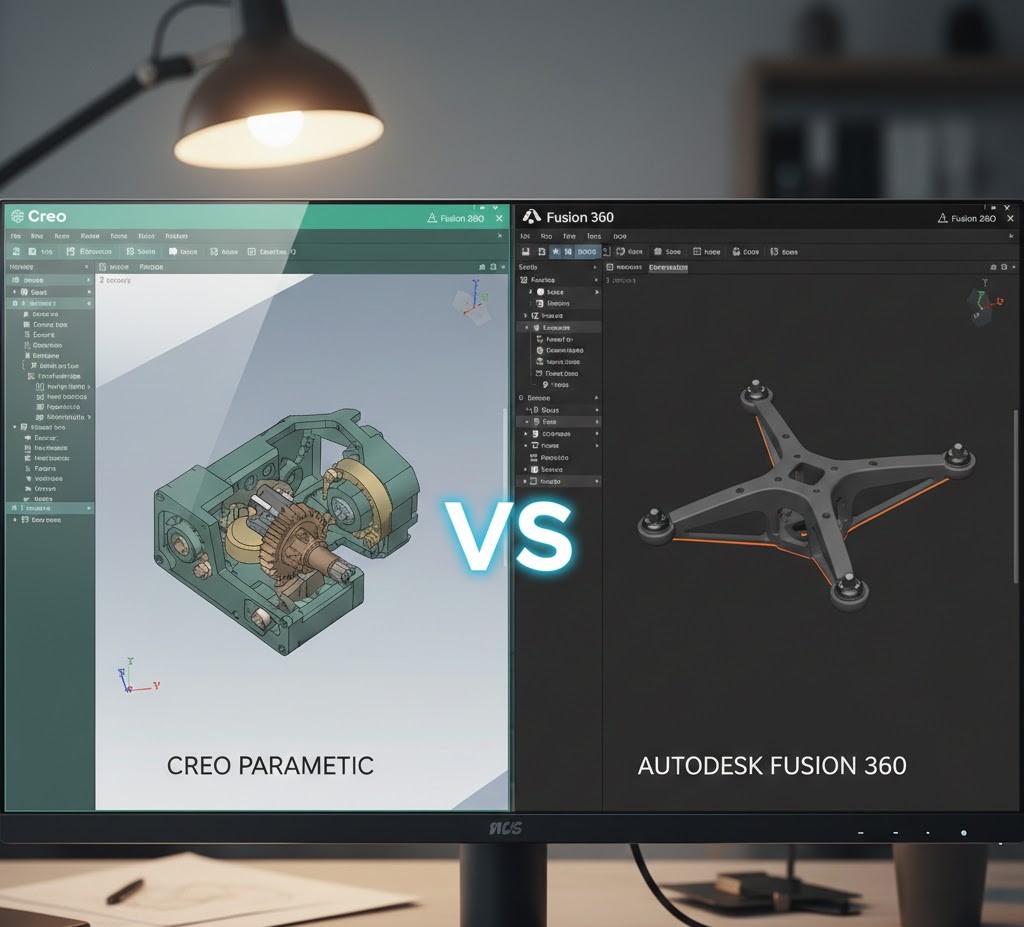
Both Creo and Fusion 360 are powerful 3D design tools, but they have some key differences from my perspective:
User Interface:
Fusion 360 has a more modern and user-friendly interface, making it easier for beginners to learn and navigate. Creo, on the other hand, has a steeper learning curve and may require more time to become proficient.
Collaboration:
Fusion 360 is cloud-based, allowing for easy collaboration and access to projects from anywhere with an internet connection. Creo is primarily desktop-based, which can make collaboration more challenging, especially for remote teams.
Features:
Both pieces of software offer a wide range of features for 3D modeling, simulation, and analysis. However, Creo is often considered more robust and better suited for complex product design projects, while Fusion 360 is more versatile and suitable for a wider range of applications, including hobbyist and educational uses.
💡 Note: I used Copilot to help me ensure the document is clear of grammar mistakes.
3. Media Compression
Image Compression
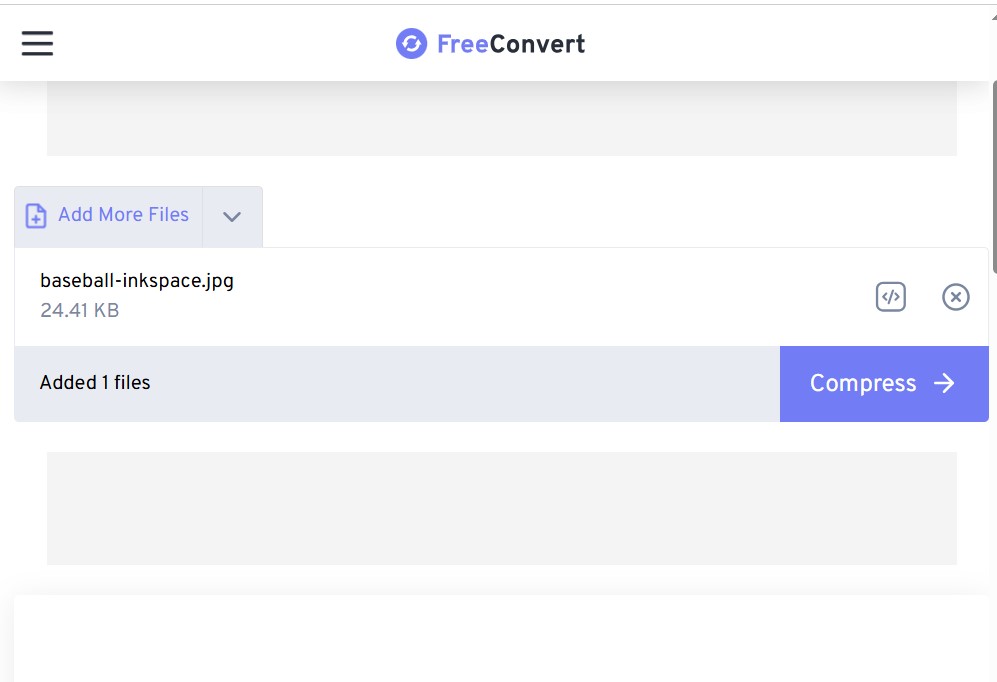
- Go to the FreeConvert Image Compressor website.
- Click on the "Choose Files" button to select the image you want to compress from your computer.
- After selecting the image, click on the "Compress Now" button to start the compression process.
- Once the compression is complete, you can download the compressed image by clicking on the "Download" button.
Video Compression
- Download ffmpeg from the official website: ffmpeg official website
- Click on the download option and choose your operating system. For Windows, choose Windows builds from gyan.dev.
- After downloading, extract the contents of the zip file to a folder on your computer.
- Move your extracted ffmpeg folder to C:\ or any other location you prefer.
- Add the ffmpeg bin folder to your system's PATH environment variable. This allows you to run ffmpeg from any command prompt or terminal window.
- Open a command prompt or terminal window.
- Navigate to the directory where your video file is located using the cd command.
- Use the following command to compress your video:
- Press Enter to execute the command. ffmpeg will process the video and create a compressed version in the same directory.
To ensure the image size does not exceed 1-2 MB, use this website: FreeConvert Image Compressor.
Here are the steps to compress an image using the FreeConvert Image Compressor website:

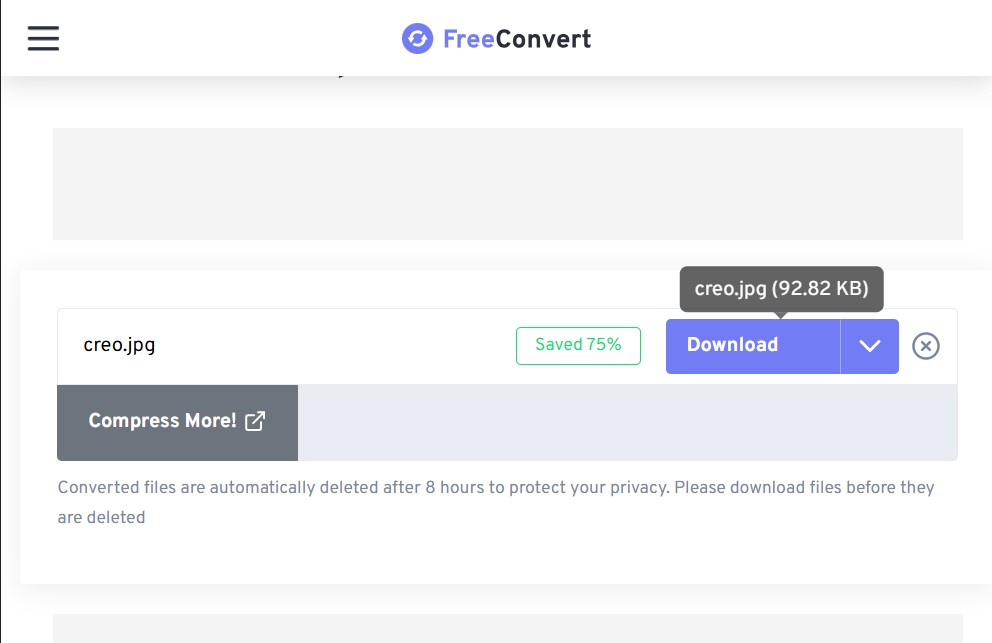 💡 Note: You can see the file size after compression by hovering over the download button.💡 Note: If the compressed image is still too large, you could try I Love Img website, which could give you a better result sometimes.
To compress videos and ensure size reduction and encoding quality: I use ffmpeg
ffmpeg
ffmpeg is a command-line tool that can be used to convert, compress, and manipulate audio and video files. It is a powerful and versatile tool that supports a wide range of formats and codecs. ffmpeg can be used to compress videos by reducing their resolution, bitrate, or changing the codec used for encoding. It is available for Windows, macOS, and Linux operating systems.
Here are the steps to download and use ffmpeg. I used this tutorial as a reference:
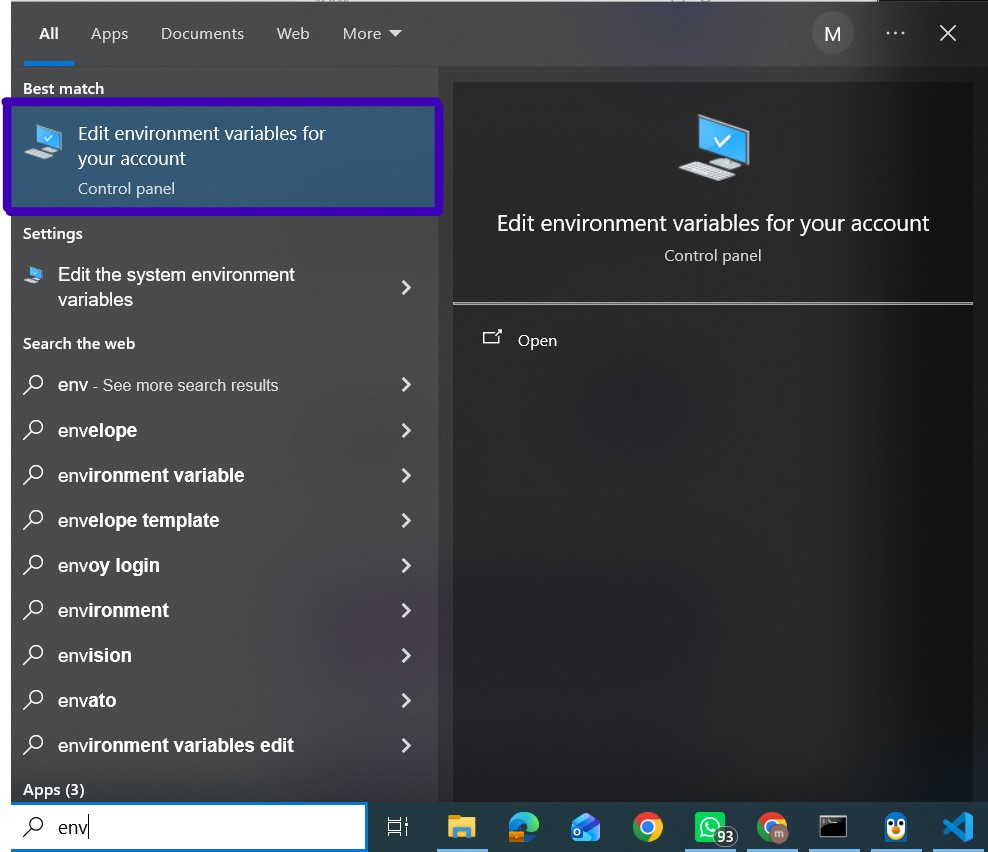
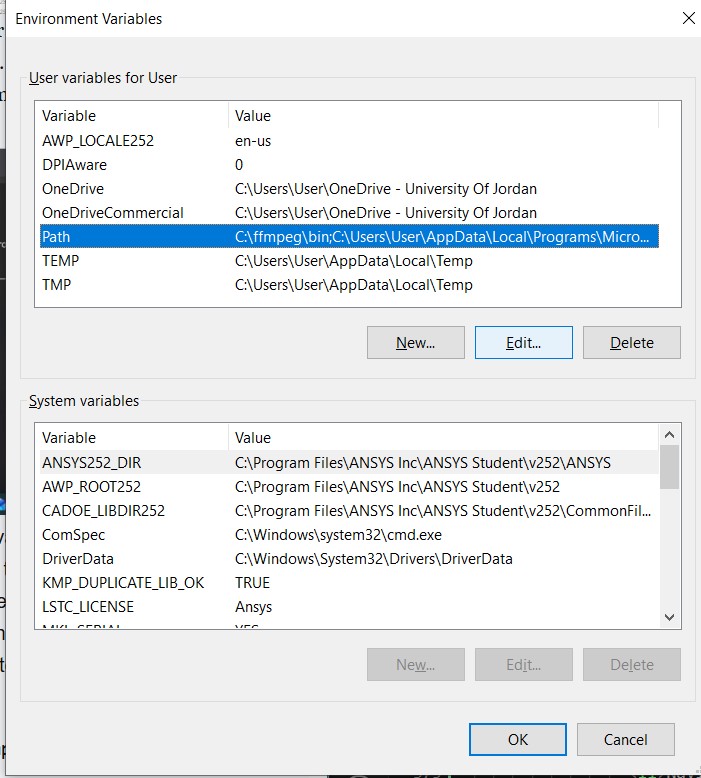
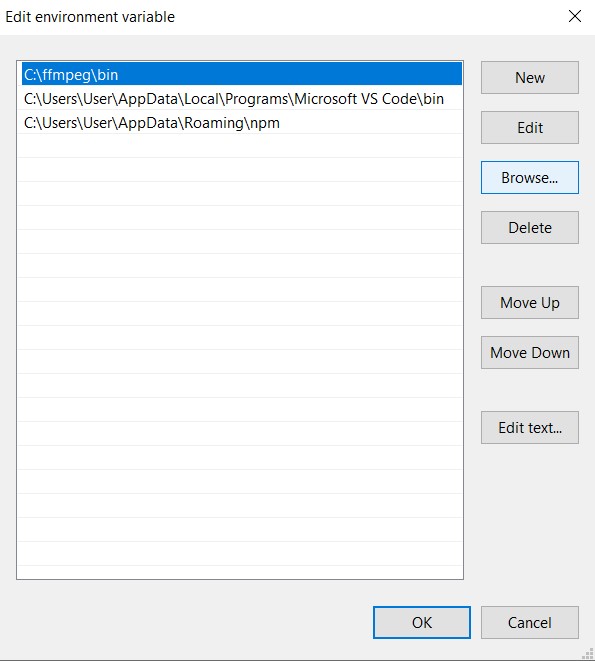
To add the ffmpeg bin folder to your system's PATH environment variable, click "Browse" and select the bin folder inside the ffmpeg folder you extracted earlier. Then click "OK" to save the changes.
ffmpeg -i input.mp4 -vcodec libx264 -crf 25 -preset medium -vf
scale=-2:1080 -acodec libmp3lame -q:a 4 -ar 48000 -ac 2
output_compressed.mp4
Replace input.mp4 with the name of your original video file and output_compressed.mp4 with the desired name for the compressed video file. The -crf value controls the quality of the output video (lower values result in higher quality and larger file sizes, while higher values result in lower quality and smaller file sizes).
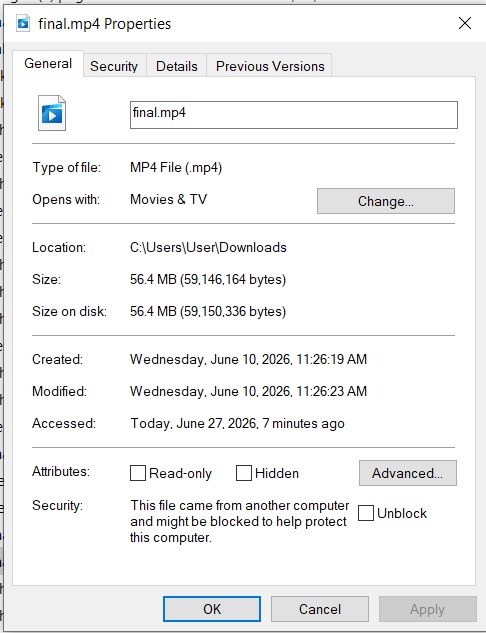
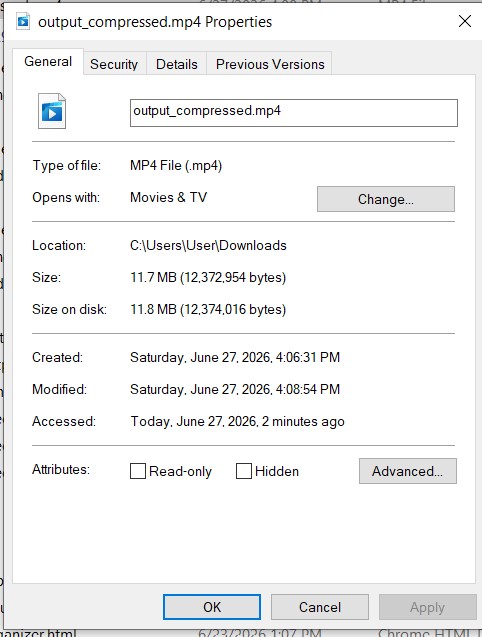
As you can see, the compressed video is significantly smaller while maintaining good quality.
Alternative Method for Video Compression:
To ensure the video size does not exceed 5 MB, use this website: FreeConvert Video Compressor.
Use the same steps as the image compressor, but choose a video file instead of an image.
💡 Note: There is also another website you can use for video compression that could give you a better result: CompressVideo.