Week 12: Mechanical Design and Machine Design
Week 12 Assignment:
- Group Assignment
- Design a machine that includes mechanism+actuation+automation+function+user interface
- Build the mechanical parts and operate it manually
- Document the group project and your individual contribution
Notes from the Lecture
-
Parts: Stock parts and Custom parts
-
Stock Parts: Adding stock parts to your design dramatically opens up the space of possibilities. However, it cost money and take time to ship.
-
Buttonhead Screws -> fasterners, classic screw for attaching parts together with a strong normal force
-
Flathead Screws -> fasteners, these screws can be seated such that they are flush with the material that they are holding
-
Shoulder Screws -> fasteners, these screws have a smooth shaft along most of their length, ideal for pivot points and joints
-
Heat-set Inserts -> Gives parts a strong screw feature when your parts will be inserted/removed often
-
Dowel Pins -> parts for motion, these steel pins are smooth throughout. they can be pressed into materials permanently and also serve as shafts
-
Small L-brackets -> fasteners, tiny & thin stainless steel brackets, good for laser-cut corners
-
Push-in Plastic Rivets -> fasteners, removable and great for pivot points
-
Mechanisms: a device that transforms input forces and movement into a desired set of output forces and movement. For example: joints, cams, linkages, gears, pulleys. Making mechanisms with digital fabrication and stock parts opens up a moving-things design space!
-
Mechanisms include:
-
Joints
-
Cams
-
Linkages
-
Gears
-
Pulleys
-
Compliant Mechanisms
-
Consider friction and force needed to move your mechanisms!
-
Bearings
GROUP ASSIGNMENT
Chai Huo Week 12 - Group Assignment: XIAO VENDING MACHINE
INDIVIDUAL ASSIGNMENT
Material Selection
Acrylic (Window)
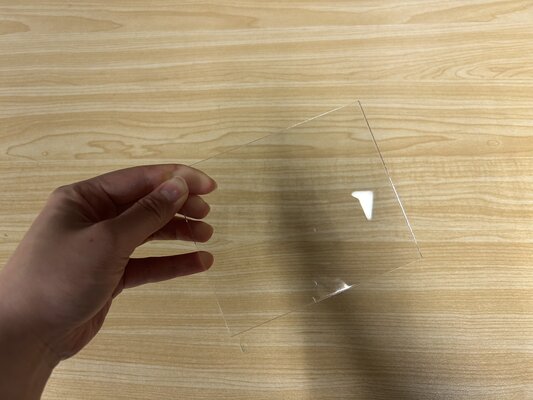
We used clear, colorless acrylic for the vending machine window. The thickness is 2mm thick. Acrylic was chosen for the following reasons:
-
Optical Clarity:
Acrylic is “optically clear,” providing excellent light transmission. This ensures that the products inside the vending machine appear sharp and vibrant to the customer.
-
Lightweight:
It is significantly lighter than glass, allowing a thin 3D-printed frame to support it securely without the risk of the PLA frame sagging or warping over time.
-
Impact Resistance:
Unlike glass, acrylic is shatter-resistant. It can withstand the minor impacts associated with regular use without breaking.
-
Manufacturing Efficiency:
It is compatible with laser cutting, which allows for a fast and highly precise cutting process.
Frame and Internal Components (3D Printing)
-
Upper Window Frame (PLA)
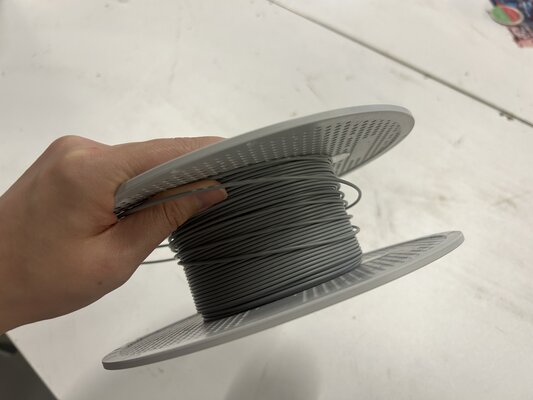
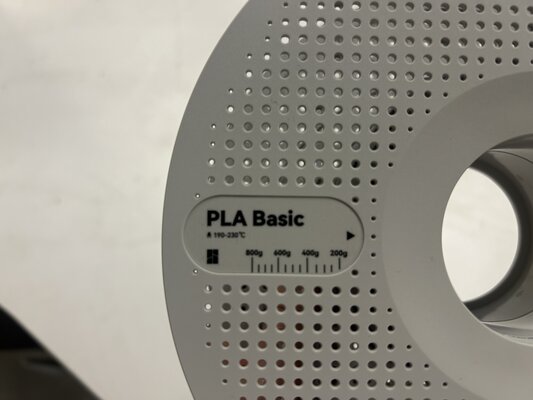
For the visible, upper portion of the frame, we used gray PLA filament.
The “Slide-In” Method: The frame was printed as a single piece with a built-in groove. PLA’s high rigidity makes it ideal for this design; it holds its shape perfectly, ensuring the acrylic pane stays securely in place without “popping out” or bending. This results in a sturdy, premium-feeling structure.
-
Base, Product Holder, and Servo Arm (PETG)
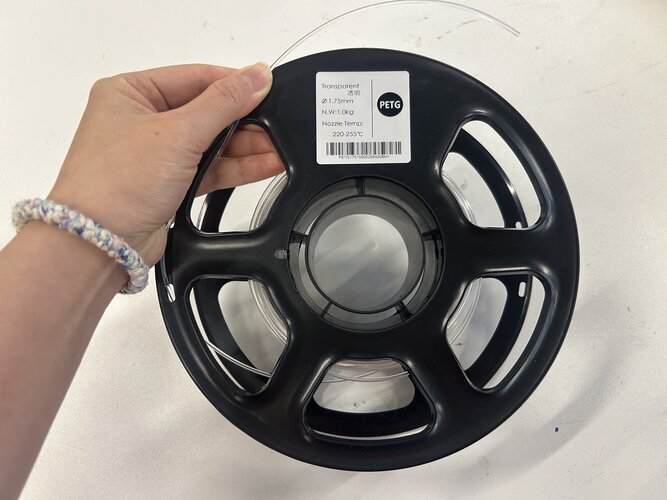
For the internal mechanical parts, we transitioned to transparent PETG due to its superior durability.
-
XIAO Product and Motor Holder:
While we chose transparent PETG to showcase the internal electronics, the material’s nature makes it difficult to see through clearly once printed (due to internal layer lines).
However, PETG was the correct functional choice. Our previous attempts with PLA were too brittle and failed under stress, whereas the PETG holder is resilient and holds the components securely.
-
Bottom Section (The Foundation):
PETG is an excellent choice for the base because it is tough and impact-resistant.
Additionally, PETG has a lower coefficient of friction (it feels “slippery”). This is a functional advantage, as it allows the XIAO product to slide smoothly into the delivery chute without getting stuck.
Why PETG feels “Slippery”
PETG is naturally more wear-resistant and has a smoother surface finish than PLA. This makes it a great choice for mechanical “slides” acts almost like a self-lubricating surface for your product to slide down.
-
Servo Arm:
The servo arm must withstand constant mechanical stress. Our initial PLA arms snapped after repeated movements. The PETG arm is much more ductile, meaning it can absorb the motor’s torque and vibration without cracking.
-
3D Printed Parts (Servo Arm)
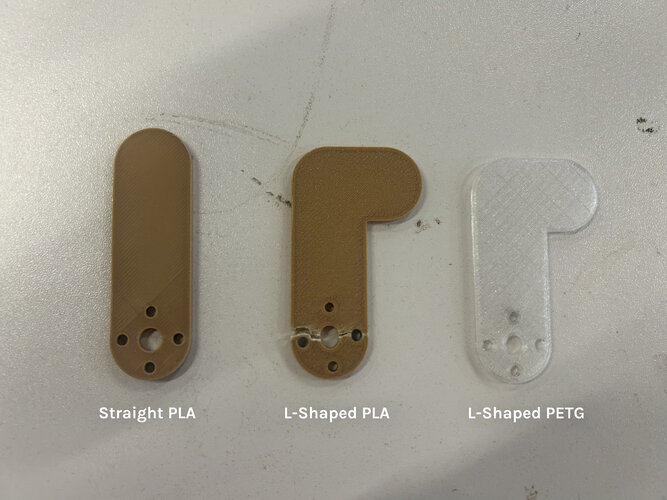
Our design went through several iterations to achieve the necessary mechanical force:
First Iteration (Straight PLA): We started with a simple, straight arm. While helpful for visualizing the movement, the PLA was too brittle, and the straight geometry did not provide enough leverage to push the product effectively.
Third Iteration (L-Shaped PLA): We redesign the arm into an L-shape. The L-shape provides a better mechanical advantage to push the XIAO product forward. However, the PLA material was not tough enough to withstand the motor’s torque.
Third Iteration (L-Shaped PETG): We switched to PETG. The PETG material provides the toughness required to withstand the motor’s torque without snapping.
The L-Shape Logic
The switch to an L-shape was a smart engineering move. In physics, this changes the moment arm. An L-shape can often apply force more directly against the object being pushed, reducing the “slipping” that sometimes happens with a flat, straight arm.
Design Explanation
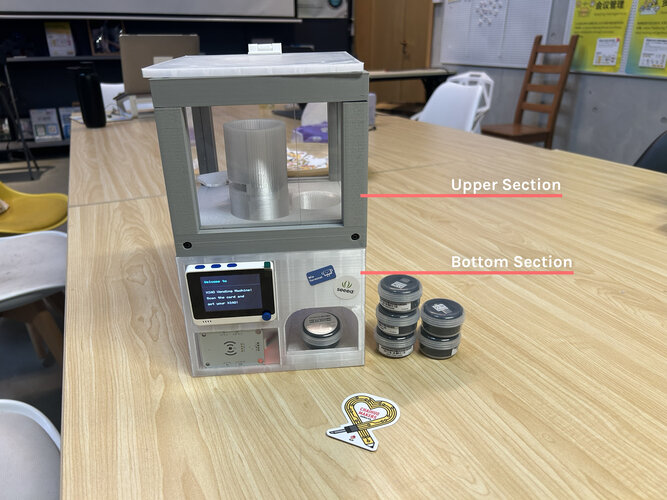
Design Philosophy: Portability & Modularity
Since this vending machine is designed to be transported to Boston, we prioritized a modular design. The machine is split into two primary, detachable sections to ensure it can be packed into a compact space, protected during travel, and reassembled quickly without complex tools.
-
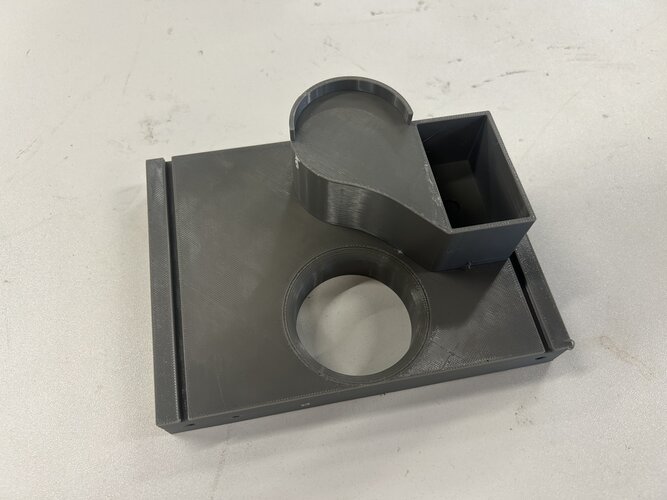
The Bottom Section (Base & Interface)
The bottom section serves as the foundation and the primary interaction point for the user.
-
User Interface (Front)
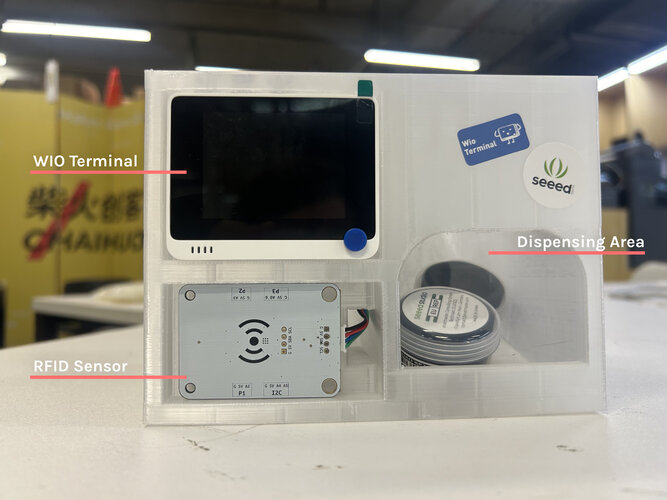
WIO Terminal Mount: A secure housing for the main display and controller.
RFID Sensor Housing: A dedicated tap point for card-based payments or authentication.
Dispensing Area: A conveniently located opening that allows users to easily reach in and grab their product.
-
Internal Mechanics & Cable Management
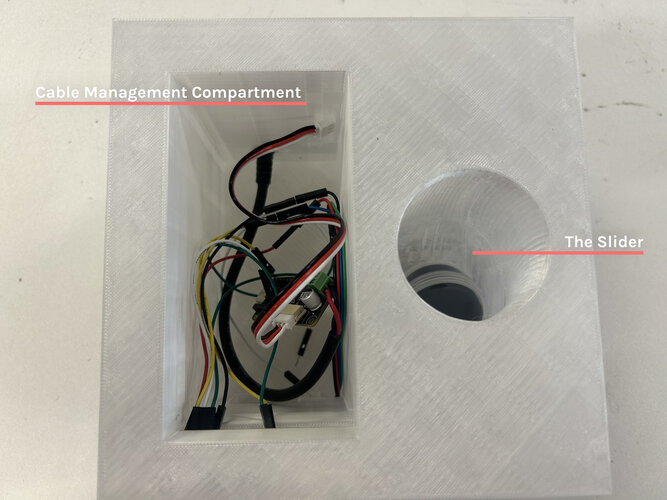
The Slider (Delivery Ramp): An angled internal surface designed with a low-friction finish to guide the product from the dispenser to the retrieval hole.
Cable Management Compartment: An internal cavity designed to organize wires and prevent them from interfering with moving parts.
-
Power Connectivity (Back)
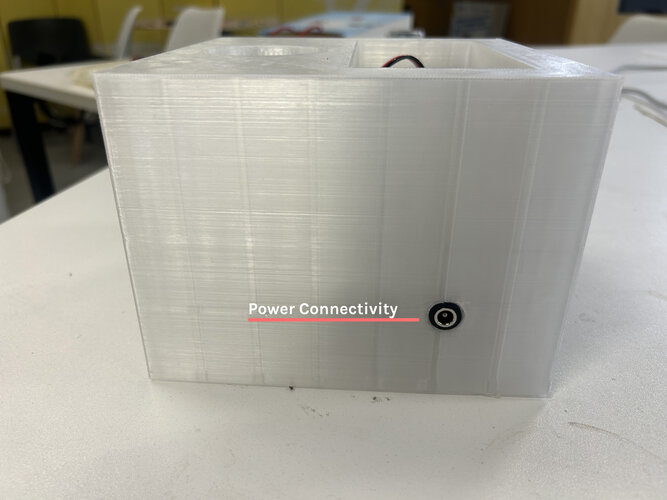
Power Access Port: A circular cable pass-through at the rear, allowing for a neat and secure connection to the external power supply.
-
-
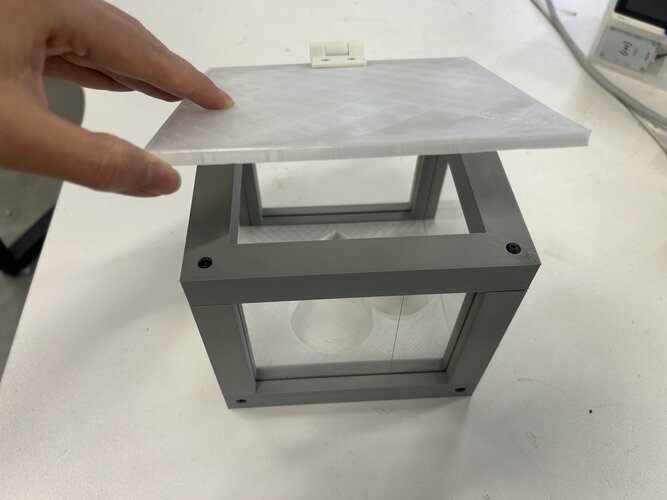
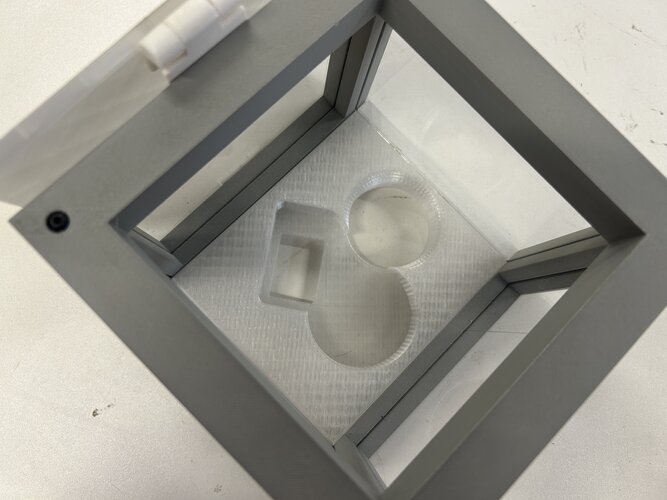
The Upper Section (Display & Dispensing)
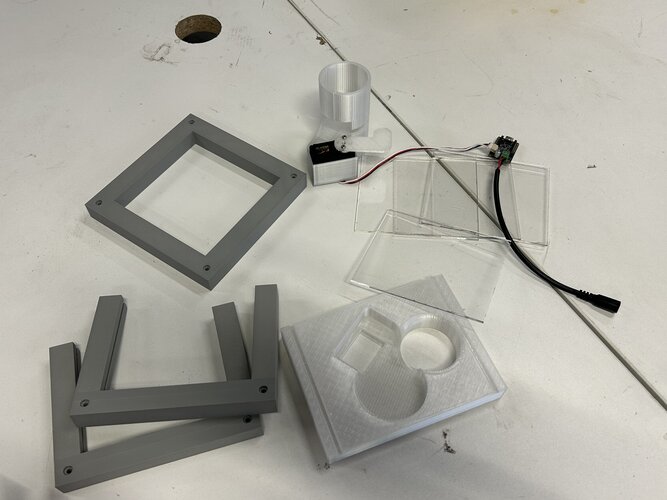
The upper section focuses on product visibility and the mechanical dispensing system.
-
Visual Display & Access
Window Frame: A precision-printed frame that houses the transparent acrylic pane, allowing customers to see the available inventory.
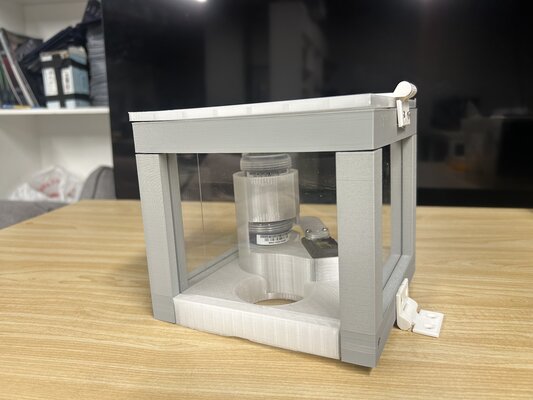
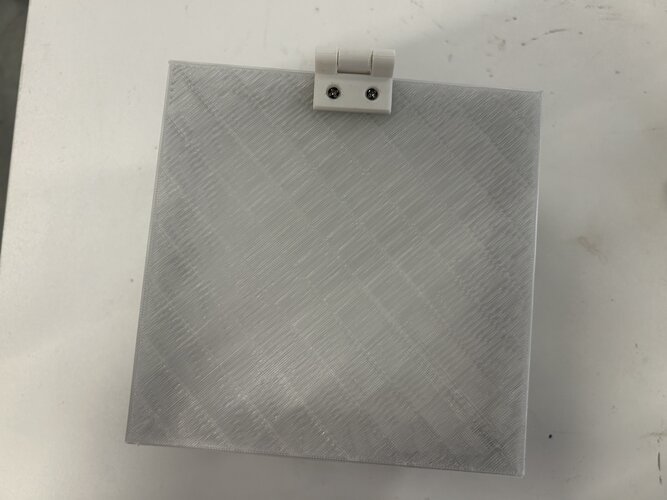
Refill Hatch: A hinged or removable top panel that allows for quick and easy restocking of the XIAO products without dismantling the machine.
-
Dispensing Mechanism
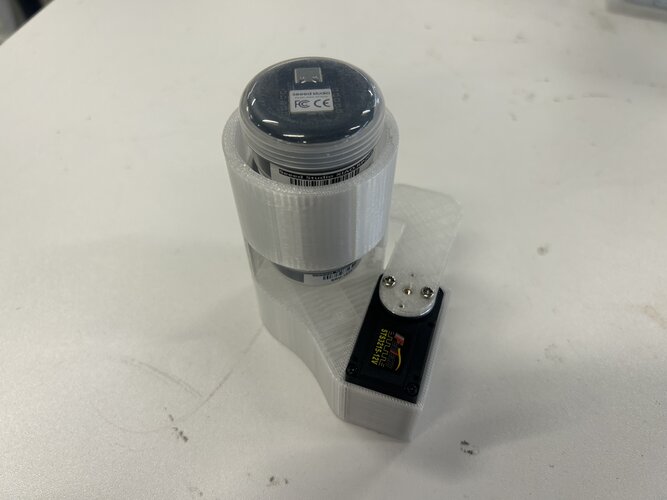
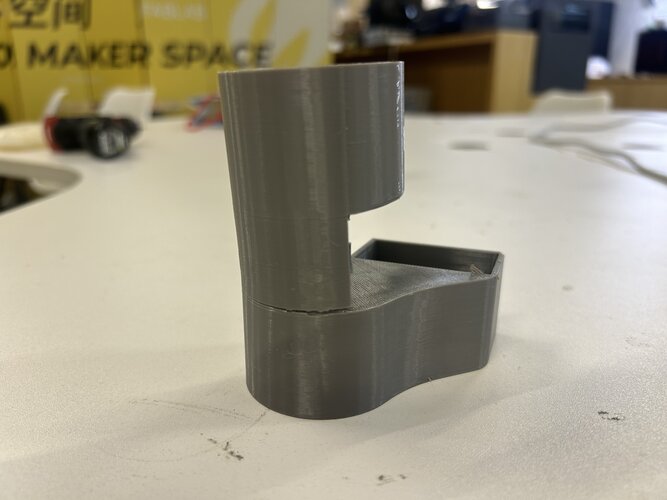
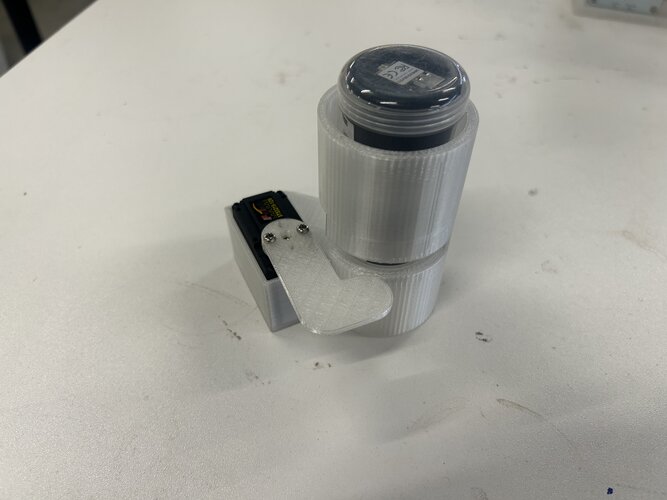
Integrated Component Holder: A specialized mount that aligns the XIAO product, the motor, and the servo arm in a single assembly.
The Old Integrated Component Holder
-
Wall Thickness & Material Limits: We initially printed the integrated holder using PLA with thinner walls for the XIAO holder, but it broke easily. Furthermore, specific movements of the servo arm would strike the holder’s body, causing it to snap under pressure.
-
Separating the Components: We originally designed the component holder and the chassis base as a single, combined piece. This proved inefficient; if the component holder broke, we had to reprint the entire base. Ultimately, we separated them into two distinct, modular parts for easier replacement and maintenance.

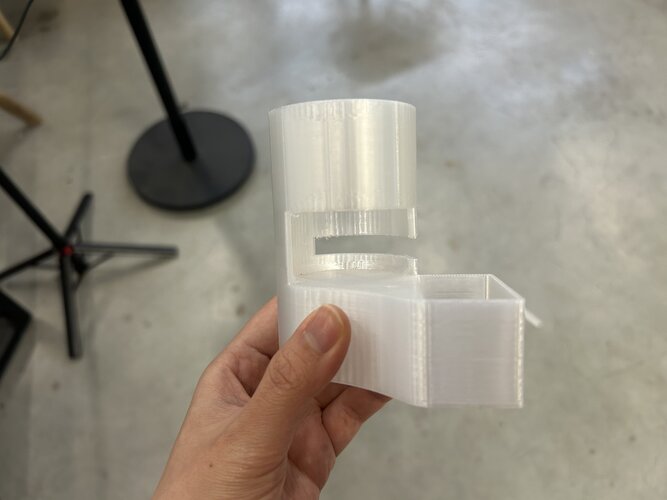
The component holder can comfortably fit up to 3 XIAO products at a time.
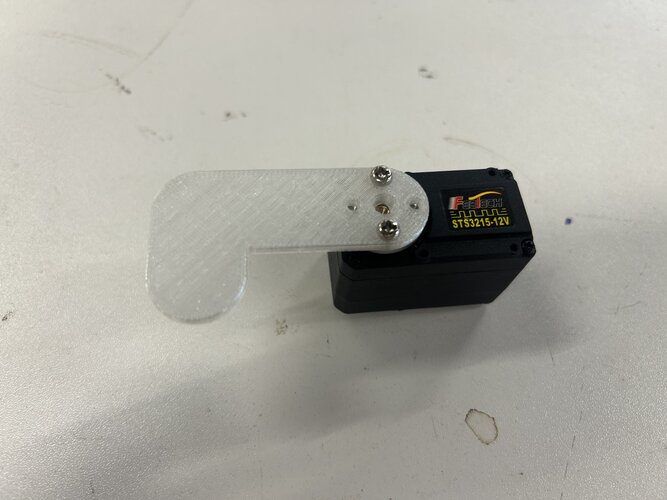
The final assembly of the XIAO product, the motor, and the servo arm:
Chassis Base: The structural floor of the upper section, which features the dispensing hole that aligns perfectly with the bottom section’s slider.
-
-
The final workflow of the vending machine: