Week 16: System Integration
Week 16 Assignment:
- Design and document the system integration for your final project
System Integration — AWL
How does it work?
AWL is an offline-first quiz game for 3 teams playing together in the same room. Each team holds a wireless game controller. A shared big screen — driven by a Raspberry Pi — shows the quiz questions, the four answer options (A, B, C, D), and the live score rankings.
The game flow is like this:
1. Mode 1 — “Raise Hand” round (Family 100 style)

For open questions where the answer isn’t multiple choice:
- Big screen shows the question (no A/B/C/D options)
- First team to press “Raise Hand” wins the right to answer
- They speak the answer out loud
- The Pi displays a “correct?” prompt — the host (or that team) presses any button to mark right/wrong
- Correct -> team gets points; wrong -> next-fastest team gets a chance
2. Mode 2 — “A/B/C/D” round (Kahoot style)

For multiple choice questions where everyone can answer:
- Big screen shows the question + 4 options
- All teams press their A/B/C/D button (independently, in parallel)
- Speed matters — faster correct answers get more points (Kahoot-style scoring)
- Big screen reveals the answer + updates the scoreboard
- The “Raise Hand” button isn’t used in this mode
This rewards every team for participating, not just the fastest.
System Architecture
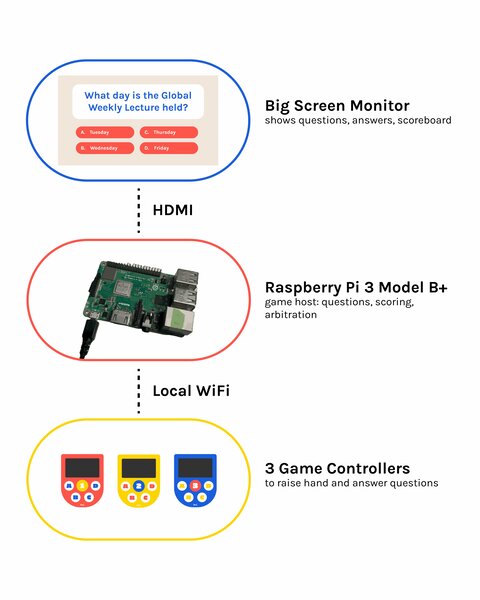
Three subsystems connected over a local WiFi network — no internet required.
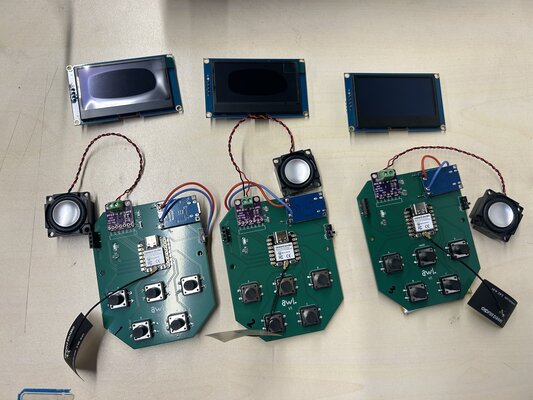
Game Controller
-
Custom PCB (JLCPCB, 2-layer, green soldermask, white silkscreen)
-
XIAO ESP32-C3 microcontroller with external IPEX WiFi antenna
-
2.42” OLED display (SSD1309, I²C) — shows per-team status
-
MAX98357A I²S amplifier + 4 Ω 3 W speaker — plays sound effects
-
5 tactile switches with button caps — Raise Hand (Silicone) + A / B / C / D (3D printed)
-
Status LED with resistor
-
Slide switch — power on/off
-
LiPo 2000 mAh + TP4056 charging module
-
3D printed enclosure (Bambu PLA matte, red / yellow / blue per team)
Raspberry Pi
- Raspberry Pi 3+ as the game host (lent by my instructor)
- Local WiFi access point — controllers auto-connect
- FastAPI server with WebSocket endpoints for each controller
- First-press arbitration — uses millisecond timestamps so it’s fair
- AI-generated questions via the Claude API (different categories, difficulties)
- React + Tailwind frontend displayed full-screen via Chromium kiosk mode on the HDMI monitor
Integration
-
Mechanical
3D printed top + bottom shells with lip joint, button caps over tactile switches, 4 M2.5 screws, side-mounted speaker, recessed battery pocket
-
Electronics
Custom PCB with XIAO + OLED + amp + buttons + power management, hand-soldered SMD and through-hole, modular submodules socketed via headers
-
Power
LiPo -> TP4056 -> slide switch -> XIAO BAT_VIN, USB-C charging via TP4056, runs around 8 hours per charge
-
Wireless
WiFi via external IPEX antenna, WebSocket protocol to Pi
-
Software
Firmware in Arduino IDE, FastAPI on Pi, React frontend for big screen
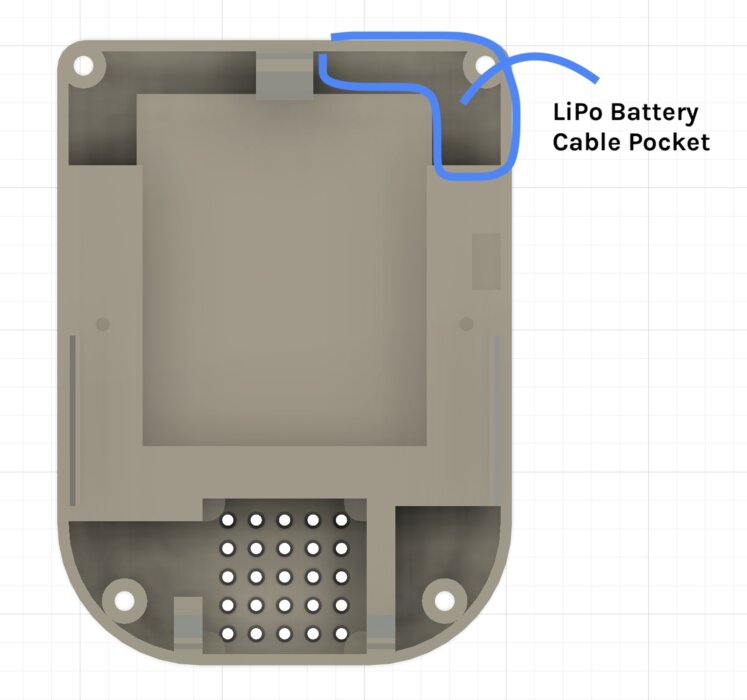
Cable Management
(Updated on 24 June 2026)
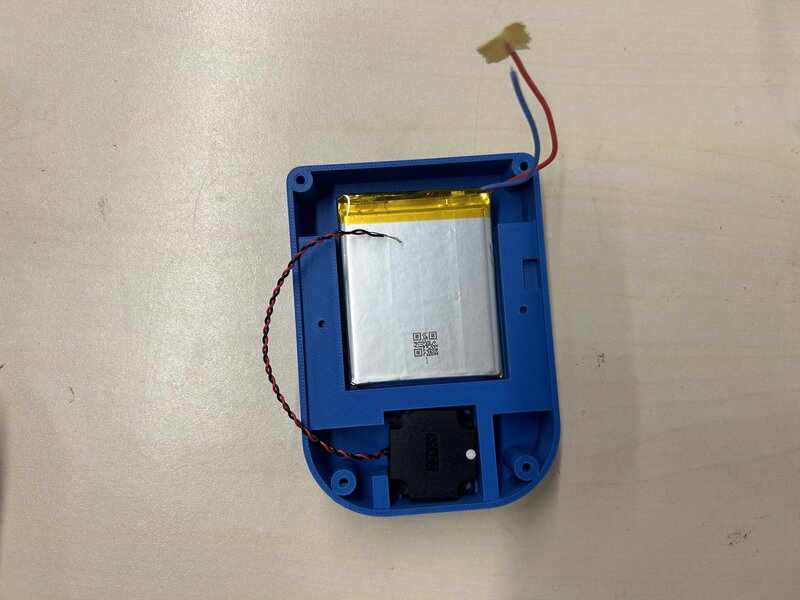
This is how the electronics look without the enclosure — cables are loose and unmanaged.
To keep things tidy inside the enclosure, I designed two cable management features:
- A cable pass-through on the bottom enclosure wall for the speaker cable.
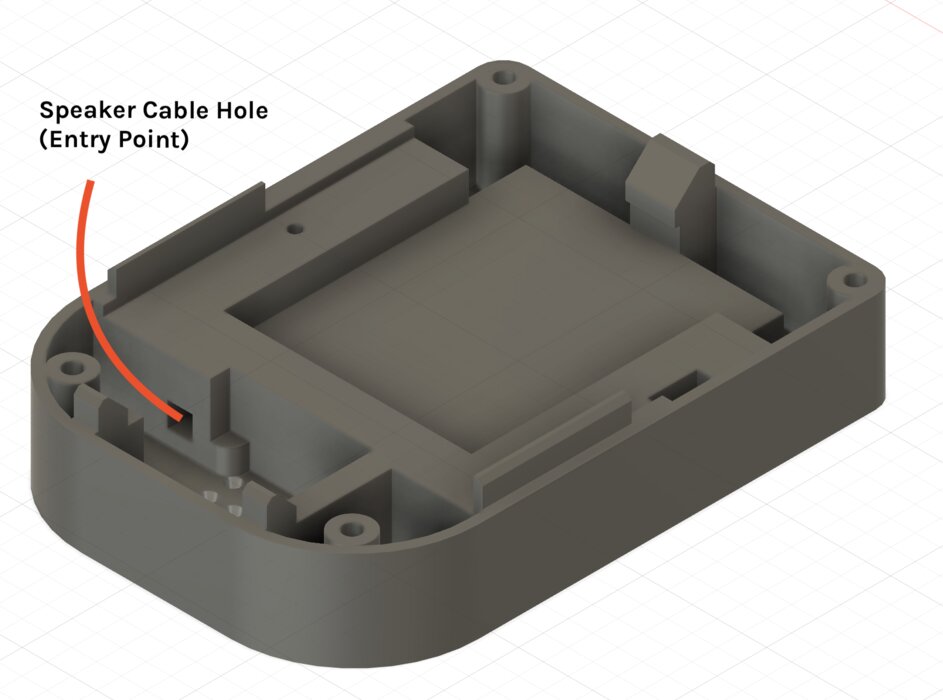
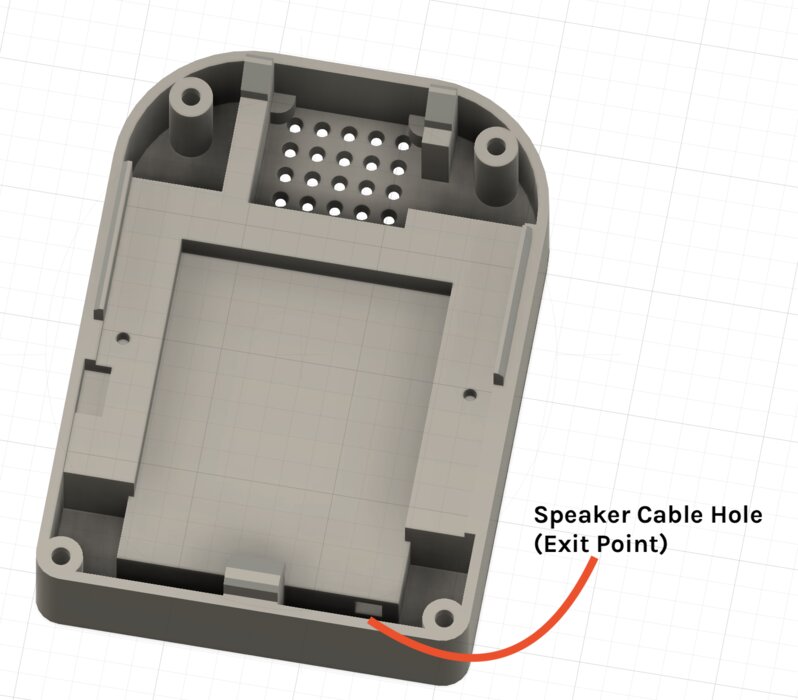
- A cable pocket on the inner wall to tuck the LiPo battery cable away from other components.
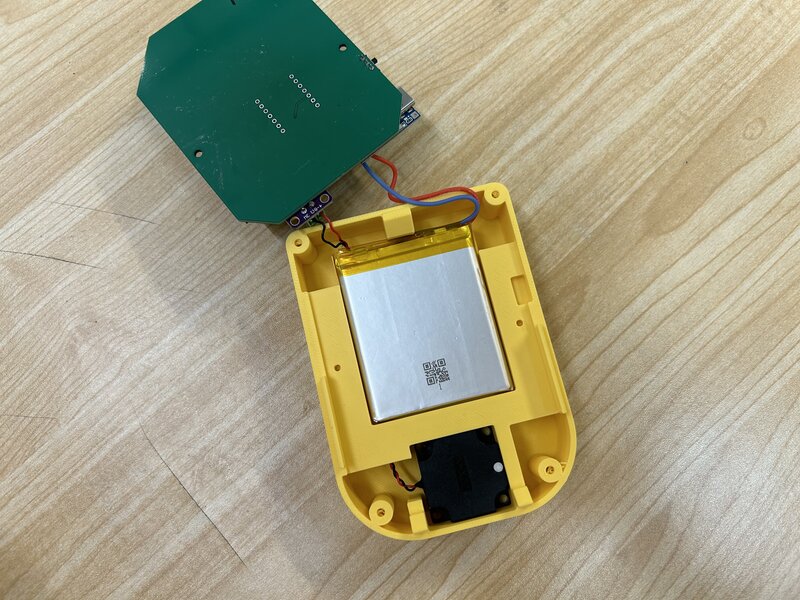
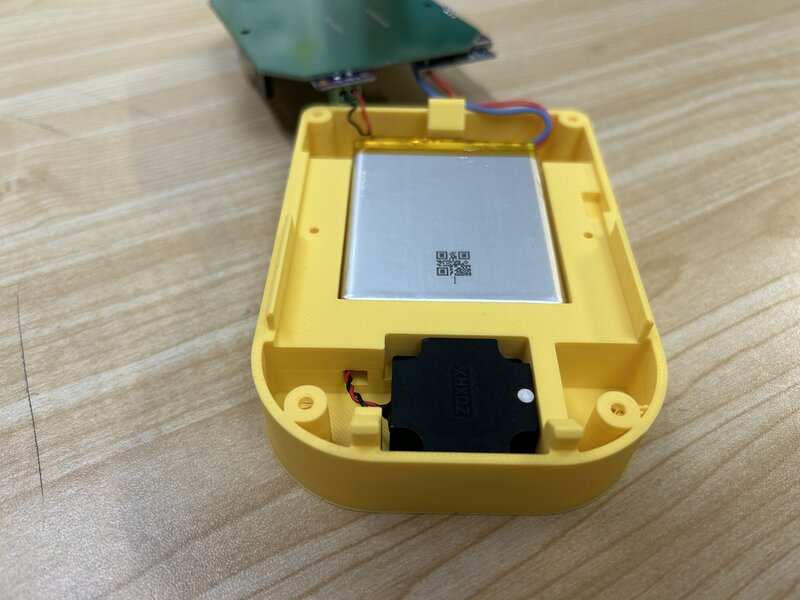
Here is the result after assembling everything into the enclosure:
Tools & Processes
- KiCad — schematic + PCB design
- JLCPCB — PCB fabrication
- Fusion 360 — enclosure + button mold design
- Bambu Studio - 3D print slicing
- Bambu Lab printer — 3D printing the enclosure
- KEXU CNC mill — milling the prototype PCB
- Silicone — molding & casting button caps
- Arduino IDE — embedded firmware
- VS Code — documentation
- Adobe Illustrator - logo and brand design