Weekly Progress
This is the weekly progress of my final project.
Week 01
Idea Brainstorming:
-
Idea 01: Calories Intake Calculator
Idea 01: Calories Intake Calculator
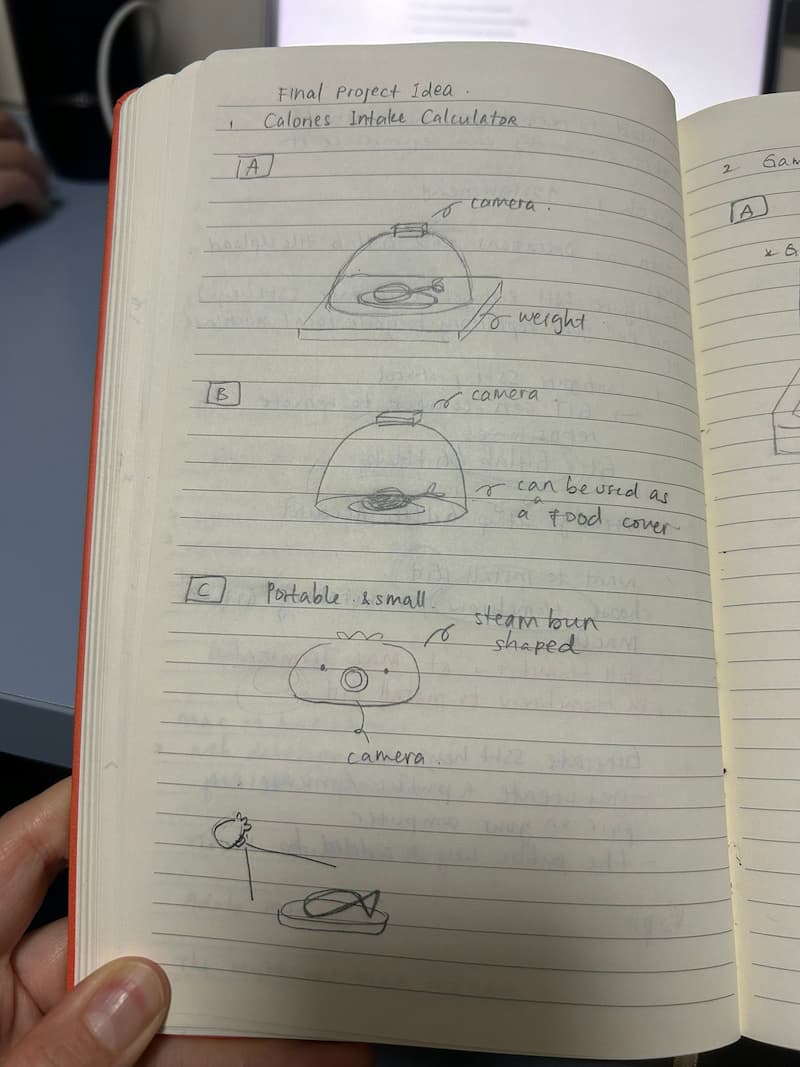
Inspired by my friend who always brings her weight to calculate food calories, I would like to create an automatic calories intake calculator. I have 3 different kinds in mind:
A. Camera + Food Cover Lid + Weight + Ai -> not portable, but multifunctional, and maybe the most accurate? B. Camera + Food Cover Lid + Ai -> less portable and multifunctional C. Camera only (steam bun shaped) + Ai -> portable
-
Idea 02: Game Console for Communal Play (Quiz Style)
Idea 02: Game Console for Communal Play (Quiz Style)
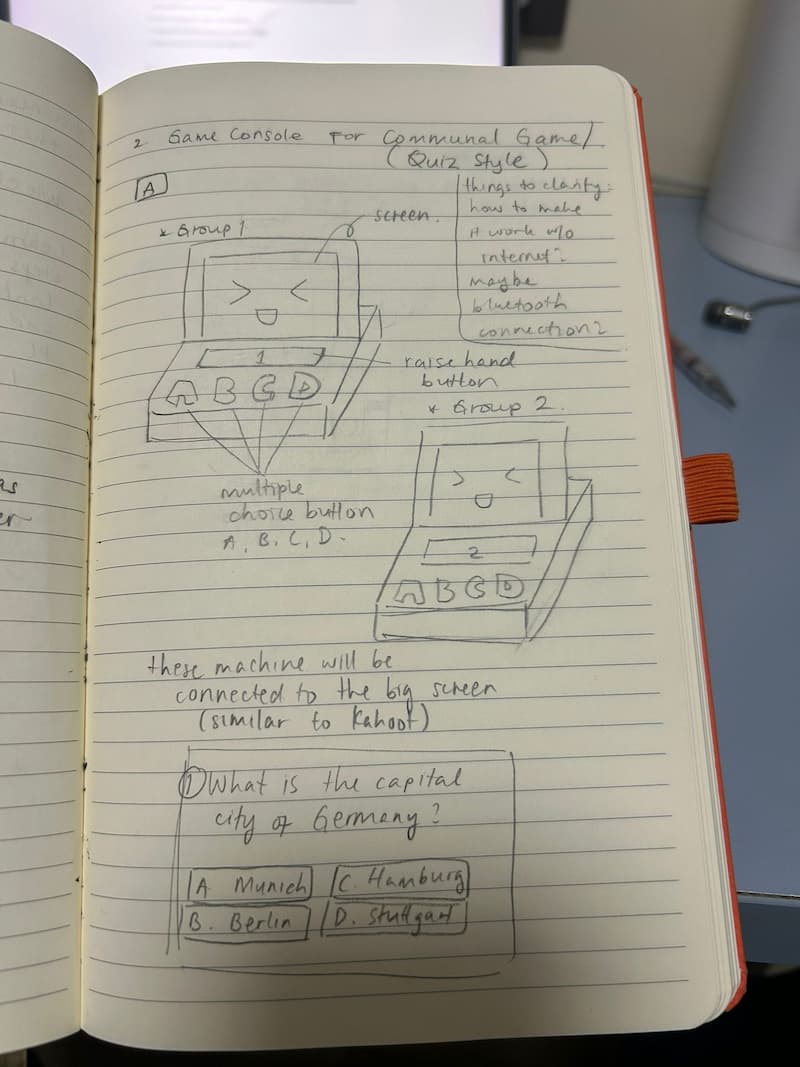
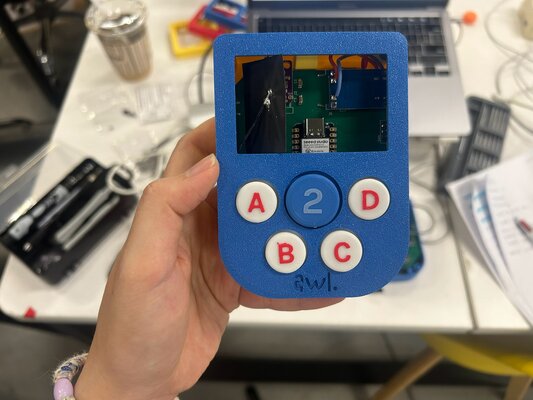
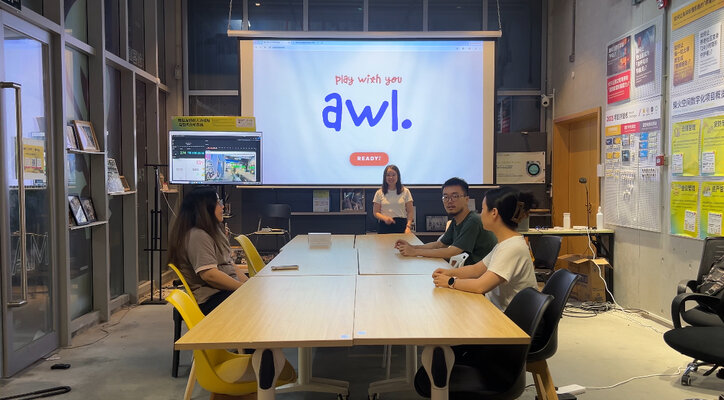
I’ve always loved creating or hosting games for my friends. Last time, I hosted a game underground, but there was no internet access, so we couldn’t play games like Kahoot. Moreover, I always had a hard time to figure out who’s the first to raise their hands or the quickest one to answer. Because of that, I came up with the idea of creating a quiz-style game using a game console connected via Bluetooth. Each group would have its own console connected to a big screen. The big screen would display the questions. If a group wants to answer a question, they can press a “raise hand” button. For multiple-choice questions, they can select the A, B, C, or D button. There is also a small screen on the console to show if their answer is correct or wrong.
Week 02
After talking with my instructor, Matthew, we decided to go with the second idea: a game console for communal play (quiz style). We felt this option would allow me to explore more and be more creative, as it involves more components.
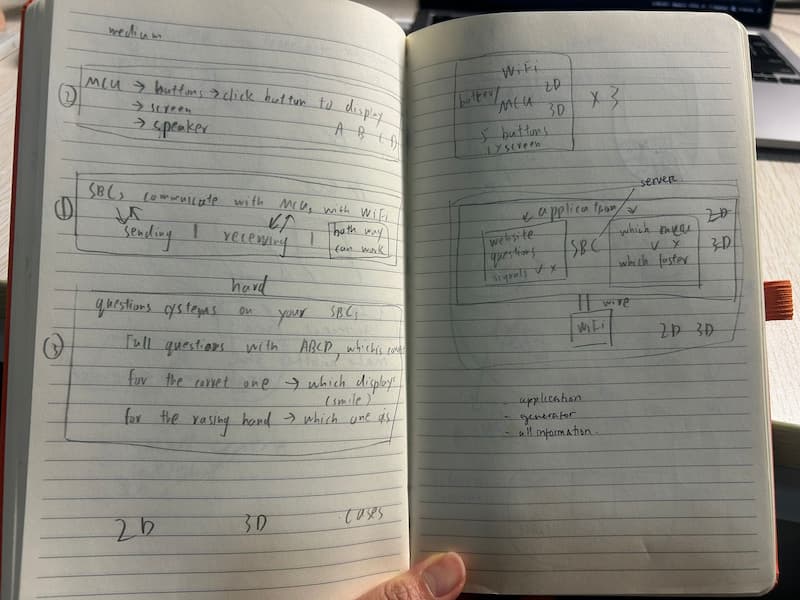
Matthew helped me visualize the idea and identify the components I will need to build the game console:
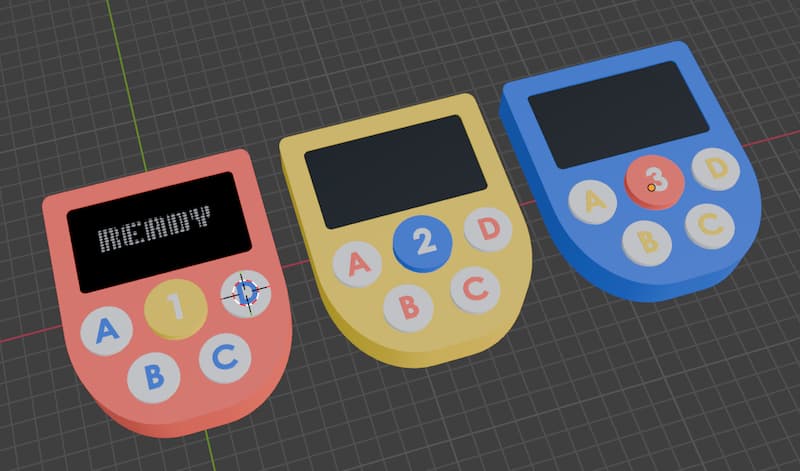
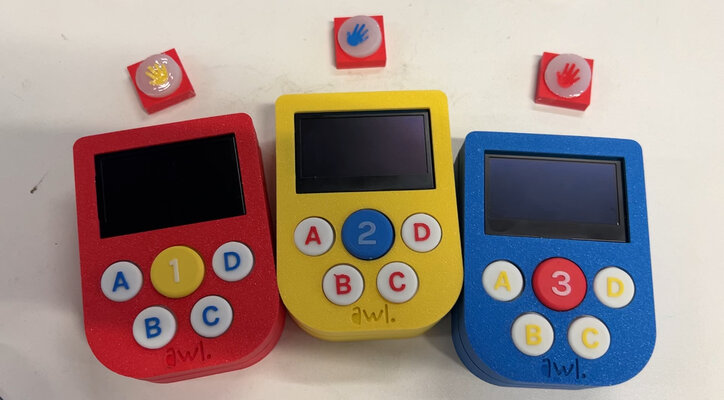
In this week, I created the 2D design for three different game consoles and the logo using Adobe Illustrator and the 3D design in OnShape and Blender.
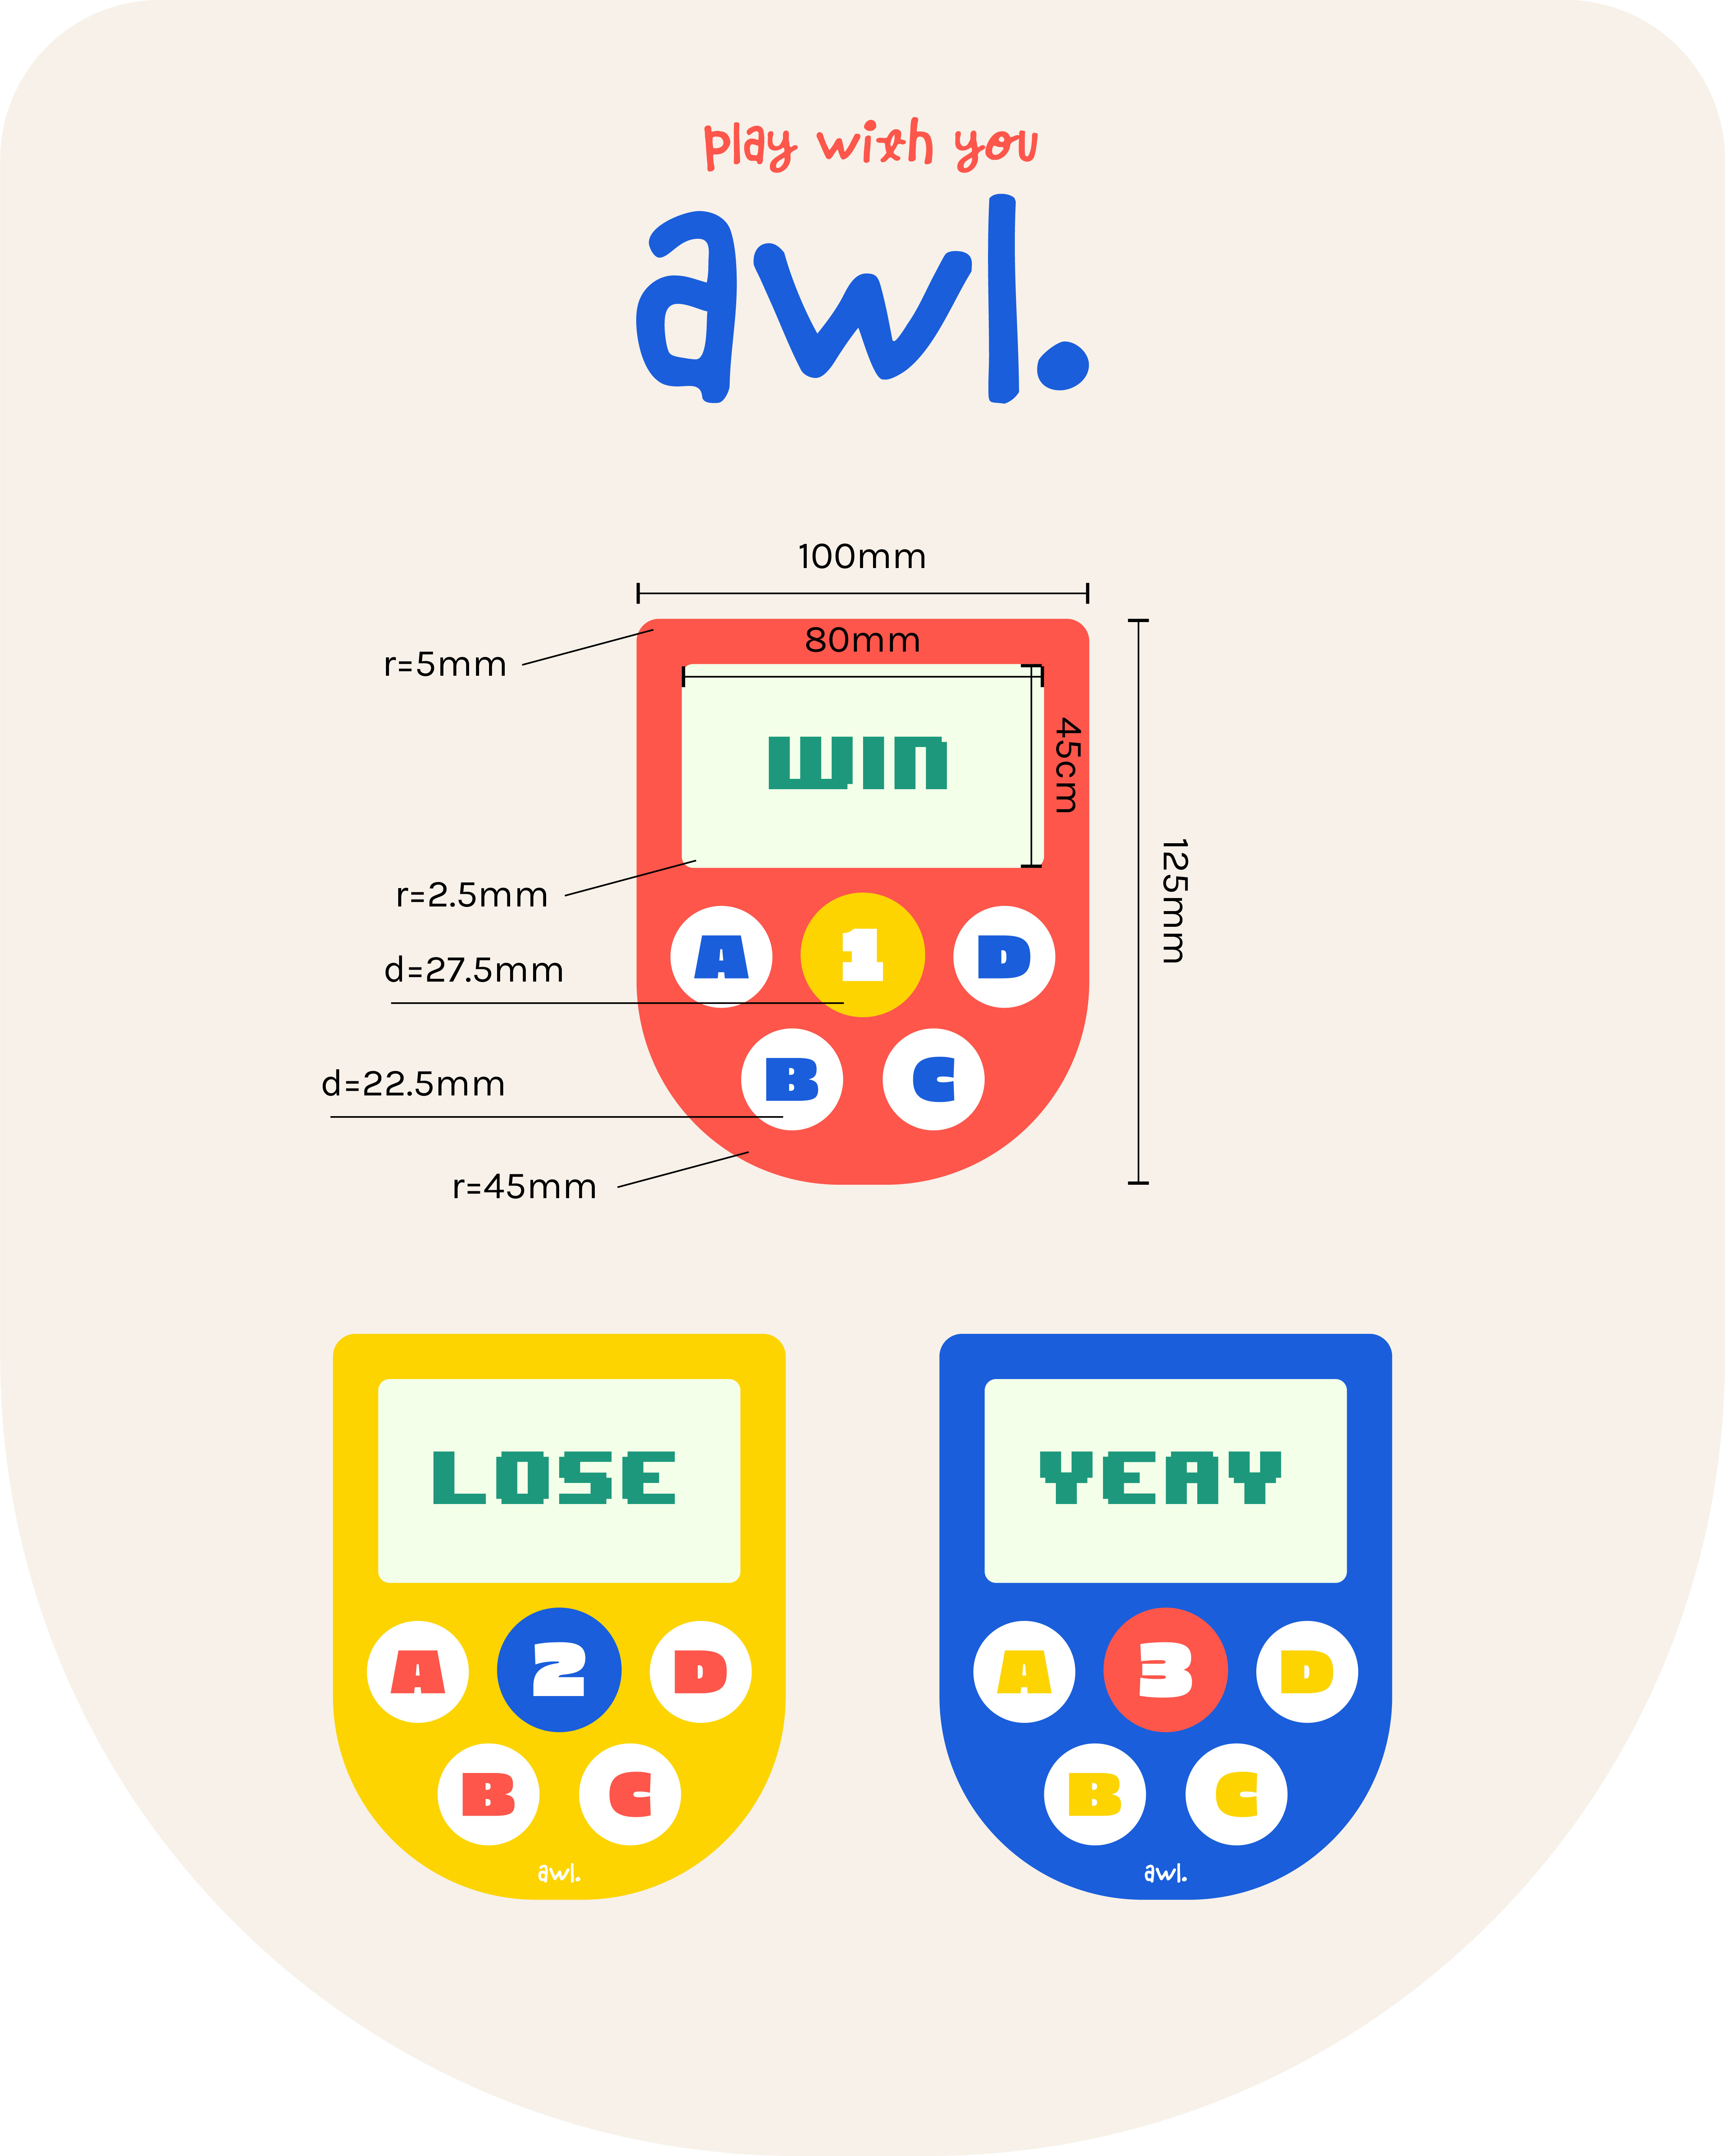
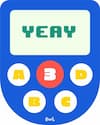
I incorporated vibrant colors (red-orange #fe564b, yellow #fdd400, blue #1a5edb) and many rounded shapes to make the design look fun and friendly, including rounded corners on the body and screen, as well as cylindrical buttons.
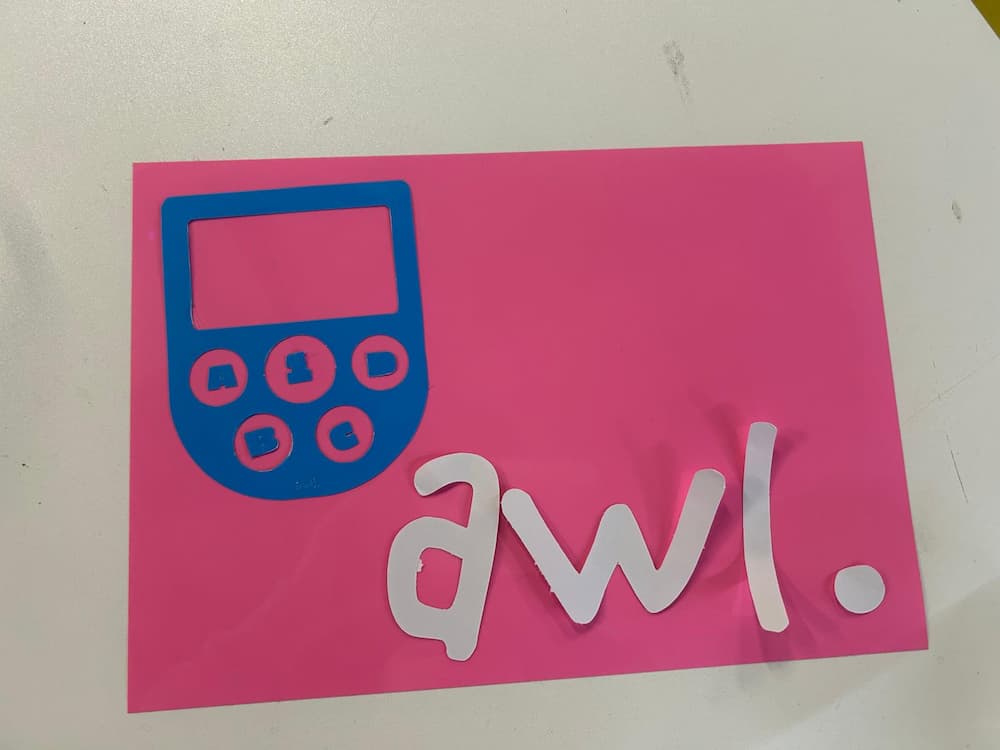
For the product name, I wanted to include the word “all” - since the goal is for everyone (all) to play and have fun together. I researched several name ideas, and I found that on Thesaurus.com, the word “all” is pronounced as “awl”. I loved the name so much, I went ahead and made the simple logo “awl.” and the tagline “play with you awl.”
-
2D Design in Adobe Illustrator:
-
3D Design in Blender:
-
3D Design in OnShape:
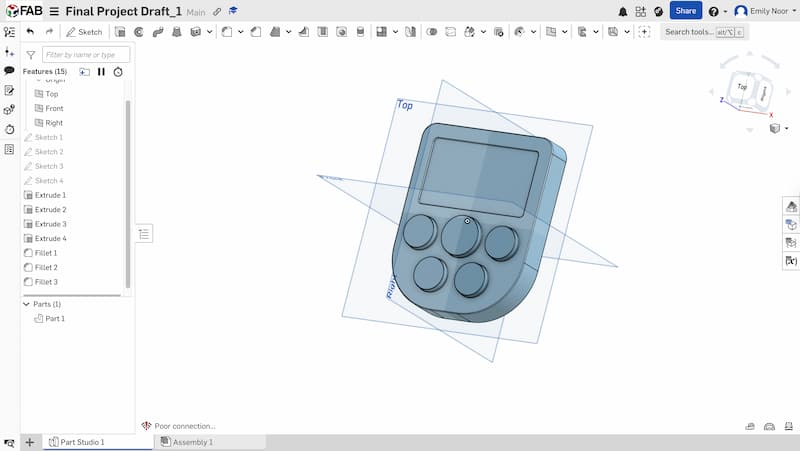
Mistake
I didn’t set up parametric design at the beginning. It would have been better if I had created the model with parametric design from the start.
Week 03
I cut my 2D design for my final project using Cricut Explorer.
I tried to print the game console on paper before, but it failed. I think it was because the design was too small and complex. Or maybe the paper is too thin?
Week 04
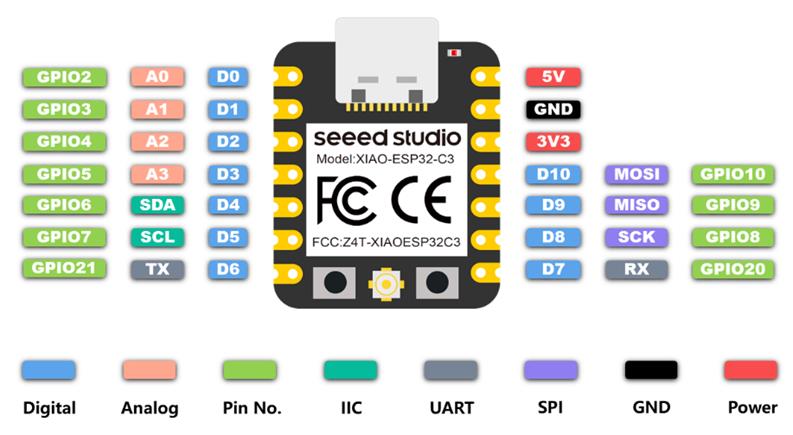
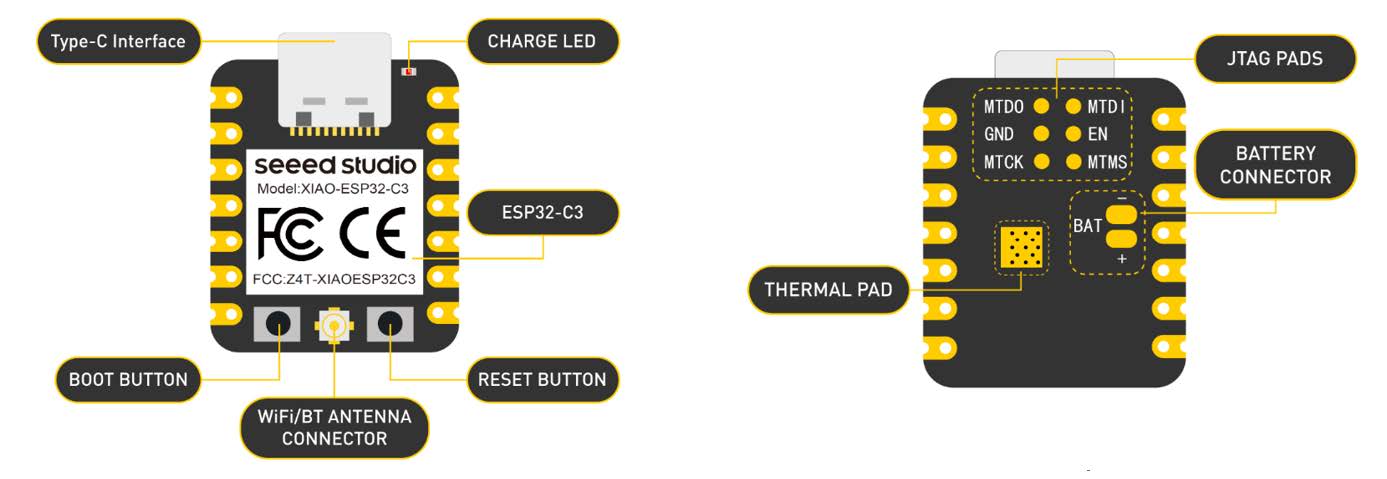
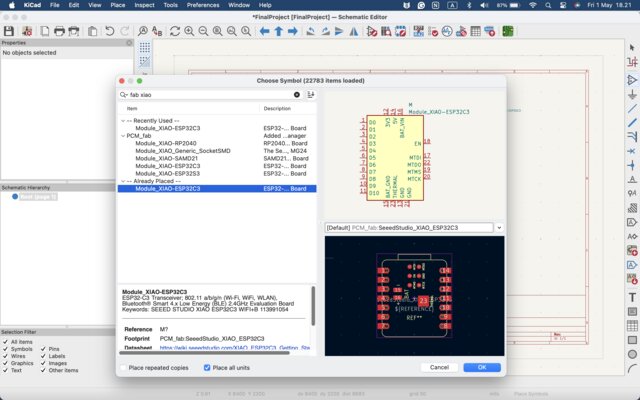
This week, I learned how to use the XIAO ESP32-C3, an MCU that I will use later for building game consoles. I also learned about different programming languages, including CircuitPython, MicroPython, and Arduino.
Week 05
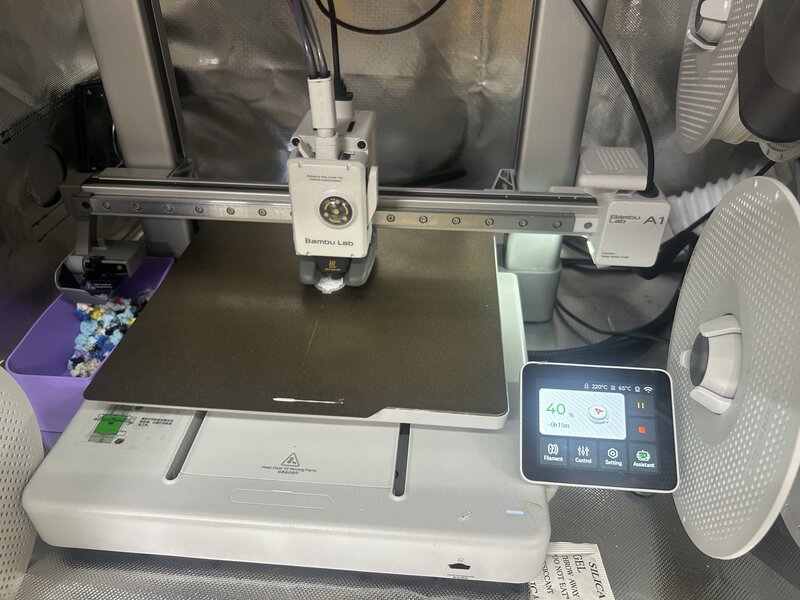
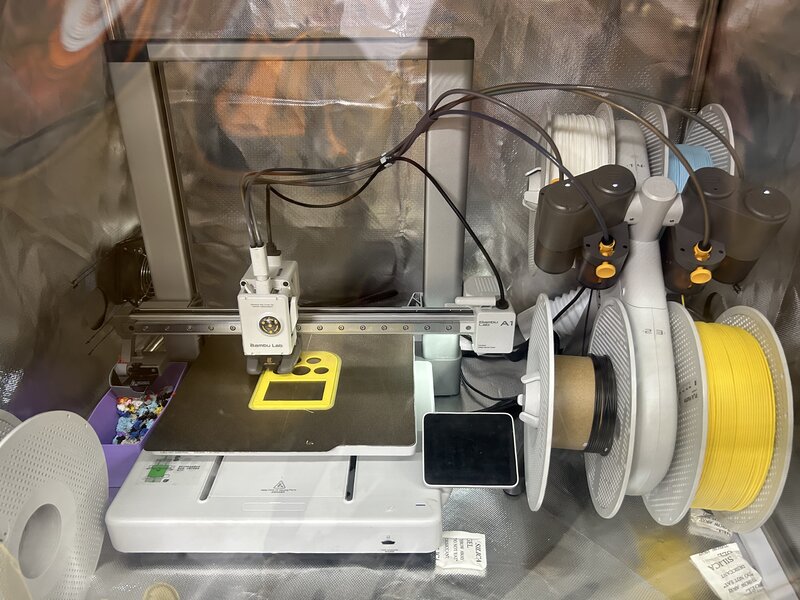
This week, I learned how to use the 3D printer, the Bambu Lab A1 Mini. I tested several design rules, including angle, bridging, clearance, wall thickness, and overhang tests. I also learned about hinge mechanisms. Since I will use the 3D printer extensively for my final project to build game consoles, this experience was very insightful.
Week 06
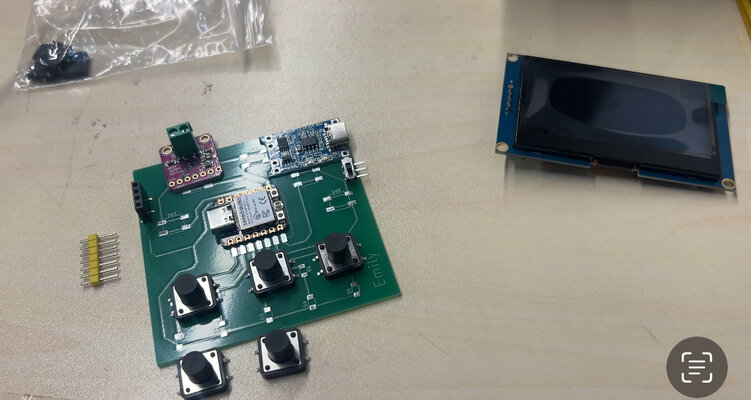
 Since my final project will involve using buttons, I chose to incorporate them into this week’s assignment in order to practice and better understand how they work.
I learned how to simulate circuit on Wokwi:
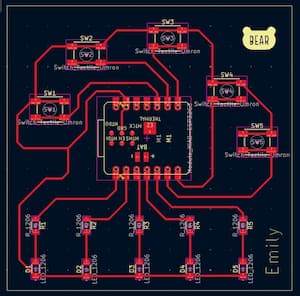
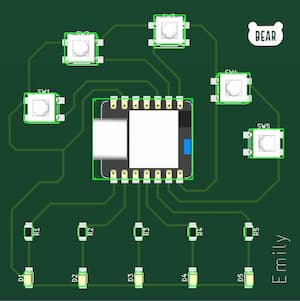
Then I used KiCad to create the PCB design :
Week 07
This week, I created a 3D prototype of the game console to evaluate its physical size and layout. During this process, I realized that the LED screen used in the first design was too large, so I redesigned the console. The console will use a 2.23-inch 7-pin OLED screen adapter board.
I redesigned the model in Onshape and implemented parametric design, which I had not set up in Week 2.
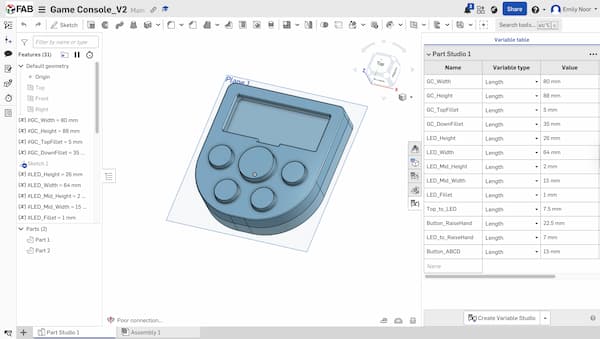
OnShape File - Game Console_V2
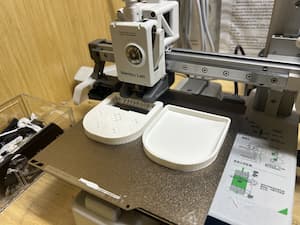
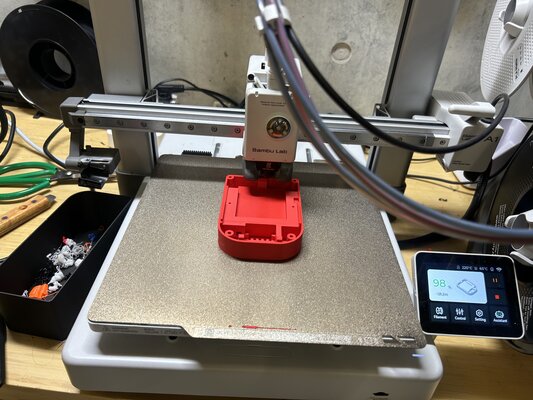
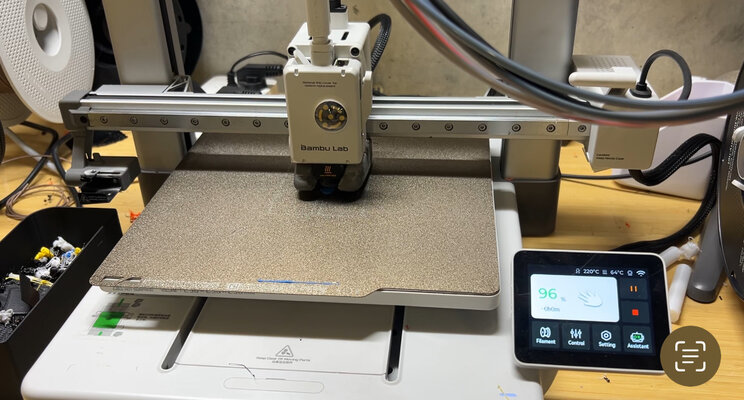
Then I printed the model using the Bambu Lab A1 Mini 3D printer.
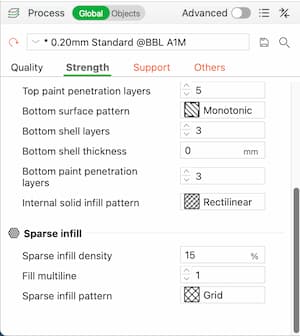
First, I sent the file to the Bambu Studio app.

These are the print settings in Bambu Studio:


The printing process:
Here is the final result:
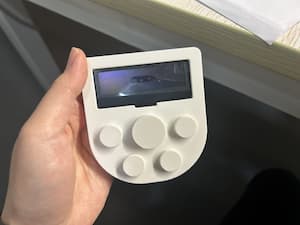
Mistake
- The OLED screen did not fit into the design I made. The space was too small. I should have taken the design rules into account more carefully.
- I used the printer’s default settings. In the future, I should experiment more with the print settings.
Note
I will redesign the game console again:
- Make the OLED section larger so the screen will fit properly
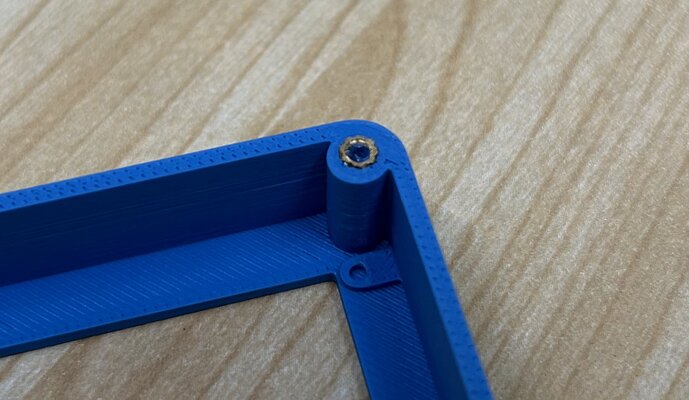
- Design a joint for the top and bottom parts
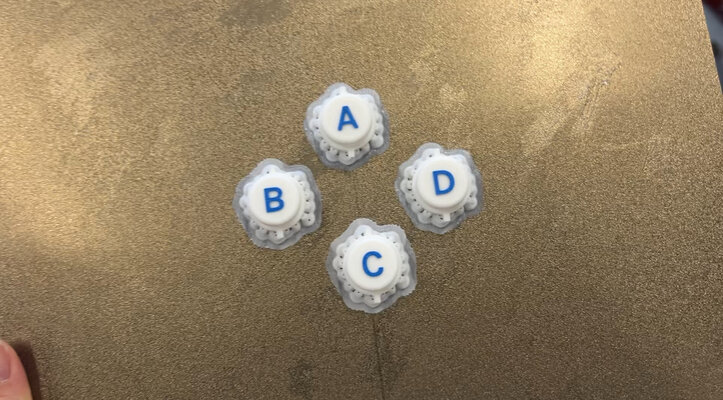
- Label the buttons
- Print the buttons separately from the game console body
- Experiment more with the print settings
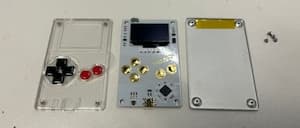
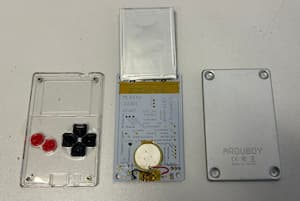
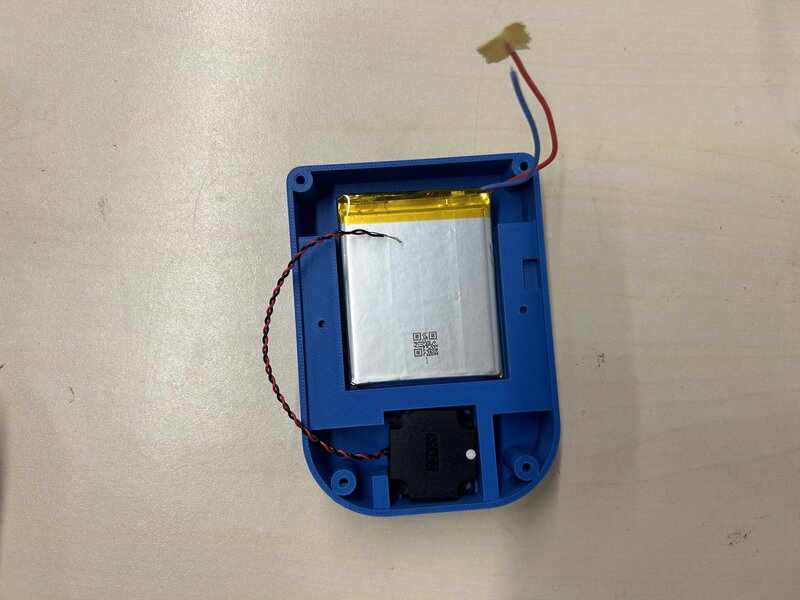
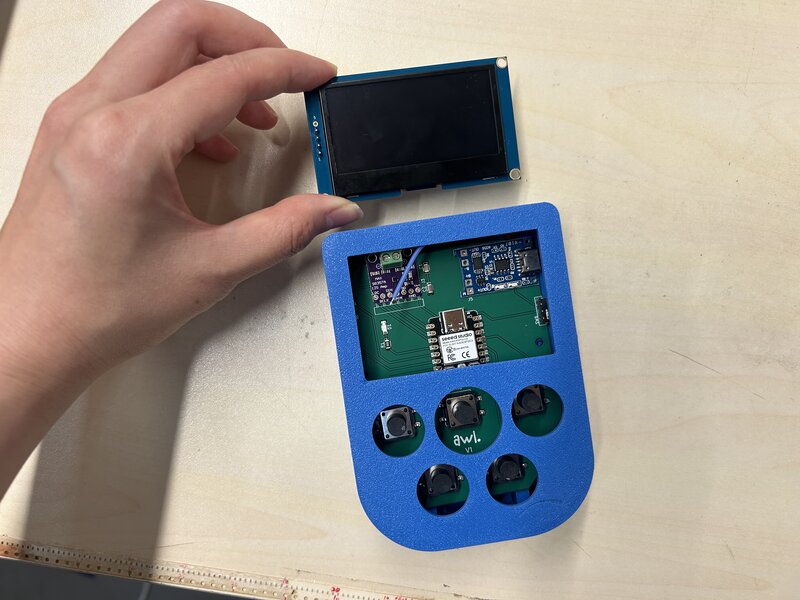
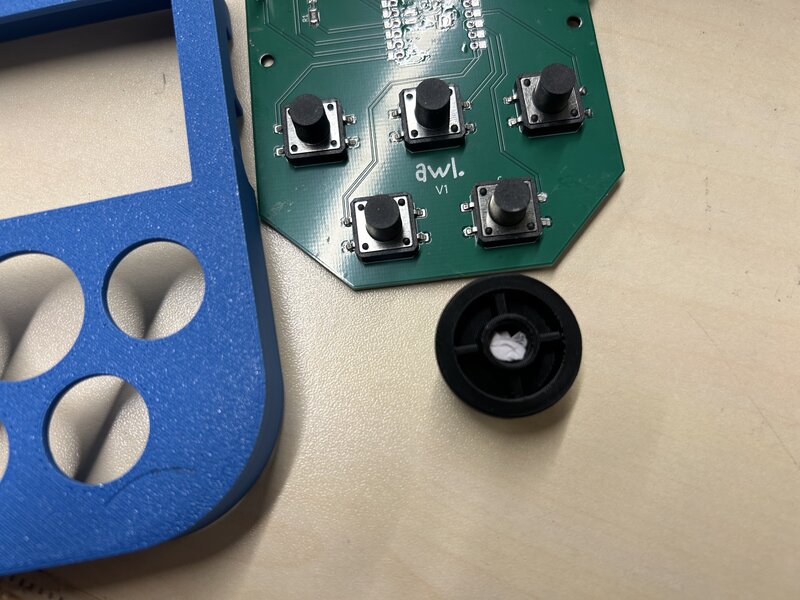
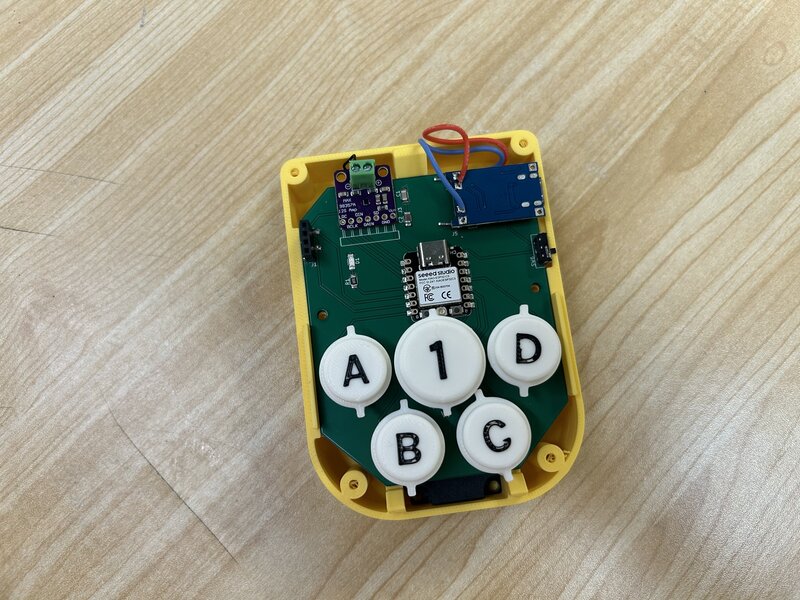
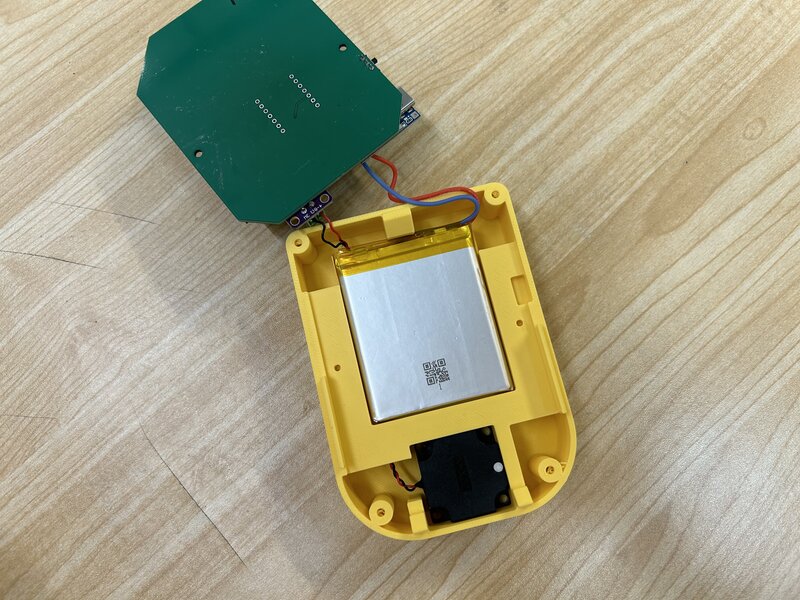
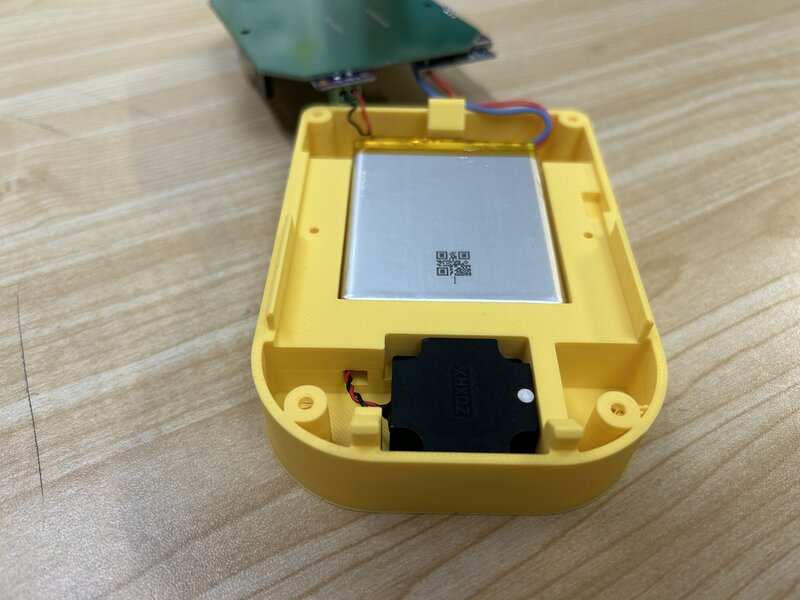
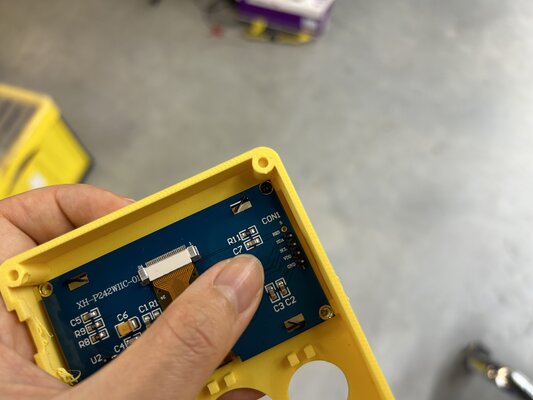
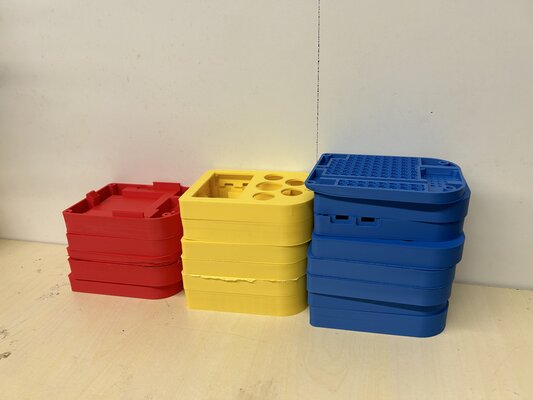
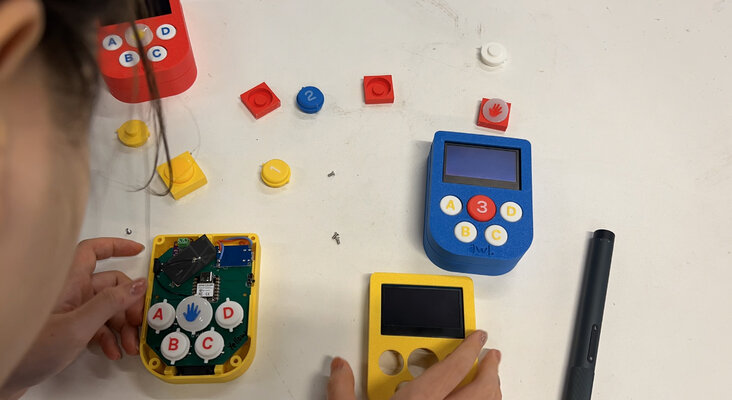
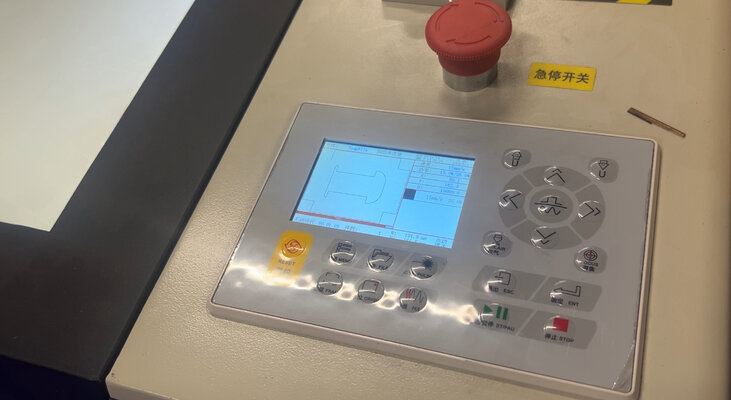
I found this game console at ChaiHuo and opened it to examine its components and assembly process:
Week 08
Tried to make PCB production.
Week 09
Input device
Week 10
Output device
Week 11
Networking, WiFi
Week 12
I learned so much in this week how to integrate things together, which would be extremely helpful for my final project.
Week 13
Week 14
From this week I have an idea to make the button from the silicone.
Week 15
Starting in May, I will try to do day-to-day documentation.
I started buying the components on Taobao and Pinduoduo for the 3 game controllers.
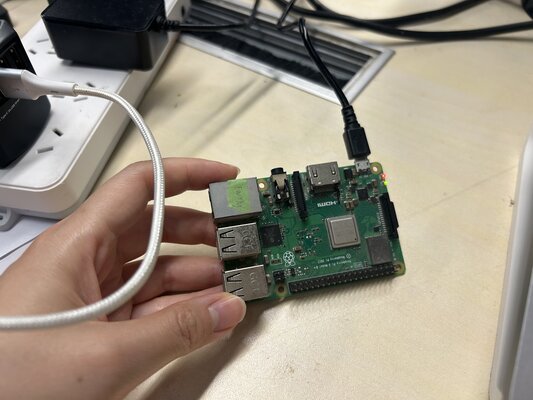
I received the XIAO ESP32C3 from Seeed Studio through my instructor, and the Raspberry Pi also from my instructor.
It took me quite some time to find the right products. However, I think it is important to have the components in hand first before starting anything else, so that I can directly visualize the size and how everything looks.
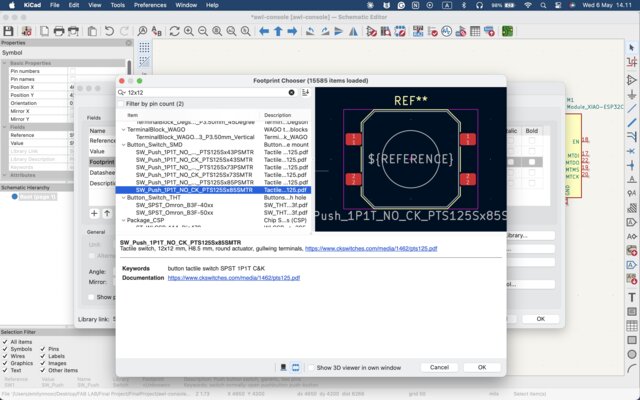
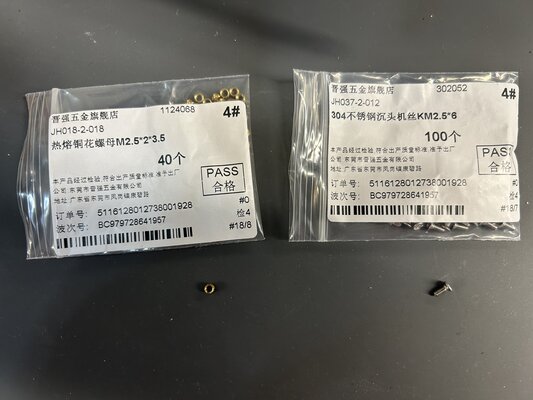
I didn’t know earlier that there was a tactile button in 12x12mm size. I was so happy when I found it, because it is just the perfect size for the game controller. I also couldn’t imagine how to design the button caps, so I ordered a button cap for the tactile button 12x12mm to help me design them better.
I was considering between using a speaker or a buzzer. I chose to use speaker at the end.
On May 6th, the components started to arrive. I changed some of them due to size issues. The speaker I originally bought was too large, so I switched to a smaller one and changed the impedance from 8Ω to 4Ω, since 8Ω would sound cleaner with the MAX98357A. I also changed the OLED display from 2.23” to 2.42” for a bigger screen.
Here is the list of materials with their Taobao and Pinduoduo links that I am going to use for this project:
| Description | Qty | Price/pc | Price | Links |
|---|---|---|---|---|
| Bambu Lab PLA Matte (Red - 11200) | 1 | ¥ 69,00 | ¥ 69,00 | e.tb.cn |
| Bambu Lab PLA Matte (Yellow - 11400) | 1 | ¥ 57,30 | ¥ 57,30 | yangkeduo.com |
| Bambu Lab PLA Matte (Blue - 11600) | 1 | ¥ 57,30 | ¥ 57,30 | yangkeduo.com |
| OLED Display 2.42” 4pins | 3 | ¥ 56,00 | ¥ 168,00 | e.tb.cn |
| Button 12x12x10mm | 15 | ¥ 0,10 | ¥ 1,50 | e.tb.cn |
| Speaker 4Ω | 3 | ¥ 4,30 | ¥ 12,90 | e.tb.cn |
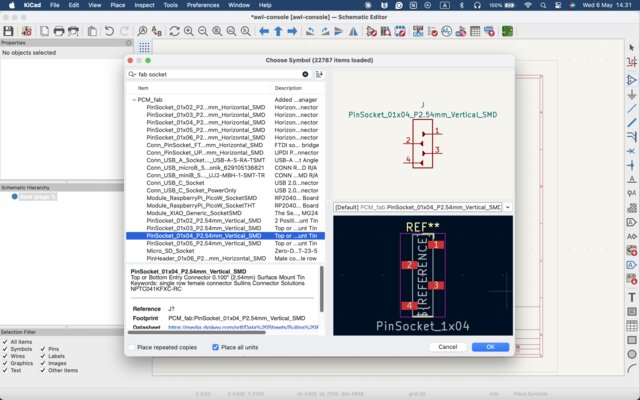
| Pin Socket 2.54mm 4P (5pcs) - right | 1 | ¥ 2,80 | ¥ 2,80 | e.tb.cn |
| LiPo Battery 2000mAh | 3 | ¥ 19,80 | ¥ 59,40 | e.tb.cn |
| TP4056 USB-C | 3 | ¥ 0,75 | ¥ 2,25 | e.tb.cn |
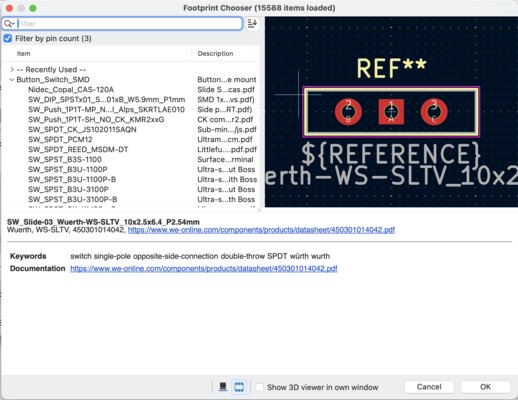
| Button Slider (5pcs) | 1 | ¥ 1,56 | ¥ 1,56 | e.tb.cn |
| MAX 98357A I2S | 3 | ¥ 3,74 | ¥ 11,22 | e.tb.cn |
| 360Ω resistor (100pcs) | 1 | ¥3.00 | ¥3.00 | e.tb.cn |
| Capacitor 0.1UF (50pcs) | 1 | ¥3.00 | ¥3.00 | e.tb.cn |
| Capacitor 10UF (20pcs) | 1 | ¥4.60 | ¥4.60 | e.tb.cn |
At first, I ordered the Bambu Lab red filament from a non-official store, and then bought the yellow and blue filaments from the official store, which turned out to be cheaper than the non-official one.
Week 16
6-11 May - Schematic Design, PCB Design
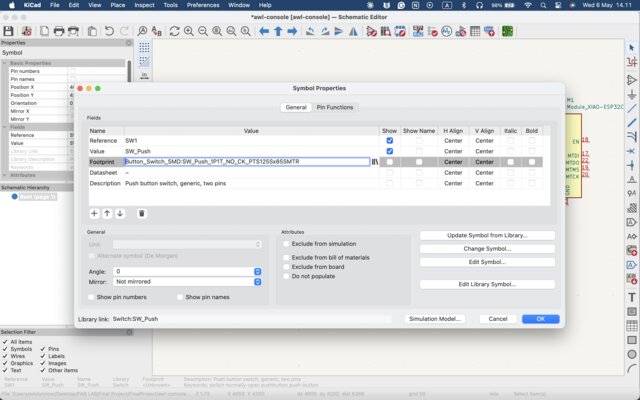
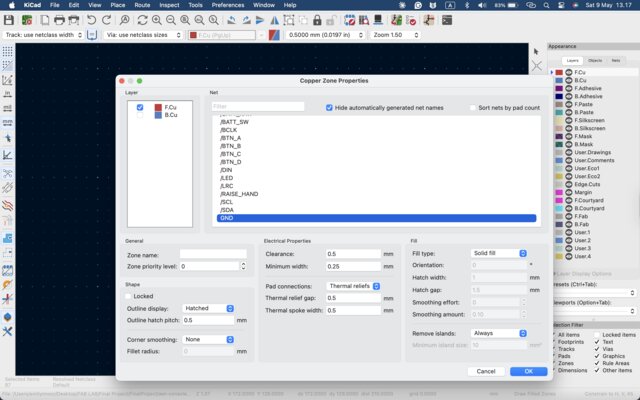
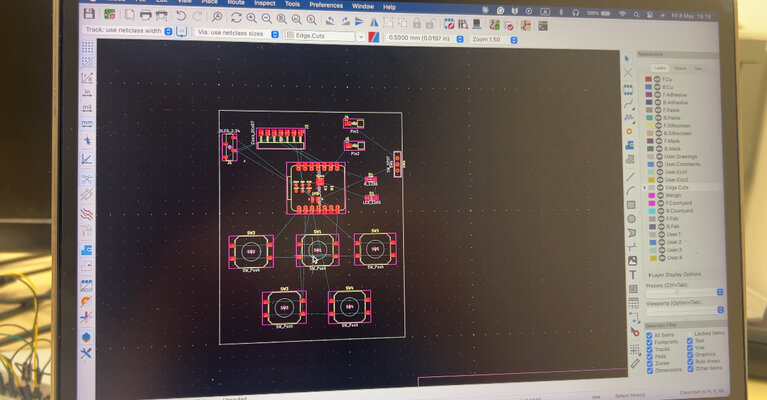
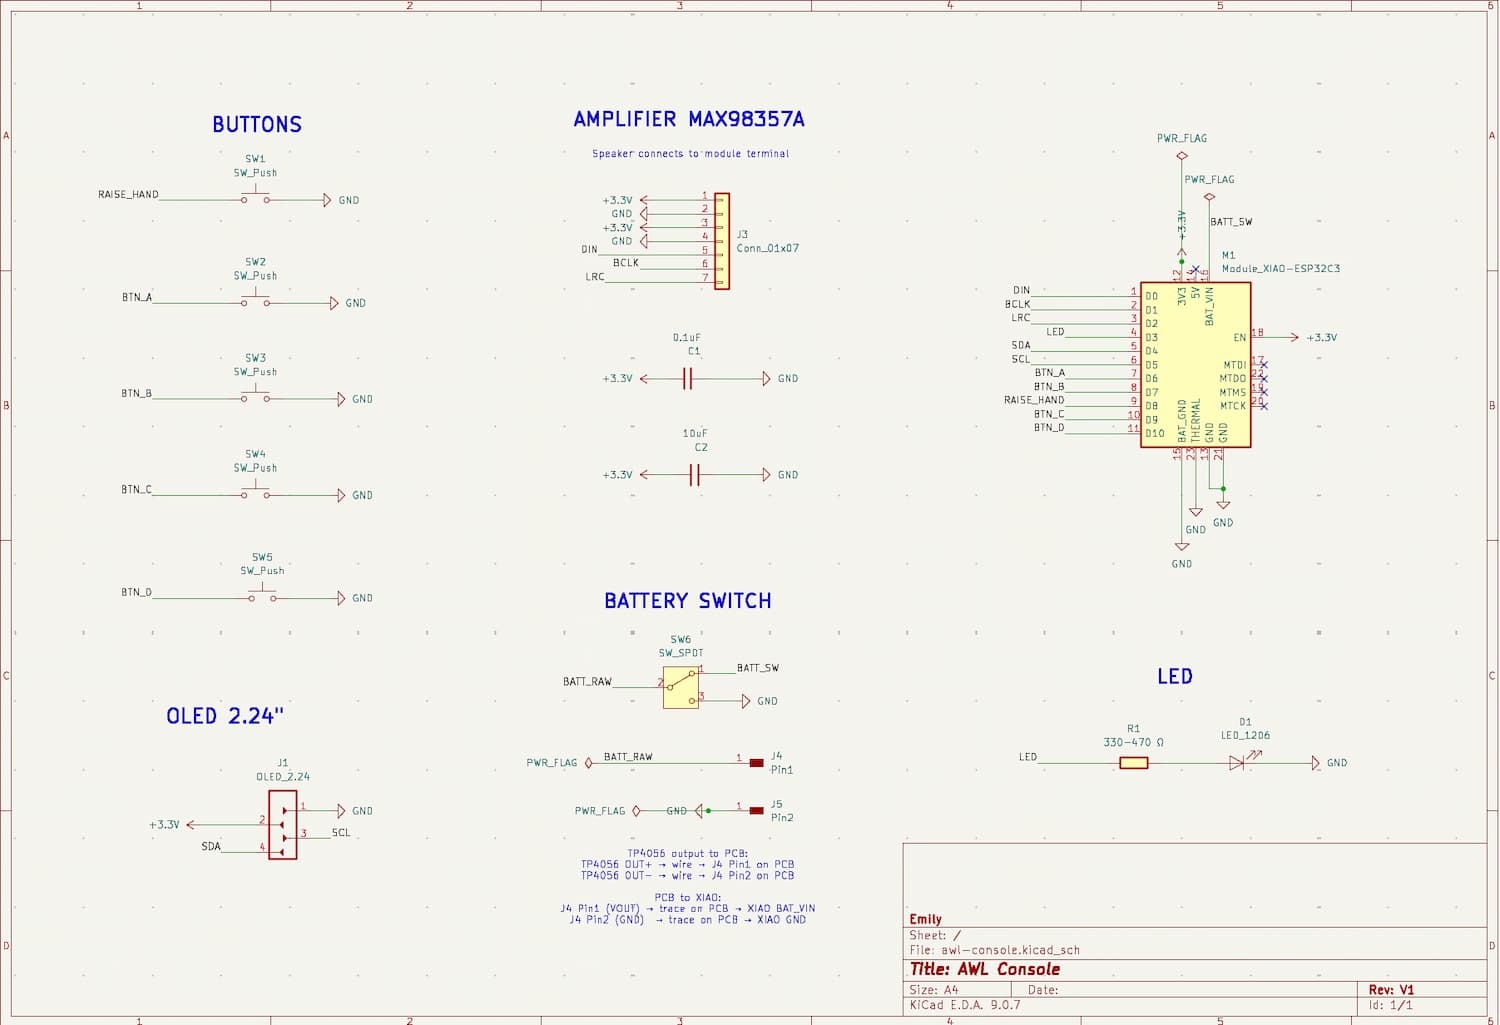
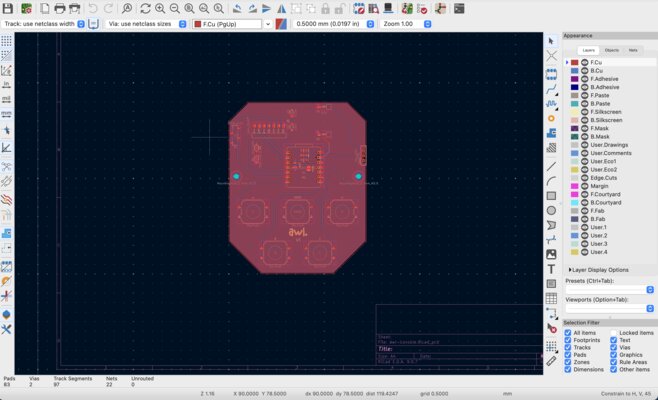
After all the components arrived, I started to make the schematic design and the PCB design with KiCad. It took me several days to finish the PCB design.
Schematic & PCB Design Progress:
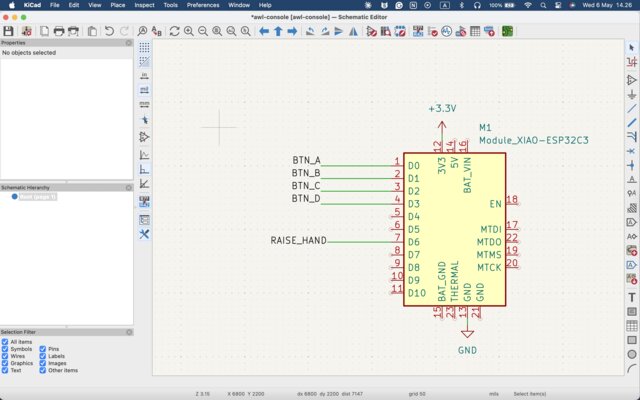
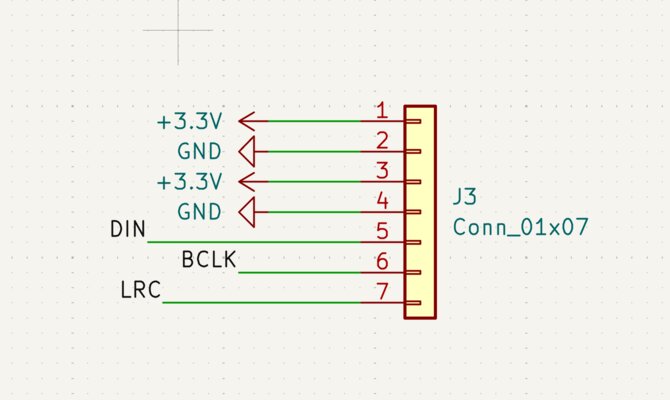
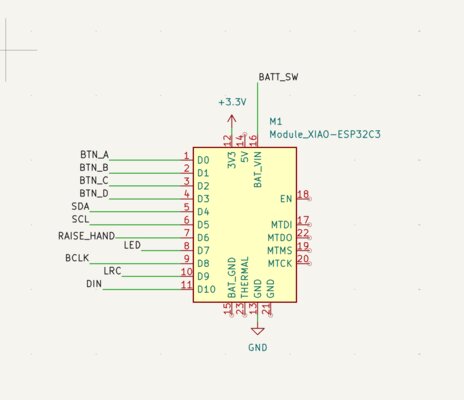
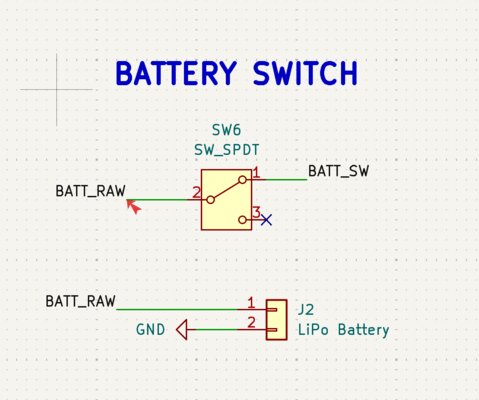
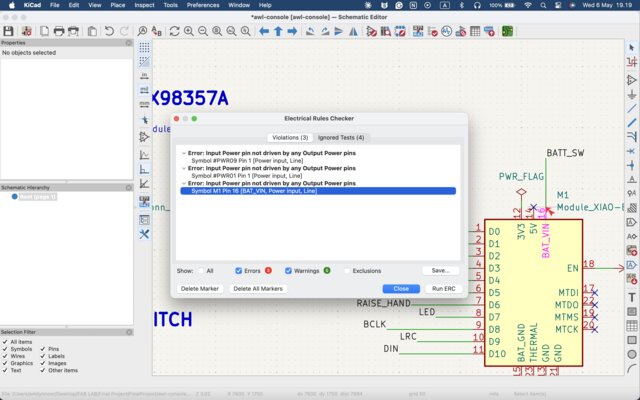
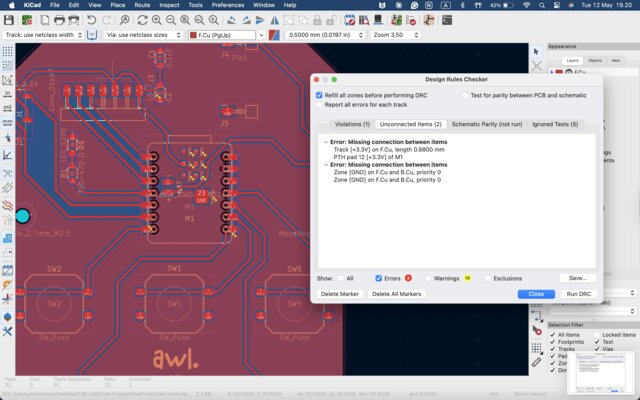
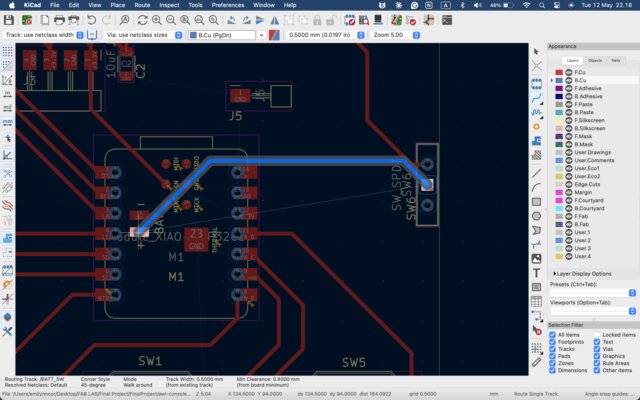
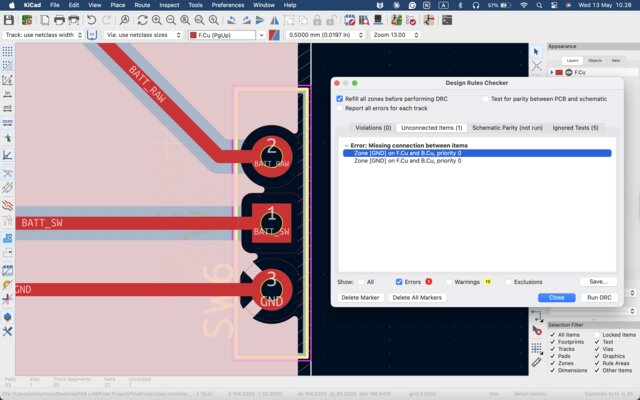
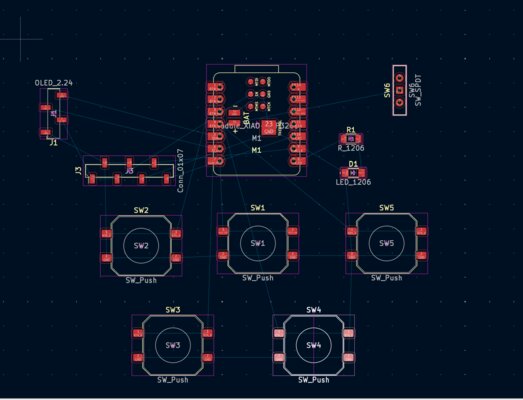
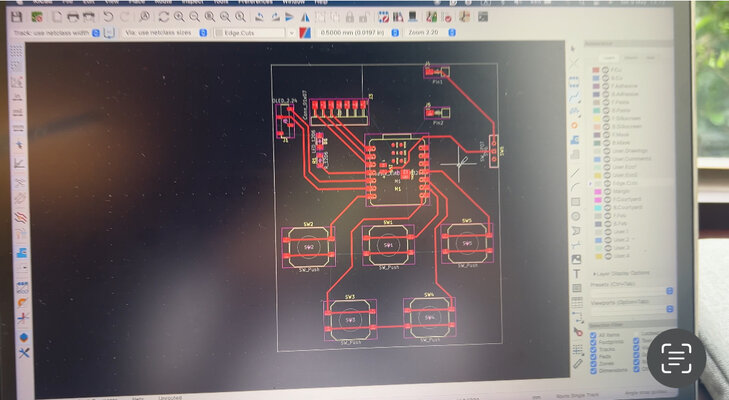
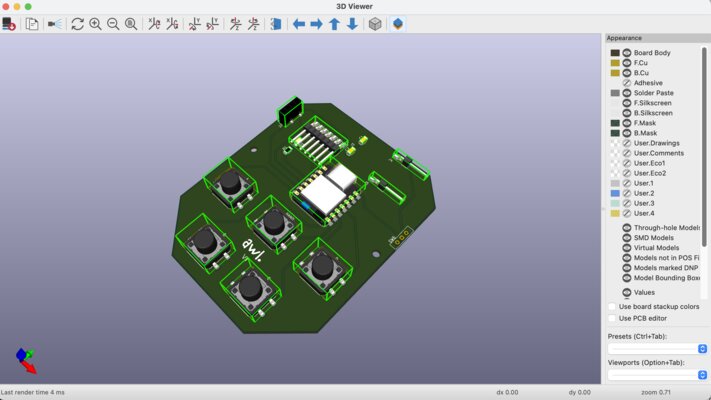
Final Schematic & PCB Layout:
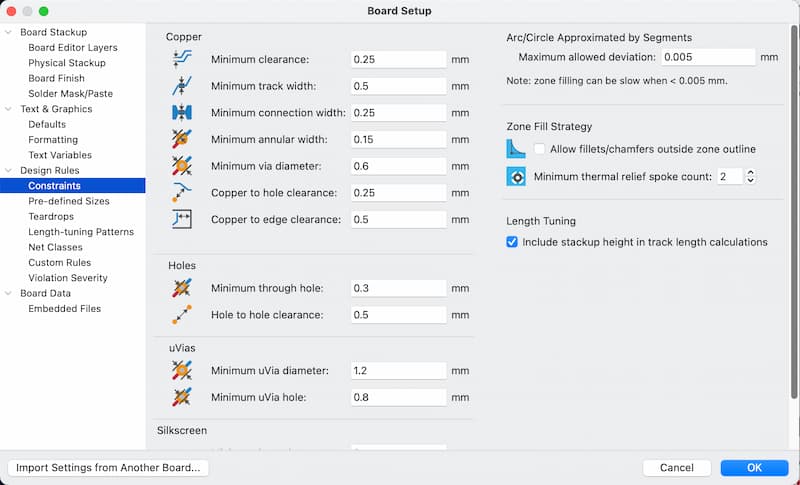
Board Setup Settings:
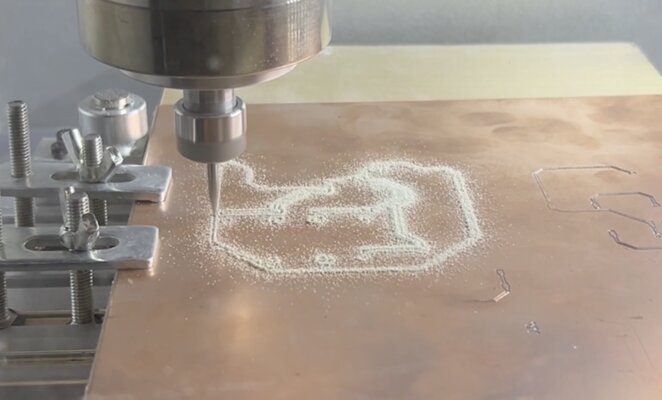
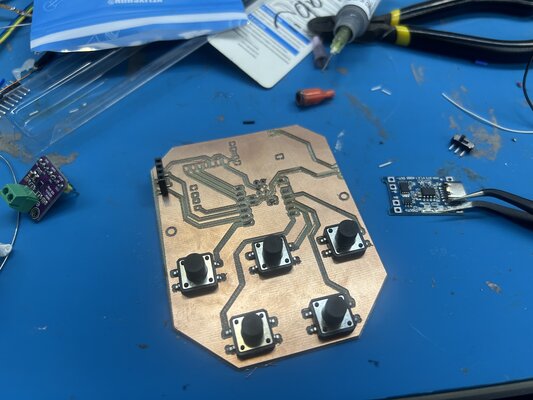
12 May - CNC Milling
I tried to mill the PCB using CNC, but it didn’t turn out well. The current design required a two-sided board, and the traces were also too small to mill cleanly.
13 May - I sent my PCB to JLCPCB and then I started to design the game controller casing (top and bottom)
PCB Order:
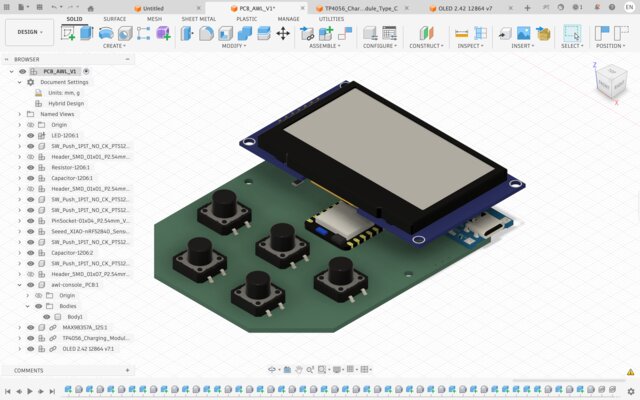
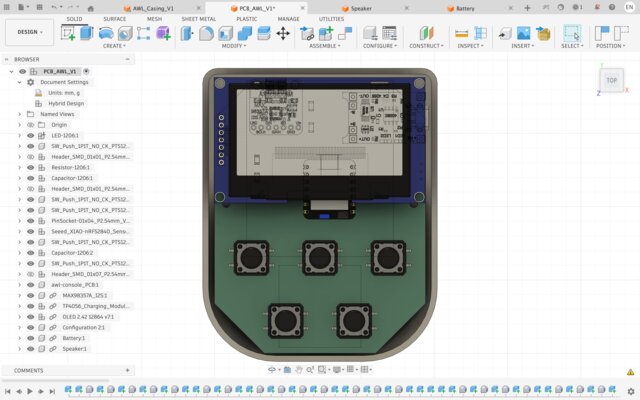
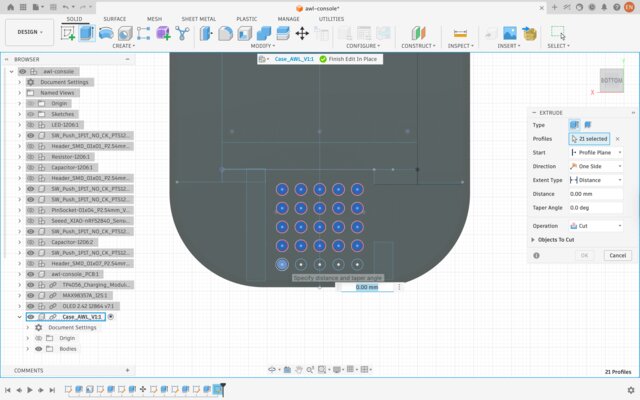
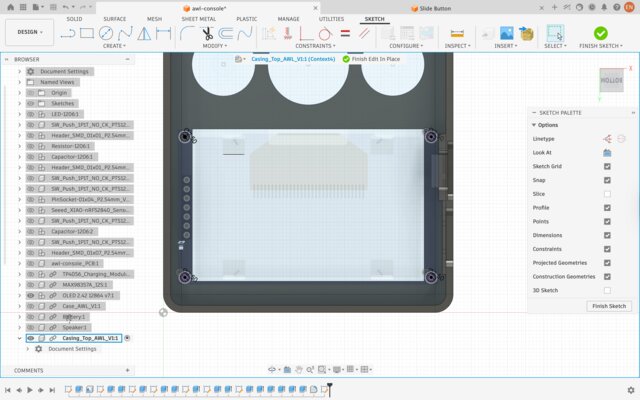
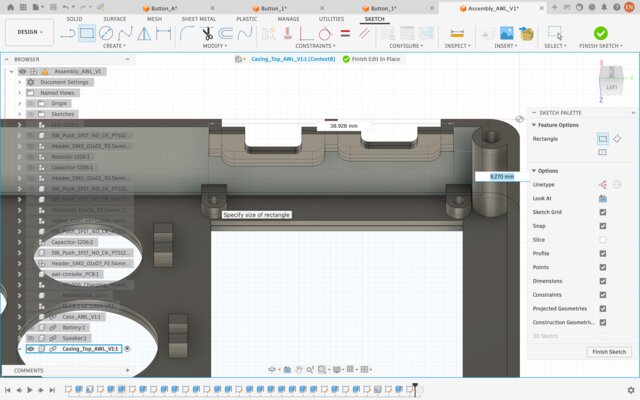
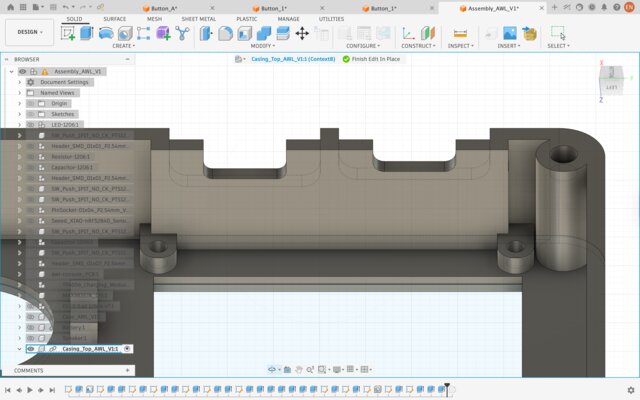
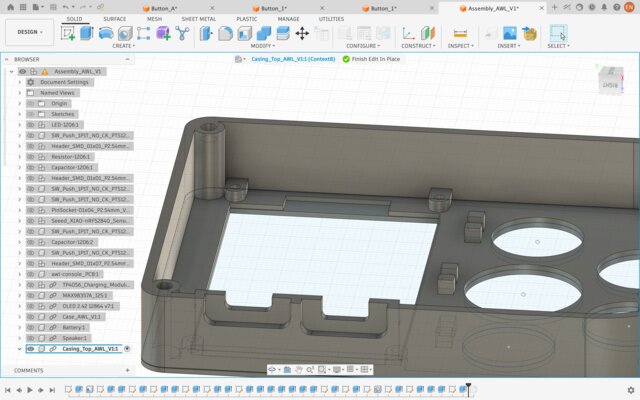
For the enclosure design, I needed accurate 3D models of my components so I could check how they fit inside the case and leave the right clearances. Instead of measuring and modeling every part myself, I downloaded ready-made CAD models from the GrabCAD Library and imported them into Fusion 360 as reference bodies. I downloaded 3D models for the OLED Display 2.42”, the MAX98357A amplifier, and the TP4056 charging module:
OLED Display 2.42” — Link
MAX98357A — Link
TP4056 — Link
I used these models to position the components inside the casing, size the holder pockets, and place the cutouts for the OLED window, the USB-C charging port, and the speaker.
Week 17
14 May-15 May
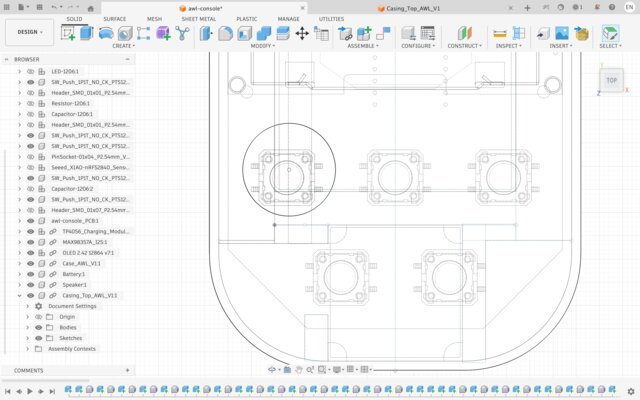
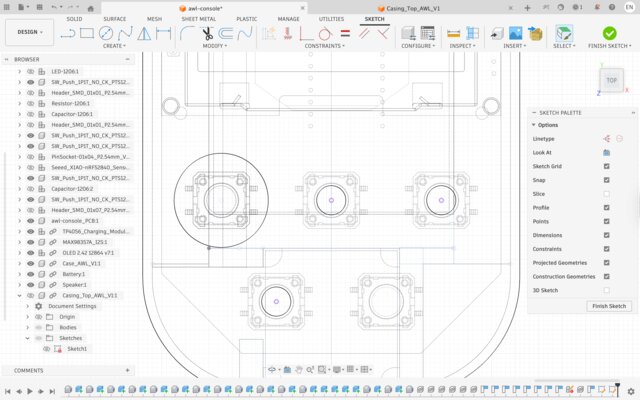
I continued to create the 3D design.

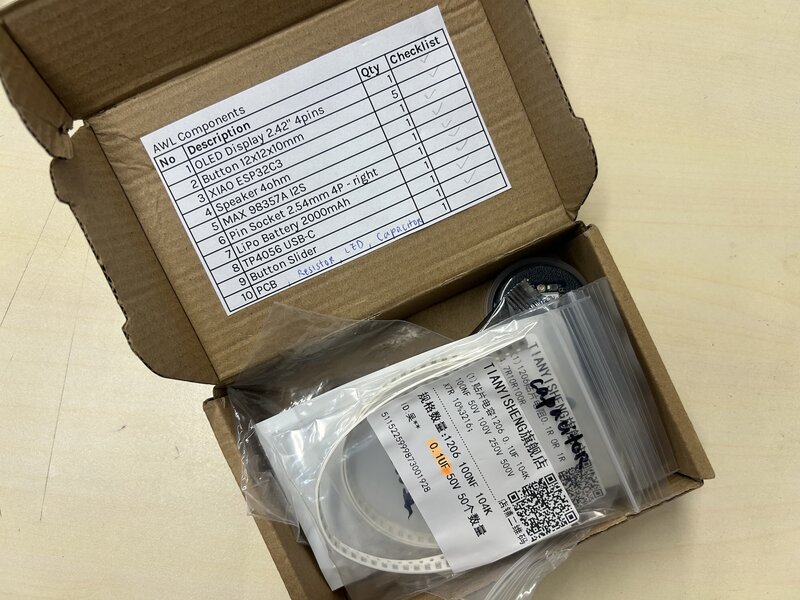
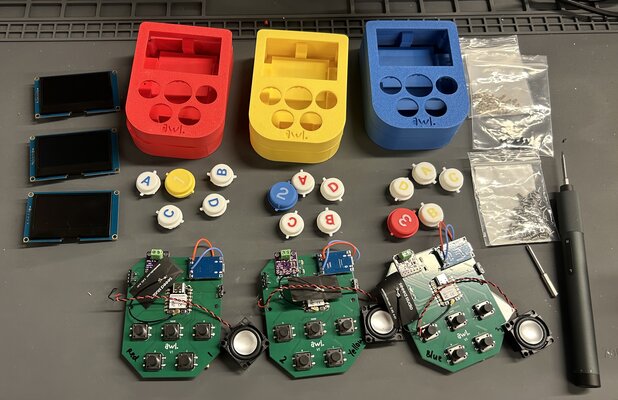
I put the components for every game controller in 3 different boxes and I printed the component list for each box.
16 May
My order from JLCPCB arrived. It took around 3 days from placing the order until the package arrived.
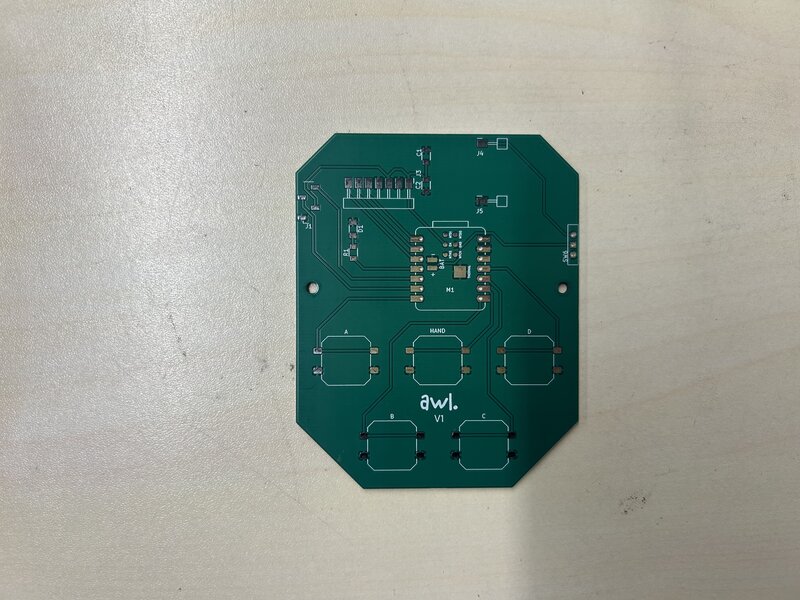
I also tried placing the components on one of the PCBs.
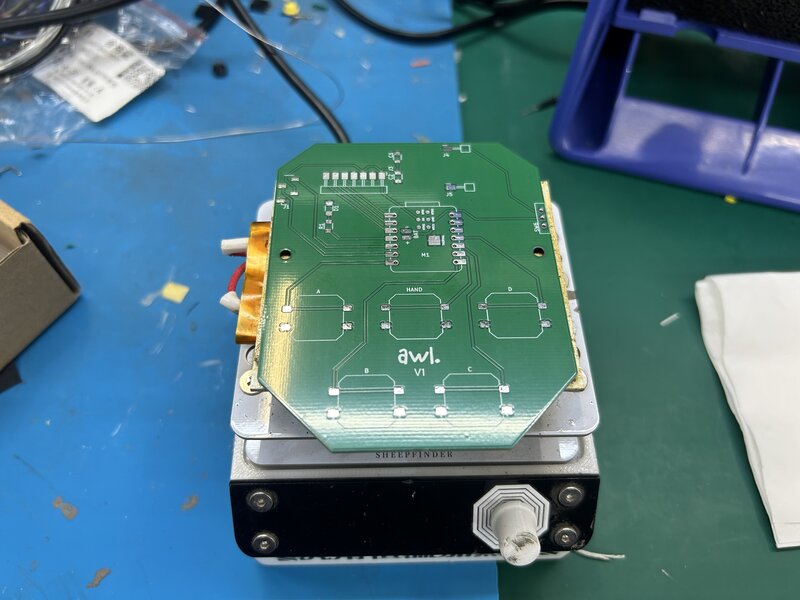
_<
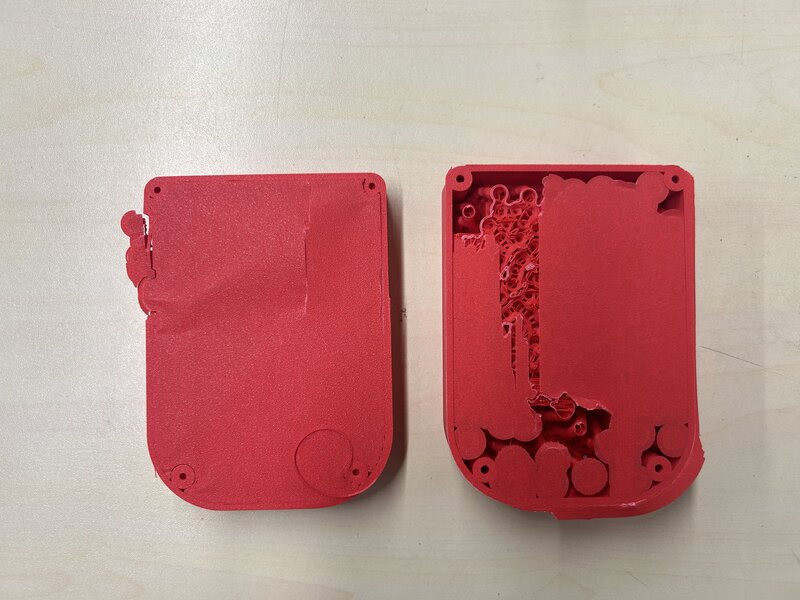
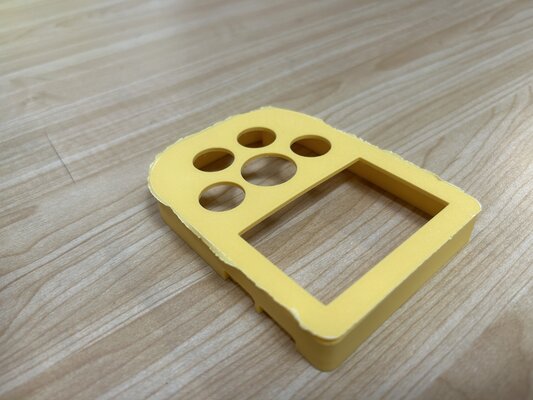
With the same design, I printed it with the flat surface facing down on the build plate, so it came out smoother. I am quite satisfied with the result, but it still needs some improvements.
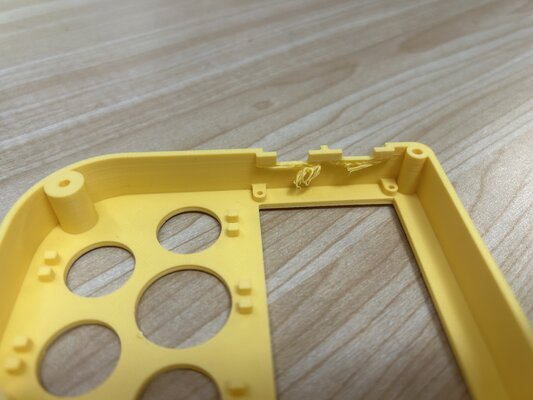
The charging port area and the slide switch area came out looking like “spaghetti”.
For the cable routing, I added tree supports, but then I couldn’t remove the supports or place the cable inside.

The battery holder and the speaker holder are a bit too big — I need to make them smaller.
Also, the OLED hole is too big, so I can make it smaller. And since I missed the 4 pins on the left side of the OLED, I should make the top casing taller.
18 May
I uploaded a test code to the XIAO ESP32-C3 to check whether all the components were working, and it turned out everything works!
After confirming the first board worked, I assembled the components on the other two PCBs.
I made a mistake in the schematic and PCB design for the TP4056, so I had to mount it upside down — but thankfully it still works!
19 May
I tried designing the button in Fusion.
The first button I made had a hole that was too deep, so I had to put something inside the button to make it work.
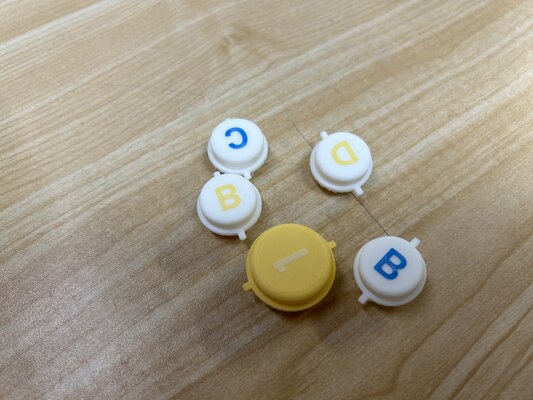
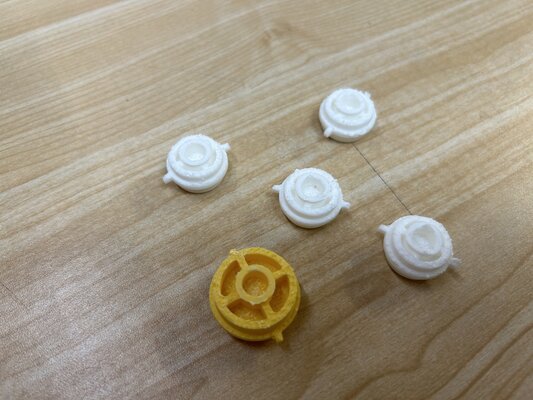
I redesigned the buttons, and this is how they look:
The size is okay now, but the buttons keep rotating. I need to readjust the design so the buttons stay in place. I am also not satisfied with the print quality.
20 May
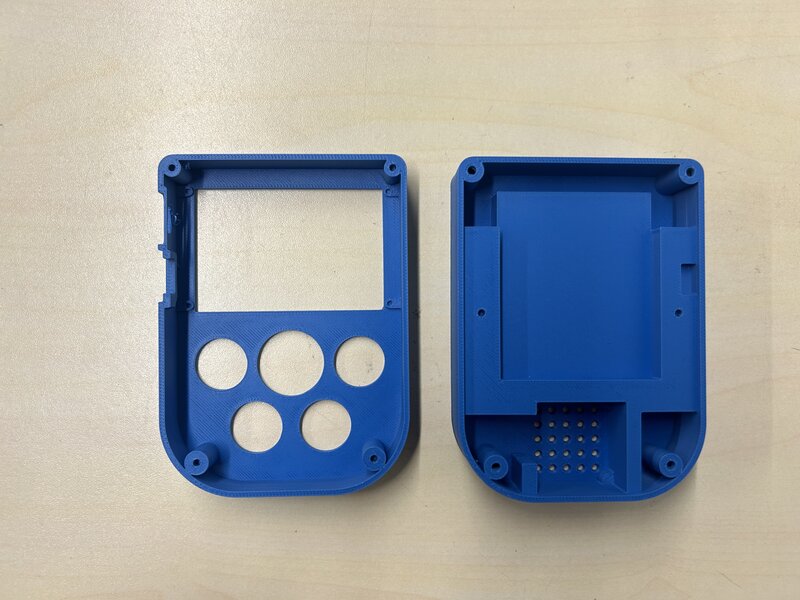
I redesigned the bottom casing. This time I didn’t use any supports, so I can place the cable inside the cable holder. I also decreased the size of the speaker holder and battery holder, and added a lip joint to keep the speaker and battery in place.
This is the final 3D assembly:
I printed the other buttons.
The print setting:
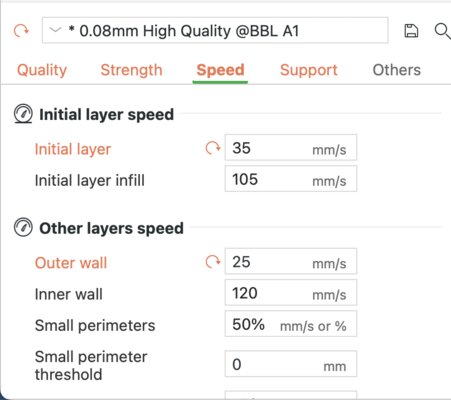
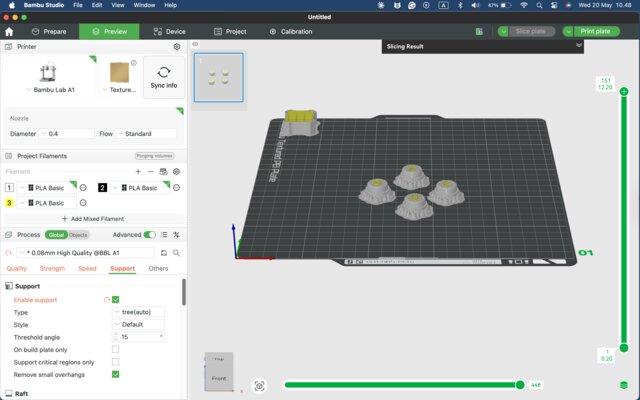
The text thickness was 0.2 mm, so I couldn’t see the text clearly, and the bottom part came out messy.
Week 18
21 May
I tried reprinting the buttons and made the text thicker, from 0.2 mm to 0.5 mm.
These are the print settings:
The text looks clearer now, but it still doesn’t look smooth, and the bottom part came out very messy.
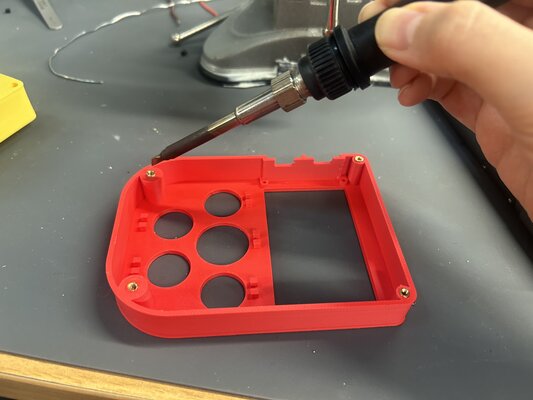
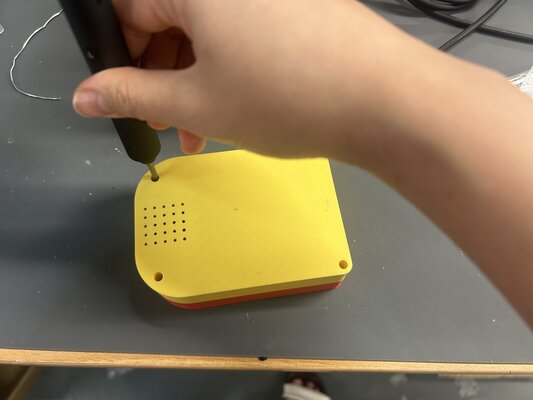
Then I tried adding heat-set inserts into the PLA.
First I tried with the soldering iron at 330 °C — the PLA melted…
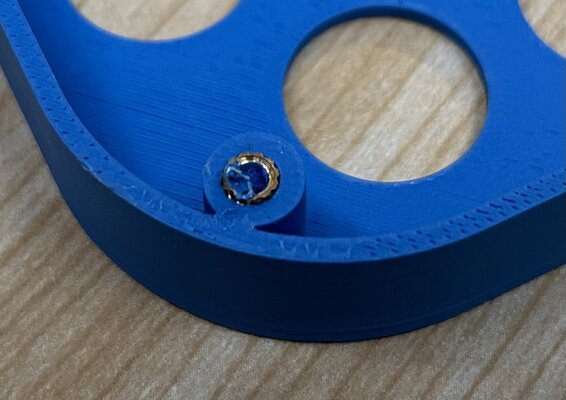
Then I tried at 200 °C — the PLA still melted a bit, but it was better.
So I am considering whether I should use heat-set inserts or just plain screws.
22 May
I adjusted the design of the top part and reprinted it. (V2)
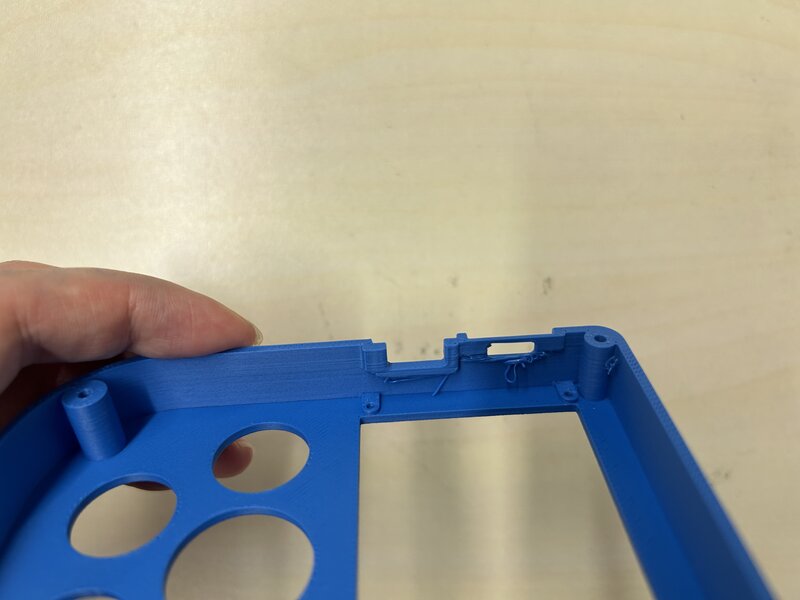
The charging port area and the slide switch area came out still looking like “spaghetti”.
I learned that I shouldn’t use the outer brim…
I decided to use black screws to hold the OLED display onto the top casing, without using heat-set inserts.
The button holder worked! The buttons don’t rotate anymore.
Almost there… but it still needs a lot of improvements!!
25 May
Since I put TP4056 upside down, I need to adjust the enclosure design again:
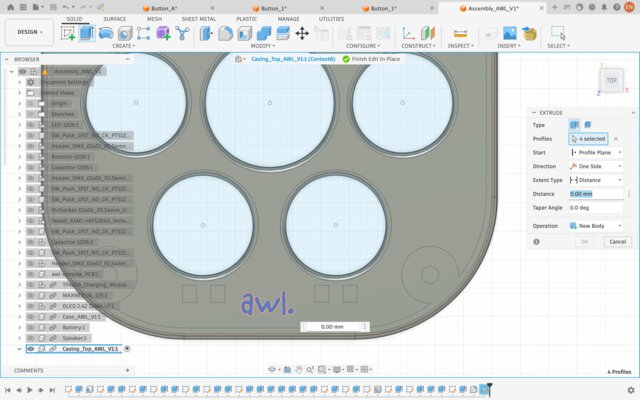
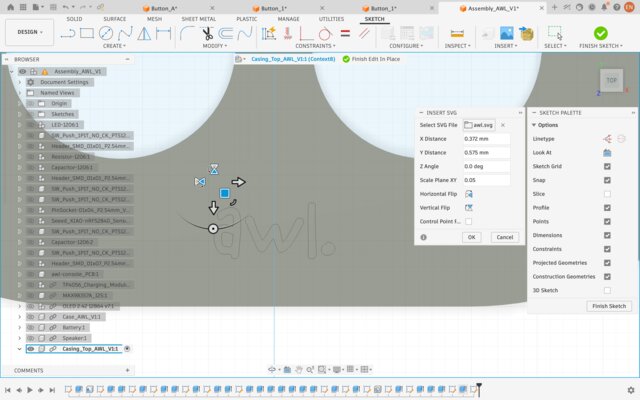
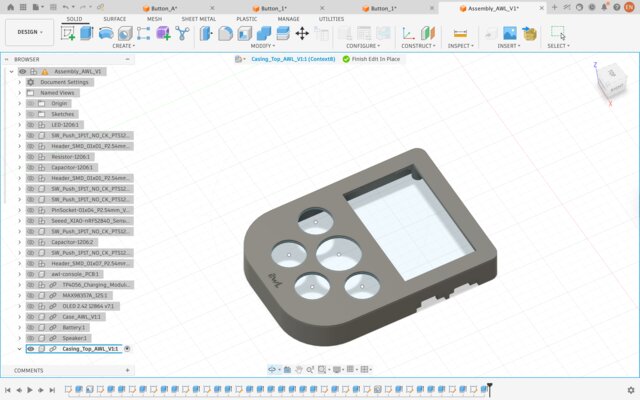
I also added AWL logo to the top enclosure:

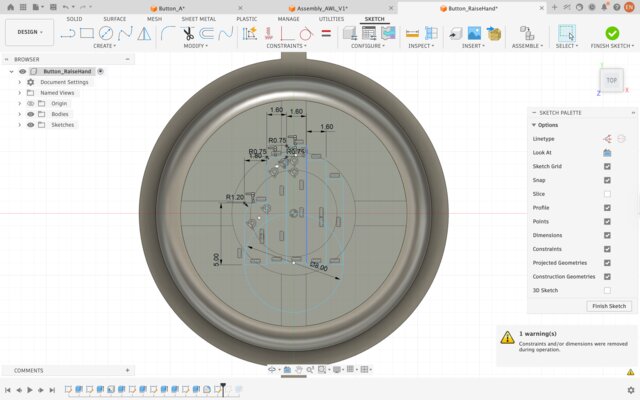
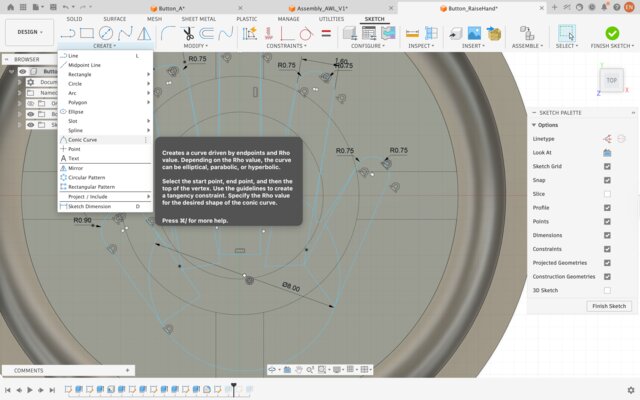
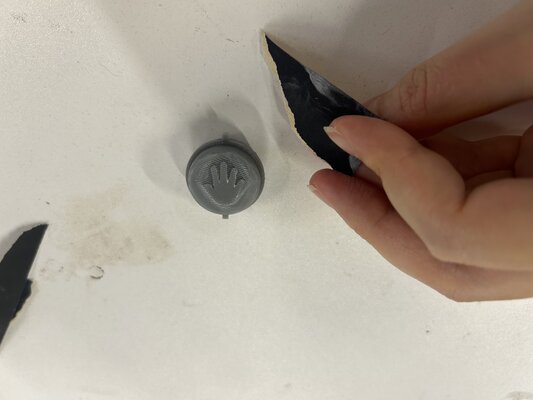
Moreover, I made the “Raise Hand” 3D design for the decoration on top of the silicone button.

26 May
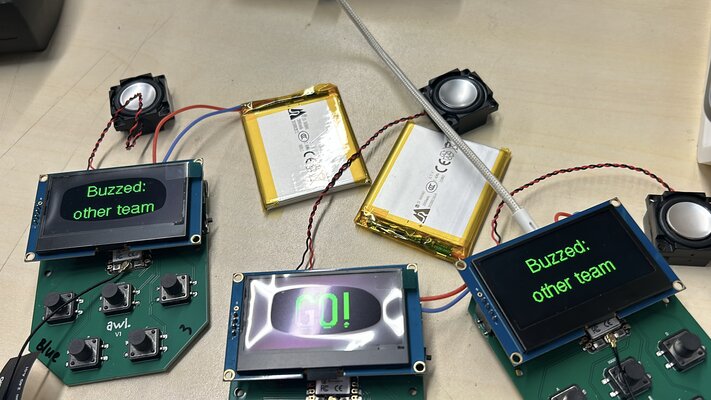
I tested the Raspberry Pi with the 3 game consoles:
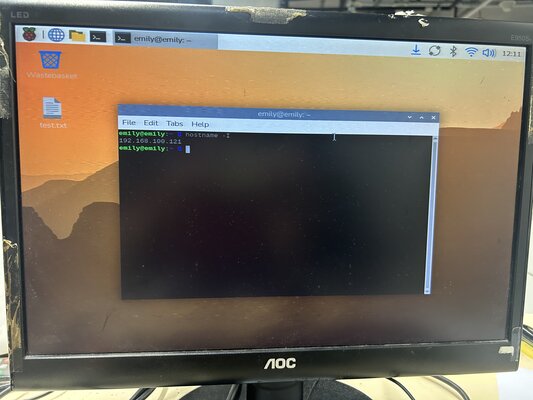
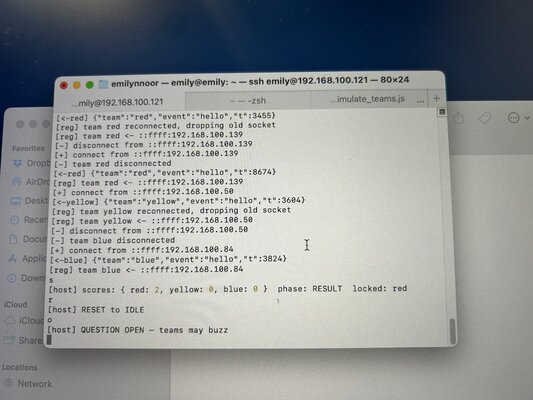
But the problem was that using the Raspberry Pi required me to change the IP address every day, which was quite troublesome.
Moreover, I also tried heat inserts and screwed the top and bottom enclosures together:
27 May
I decided not to use the Raspberry Pi and used my laptop as the server instead, as it was easier to set up and run during the playtest.
I tried to do resin printing for the button or the mold, but at the end I didn’t use it.

Week 19
28 May-30 May
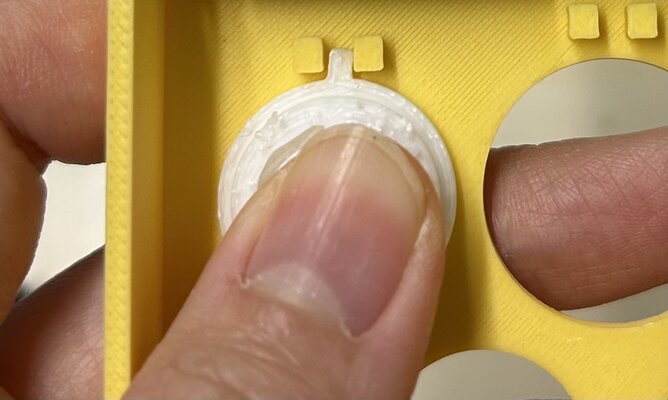
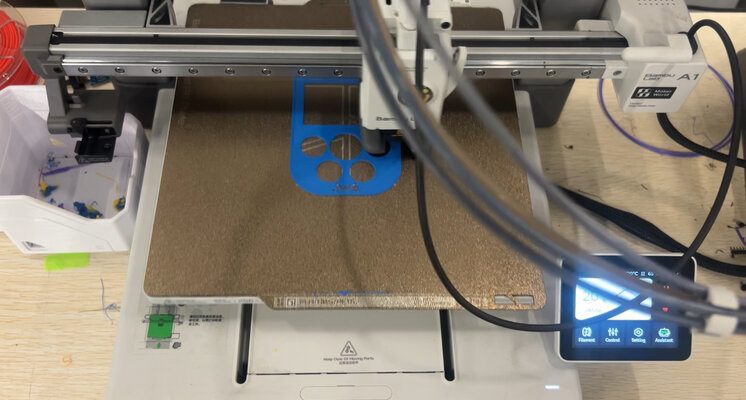
Apparently, the previous the design, the button holes were to tight:
So I adjusted the size of the holes, and I tried to print one top and bottom enclosure first, and tried to assemble it. Once it fit, I printed the rest.
I finished all the top and bottom enclosures and buttons 3D printing.

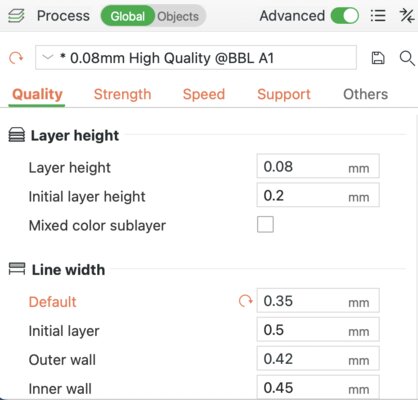
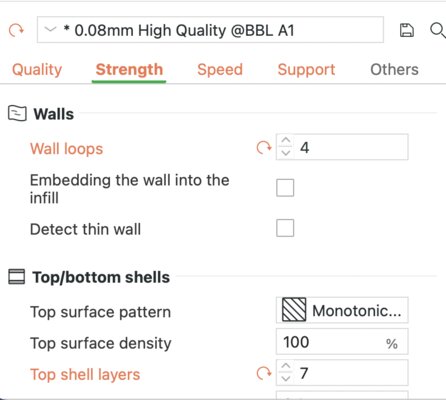
Print Settings
-
(Top Enclosure)
Layer height 0.16 mm, walls 4, top shell layers 5, sparse infill pattern Gyroid.
-
(Bottom Enclosure)
Layer height 0.16 mm, Ironing type Top surfaces, walls 5, top shell layers 4, sparse infill pattern Gyroid.
-
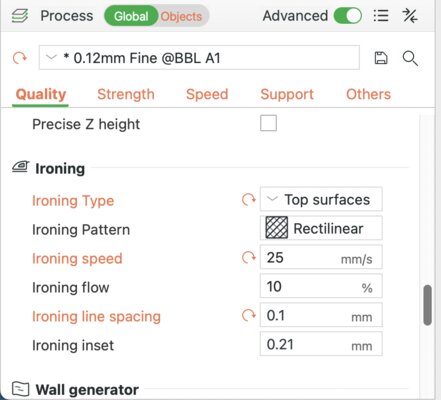
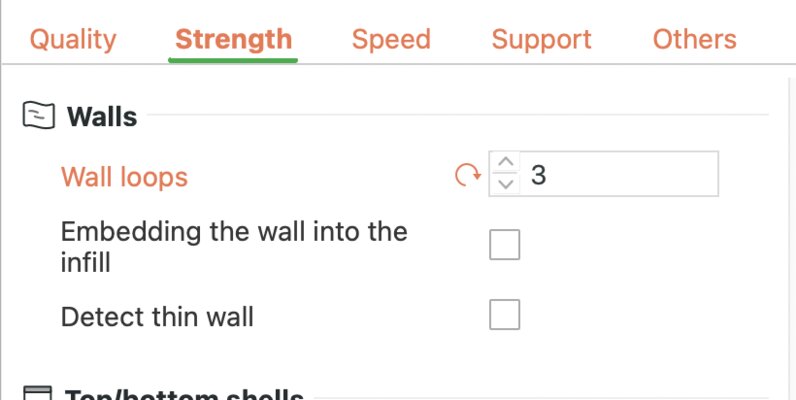
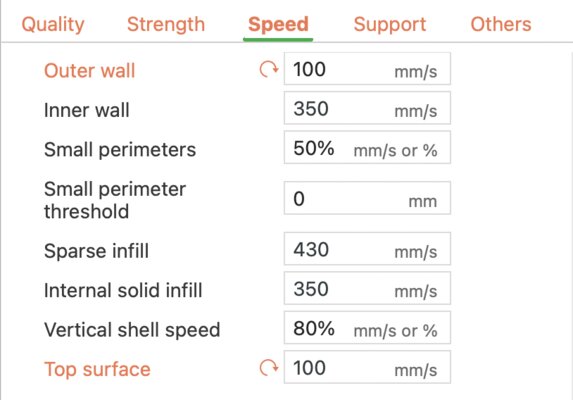
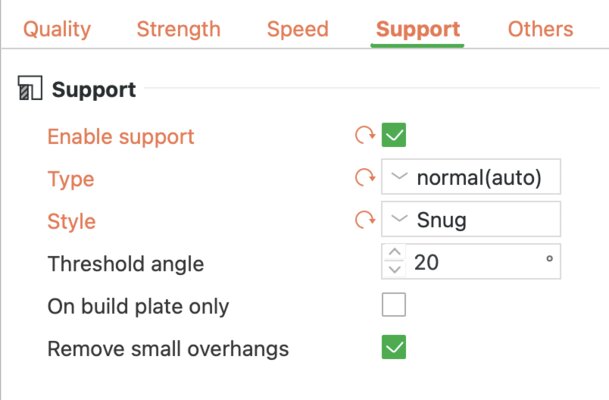
(Buttons)
Layer height 0.12 mm, walls 3, top shell layers 6, sparse infill density 25%, sparse infill pattern Gyroid, speed outer wall 100mm/s, enable support yes (support critical regions only).
Printed in Bambu Studio A1.
31 May
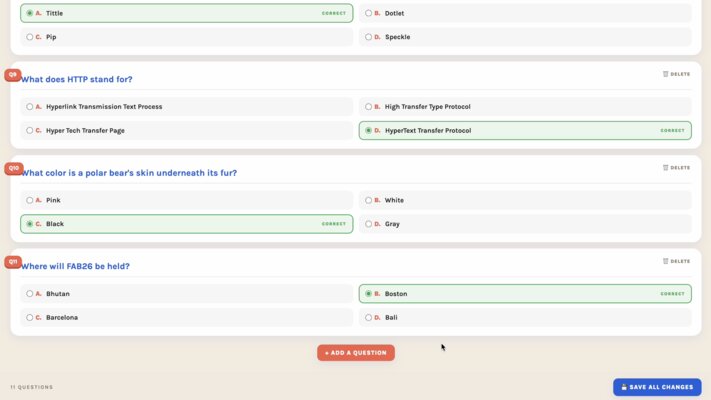
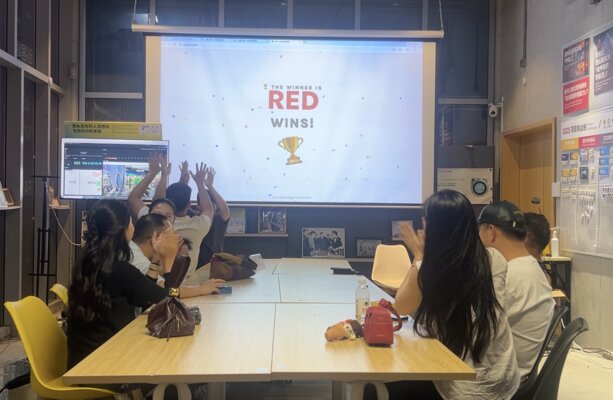
That day was a looong day. In the morning I assembled all the components and enclosure, and then in the afternoon I prepared the trial with my instructor and classmates (Matthew, Sunny and Alison), creating questions, and also the playtest with my Indonesian friends who came to visit Chaihuo (Tim, Joel, Joan, Joel’s dad, Edwin, Valen, Mancius, Nicole, Jason, James).
1 June
I tried to check again if everything worked well.
2 June-3 June
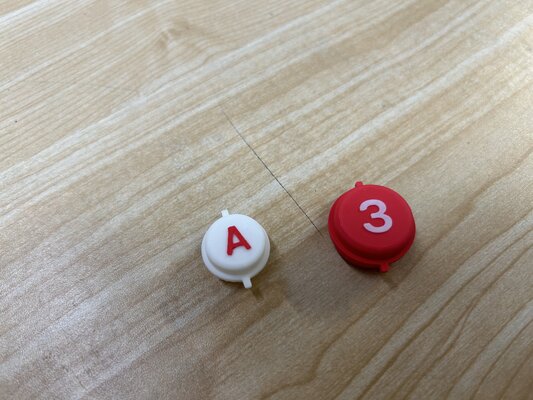
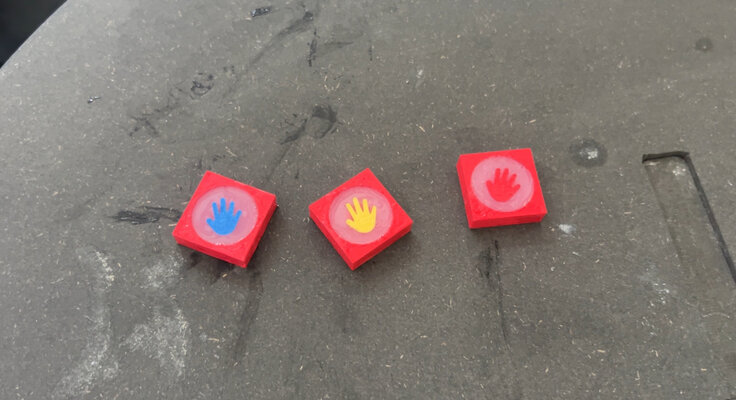
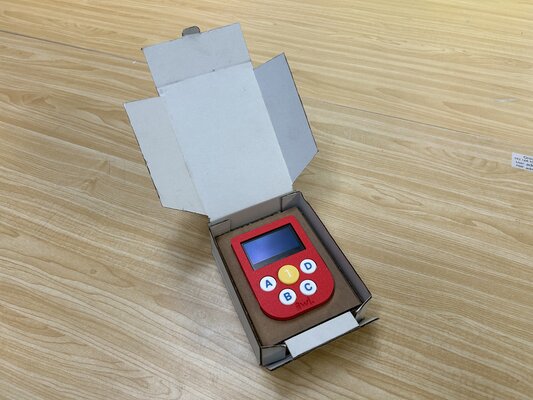
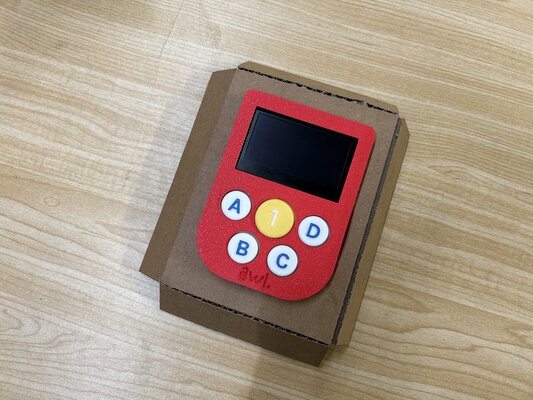
I printed the tiny Raise Hand 3D to put on the top of the silicone button.
Moreover, I finalized the button casting and also laser cut the cardboard box.
Also, these are the stacks of trial-and-error 3D-printed enclosures…
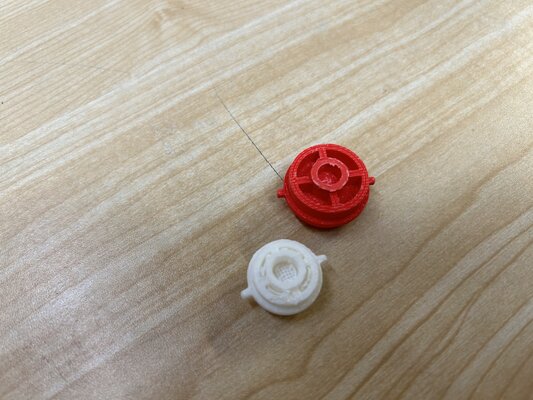
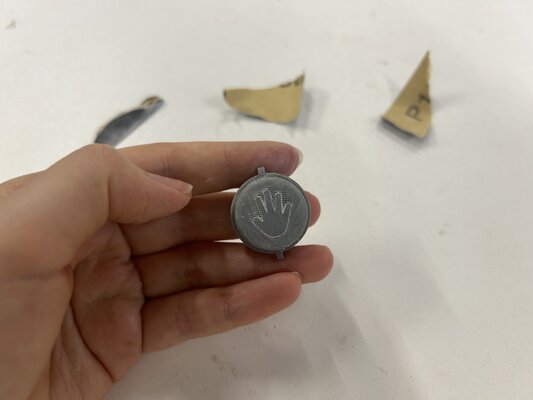
CAST BUTTON
I cast the soft button caps in silicone from a 3D-printed negative mold, so the button feels squishy and tactile to slam — something a rigid PLA cap couldn’t give me.
I chose tin-cure (condensation-cure) silicone rather than platinum-cure. Platinum/addition-cure silicone is prone to cure inhibition — against PLA or certain resins the surface won’t fully cure and stays tacky. Tin-cure avoids this, so it’s the safer match for a PLA mold.
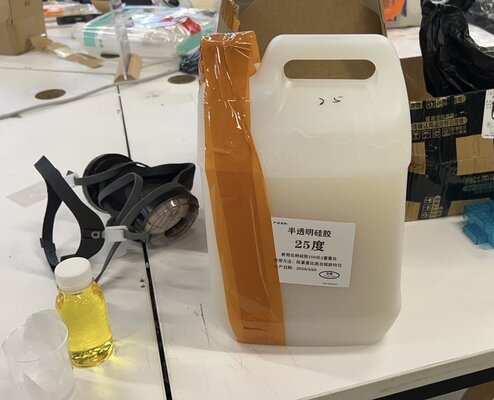
Mixing & curing”
The mixing ratio is 50:1. After stirring I tapped to release bubbles and cured for 24 hours at room temperature before demolding.
CARDBOARD BOX
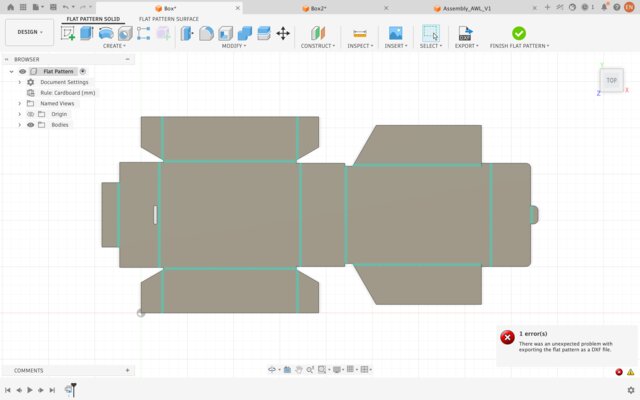
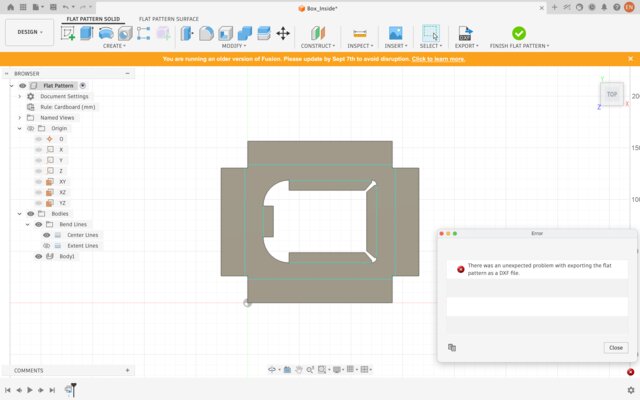
A laser-cut cardboard display/packaging box. I modeled it in Fusion 360’s Sheet Metal workspace, then used the flat-pattern to export a DXF for the laser cutter.
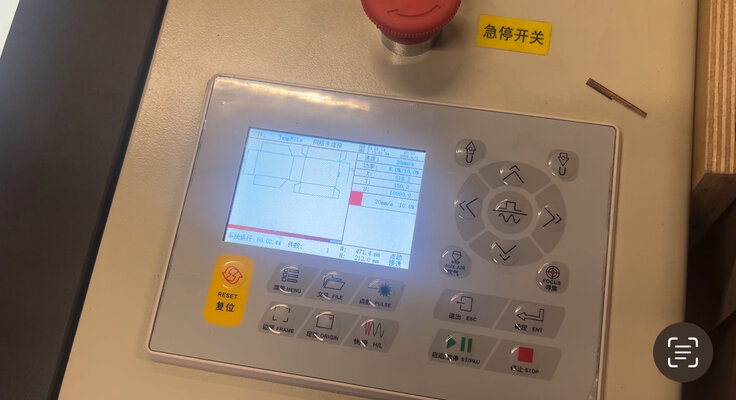
Material & Settings
Material: 3 mm cardboard.
Laser cut: speed 20 mm/s, min power 5.0%, max power 10.0%
Note: different laser cutters have different settings.