Week 14: Molding and Casting
Week 14 Assignment:
-
Group Assignment
- Review the safety data sheets for each of your molding and casting materials, then make and compare test casts with each of them
- Compare mold making processes
-
Individual Assignment:
- Design a mold around the process you’ll be using, produce it with a smooth surface finish that does not show the production process toolpath, and use it to cast parts
- Extra credits:
- Use more then two mold parts
- Make your own materials
Notes from the Lecture
-
Molding -> The Tool: Molding is the process of creating a negative cavity or tool (mold) that holds a reverse impression of an original model.
-
Casting -> The Product: Casting is the process of pouring or injecting liquid/pliable material (resin, metal, plaster) into that mold, allowing it to solidify to create a positive, finished part.
-
Bio-based -> Derived wholly or partly from renewable biological sources such as plants, algae, or microorganisms Advantage: Potential reduction of fossilfuel dependency and associated greenhouse gas emissions. Not necessarily biodegradable.
-
Biodegradable -> Designed to break down through microbial activity into natural substances such as water, carbon dioxide, and biomass under specific environmental conditions. Advantage: Capacity to reduce environmental persistence where recovery or recycling is impractical. They can be derived from biological and/or fossil sources.
GROUP ASSIGNMENT
Chai Huo Week 14 - Group Assignment
Safety Data Sheet
Resin Printing
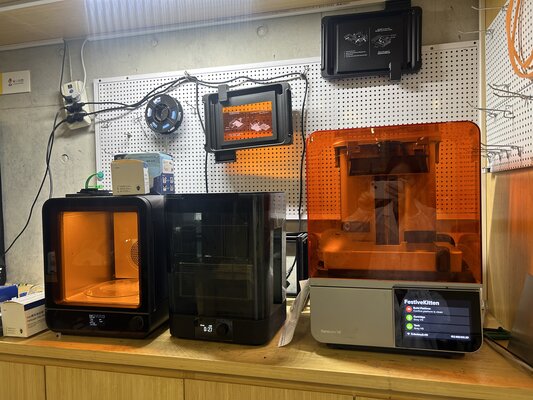
The products: (from right to left) Form 4, Form Wash, Form Cure
Resin used: Grey Resin V5
Product Information
-
Form 4: The Printer -> The Form 4 uses a high-power LED engine and an LCD screen to mask the light, curing an entire layer at once.
-
Form Wash: The Cleaner -> When the part finishes printing, it is covered in a sticky layer of liquid resin called the “uncured” layer. If you don’t clean this off, the final product will be tacky and lose its detail. The solvent used usually Isopropyl Alcohol (IPA).
-
Form Cure: The Finisher -> Even after washing, the resin isn’t at its full strength. It is still a bit “soft” on a molecular level. The Form Cure uses two things to fix this: 405nm UV Light and Heat. It makes the resin harder and more heat-resistant.
Safety
-
Gloves: Use Nitrile gloves. Latex gloves will dissolve when they touch the resin or IPA.
-
Eye Protection: If resin splashes while you are removing the supports from your baguette, it can be very dangerous for your eyes. Always wear safety glasses.
-
Ventilation: Resin has a distinct smell (VOCs). Ensure your lab has an air extractor or a window nearby.
-
Spill Kit: Keep some paper towels and a bottle of IPA nearby to clean up drips on the floor or table immediately. In addition, wear a lab coat to protect your body and your clothes.
Silicone
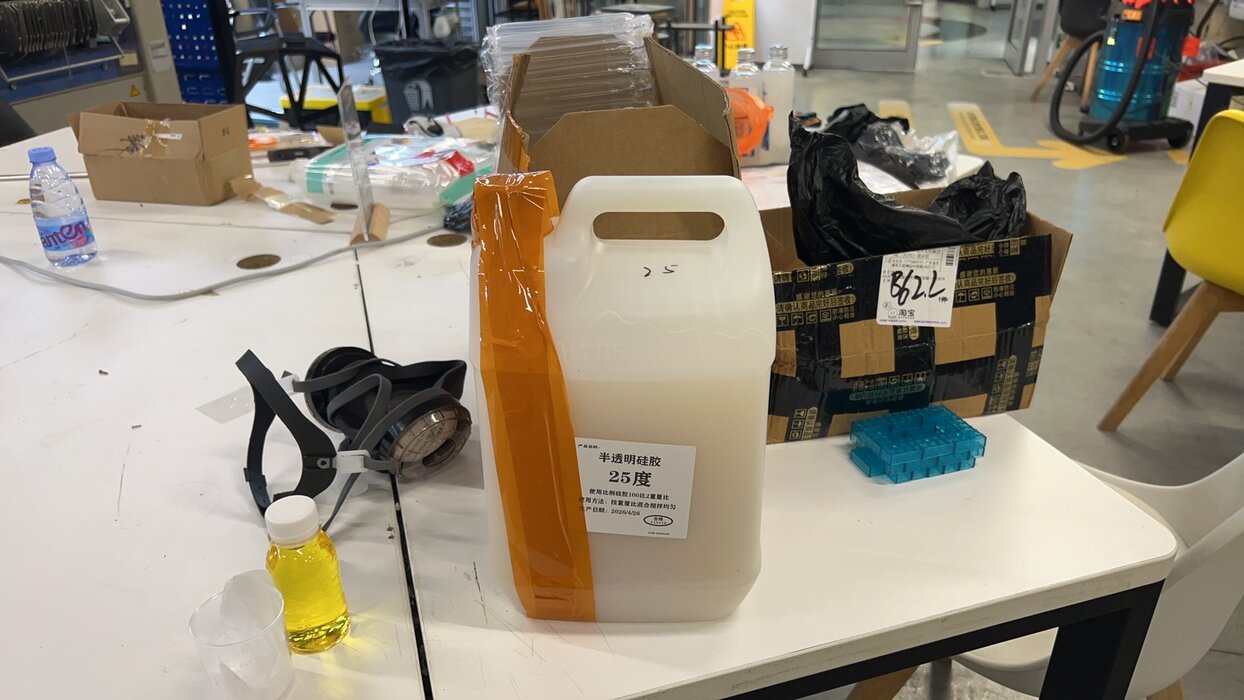
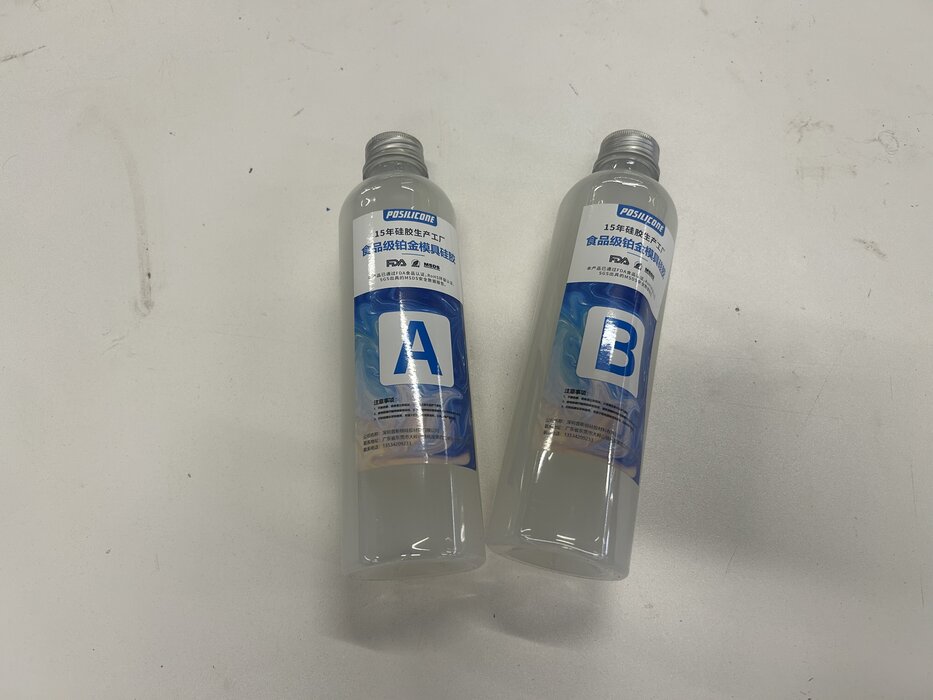
In this experiment, we used the tin-cure silicone and also the two-part platinum-cure silicone.
Tin-Cure Silicone
-
How it works: It stays liquid until the “yellow liquid” (the tin-based catalyst) triggers a reaction with moisture in the air to harden the rubber. The mixing ratio is 50:1.
-
The “Workhorse”: This is the most common silicone for general molding. It is very “tough”—it doesn’t care if your 3D print is a bit dirty or made of cheap plastic; it will almost always cure.
-
Shrinkage: It shrinks slightly (about 1%) over time as it “gasses out” the chemicals used to cure it.
-
Safety: Usually not food-safe. It’s best for industrial parts or art pieces.
Platinum-Cure Silicone
-
How it works: It uses a platinum salt as a catalyst. When Part A and Part B meet in equal amounts, they “add” together to form a solid. The mixing ratio is 1:1.
-
Precision: It has zero shrinkage. The size you pour is the size you get forever.
-
Food Grade: Because it doesn’t “gas out” chemicals, this is the type used for food-safe molds (like your baguette!).
Safety
-
Nitrile Gloves: Always wear nitrile gloves. Silicone catalysts (the yellow liquid) and uncured resins can cause skin irritation or sensitization (developing an allergy over time). Avoid latex, as it can actually prevent platinum silicone from curing.
-
Safety Glasses: A splash of catalyst or Part A/B in the eye is a serious medical emergency. Always protect your vision, especially when pouring or mixing.
-
Lab Coat: This protects your skin and prevents you from carrying chemicals outside the workspace on your clothes.
-
Spill Cleanup: If you spill liquid silicone, use paper towels to soak up as much as possible, then clean the residue with Isopropyl Alcohol (IPA). Be careful—silicone spills make floors extremely slippery.
-
Never Pour Down the Drain: Liquid chemicals will ruin your plumbing and harm the environment.
-
Cure Before You Toss: The best way to dispose of leftover silicone is to mix it and let it harden. Once it is a solid piece of rubber, it is chemically inert and can usually be thrown in the regular trash.
-
The Catalyst (Yellow Liquid): This is often the most concentrated and hazardous component. If it touches your skin, wash it off immediately with soap and water. If you ever get the “yellow liquid” catalyst on your skin, don’t just wipe it; use a heavy-duty hand cleaner or dish soap to break down the oils so it doesn’t stay in your pores.
Releasing Agent
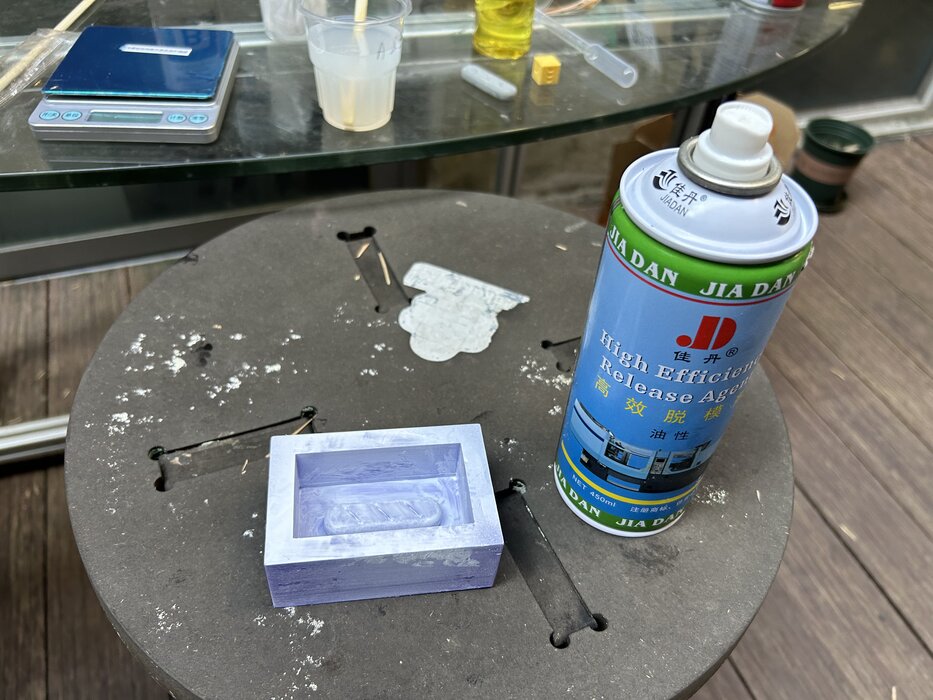
A release agent spray as the industrial version of non-stick cooking spray for your workshop. Its entire job is to create an ultra-thin, slippery barrier between two surfaces so they don’t bond together permanently.
Safety
Most release agents are aerosols. They contain solvents and propellants that are harmful if inhaled. Always spray them outdoors or under a fume hood.
Compare Tests
Silicone Mold with and without Release Agent
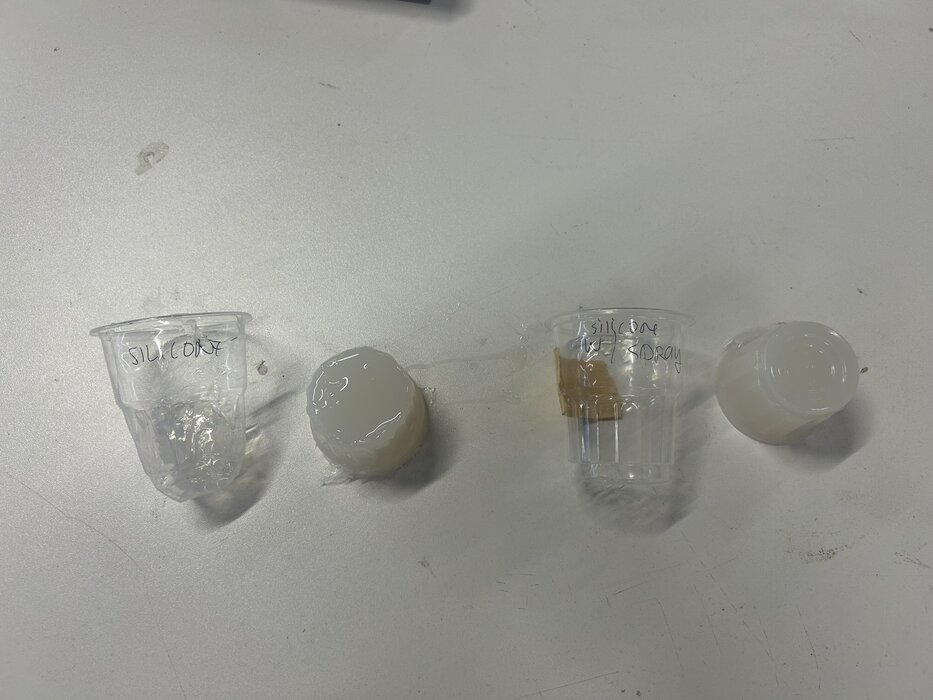
Platinum-Cure Silicone with and Without Release Agent
INDIVIDUAL ASSIGNMENT
3D Printing & Resin Printing for Mold Making
https://fab.onshape.com/documents/a7c7601df45468793dd14ce6/w/213afe5a7749ac3076a95766/e/3769beae25997aacc6307c30?renderMode=0&uiState=69f88b510b14b613ab53a9d2
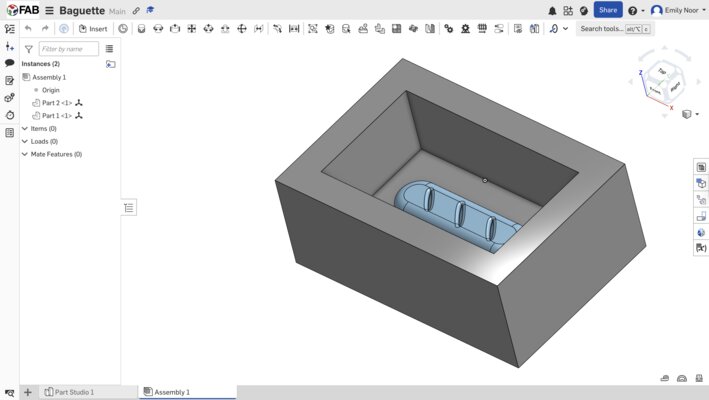
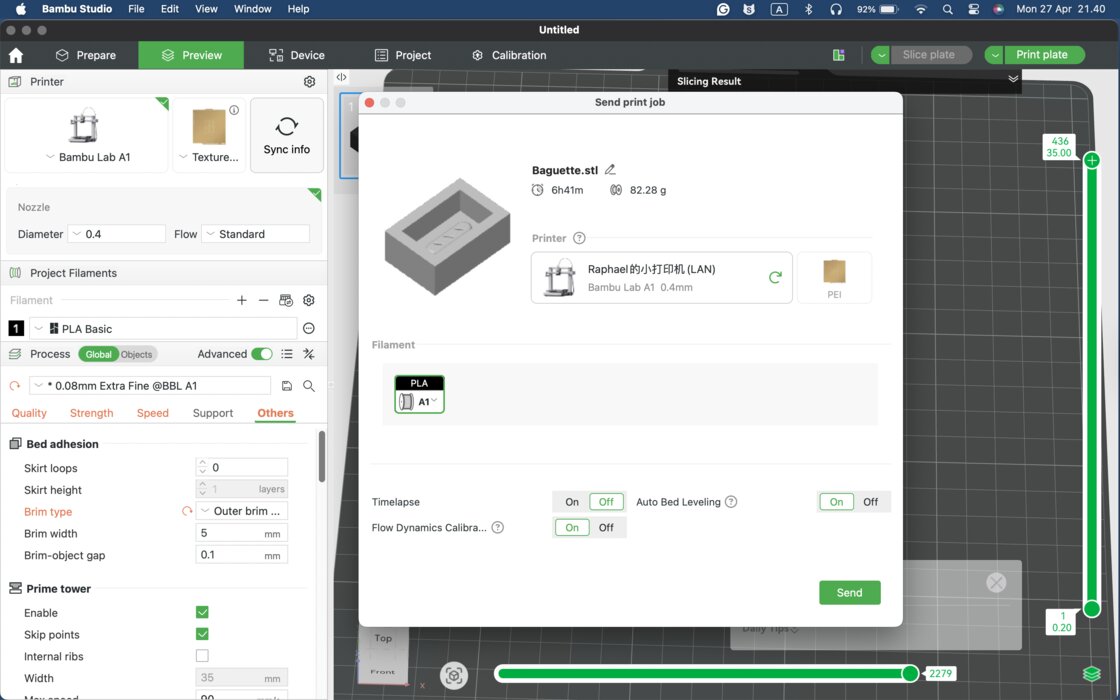
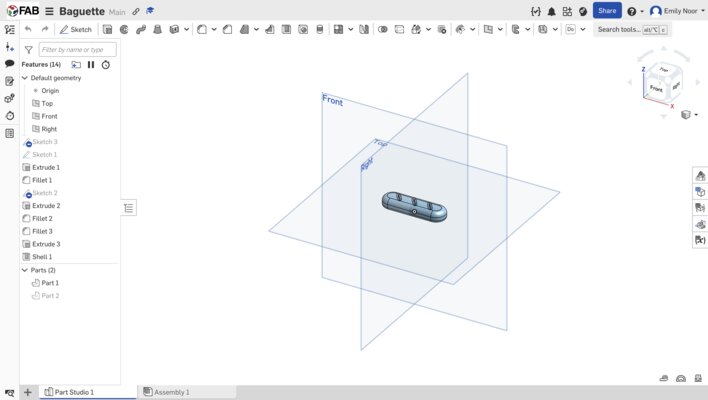
To create the mold, I utilized both 3D printing and resin printing. The design is based on a baguette shape.
3D Printing
I designed the baguette and the surrounding molding box in OnShape.
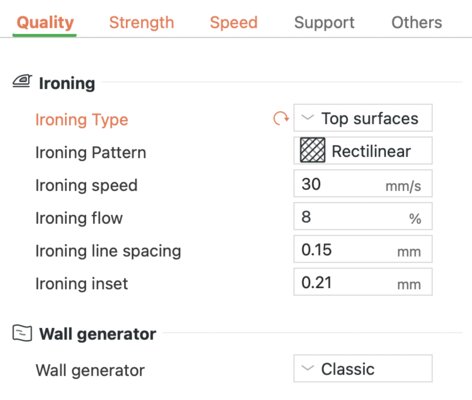
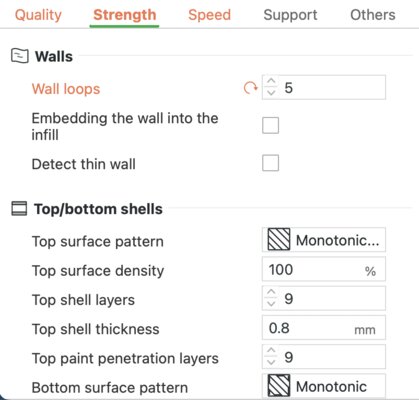
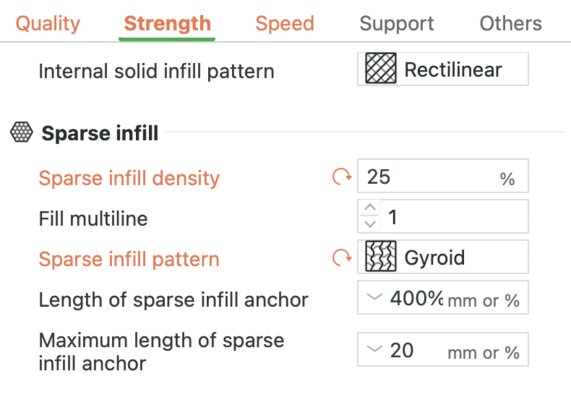
To ensure the mold was dense and smooth, I configured the following settings in Bambu Lab:
-
Layer Height: Enabled Advanced Mode and set the layer height to 0.08mm for high detail.
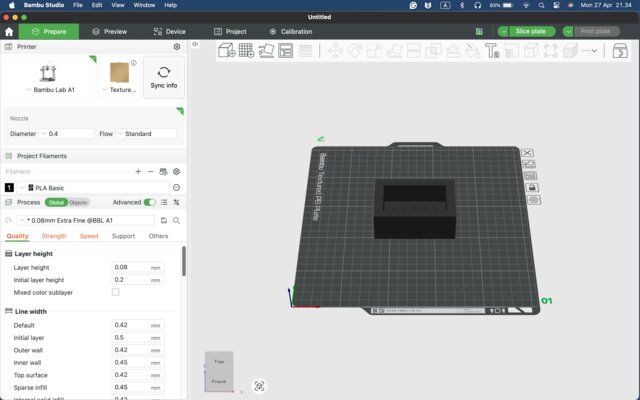
-
Ironing: Set to “Top Surfaces” to minimize layer lines.
-
Walls: Increased the wall loops to 5 for extra thickness.
-
Infill: Used a 25% density with a Gyroid pattern for structural strength.
-
Speed: Decreased the acceleration for the outer walls and top surfaces to 50 mm/s² to improve surface quality.

-
Build Plate Adhesion: Added an outer brim.
Material: Used PLA filament. The total print time was 6 hours and 41 minutes.
The printing process:
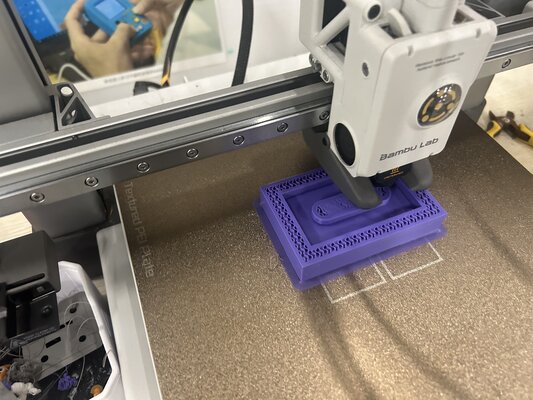
Here’s the printing result:
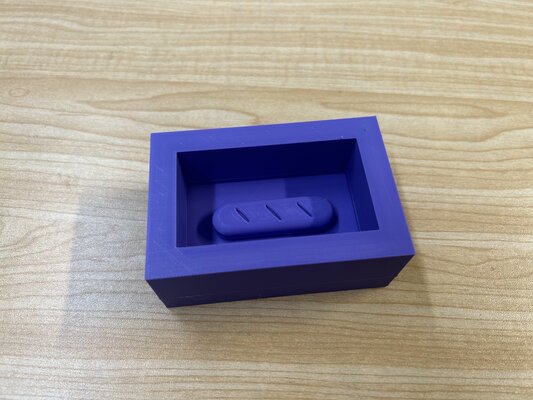
Post-Processing
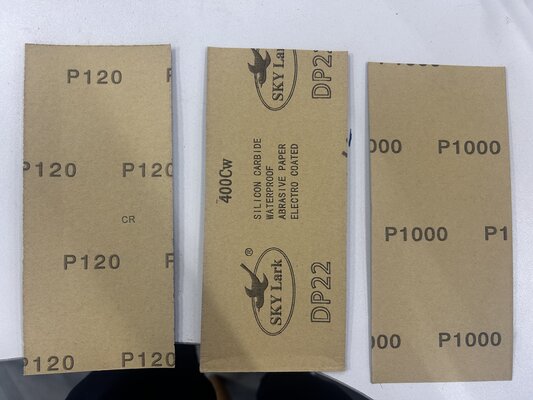
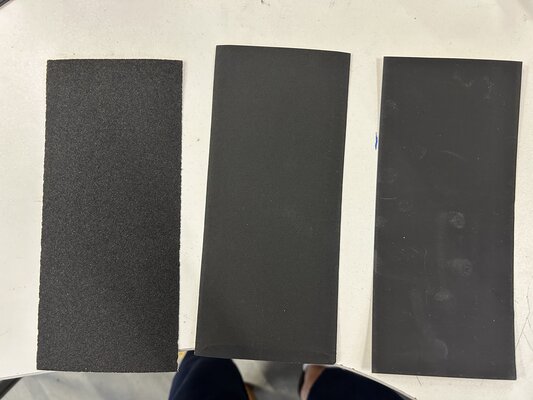
After printing, I sanded the model to achieve a smoother finish.
I progressed through three different sandpaper grits: P120 (coarse), P400 (medium), and P1000 (fine).
To seal any remaining gaps between the layers, I applied a spray paint primer.
Always wear a mask, lab coat, and nitrile gloves when spray painting.
I used this spray paint:
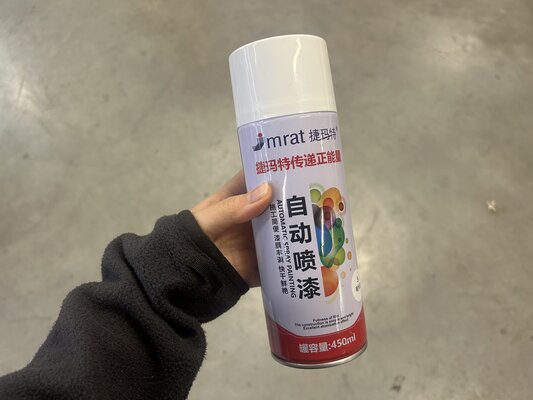
I held the print with tongs and applied the paint outdoors.
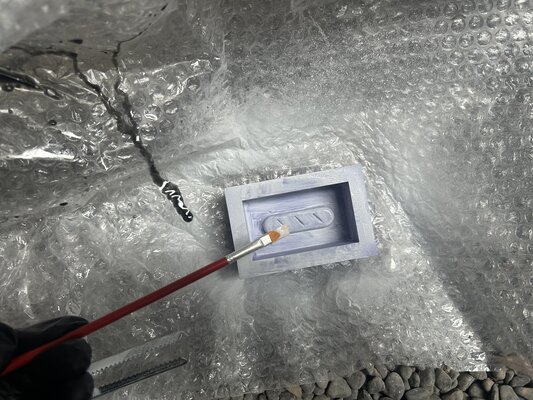
I also used a brush to ensure the paint evenly covered all surfaces and filled any tiny voids.
Resin Printing
This was my first experience with resin printing, and it was fascinating to see how the model prints upside down!
Setup and Software
-
I exported my baguette design from OnShape.
-
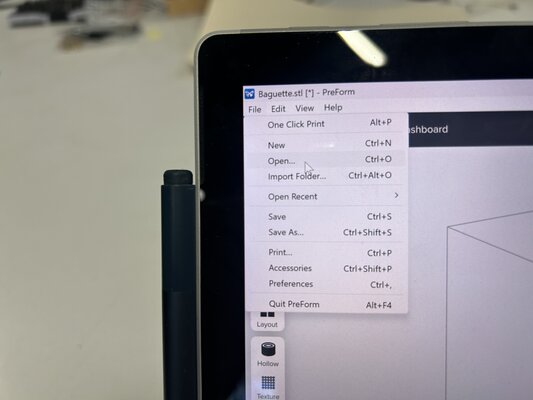
In the Formlabs software (PreForm), I opened a new file and imported the model.


-
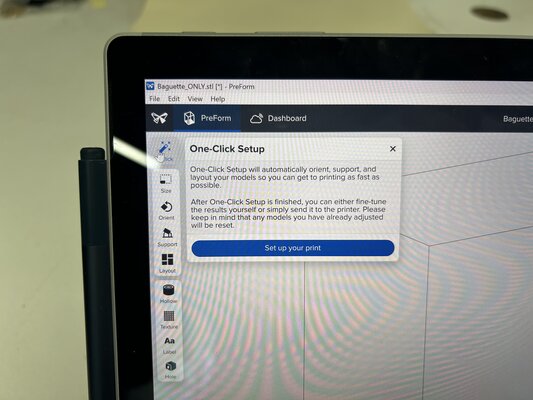
I used the “One-Click Setup” feature, which automatically generated the necessary supports and oriented the model for the best results.
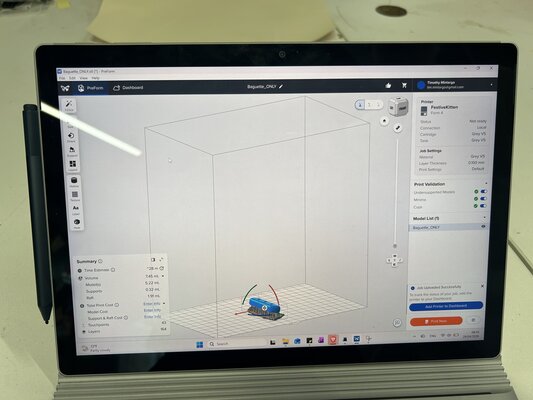
The Printing Workflow
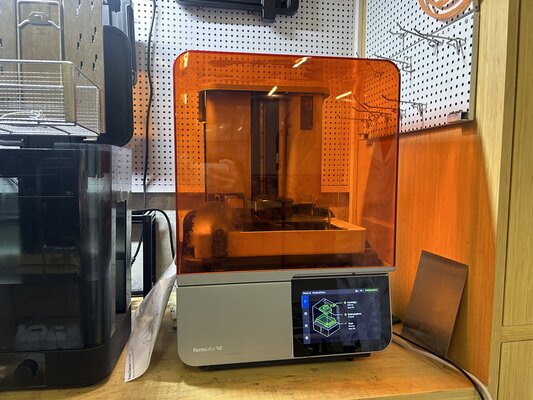
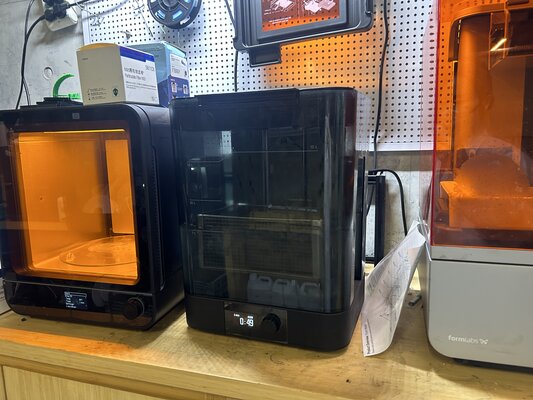
The process involves three distinct Formlabs machines: the Form 4 printer, the Form Wash, and the Form Cure.
-
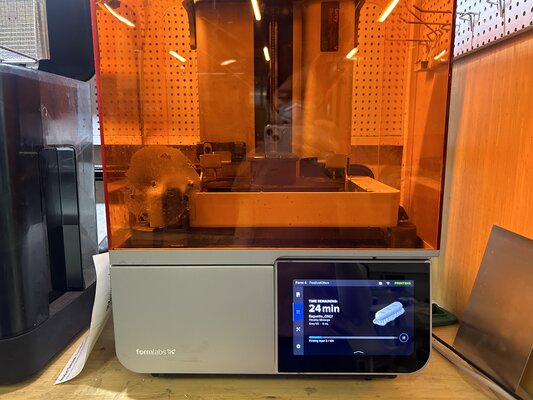
Printing: I sent the file to the Form 4 printer. The machine screen estimated a 24-minute print time.
-
Removal: Once finished, the baguette was hanging from the build plate. I carefully removed it.
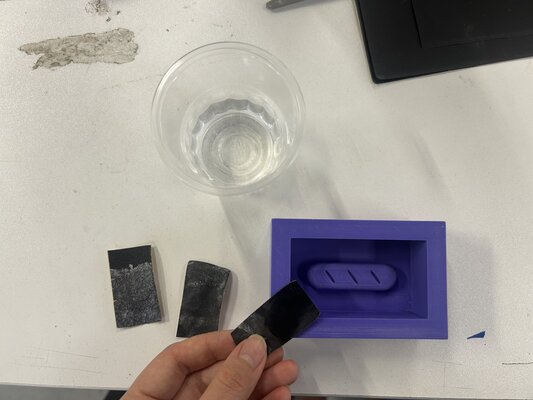
-
Support Removal & Sanding: I detached the baguette from its supports. I sanded the surface using P120, P400, and P1200 grit sandpaper to ensure a flawless finish.
-
Washing: I placed the part into the Form Wash (filled with Isopropyl Alcohol) to remove excess resin.
-
Curing: Finally, I placed the cleaned baguette into the Form Cure to fully harden the resin using UV light and heat.

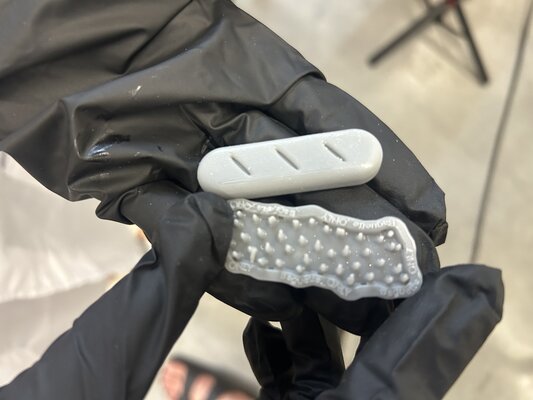
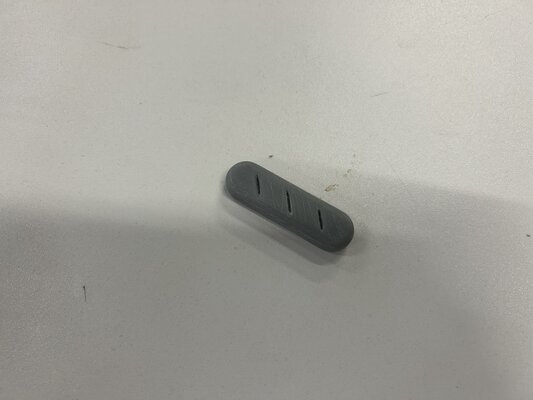
The result is a perfectly smooth baguette, ready for the next stage: MOLDING!
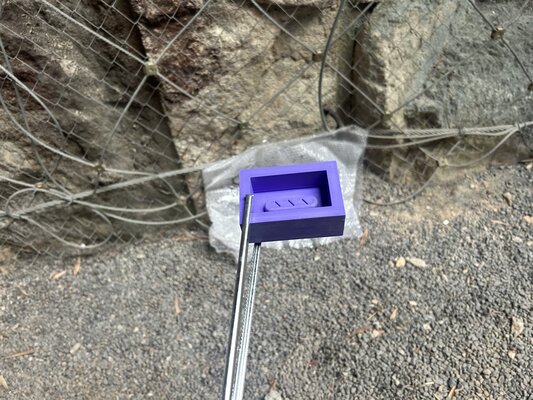
Molding
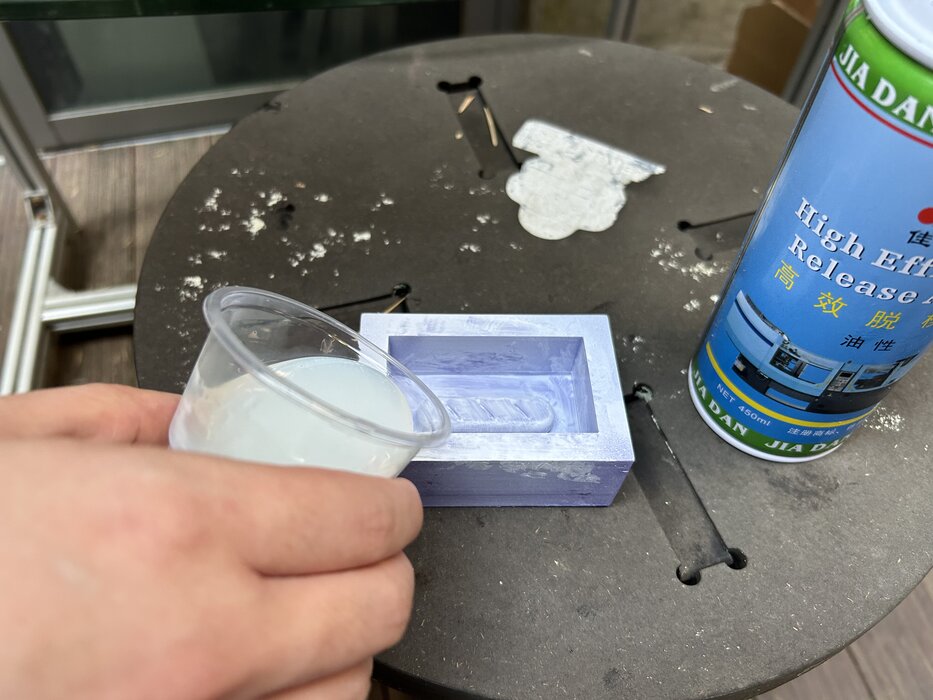
To begin the molding process, I applied a release agent to the 3D-printed parts. This ensures that the silicone can be easily removed from the master model once it has cured.
The Silicone Mixture
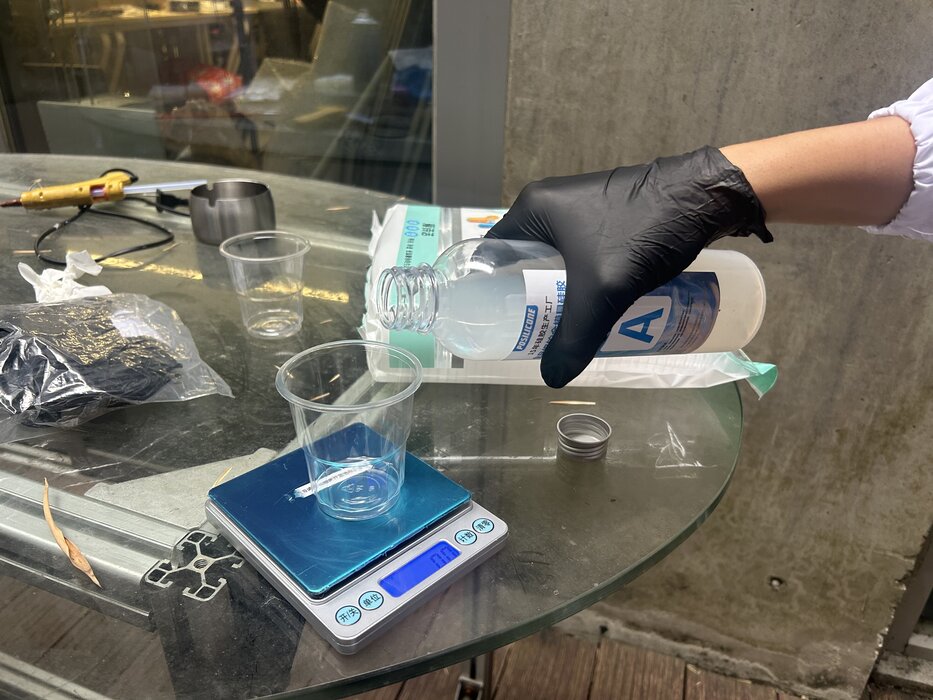
I used a two-part silicone system consisting of a base and a catalyst (the yellow liquid). The catalyst is essential; without it, the silicone will remain in a liquid state.
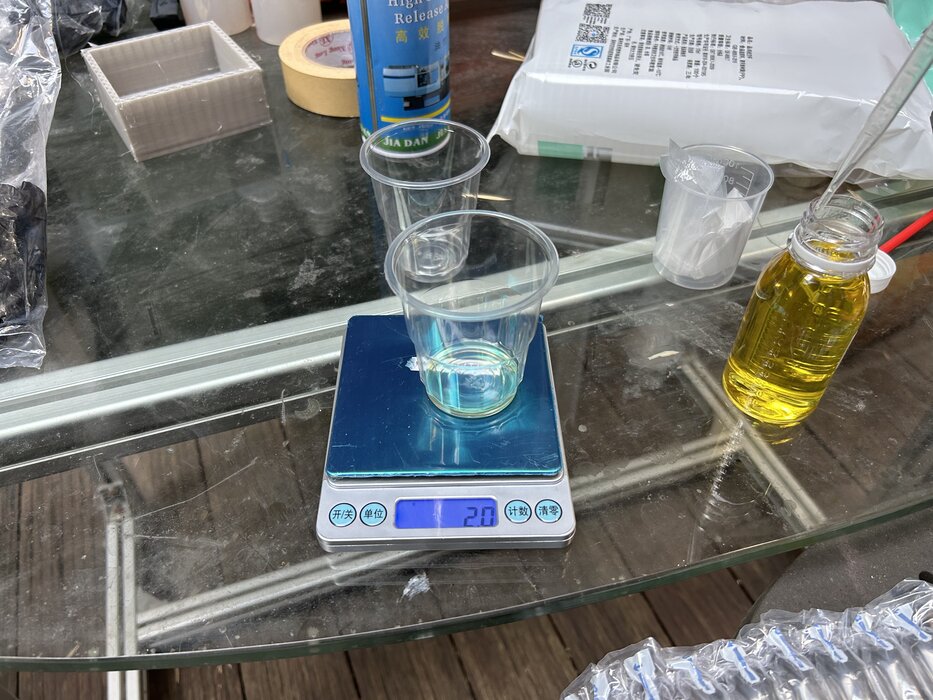
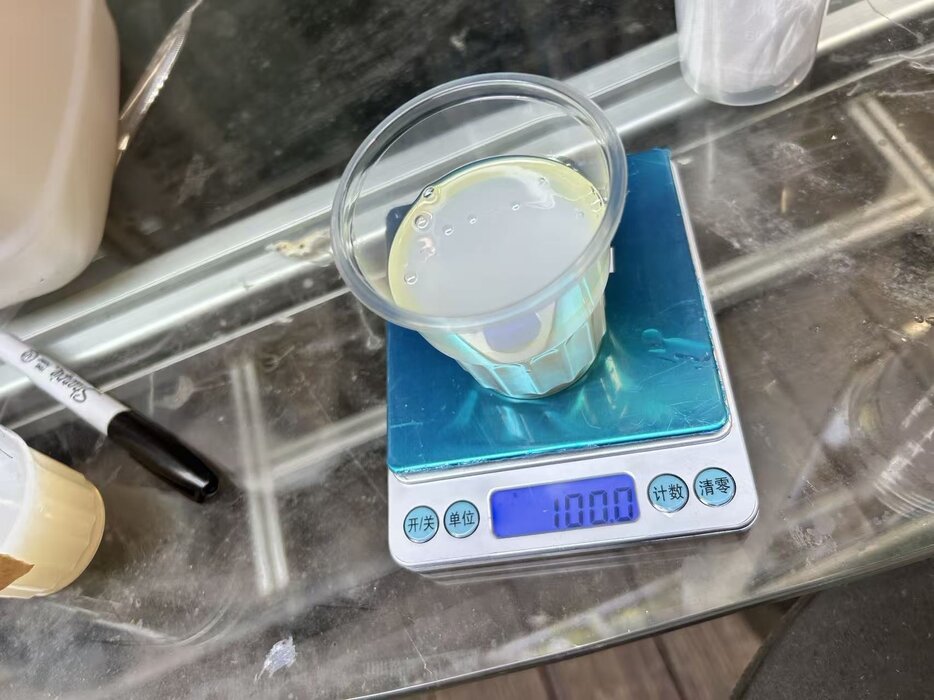
The Ratio: The instructions specified a 50:1 ratio (Example: 100ml of base to 2ml of catalyst).)
Measurement: I used a digital scale for precision.

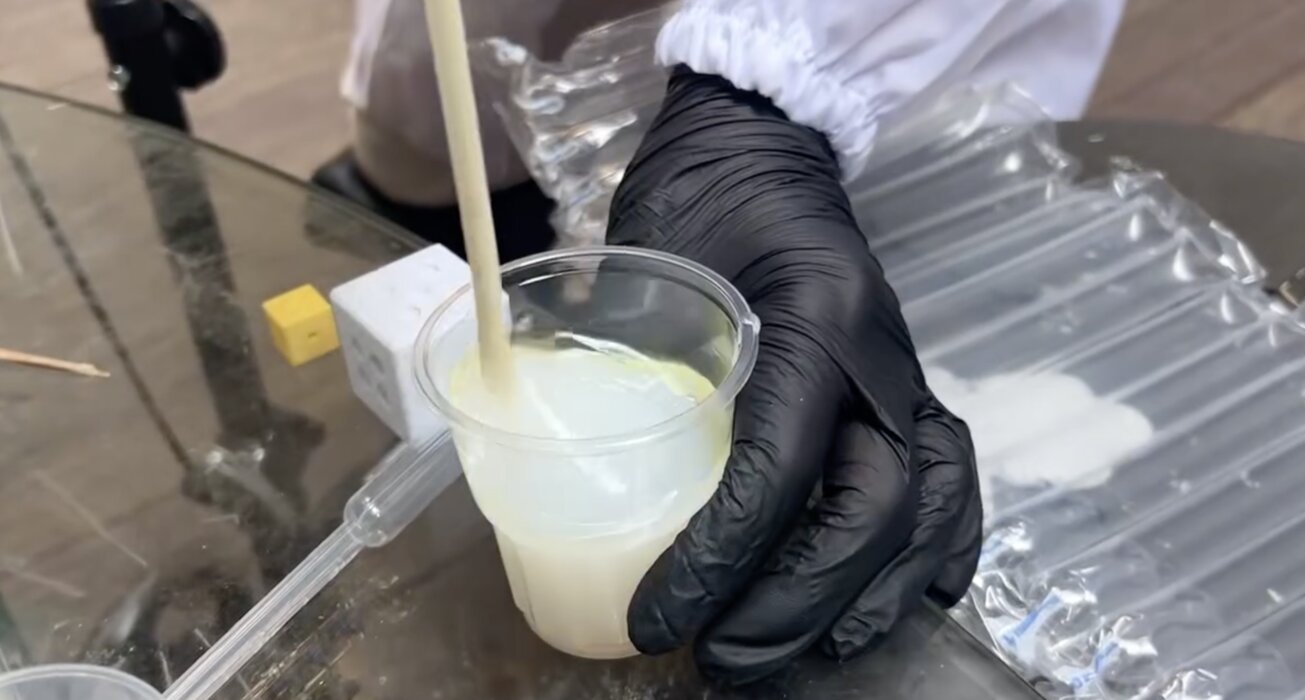
Mixing: I mixed the components thoroughly but gently. Tip: Avoid “scooping” or whipping the mixture, as this introduces air bubbles that can ruin the mold surface.
Pouring the Mold
I poured the mixture into the mold box from one side. This allows the silicone to flow across the model, pushing air bubbles out of the way rather than trapping them.
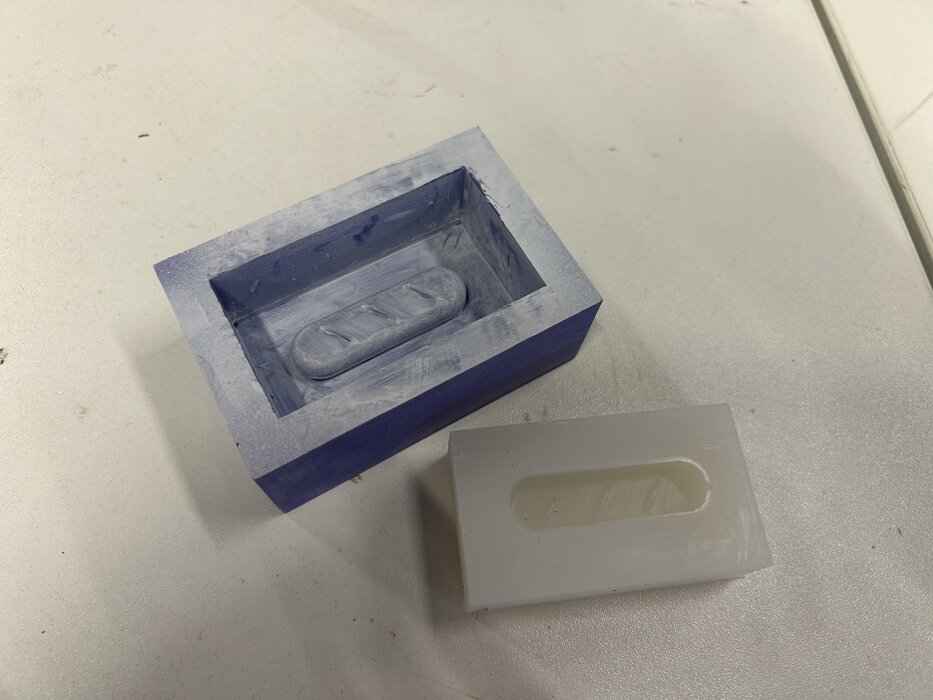
I then let it cure for 24 hours.

Here’s the final result:
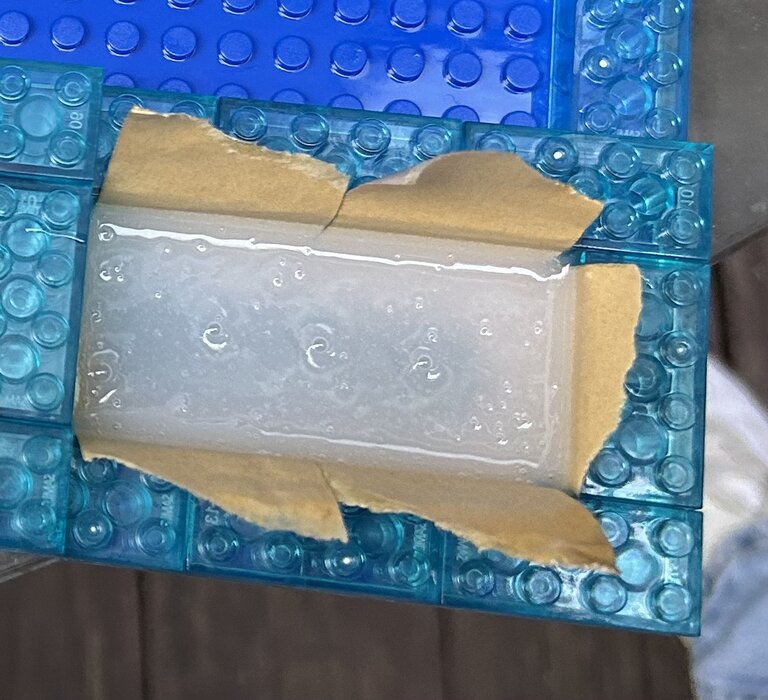
Resin Baguette & LEGO Mold Box
For the resin-printed baguette, I built a mold box using LEGO blocks.
-
I placed tape at the bottom of the LEGO frame.
-
I used a small drop of super glue to secure the resin baguette to the tape. This prevents the model from floating to the top when the heavy silicone is poured in.
-
Demolding: Disassembling the LEGO blocks made it much easier to remove the mold compared to the solid 3D-printed box.
Casting
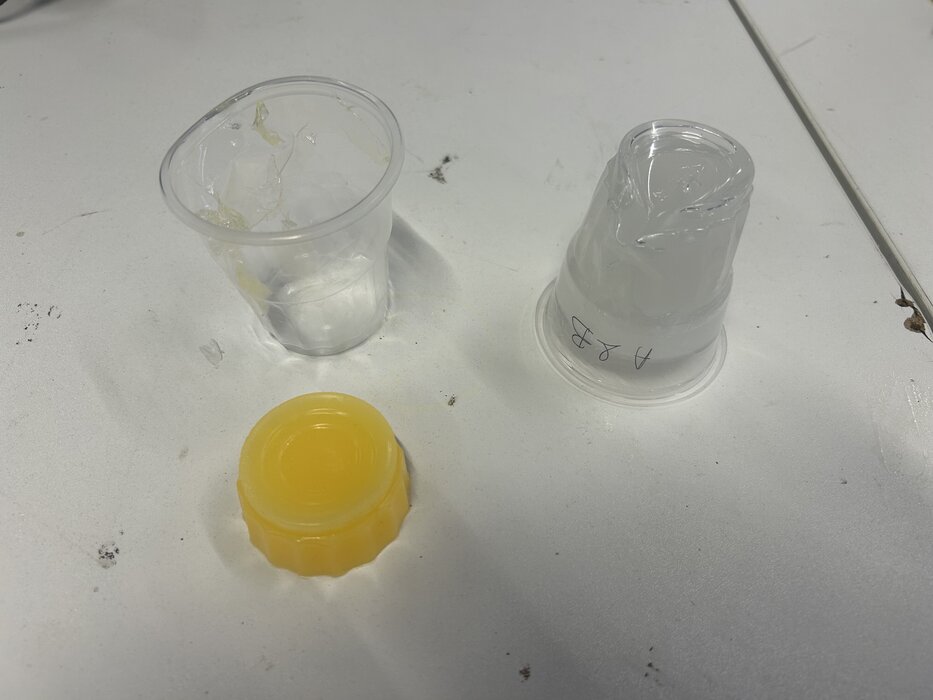
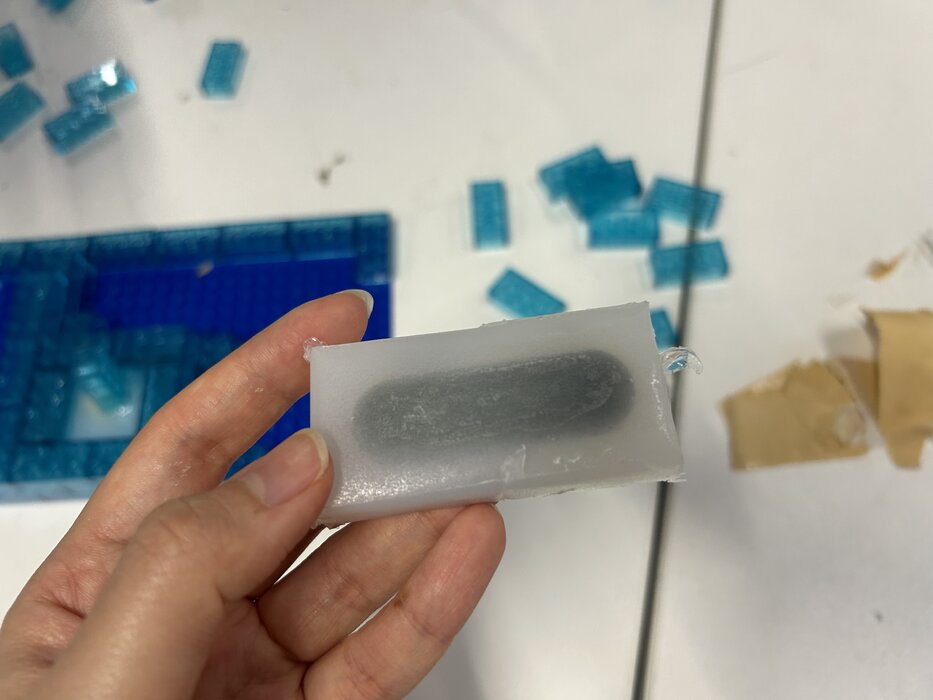
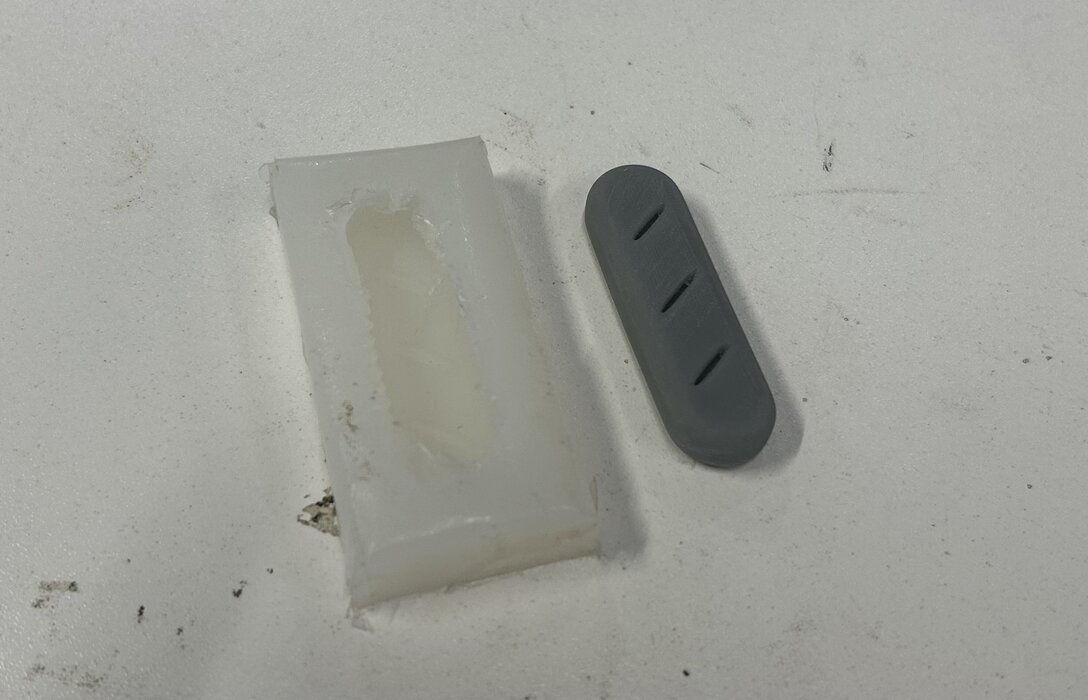
Attempt 1: Platinum-Cure Silicone (AB Silicone)
Lesson Learned: Silicone on Silicone
We initially mistook this for AB Epoxy, but it was actually Platinum-Cure Silicone. We quickly discovered that silicone does not like to be cast into a silicone mold. They tend to bond together or stay sticky.
Brand: Posilicone (Food-grade platinum silicone)
Ratio: 1:1 (Example: 100ml of Part A to 100ml of Part B).
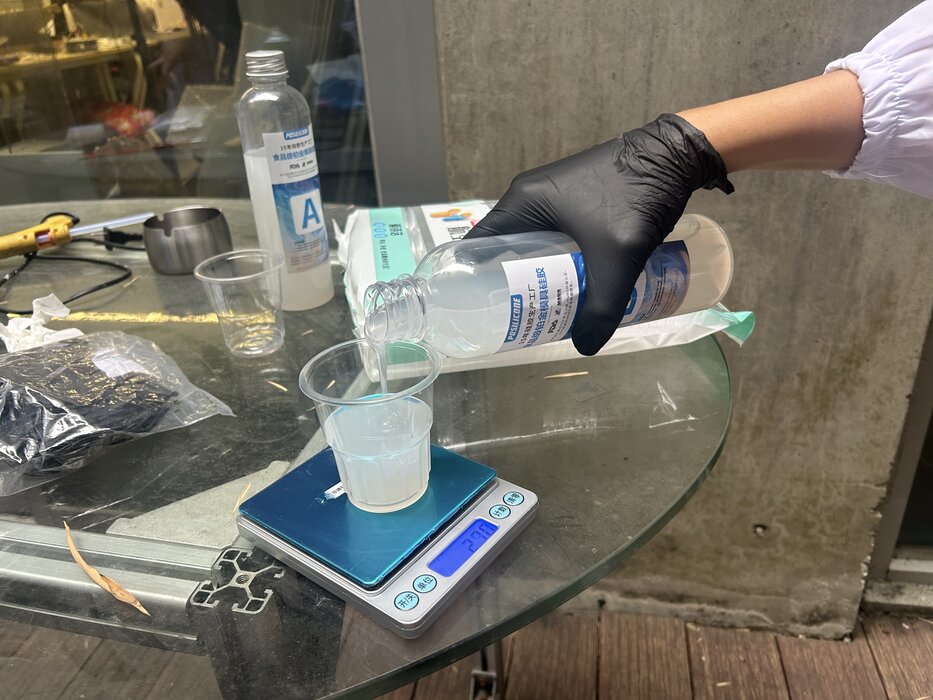
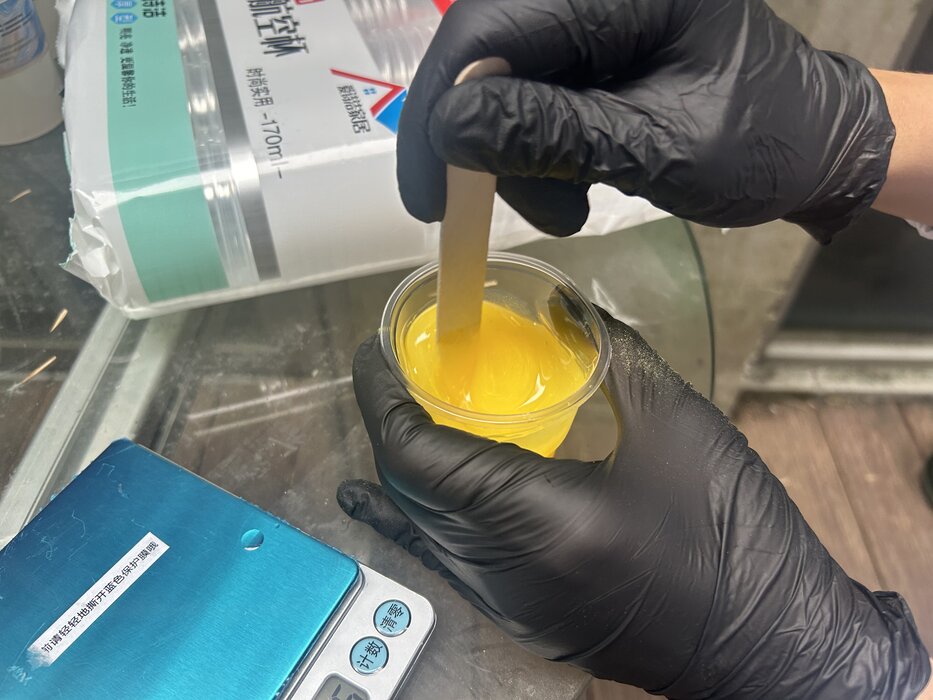
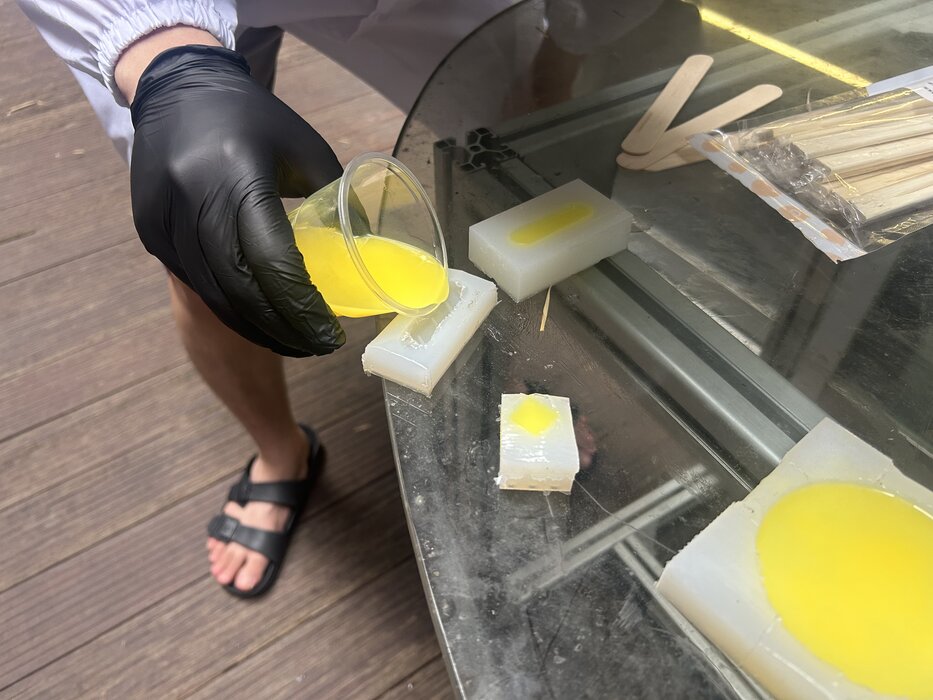
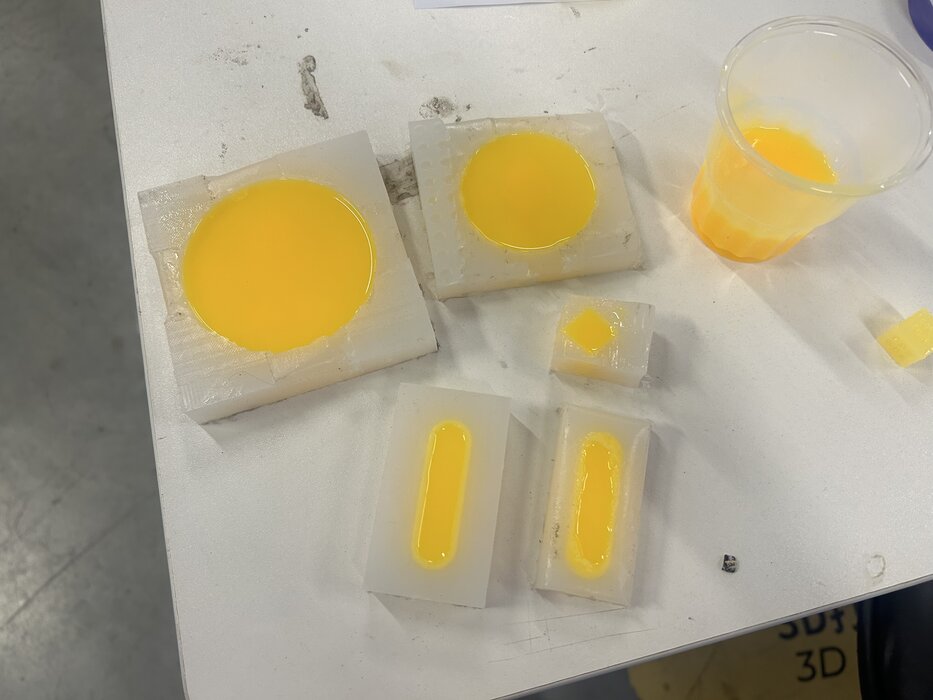
Additive: I added yellow fluorescent pigment to make the final baguette glow in the dark.
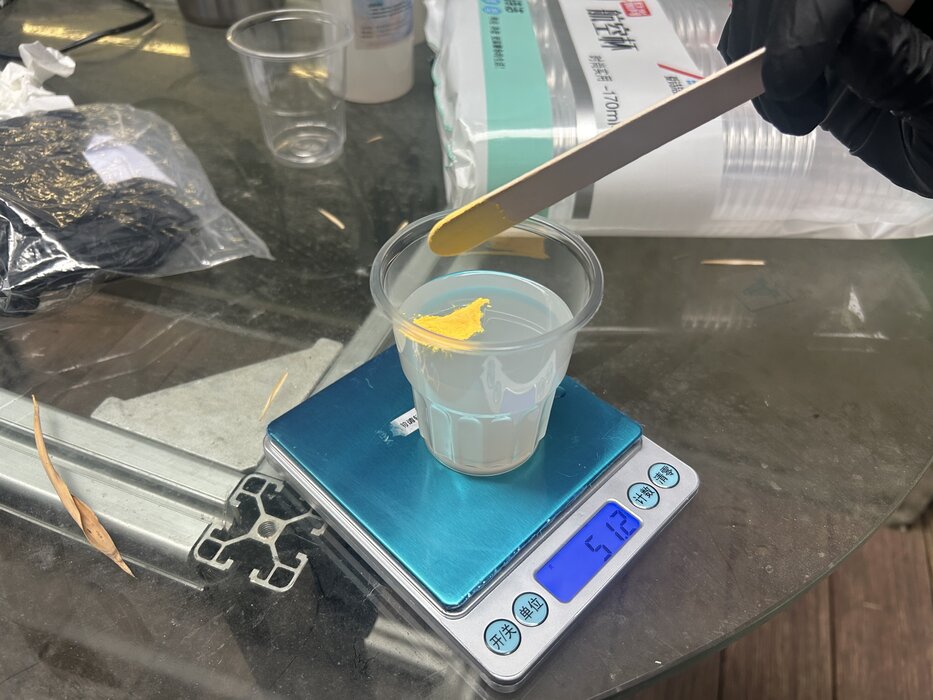
Mixing: Mixed gently for 2 minutes to ensure a streak-free color without adding bubbles.
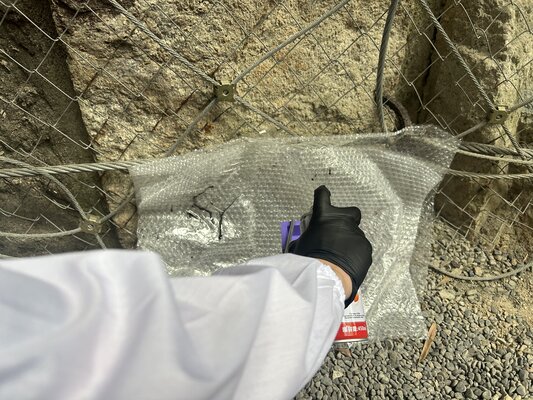
And then we sprayed the release agent:

We poured the mixture to the mold:
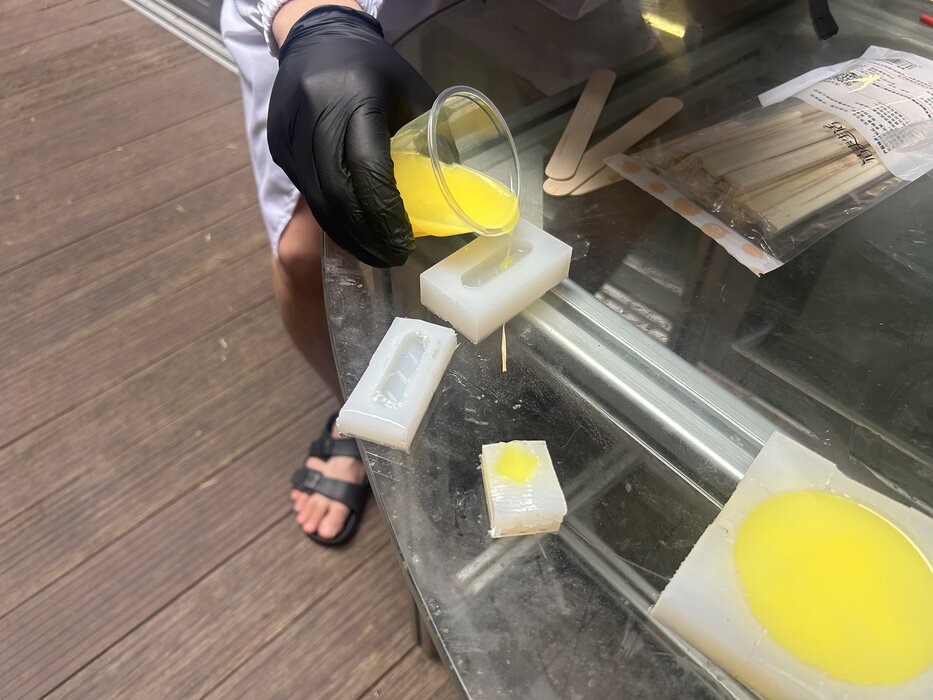
The Result:
The casting turned out very sticky and didn’t cure properly.
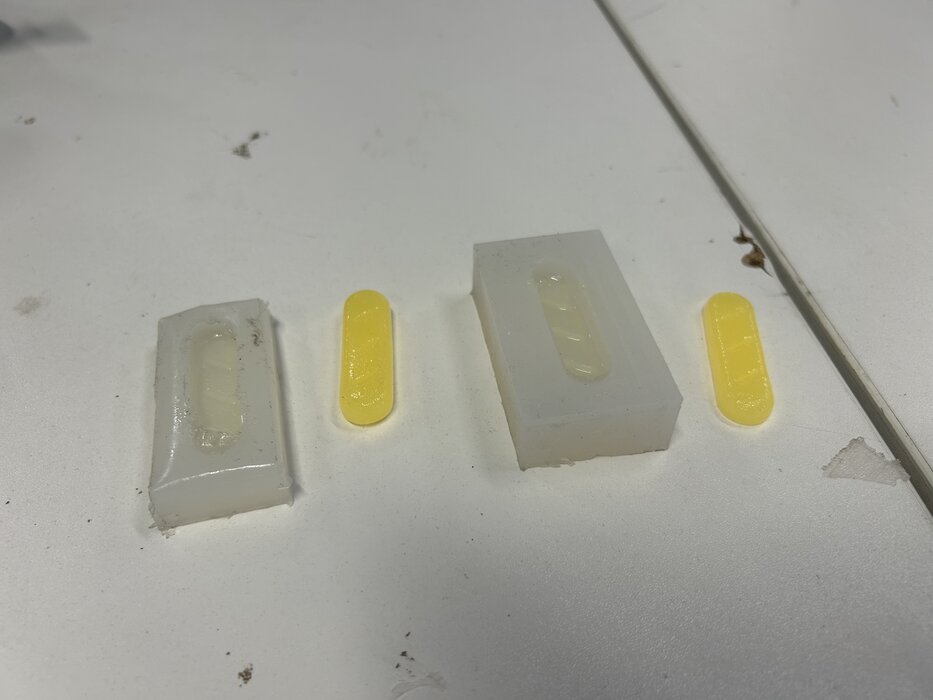
To troubleshoot, we repeated the process without the spray release agent to see if the spray was the cause of the reaction, but the results remained the same.
Conclusion
In conclusion, the failure to cure was most likely due to the chemical affinity between the silicone mold and the silicone casting. Casting identical materials into one another often leads to permanent surface bonding or cure inhibition, resulting in the tacky finish I experienced.