Week17 - Wildcard Week – Diving into Digital Embroidery
A huge shoutout to Emily for her incredibly patient guidance this week! For my Wildcard assignment, I decided to explore the world of digital embroidery. I went through the entire workflow—from figuring out the machine and testing built-in patterns, all the way to designing my own Chinese character "Fu" (福). Here is how the journey went.
1. Getting Everything Ready: The Machine and Materials
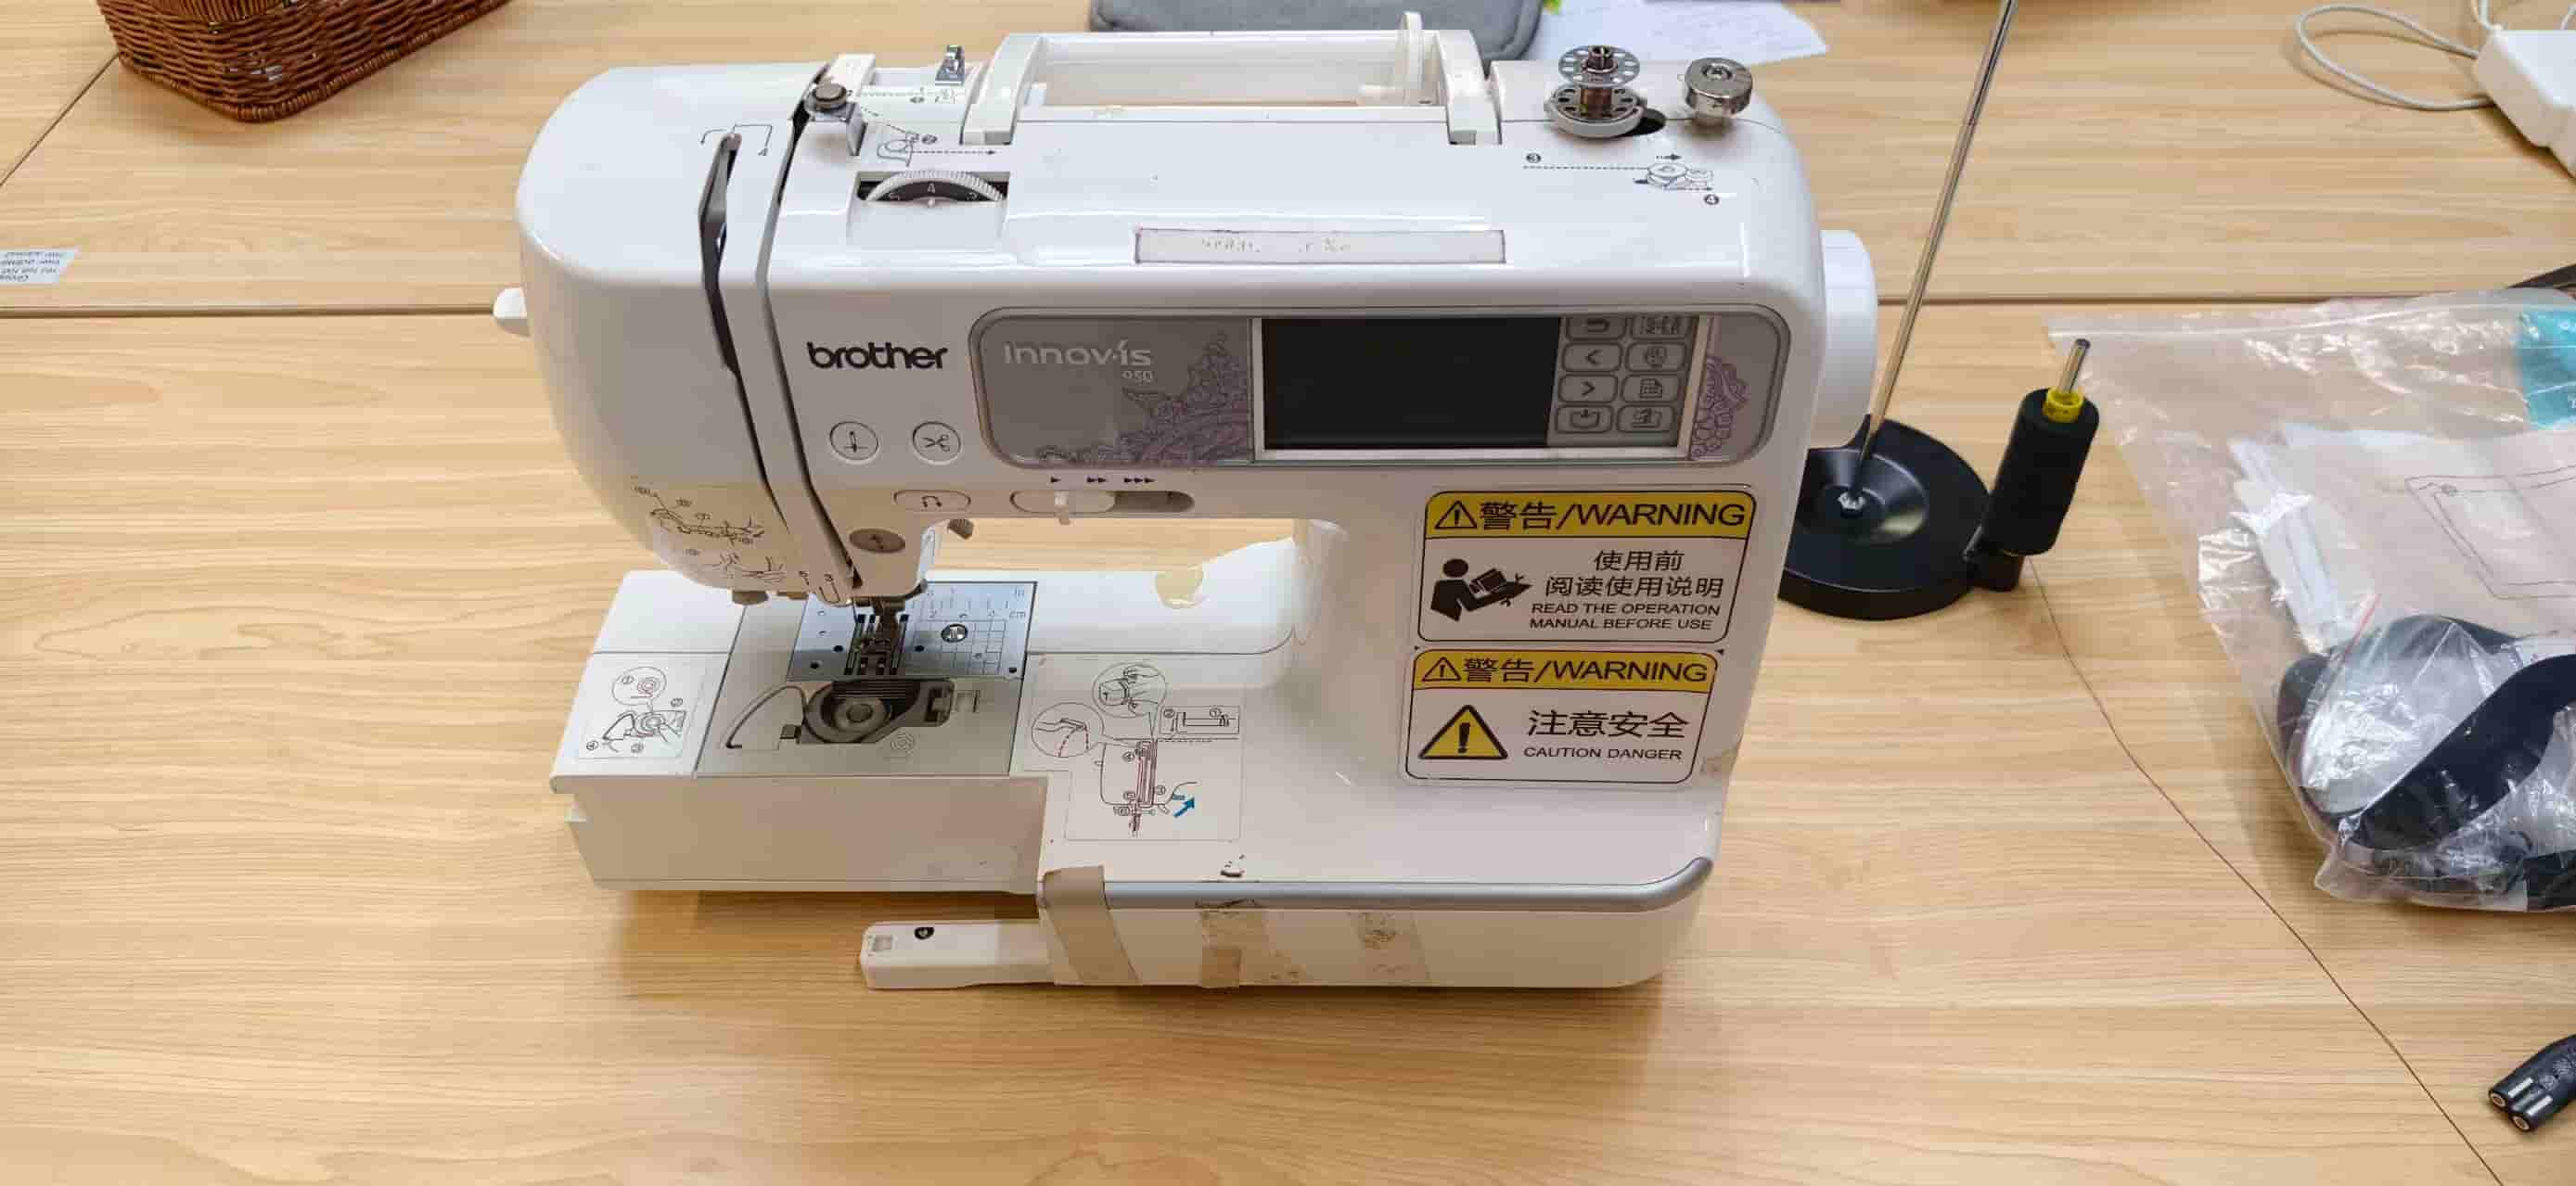
The Star of the Show: The Brother Embroidery Machine Basically, a digital embroidery machine reads specific stitch files and moves the embroidery hoop precisely along the X and Y axes. Coordinated with the needle moving up and down, it automatically stitches and fills complex designs on the fabric. You can control stitch types, density, and direction, making it perfect for custom patterns or even prototyping e-textiles!
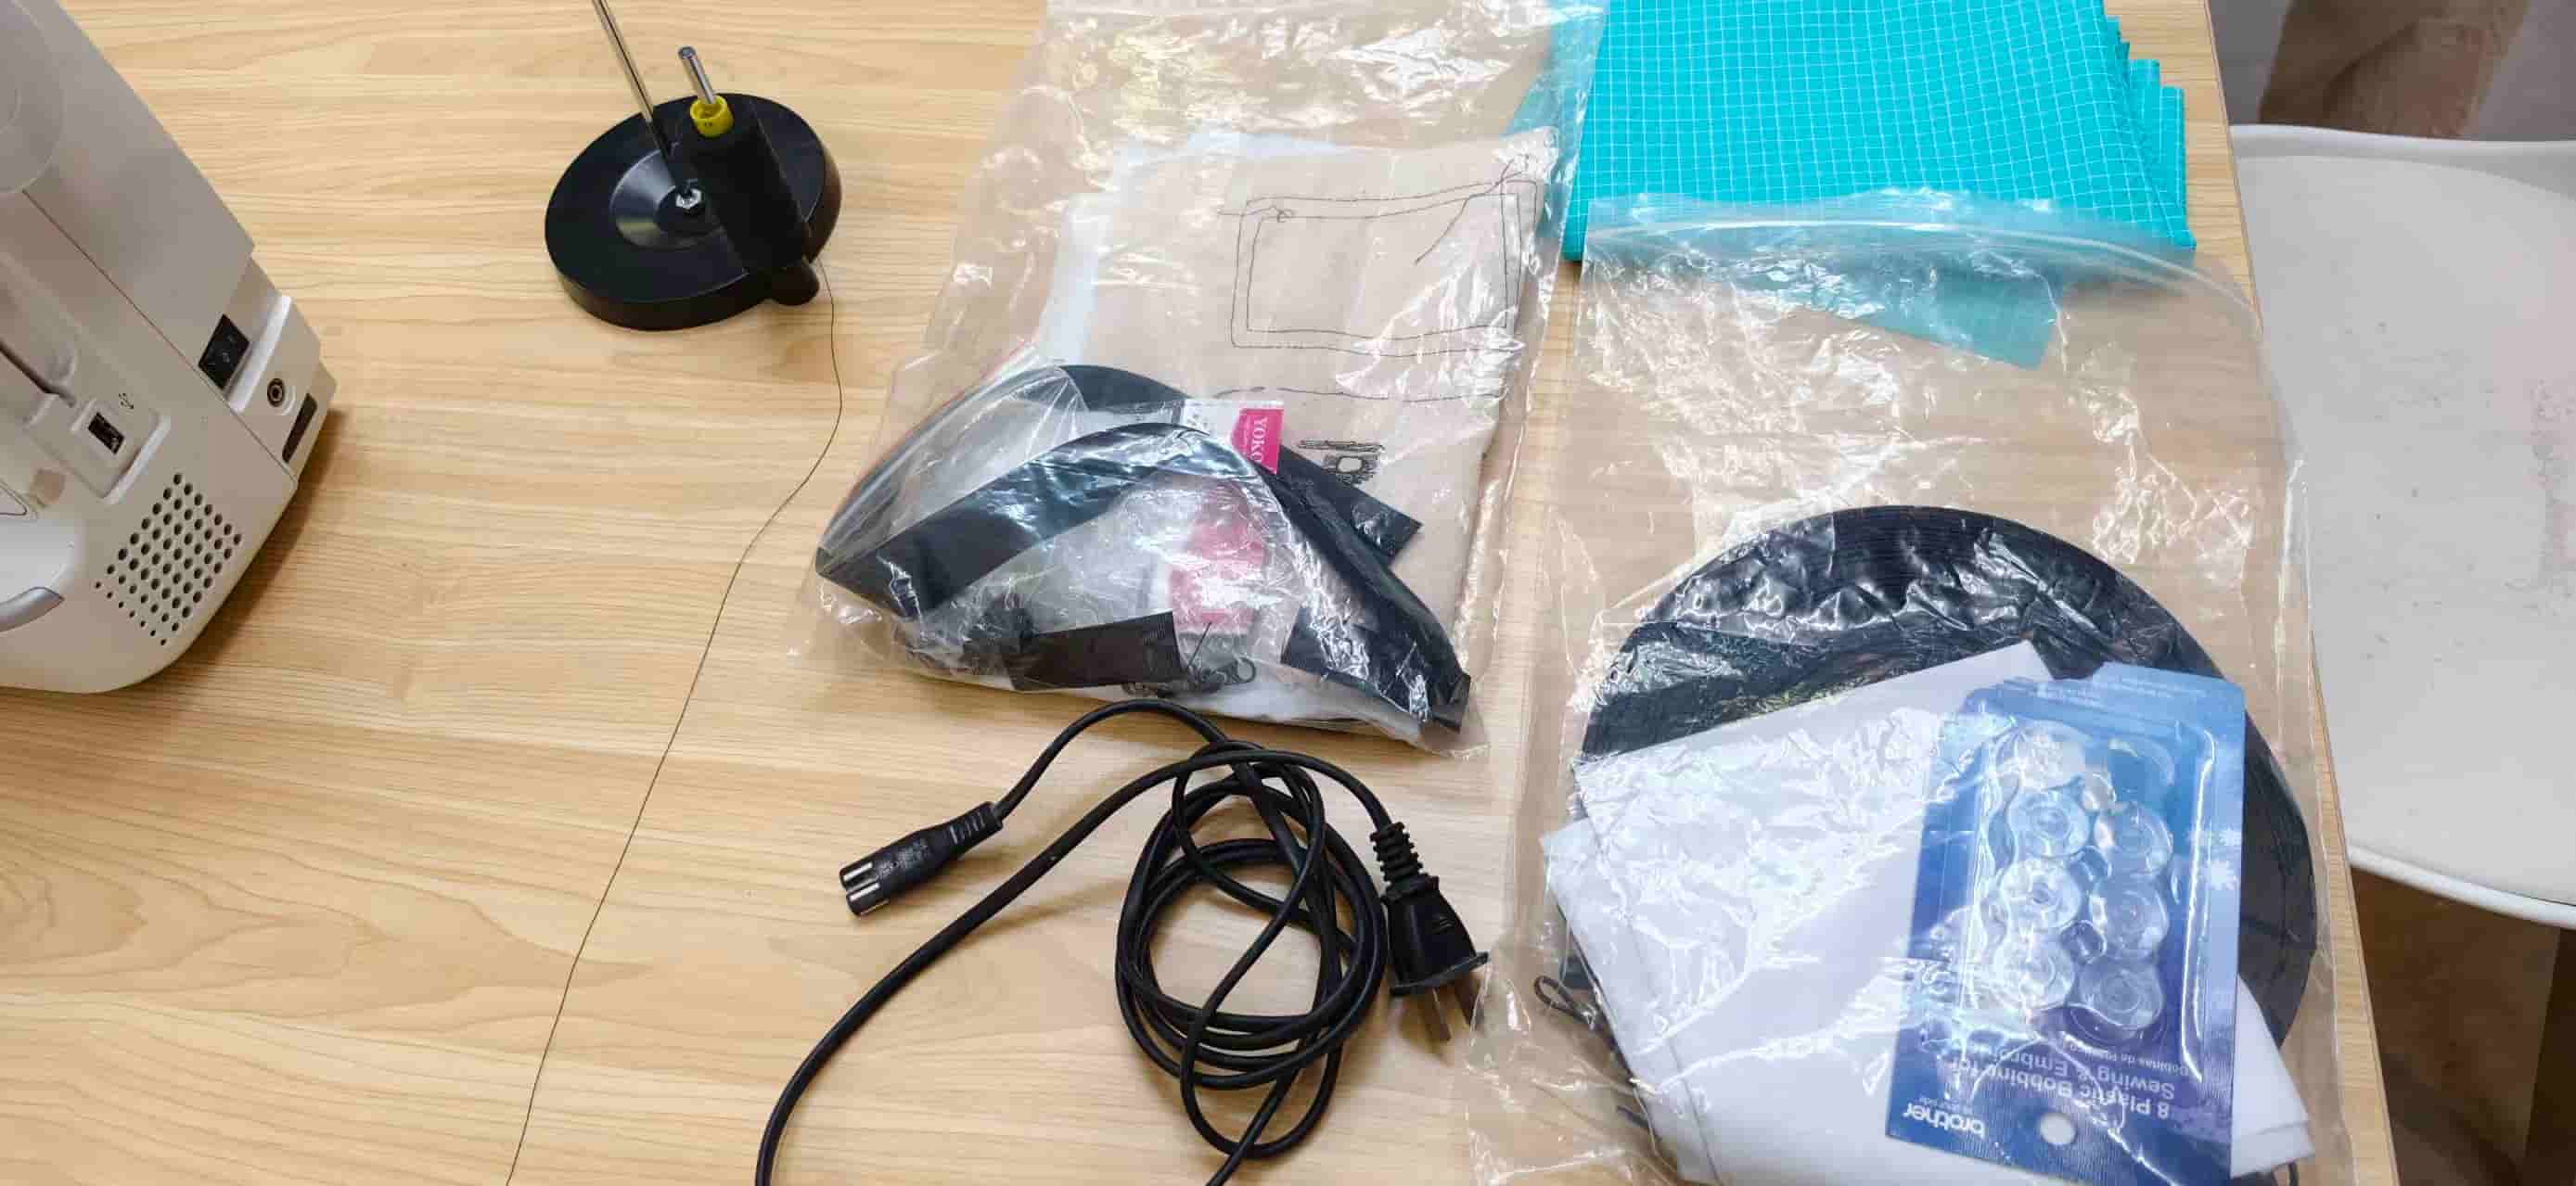
What I Gathered:
- A piece of white fabric as my canvas.
- Stabilizer paper (this goes underneath to keep the fabric taut and prevent wrinkling).
- Embroidery threads: a black one for the top and a white bobbin thread for the bottom.
- Scissors, spare needles, and the embroidery hoop.
2. Setting Up and Running the First Tests
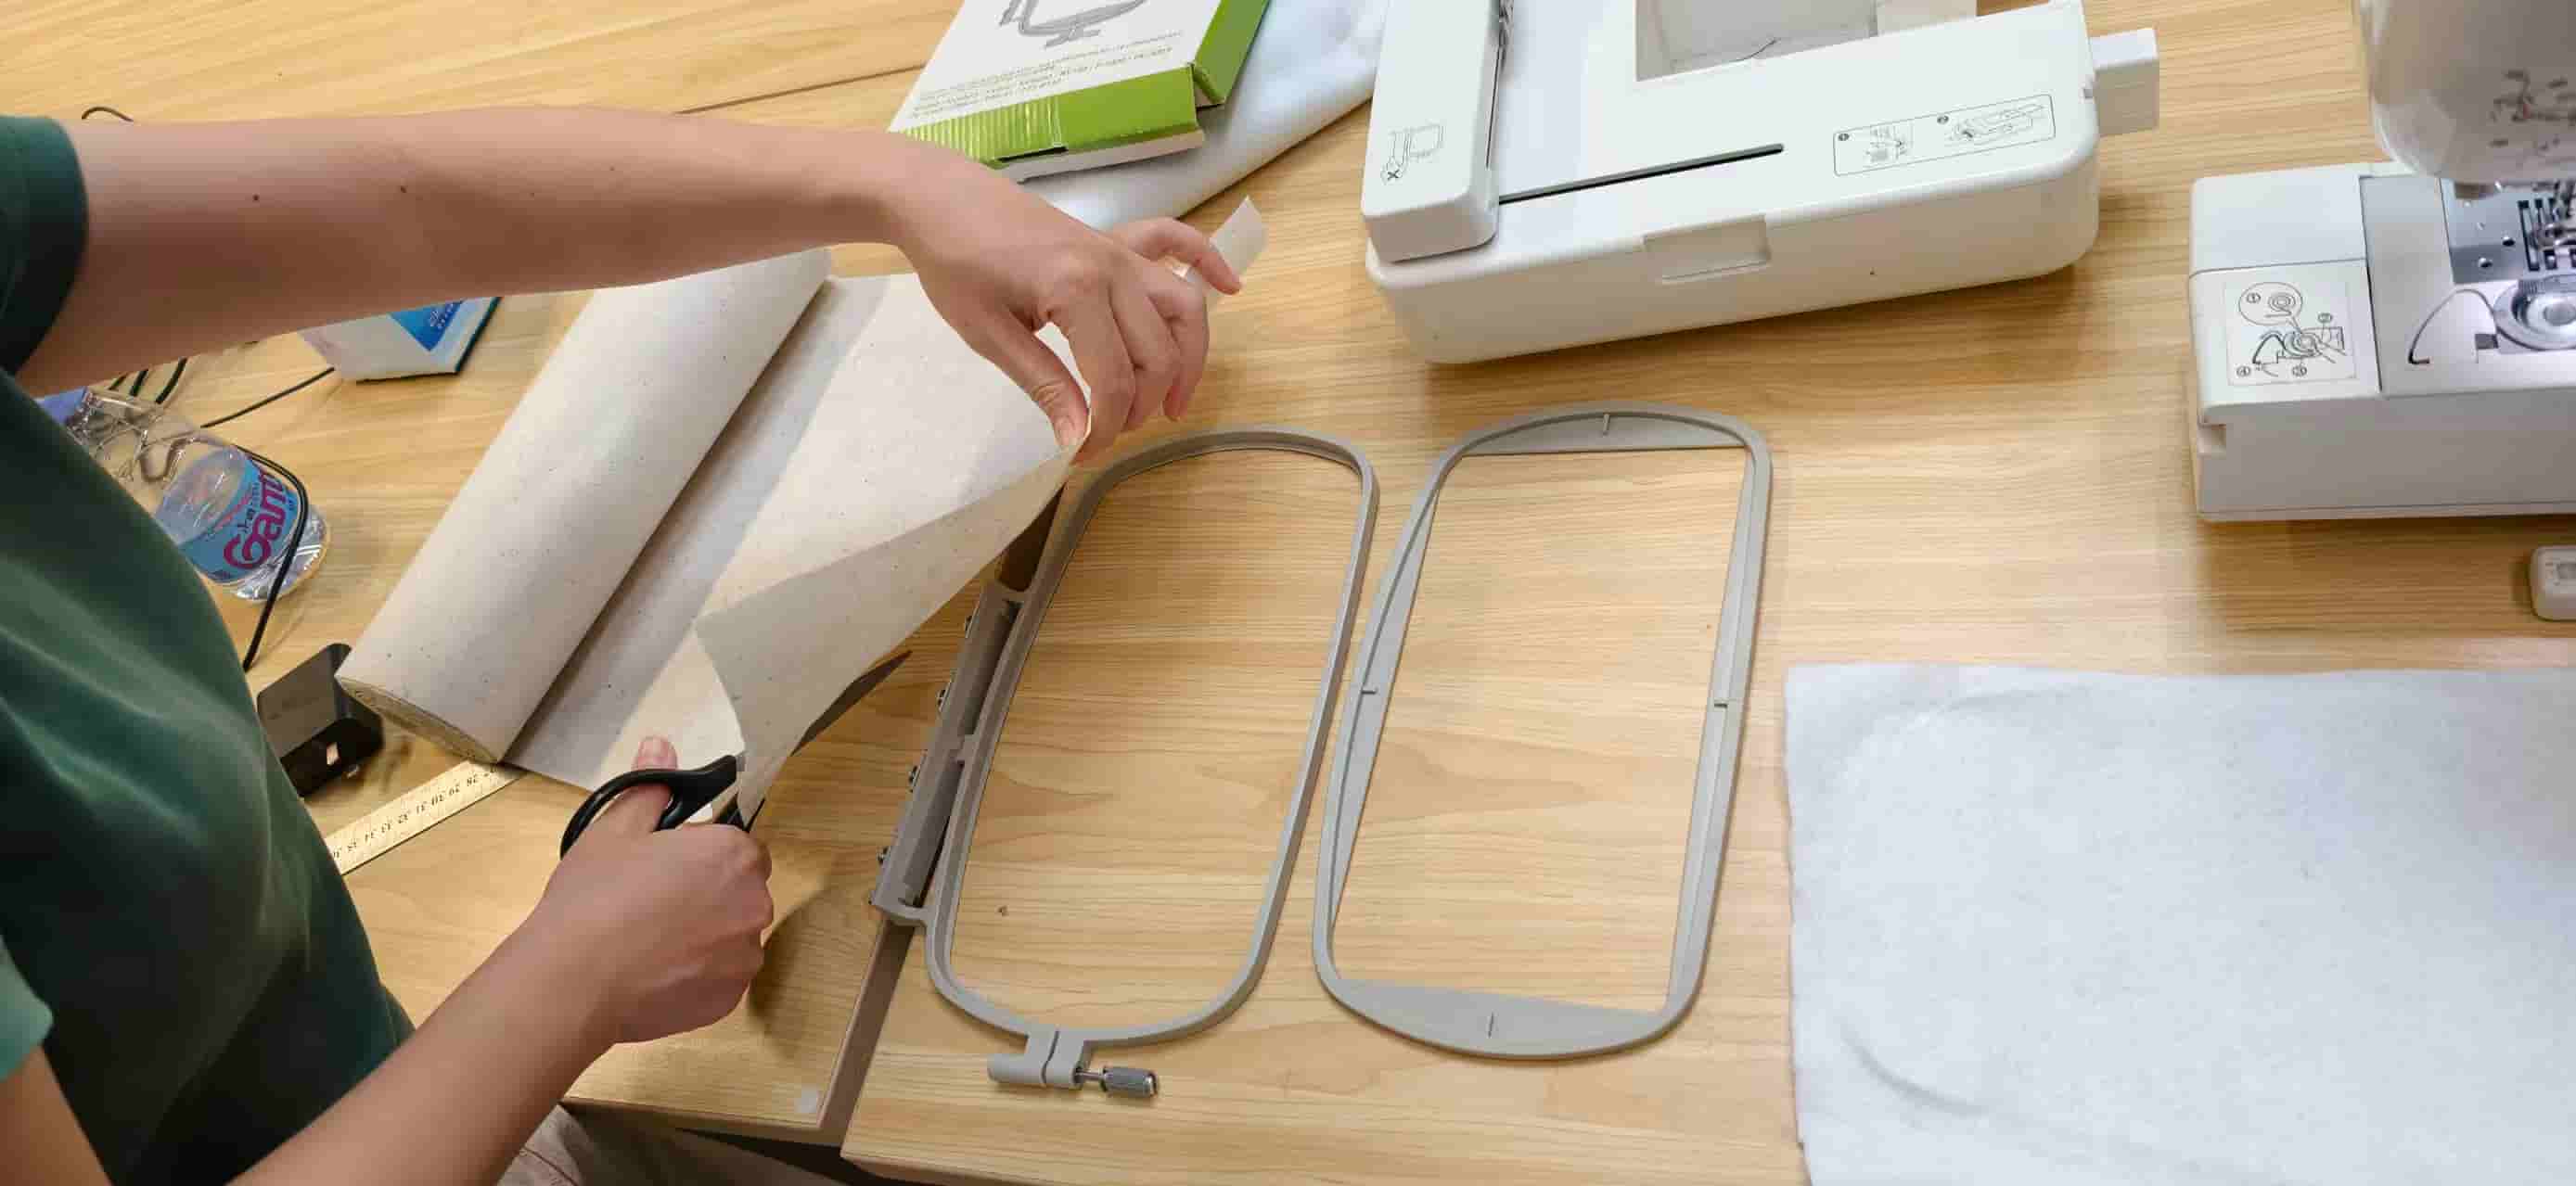
First, I found a stable spot for the Brother machine and plugged it in. Then came the tricky part: hooping the fabric. I cut the fabric and the stabilizer slightly larger than the hoop, sandwiched them together, and pressed down hard to lock them in. Then there's a rotary knob, make it tight as you can.
Next, I slid the loaded hoop into the machine's guide rails. The needle mechanism kind of gets in the way here, so I had to press the release button underneath and manually wiggle it into place until it clicked.
Threading the machine was a step-by-step process. I popped the white bobbin thread into the bottom slot, then followed the 1-to-5 arrow guides on the machine body to thread the black top thread through the tension disks, the take-up lever, and finally the needle eye.
Once I turned it on, I spent some time playing with the touchpad to get the hang of it. I picked a simple built-in letter design and used the Layout feature to tweak its position. (You can also just physically move the hoop at the very beginning to set your origin.)
Before hitting start, I double-checked that the needle screw and the presser foot were securely tightened. The start button turns yellow when everything is good to go, and red if something is wrong (like if you forgot to lower the presser foot).
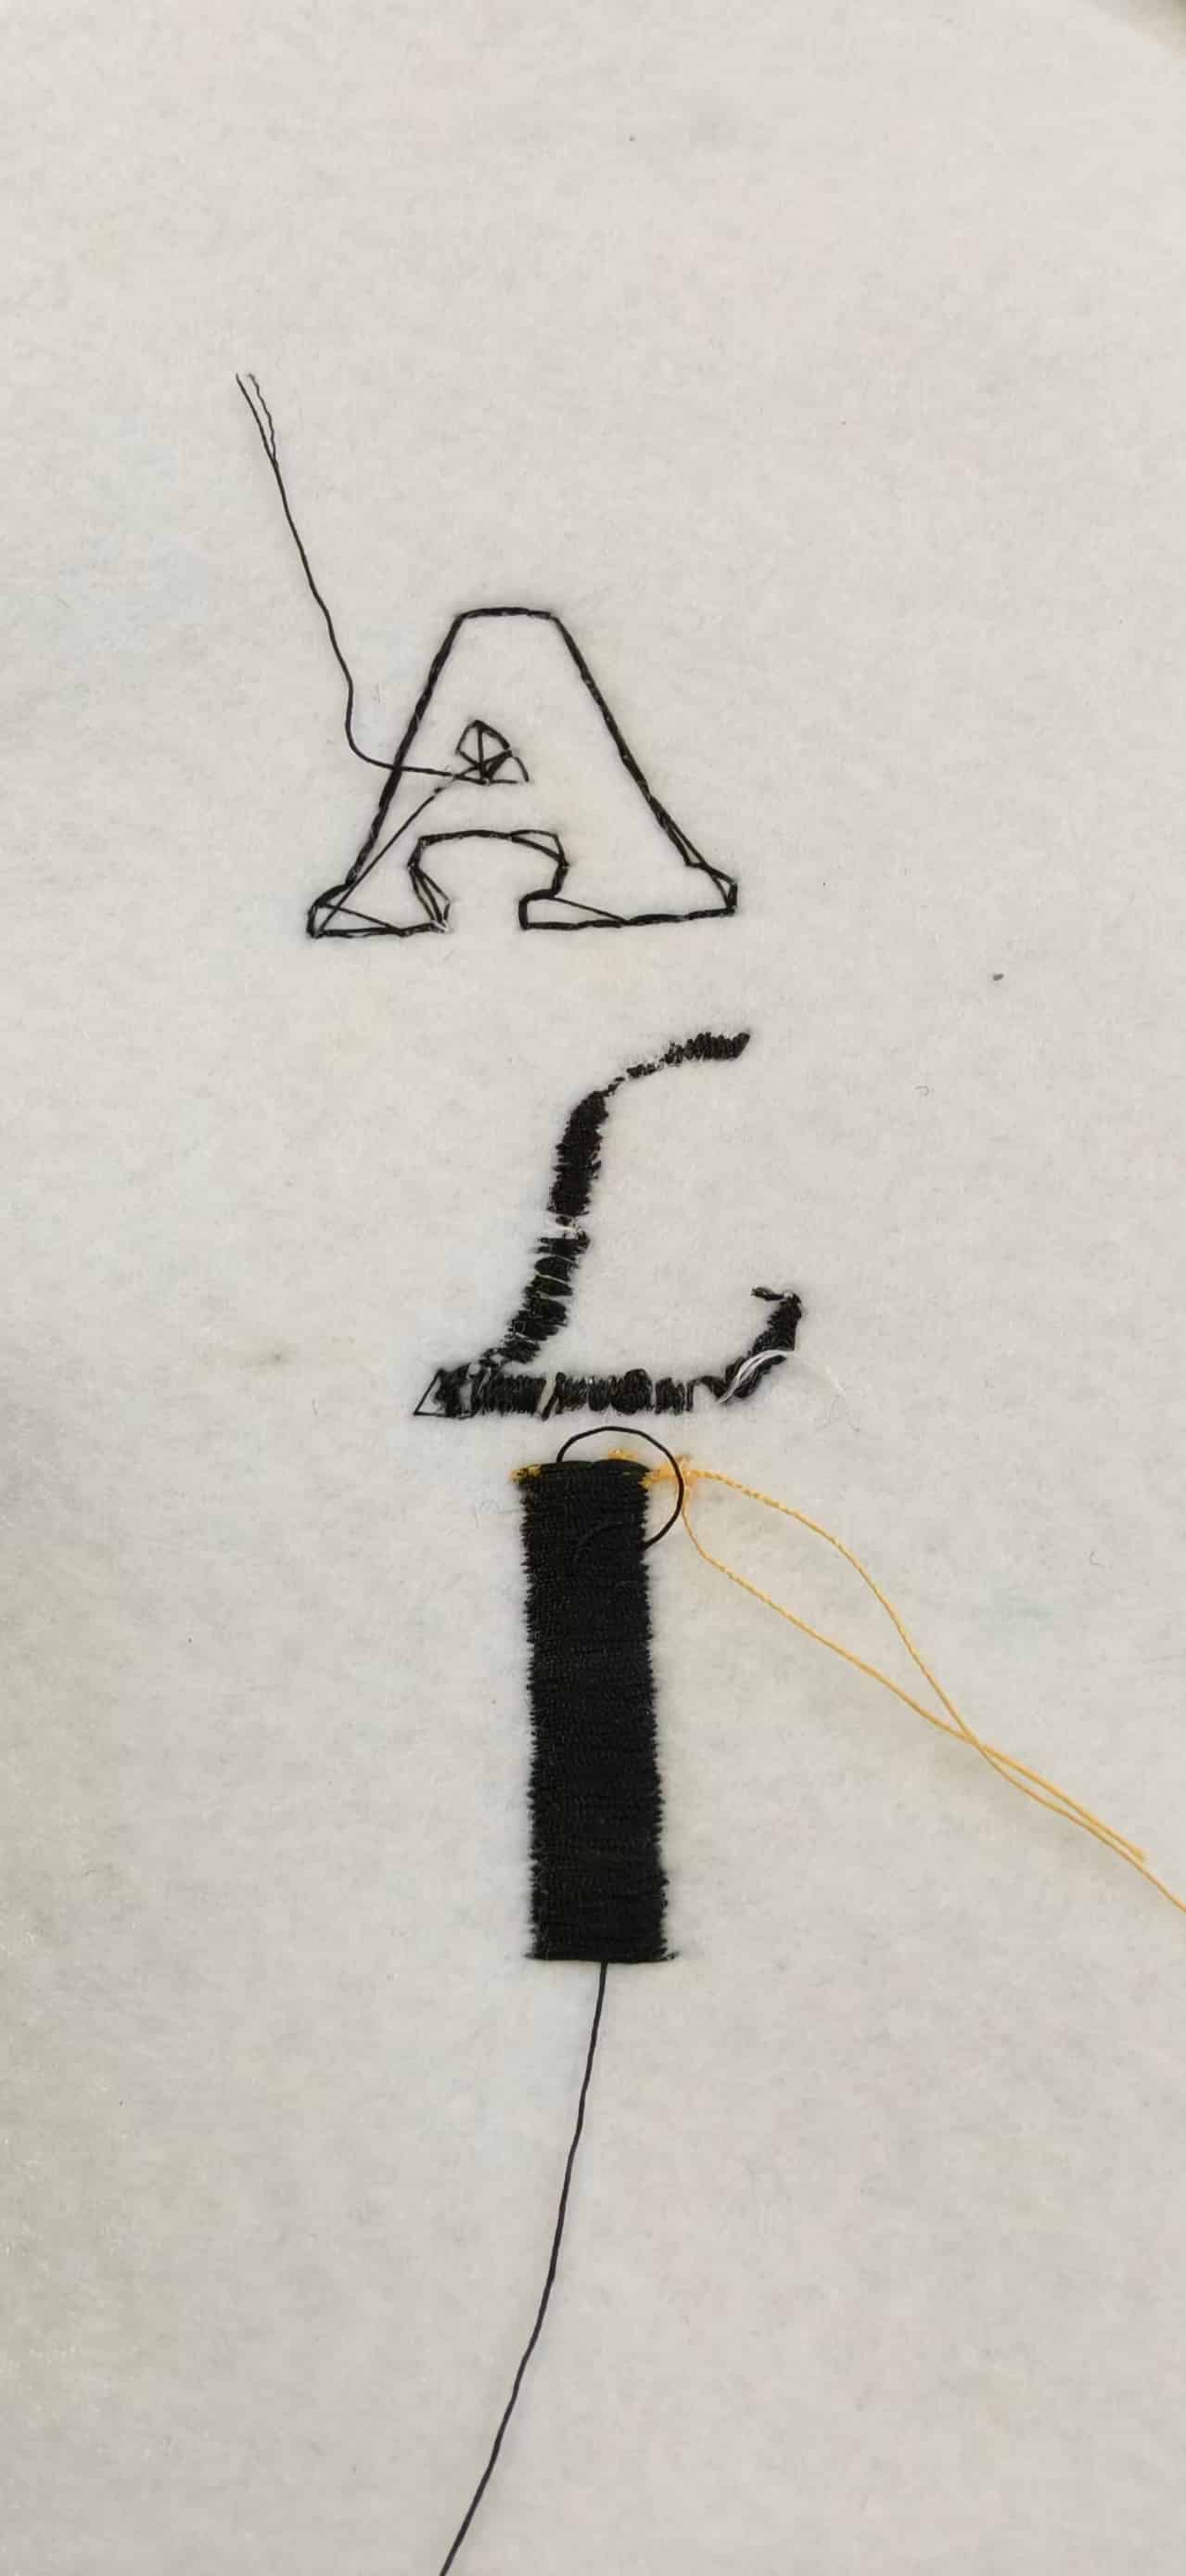
I hit that yellow button and tested three different letter styles: hollow, italic, and solid.
- My observation: The machine starts off pretty slow for the first 3 to 5 seconds, but then it completely takes off! Because I used black thread on top and white on the bottom, it almost looked like double-sided embroidery—it had this really premium, finished look to it.
3. Making It My Own: The "Fu" (福) Design
After the basic tests, I wanted to stitch something meaningful, so I decided to design the Chinese character "Fu" (good fortune).
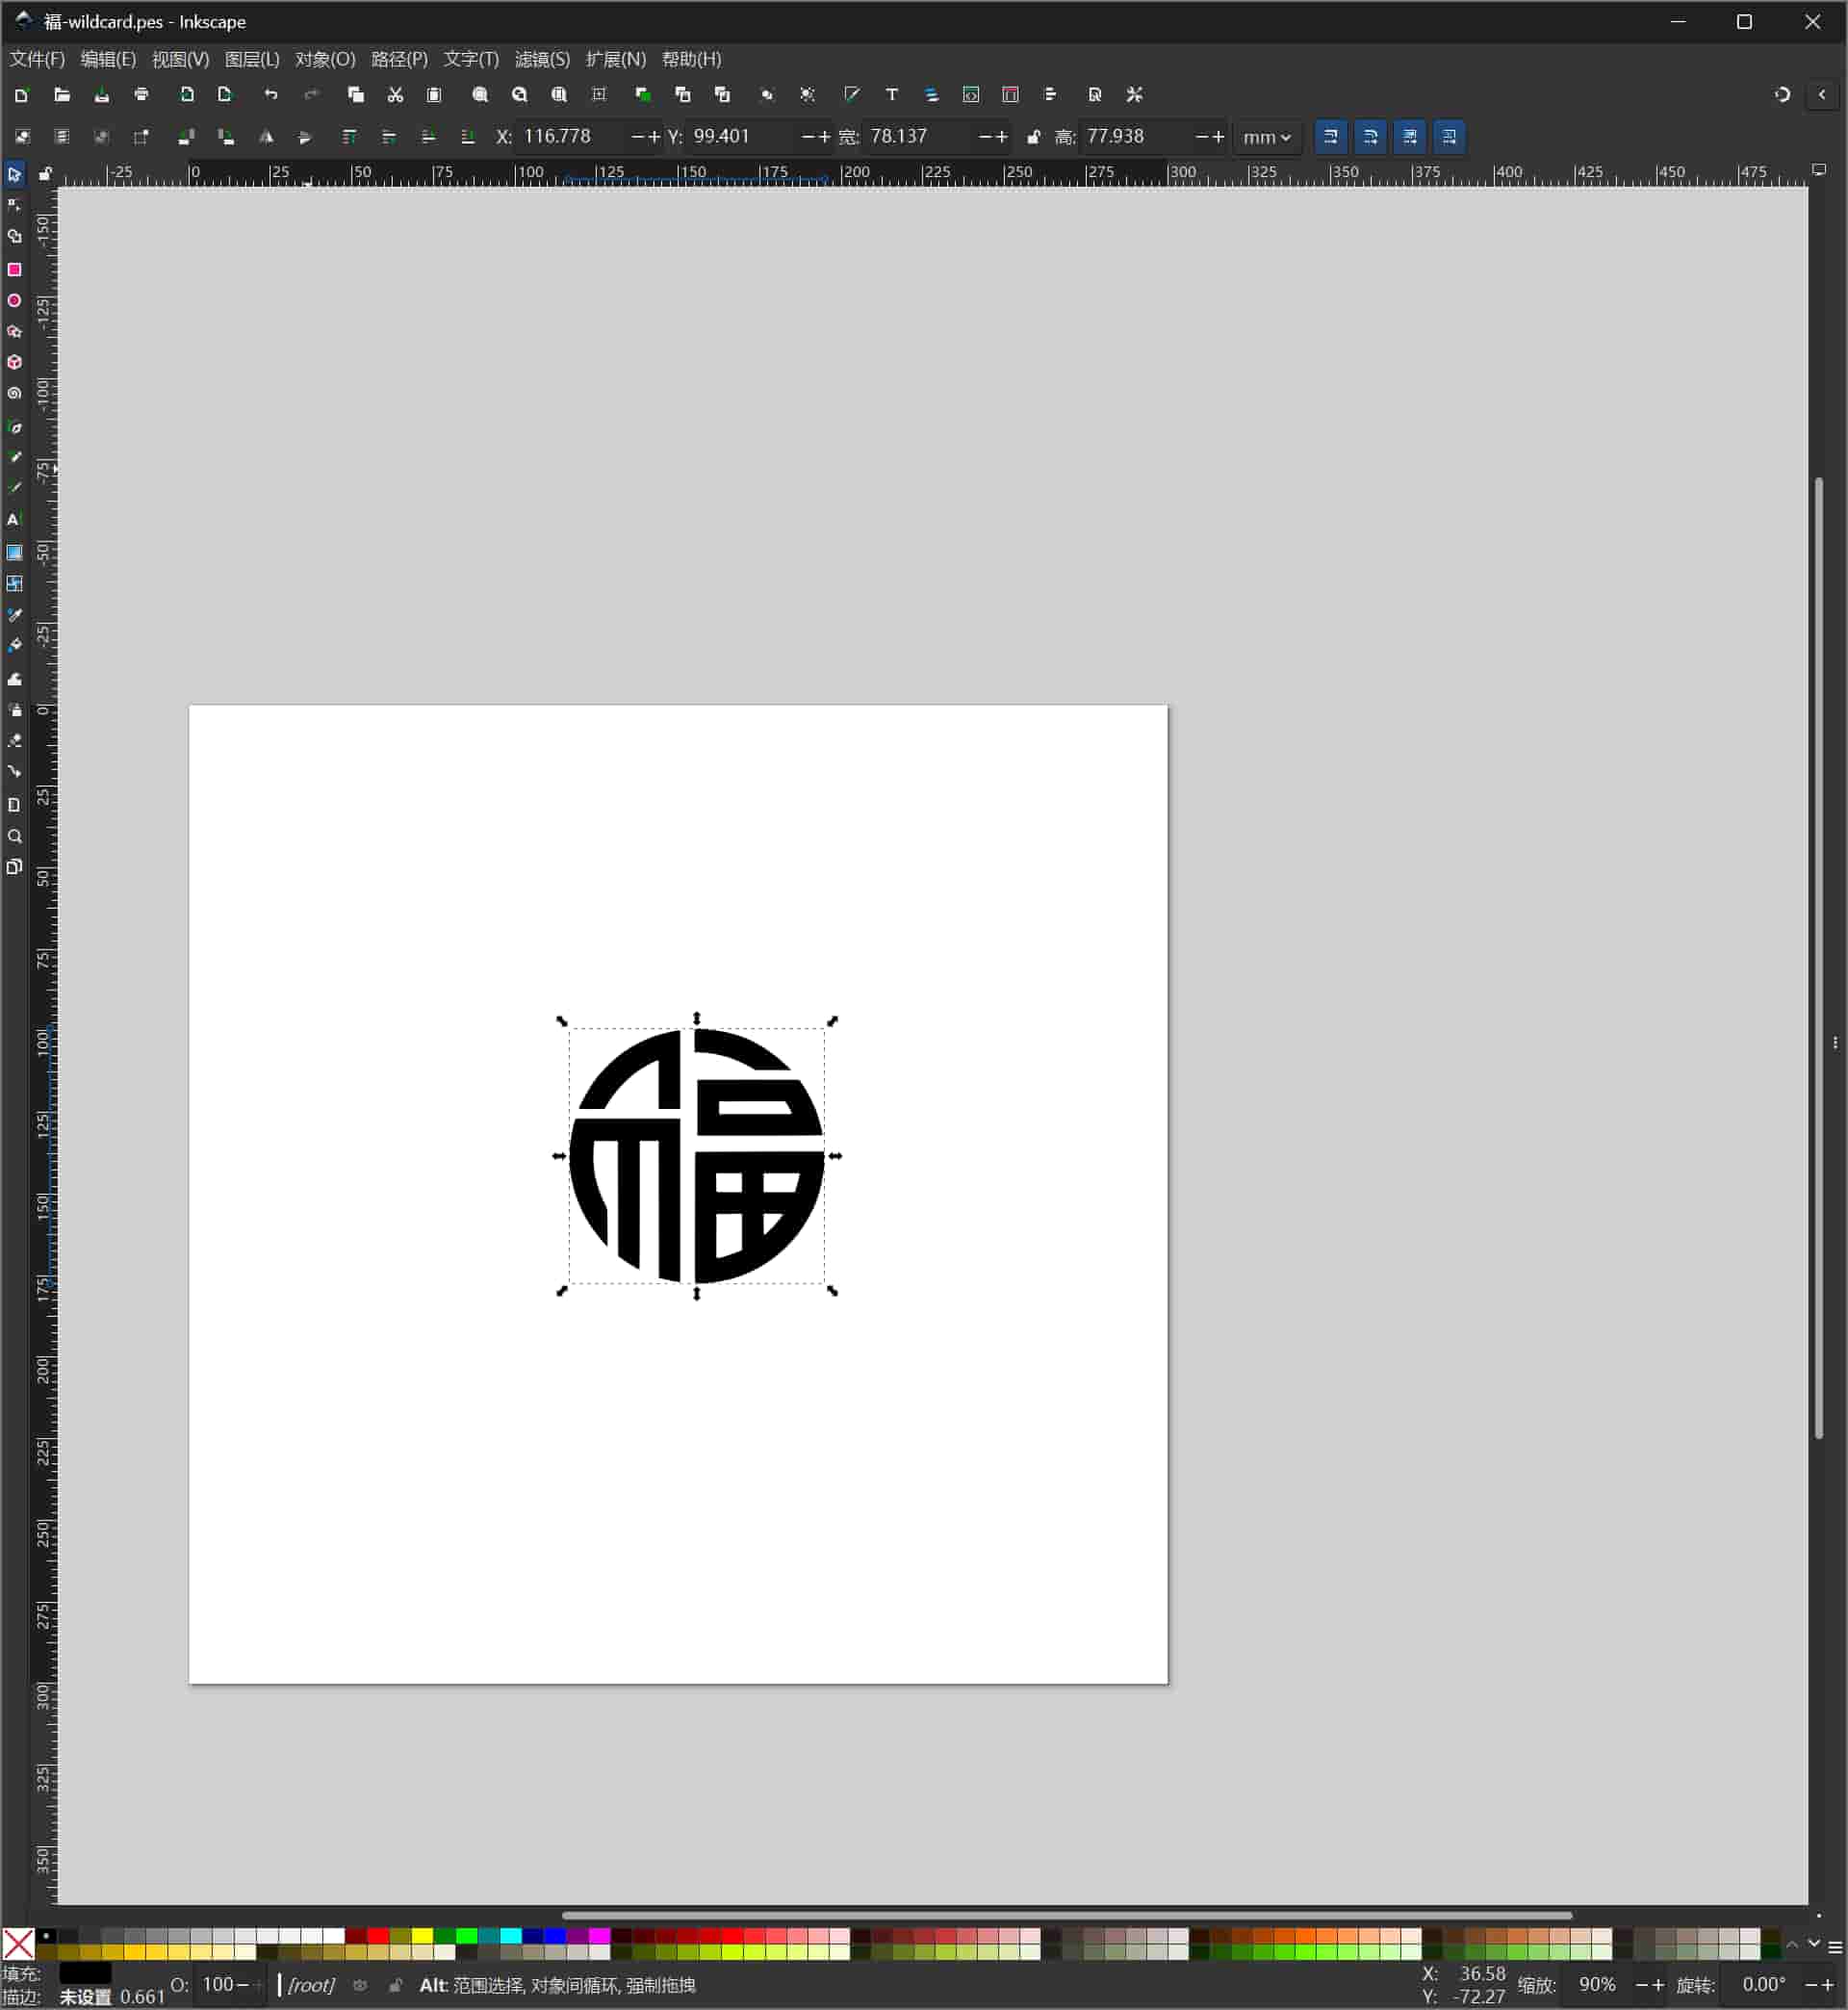
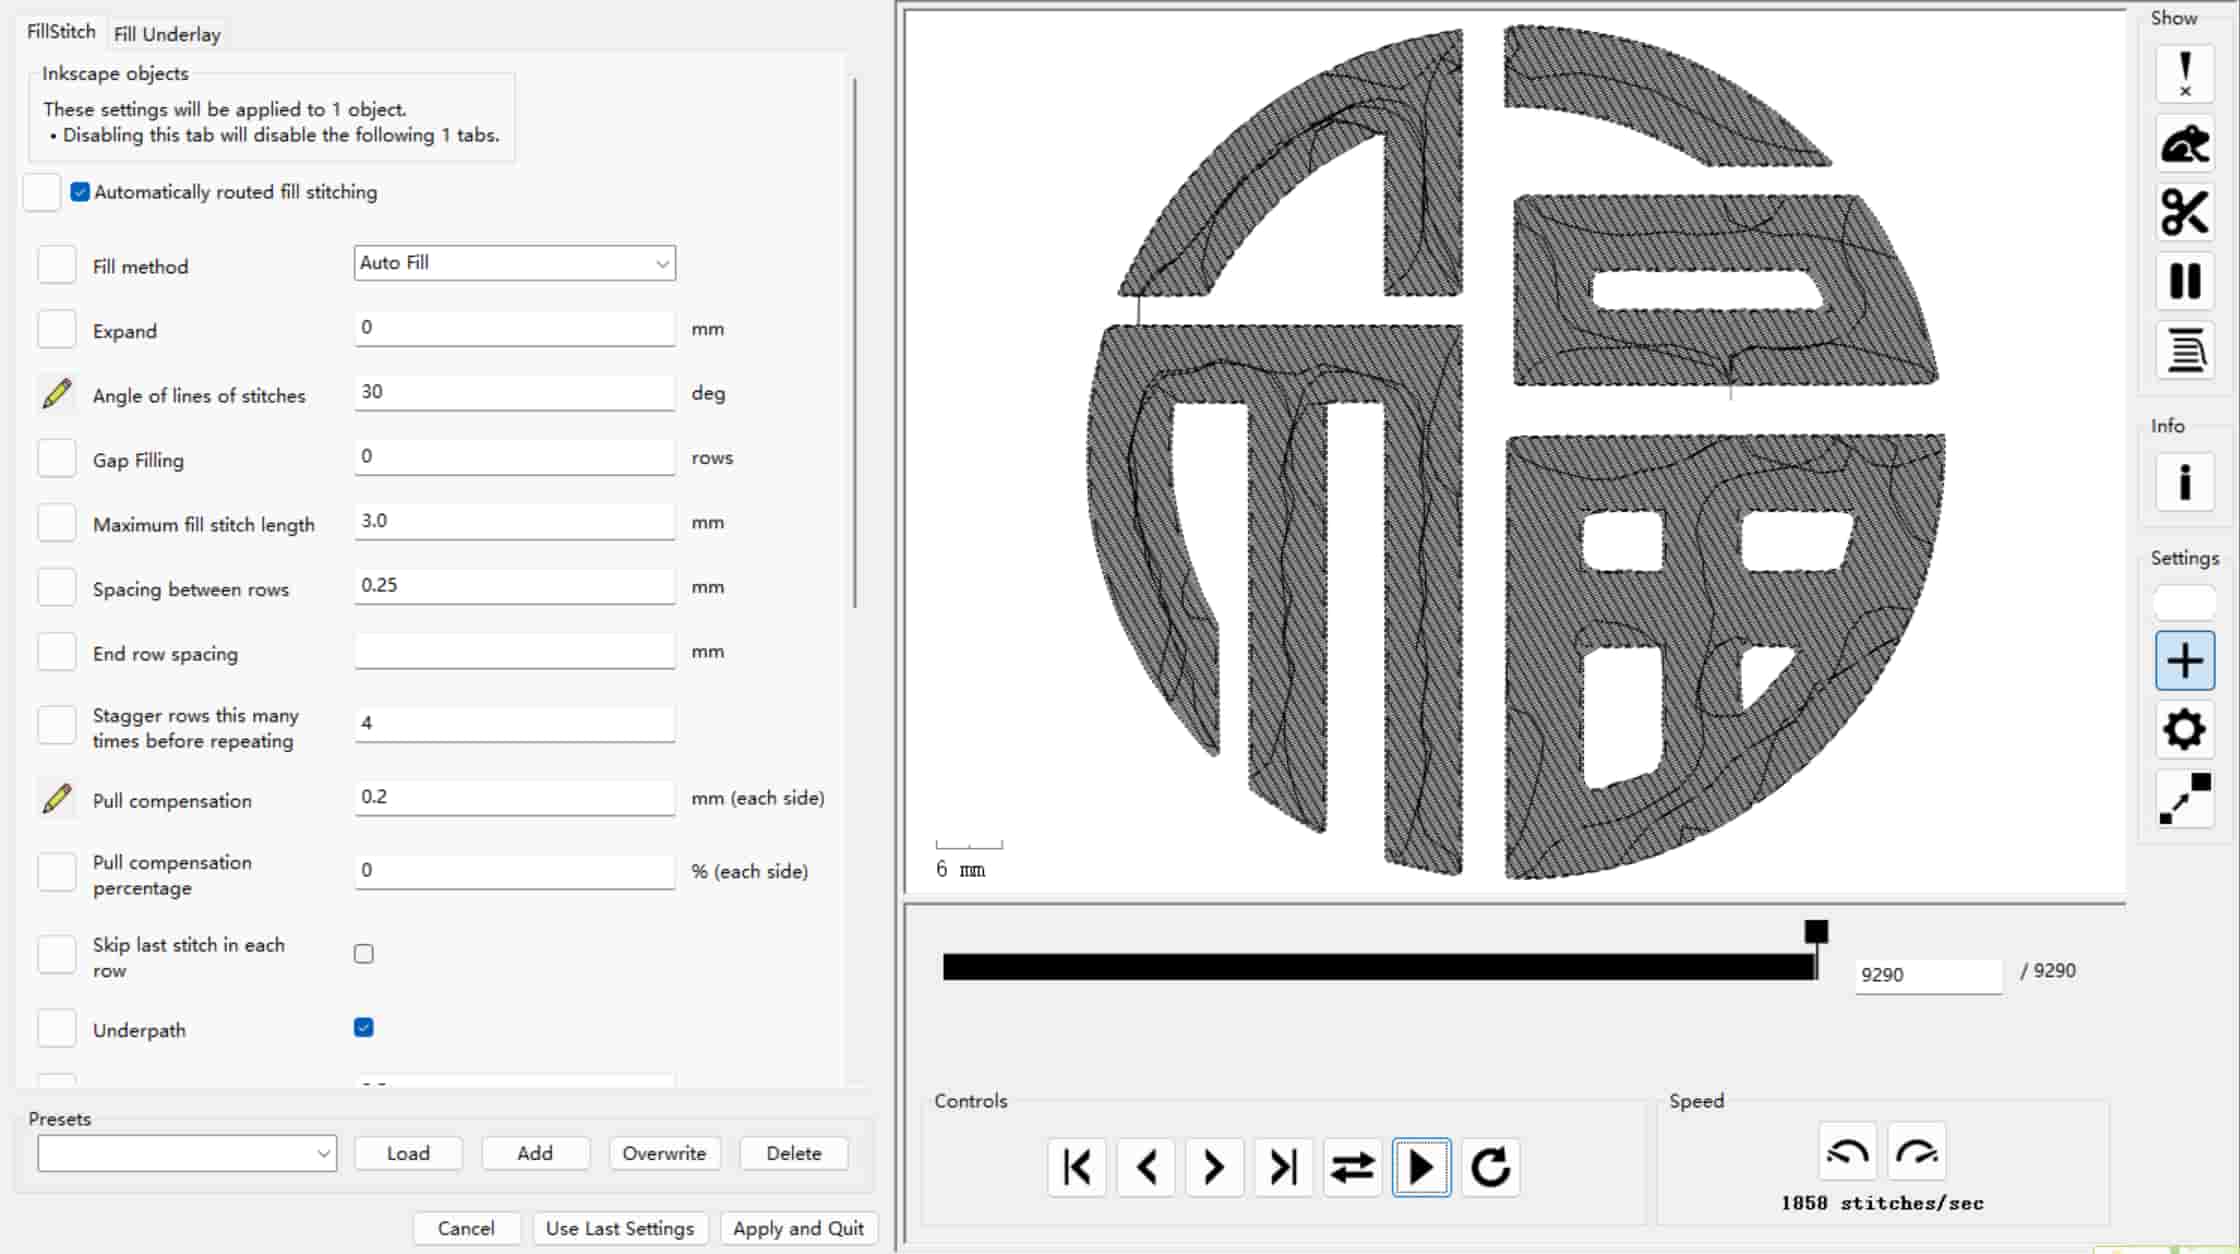
I drew the vector graphic in Inkscape and installed an open-source extension called Ink/Stitch. This extension is magical—it converts vector paths into embroidery machine codes (Brother machines usually need a .pes format). Looking at the preview in the software, I could clearly see the machine's logic playing out in three distinct layers:
- Drawing the outer outline.
- Laying down the core skeleton path.
- Filling in the areas with dense, supplementary stitches.
I exported the file, grabbed a USB drive, and plugged it into the Brother machine. Once my design popped up on the screen and I confirmed the layout, I pressed start.
4. Troubleshooting and a Serious Safety Lesson
Things got a bit intense when I was stitching the solid patterns and the right side of my "Fu" character. The thread kept breaking, and worse, I snapped three needles in a row.
Here is what was happening: The machine is quite old and hasn't been maintained well. When it runs at top speed, the violent vibrations easily loosen the needle set screw and the presser foot. Once those get loose, the needle shifts, hits the metal foot or the needle plate, and just snaps and flies off.
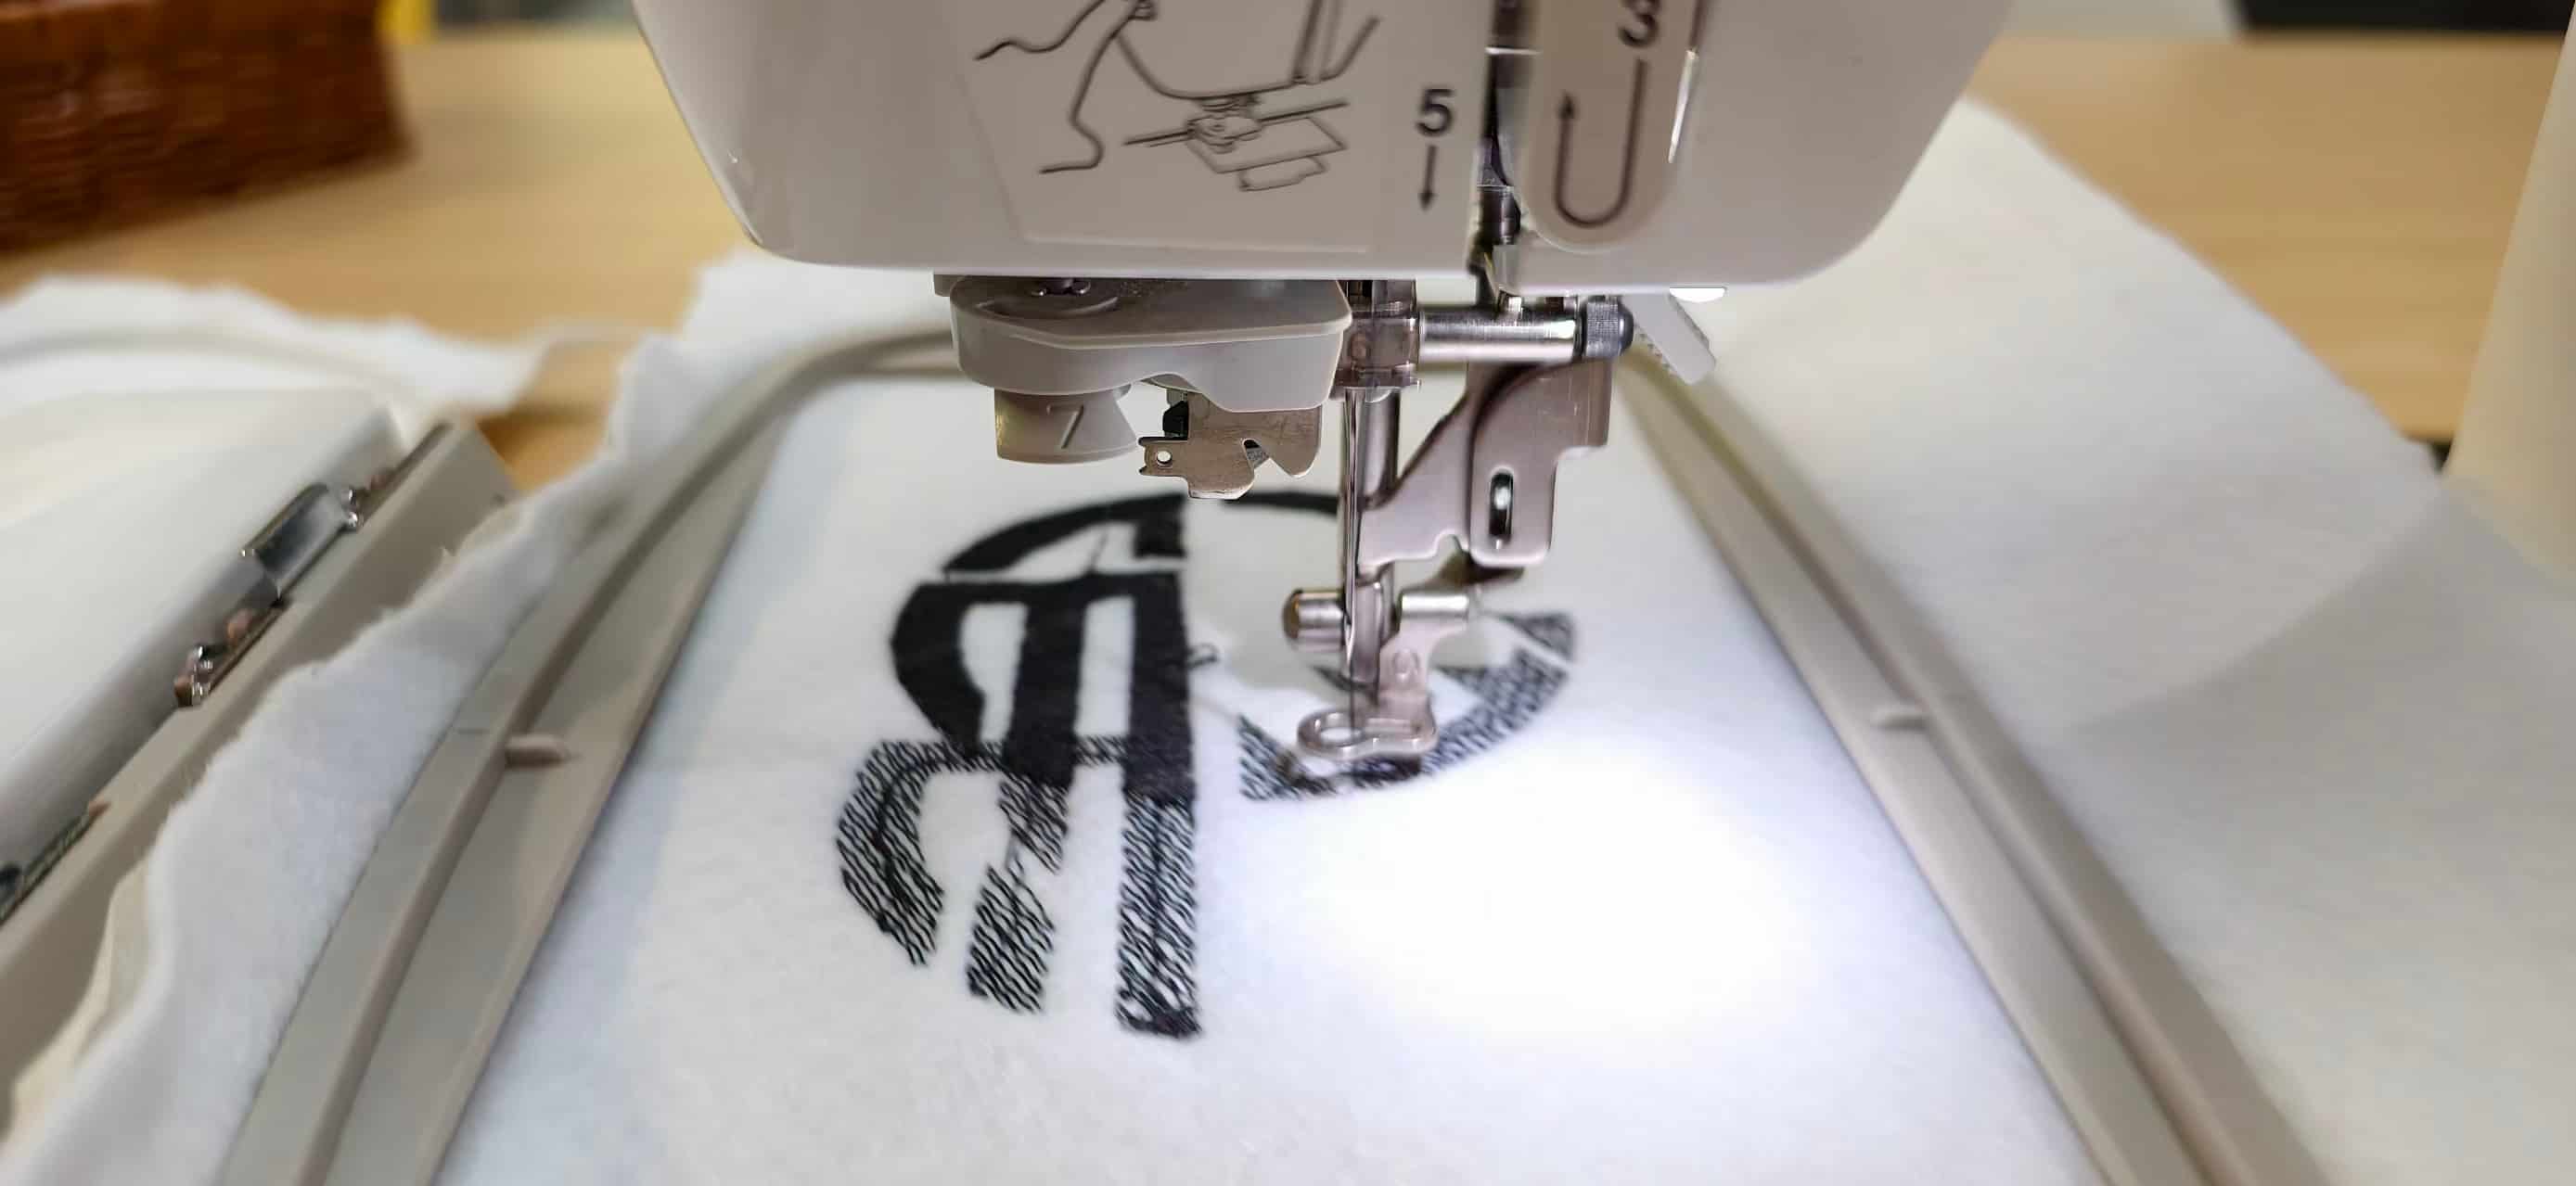
To get through it, I had to manually hit the stop button every so often just to re-tighten all the screws.
⚠️ A Massive Safety Warning: A broken needle shooting across the room is incredibly dangerous! When operating high-speed equipment like this (especially older, worn-out machines), you absolutely must wear safety goggles. Fortunately, no one was hurt, but it's just not worth the risk.
5. Final Thoughts
Because of the constant hardware hiccups and loose screws, I couldn't completely finish my "Fu" character (and because I tried twice, there is some overlapping in the middle).
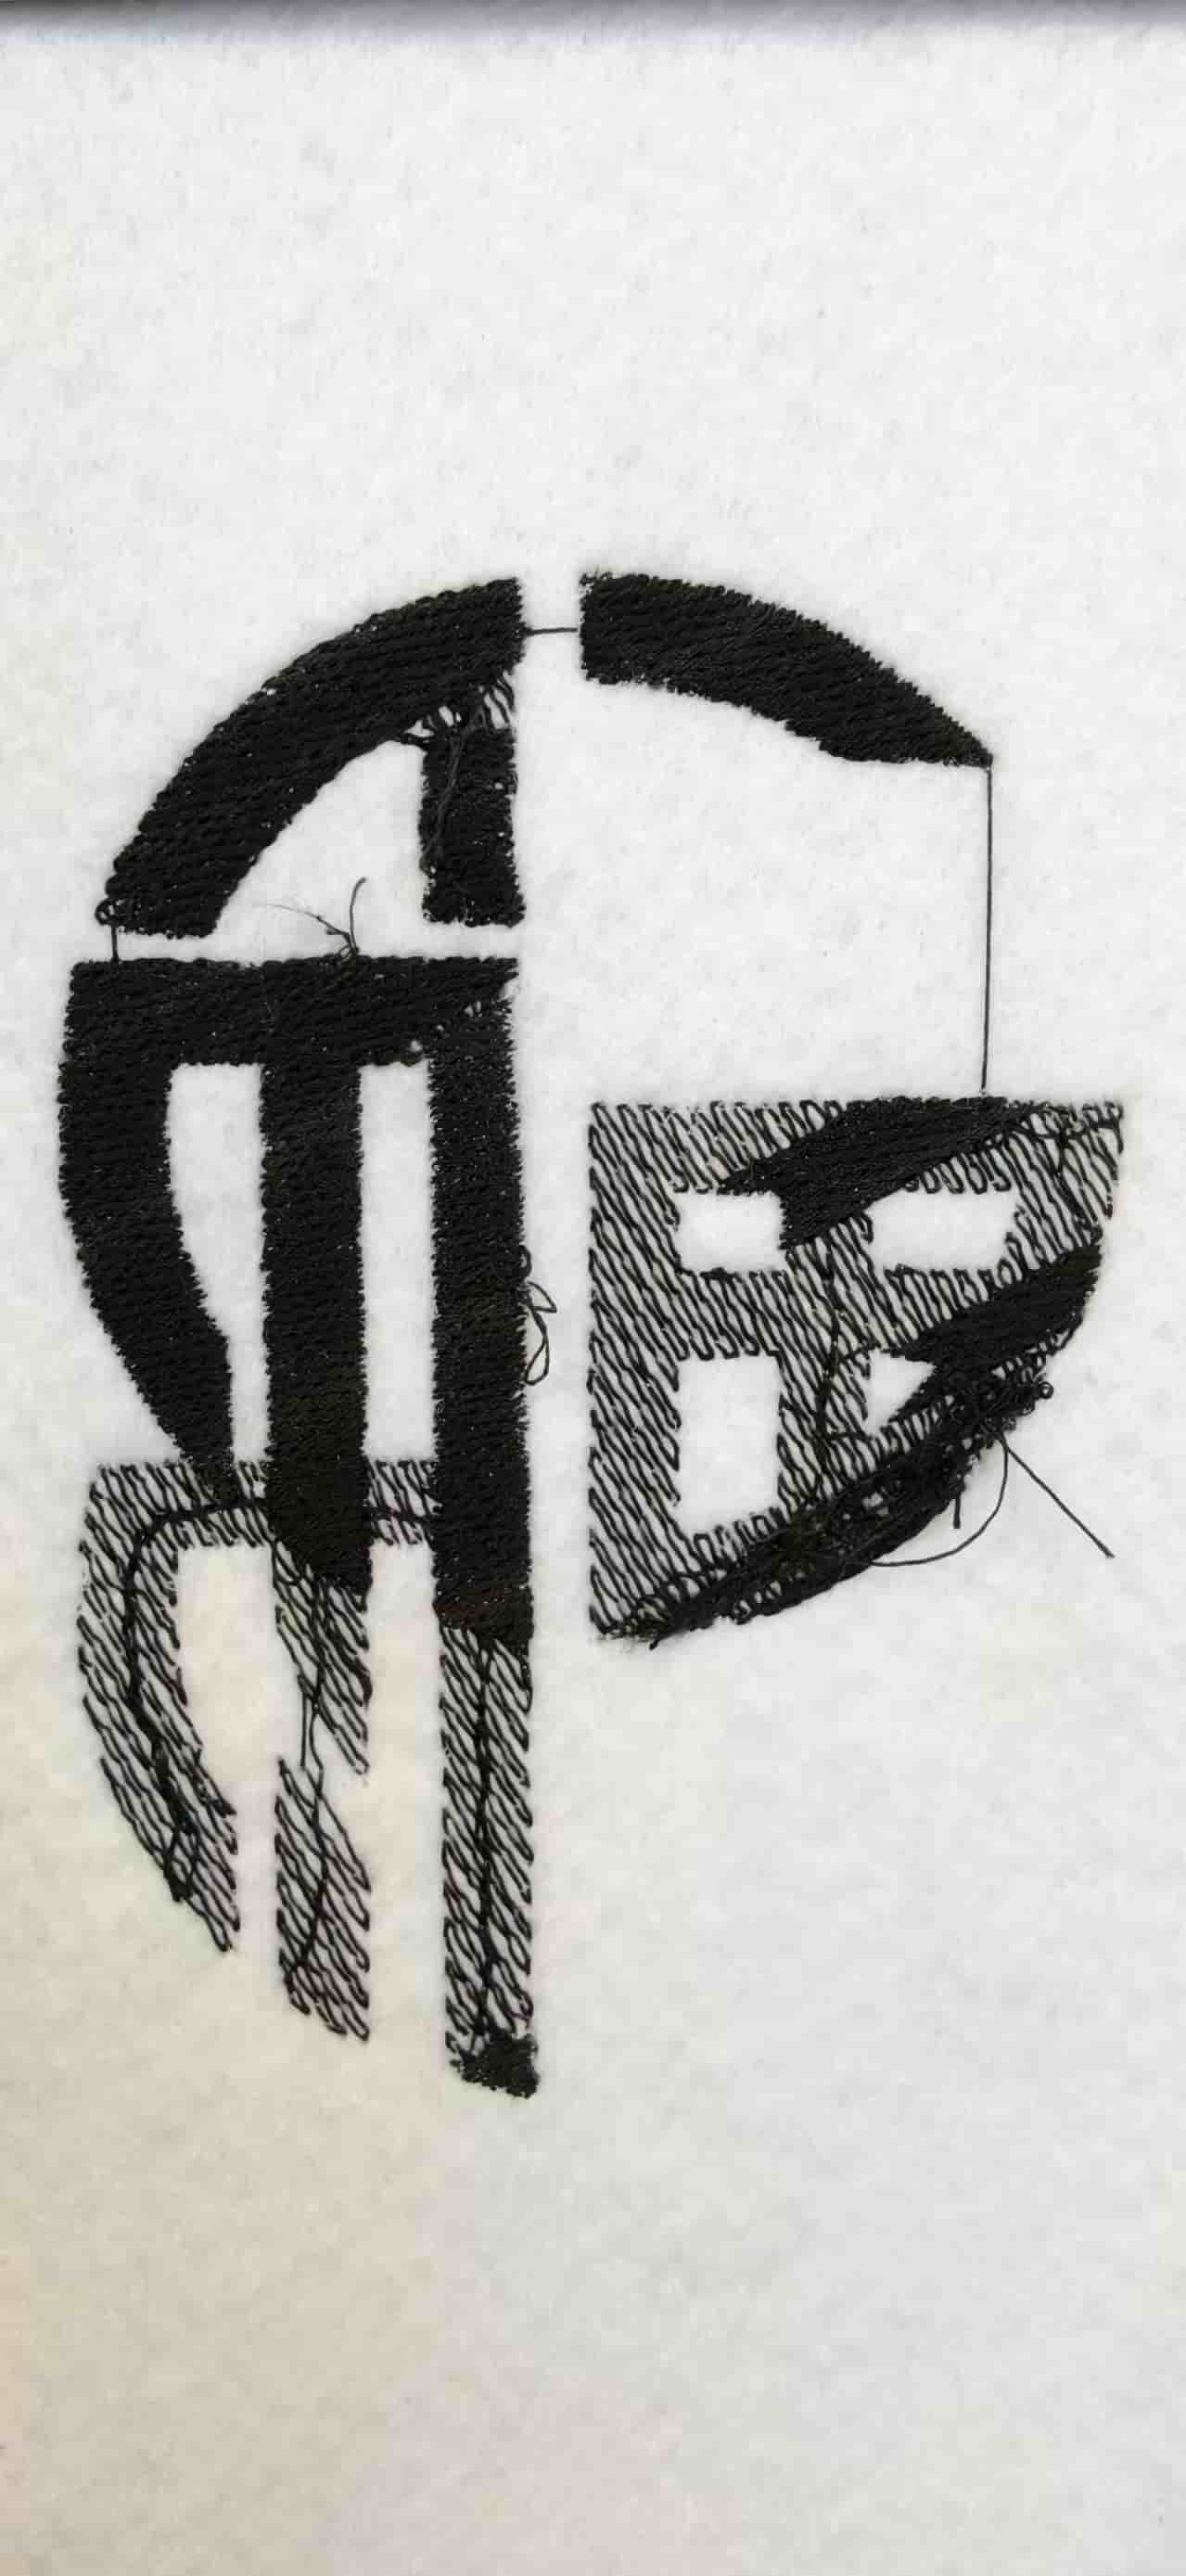
However, the left side of the character turned out beautifully! The stitching is incredibly dense, the edges are clean, and the surface is perfectly flat.
This assignment was a great learning experience. Not only did I master the digital workflow from Inkscape and Ink/Stitch to a physical embroidered piece, but I also learned a hard lesson in mechanical stability. The maintenance of those tiny fasteners completely dictates both the quality of your work and your personal safety.
Downloadable Files
Paths below are repository-relative (same style as my other weekly pages). In GitLab, open the file and use Download or Raw, or clone the repo to get everything.