Smart Fu - Digital Door Guardian
Traditional Chinese Fu into an Interactive Visitor Notification System
Final Result
Door Guardian - FU is an interactive door decoration inspired by the traditional Chinese Fu (福 character and door guardian culture).
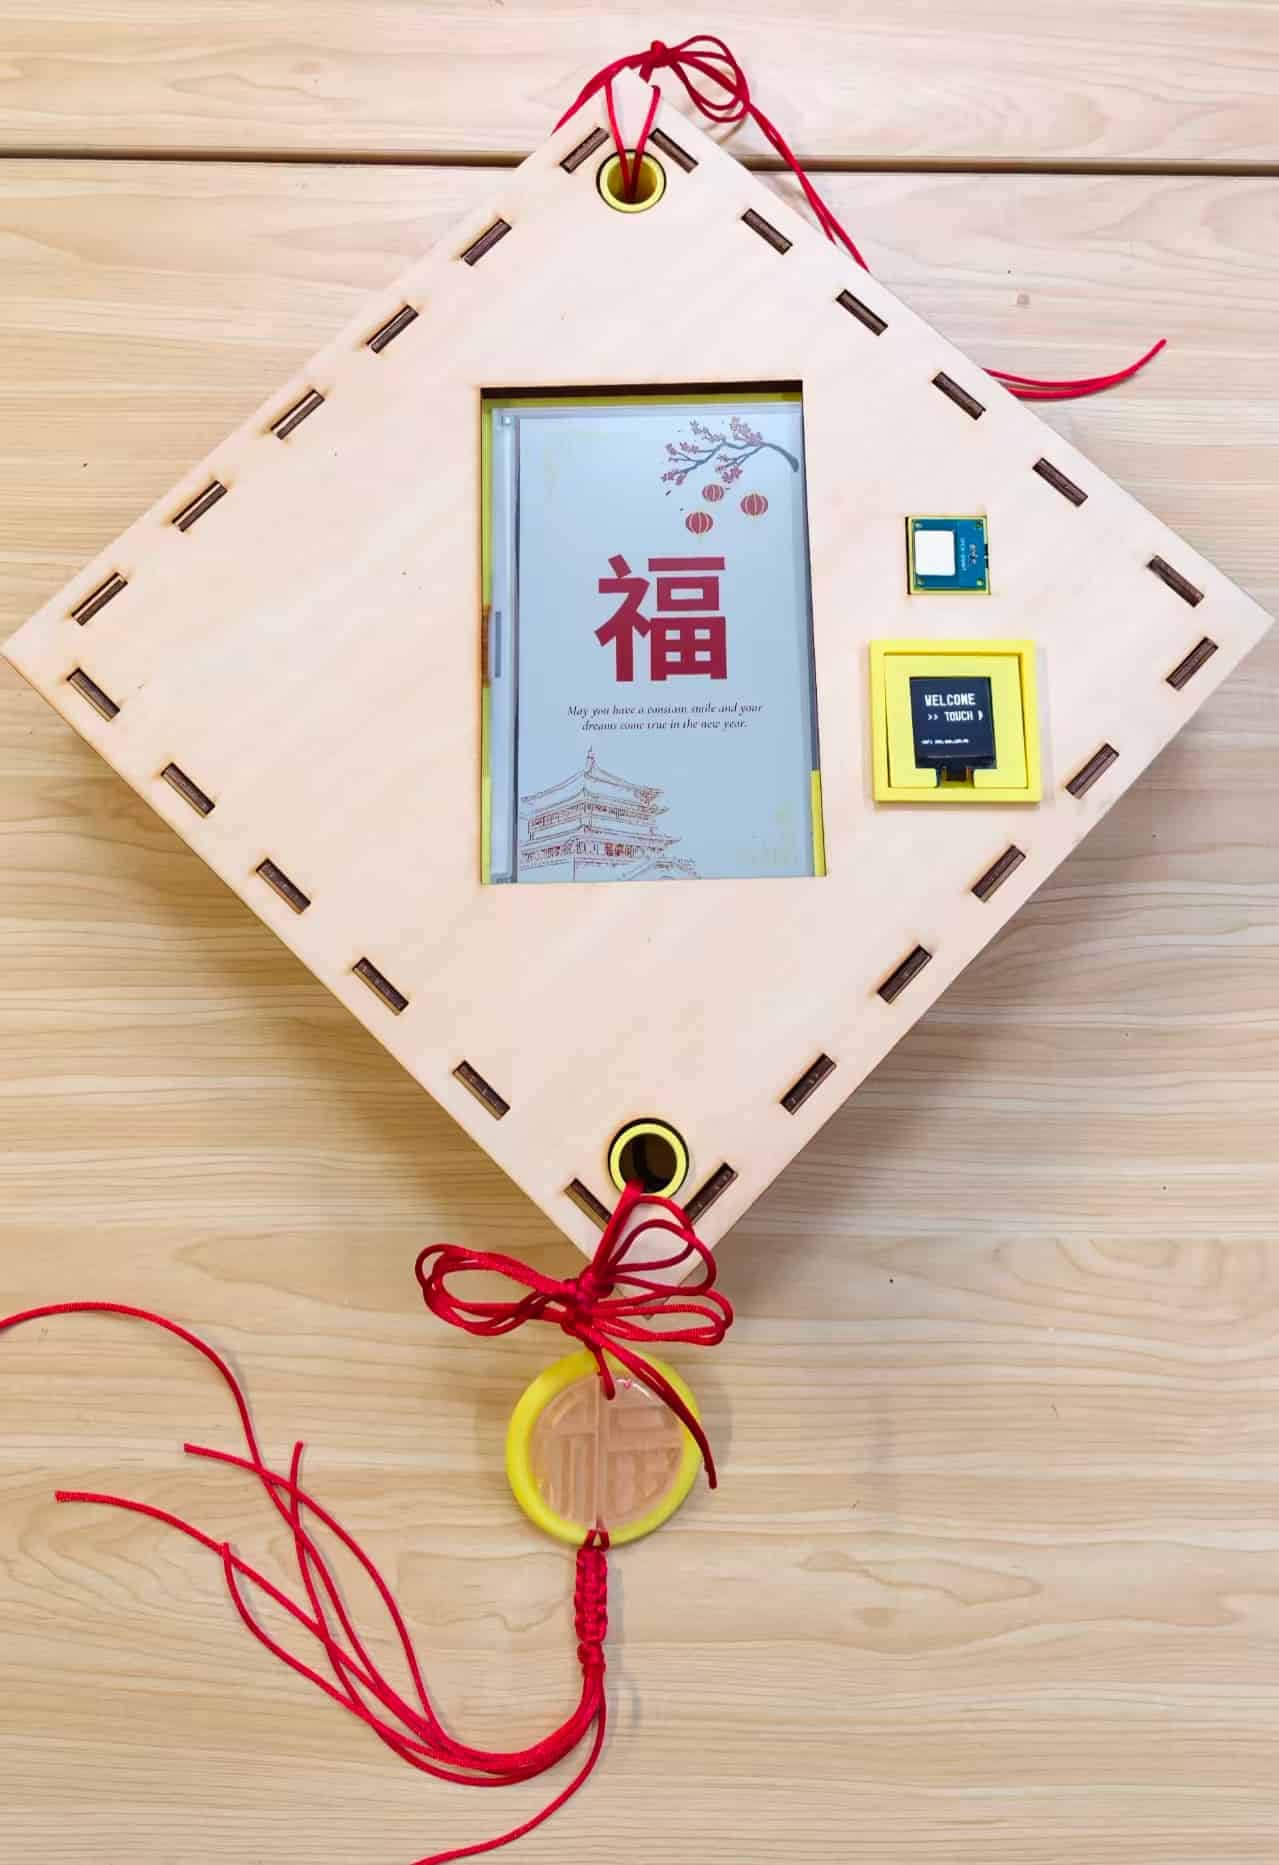
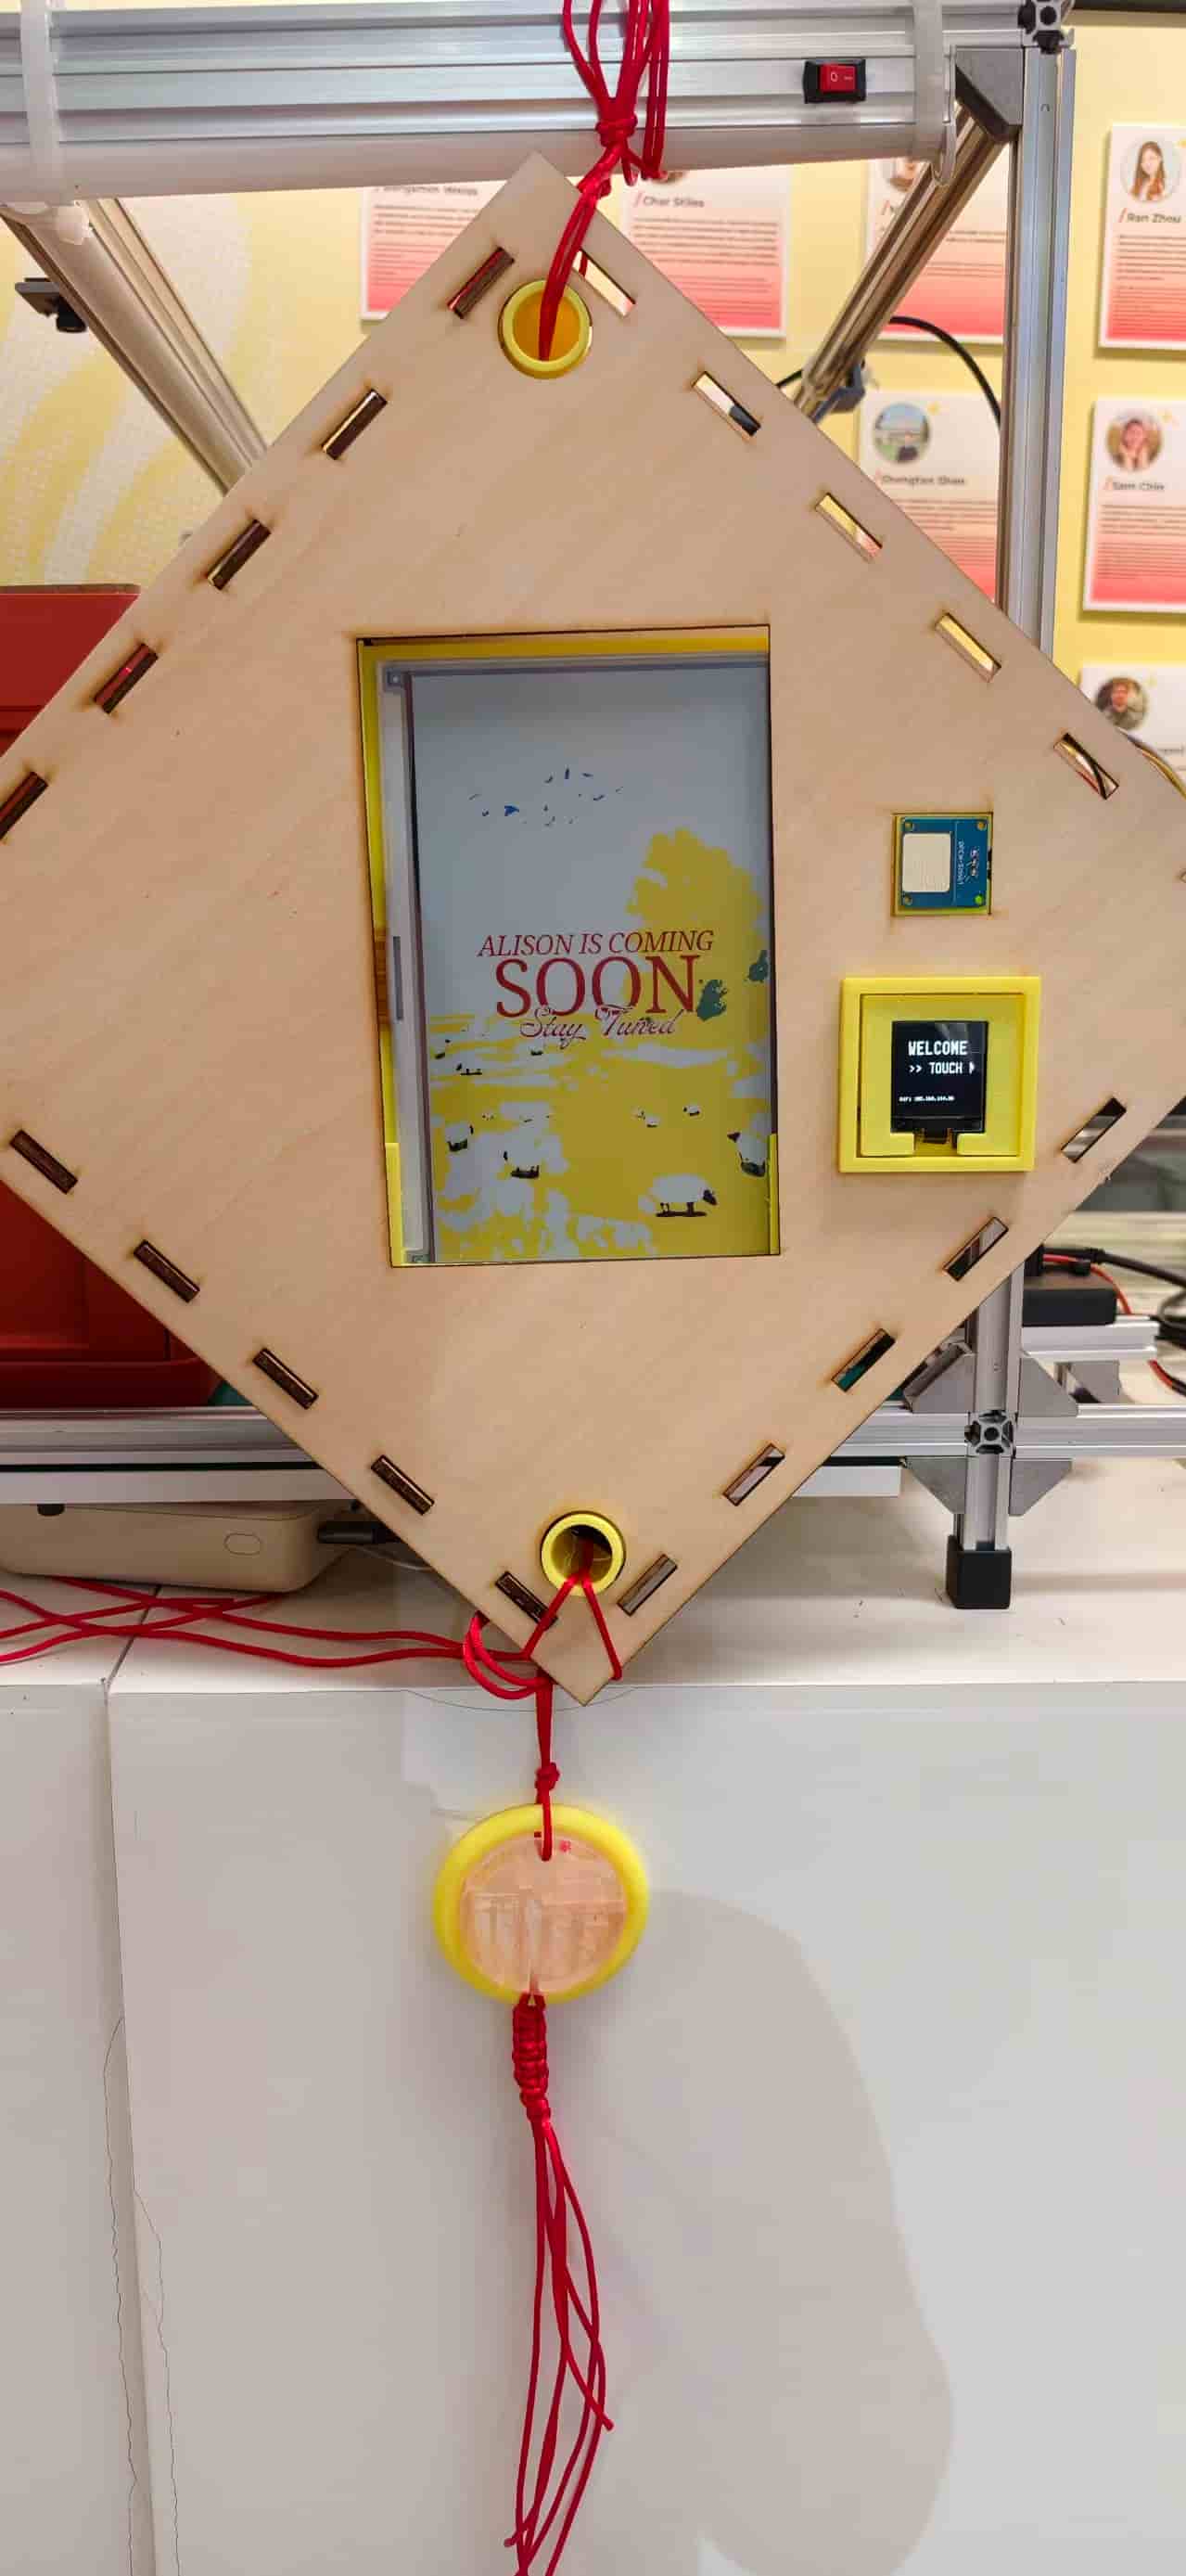
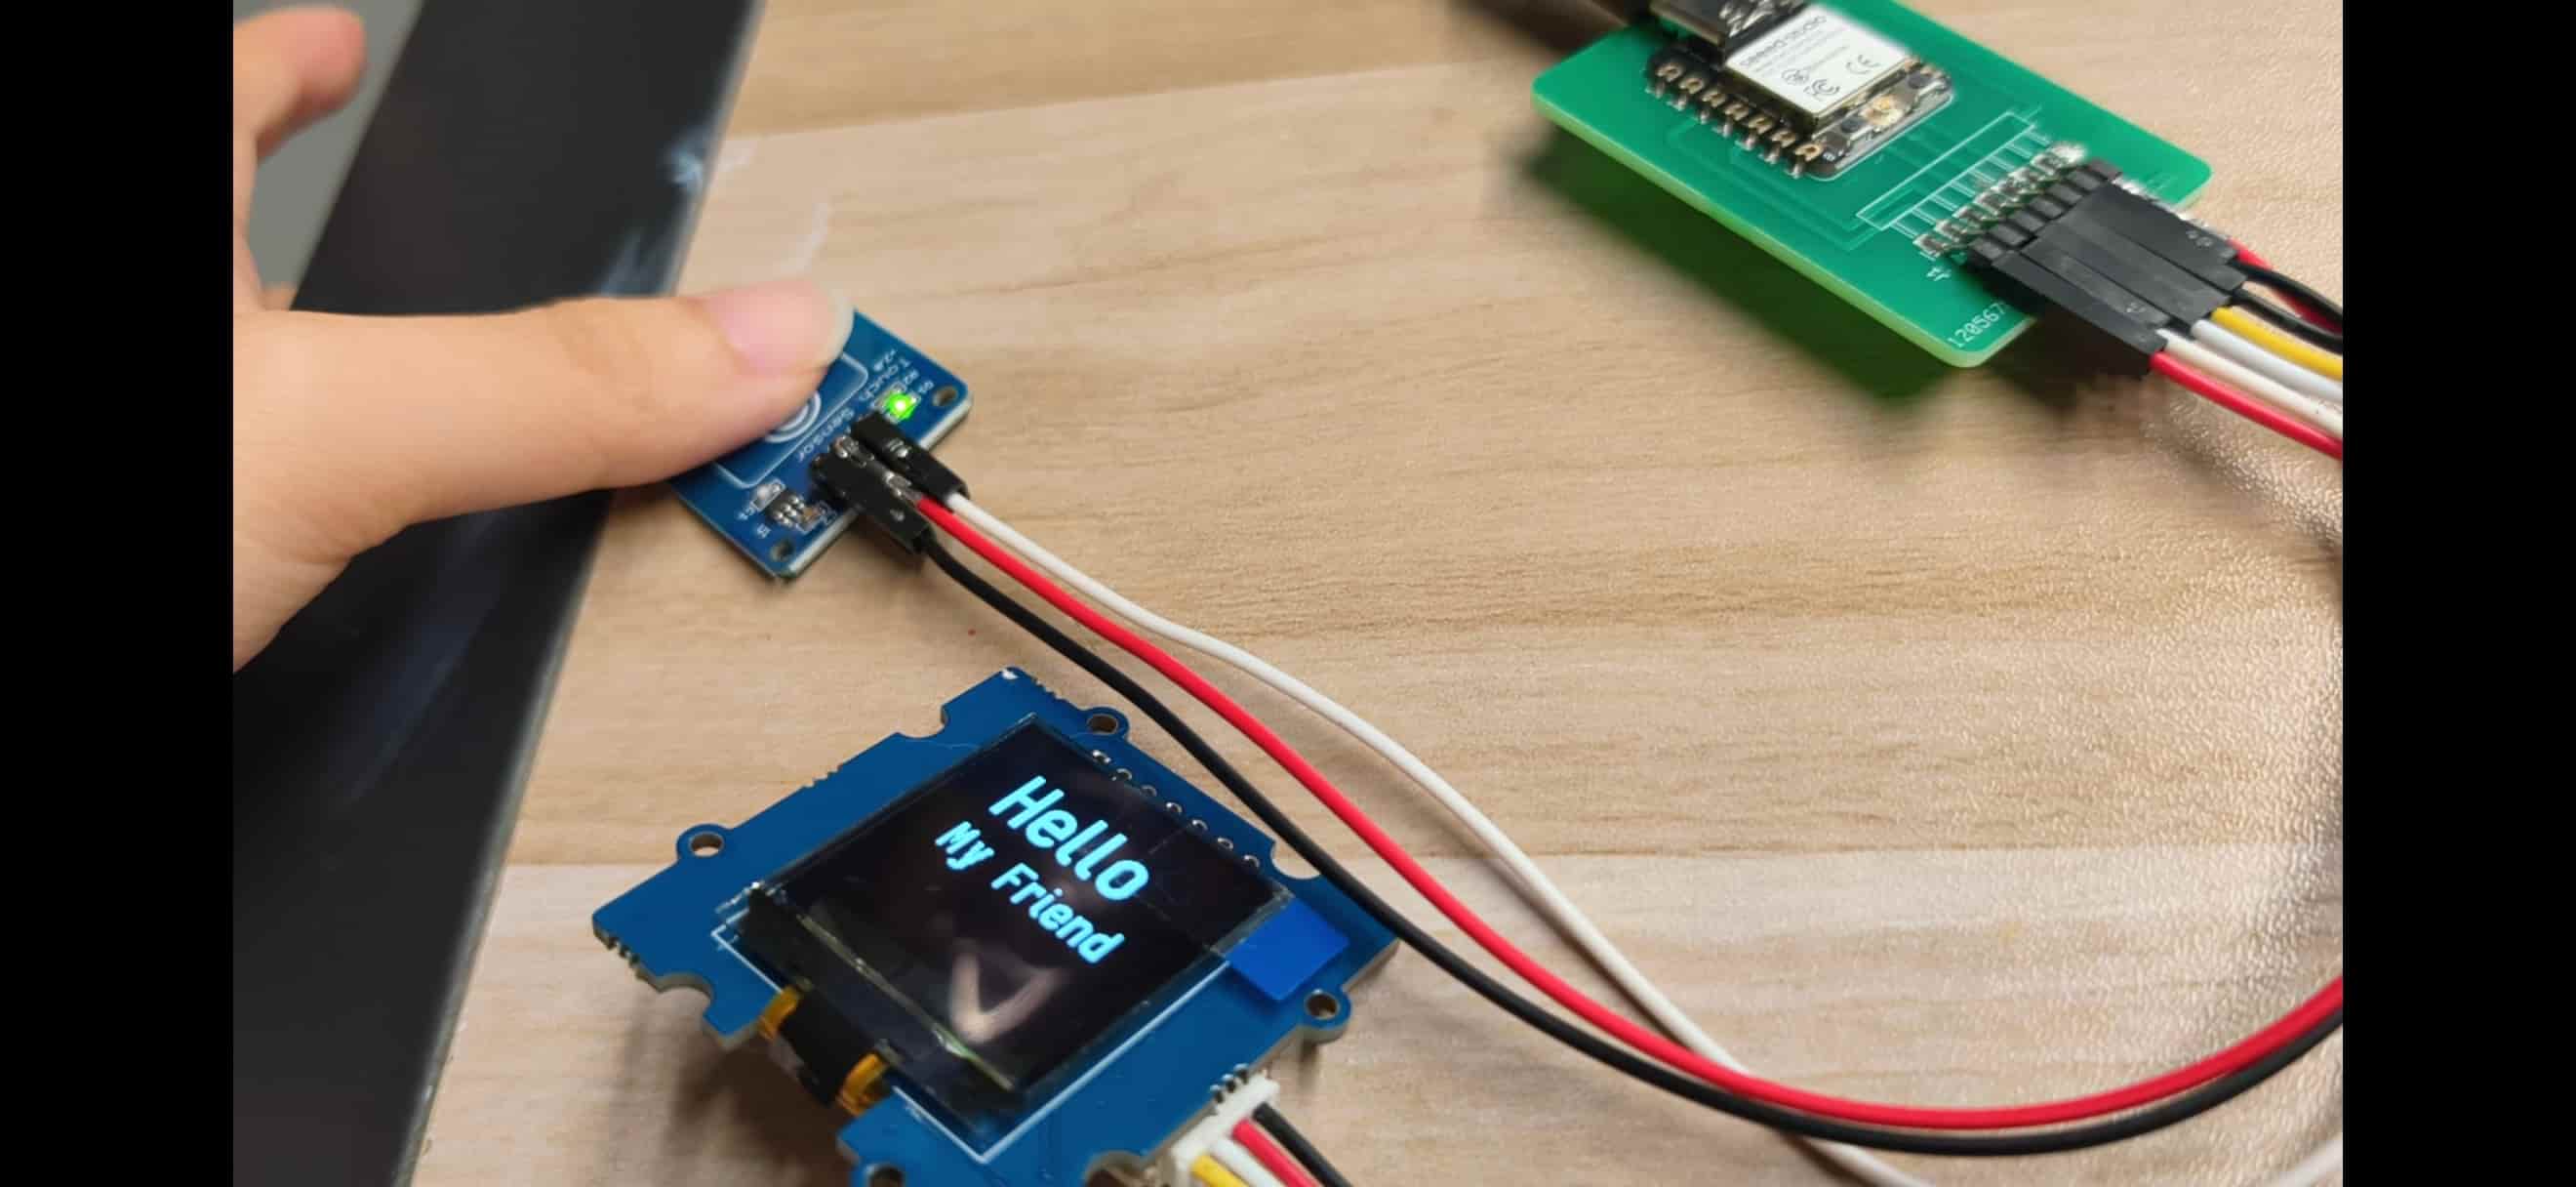
Most of the time it behaves like a quiet decorative object. The 7.3 inch color ePaper display shows Fu artwork, seasonal posters, or personalized graphics with a paper-like calmness. When a visitor arrives, they do not need to press a loud doorbell. They touch the small sensor near the decoration, the OLED greets them with " Hello My Friend"
At the same time, the touch device sends a WiFi message to a local Node.js server. The web dashboard shows a visitor notification, and the ePaper display switches to a visitor poster. In that moment, the traditional Fu is "awakened" and becomes a digital door guardian.
The finished project combines:
- Chinese cultural heritage
- digital fabrication
- custom electronics
- embedded programming
- WiFi communication
- a web dashboard
- physical interaction
- ePaper visual output
The result is not a commercial smart doorbell. I see it more as a small calm-technology object: useful when someone arrives, quiet when nothing is happening, and still recognizable as a cultural decoration.
Why I Made It
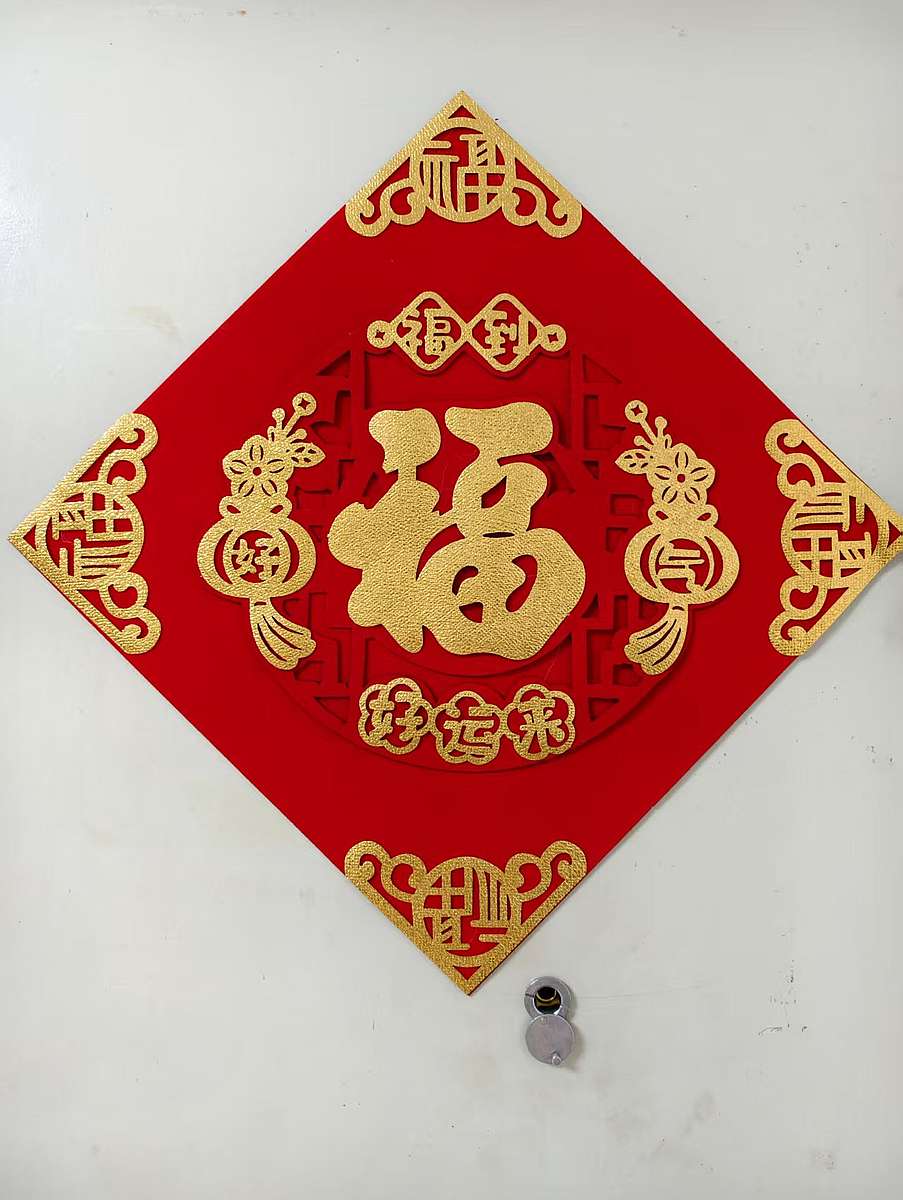
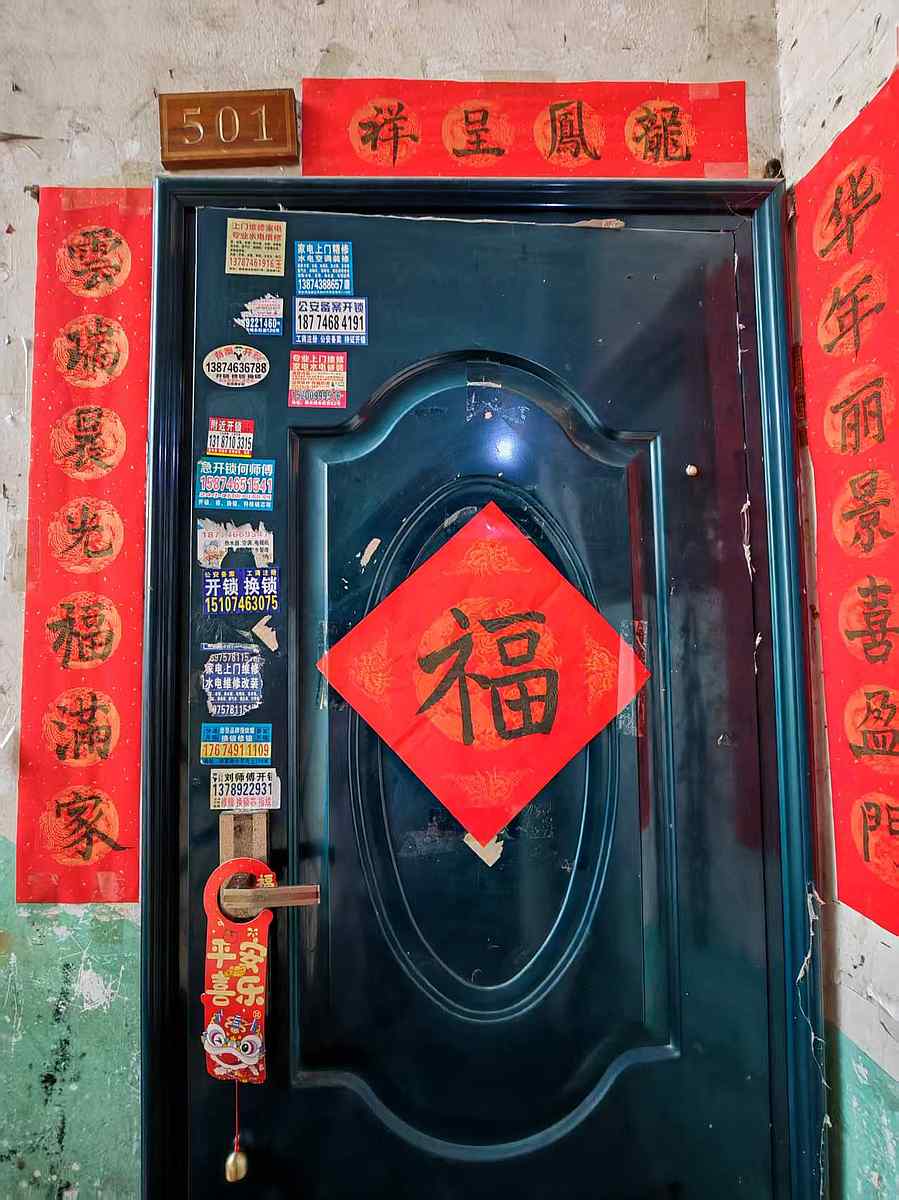
Growing up in China, Fu has always been part of my memory of home. Every Spring Festival, my family would write or hang a Fu decoration on the front door. It symbolized good fortune, welcome, and protection. Traditionally, Chinese households also placed Door Guardians at the entrance to watch over the home and greet visitors.
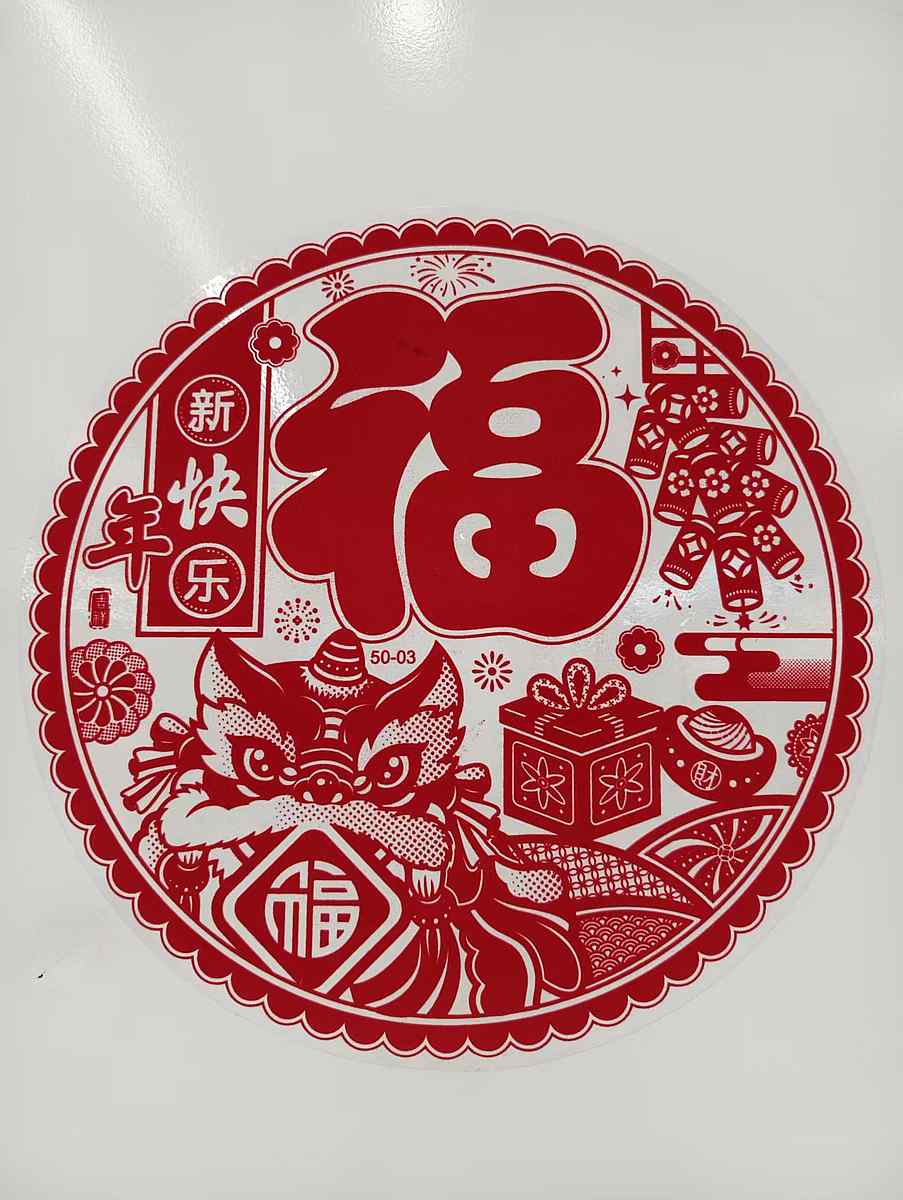
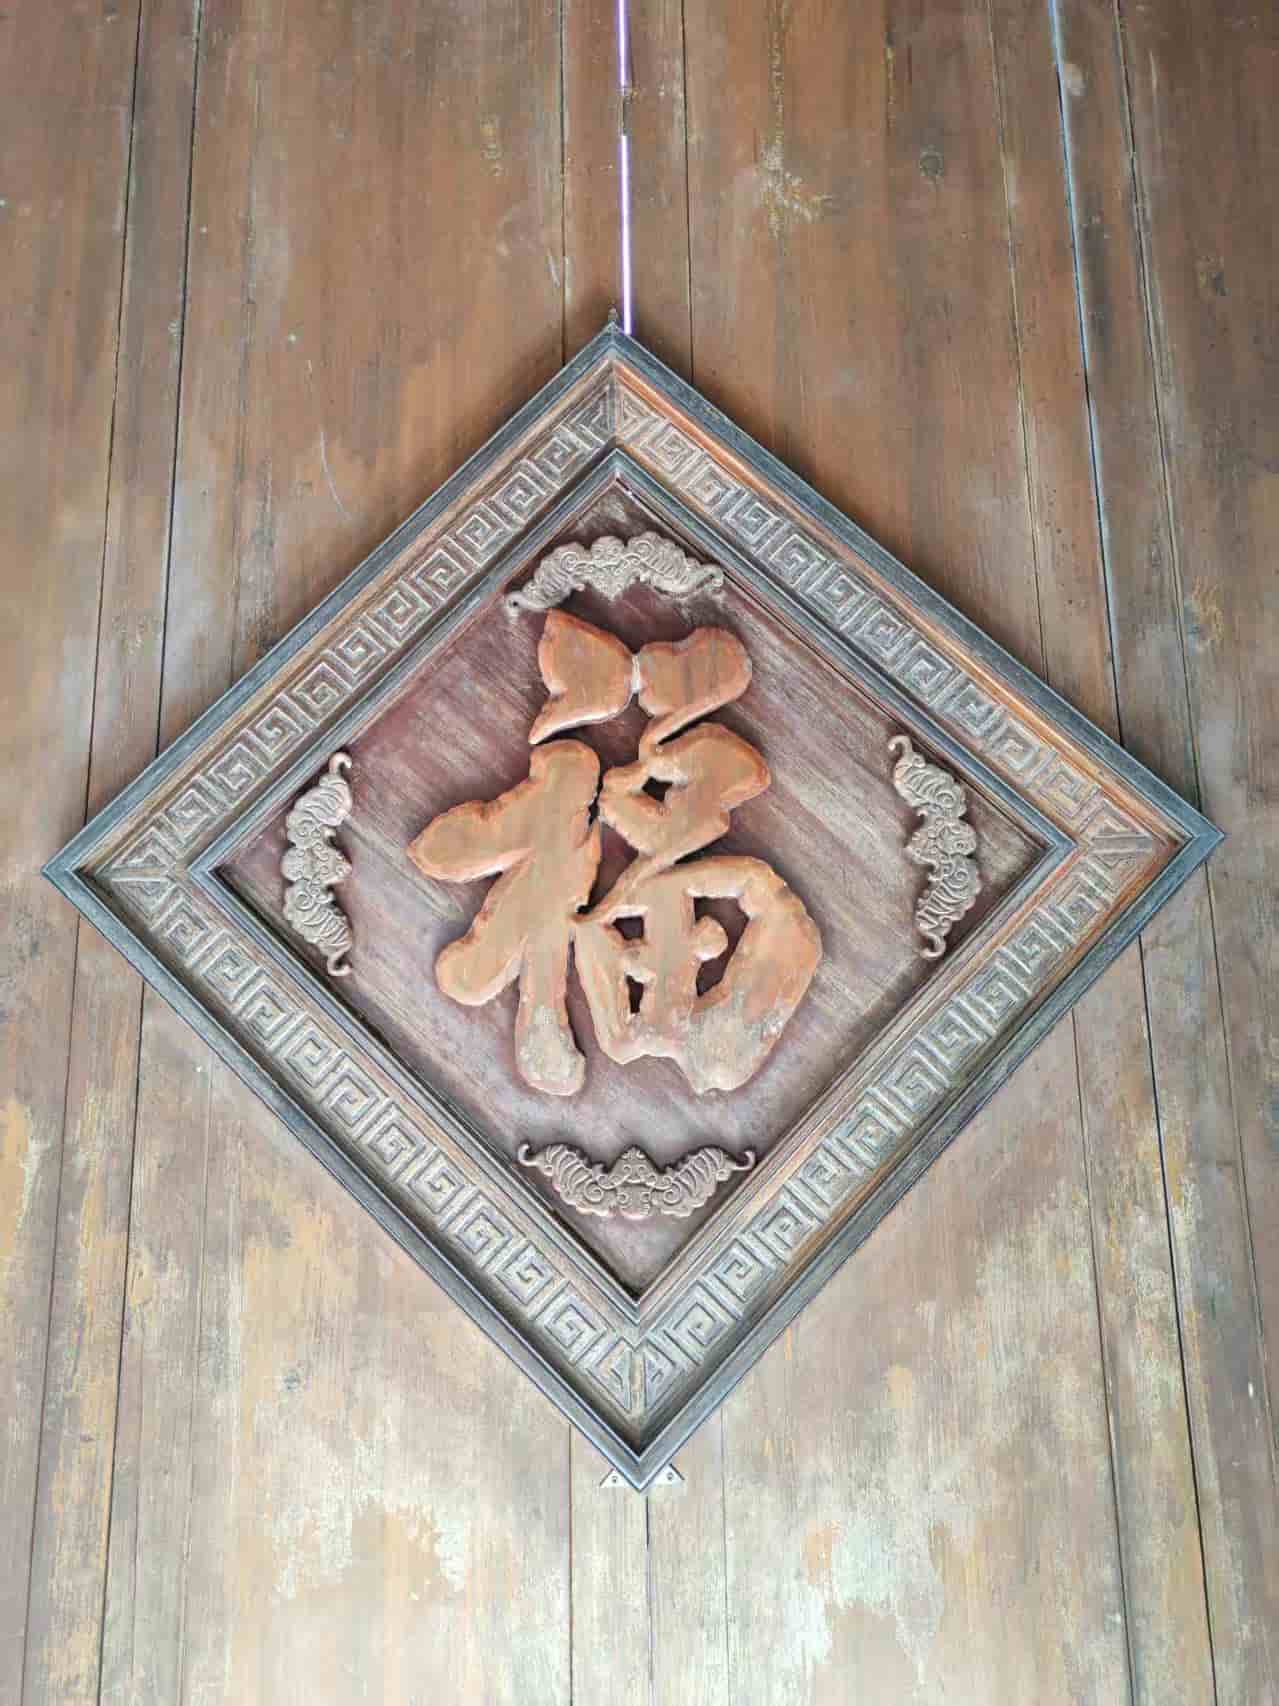
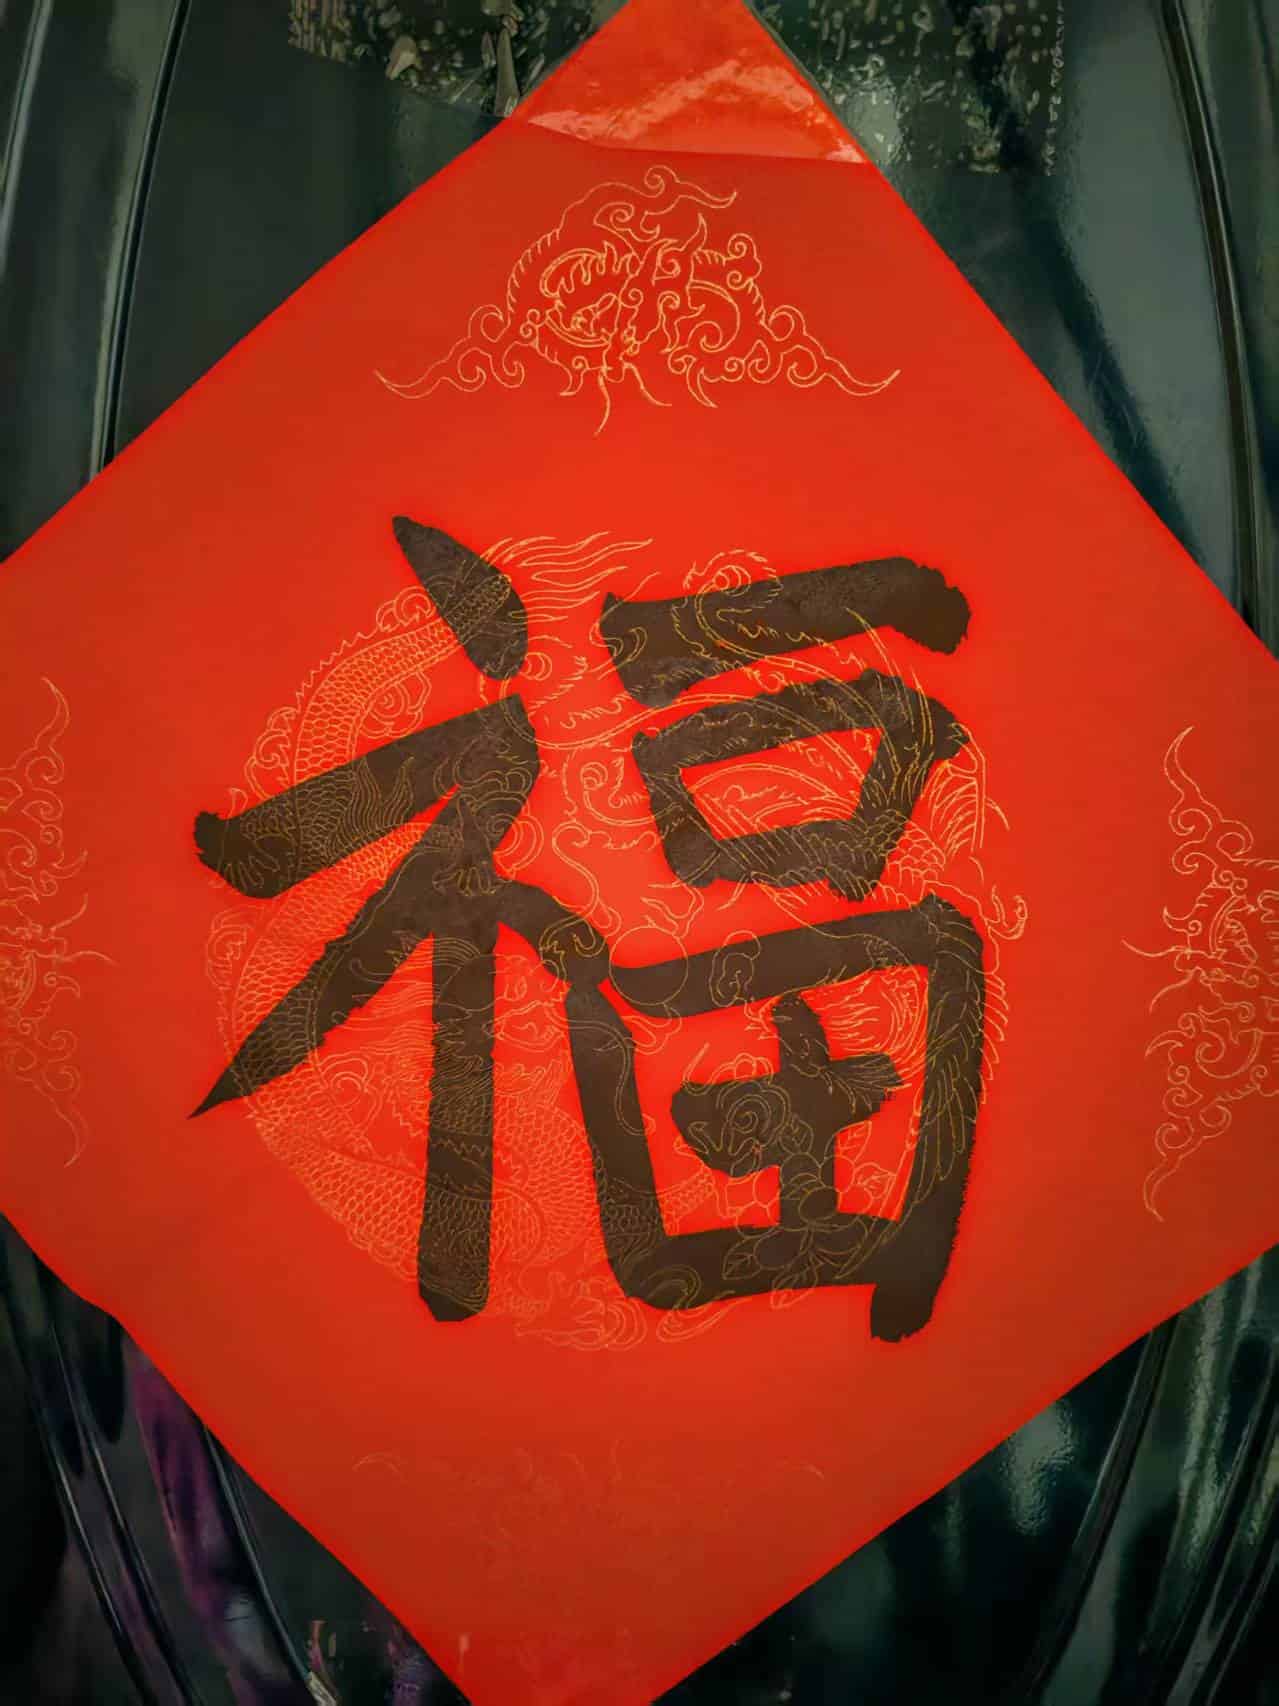
Last year, I hand-wrote a large Fu character with ink on special paper.


I liked it a lot, but after one year the color had faded. That made me ask a very simple question:
How to make a Fu that does not fade?
At first, this sounded like only a material problem: replace paper with LEDs or a screen. But the more I worked through Fab Academy, the more I realized the interesting part was not only the display. It was the relationship between the object, the door, the person inside, and the visitor outside.
I often work with headphones on, in that focused state I can easily miss someone knocking at the door. I wanted a gentle way for visitors to announce themselves without adding a loud, technical-looking doorbell.
So my question became:
Could a traditional Fu decoration still carry the feeling of welcome and protection, while also becoming useful in modern daily life?
These references shaped the project visually and emotionally. The round Fu, my handwritten Fu, and the square door decoration each carried a different feeling: festival, memory, and threshold. I wanted the final object to keep that feeling instead of becoming only a gadget with a Chinese character attached to it.
Concept Development
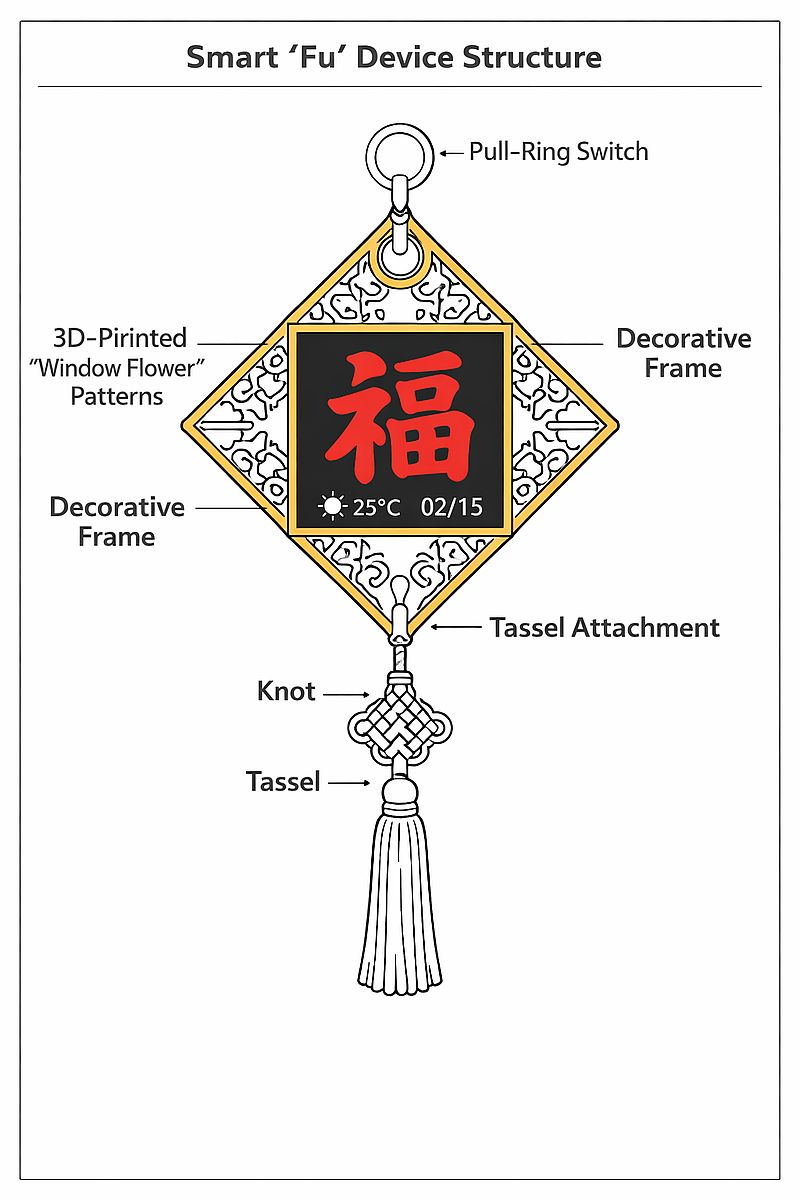
My first idea was much simpler: a smart Fu decoration that could display the character, time, and weather. I also imagined a pull-ring interaction, like an old lamp. One pull could show time, another pull could show weather.
This early concept was useful because it gave me a visual direction, but it was not yet a strong interaction. It felt like an indoor information object. The turning point came after conversations with instructors and friends. The repeated question was:
What if it could interact with visitors?
That question moved the project back to the door, where Fu already belongs. Instead of asking the object to show many types of information, I focused on one meaningful moment: someone arrives, touches the Fu, and the home becomes aware of them.
The project evolved in spirals:
- Decorative Fu object: focus on the traditional symbol and visual identity.
- Smart Fu display: add a digital screen and poster logic.
- Interactive Fu: add touch as the visitor input.
- Door Guardian: connect the outside touch to an indoor notification.
- Split roles: C3 handles visitor interaction at the door; the EE04 board (with its built-in ESP32-S3 Plus) handles the indoor ePaper display.
- Networked dashboard: let the web interface monitor device state and manually switch posters.
Each spiral made the project less like a decorative screen and more like an interaction system.
System Overview
The final system has three connected modules.
Module 1 - Visitor Interaction
This module sits near the entrance and is handled by a XIAO ESP32-C3 on my custom PCB.
It includes:
- custom XIAO ESP32-C3 board
- simple digital touch module (VCC, GND, SIG) wired to
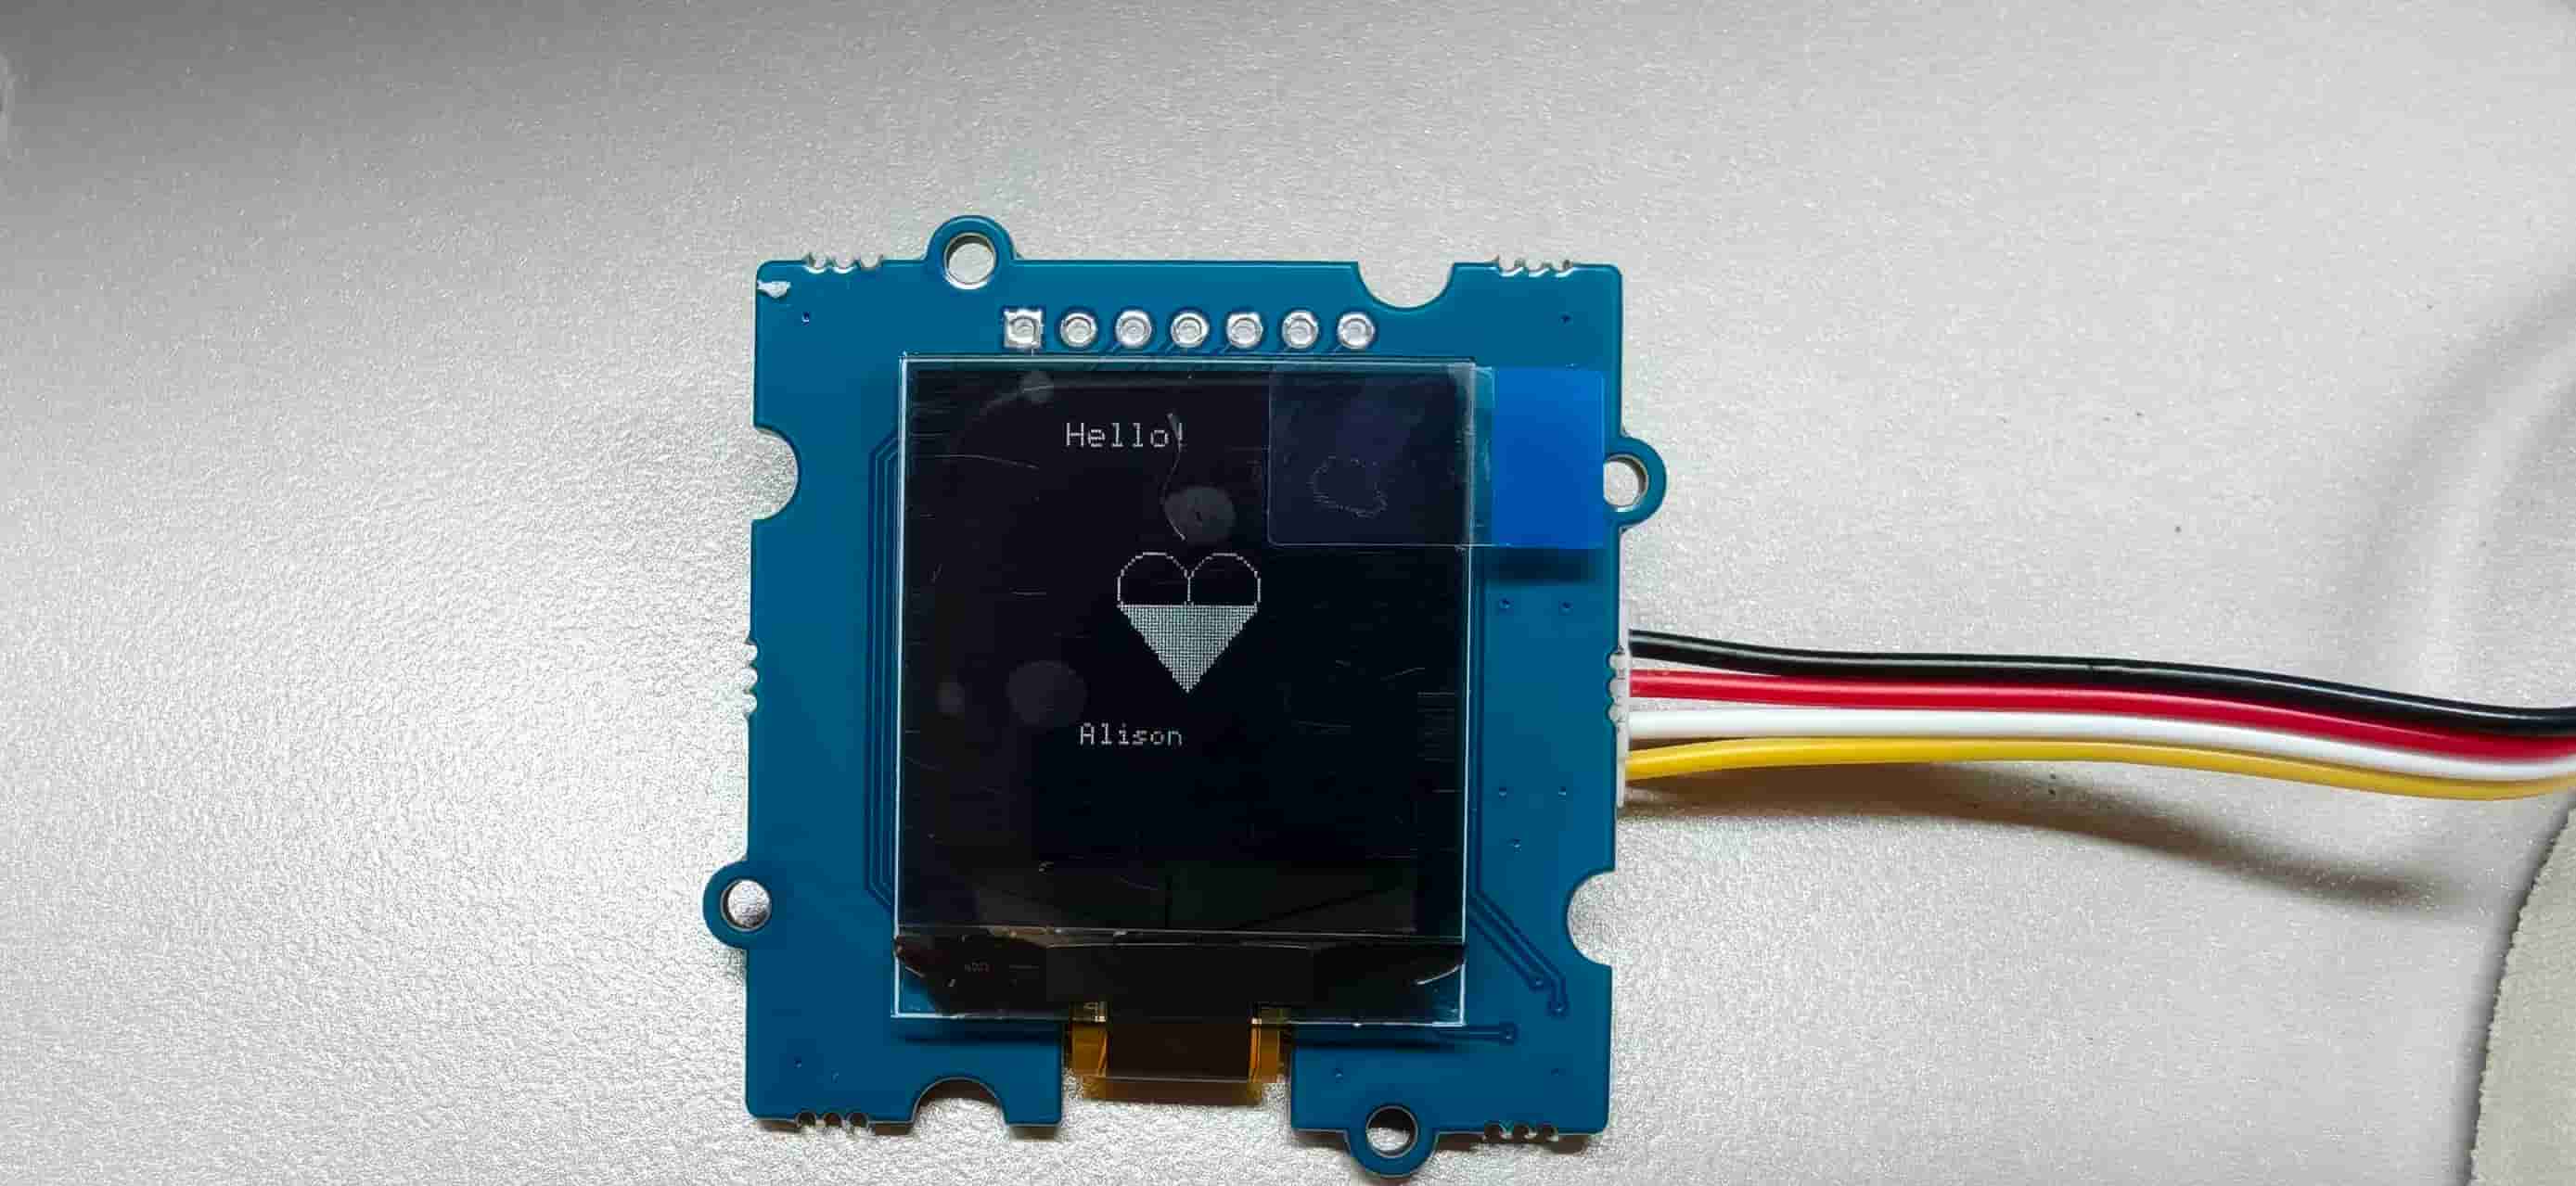
D2with internal pull-up - 128 x 128 Grove OLED display
- WiFi connection to the local server
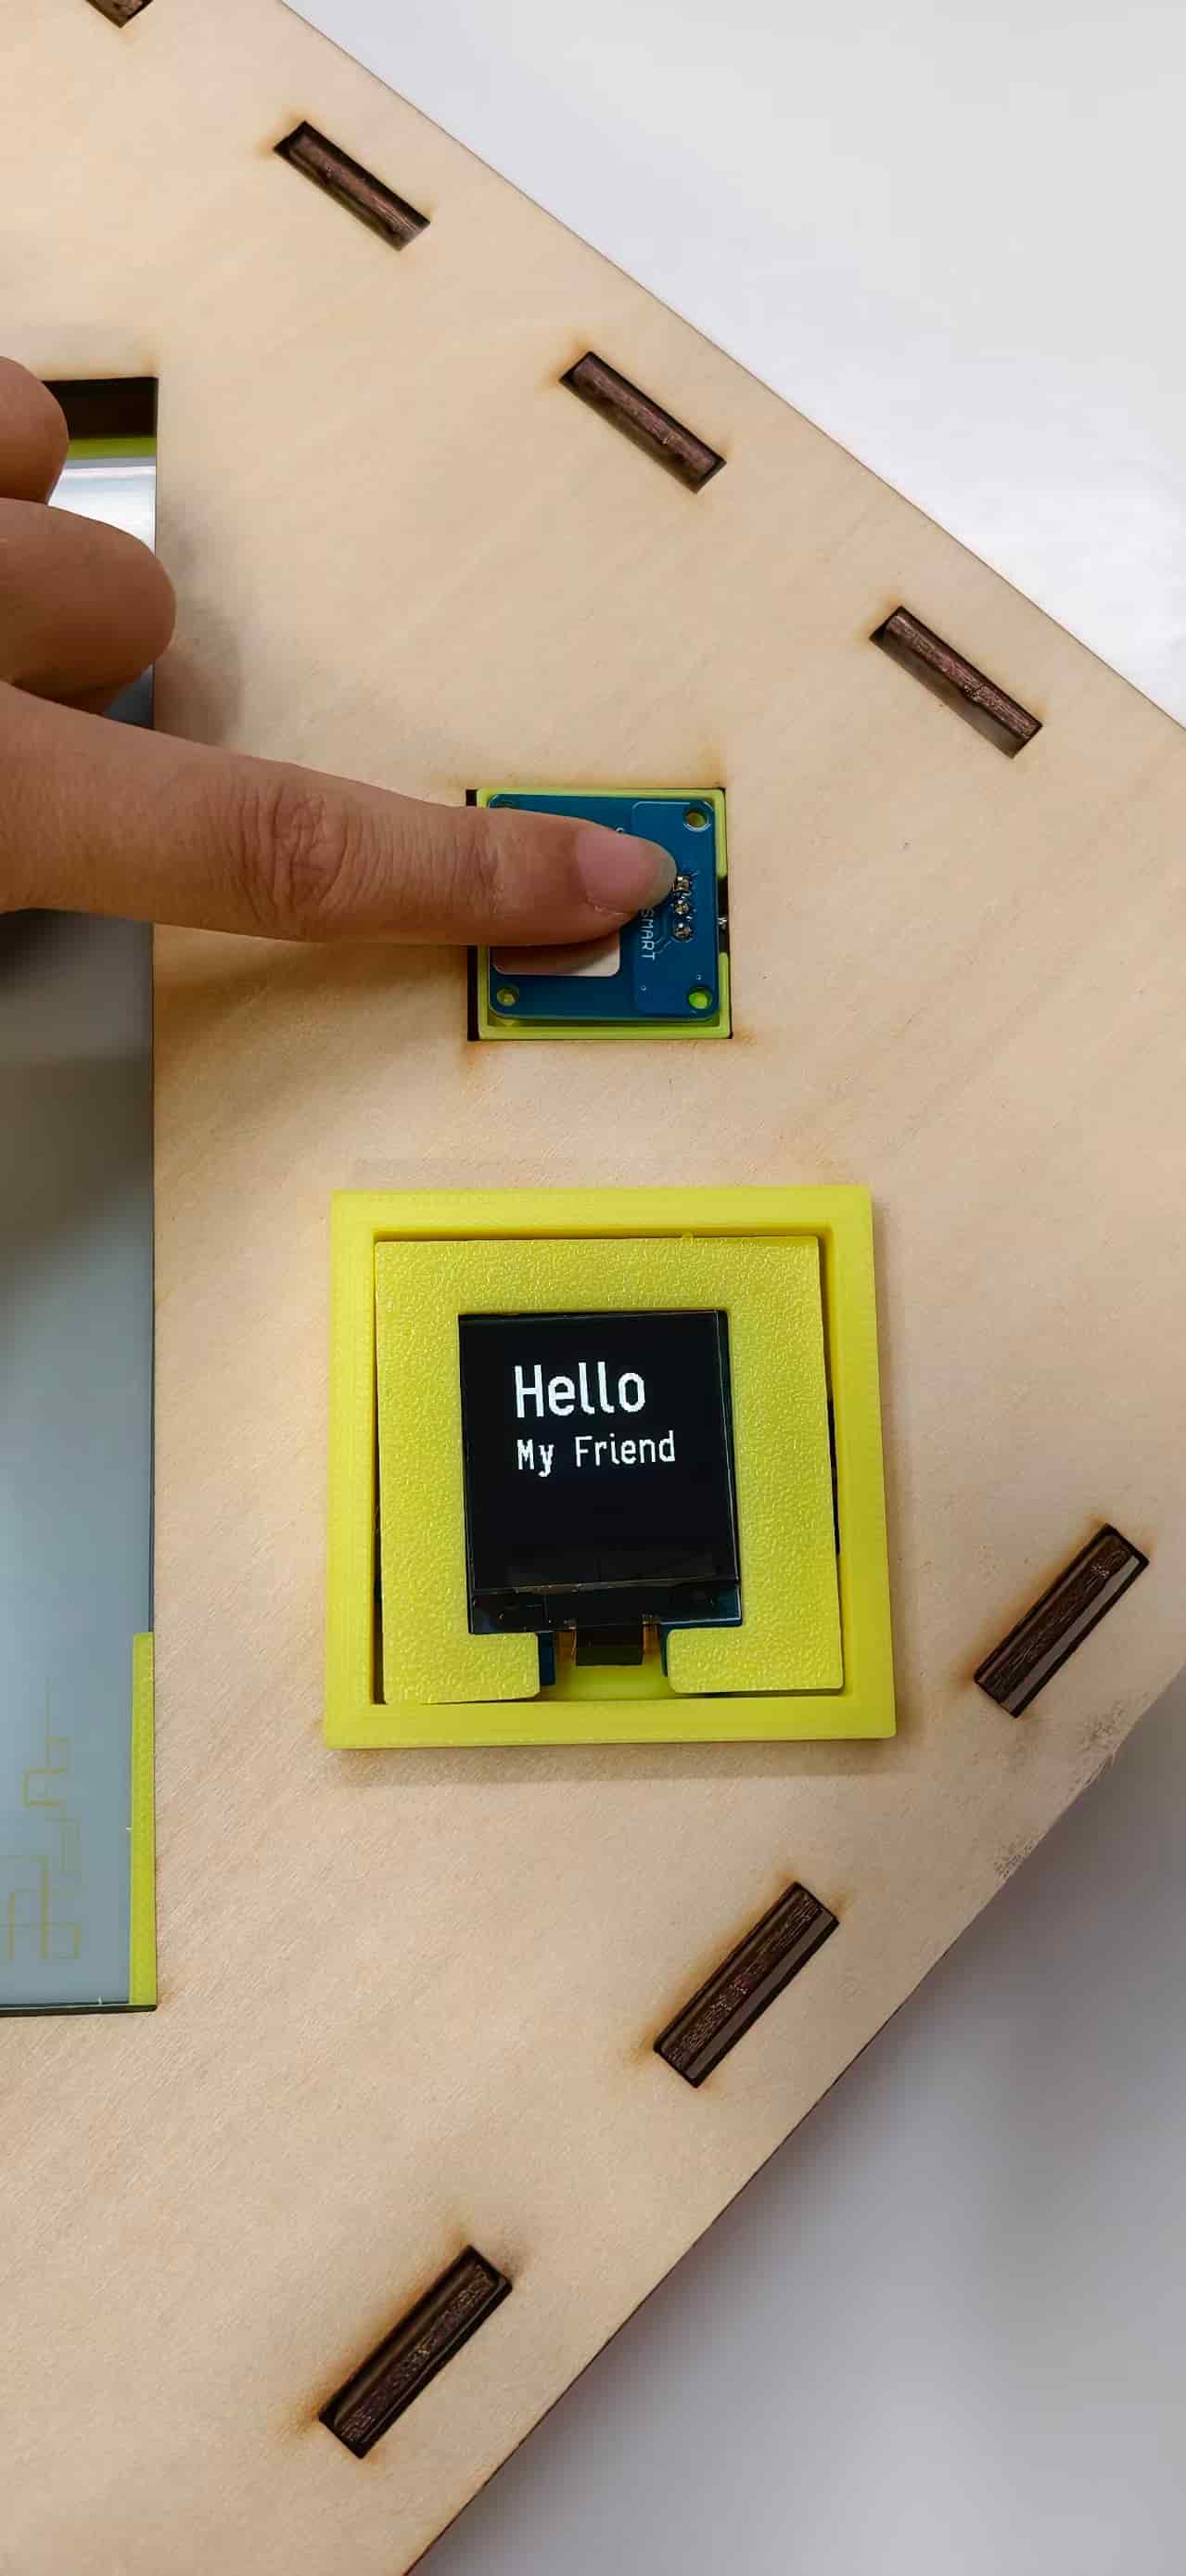
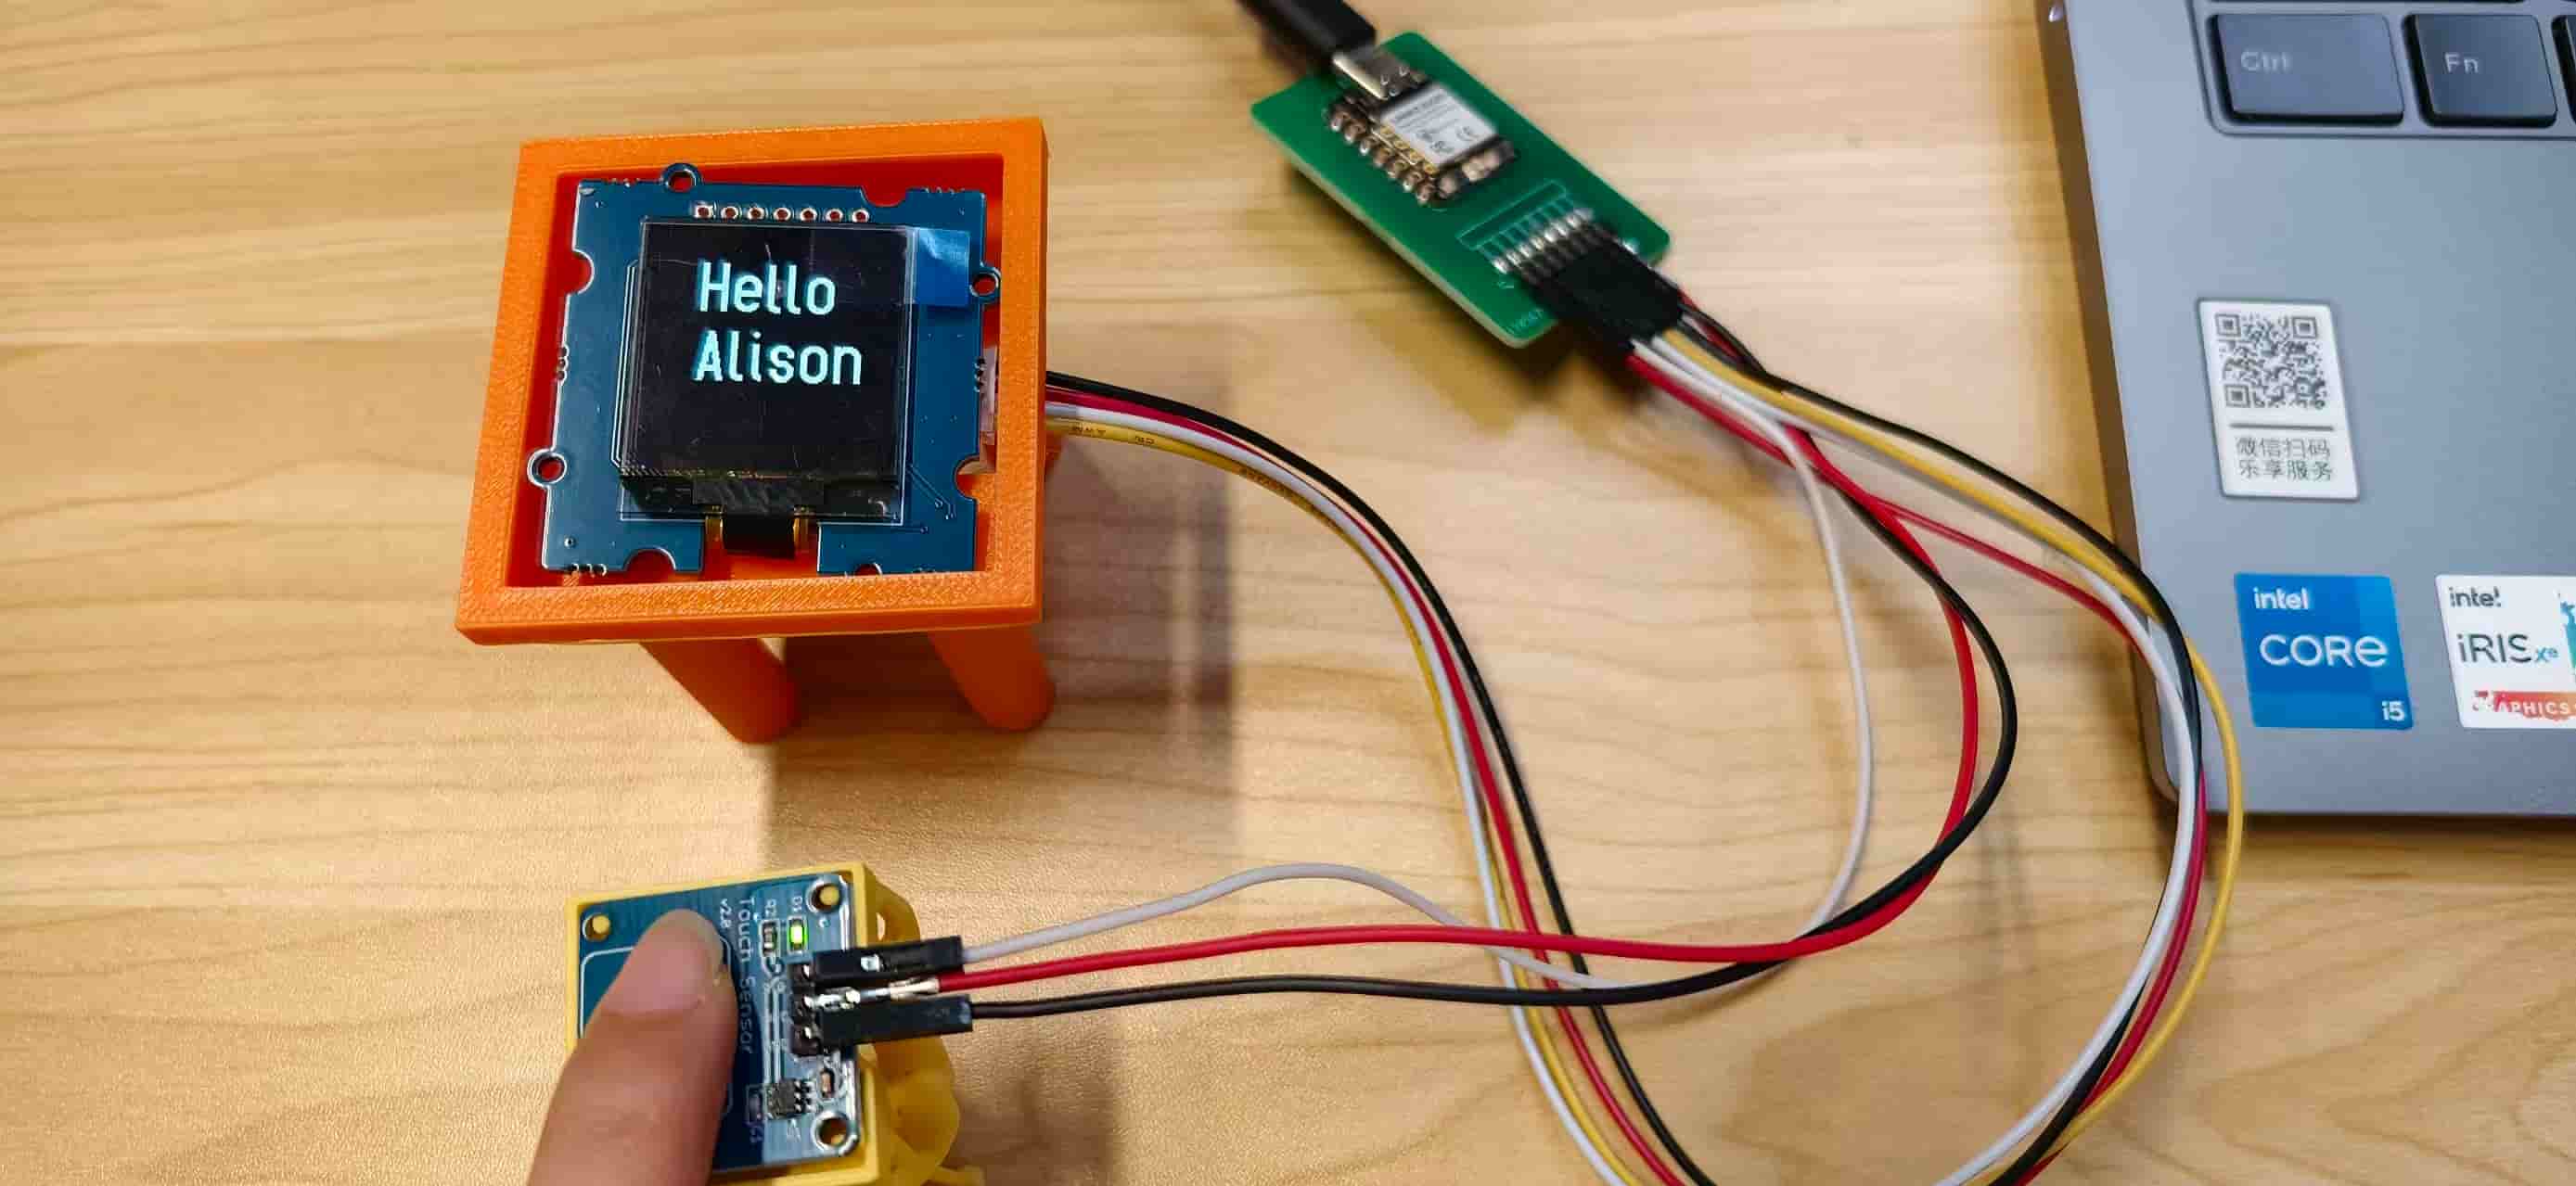
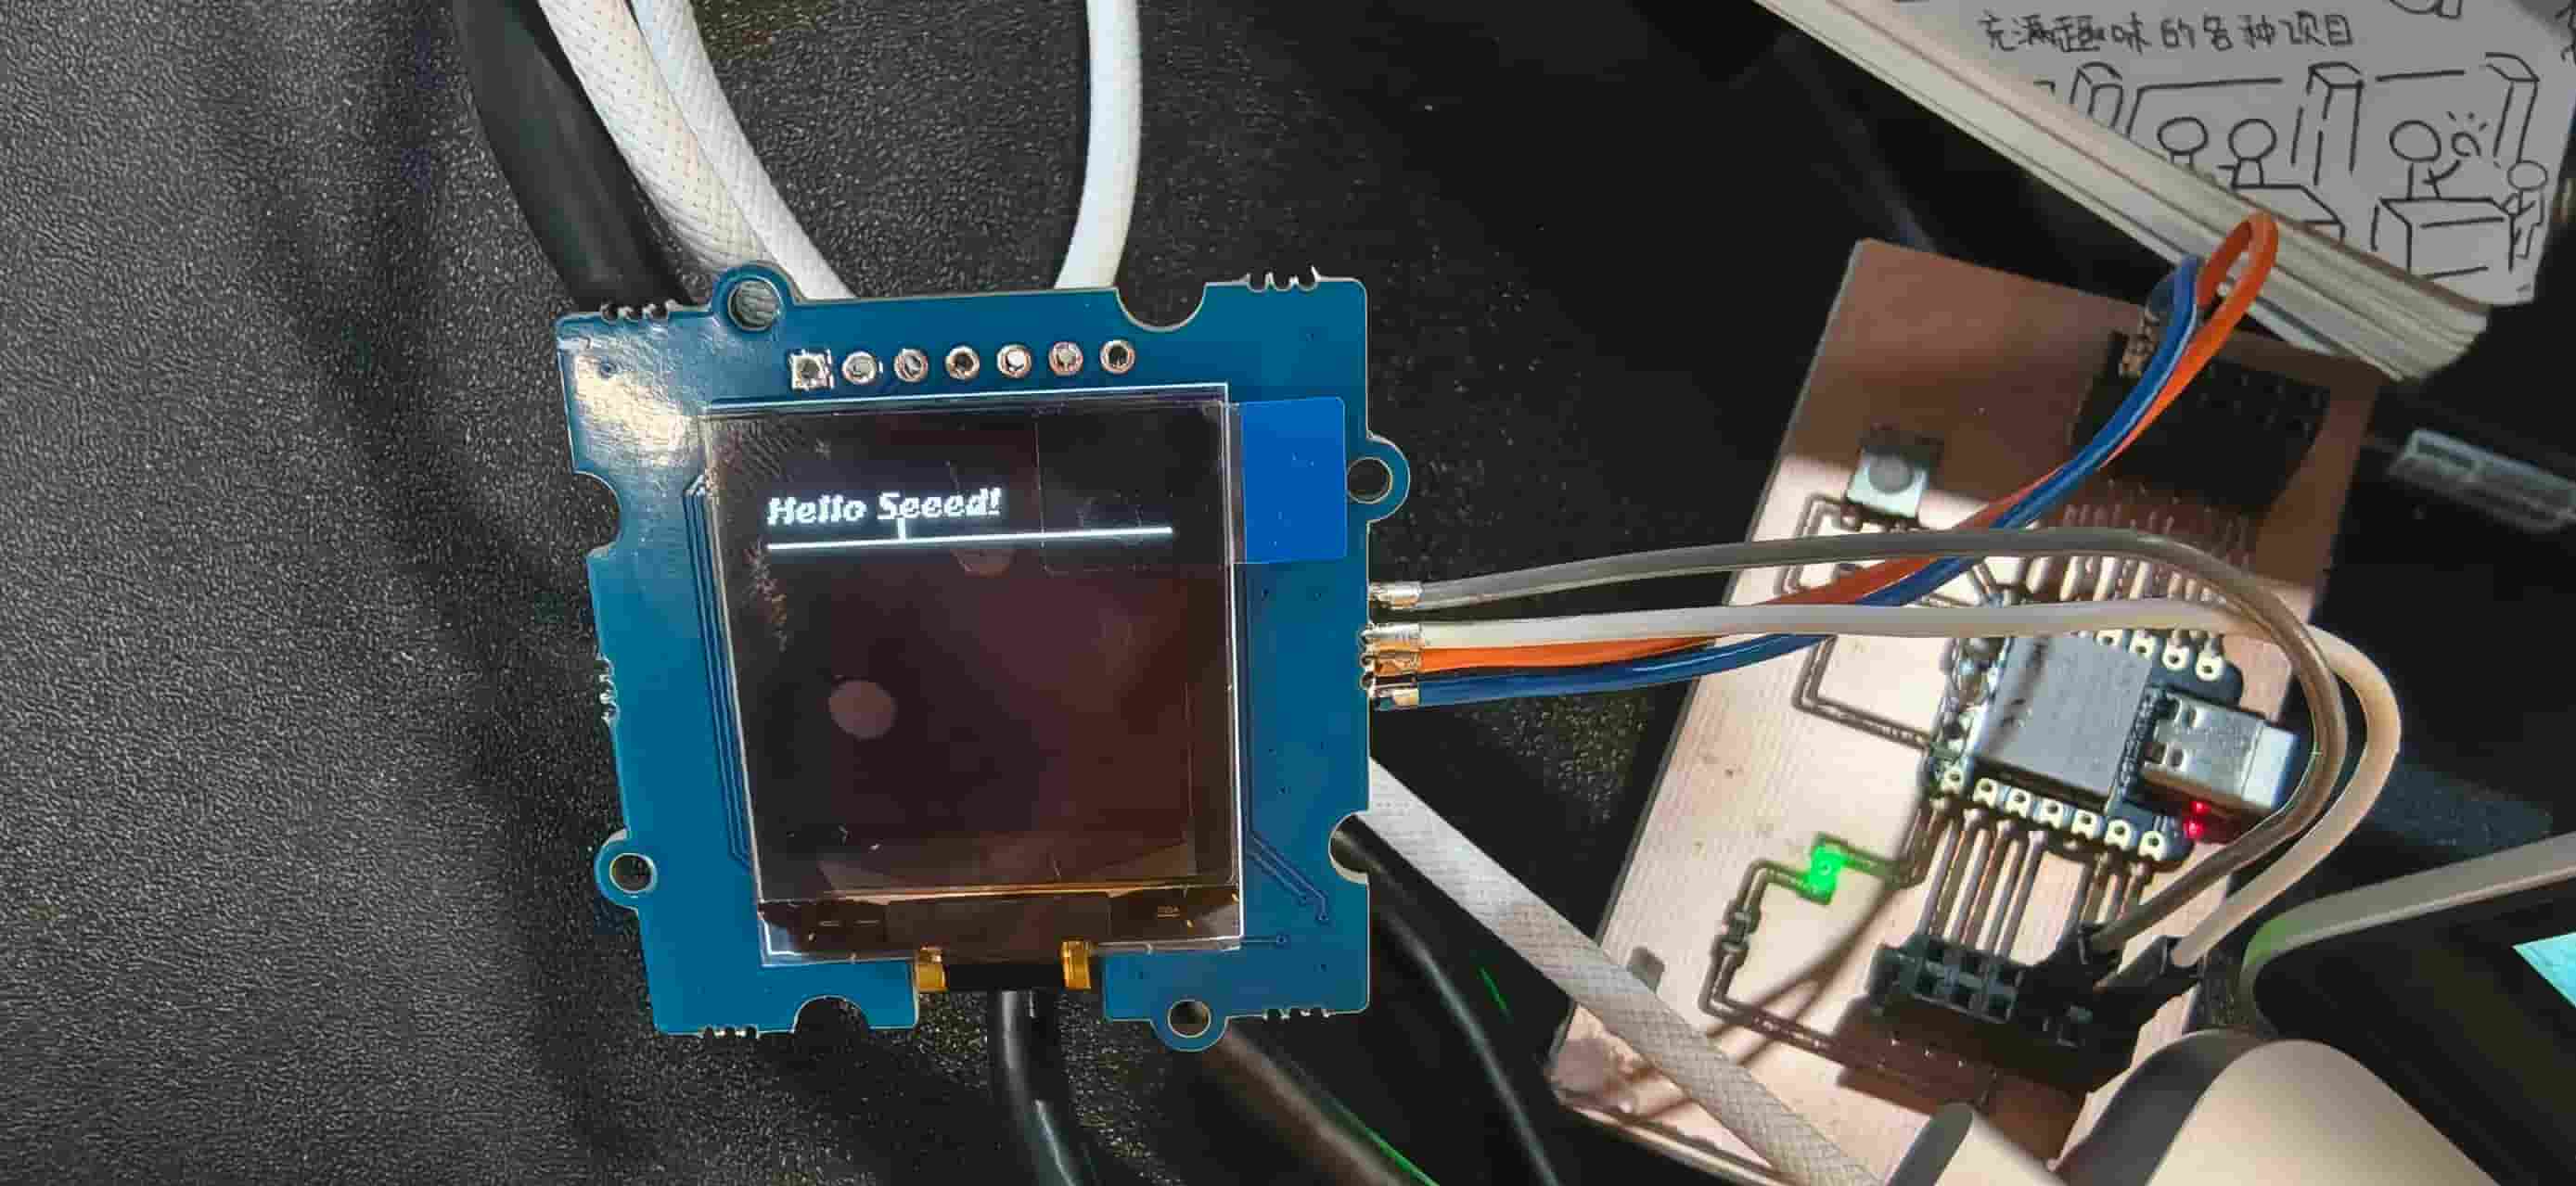
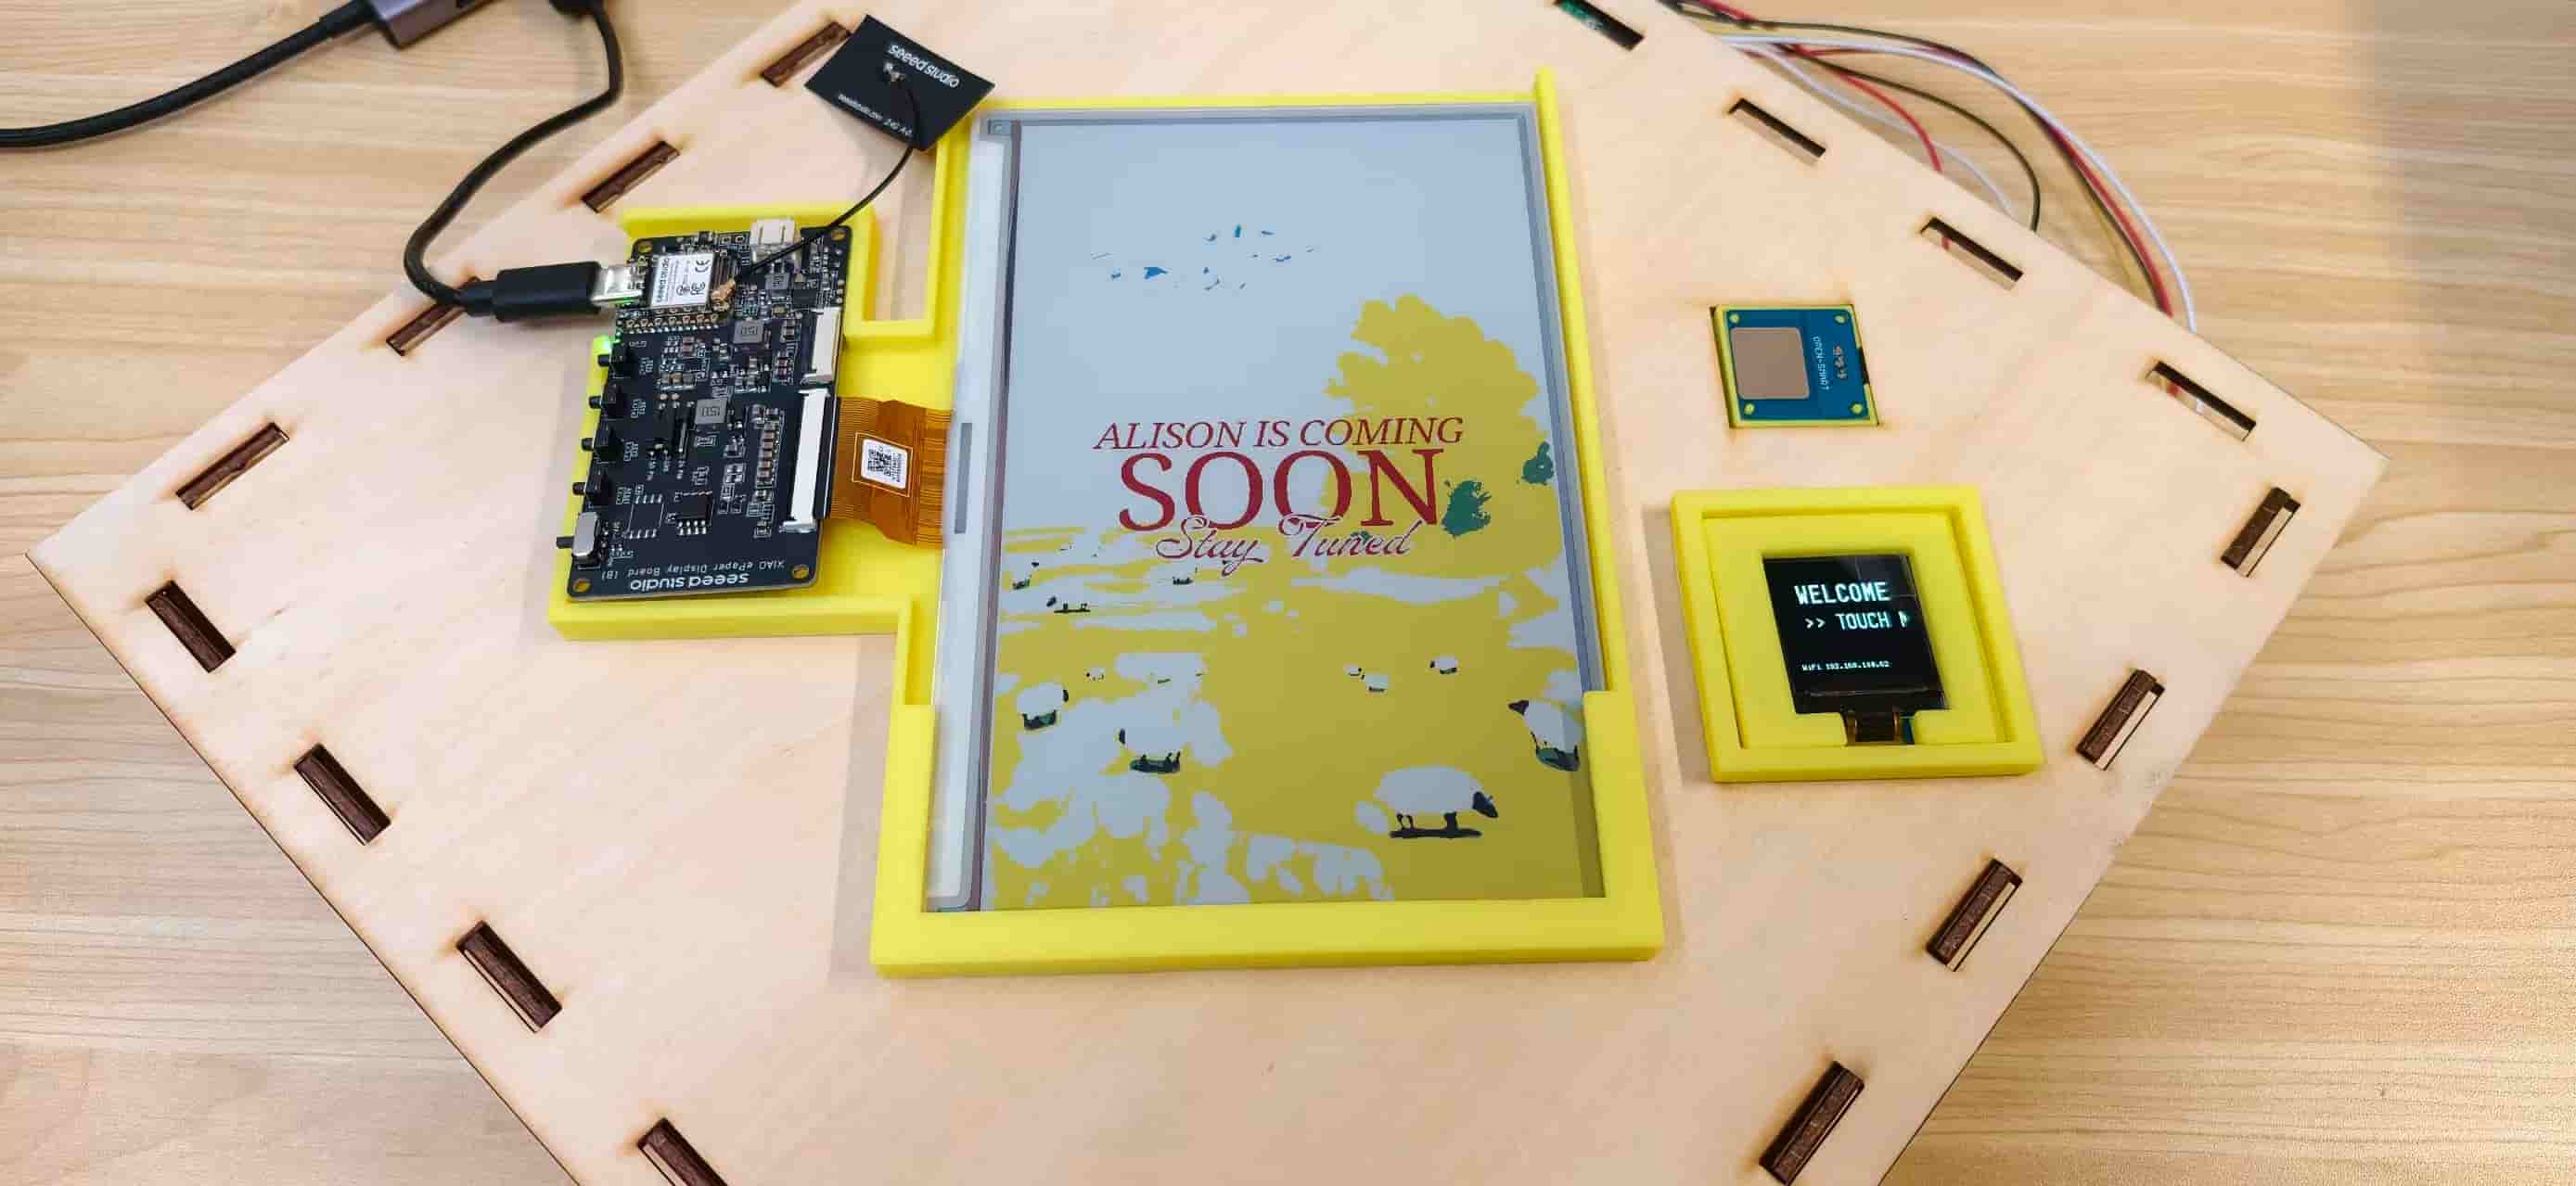
The OLED shows WELCOME, TOUCH ME, and the WiFi/IP status. When touched, it displays Hello / My Friend for two seconds and sends an HTTP POST request to the server.
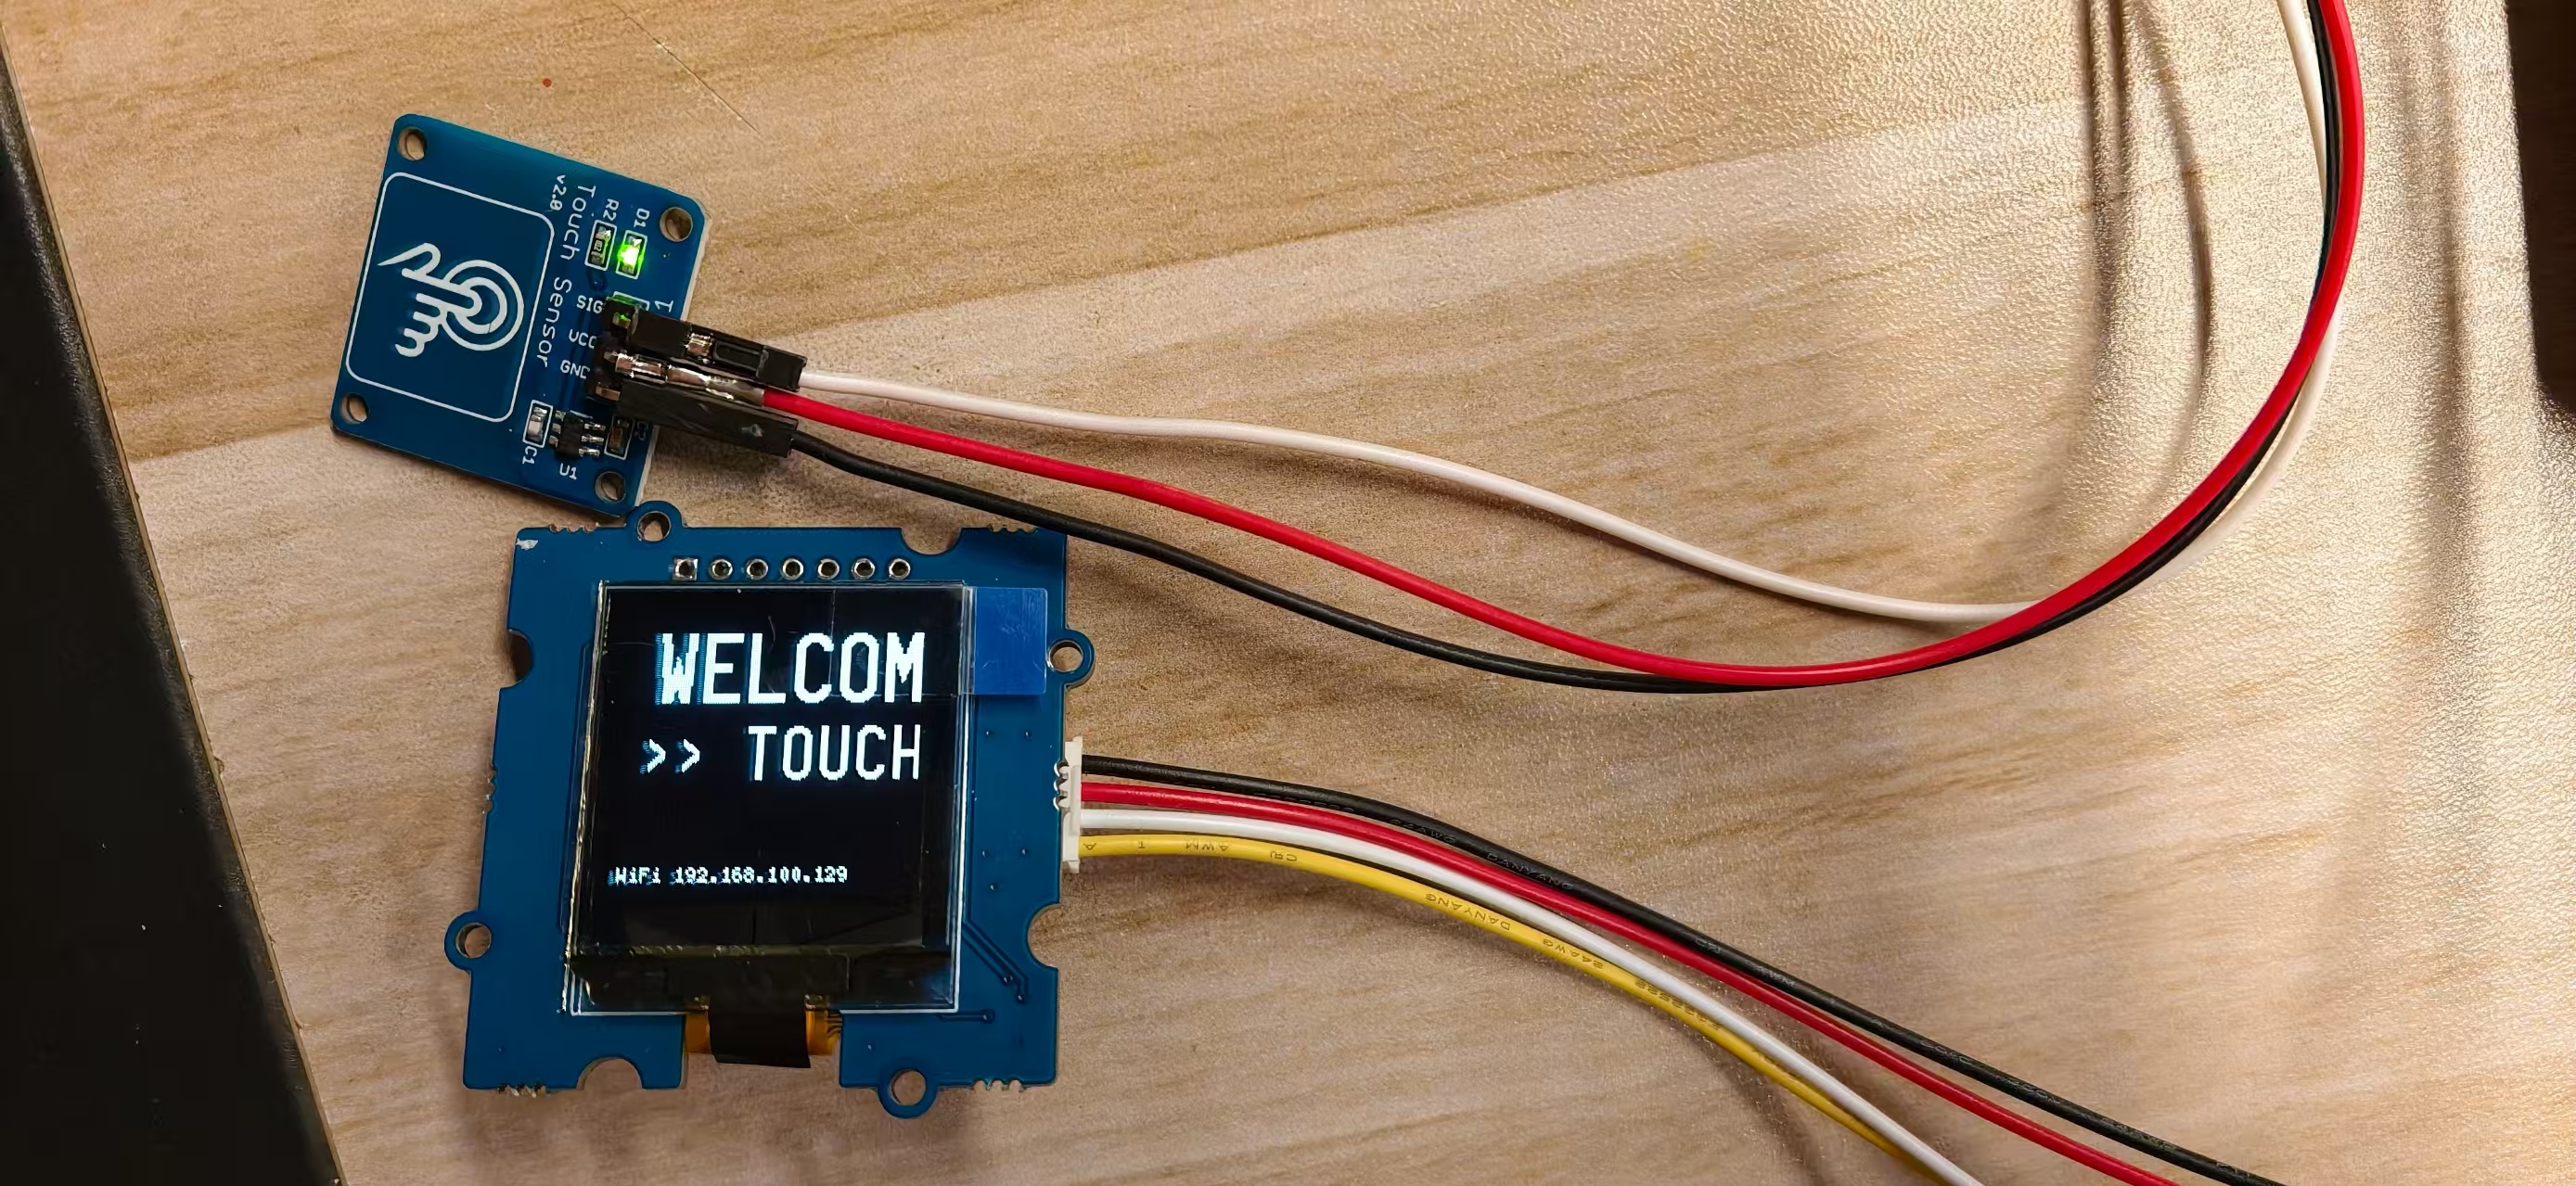
For early testing I used Hello Alison instead of Hello My Friend.
Module 2 - Network Hub
A local Node.js Express server acts as the communication hub.
It provides:
GET /api/statusfor the web dashboard and EE04 display boardPOST /api/statusfor touch events and poster changesPOST /api/resetto return to poster 1- static hosting for the dashboard and poster images
- online/offline tracking for the C3 touch board and EE04 display board
When the C3 sends status=coming, the server changes currentPoster to 3, records lastEvent as touch, and updates the dashboard state.
Module 3 - Ambient Display
The main Fu display uses the EE04 ePaper driver board, which already includes an embedded XIAO ESP32-S3 Plus. There is no separate XIAO board plugged in — the microcontroller, driver circuitry, and connector for the panel are all on one board.
It includes:
- EE04 ePaper driver board (with embedded XIAO ESP32-S3 Plus)
- 7.3 inch Spectra 6 color ePaper display
- three prepared poster bitmap arrays
The EE04 polls the server every five seconds using GET /api/status?device=s3. It only refreshes the ePaper when the poster ID changes. This state-lock behavior matters because ePaper refresh is slow and repeated refreshes can reduce the life of the display.

Interaction Flow
flowchart LR
    A[Visitor touches sensor] --> B[XIAO ESP32-C3]
    B --> C[OLED shows Hello / My Friend]
    B --> D[POST status=coming]
    D --> E[Node.js server]
    E --> F[Web dashboard toast alert]
    E --> G[currentPoster = 3]
    G --> H[EE04 embedded S3 polls status]
    H --> I[7.3 inch ePaper switches to visitor poster]
The same server also supports manual poster selection from the dashboard. This helped during debugging because I could test the EE04 and ePaper without touching the C3 every time.
Poster and Interface Design
The ePaper display normally shows Fu-style artwork. I prepared three poster states:
- Poster 1: calm Fu blessing poster
- Poster 2: alternate festive Fu poster
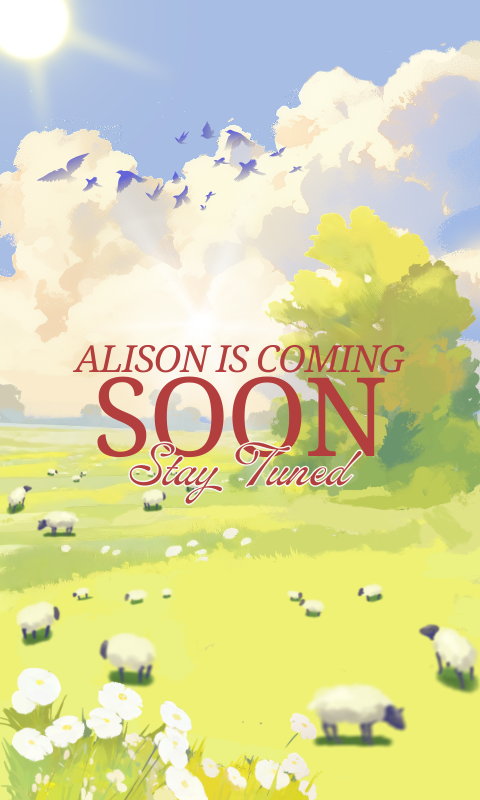
- Poster 3: visitor notification poster


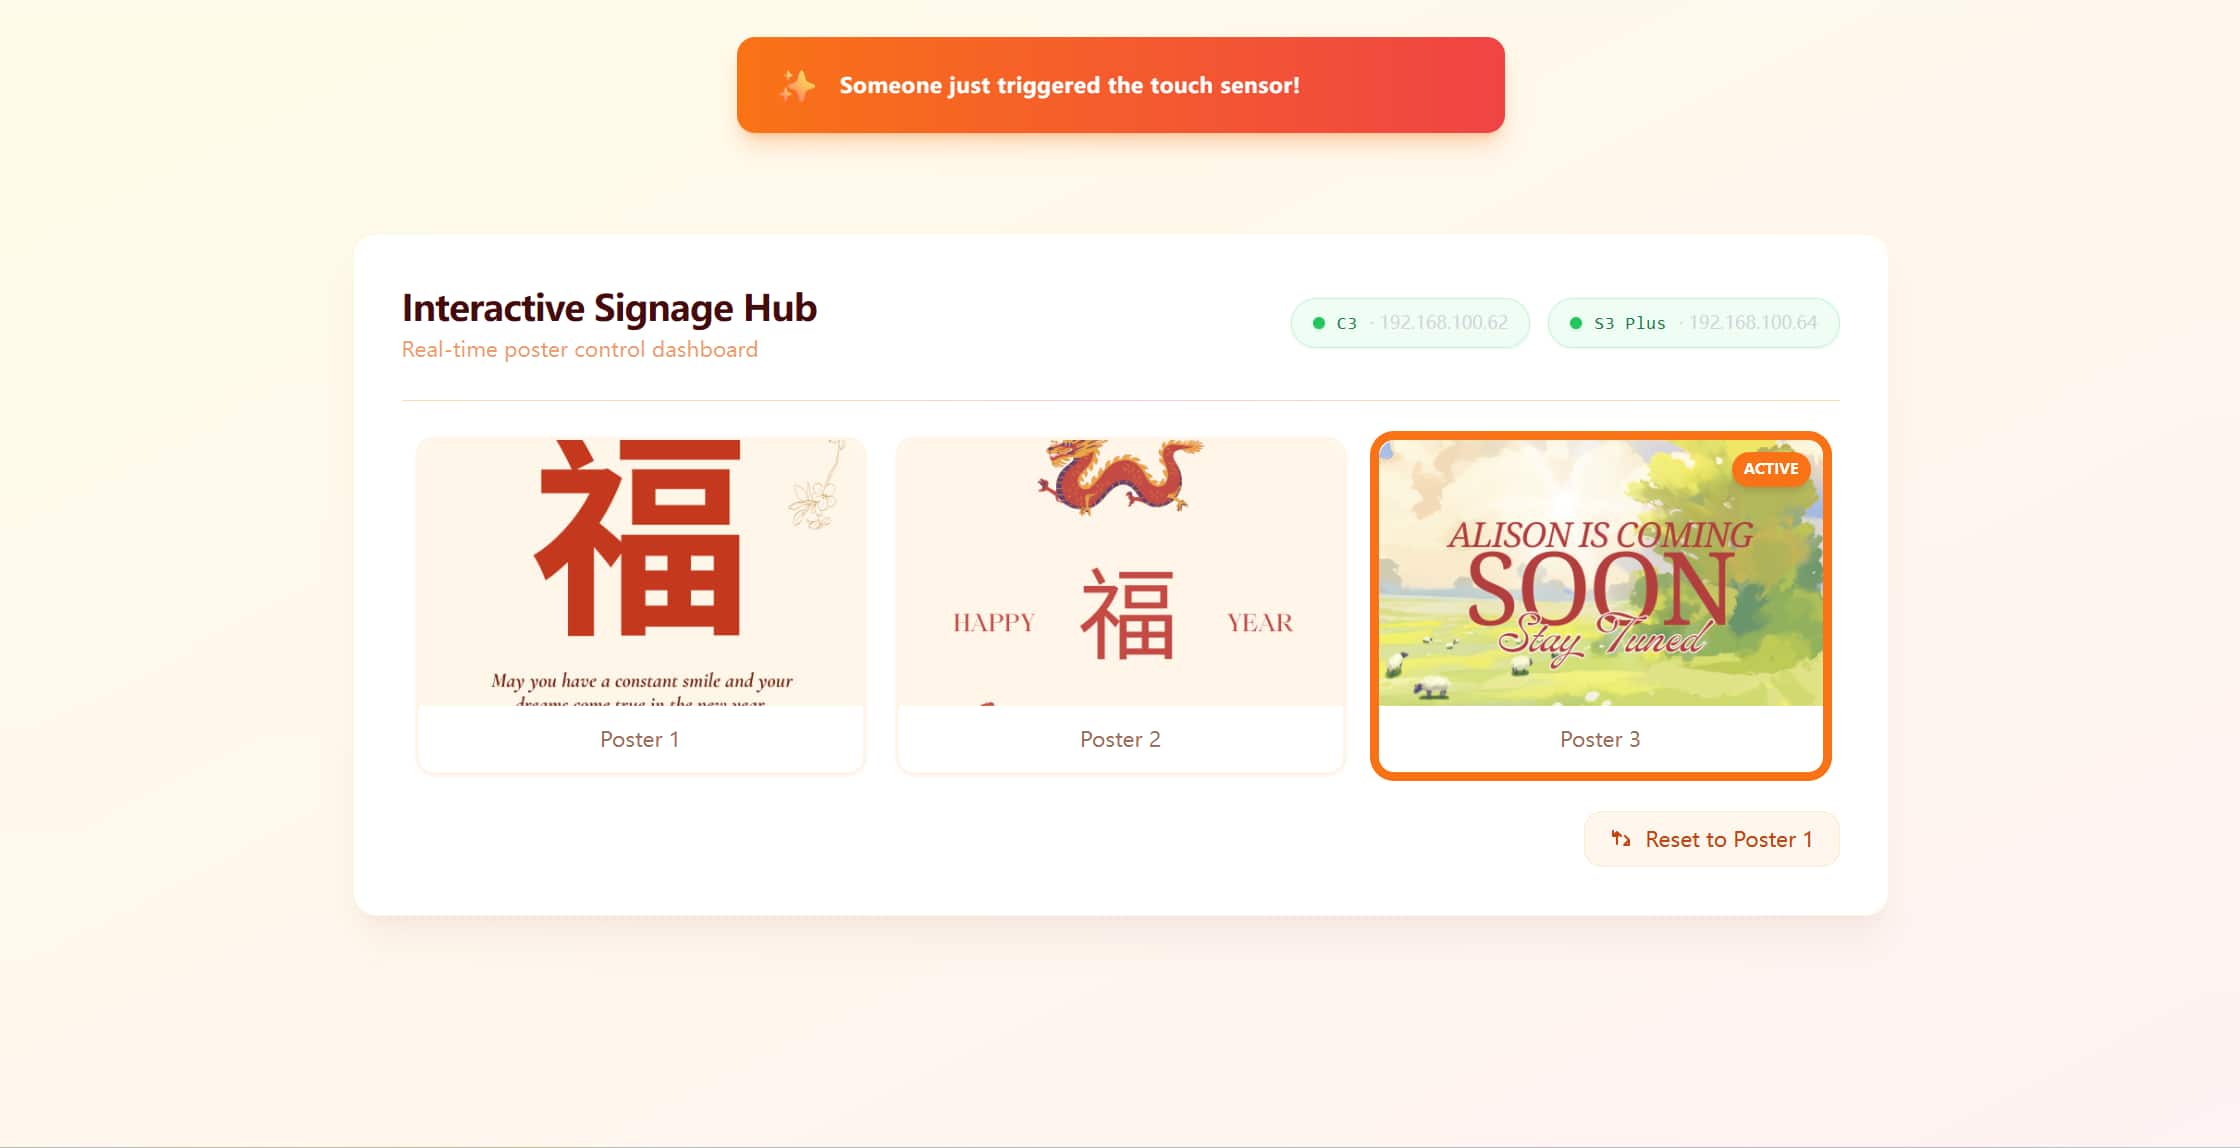
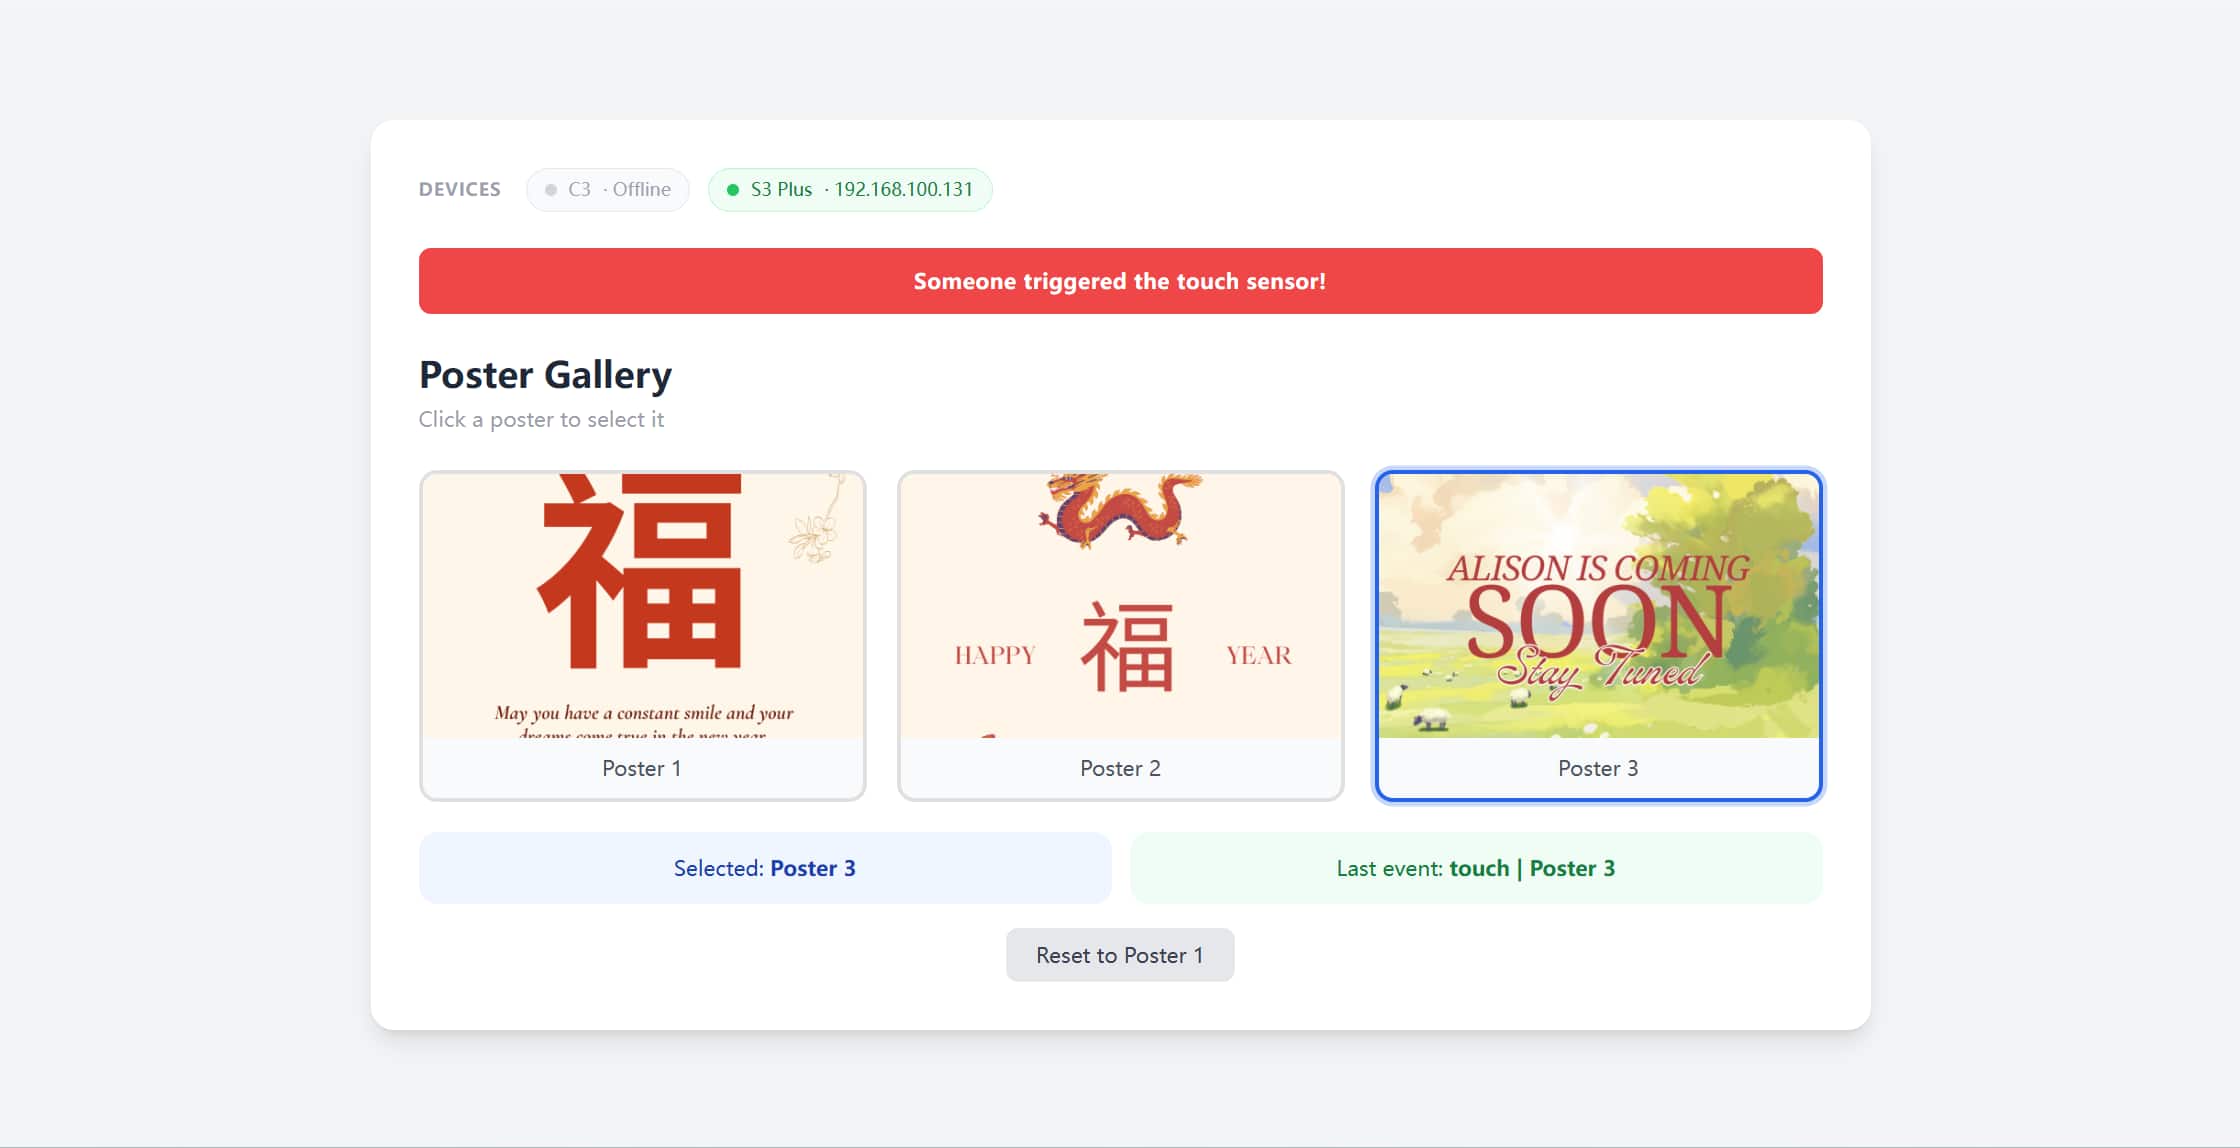
The dashboard uses a warm orange-red palette, rounded cards, poster thumbnails, device status pills, and a toast notification. The most important thing is that it shows the system state clearly:
- which poster is active
- whether the C3 touch board is online
- whether the EE04 display board is online
- whether the last event came from touch, web control, or reset
Physical Design
From Flat Decoration to Real Object
The physical object began as a simple diamond-shaped Fu display. I wanted the overall silhouette to feel familiar, close to the square decorations that are often rotated 45 degrees and pasted on doors.
The first physical questions were simple but stubborn:
- How big should the ePaper opening be?
- Where should the OLED and touch sensor live?
- How can the structure hang vertically?
- How can I still access the electronics after assembly?
- How can the front look decorative while the back remains serviceable?
The answers did not arrive in one design. They arrived through repeated misfits.
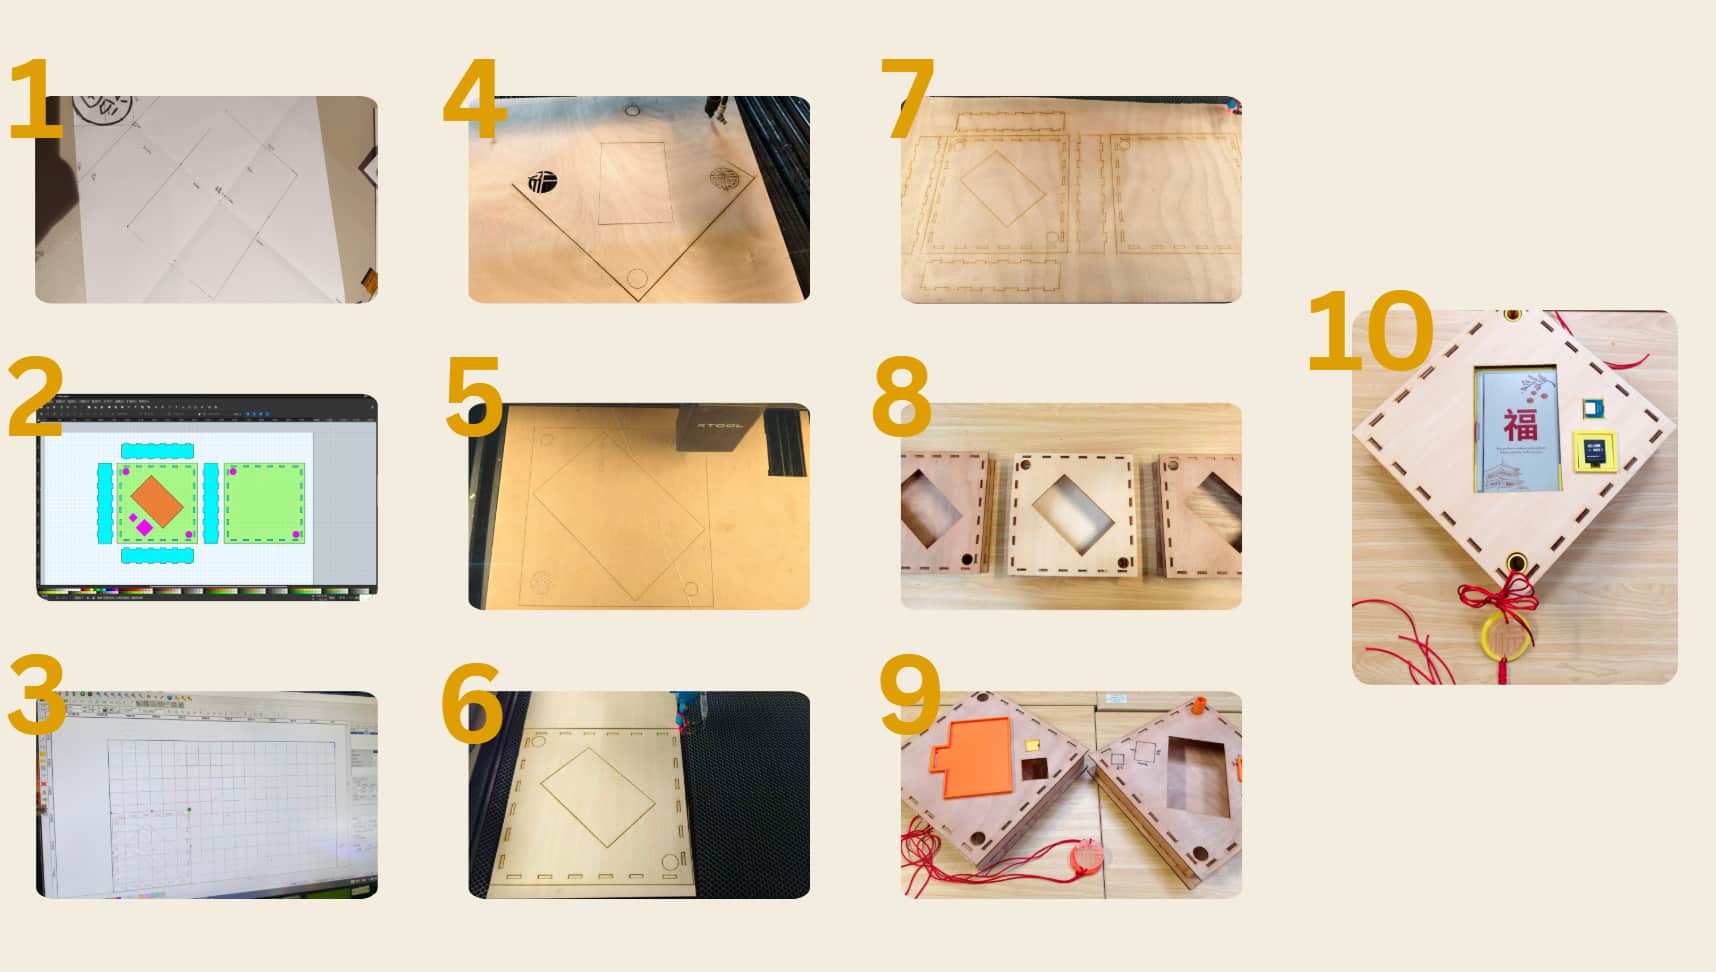
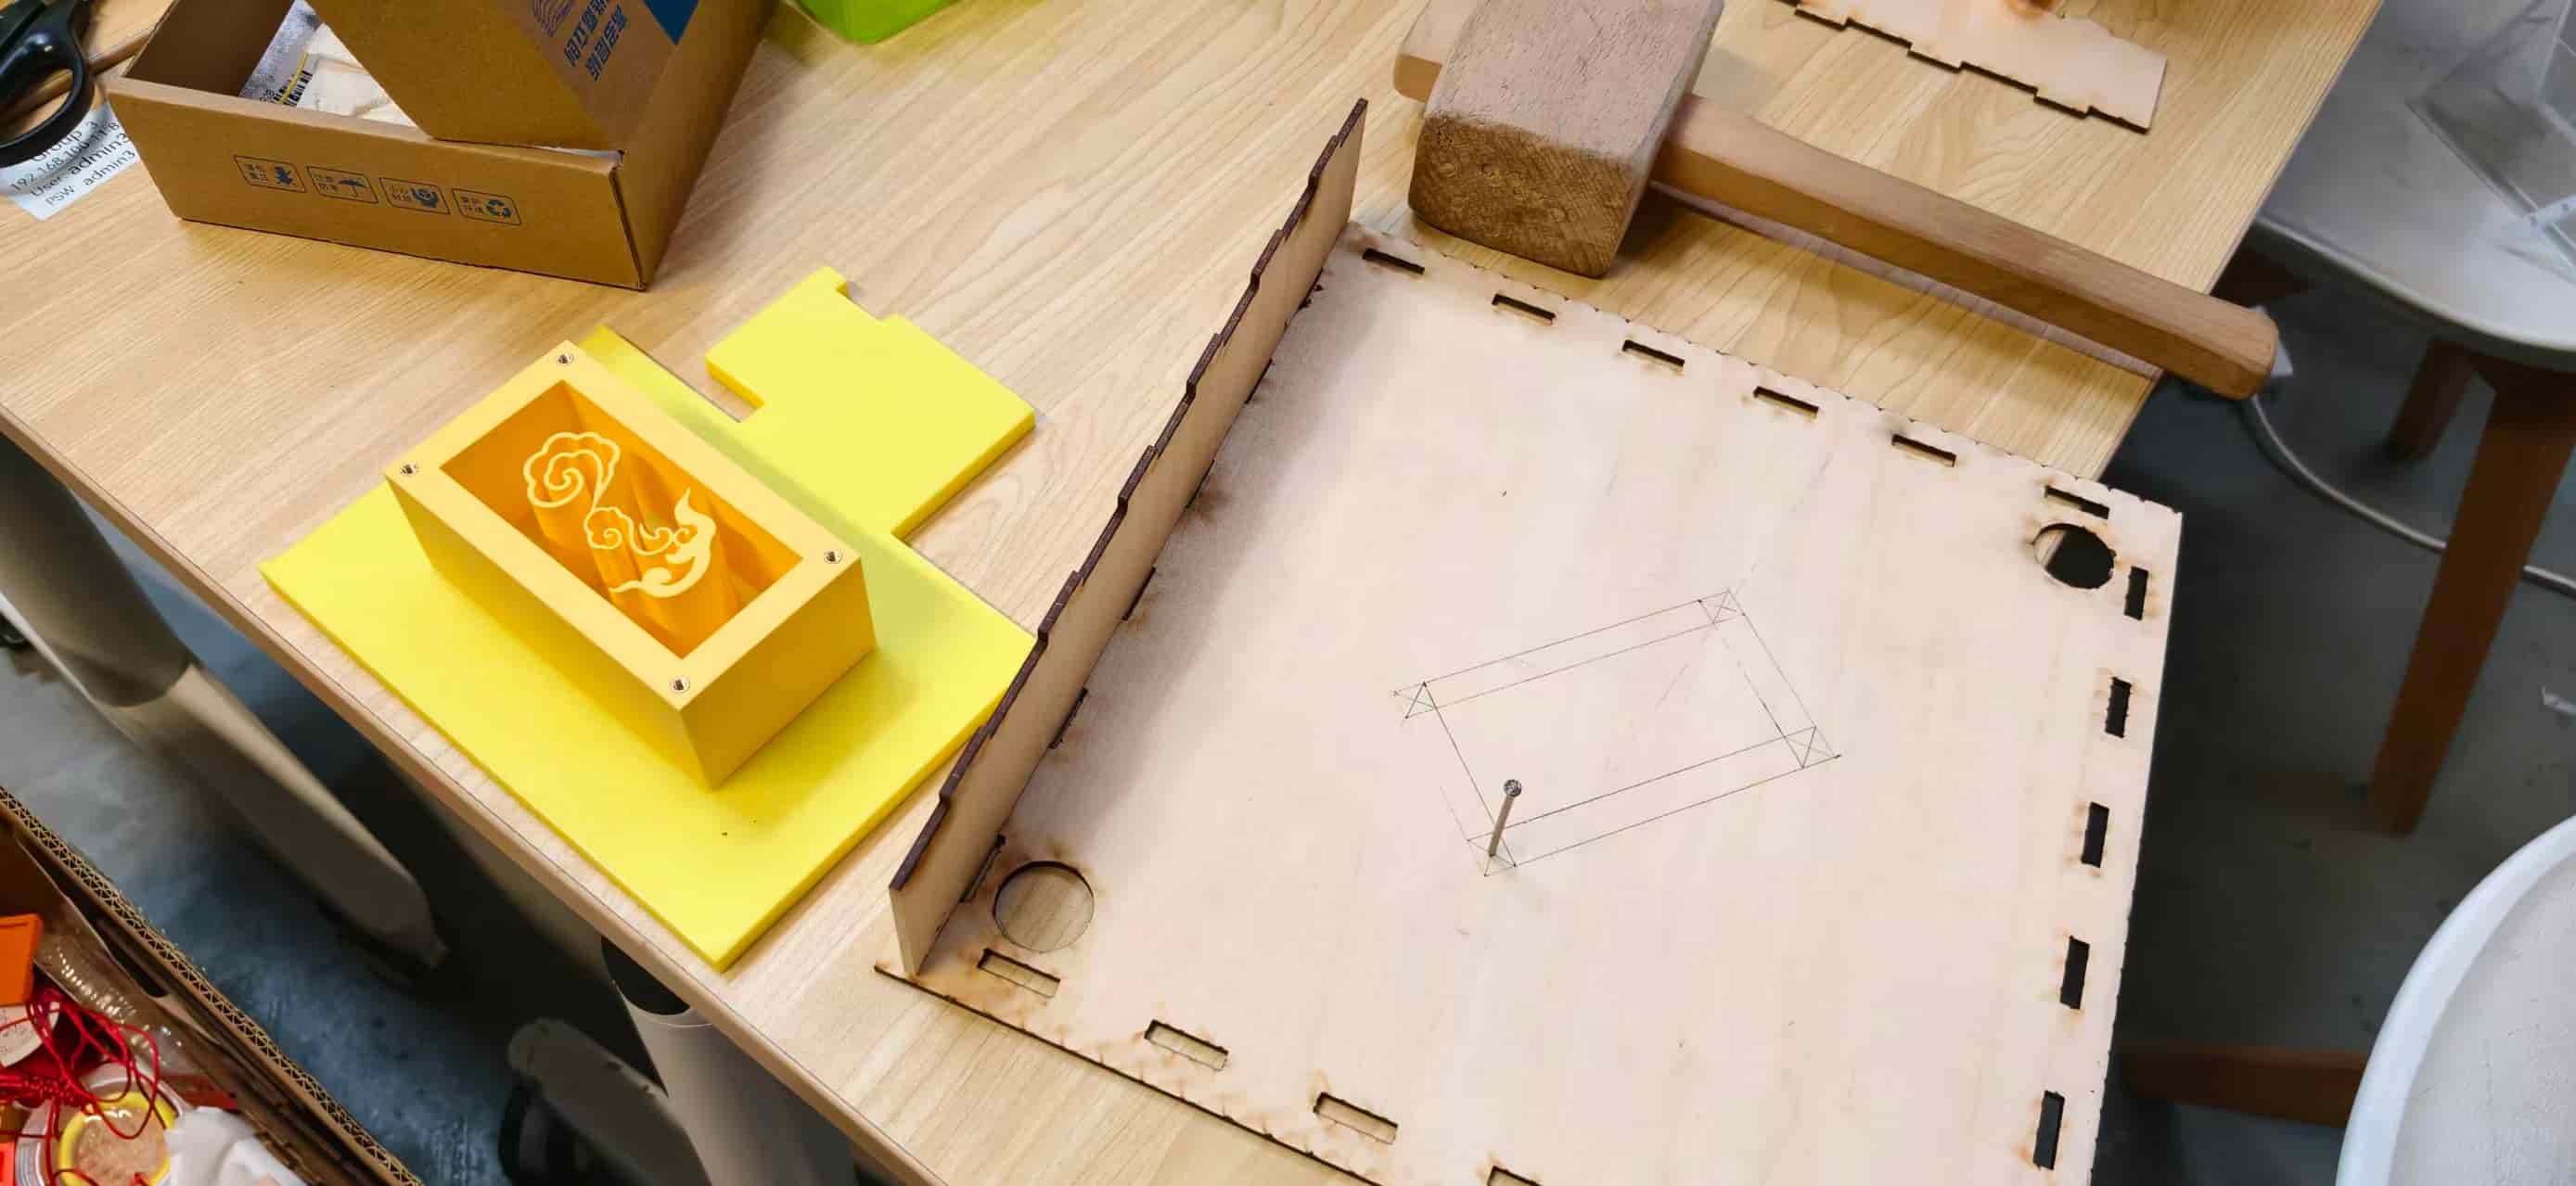
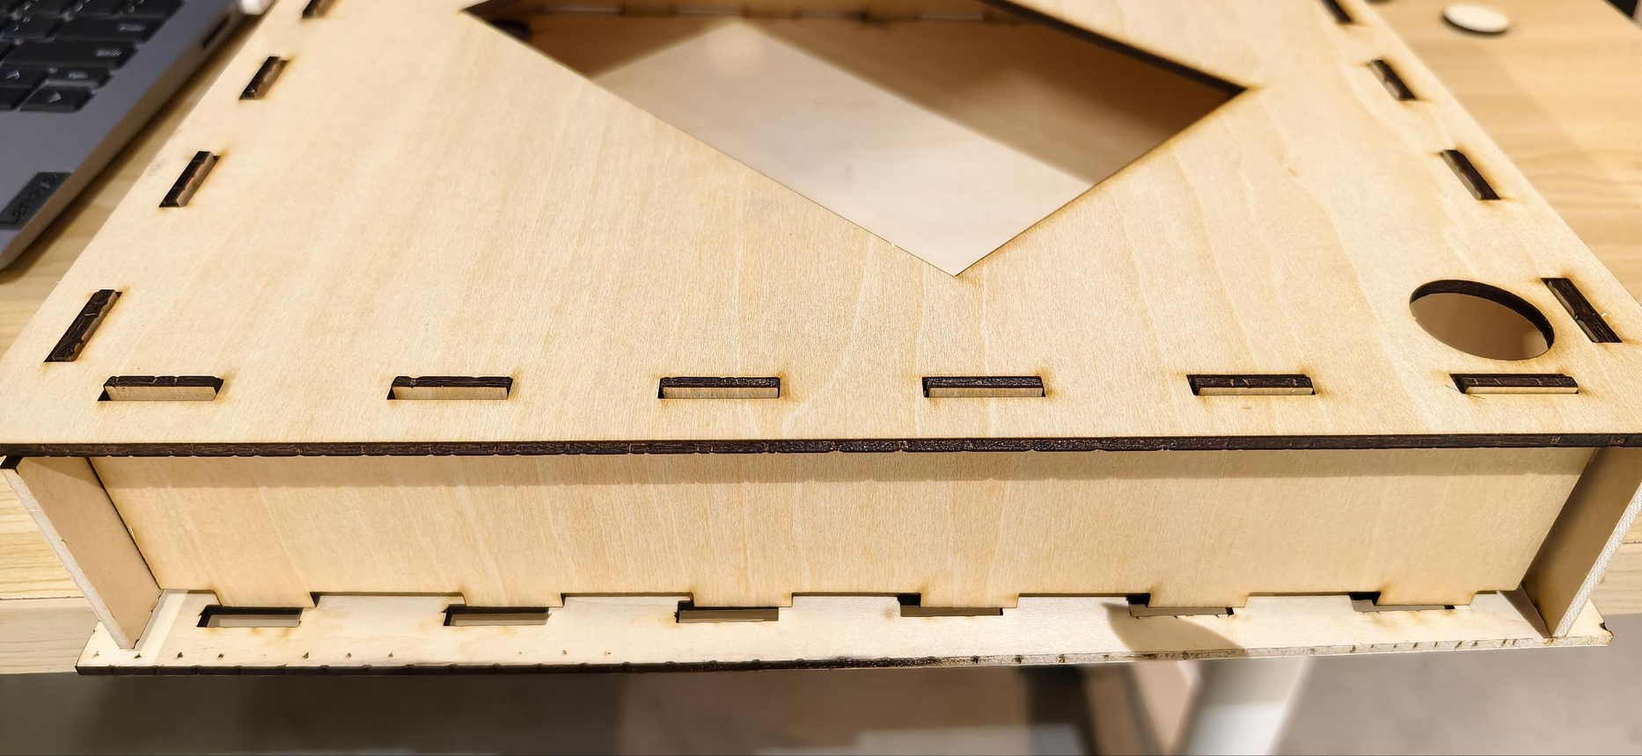
Laser-Cut Frame Iterations
The front frame was laser-cut from plywood. It includes:
- a central opening for the ePaper display
- finger-joint style edge slots
- holes for hanging or mounting
- a diamond-shaped Fu decoration proportion
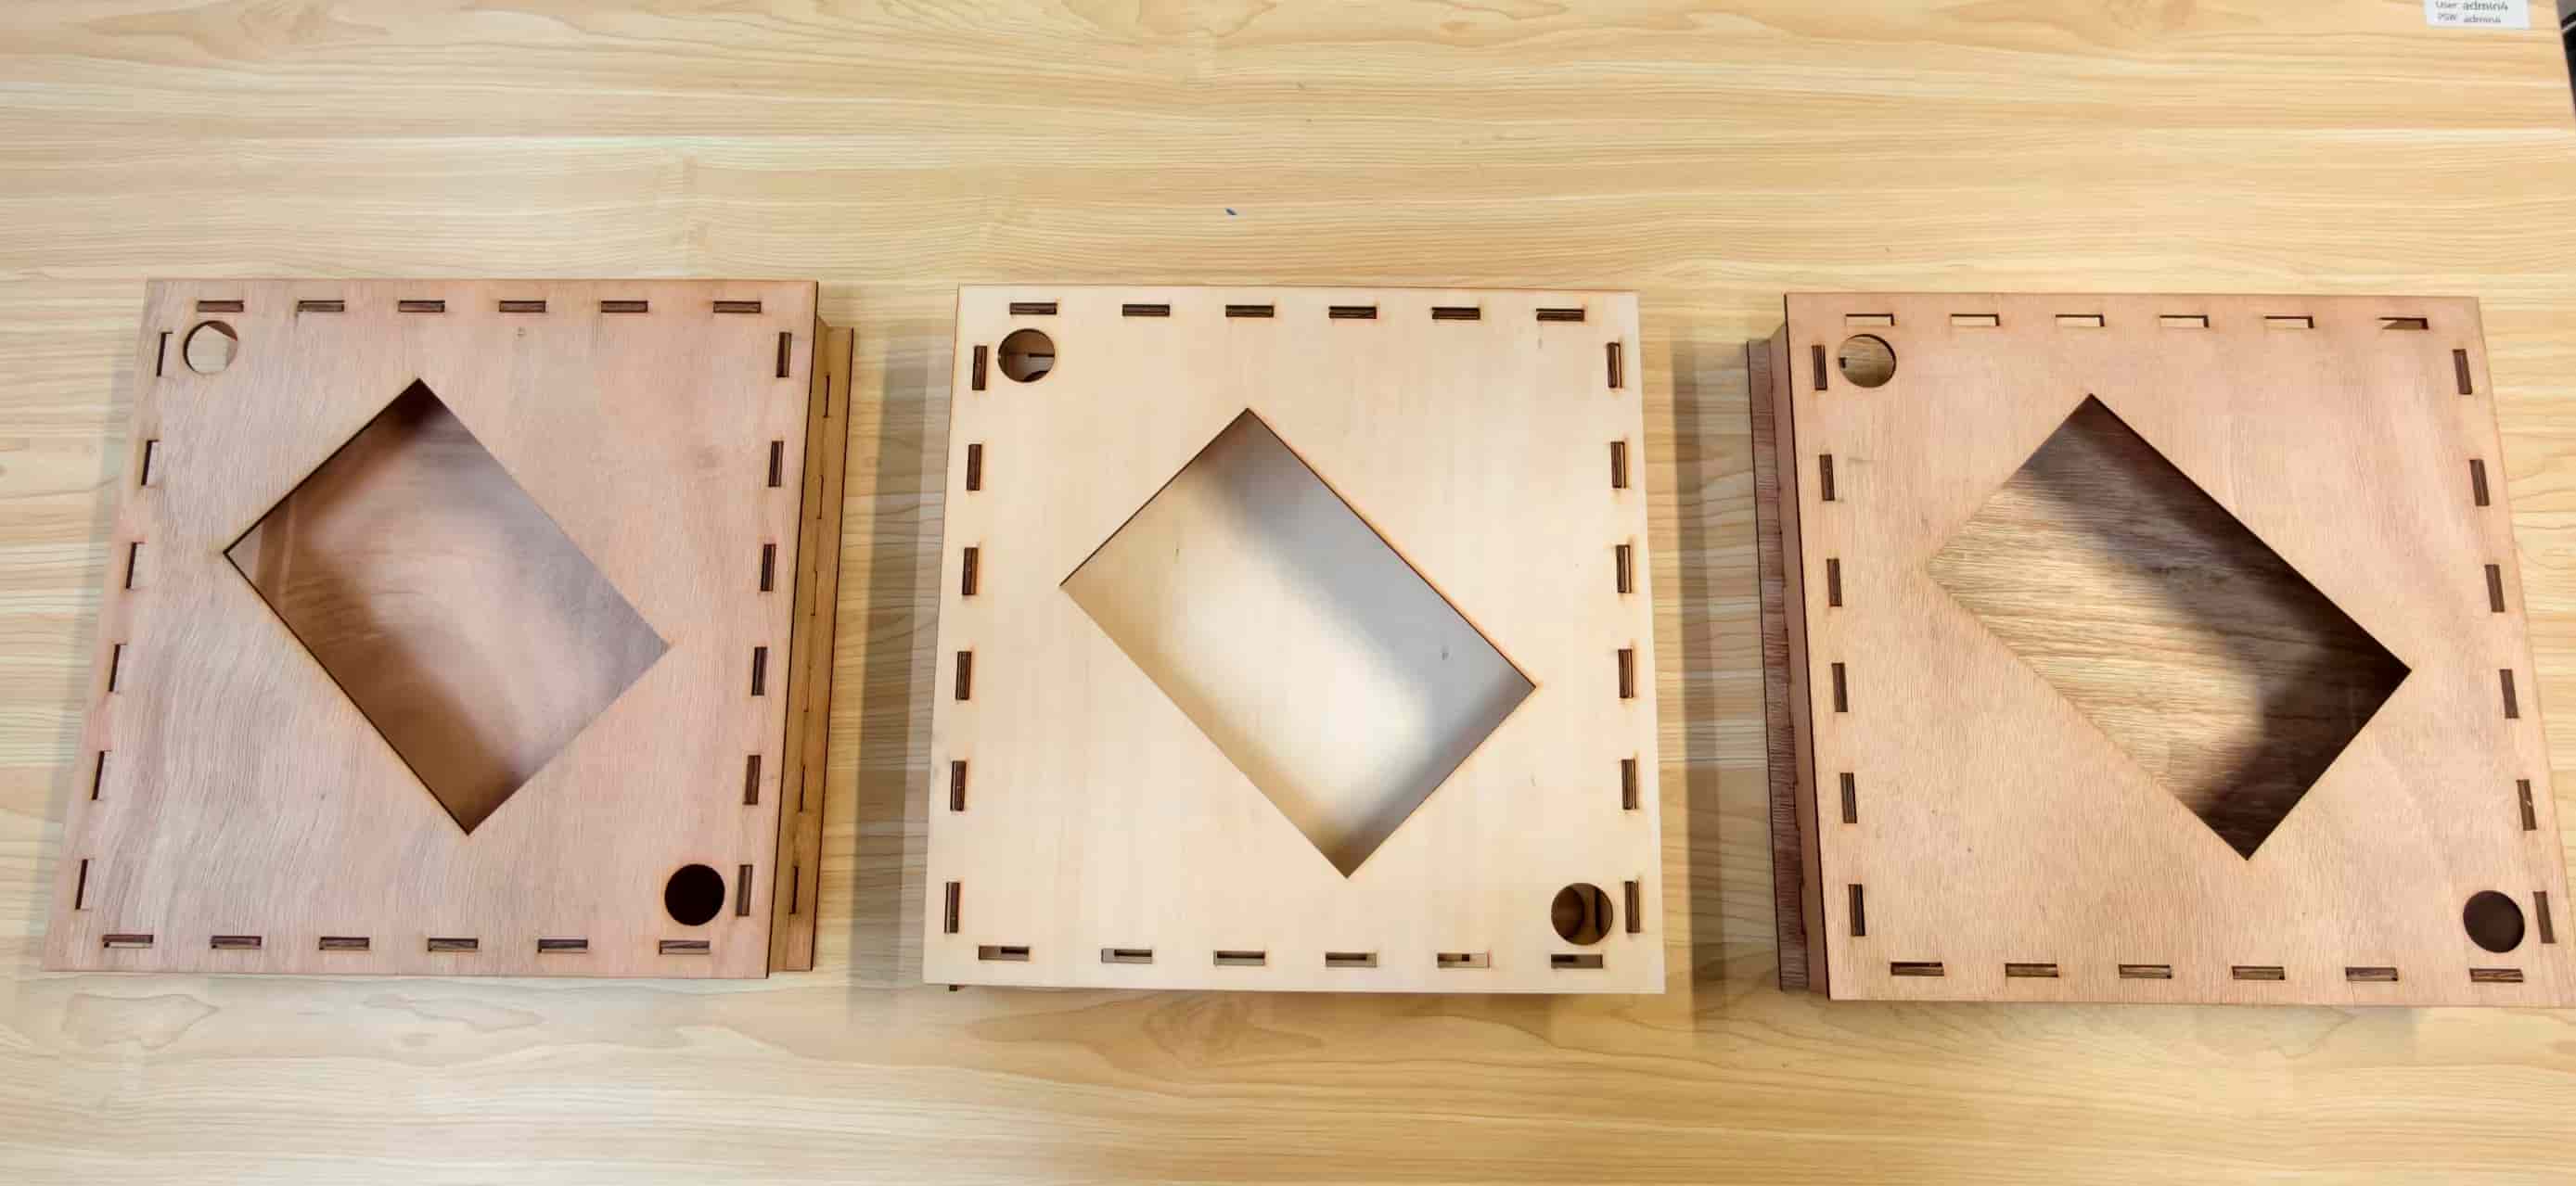
The first version ignored real assembly tolerances. It looked correct on screen, but the parts could not fit together.
The second version introduced directional panels, but many pieces looked visually identical after cutting. I kept assembling them incorrectly. That failure was not dramatic, but it was very annoying, and it taught me that orientation markings are part of design, not an afterthought.
Eventually I added clearer assembly references and made several cut versions before getting an acceptable fit.
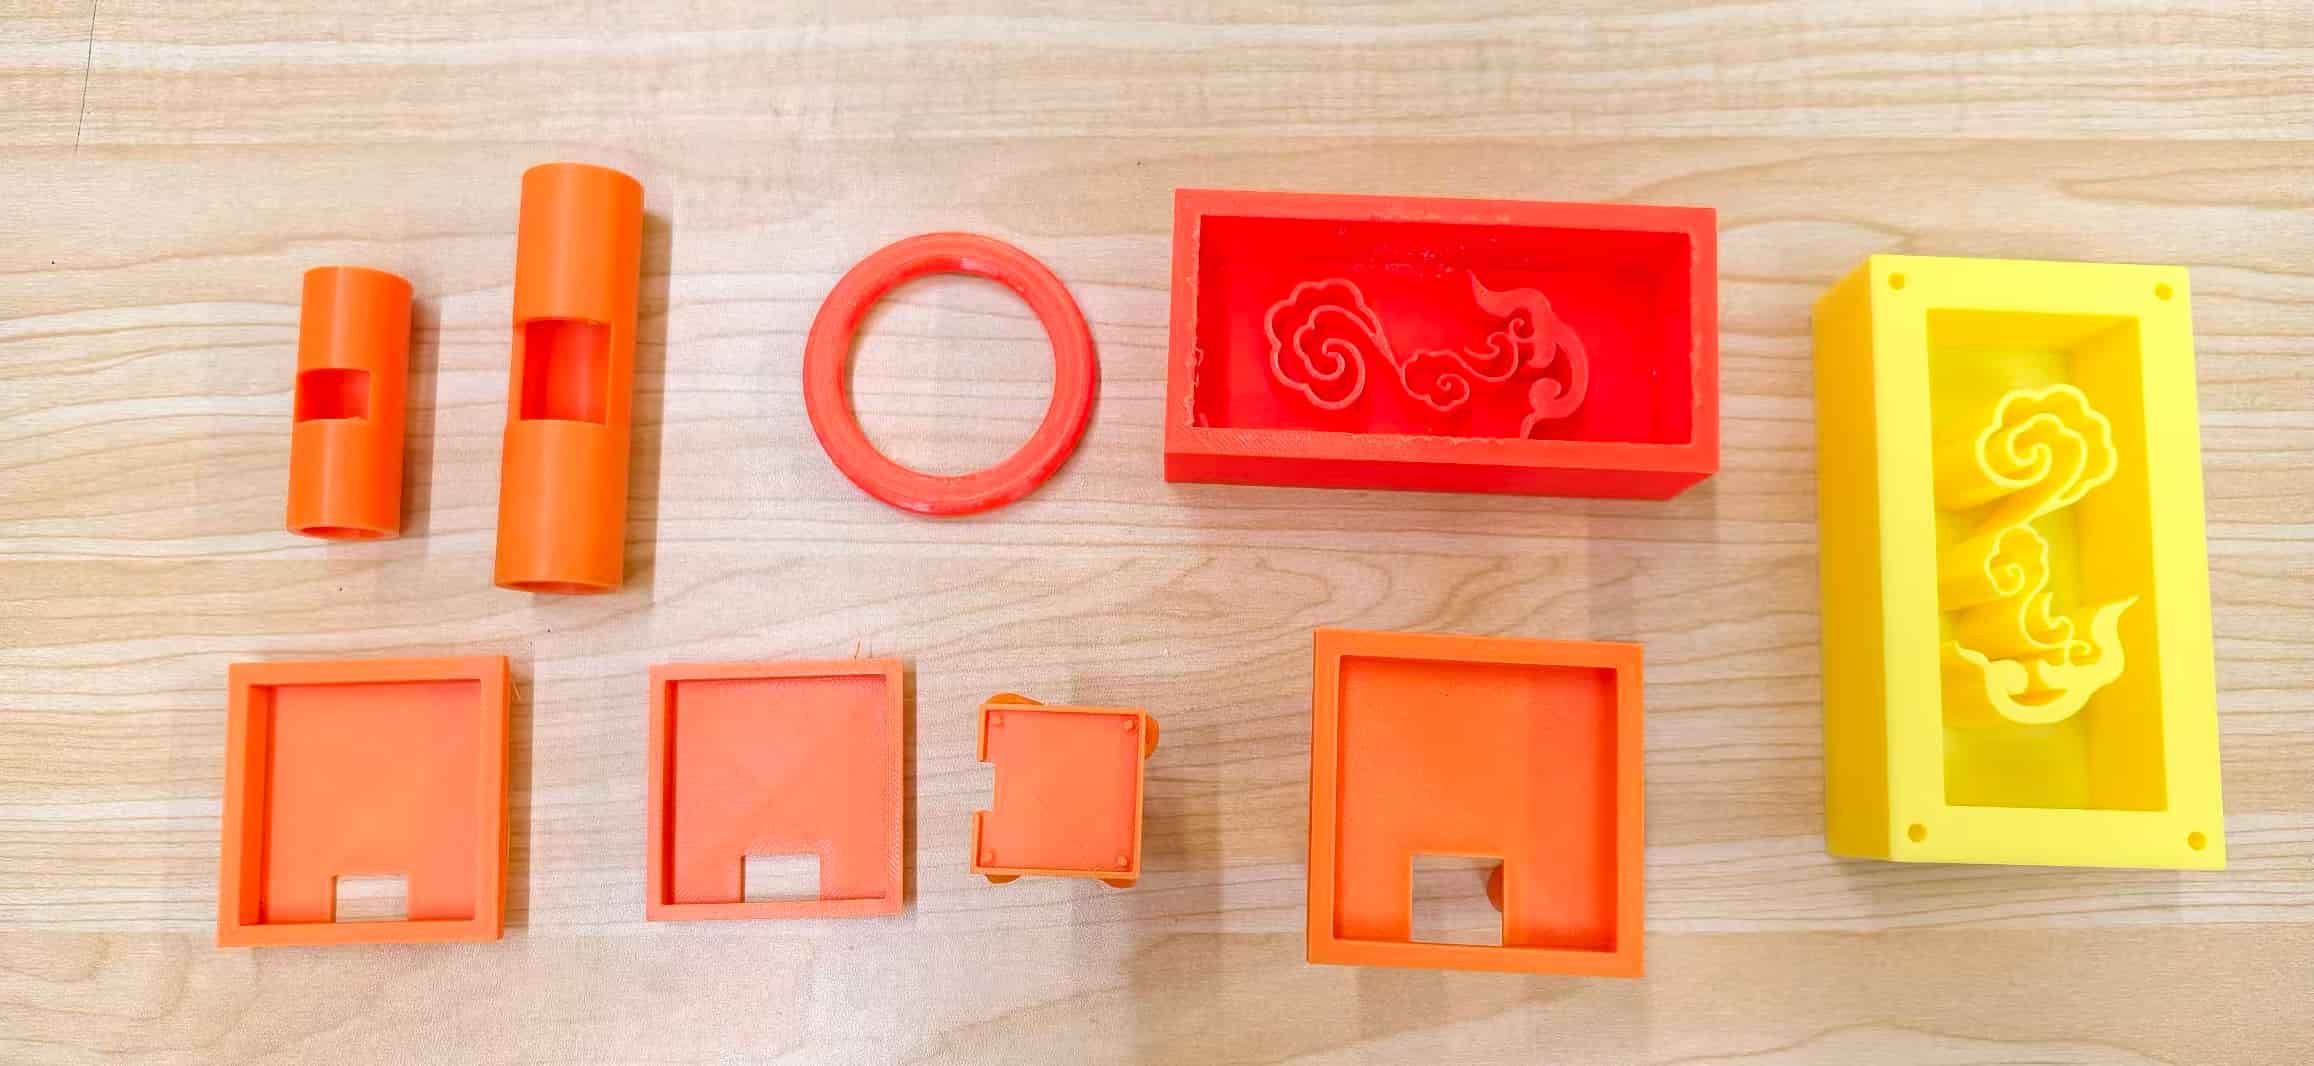
CAD and Holders
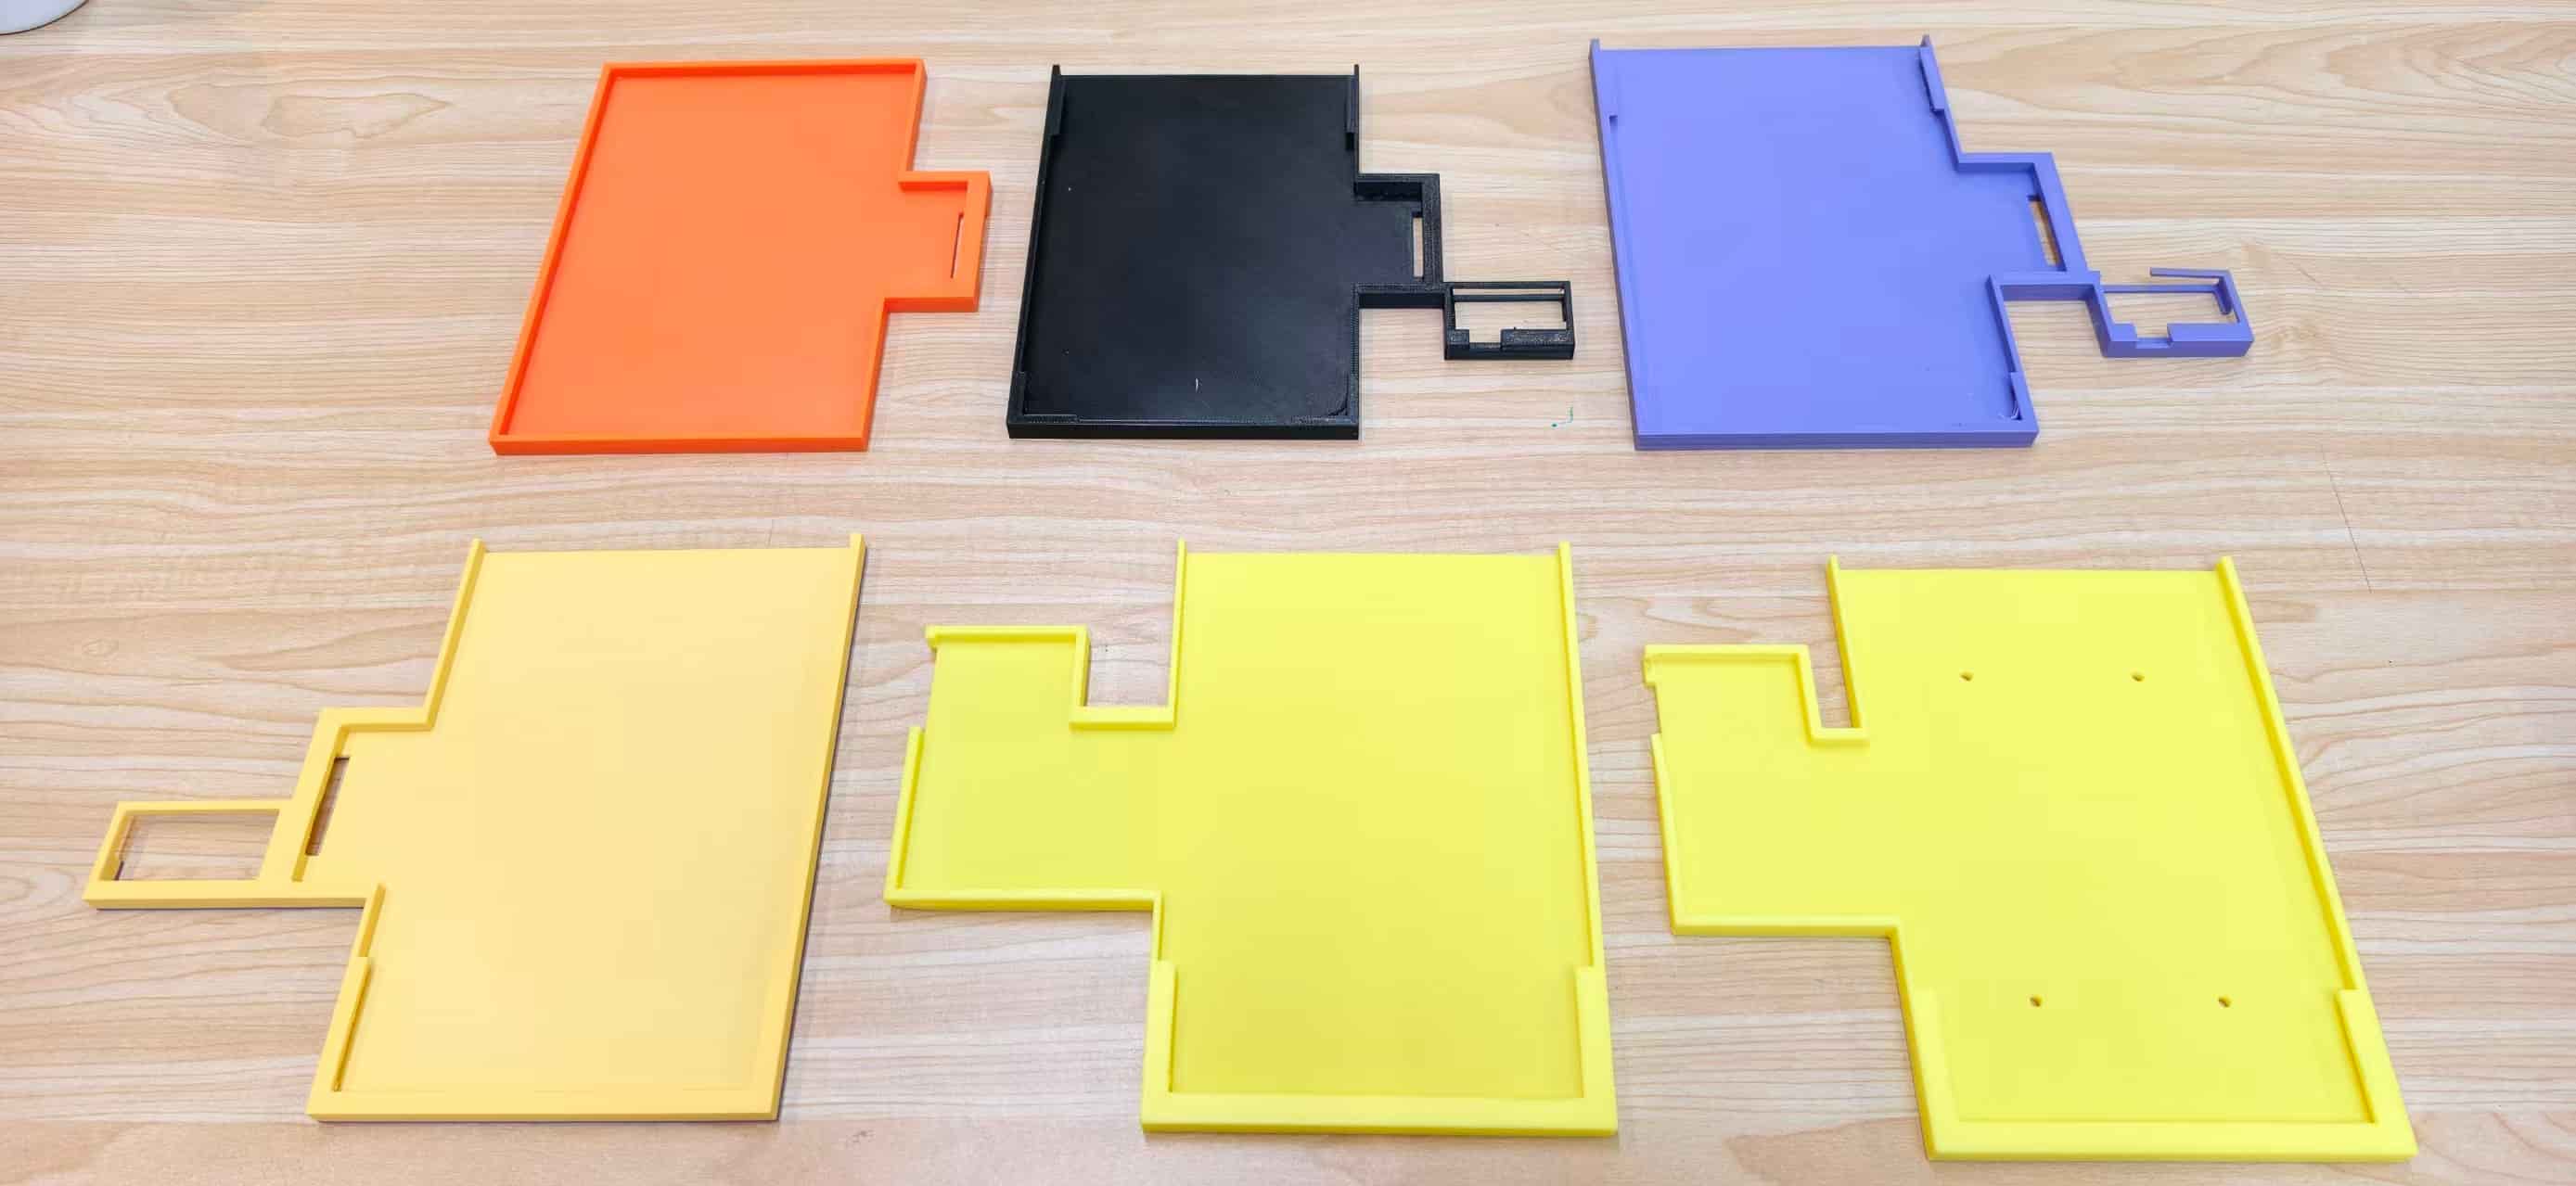
For the internal parts, I designed and printed multiple custom holders:
- ePaper holder
- OLED holder
- touch sensor holder
- decorative cloud-pattern support
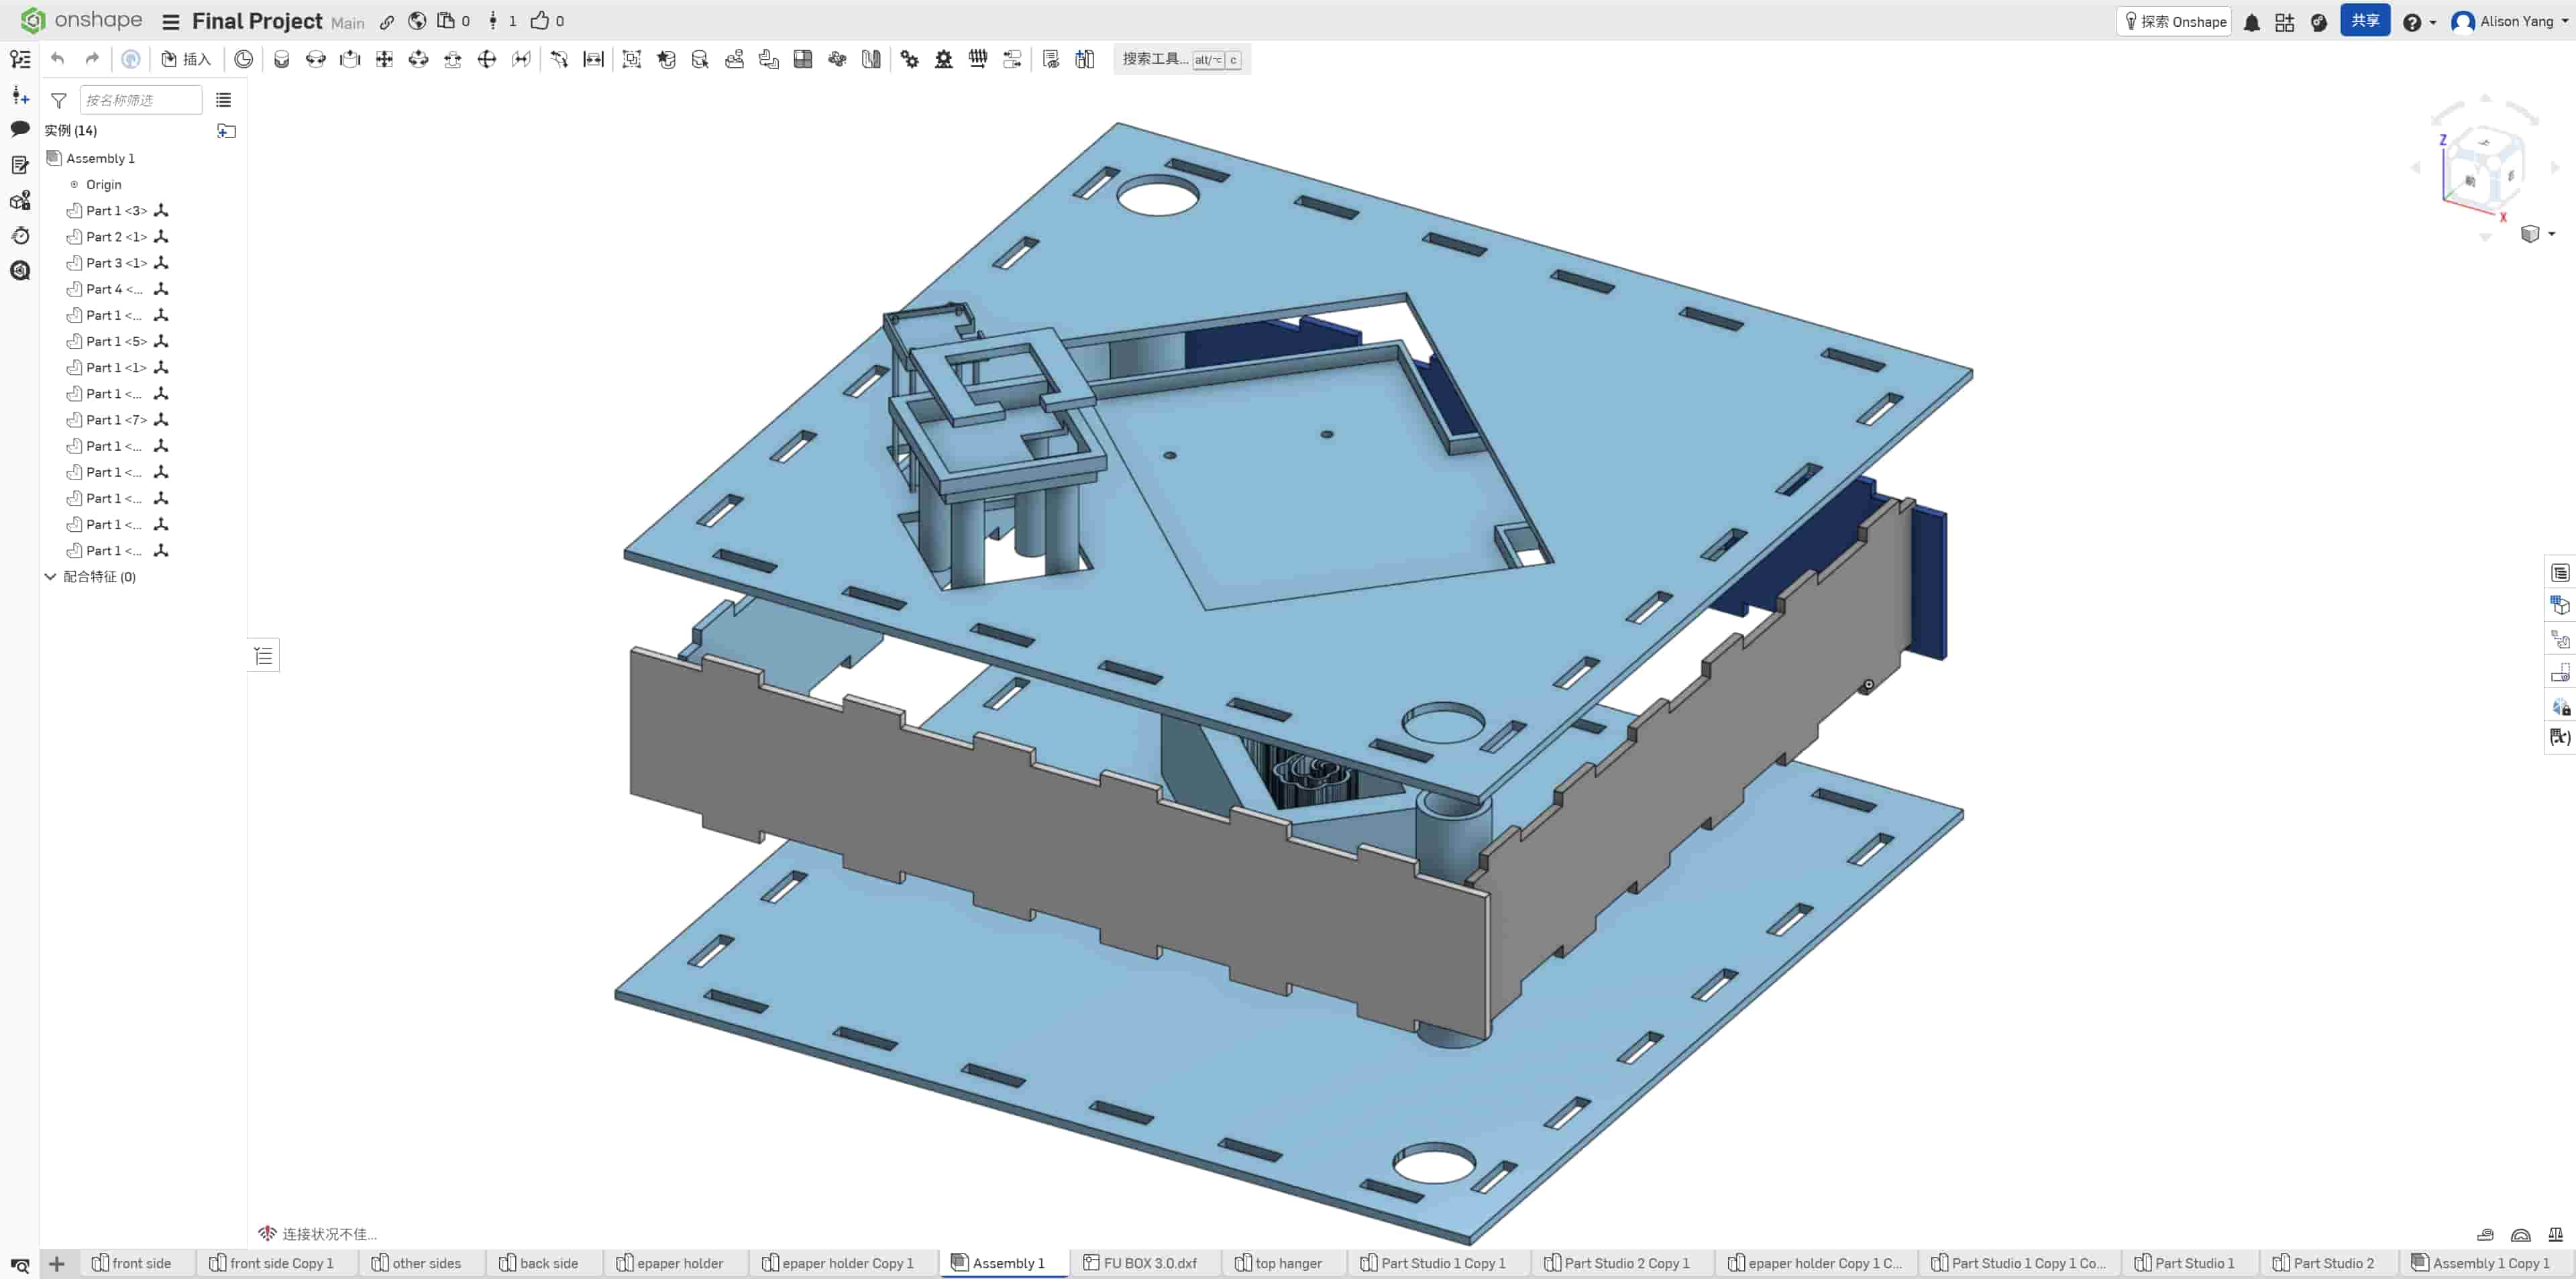
At first, I designed the holders almost like small boxes for a table setup. Then I realized the final object had to stand vertically on a door or wall. That changed everything. Gravity, cable routing, display orientation, and screw positions all became more important.
In total I printed six versions of the ePaper holder, several OLED support revisions, and several touch sensor support tests.
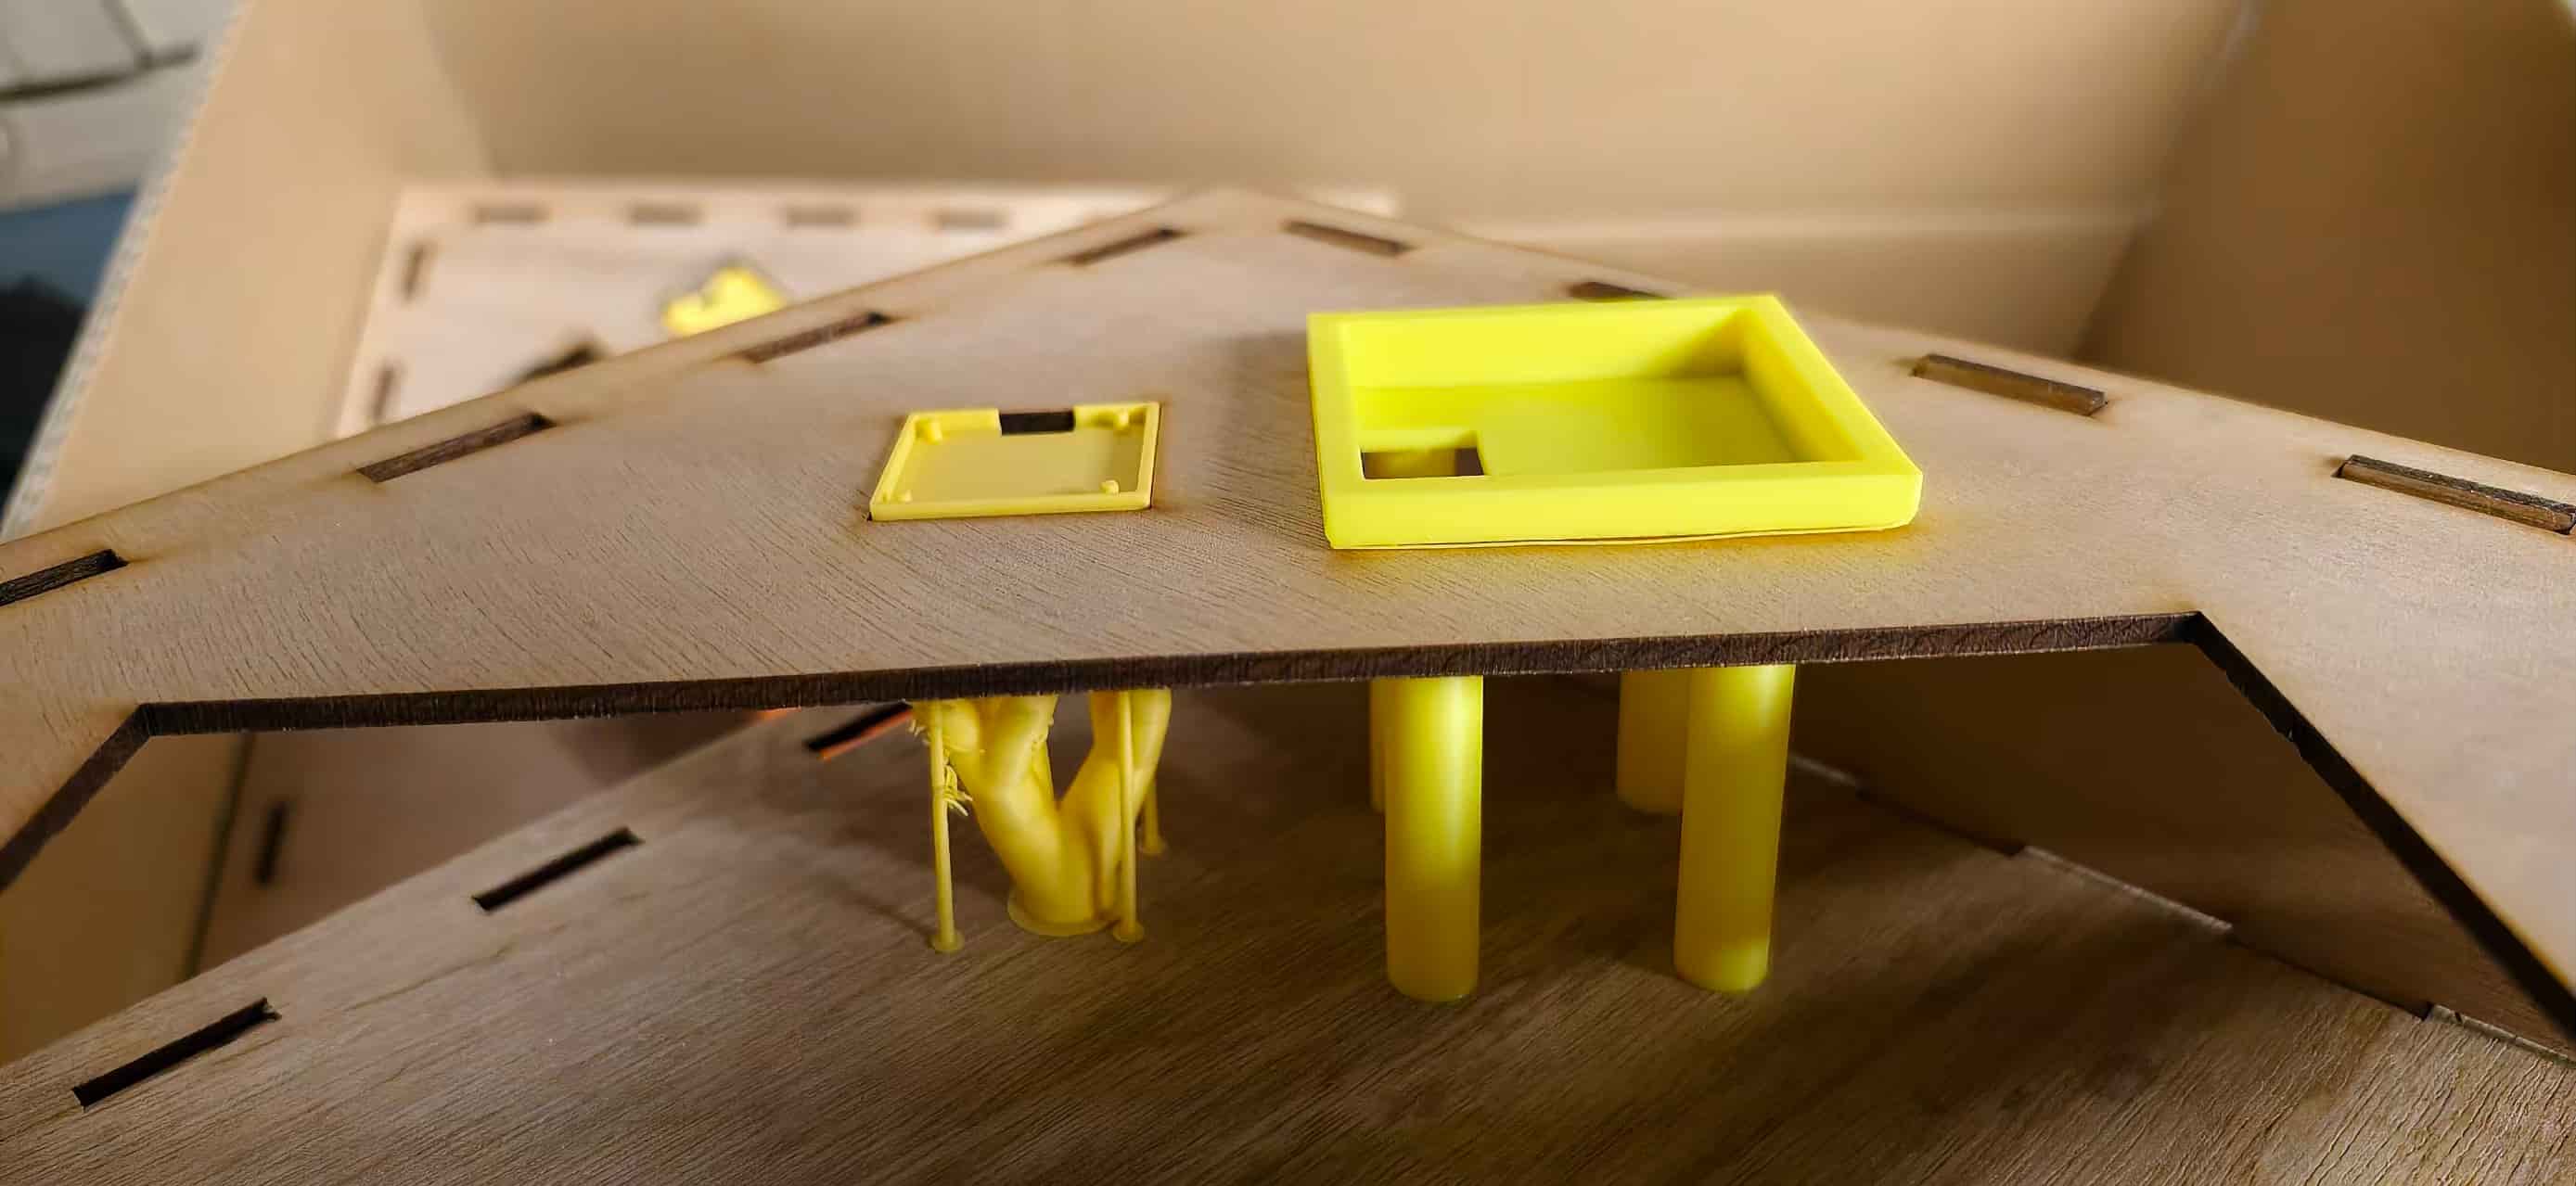
Rear Support and Mechanical Integration
One of the biggest mechanical challenges was connecting the wooden front panel with the 3D-printed internal structure. Glue alone felt too fragile and too final. If something failed, I wanted to be able to open or repair the object.
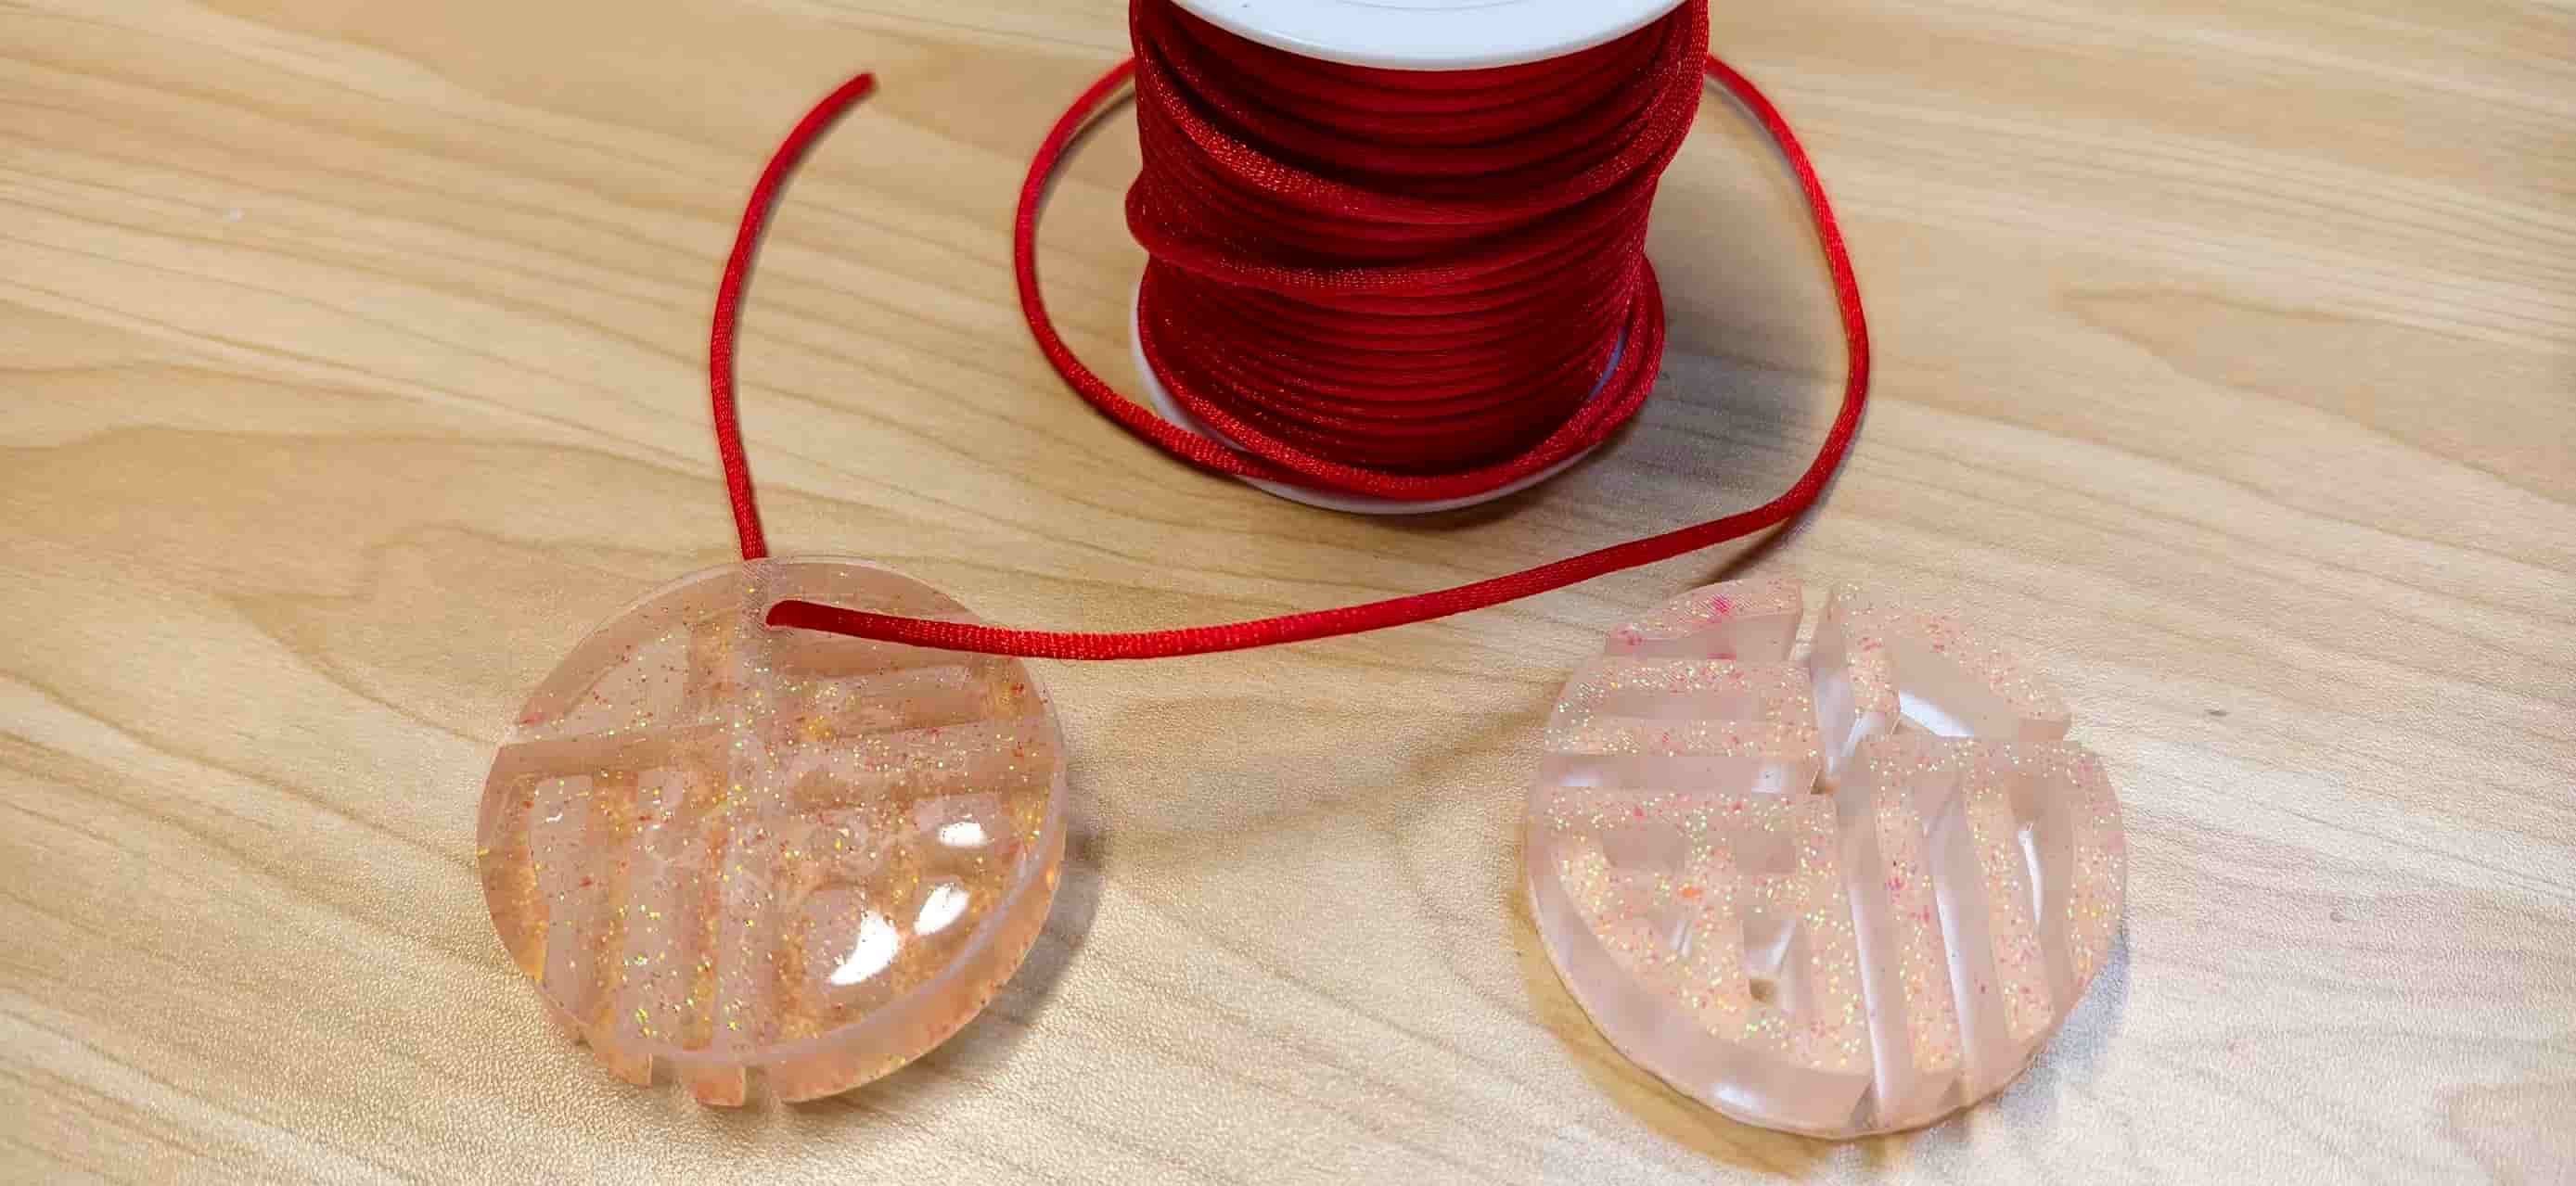
During molding and casting week, I made a decorative ruyi cloud pattern. Later, that cloud-pattern box gave me a better idea for the rear support. I reused the visual language of the cloud as a structural element behind the display.
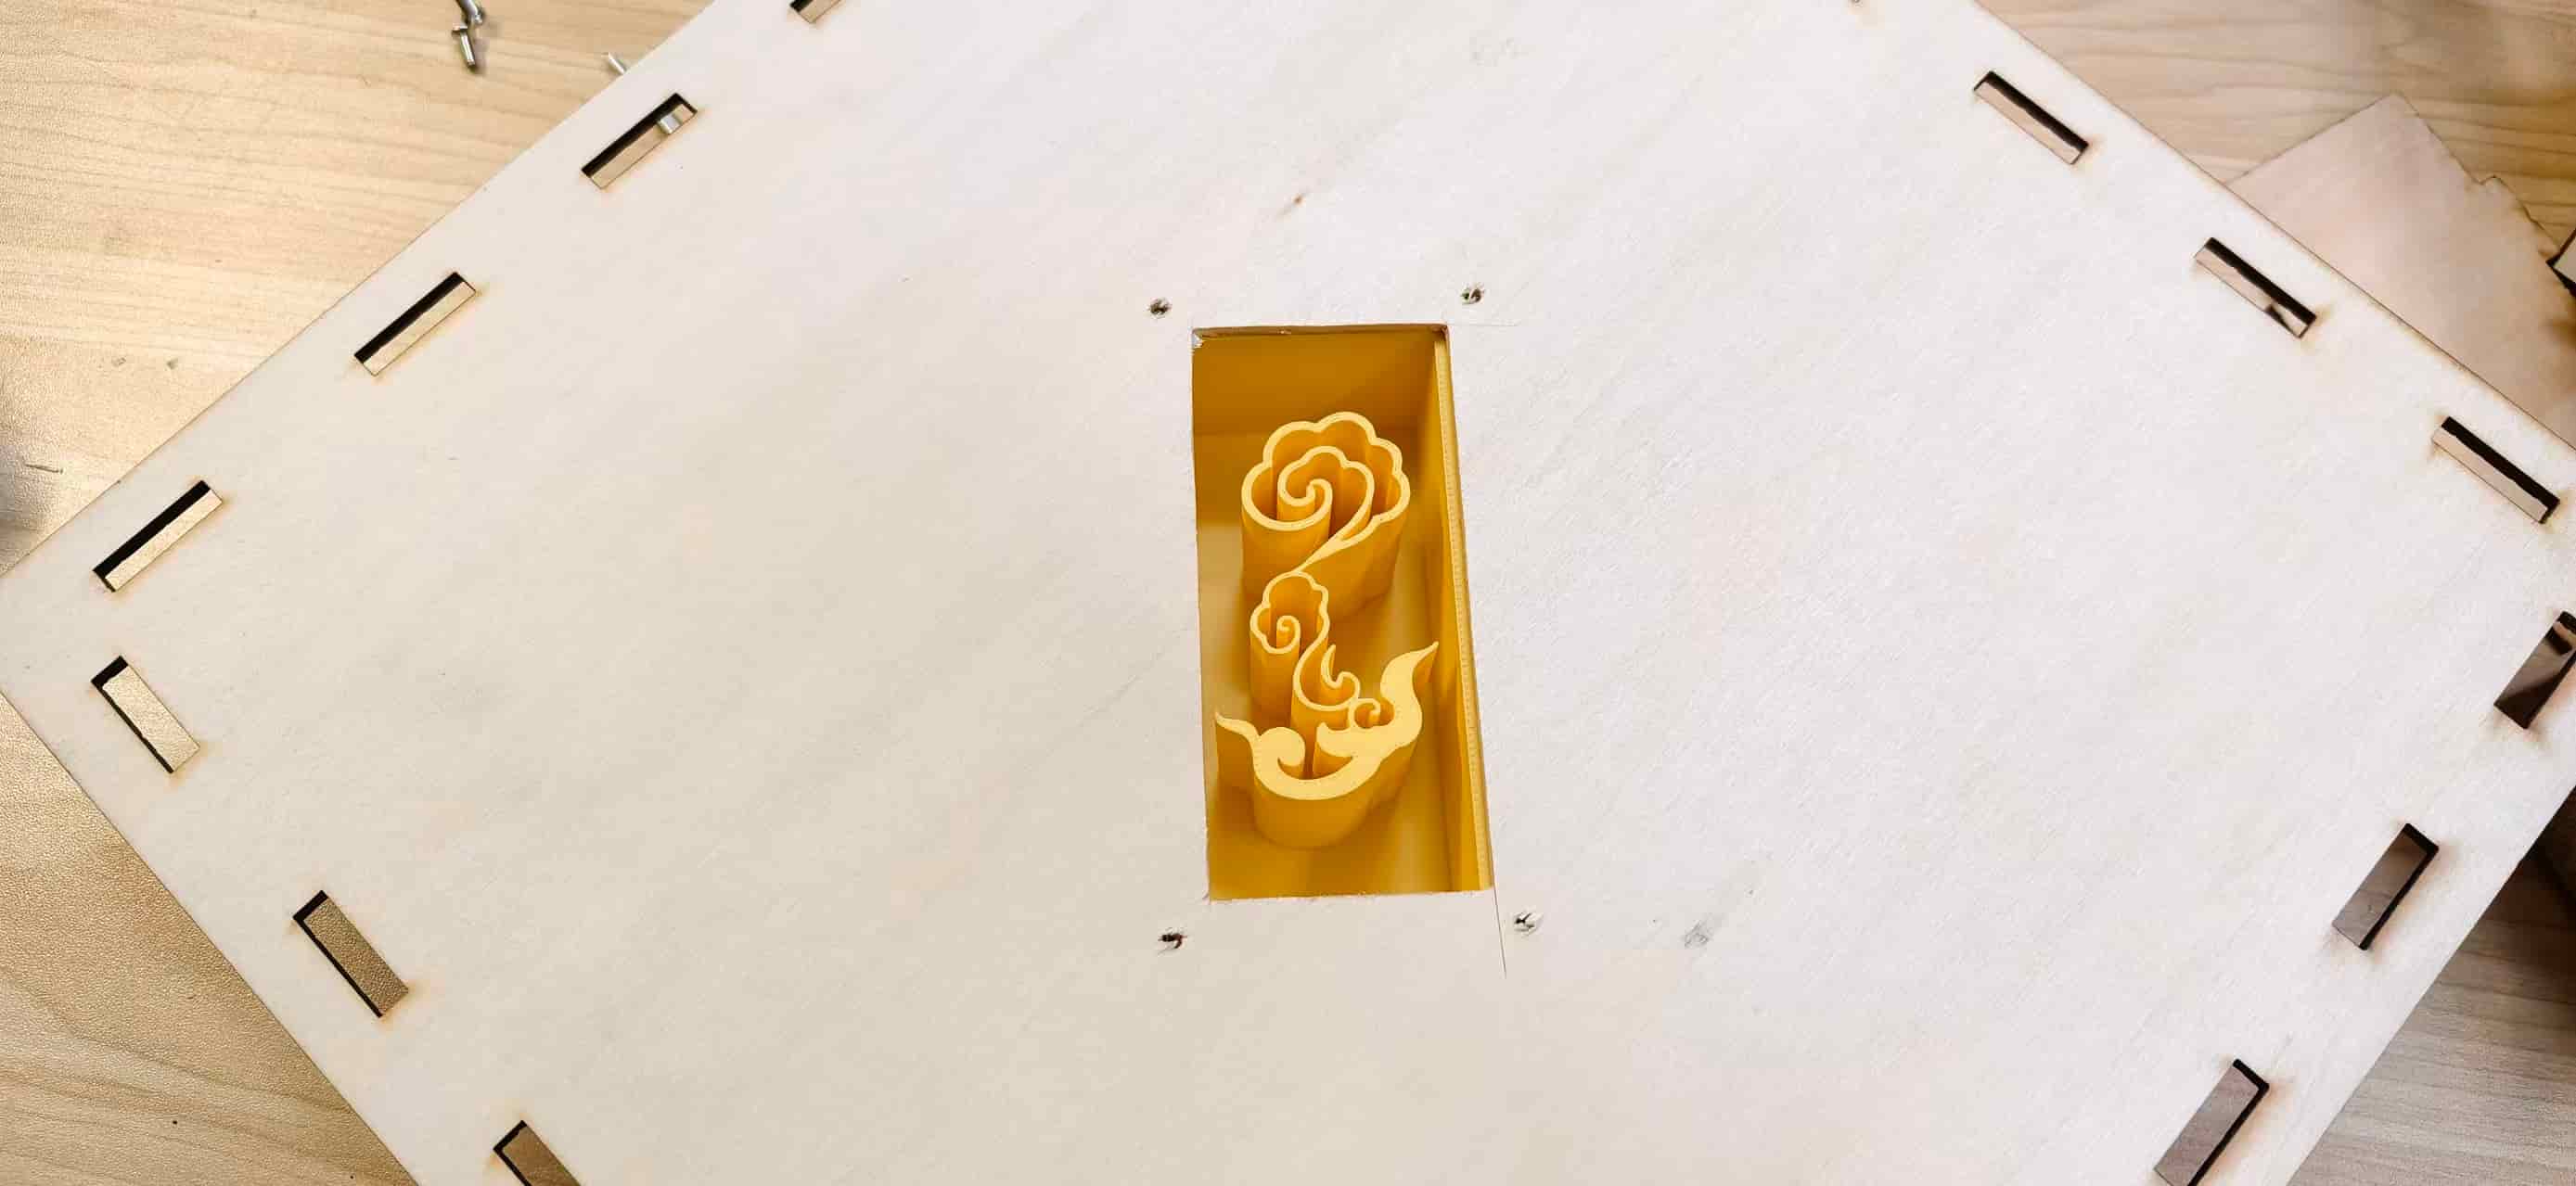
The support included four screw mounting points. By drilling matching holes in the wooden panel, I could fasten the ePaper enclosure mechanically instead of depending completely on glue.
This was one of the moments where a weekly assignment came back into the final project in an unexpected way. A decorative experiment became a structural answer.
Electronics Development
First PCB: Learning the Base
My PCB work started before the final interaction was fully defined. The first board was closer to an environmental sensing and Hello World board. It helped me practice:
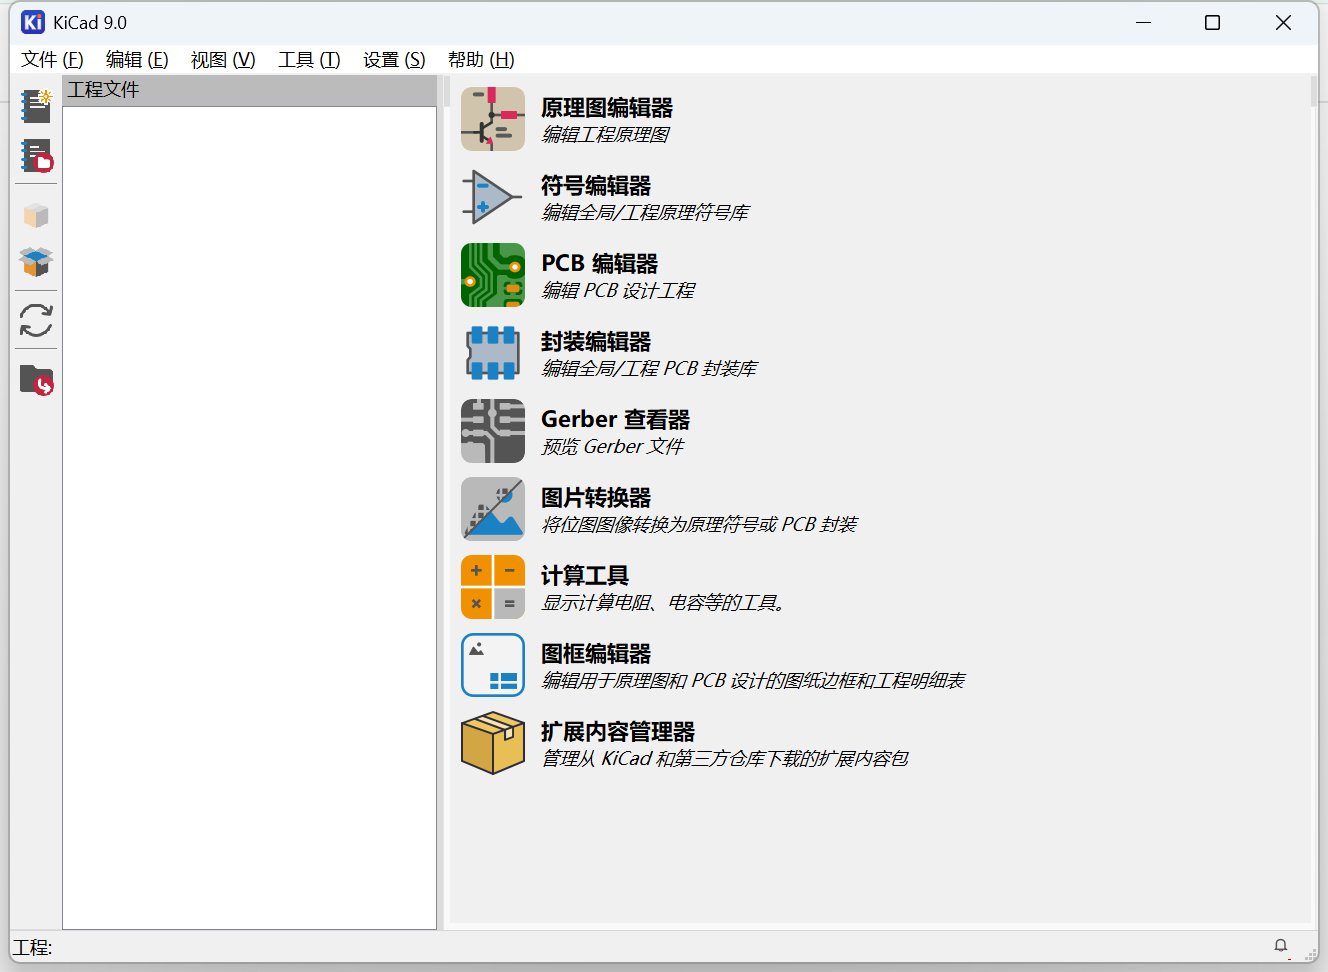
- schematic design in KiCad
- footprints and routing
- ERC and DRC checks
- trace width decisions
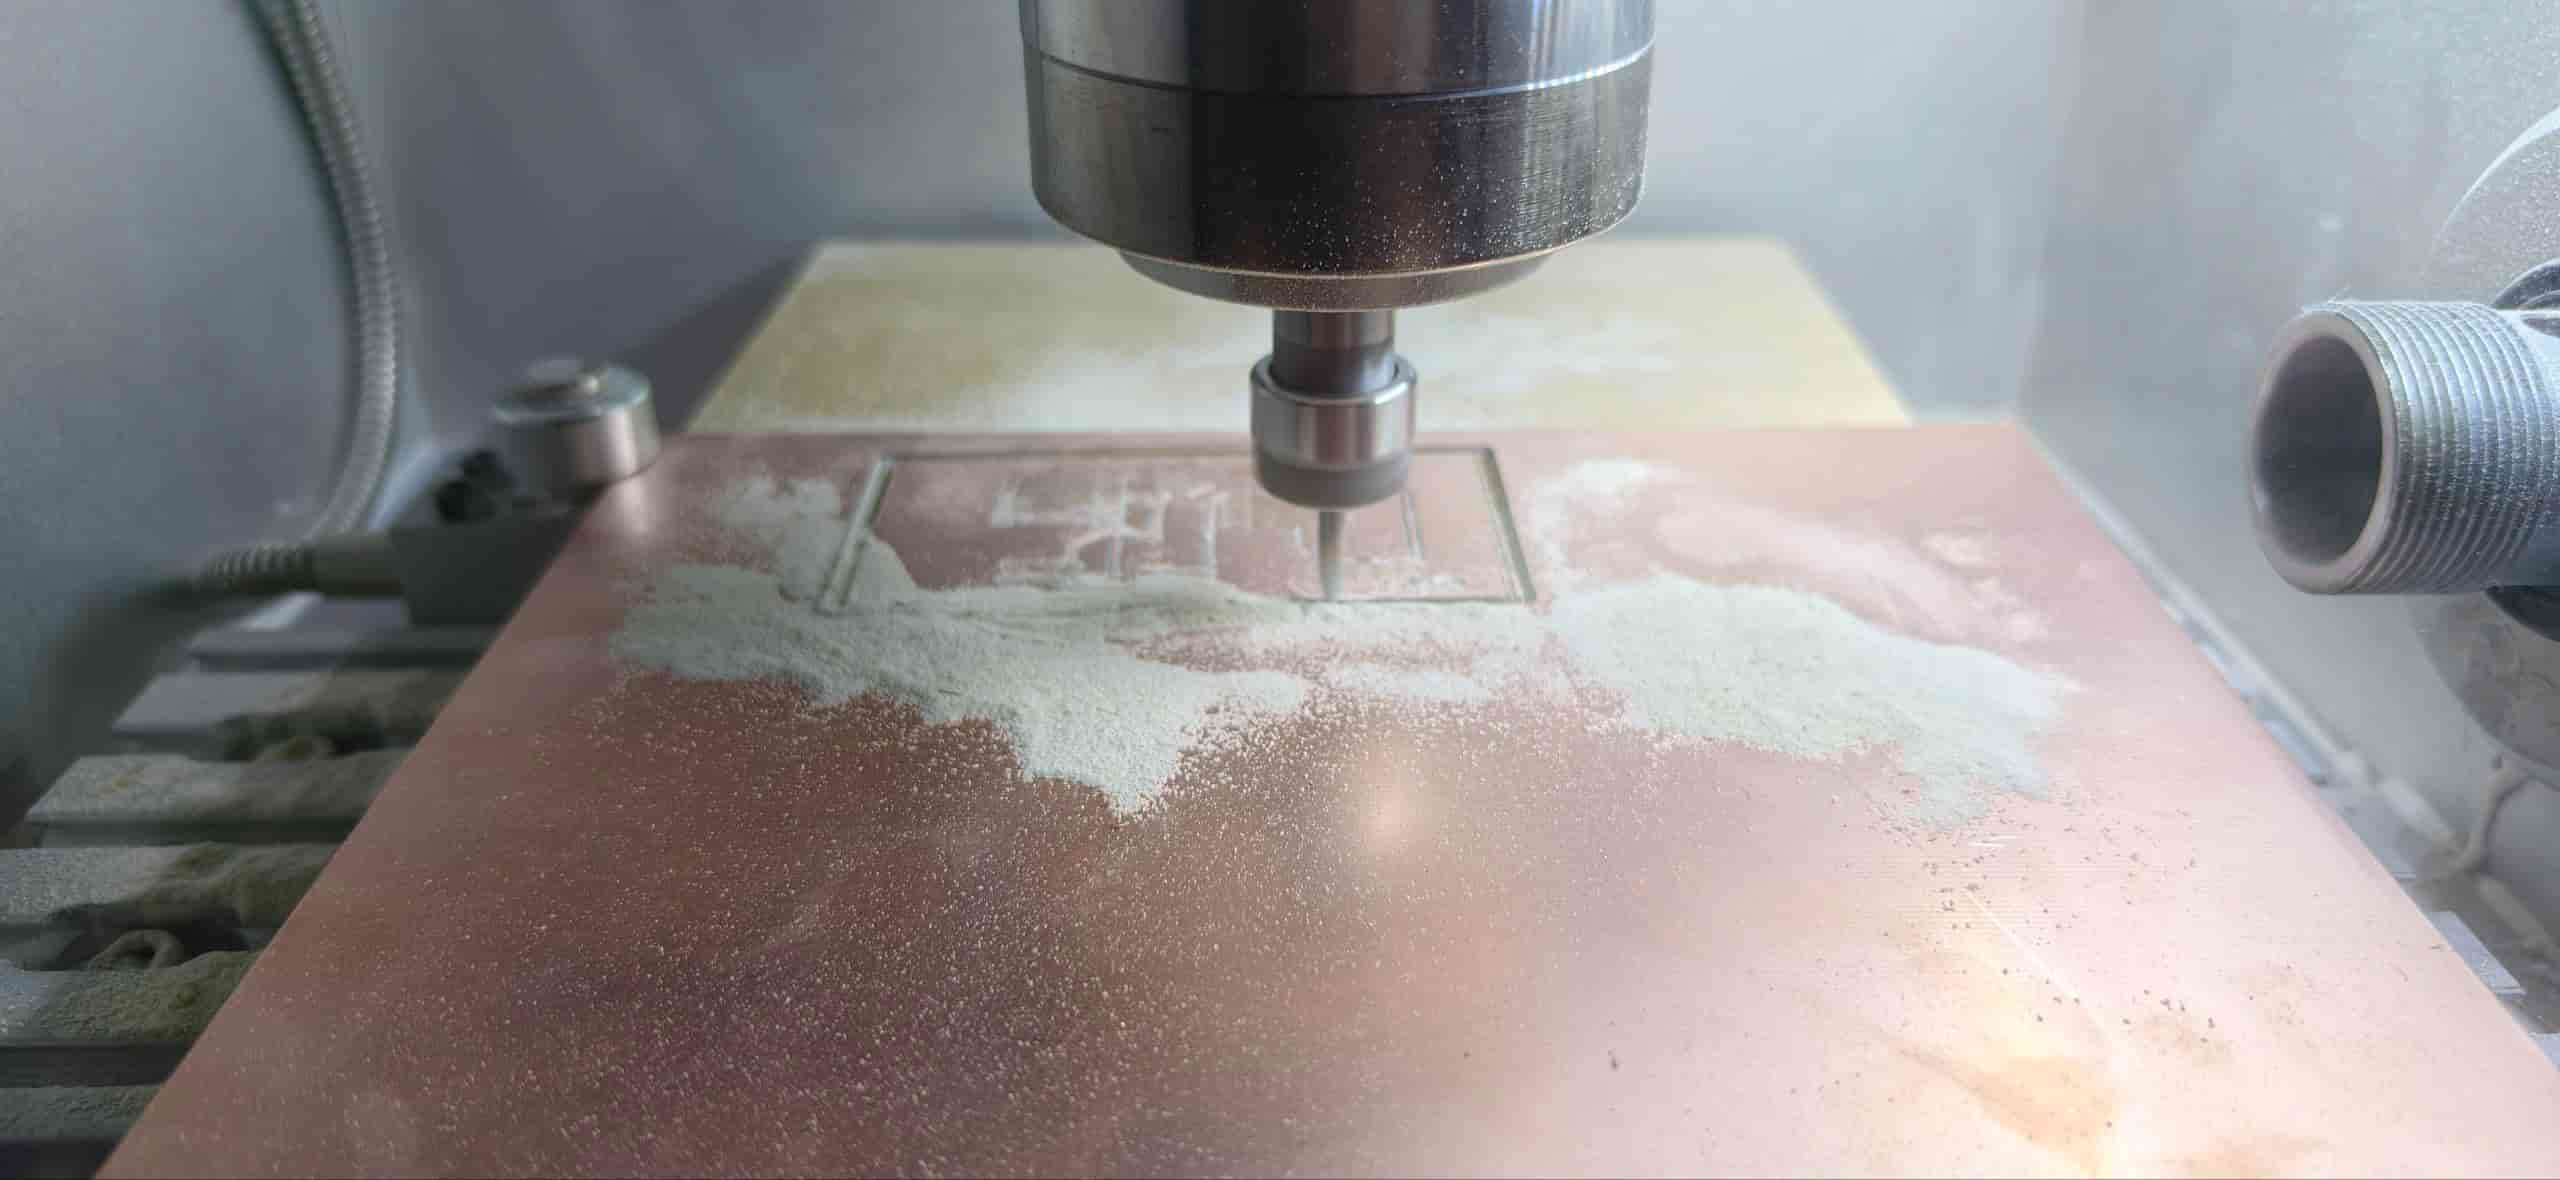
- milling and soldering
- testing with LED and button code
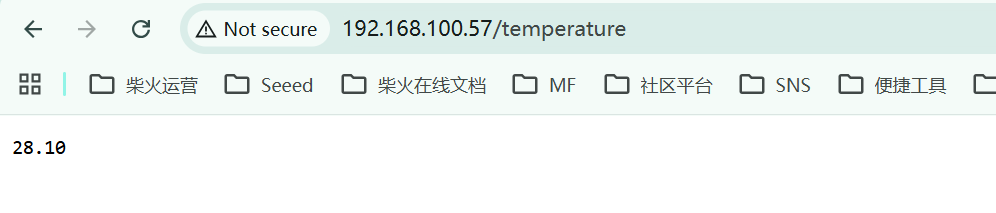
The first board successfully collected temperature and humidity data, and the onboard indicator LED worked. That gave me confidence that I could move beyond a breadboard demo.
But the board was not perfect. One revision had a missing ground connection, so the LED never illuminated. At first I looked at the code, the resistor, and the LED orientation. Eventually the real problem was simpler and deeper: the net was not connected. That mistake made me much more careful about checking every ground and power path before fabrication.
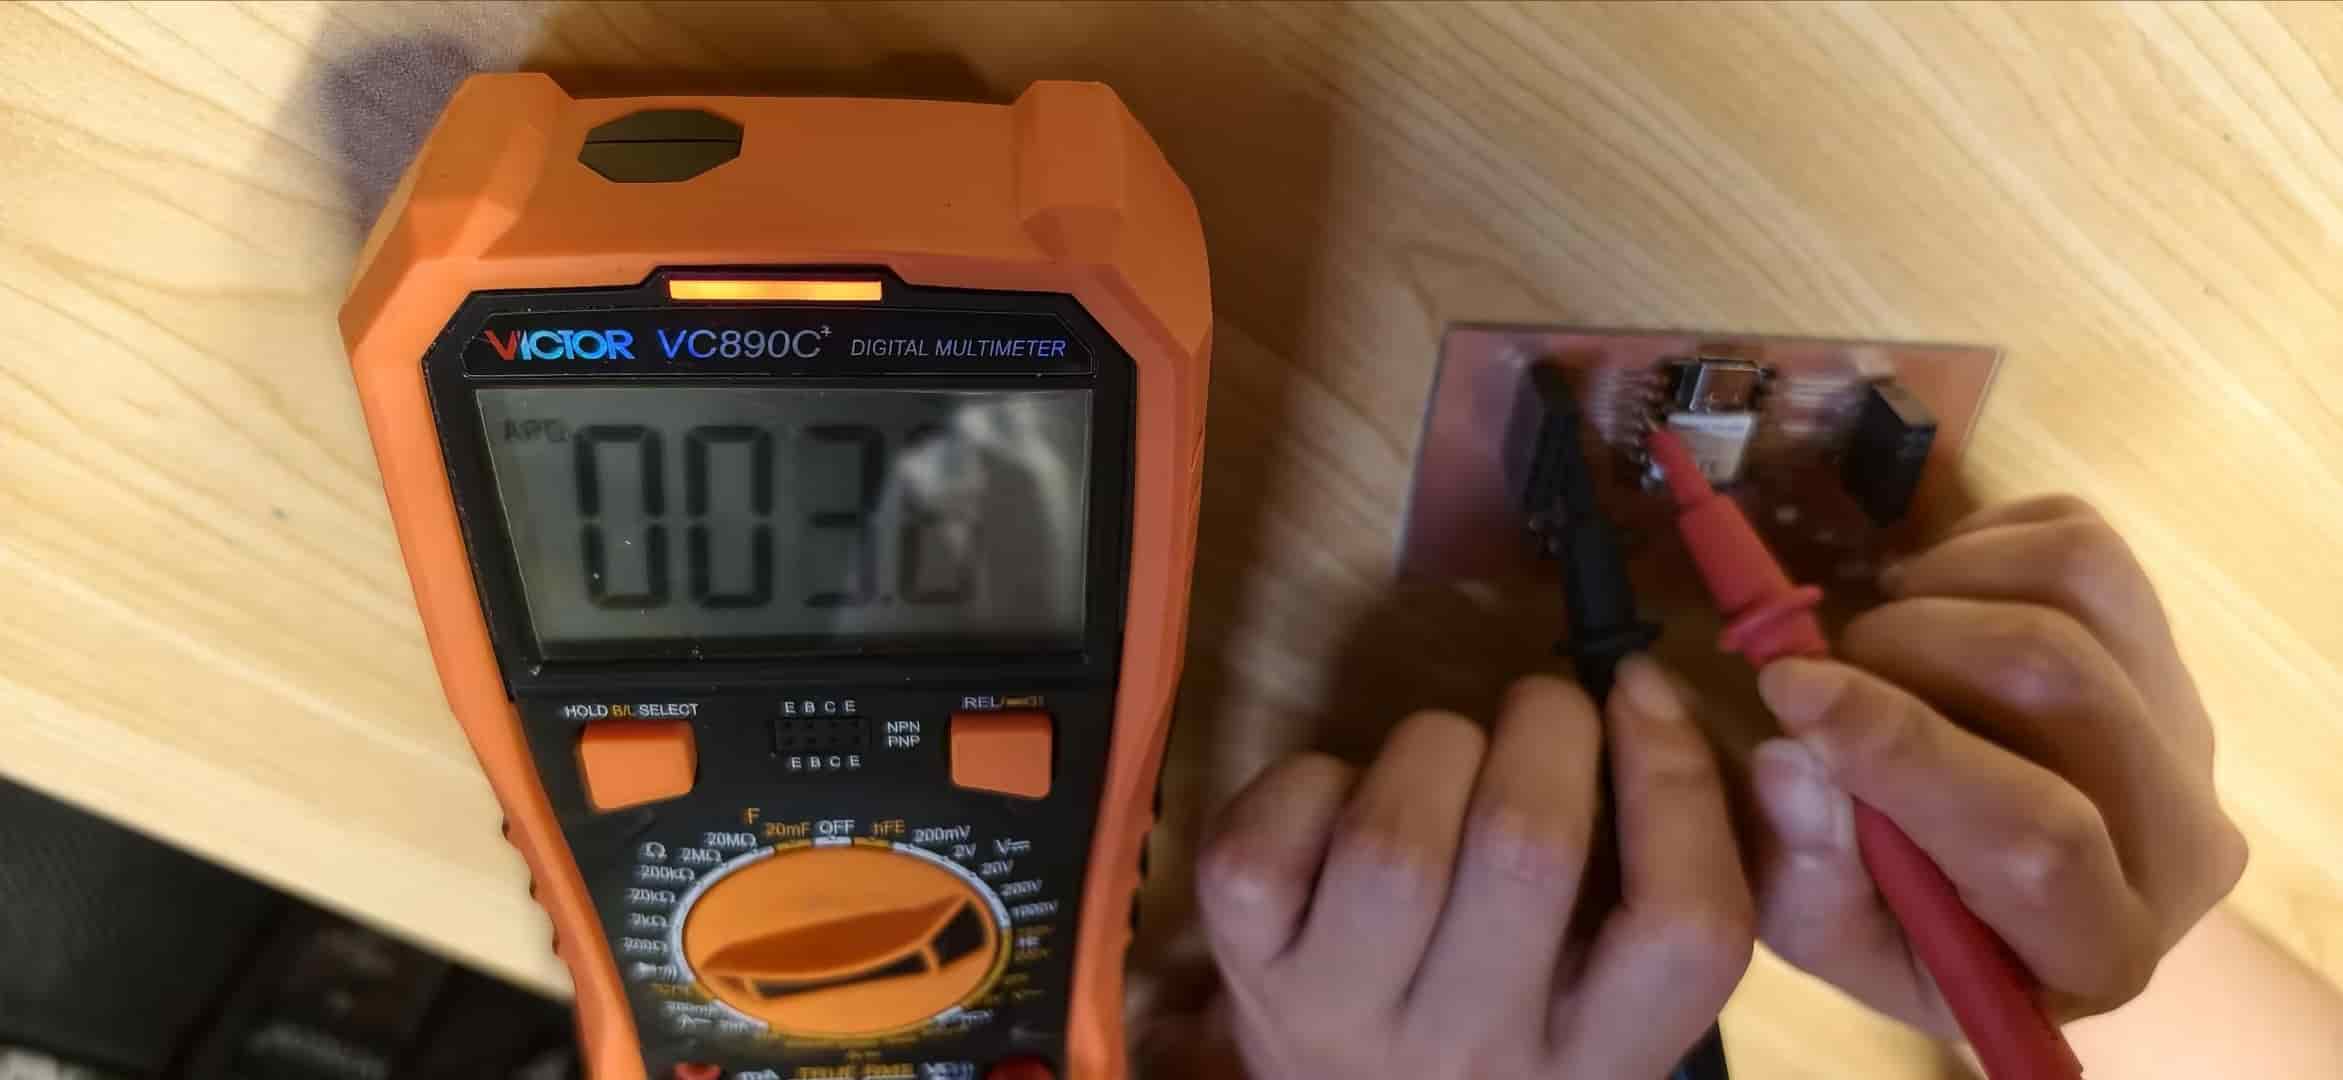
And the second try worked:
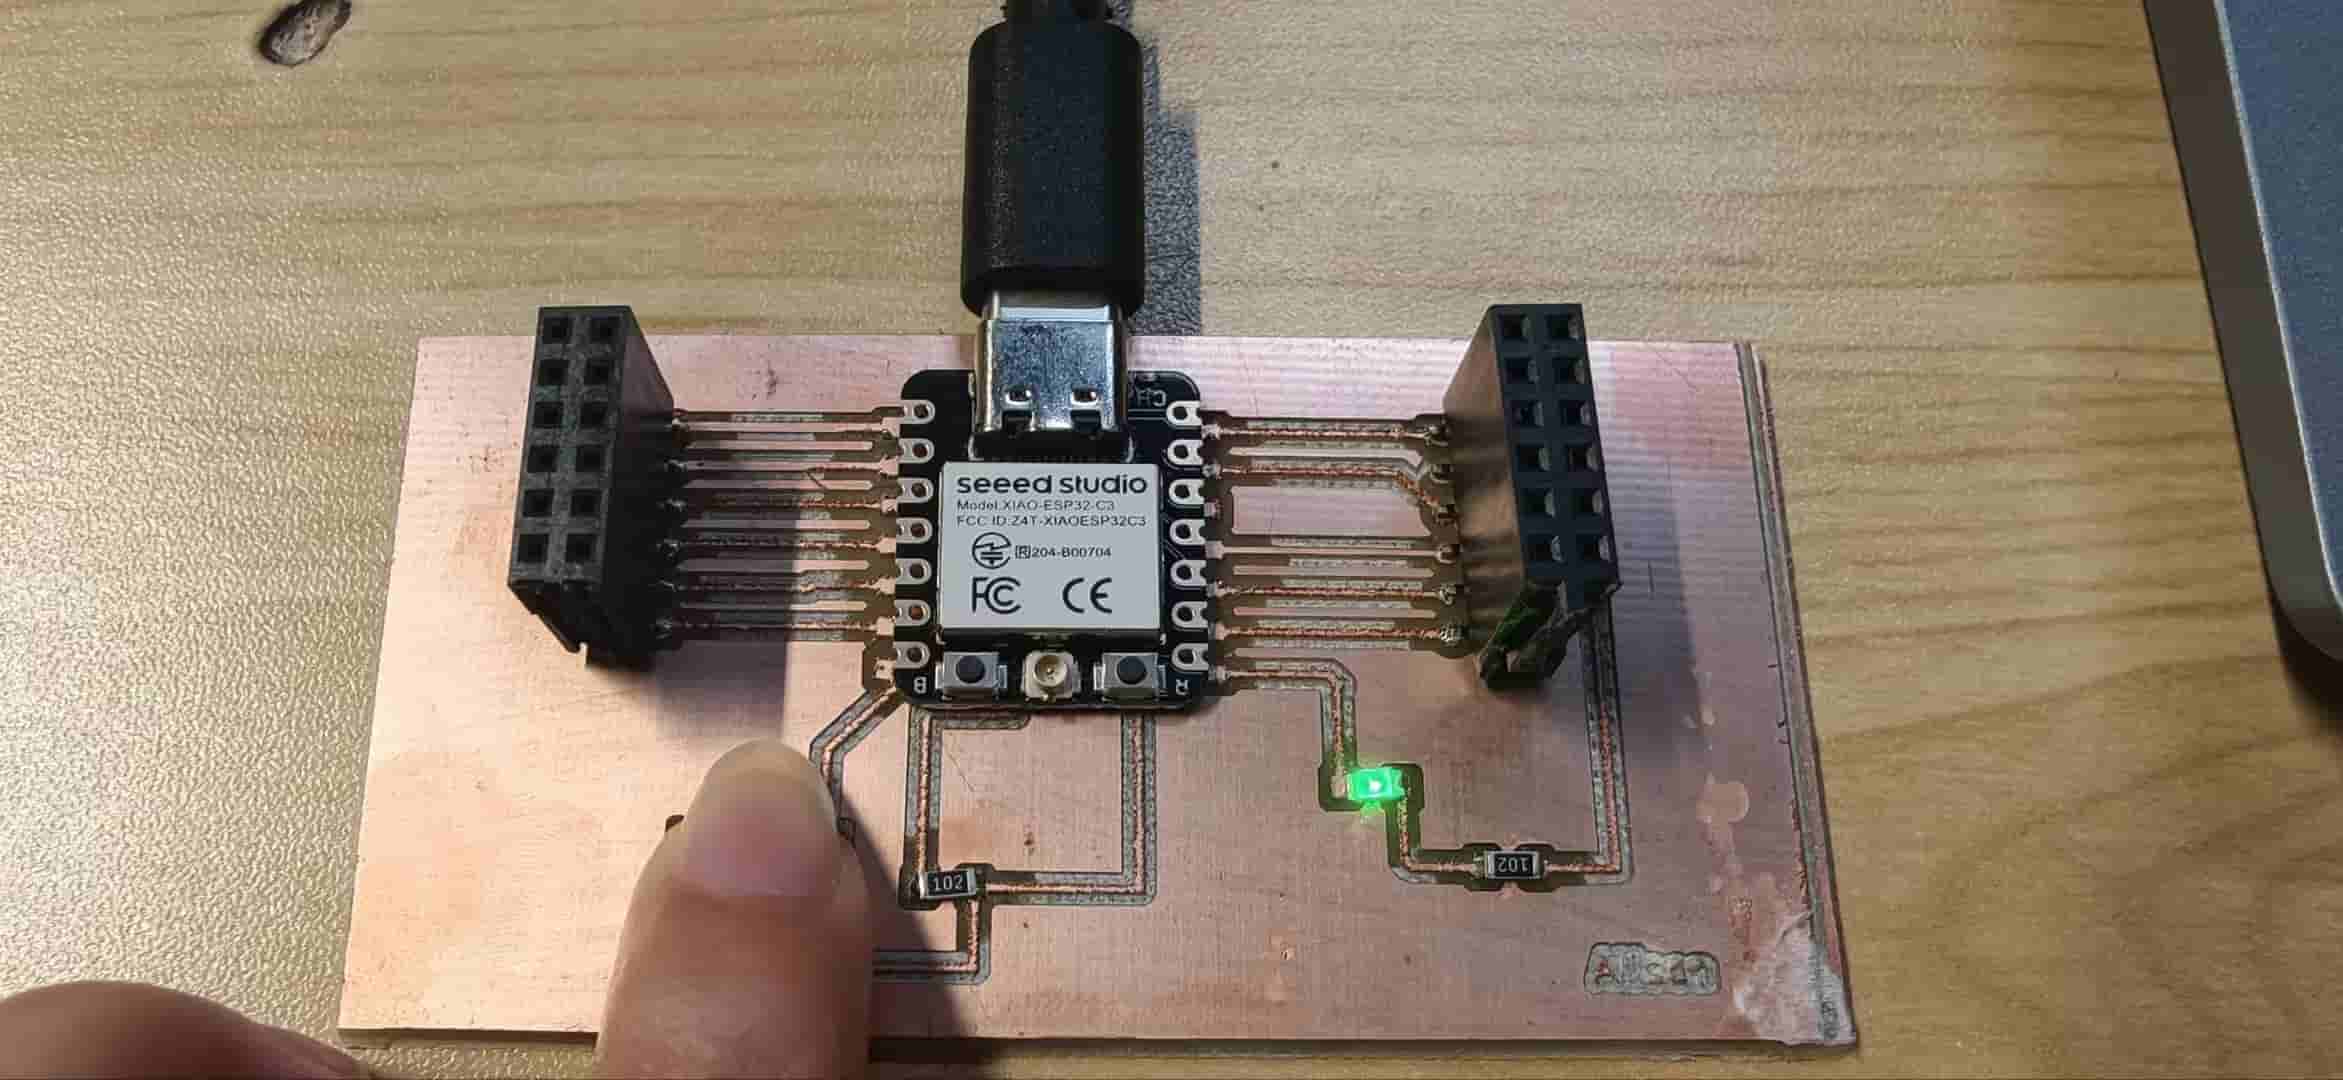
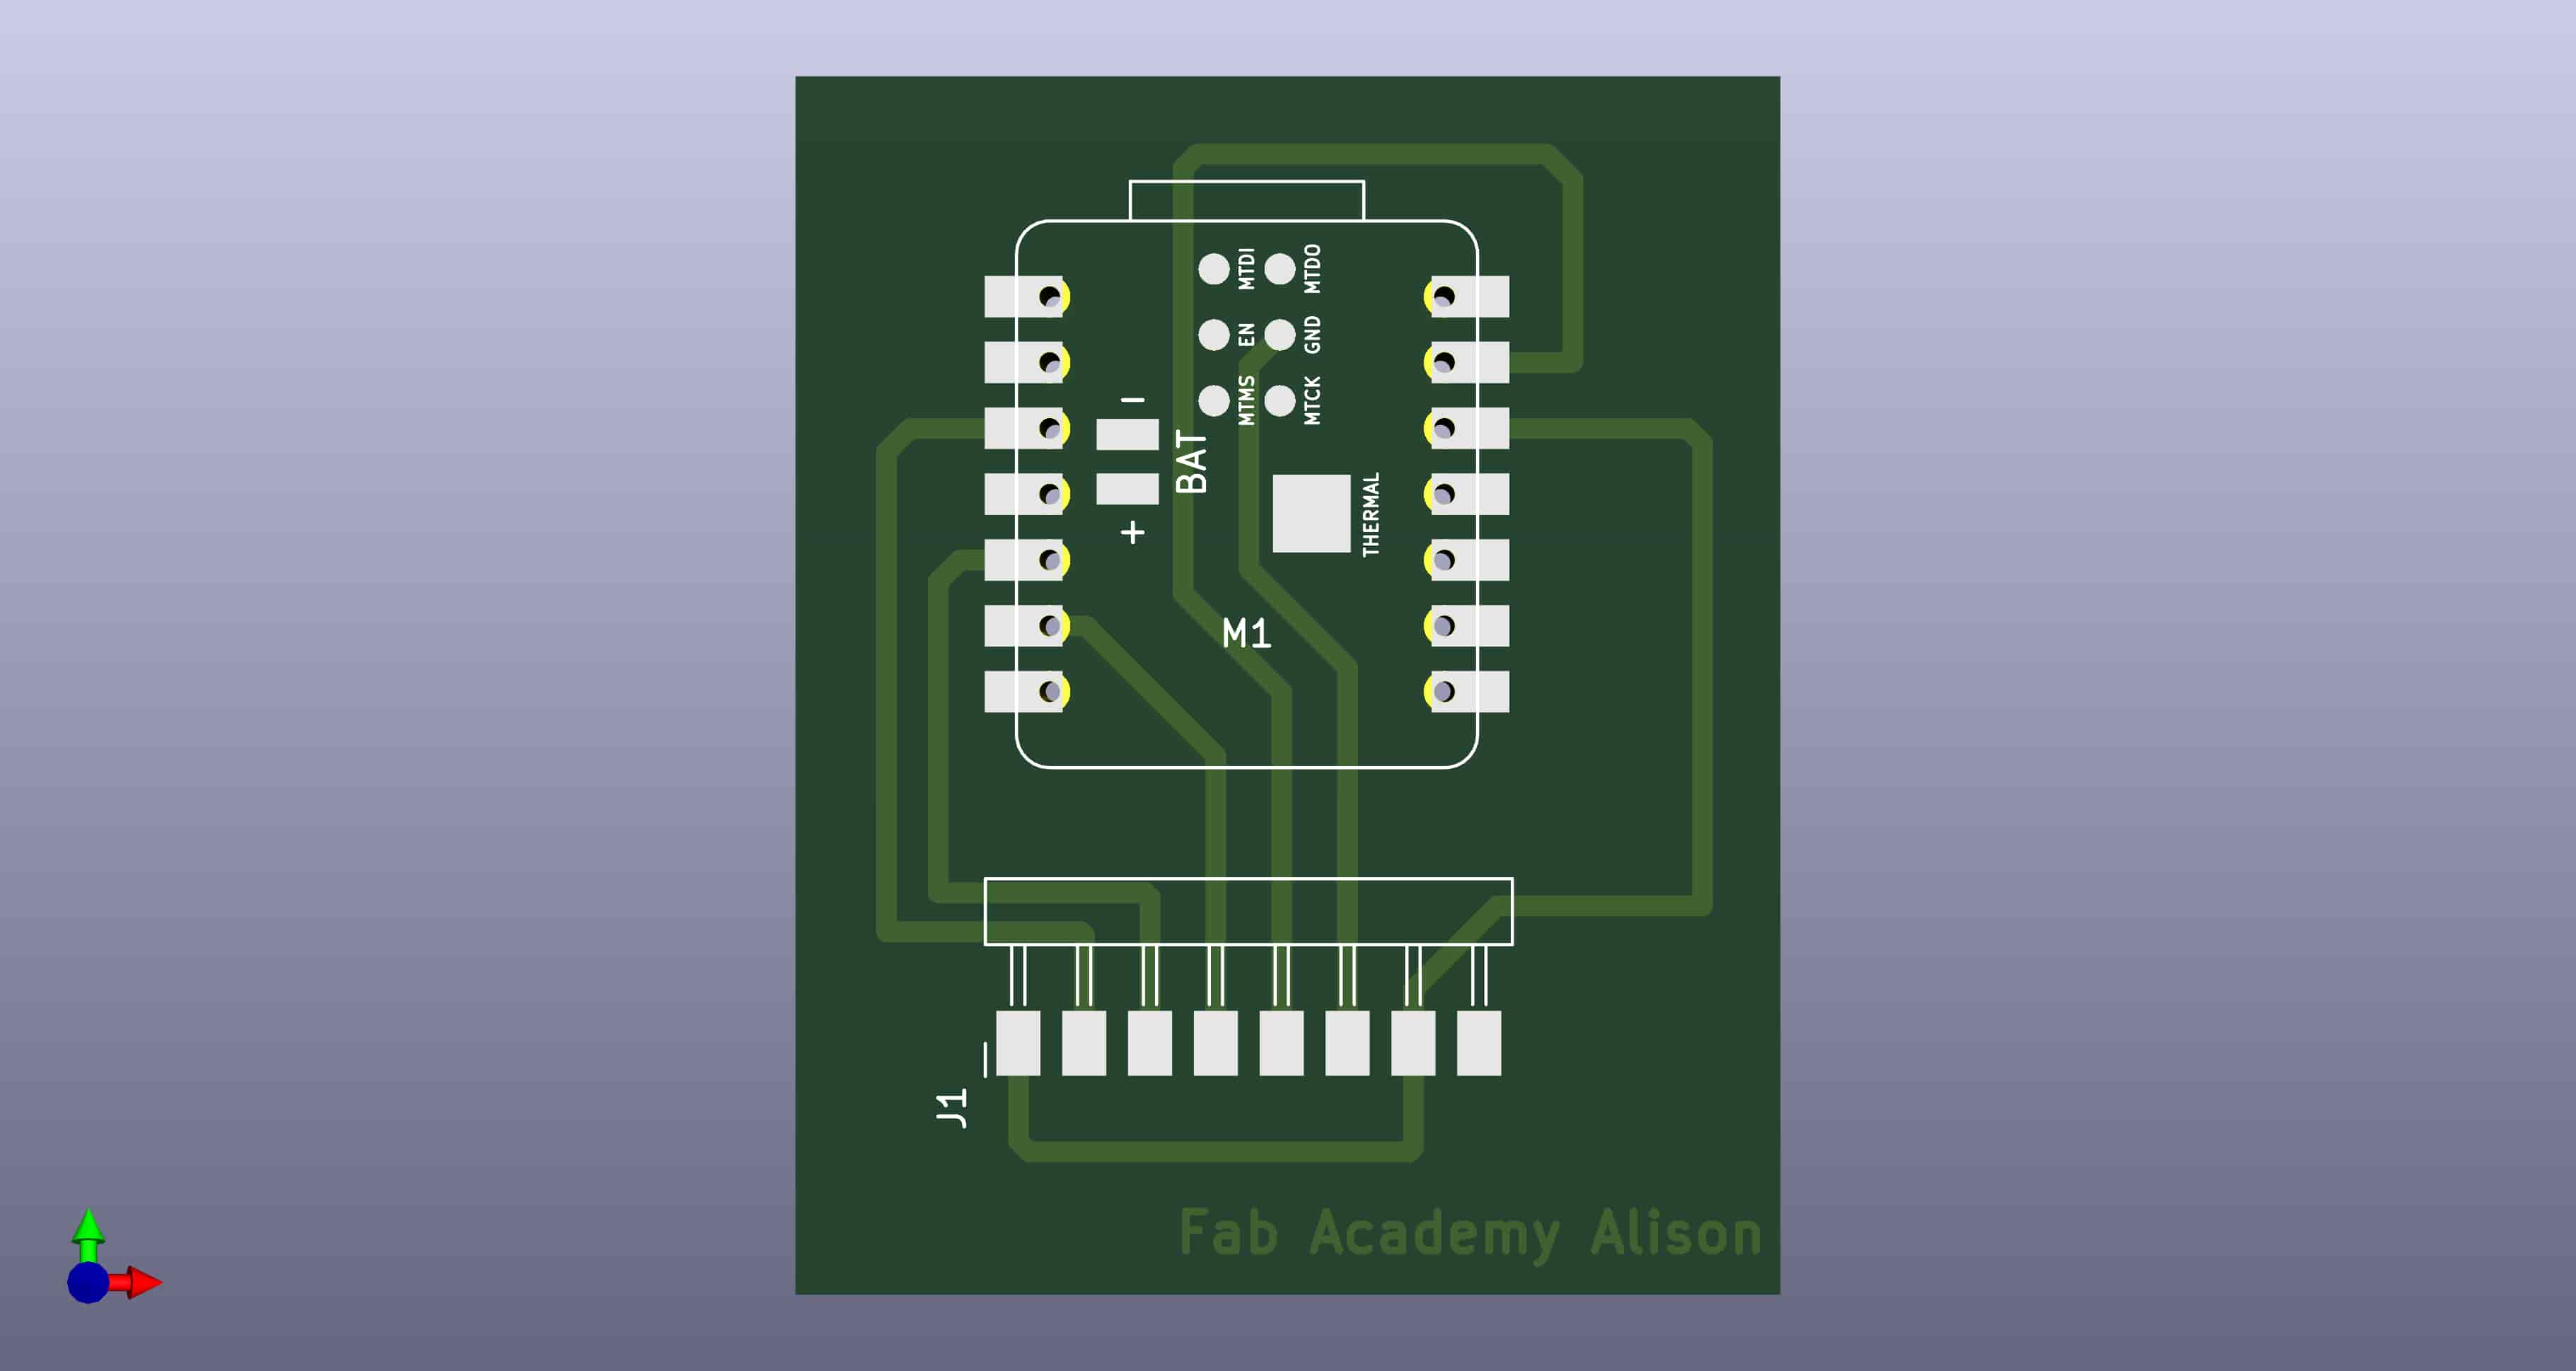
Third PCB: Matching the Final Interaction
As the project changed from environmental sensing to visitor interaction, the original PCB architecture no longer matched the needs. I redesigned the board so the XIAO ESP32-C3 could expose the pins needed for:
- digital touch module input on D2
- OLED display connection over I2C
- WiFi communication
- future expansion
This was a good example of Fab Academy iteration. The first board was not a waste; it taught me the method. The final project board came out neater and more useful:
Embedded Programming
C3 Touch Sender
The C3 firmware has four main jobs:
- Connect to the 2.4 GHz WiFi network.
- Show an idle screen on the OLED.
- Detect touch on
D2. - Send
POST /api/statuswithstatus=coming.
I added debounce and cooldown timing so one long touch does not create many repeated events. The OLED gives immediate feedback to the visitor, while the WiFi request triggers the rest of the system.
The touch logic also carries lessons from input device week. With the DHT11 sensor, I spent a lot of time chasing problems caused by wrong GND wiring, loose jumper wires, and pin confusion. For the final touch module I tried to debug more calmly: check pinout, check power, check ground, print values in Serial Monitor, then add the network layer.
The touch module is a small three-pin board (VCC, GND, SIG). It is not a Grove module — I wired it directly to the custom PCB with dupont cables. On my module, a touch reads as HIGH on D2 with INPUT_PULLUP.
EE04 ePaper Controller
The EE04 firmware runs on the board's embedded ESP32-S3 Plus. It polls the server every five seconds. If the poster ID changes, it updates the display. If the ID is the same, it does nothing.
That sounds simple, but the ePaper was the hardest debugging part of the final system.
The first display examples worked, so I assumed poster switching would be straightforward. It was not. The display could show one poster, then hang during the second update. The board looked like it was repeatedly failing WiFi, but the real root cause was deeper: the ED2208 ePaper controller did not wake reliably after the library's sleep/update cycle.
I tried changing wake macros and reinitializing the display. The reliable solution was to bypass the problematic library update/sleep path and manually send the SPI command sequence:
0x04  power on
0x10  send image data with color mapping
0x12  refresh display
I also kept the display awake instead of putting it into deep sleep, and disconnected WiFi during the display push to avoid conflicts during the refresh.
This was the technical knot of the project. It also changed my respect for ePaper. It looks quiet from the outside, but the refresh pipeline is very specific.
Node.js Server
The server is the bridge between the C3 touch board, the EE04 display board, and the browser. It stores one shared state object:
currentPoster
lastEvent
lastEventTime
devices.c3
devices.s3
The important server behavior is:
- C3 touch event sets
currentPoster = 3 - web poster click sets
currentPoster = 1,2, or3 - reset returns to poster 1
- EE04 identifies itself with
?device=s3(the API label for the embedded S3 on the driver board) - devices are marked offline if they have not been seen recently
This local-server approach kept the system inspectable. I could open the browser, check JSON responses, and see whether the bug was in the C3, server, dashboard, or EE04.
Fabrication and Weekly Spirals
This final project is really a bundle of smaller weekly lessons. It did not arrive as one clean idea on day one. It grew the way a house grows: first you dig a hole, then you pour a foundation, then you realize the door is in the wrong place and you move it.
Some weeks gave me direct parts — a milled PCB, a laser-cut frame, a working OLED sketch, a Node.js server that actually responded. Other weeks gave me nothing I could bolt on immediately, but they still mattered. A wrong GND pin during input week. A silicone pour without curing agent during molding week. A laser frame that looked perfect on screen but would not fit in real life. Those failures became part of the foundation too.
Looking back, Fab Academy was less like finishing one assignment after another, and more like stacking experiences until the final project could stand on them.
How the Idea Kept Changing
The earliest version was simple: a smart Fu that could show time and weather, maybe with a pull ring like an old lamp. That idea helped me draw something, but it still felt like an indoor information object.
The real shift came when people kept asking: What if it could interact with visitors? That question sent the project back to the door, where Fu already lives. From there the spirals started:
- decorative Fu object → smart display → touch input → door guardian → split roles (C3 at the door, EE04 indoors) → web dashboard for debugging and control
Each spiral removed something that did not belong (too many features, too much noise) and kept what felt culturally true (welcome, calm, threshold).
Weeks That Became Modules
Computer-aided design (Week 2–3). In CAD week I explored Fu compositions in Inkscape and Onshape. I learned that a clean vector is not just for looks — it decides laser kerf, 3D print strength, and later poster layout. The Fu character became the visual identity, the display composition, and even the logic of where a visitor should touch. Teammates Tim and Emily helped me with practical things: how to size a screw hole, how to make a surface look intentional instead of accidental.
Electronics design and production (Week 6, 8). My first PCB was an environmental Hello World board — temperature, humidity, an LED, a button. It was not the final interaction yet, but it taught me KiCad, milling, soldering, and the habit of checking continuity before blaming code. When the project pivoted to visitor touch, I redesigned the board around D2 for the touch module and I2C for the OLED. The first PCB was not wasted. It was practice.
Input and output devices (Week 9–10). Input week taught me to debug sensors with my hands first. I spent hours on a DHT11 before discovering I had GND on the wrong pin — a mistake so simple it was embarrassing. Output week taught me that a screen lighting up is not the same as a screen working correctly. I fought noisy OLED output, wrong font sizes, and library mismatches long before the ePaper ever showed a Fu poster. Those weeks became the C3 module: touch on D2, immediate OLED feedback, calm serial debugging before adding WiFi.
Networking (Week 11). Two XIAO boards talking over HTTP gave me the skeleton of the final architecture: one device sends state, another reads it, a browser can watch both. The most practical lesson was boring but critical — ESP32 boards need 2.4 GHz WiFi. When my boards kept "connecting" forever, the code was fine; the network band was wrong.
3D printing (Week 7). A Fu shape can look connected on screen and still break apart when printed. I added a continuous backing layer to make it printable. That lesson came back when I designed ePaper, OLED, and touch holders: pretty shapes need structural continuity, especially when the object hangs vertically on a door.
Interface programming (Week 15). This is where separate weekly experiments finally became one system. I moved from a flaky round-display web demo to the Interactive Signage Hub: C3 OLED at the door, EE04 ePaper indoors, Node.js as the hub, Tailwind dashboard in the browser. The hardest part was not drawing pixels — it was making state reliable across WiFi. Poster conversion, toast deduplication, device online tracking, and the ED2208 sleep bug all lived here.
System integration (Week 16). Integration week felt different from the others. Each part had already worked alone. Now they had to work as one object — vertically, on a door, with cables that could not fall out when I tilted the frame. I printed holder after holder, cut frame after frame, and learned that a 0.5 mm error at the holder becomes a visible gap at the display.
Molding and casting (Week 14). I designed ruyi cloud patterns and a circular Fu mold. I also made a very clear chemistry mistake: silicone without curing agent. Later I repeated something similar with resin hardener. That sounds far from a networked door guardian, but the lesson matched electronics: some systems have essential pairings. Silicone needs catalyst. Resin needs hardener. Ground needs to exist. WiFi needs the right band. ePaper needs the right refresh sequence. The cloud-pattern box later became the rear support for the display — a decorative experiment turned structural.
Integration: Where Everything Got Hard
The moment I tried to assemble the full object, problems stopped staying in their categories. A software bug looked like a hardware bug. A mechanical gap looked like a display failure.
A few integration stories stick with me:
- Touch + OLED on one board. They worked separately on the XIAO expansion shield. On my custom PCB with dupont wires, they fought each other until I confirmed pin behavior, power, and font sizes that actually fit 128×128.
- EE04 second refresh. The first ePaper poster appeared, then the board hung on the next update. I thought WiFi was dropping. The real issue was the ED2208 sleep/wake cycle. Fixing it meant manual SPI commands and keeping the panel awake — not a library one-liner.
- Dashboard toast spam. One touch triggered endless orange alerts because the browser polled the same event every two seconds. I had to store the previous event and only animate on change.
- Vertical mounting. Holders that looked fine on a table failed when gravity pulled cables down and the frame leaned against a wall.
Integration taught me to test one layer at a time, but never trust that layer alone. The full loop — touch, POST, toast, poll, ePaper refresh — is its own skill.
What I Learned from Making This
If I had to name the real output of Fab Academy, it would not be the object on the wall. It would be the habit of spiraling:
- Try something small and concrete.
- Watch where it breaks — usually somewhere I assumed would "just work."
- Fix that layer before adding the next.
- Accept that culture and electronics need the same patience: neither responds well to rushing.
I also learned that a final project is not a single invention. It is curation. I reused an EE04 board instead of designing my own ePaper driver. I reused Seeed OLED hardware. I wrote custom firmware, a custom frame, custom posters, and custom server logic to tie them together. That is still designing — just at the system level.
Most importantly, I learned that interaction is a feeling decision. I did not want visitors to press a machine button. I wanted them to touch a Fu, get a gentle greeting, and send a quiet signal indoors. Every weekly failure — wrong GND, wrong WiFi band, wrong font size, wrong laser tolerance — was really a question about that feeling: Does this still feel like welcome, or did I just build another gadget?
Main Failures and Fixes
Laser Cutting Tolerance
The first frame could not be assembled. I had designed the pieces as if the material and laser cut were mathematically perfect. They were not. I adjusted the fit and kept testing with physical parts.
Assembly Orientation
Several wooden panels looked almost identical after cutting. I repeatedly assembled them in the wrong direction. The fix was to add clearer orientation references and treat assembly guidance as part of the design.
Missing Ground
One PCB revision had a missing ground connection. The LED did not work because the electrical path did not exist. This was a quiet failure, but an important one.
Touch and OLED Integration
The digital touch module and OLED worked well separately on the XIAO expansion board, but failed together on my custom PCB when I used dupont wires. I had to confirm pin behavior, power routing, and OLED font sizes that actually fit the 128 x 128 screen. At one point WELCOME was too large and the last letter was cut off.
ePaper Second Refresh
The ePaper display could show an image once, then hang on later refreshes. The final fix was not cosmetic. I changed the control approach by manually pushing data and refresh commands instead of relying on the library sleep/wake cycle.
Dashboard Repeated Toast
The web dashboard kept showing the visitor toast even when there was no new touch. The fix was to compare the current event with the previous known event and only animate on transition.
Mechanical Integration
Many holders fit their own components but failed when installed in the full object. This was the difference between designing a part and designing an assembly. Cable routing, screw access, display orientation, and vertical mounting only became obvious when everything was together.
What I Designed and Made
I designed and fabricated:
- the interaction concept and visitor flow
- the Fu poster graphics for the ePaper display
- the laser-cut wooden front frame
- the ePaper holder and rear support structure
- OLED and touch sensor supports
- a custom ESP32-C3 PCB workflow
- the C3 touch/OLED/WiFi firmware
- the EE04 ePaper poster-switching firmware (on the embedded ESP32-S3 Plus)
- the Node.js server and API
- the browser dashboard
- image conversion workflow for the ePaper posters
The project uses existing modules where that made sense — especially the EE04 driver board with its built-in ESP32-S3 Plus and the Grove OLED — but the system integration, enclosure, interaction logic, dashboard, and final behavior were designed for this project.
Materials and Components
Main electronics:
- Seeed Studio XIAO ESP32-C3
- Custom PCB for the C3 interaction board
- Simple digital touch module (3-pin: VCC, GND, SIG)
- Grove - OLED Display
- Seeed XIAO ePaper Display Board (ESP32-S3) - EE04 — includes embedded XIAO ESP32-S3 Plus; no separate S3 board needed
- 7.3 inch Spectra 6 color ePaper display
- Jumper wires, headers, screws, and USB power
Fabrication materials:
- plywood for the laser-cut frame
- PLA filament for holders and support parts
- resin and silicone from molding/casting experiments
- screws for the mechanical mounting points
Software:
- Arduino IDE / Arduino toolchain
- KiCad
- Inkscape
- Onshape
- Node.js
- Express
- Tailwind CSS
- Python image conversion script
- Seeed ePaper / display libraries
Evaluation
The final system was evaluated by testing the full interaction loop:
- Start the local Node.js server.
- Open the dashboard in the browser.
- Power the EE04 board and confirm poster 1 appears on the ePaper.
- Power the C3 touch board and confirm the OLED idle screen appears.
- Touch the sensor module.
- Confirm the OLED shows
Hello / My Friend. - Confirm the server receives the event.
- Confirm the dashboard shows the visitor toast.
- Confirm the ePaper switches to poster 3.
- Use the dashboard reset button to return to poster 1.
The full loop works. It is still a prototype, but it proves the central idea: a visitor can interact with a culturally familiar object, and the object can quietly notify the inside system.
What works well:
- touch event triggers the network flow
- OLED gives immediate local feedback
- dashboard can switch posters manually
- EE04 updates the ePaper only when the poster state changes
- device status is visible on the dashboard
- the physical frame communicates the Fu decoration idea
What still needs improvement:
- the internal wiring could be cleaner and more robust
- the enclosure could use a more polished rear cover
- the touch area should be better integrated into the visual design
- the ePaper refresh remains slow, so interaction timing must respect it
- the server currently runs locally, not as a long-term deployed service
- WiFi credentials are still hardcoded in the prototype firmware
Bill of Materials
This is the approximate final-project BOM. Exact prices depend on supplier and local stock.
| Item | Quantity | Purpose |
|---|---|---|
| XIAO ESP32-C3 | 1 | Touch sensing and WiFi event sender |
| Custom PCB | 1 | Main C3 interaction board |
| Digital touch module (3-pin) | 1 | Visitor input on D2 |
| Grove 128 x 128 OLED | 1 | Local visitor feedback |
| EE04 ePaper driver board | 1 | Embedded ESP32-S3 Plus + driver for 7.3 inch ePaper |
| 7.3 inch Spectra 6 ePaper display | 1 | Main ambient Fu display |
| Plywood sheet | 4 | Laser-cut front frame |
| PLA filament | As needed | 3D-printed holders and supports |
| Screws / headers / wires | As needed | Mechanical and electrical assembly |
| USB power / power bank | 1-2 | Prototype power |
Project Files
Paths below are repository-relative. In GitLab, open a file and use Download or Raw, or clone the repo to get everything.
Final implementation files:
| What | Link |
|---|---|
| C3 touch sender firmware | c3_touch_sender.ino |
| S3 ePaper poster firmware | EE04_S3_Poster.ino (runs on EE04 embedded ESP32-S3 Plus) |
| S3 driver configuration | driver.h |
| Poster bitmap arrays | images.h |
| Node.js server | server.js |
| Web dashboard | static/img/interface/index.html (served by node server.js) |
| Poster conversion script | convert.py |
| Windows quick-launch script | start_server.bat |
| Serial debug helper | read_serial.py |
| Earlier touch/OLED test | helloalison-touchsuccess531.ino |
| 7.3 inch ePaper bitmap example | Bitmap_07inch30.ino |
| Fu box frame v5.0 (SVG) | FU BOX 5.0.svg |
| Fu box frame v5.0 (DXF) | FU BOX 5.0.dxf |
| Round Fu mold positive (STL) | 圆形福-3D图.stl |
Related weekly documentation:
Final presentation assets:
- Summary slide (
presentation.png) - Presentation video (
presentation.mp4) - Final project compressed video (MP4)
- Final project compressed poster (PNG)
Implications and Future Development
This project makes me think differently about smart home objects. Many smart devices begin from function and then try to look domestic afterward. Door Guardian - FU begins from a domestic and cultural object, then asks what kind of function belongs there.
Possible future directions:
- stronger enclosure and cable management
- battery power or a safer permanent power design
- more seasonal Fu poster sets
- a mobile notification option
- integration with a soft indoor light
- better weather/time poster modes
- a more hidden touch area inside the Fu surface
- AI-generated festival greetings or visitor messages
The most important future improvement would be making the system feel even less like separate modules. In the final prototype, I can still see the seams between wood, holder, board, display, and dashboard. The next version should feel more like one object.
Final Reflection
At the beginning, I thought I was making a smart Fu decoration. By the end, I understood the project more as a conversation between culture and technology.
The Fu character carries memory, blessing, and welcome. The touch sensor gives it a small ritual. The OLED answers the visitor immediately. The server carries the message indoors. The ePaper display changes slowly, almost like a paper sign being replaced. The dashboard makes the invisible network visible.
I also learned that interaction is not only about adding sensors. It is deciding what should happen, when it should happen, how strongly it should respond, and what feeling the response should create. I did not want the visitor to feel like they were pressing a machine button. I wanted the action to feel gentle: touching a Fu, sending a greeting, waking the guardian.
The hardest parts were not always the most impressive-looking parts. A missing ground, a wrong WiFi band, a too-large OLED font, a repeated toast, and an ePaper sleep problem each stopped the project in a different way. At the time, these mistakes felt like delays. Looking back, they are the actual structure of the project. Each failure forced the next spiral.
Door Guardian - FU is still a prototype, but it represents the kind of maker I want to become: someone who can connect personal culture, physical form, electronics, and software into one object that feels meaningful, not only functional.