Week14 - Molding and Casting
Overview
For Week 14:
- Design a mold and tooling that you’ll be using
- Mill it and use it to cast parts
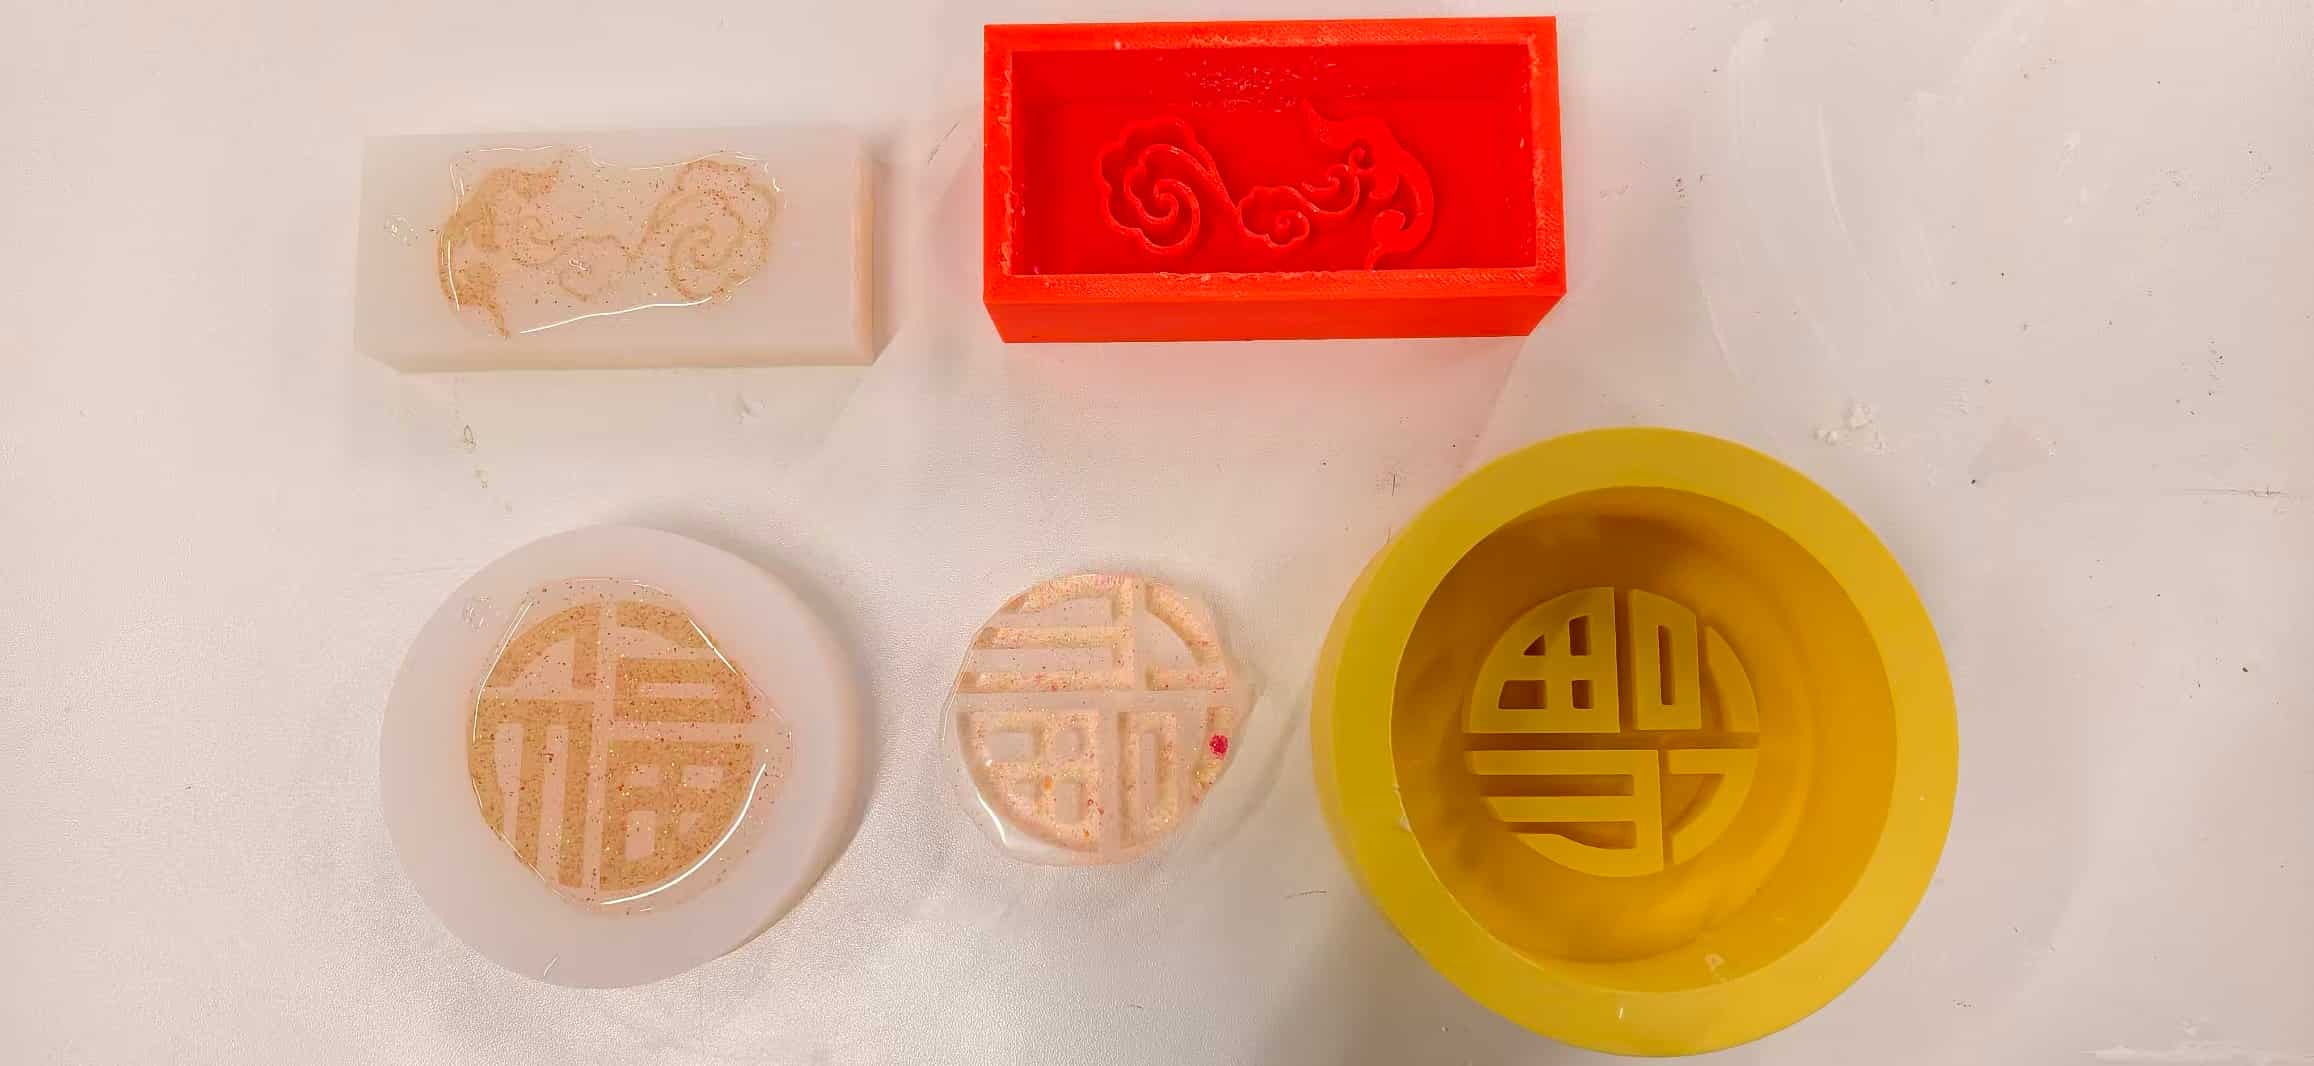
Heroshot:
I designed two mold, first one is circular “Fu” motif, and second is a ruyi-style “auspicious cloud” (祥云) pattern, all drew from Inkscape. I will choose the one that looks well to be the decorations for my final project.
This page walks through the full pipeline: 2D pattern → CAD → print → silicone → casting.
Idea and design
For this week’s molding and casting assignment, I wanted to create something that connects with traditional Chinese culture.
The pattern I chose is the “Ruyi cloud” (for Chinese named 如意祥云), a classic decorative motif that symbolizes good fortune, harmony, and the fulfillment of wishes. The word “Ruyi” literally means “as you wish,” and this pattern has been widely used in architecture, ceramics, and traditional ornaments throughout Chinese history.
I’ve always been drawn to these kinds of cultural elements, they carry meanings beyond just visual aesthetics. So instead of designing a purely functional mold, I decided to bring this pattern into my project and explore how digital fabrication can reinterpret traditional designs.
Then I thought, for the Ruyi, I could make a rectangle to hold it, and for the round fu, I can make a circle.
2D pattern design (Inkscape)
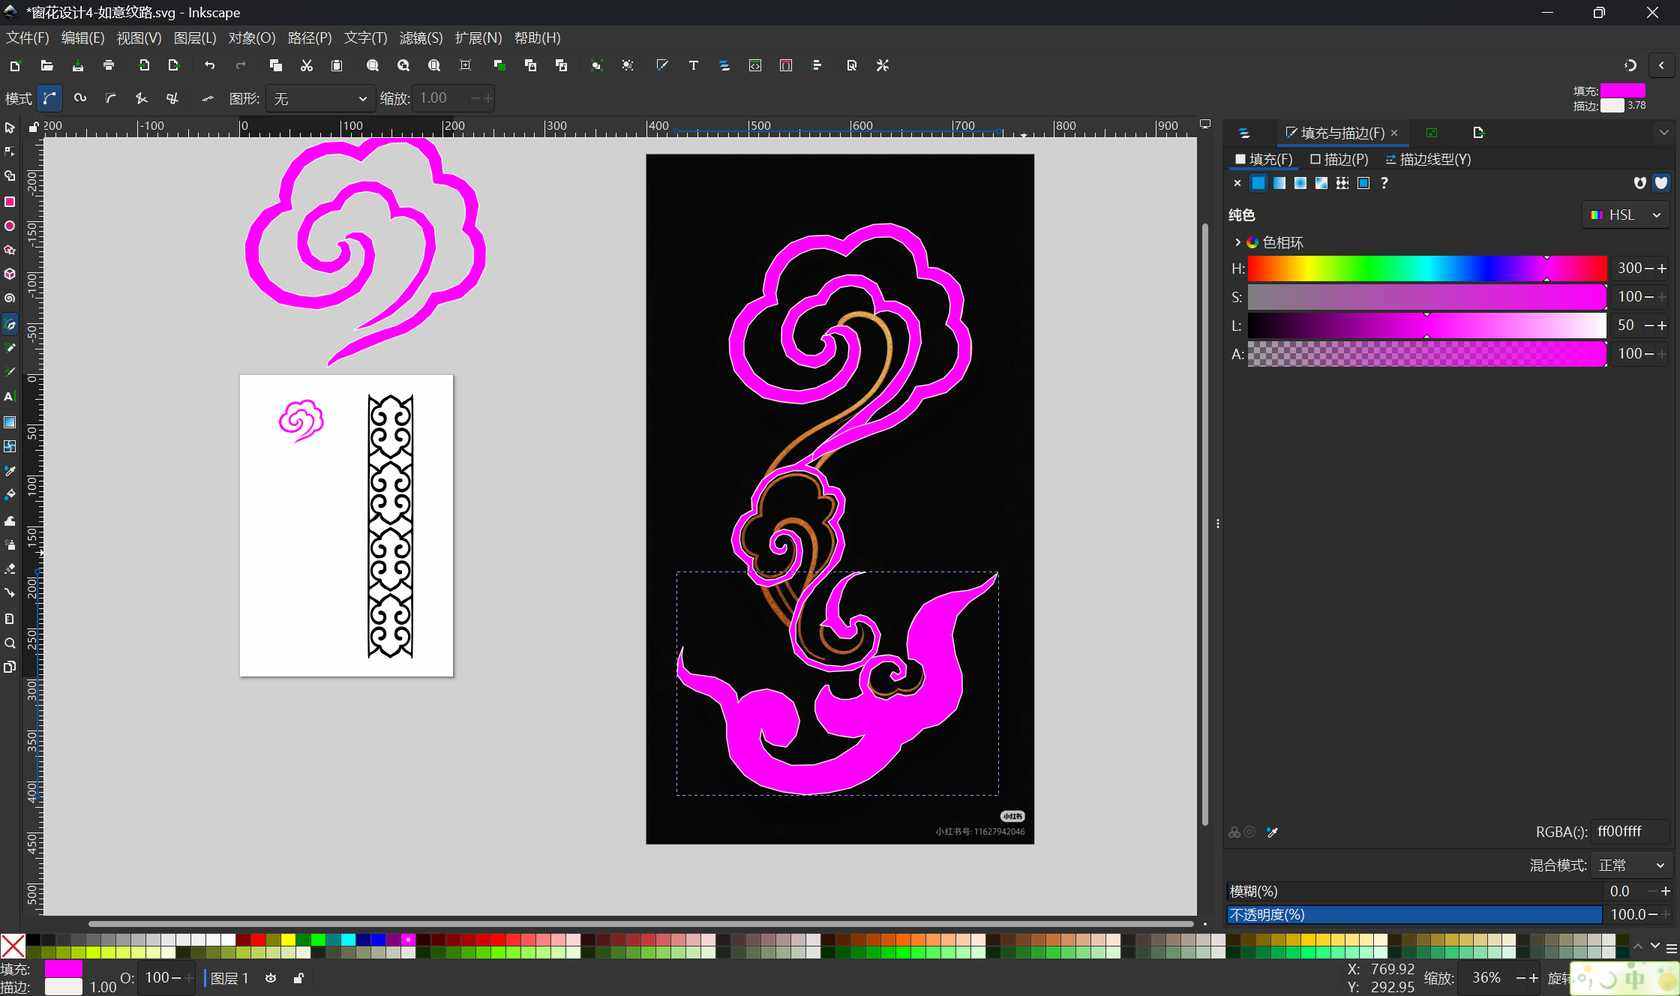
In Inkscape I drew a ruyi cloud pattern: loose, looping curves that read well at a distance but still look intricate up close. Working in 2D first was helpful because I could tweak line weight and spacing before worrying about extrusion heights or printability.
I used Trace Bitmap directly, but the result doesn't looks good. So I chose to draw myself.
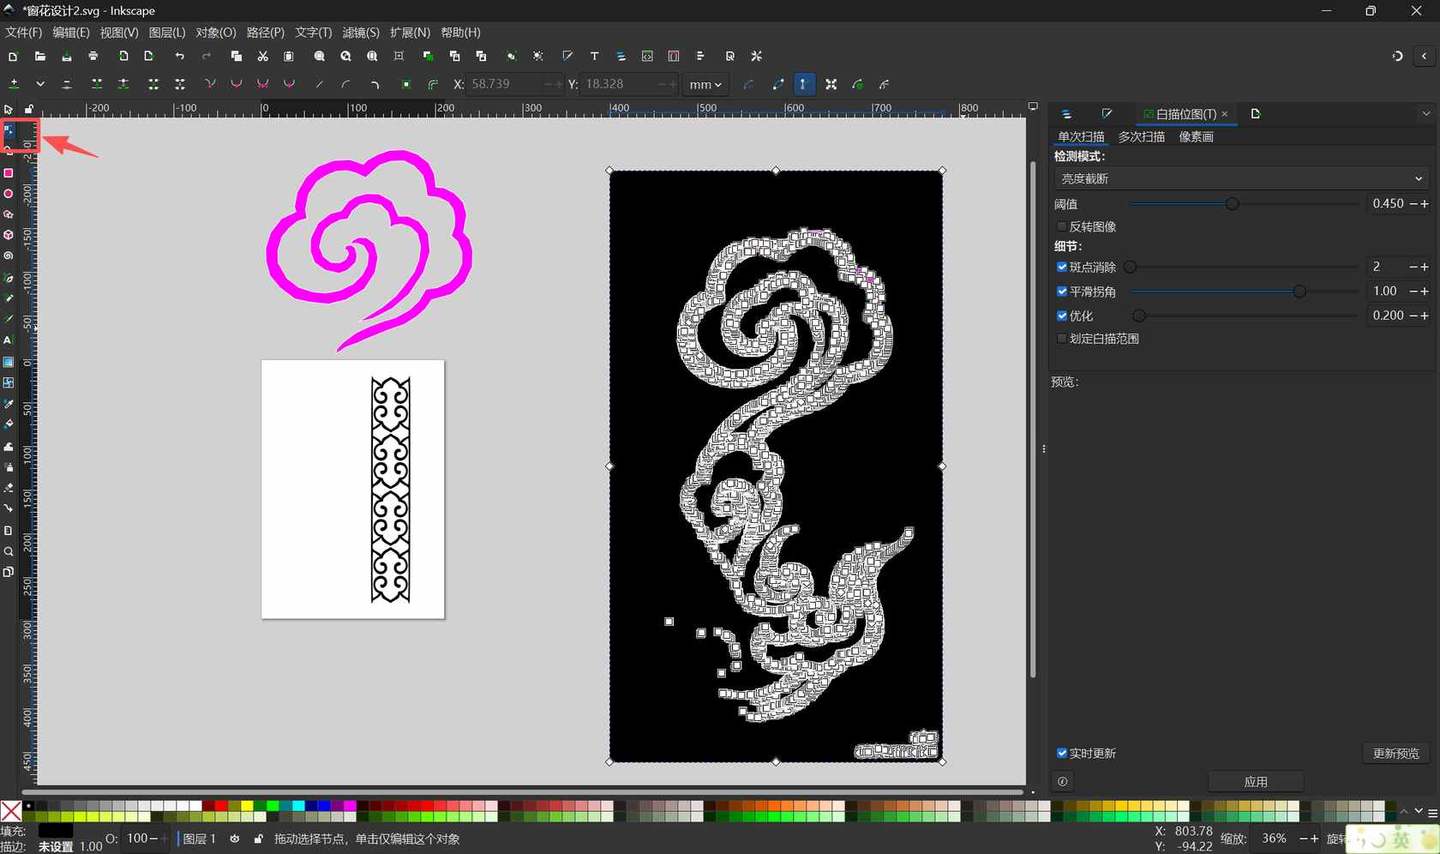
I kept iterating the Ruyi pattern linework in Inkscape, different scales on the same page, fill/stroke tweaks, until the shapes felt balanced for mold depth, not just for “looking nice on a sticker.”
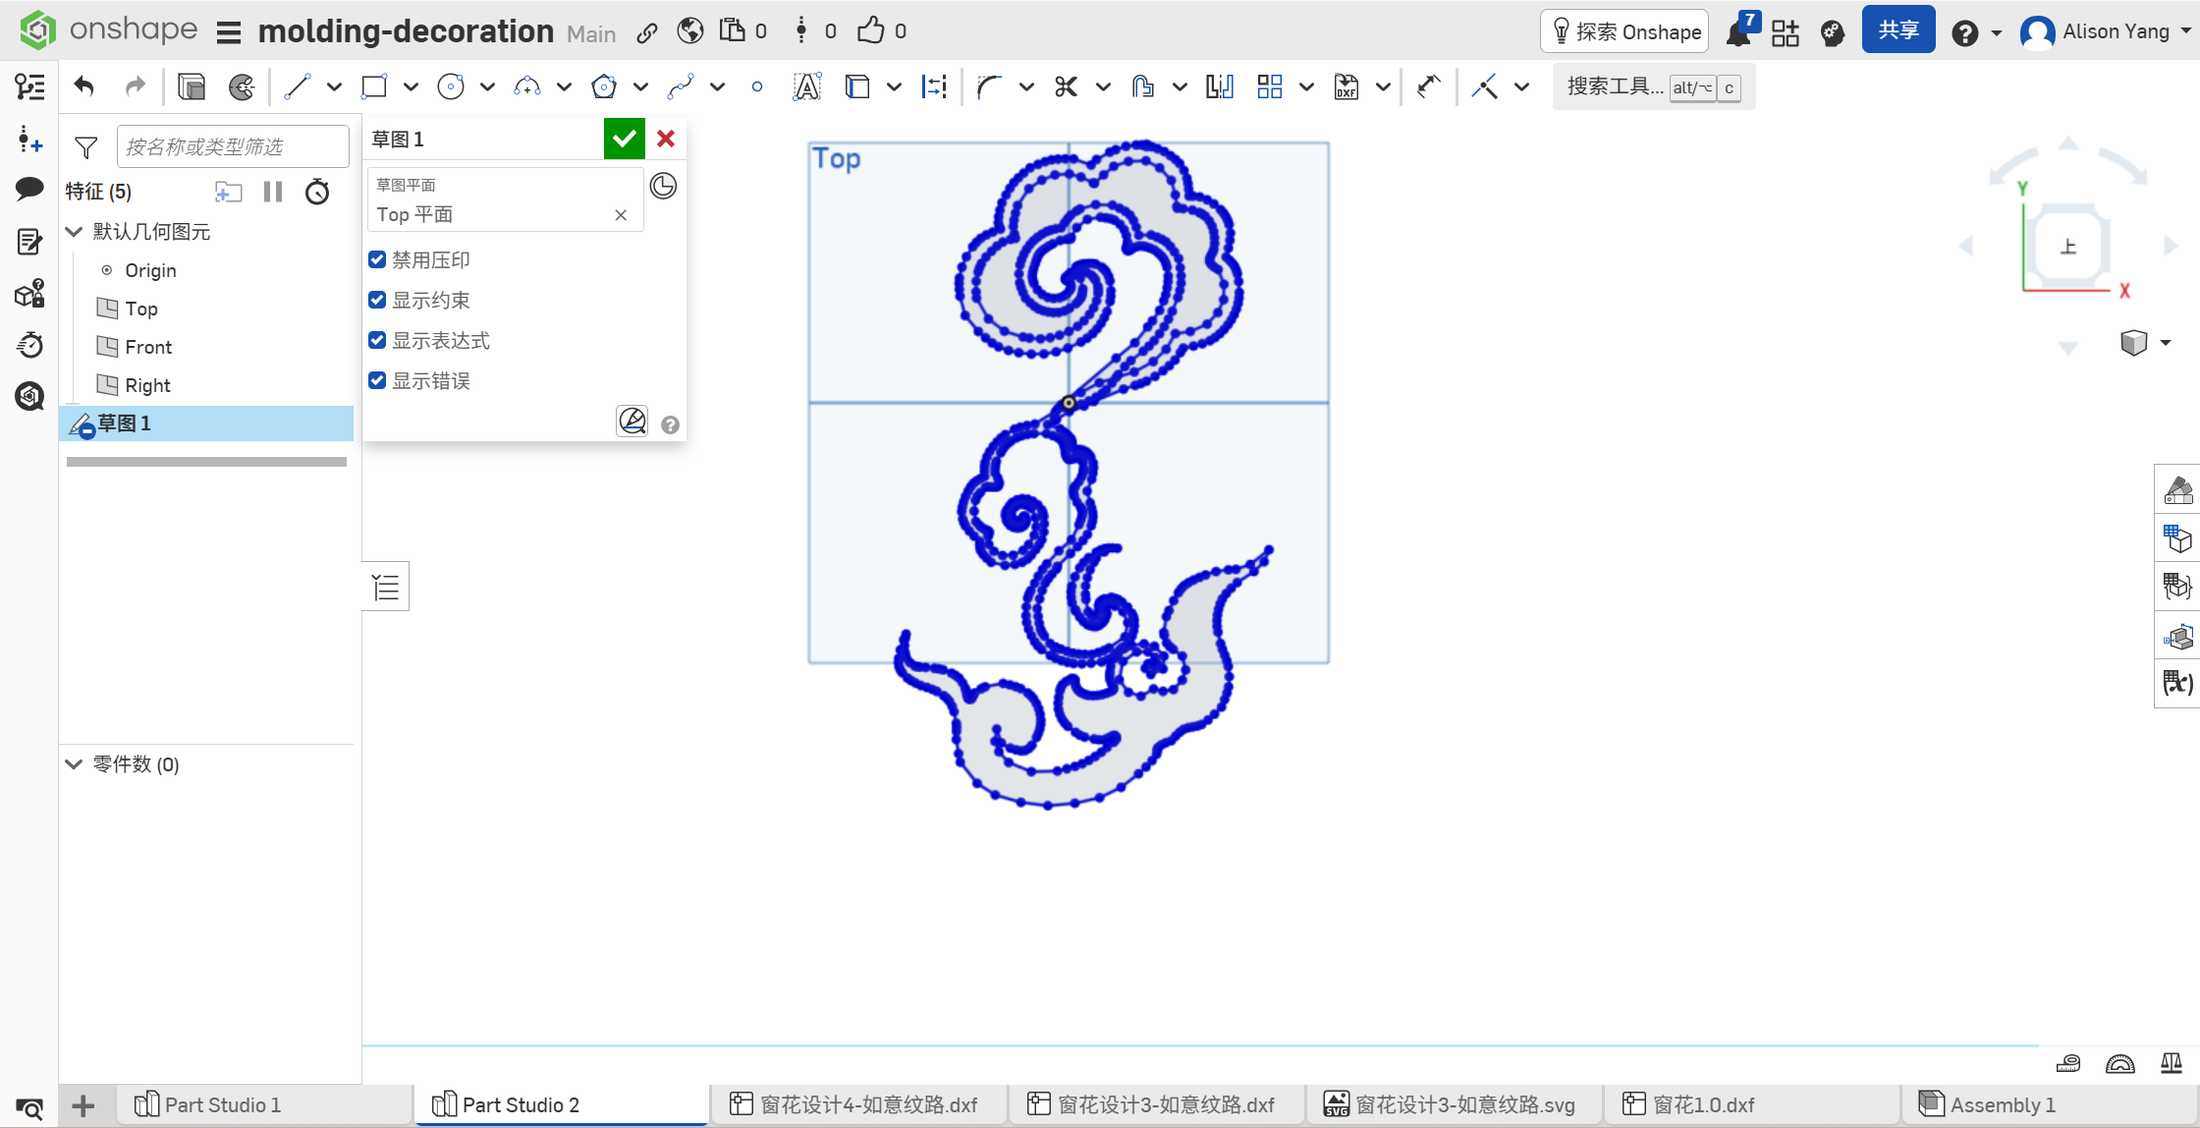
3D modeling (Onshape)
I moved the artwork into Onshape and built two separate mold positives, each designed as a “tub” the silicone would pour around.
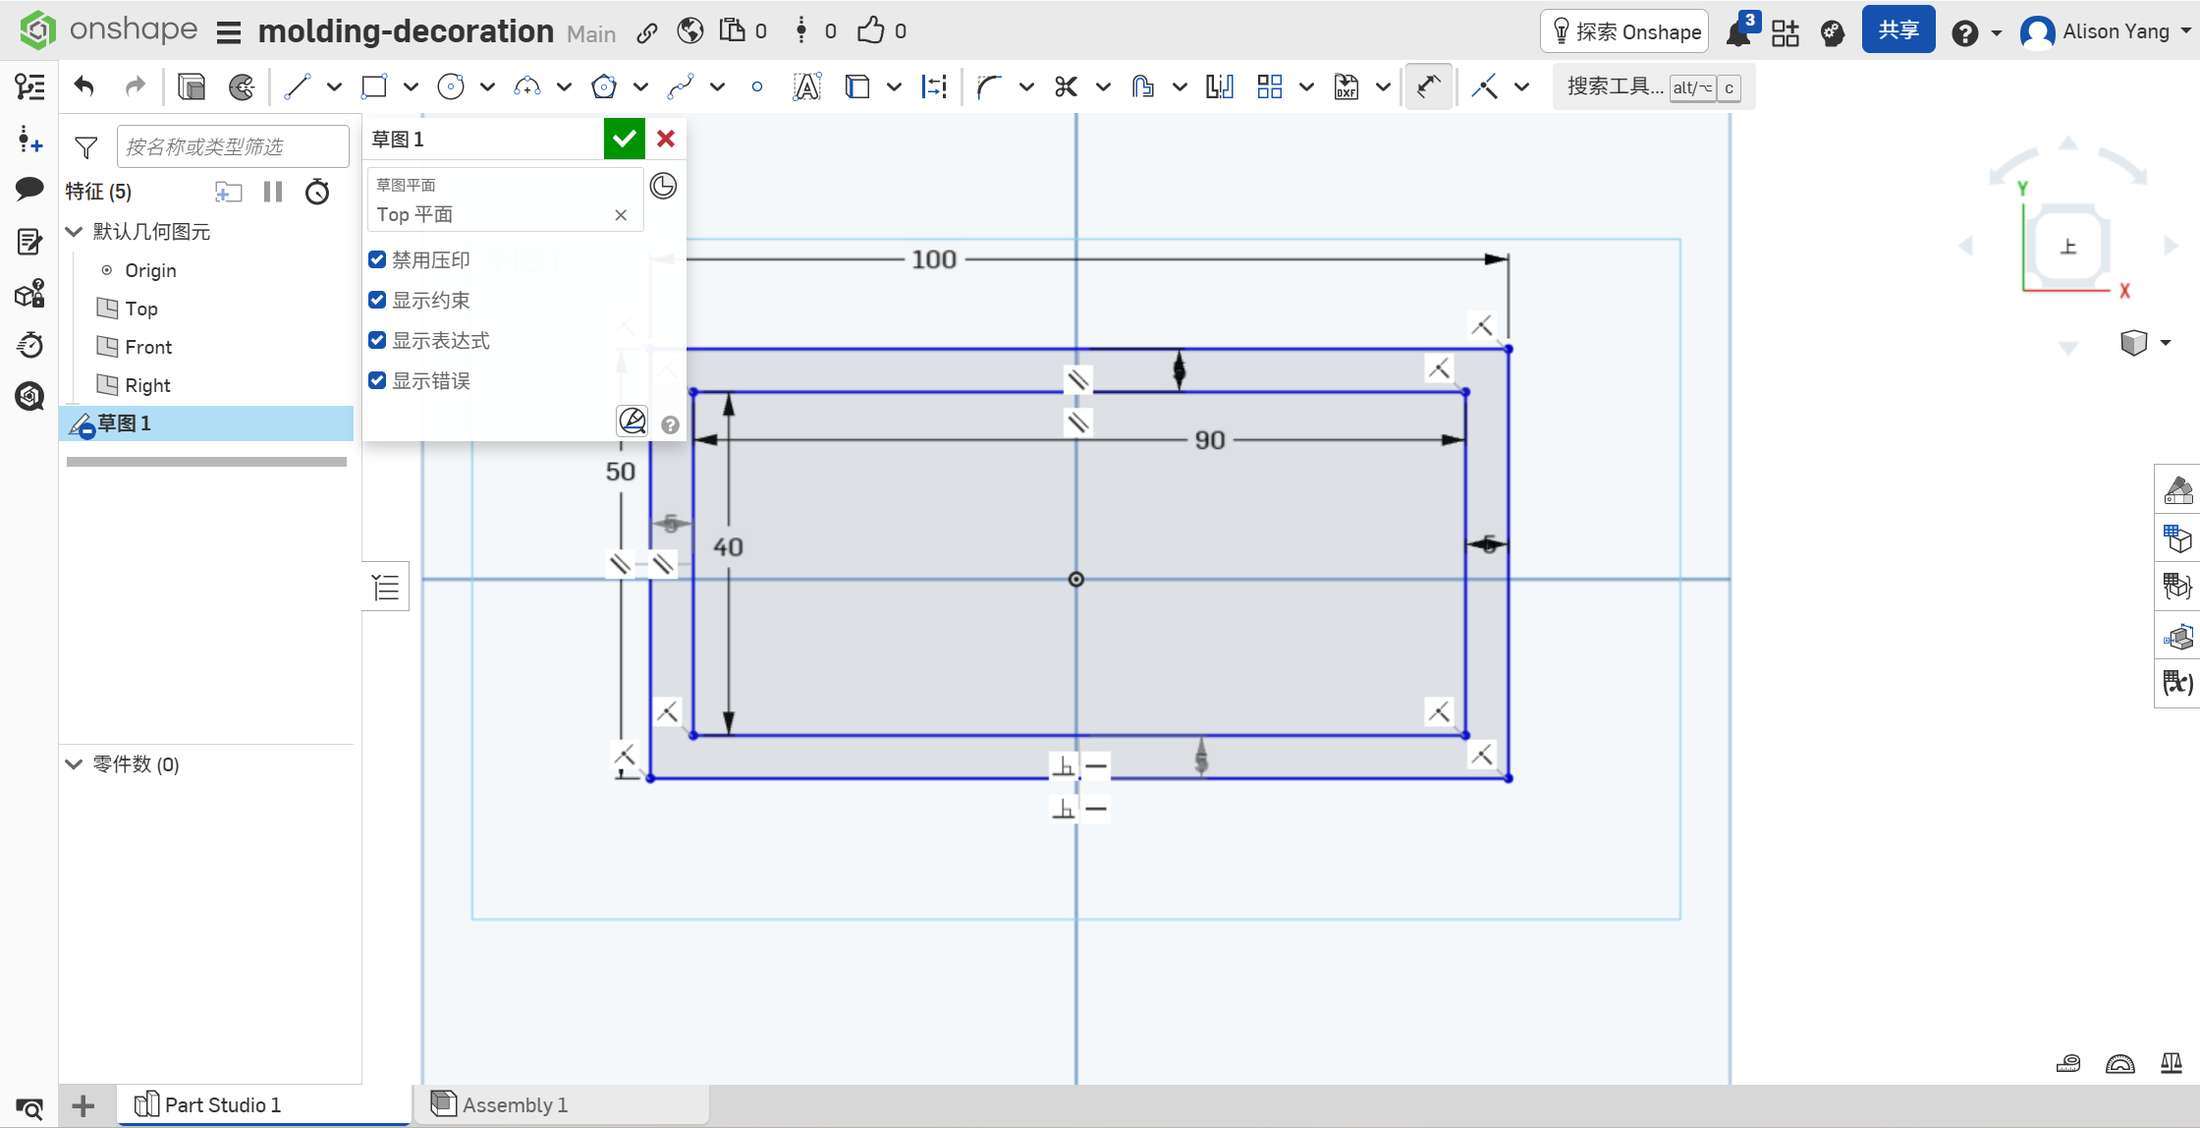
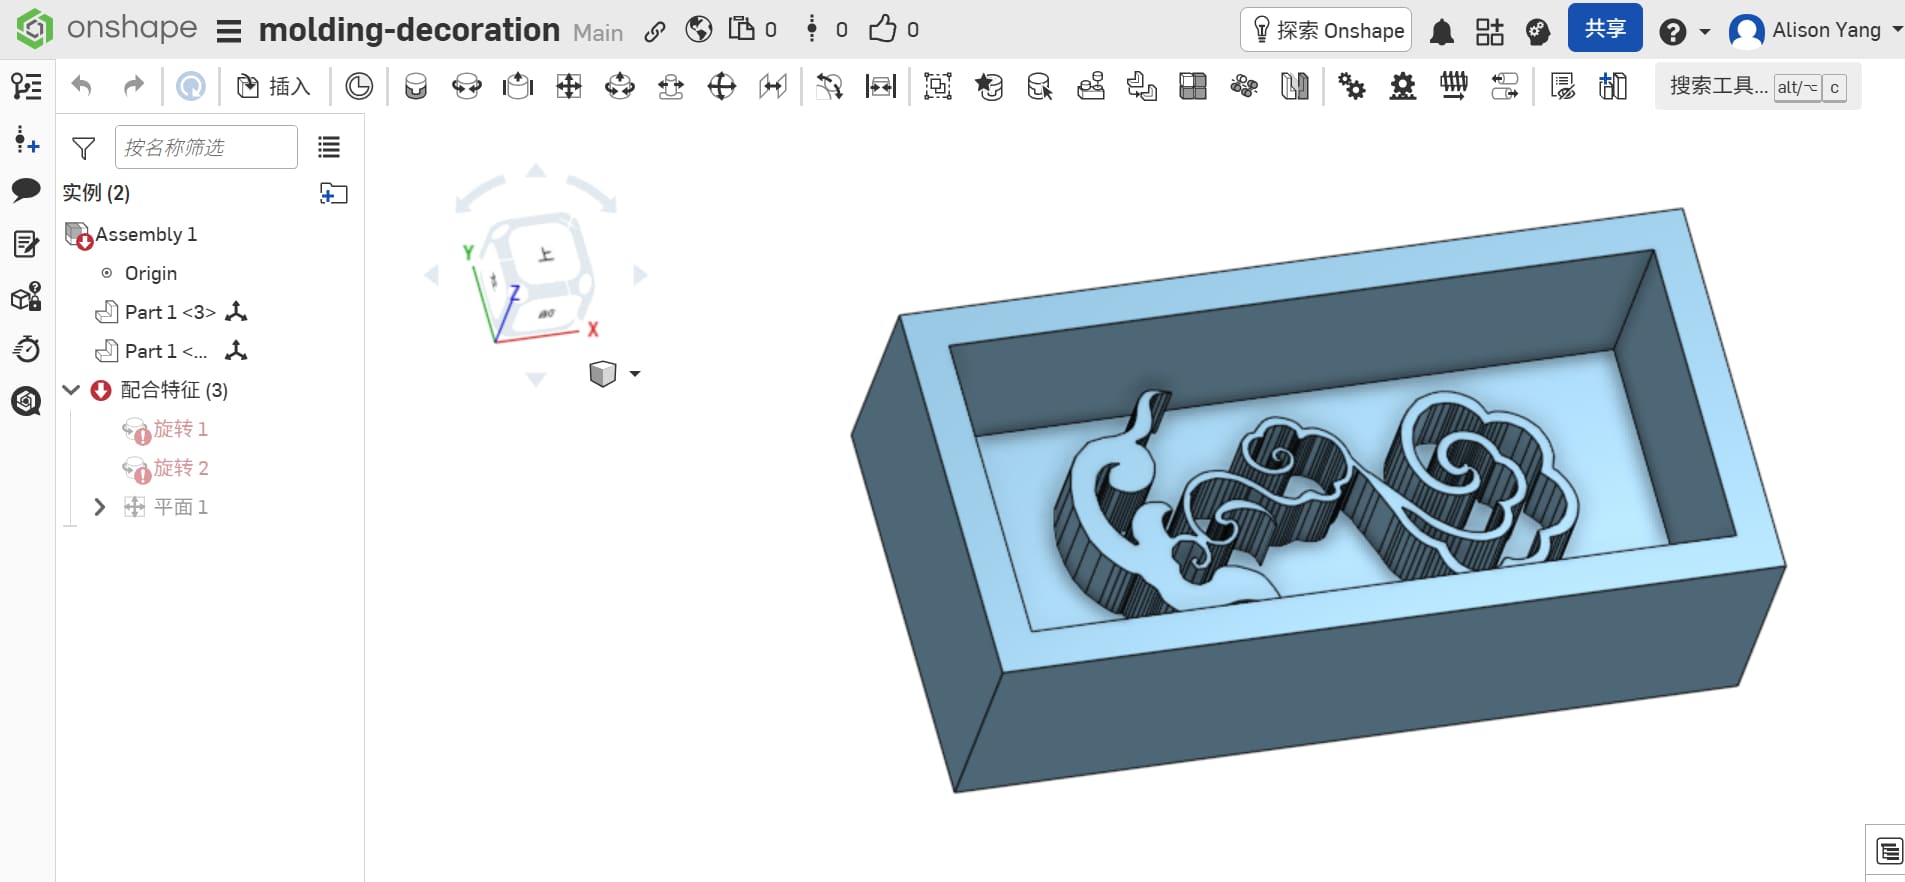
For the rectangular cloud mold, the footprint started as nested rectangles so the outer walls and inner cavity matched the numbers I wanted easy to check in the sketch before anything was extruded.
The cloud geometry came from imported DXF/SVG from Inkscape
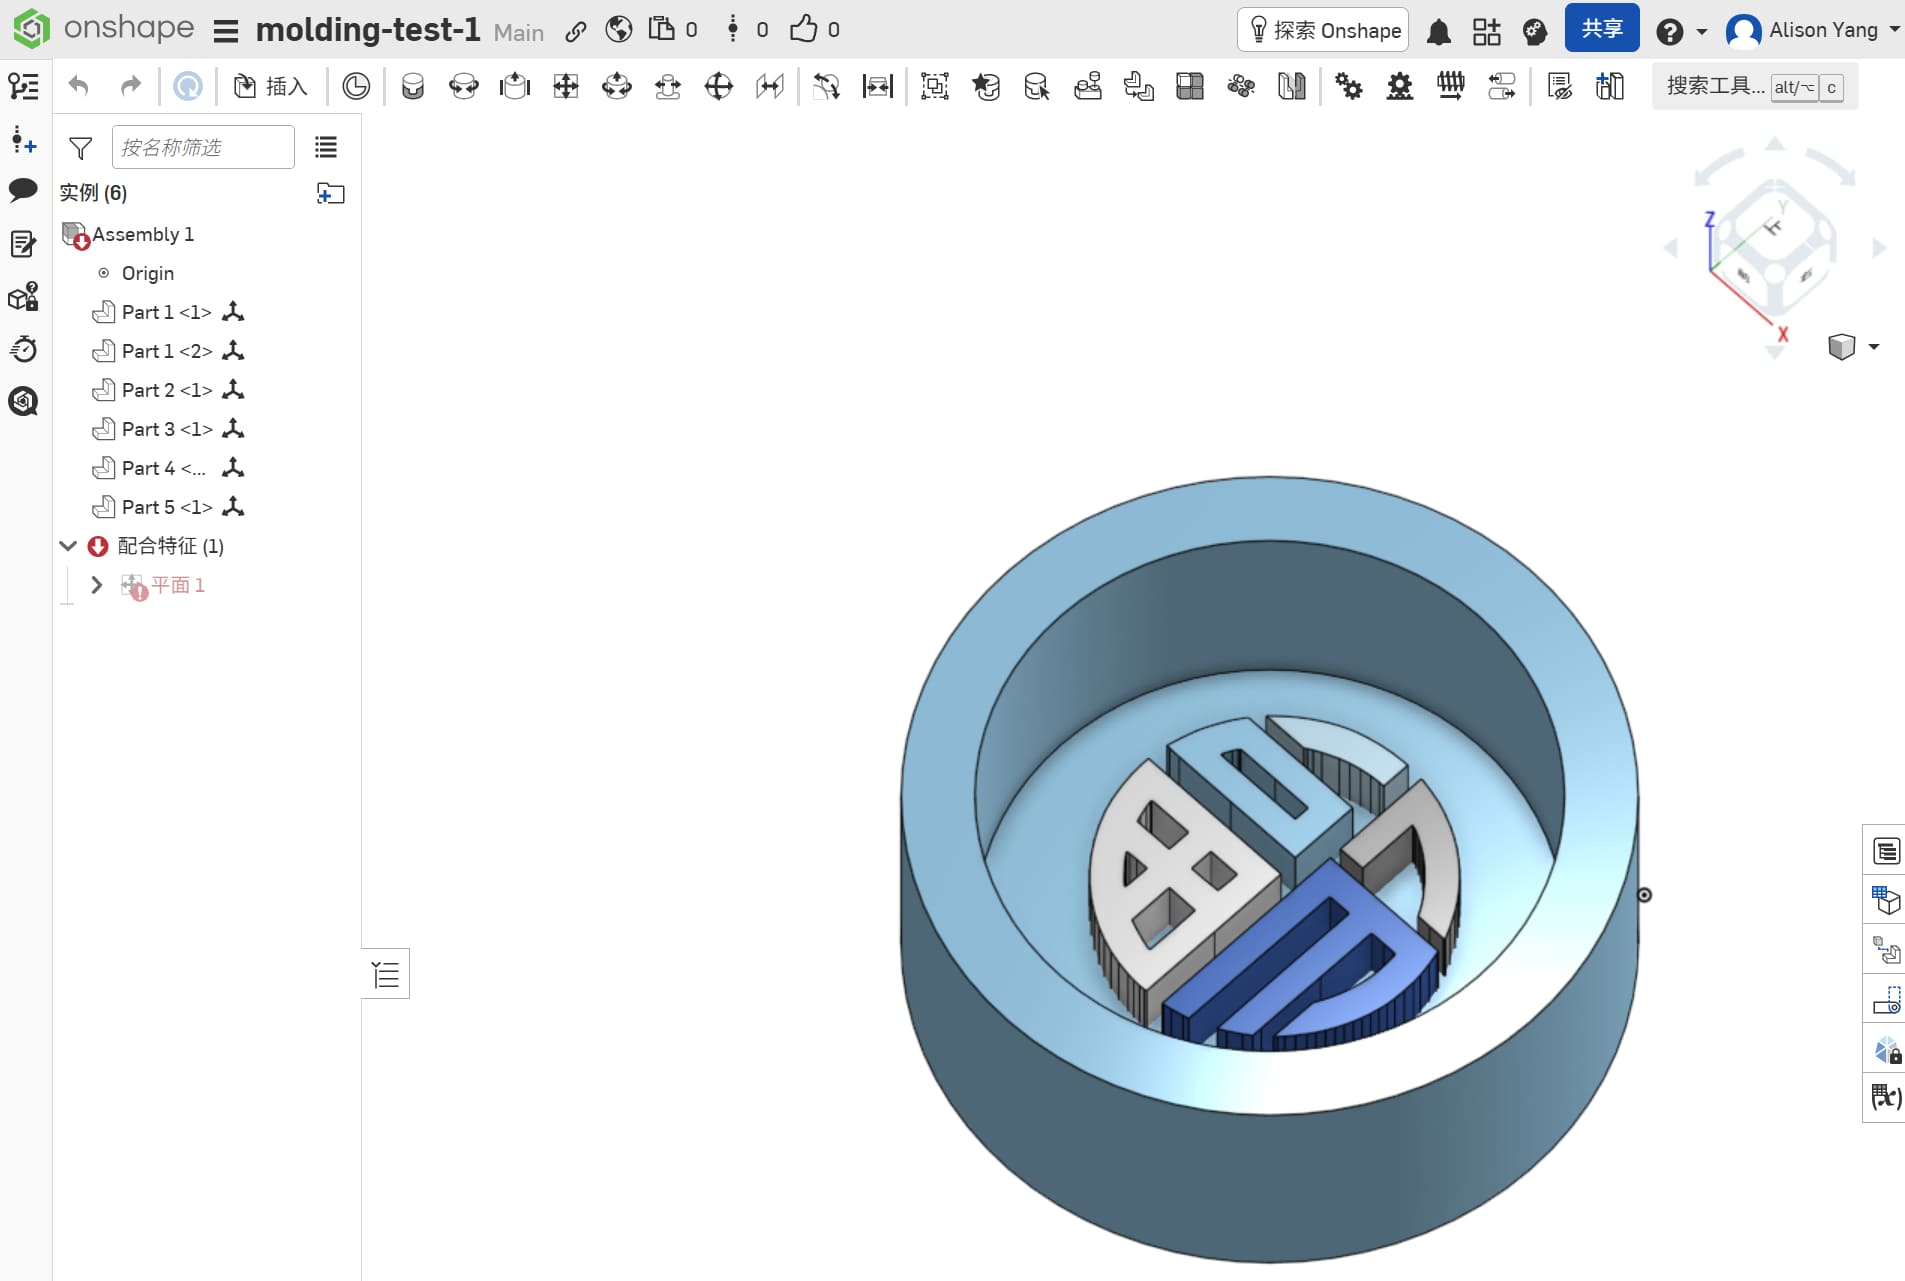
For the round Fu piece (molding-test-1), I worked from an imported DXF and used sketch tools like mirror to keep the character centered and symmetric—handy when you’re trying to keep the CAD predictable for slicing.
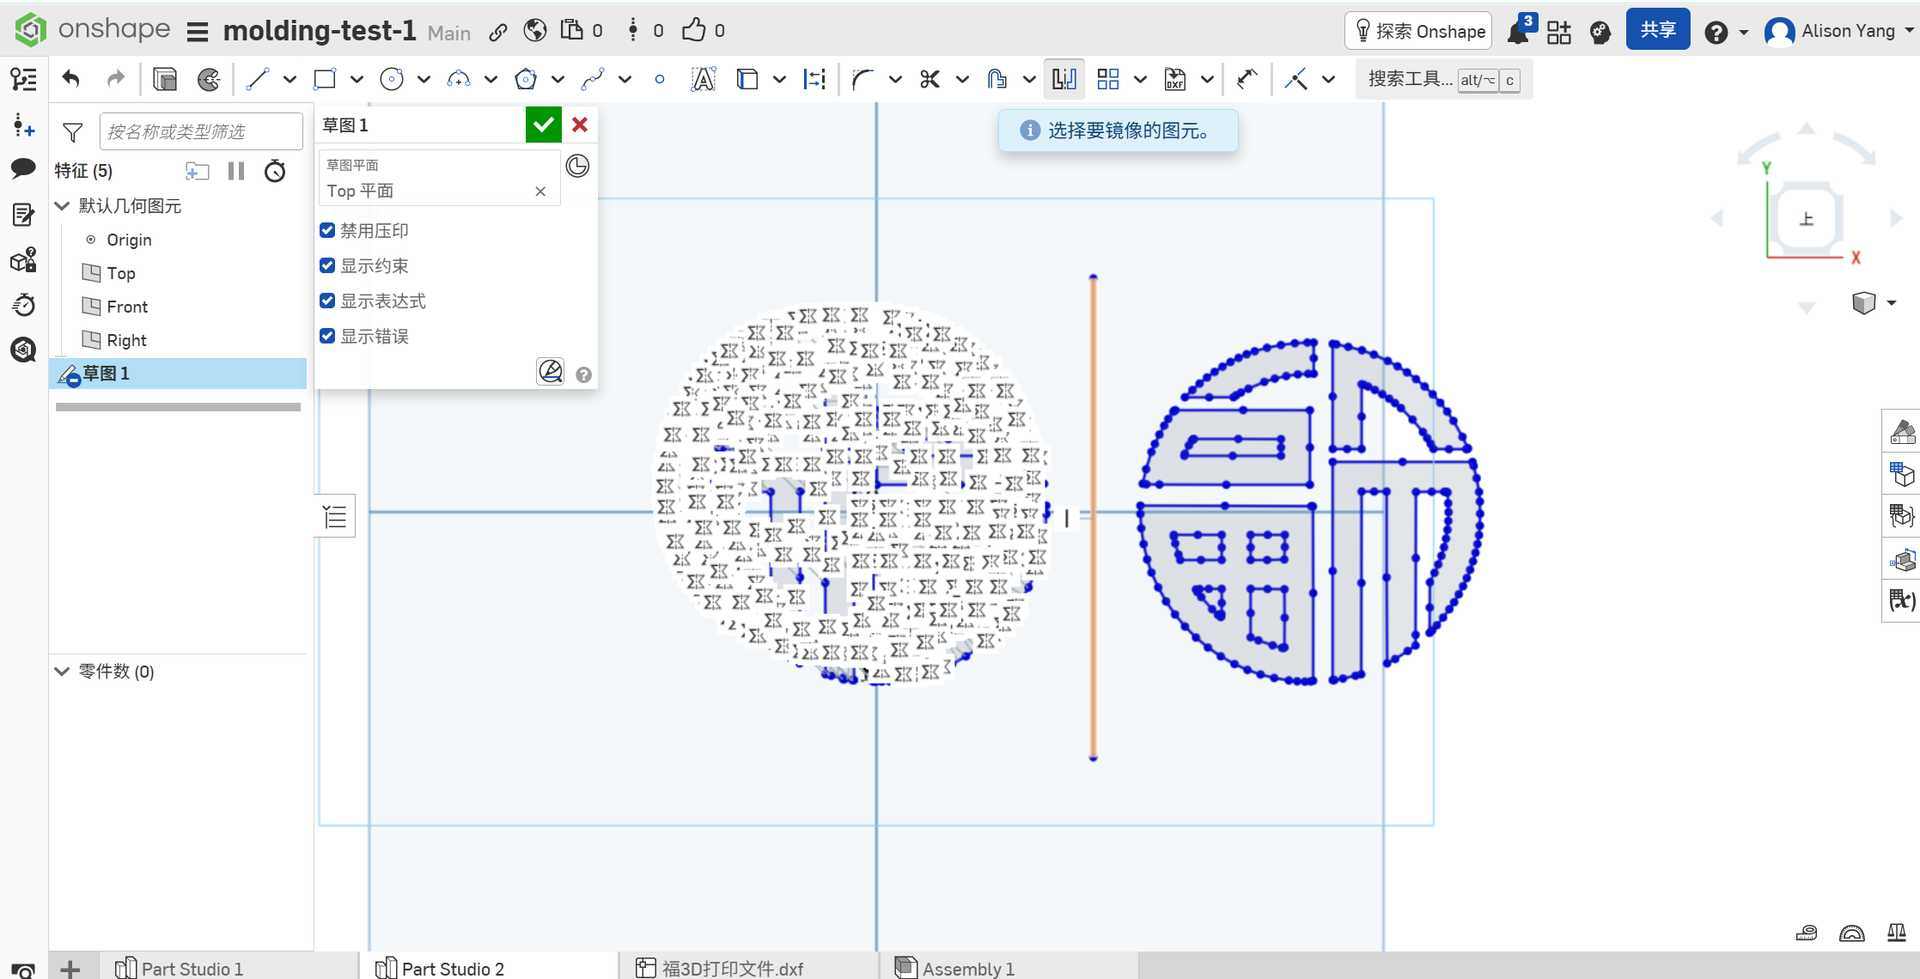
Mold A — circular “Fu” design
| Feature | Size |
|---|---|
| Outer diameter | 100 mm |
| Inner diameter | 80 mm |
| Outer wall height | 40 mm |
| Inner base thickness | 5 mm |
| Fu character relief height | 15 mm |
The Fu character sits on the inner base as raised geometry. I kept the relief height moderate so the cast part would still demold without locking into undercuts.
Mold B — rectangular box with cloud pattern
| Feature | Size |
|---|---|
| Outer rectangle | 100 × 50 mm |
| Inner cavity | 90 × 40 mm |
| Cloud / pattern relief height | 25 mm |
| Inner base thickness | 10 mm |
| Outer wall height | 60 mm |
The taller walls on Mold B gave extra headroom for pouring silicone above the tallest cloud features, which helps avoid underfill if the pour is a bit shallow.
Why these numbers
I wanted molds that would fit comfortably on our printer bed, use a reasonable volume of silicone, and still feel like “real” objects when cast.
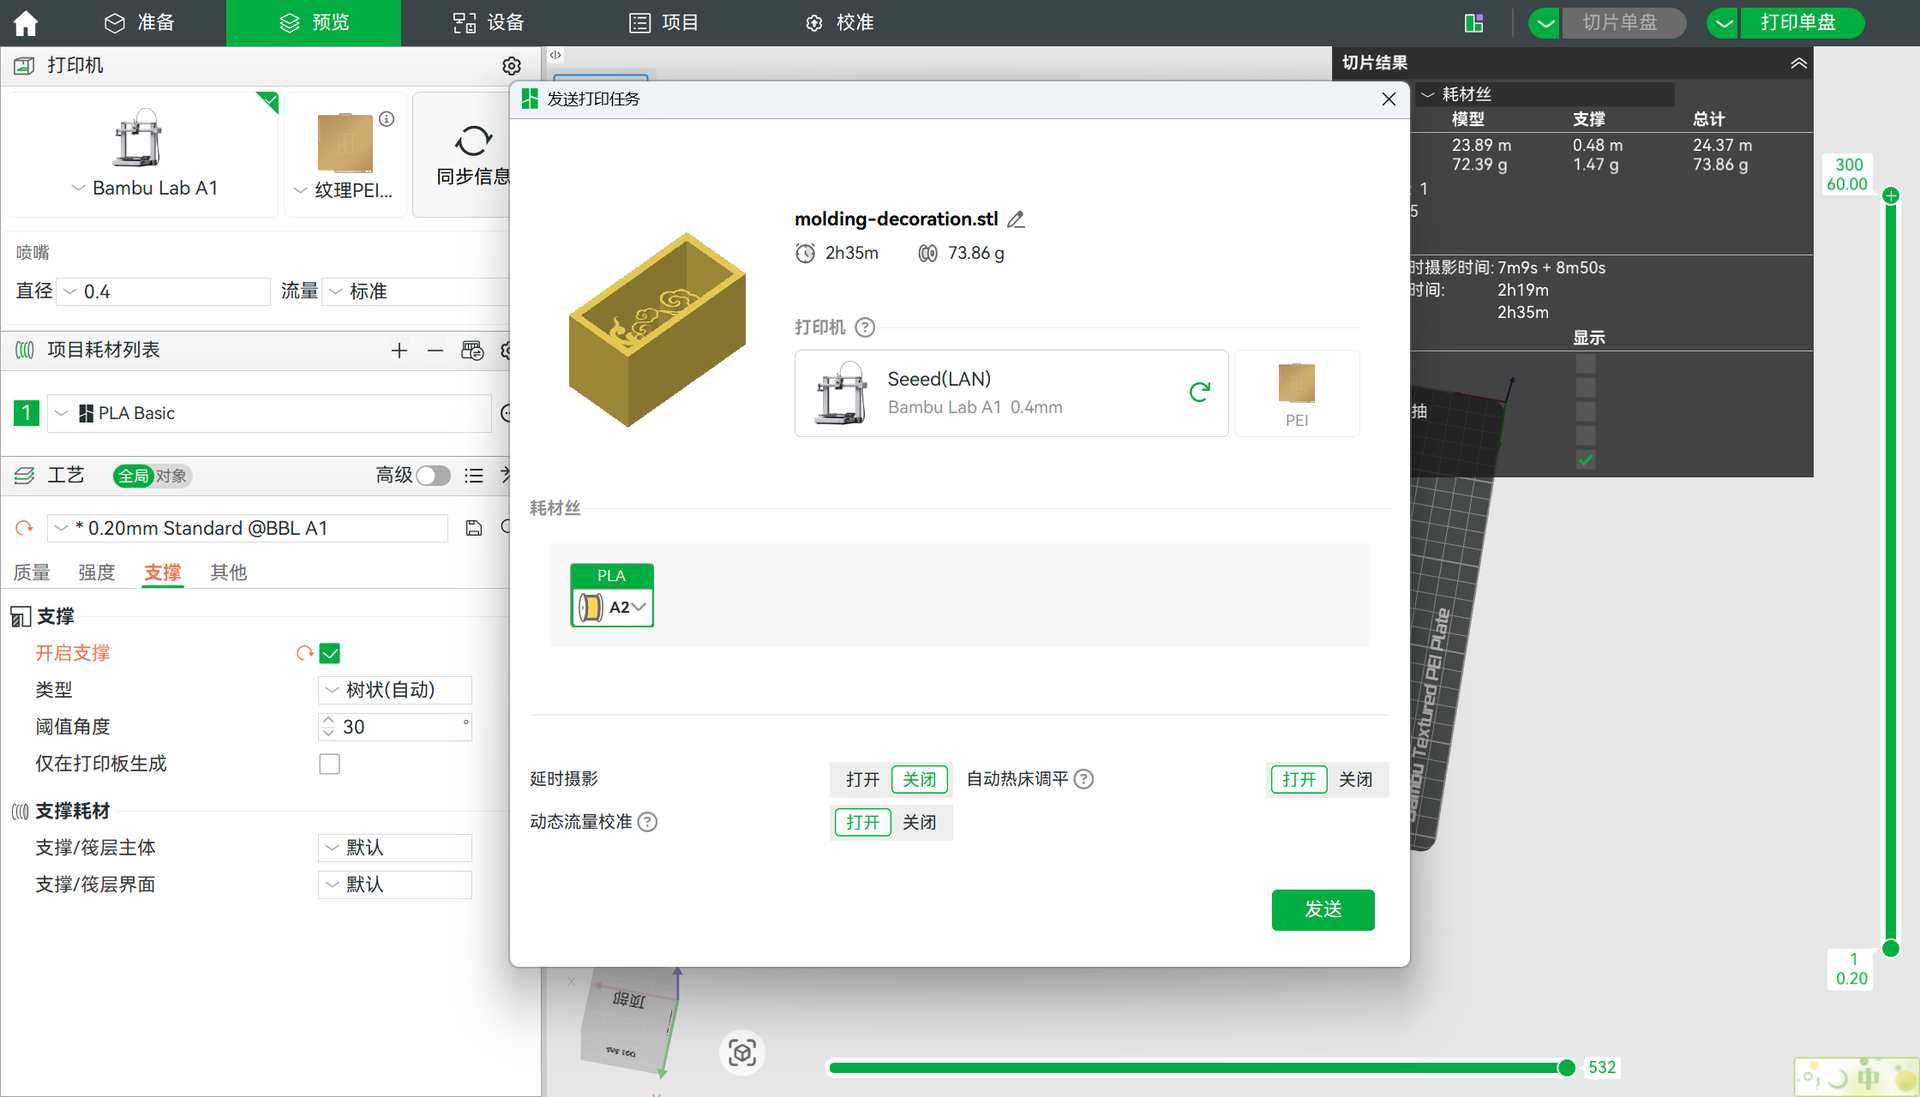
3D printing and iteration
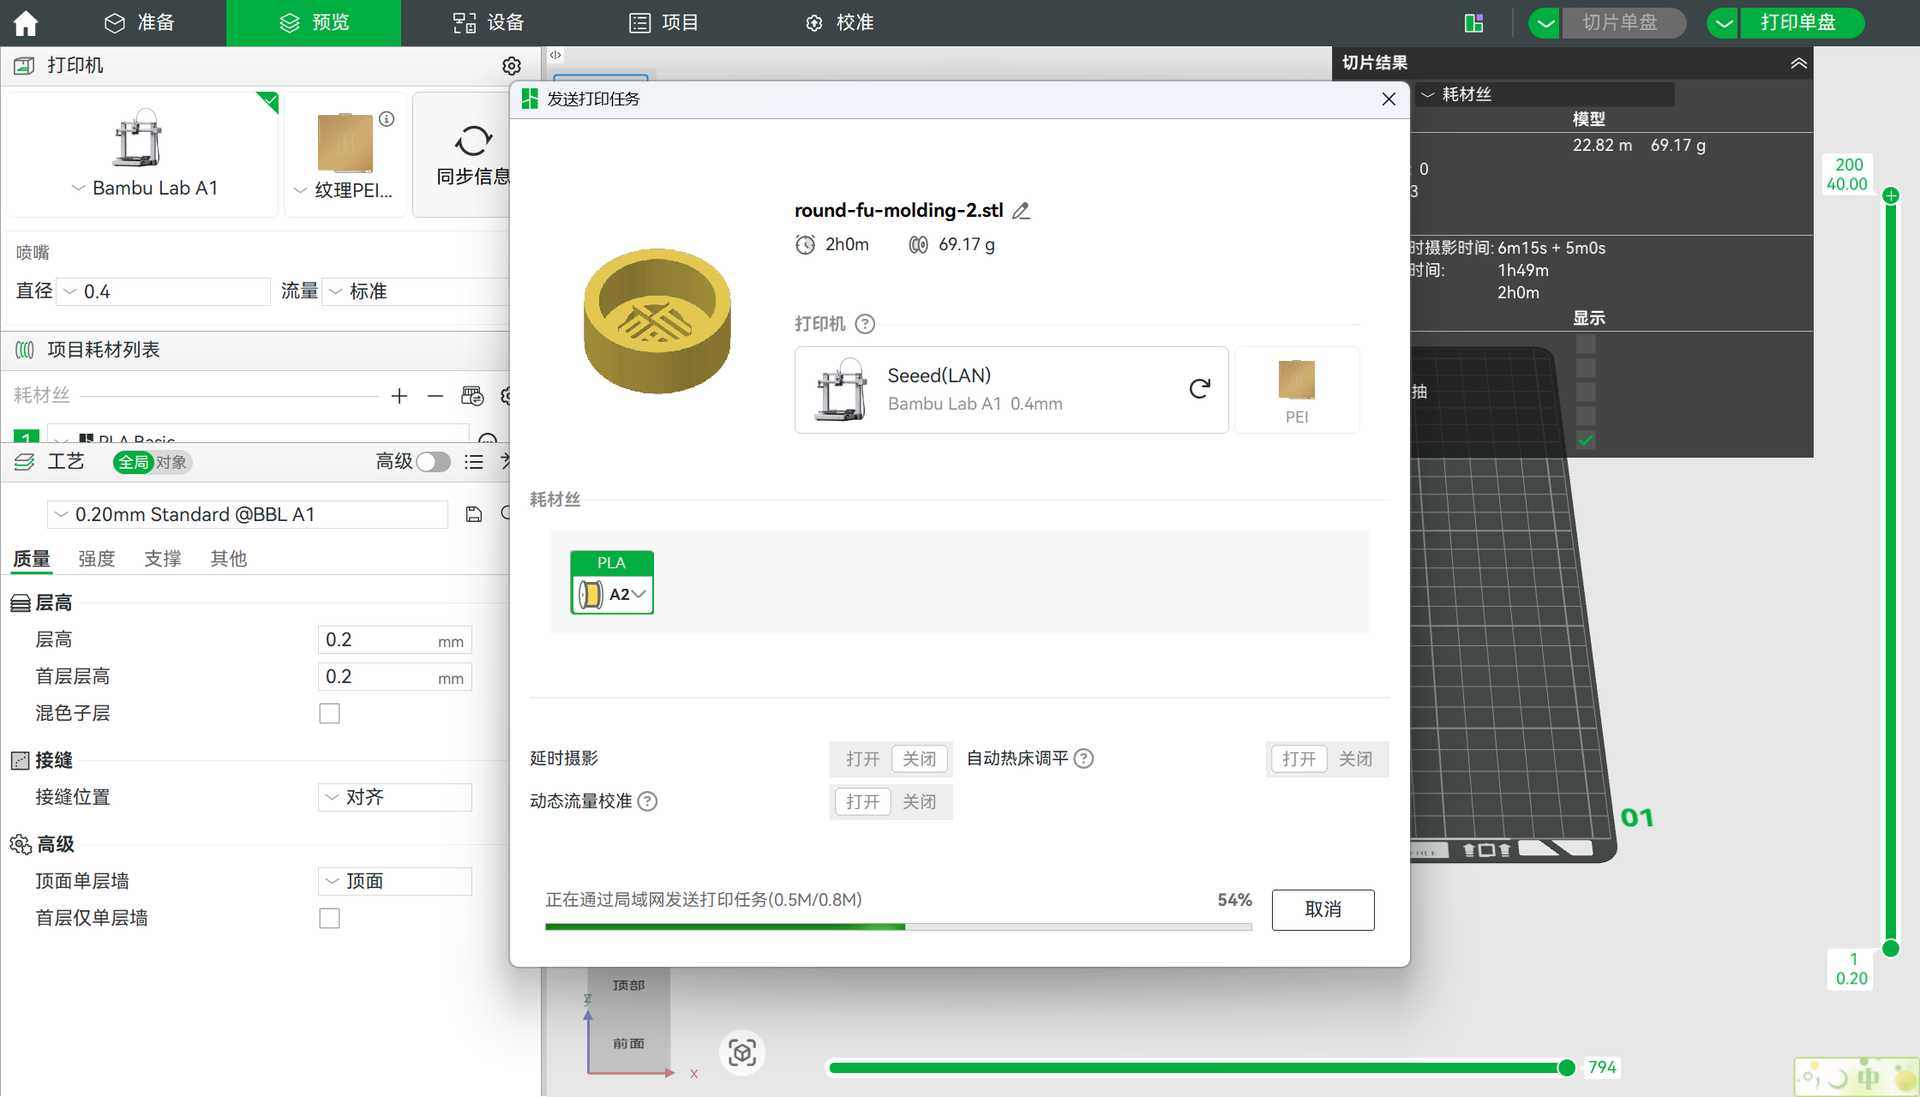
I printed the positives in yellow filament: it matched the fortune color and made fine details and surface defects easier to see.
In Bambu Studio, the round Fu job looked straightforward on the build plate, until the first cloud print reminded me that “looking fine in CAD” is not the same as “prints as one solid.”
What went wrong the first time
About 30% through the print, I noticed a gap between the base and the ruyi cloud pattern. That kind of separation is a red flag: even if the print finishes, you get a weak joint, odd shadows in the silicone, and sometimes resin sneaking into seams. The slicer had also generated more supports than felt necessary, which would mean extra cleanup and more places for silicone to grab.
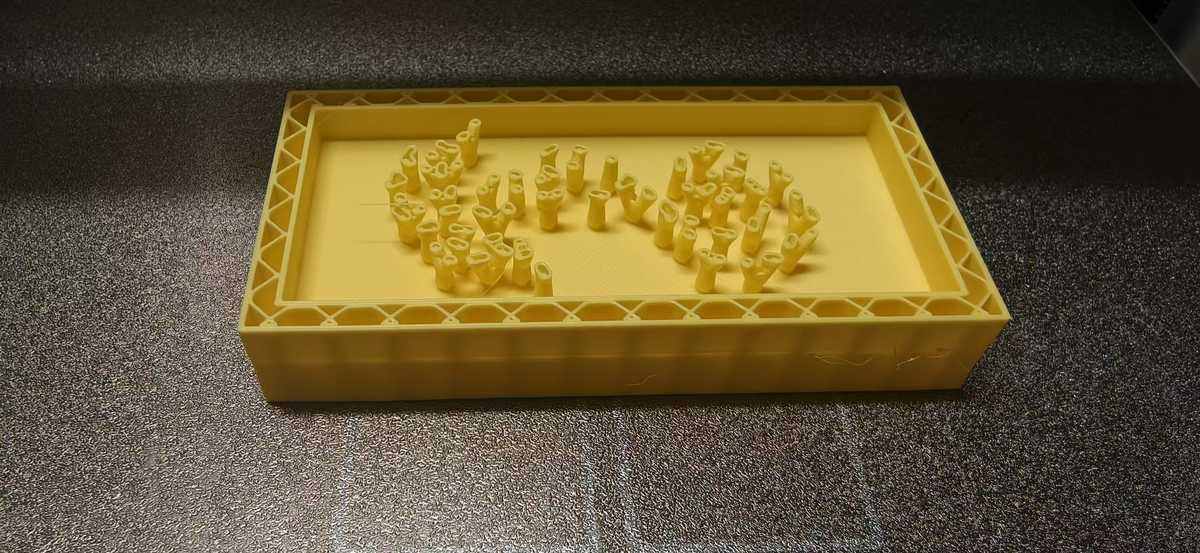
Then I noticed there is a gap between the box and ruyi pattern, so I adjust again on onshape, I merged the surfaces so the cloud pattern and base formed one continuous solid—no floating and printed again, this one looks very nice:

Result
The second print completed successfully, with only small burrs left for light sanding or careful trimming. For mold masters, I’m learning to accept that last-mile cleanup is normal; what you want is no hidden voids and no false seams that silicone can reproduce forever.
And the ruyi pattern is really hard to move out from the molding case, since the middle of the pattern too thin, and it looks like 3D printed, not so smooth.
Mold making (silicone)
I made two silicone cases, in this order: first the rectangular cloud pattern, then the circular Fu positive.
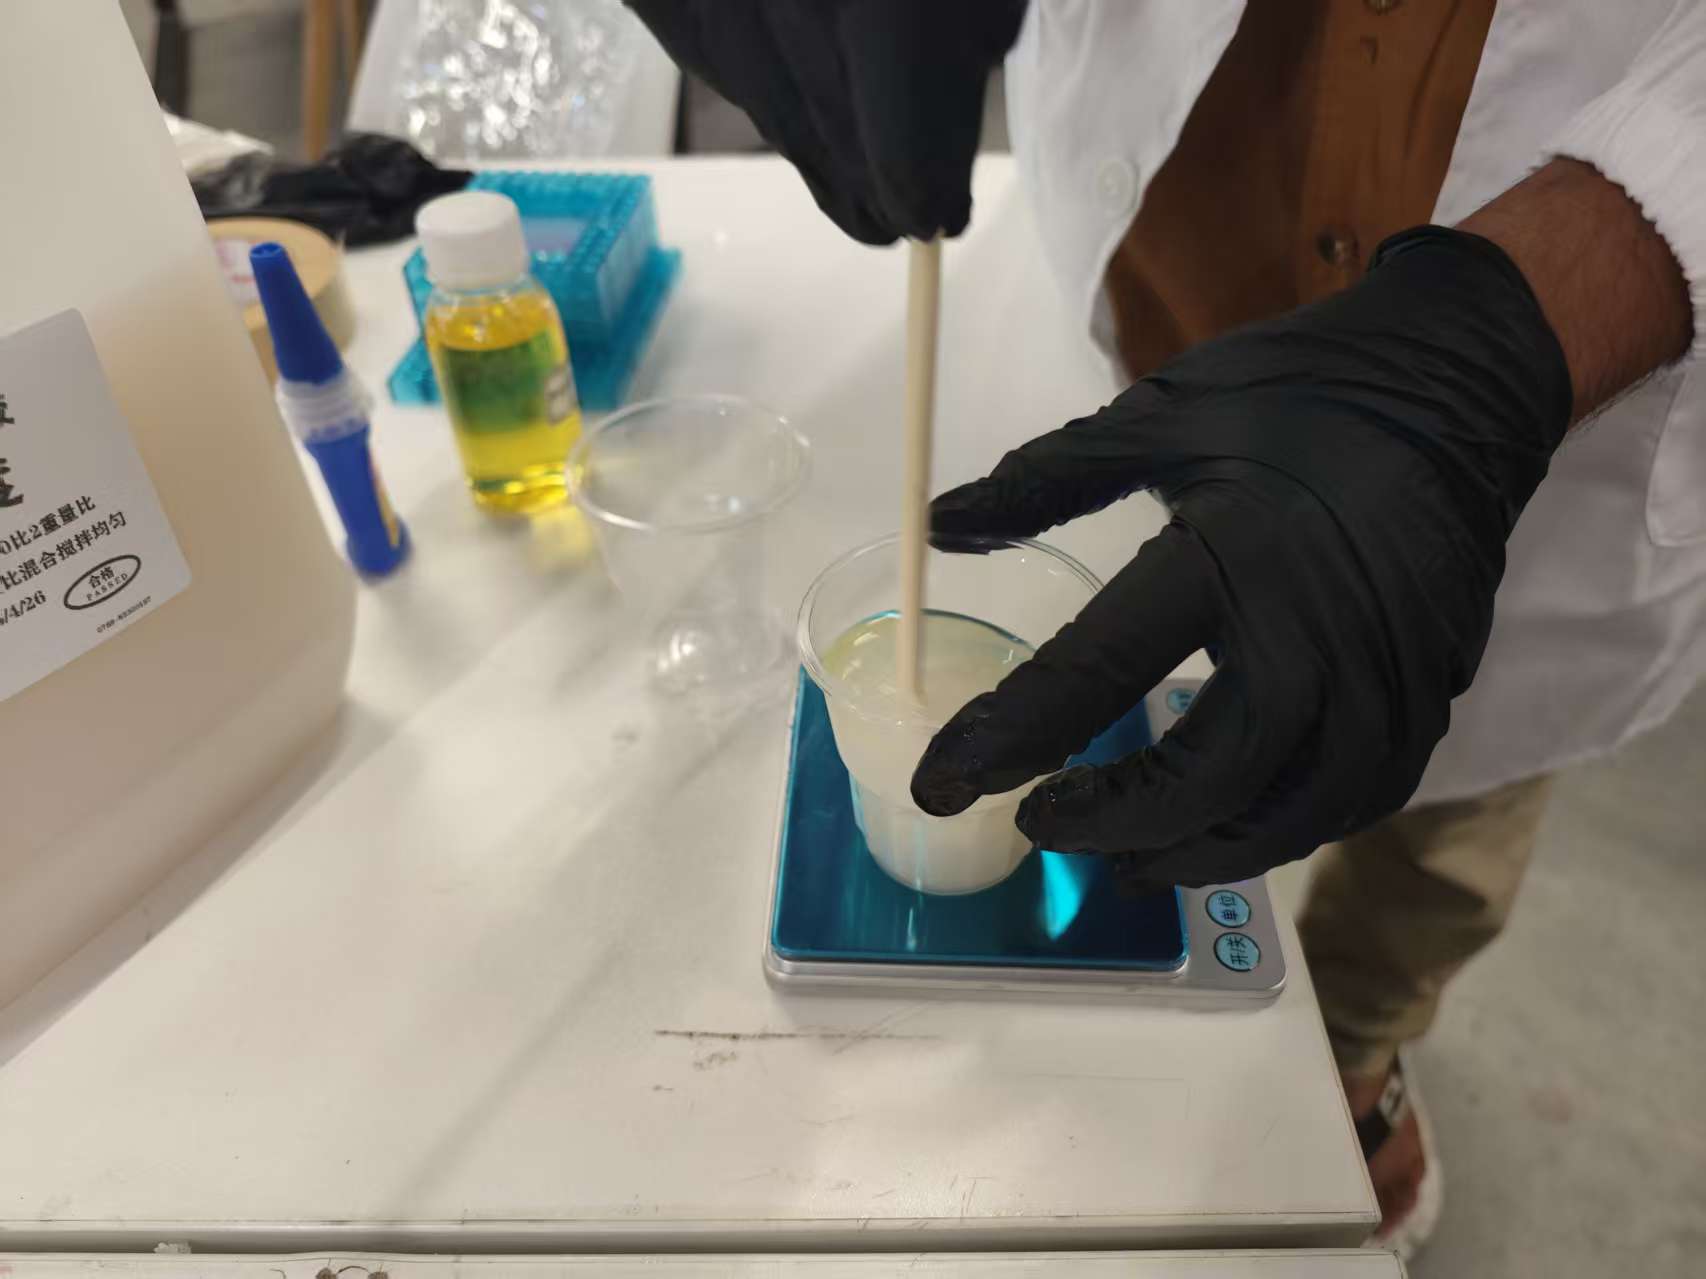
Safety first
Before opening any chemicals, I put on a mask and gloves. Silicones and their catalysts are very sticky, and fine aerosols from sprays aren’t great to breathe. Ventilation matters too working next to an open window, which I forgot at the first time.
On pour days I also wore a lab coat when working at the bench, mostly to keep spills off my clothes, but it also reinforces the “slow down and be deliberate” mood.
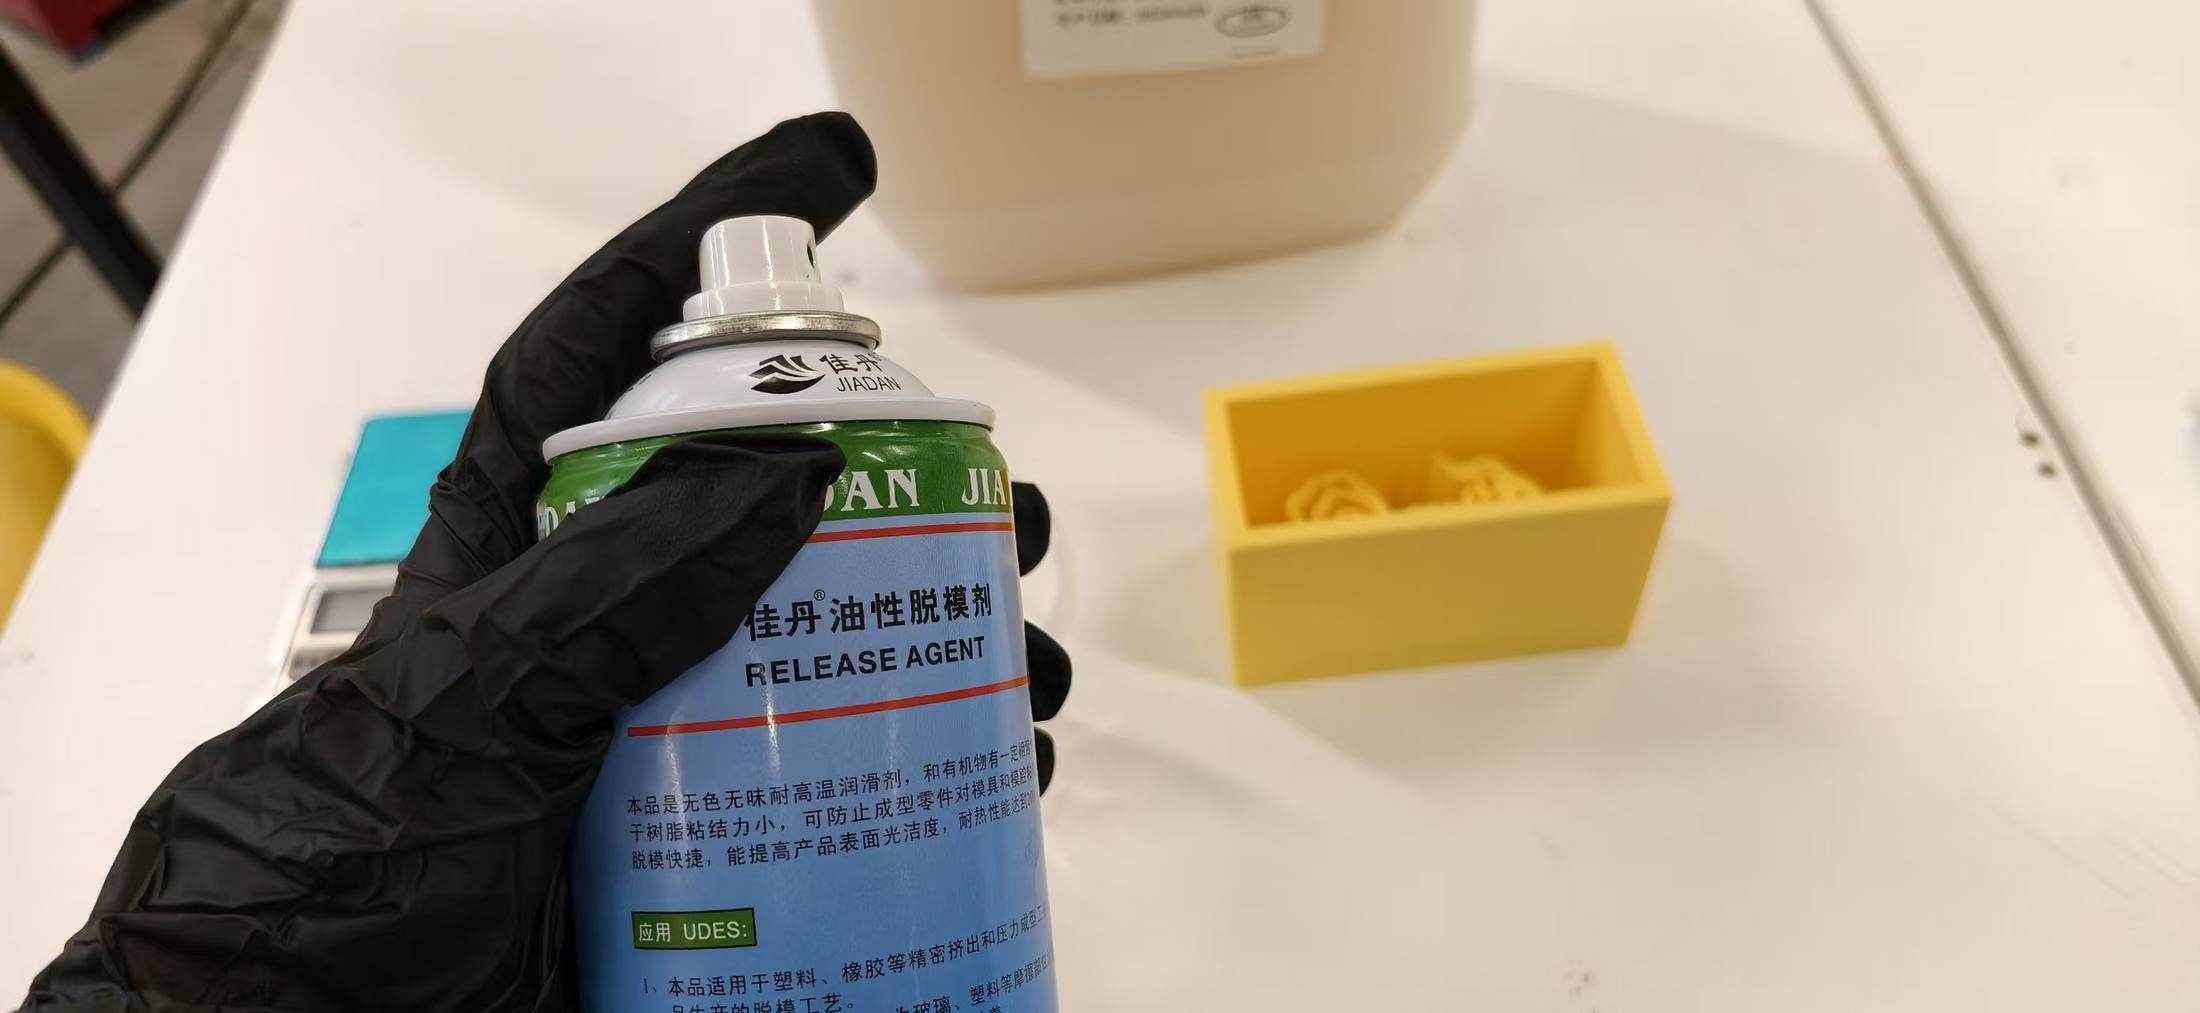
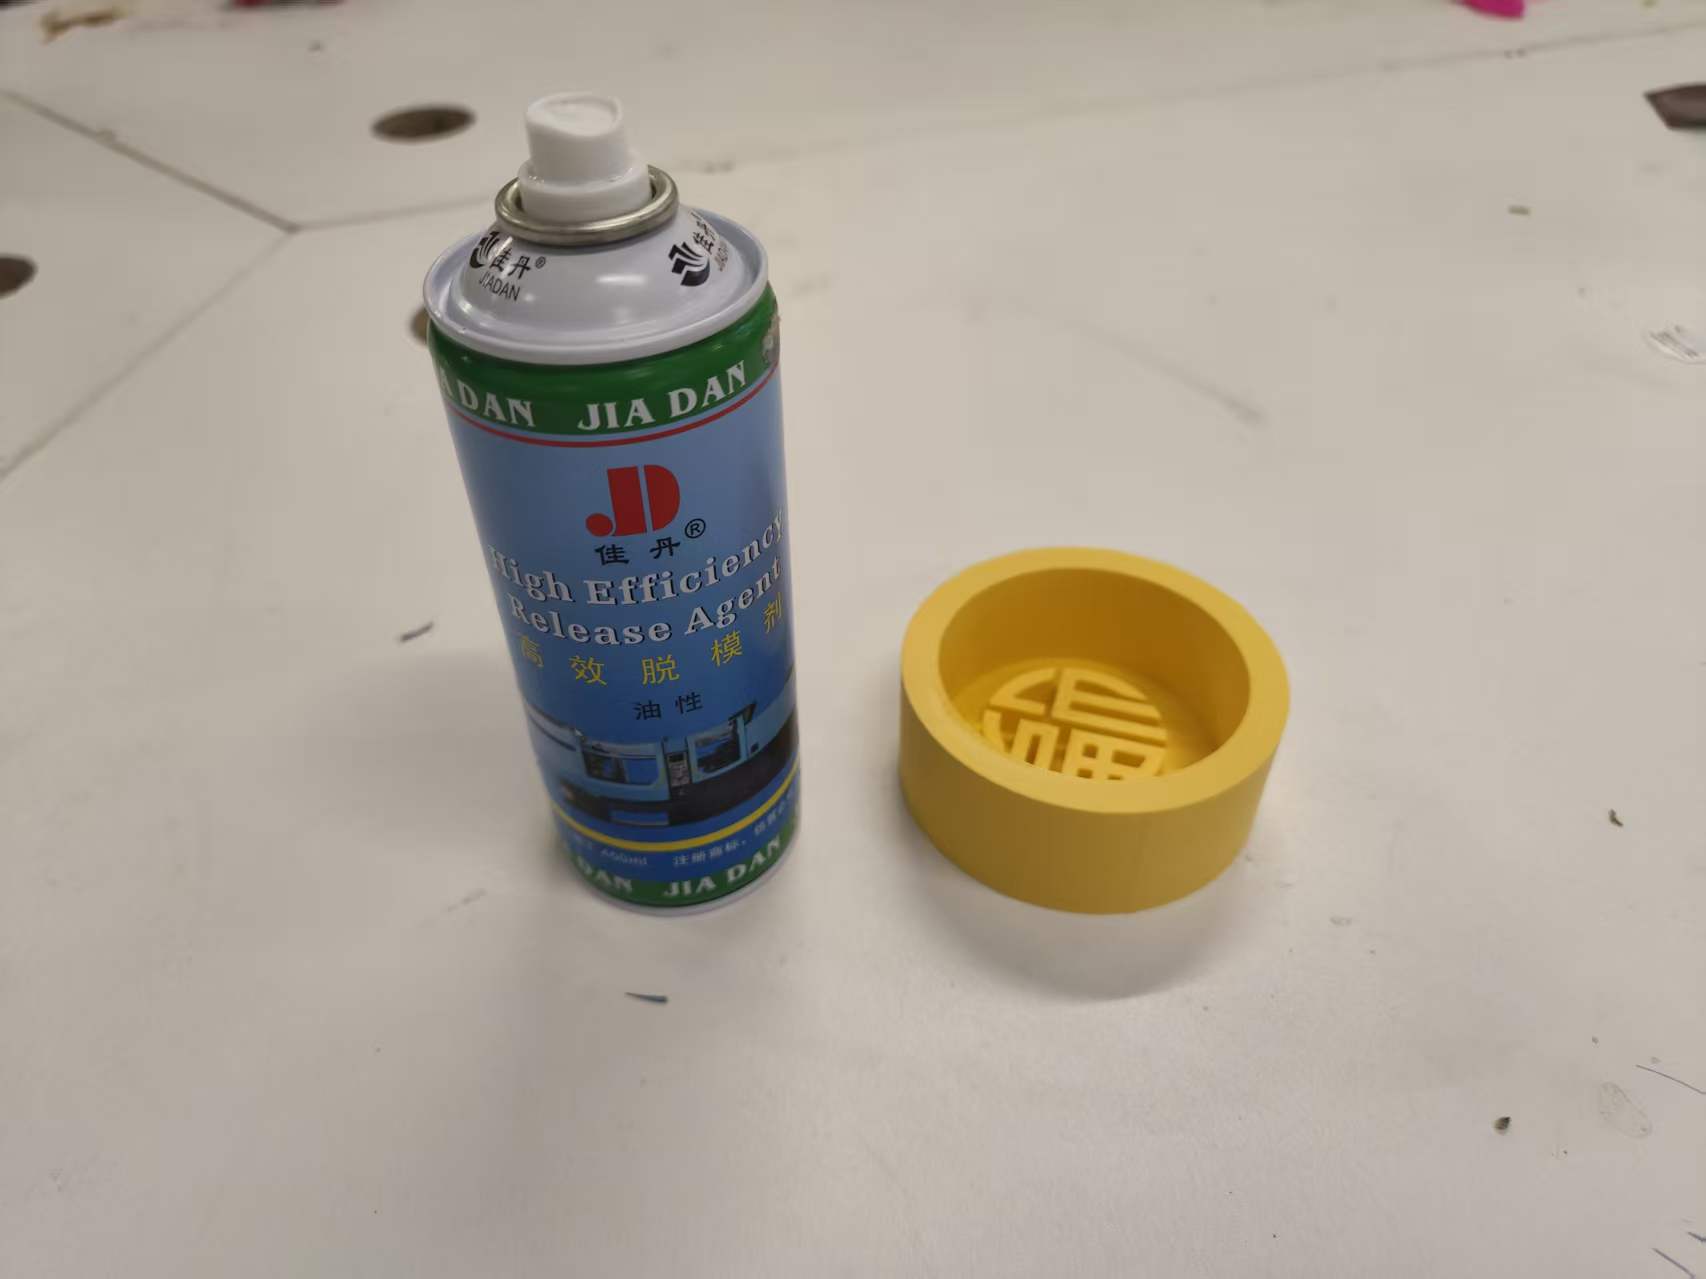
Mold release — why bother?
I applied mold release spray to the 3D-printed positives. Printed plastics, especially with layer lines, can bond more than you expect to cured silicone. Release agent reduces tear-out when you demold and helps preserve fine detail on both the master and the rubber. Skipping it is a classic way to get a ruined first mold.
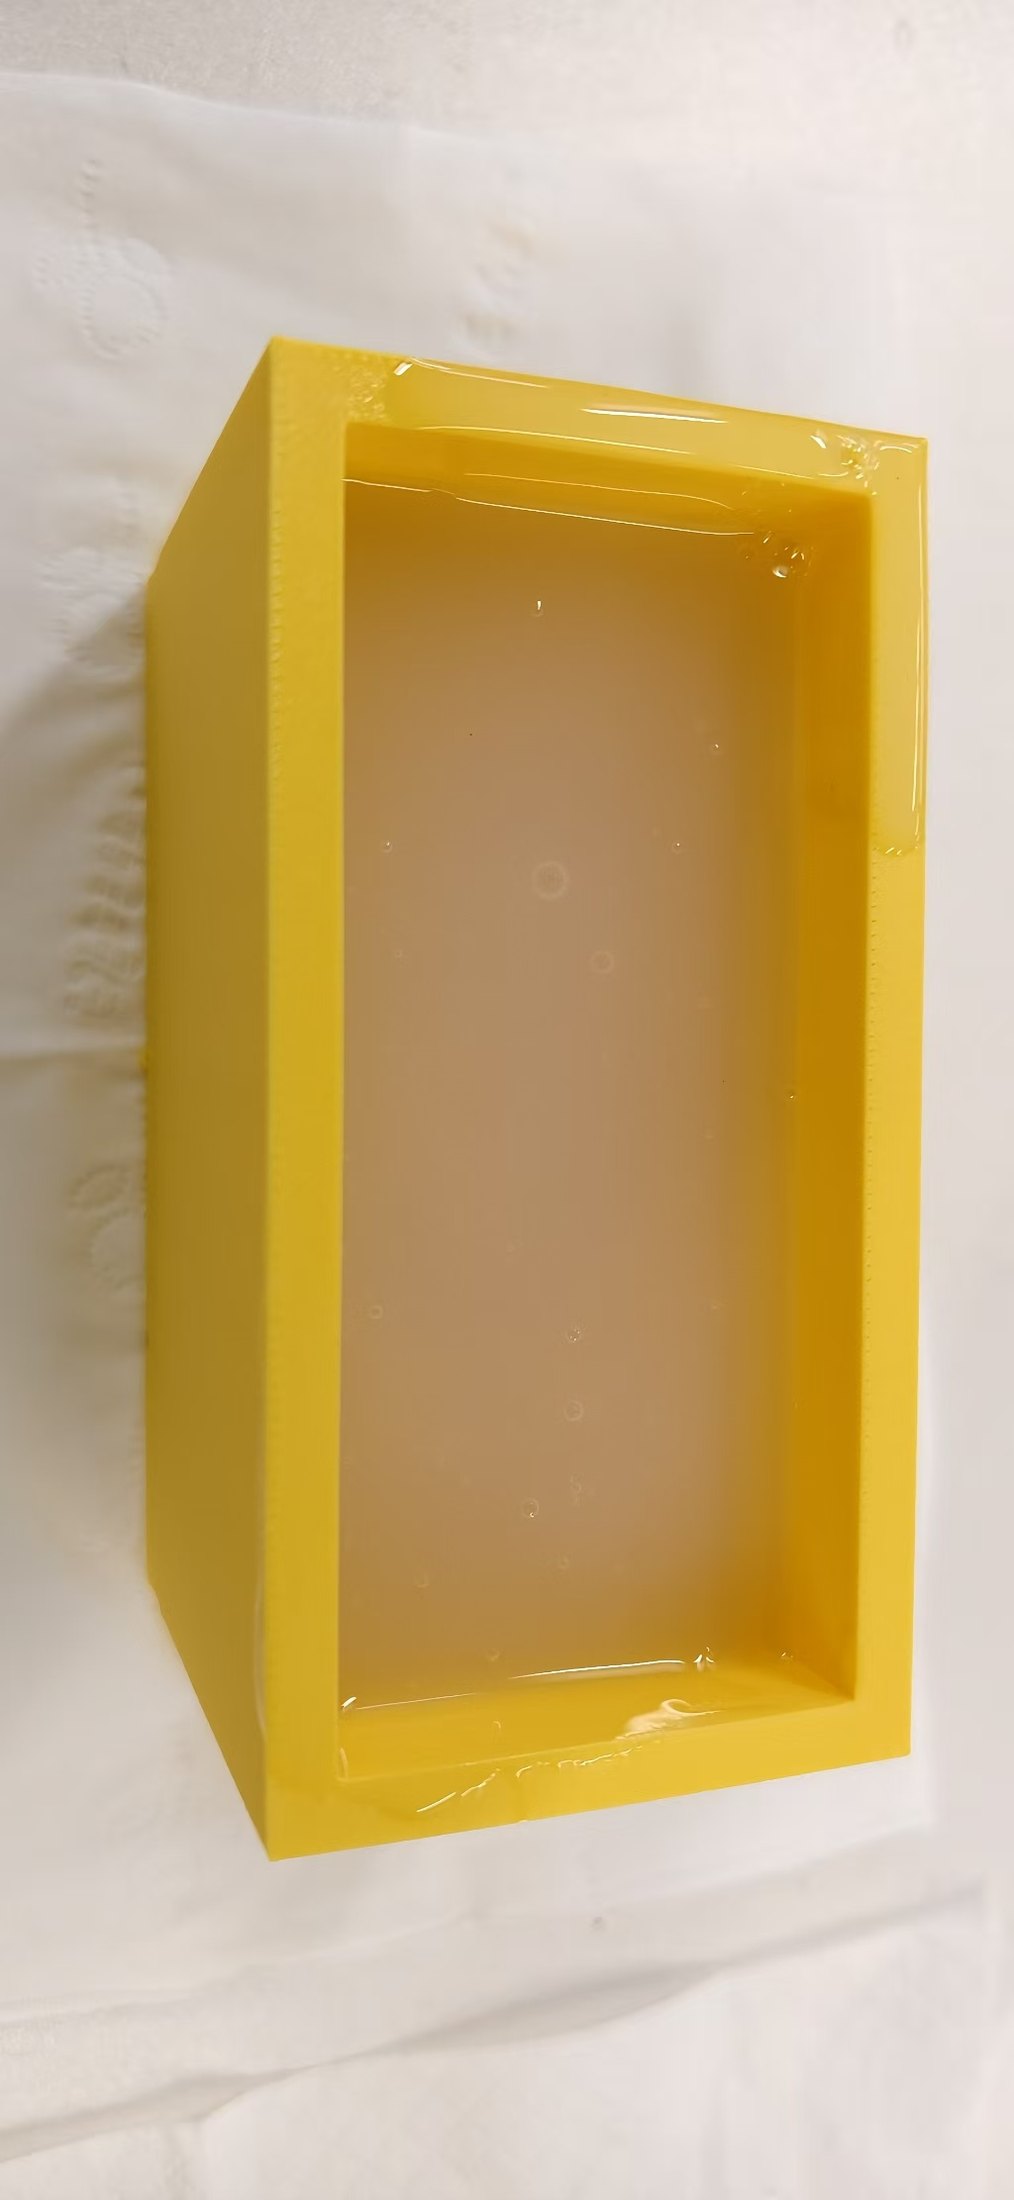
Case 1 — 祥云 (cloud) mold: failed silicone attempt
This was the first silicone pour I attempted.
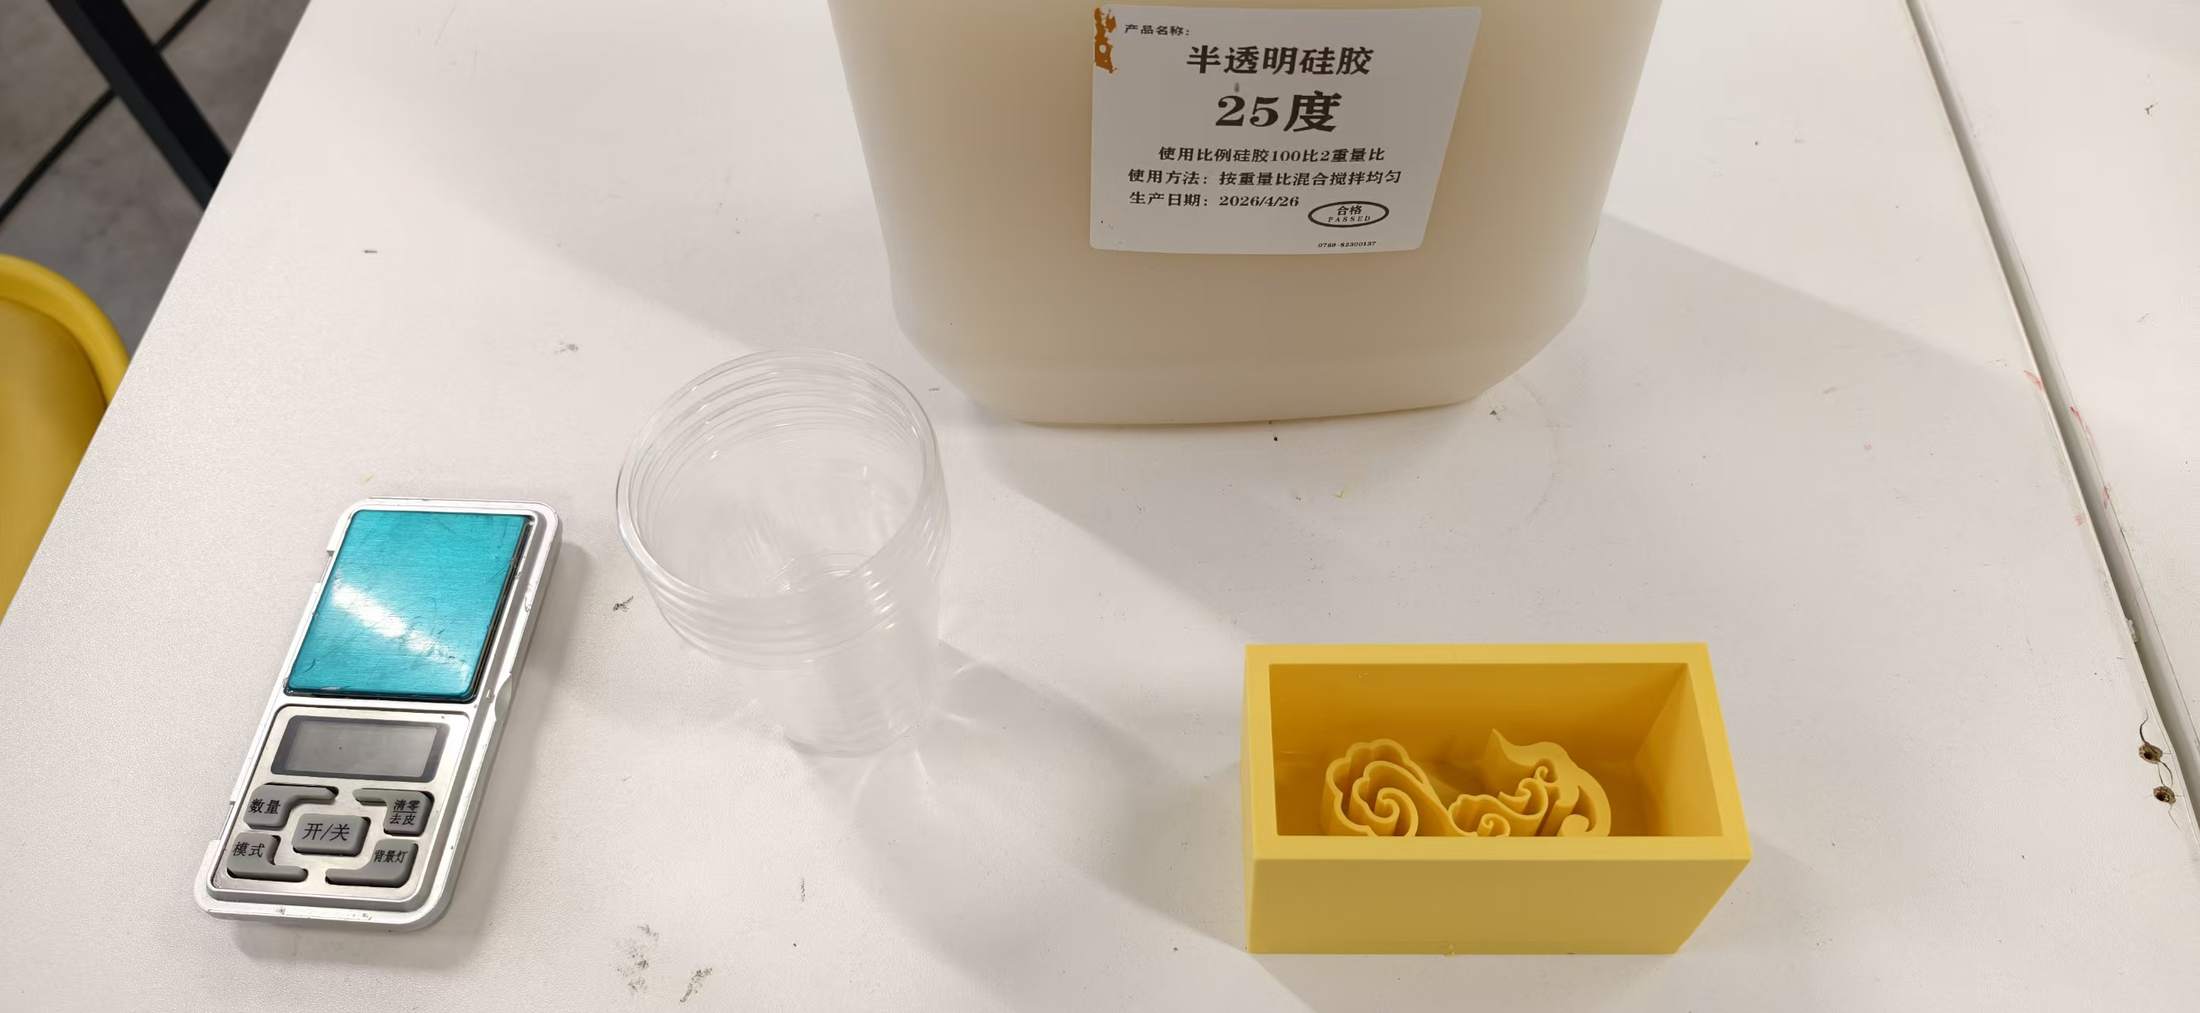
I prepared the cloud 3D printed box, a scale, mixing cups, and the silicone, ready to make a mold:
I also used mold release on the surface of the box before bringing silicone in it.(But later I found that this step could be skip)
Here is the critical mistake, stated plainly: I poured silicone base without mixing in the curing agent (Part B / catalyst).
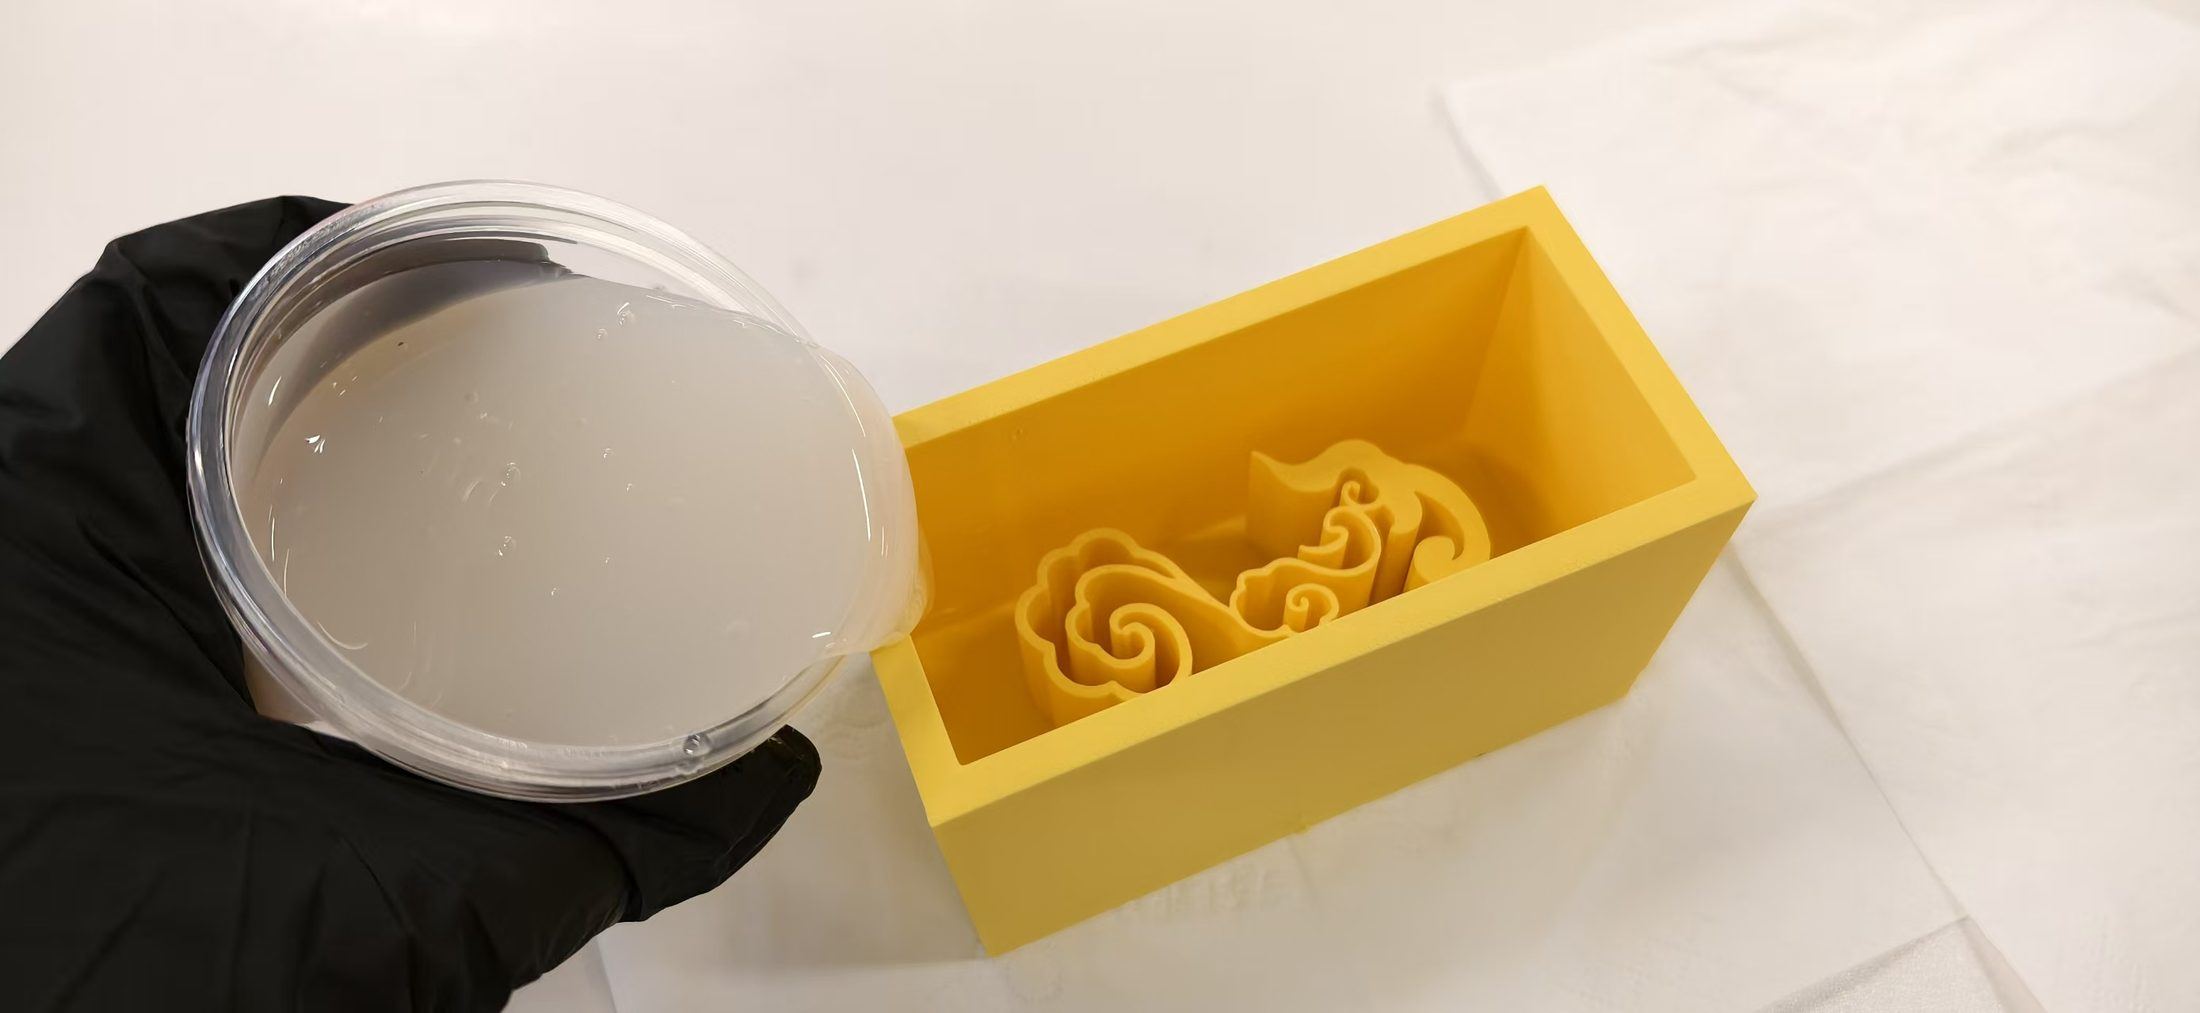
Outcome: the material never solidified. Without the right ratio, the silicone doesn’t fully cross-link—you don’t get a flexible, cured mold you can demold. After waiting for 2 days, I received this sad news.
That outcome was embarrassing, but also extremely educational: rubber is not “pour and hope”, it is a two-part system, period.
What the label was trying to tell me (mixing ratio)
After the cloud attempt, the paperwork on the materials finally got my full attention. The jug in our lab is explicit: 100 parts silicone : 2 parts curing agent, by weight.
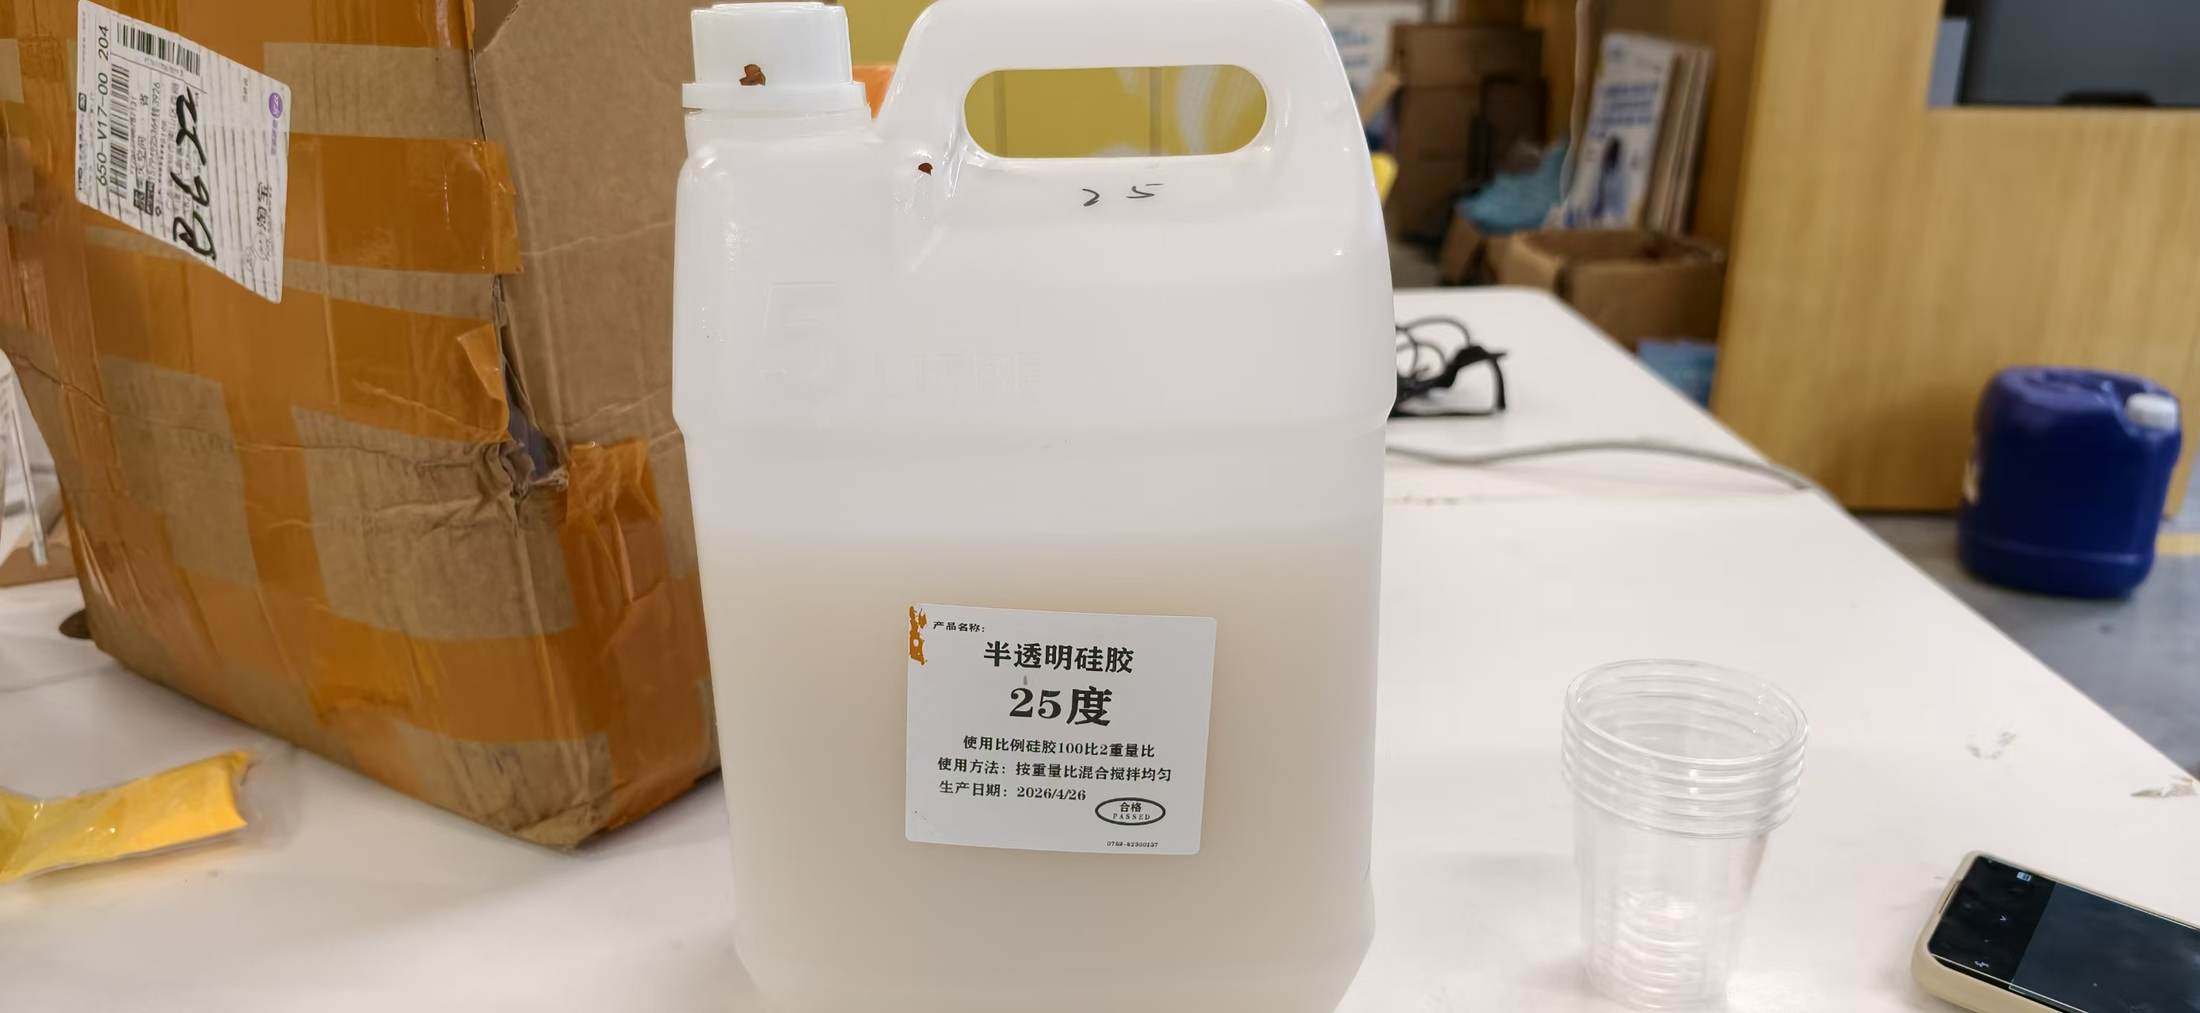
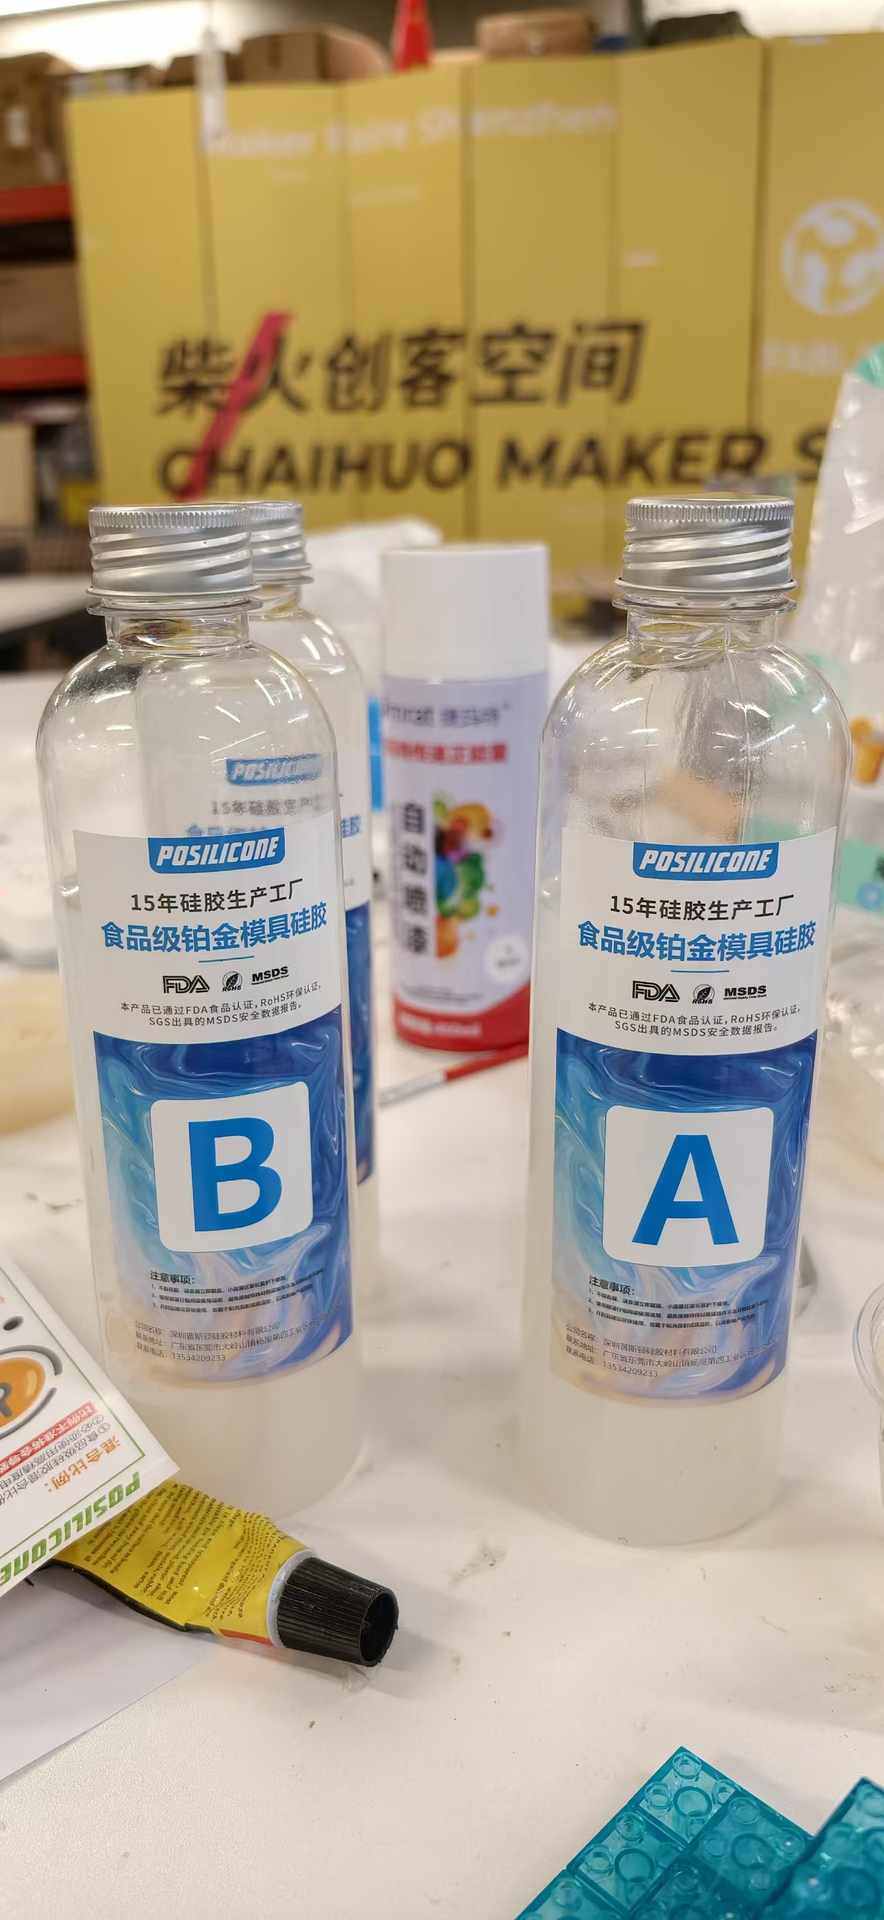
We also had other A / B bottles of glue on hand, another reminder that “silicone” is never one anonymous liquid; it’s always paired chemistry.
Why ratios matter
Two-part silicones need a specific balance so chains link evenly. Too little catalyst means no reliable cure (what I lived on the cloud mold). Too much catalyst can change work time, hardness, and shrink.
Thanks for my classmate Sunny and Tim's reminder, I realized the mistakes in a really short time, and restart again.
Case 2 — circular “Fu” mold: successful silicone attempt
For the Fu positive, I did not repeat the same mental shortcut.
Tim reminded me to actually mix Part A with curing agent the way the datasheet and label specify. I measured by weight on the scale, mixed thoroughly, then poured.

Result: this batch cured. I finally had a solid silicone mold around the Fu, something I could treat as a real mold-making outcome.
This is the contrast I want to remember: same lab and the same general materials workflow, but a totally different outcome because the second time I respected both parts of the rubber system.
Casting: Three Attempts
With the silicone molds in hand, it was finally time to pour the actual cast pieces. I used two-part AB epoxy resin, and what followed was a three-act story of chemistry failure, sparkling success, and hard-won recovery.
Attempt 1: The Yellow Cloud Pattern — Failure & Lesson Learned
My first casting attempt used the yellow 3D-printed cloud mold. The print itself had come out beautifully, the lines were crisp, the walls were solid, and I felt genuinely confident going into the pour.
I mixed what I thought was the resin and poured it straight into the mold.
The problem? I forgot to add the curing agent entirely.
Without the hardener, the epoxy never cross-links, it just stays as a sticky, viscous liquid indefinitely. What I had wasn't a cast piece; it was a mold full of uncured adhesive. Removing it was a genuinely unpleasant task: the uncured resin clung to every detail, and cleaning it out of the fine cloud grooves without damaging the mold took a long time and a lot of patience.
What I learned: Forgetting the catalyst on the silicone pour was one thing. Repeating essentially the same mistake on the resin pour was a louder reminder that casting materials are always two-part systems. The lesson isn't subtle, there is no version of this that works without both components at the correct ratio.
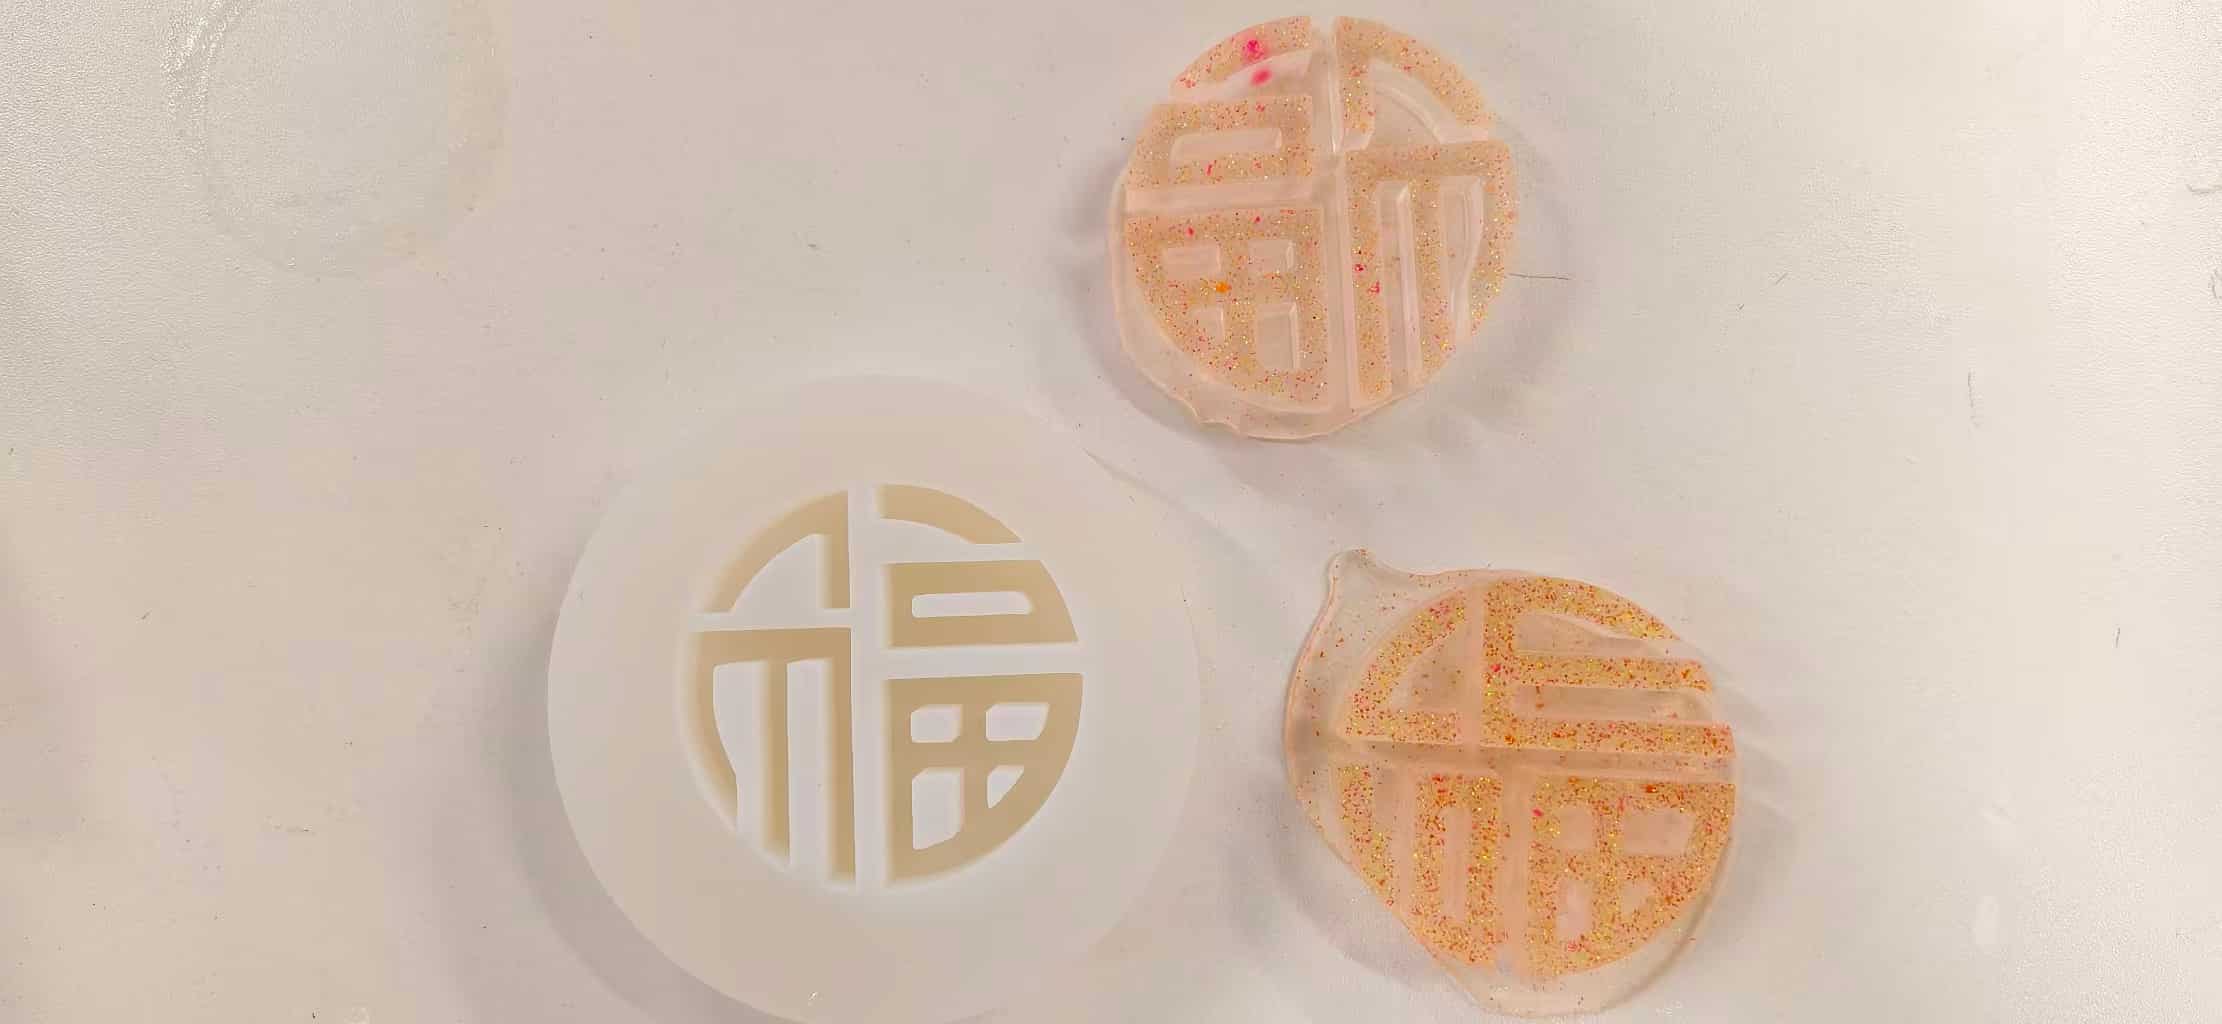
Attempt 2: The Circular "Fu" Character
For the second attempt, I switched to the circular Fu (福) mold and brought my full attention to the mixing process. The printed mold was in excellent condition, and the exported model geometry was clean, no surprise gaps or thin walls to worry about.
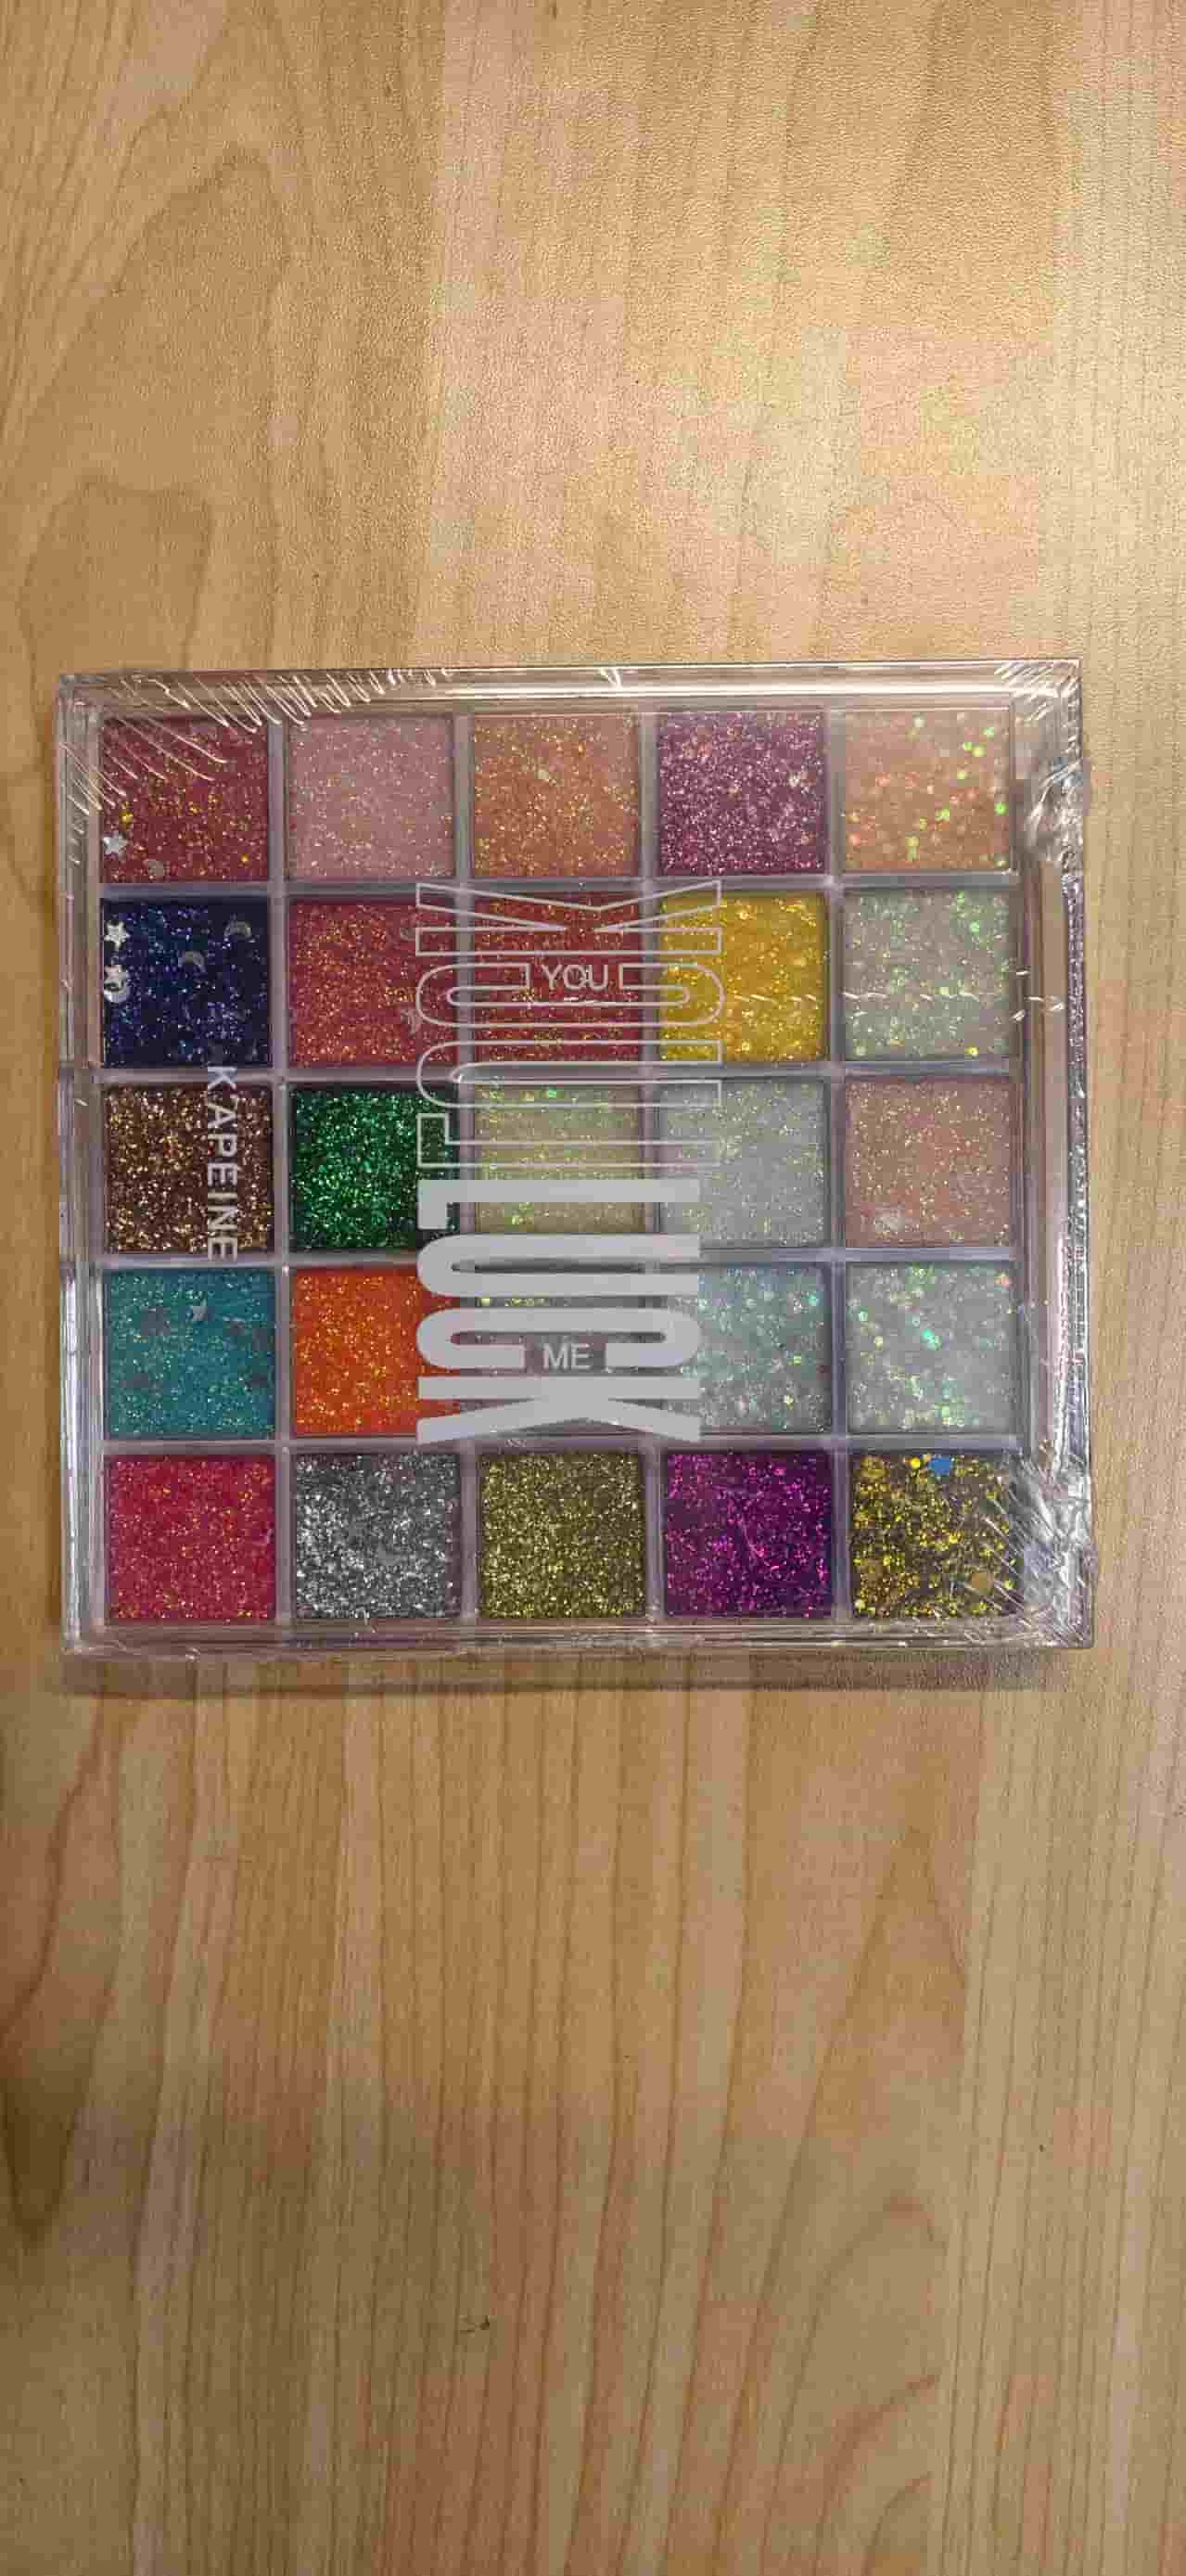
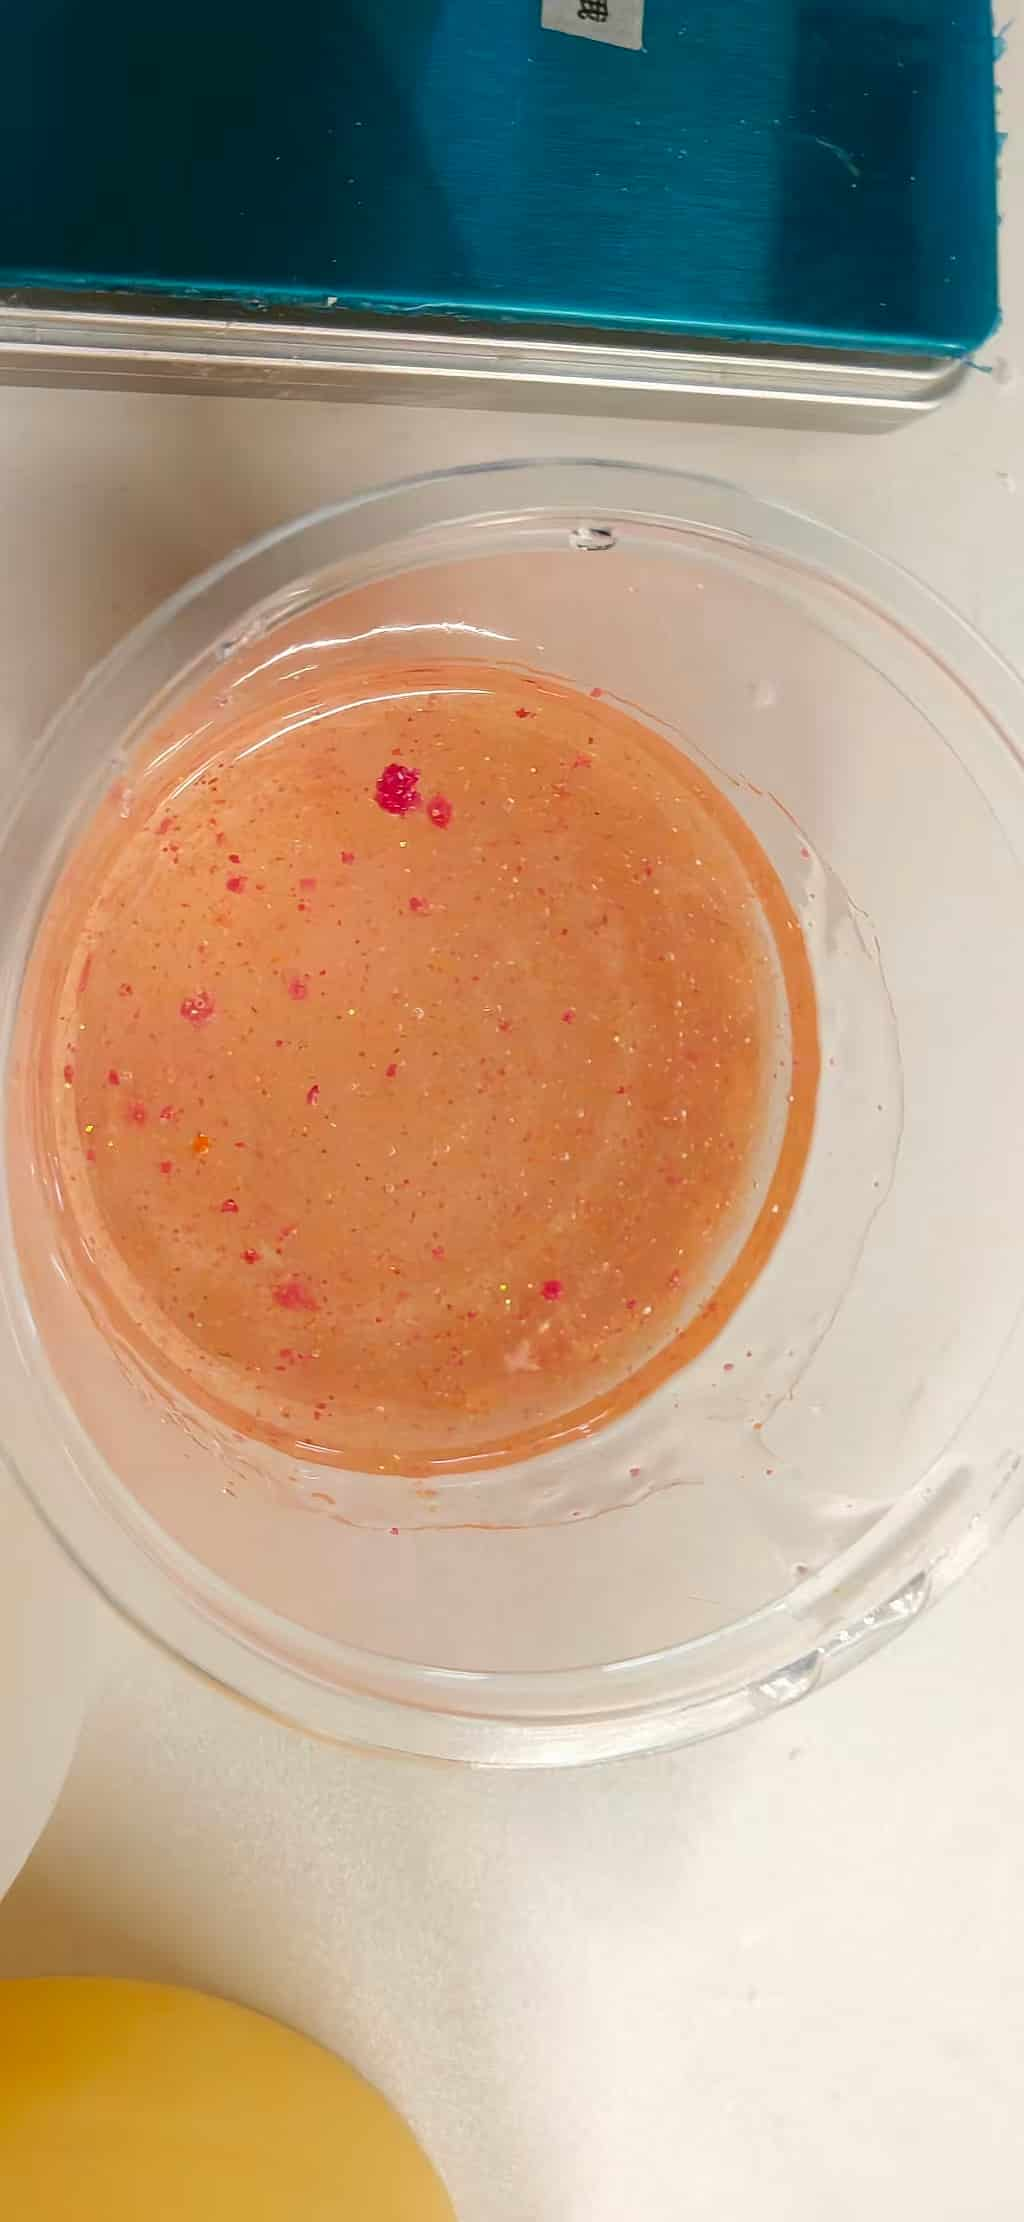
This time, I mixed the AB epoxy resin carefully at the specified 3:1 ratio measuring by weight, stirring slowly to avoid introducing bubbles, and double checking before pouring. To give the piece a unique character, I blended in a small amount of cosmetic eyeshadow glitter. The iridescent particles suspended beautifully in the resin.
I poured the mixture smoothly into the mold and set it aside to cure for 24 hours.
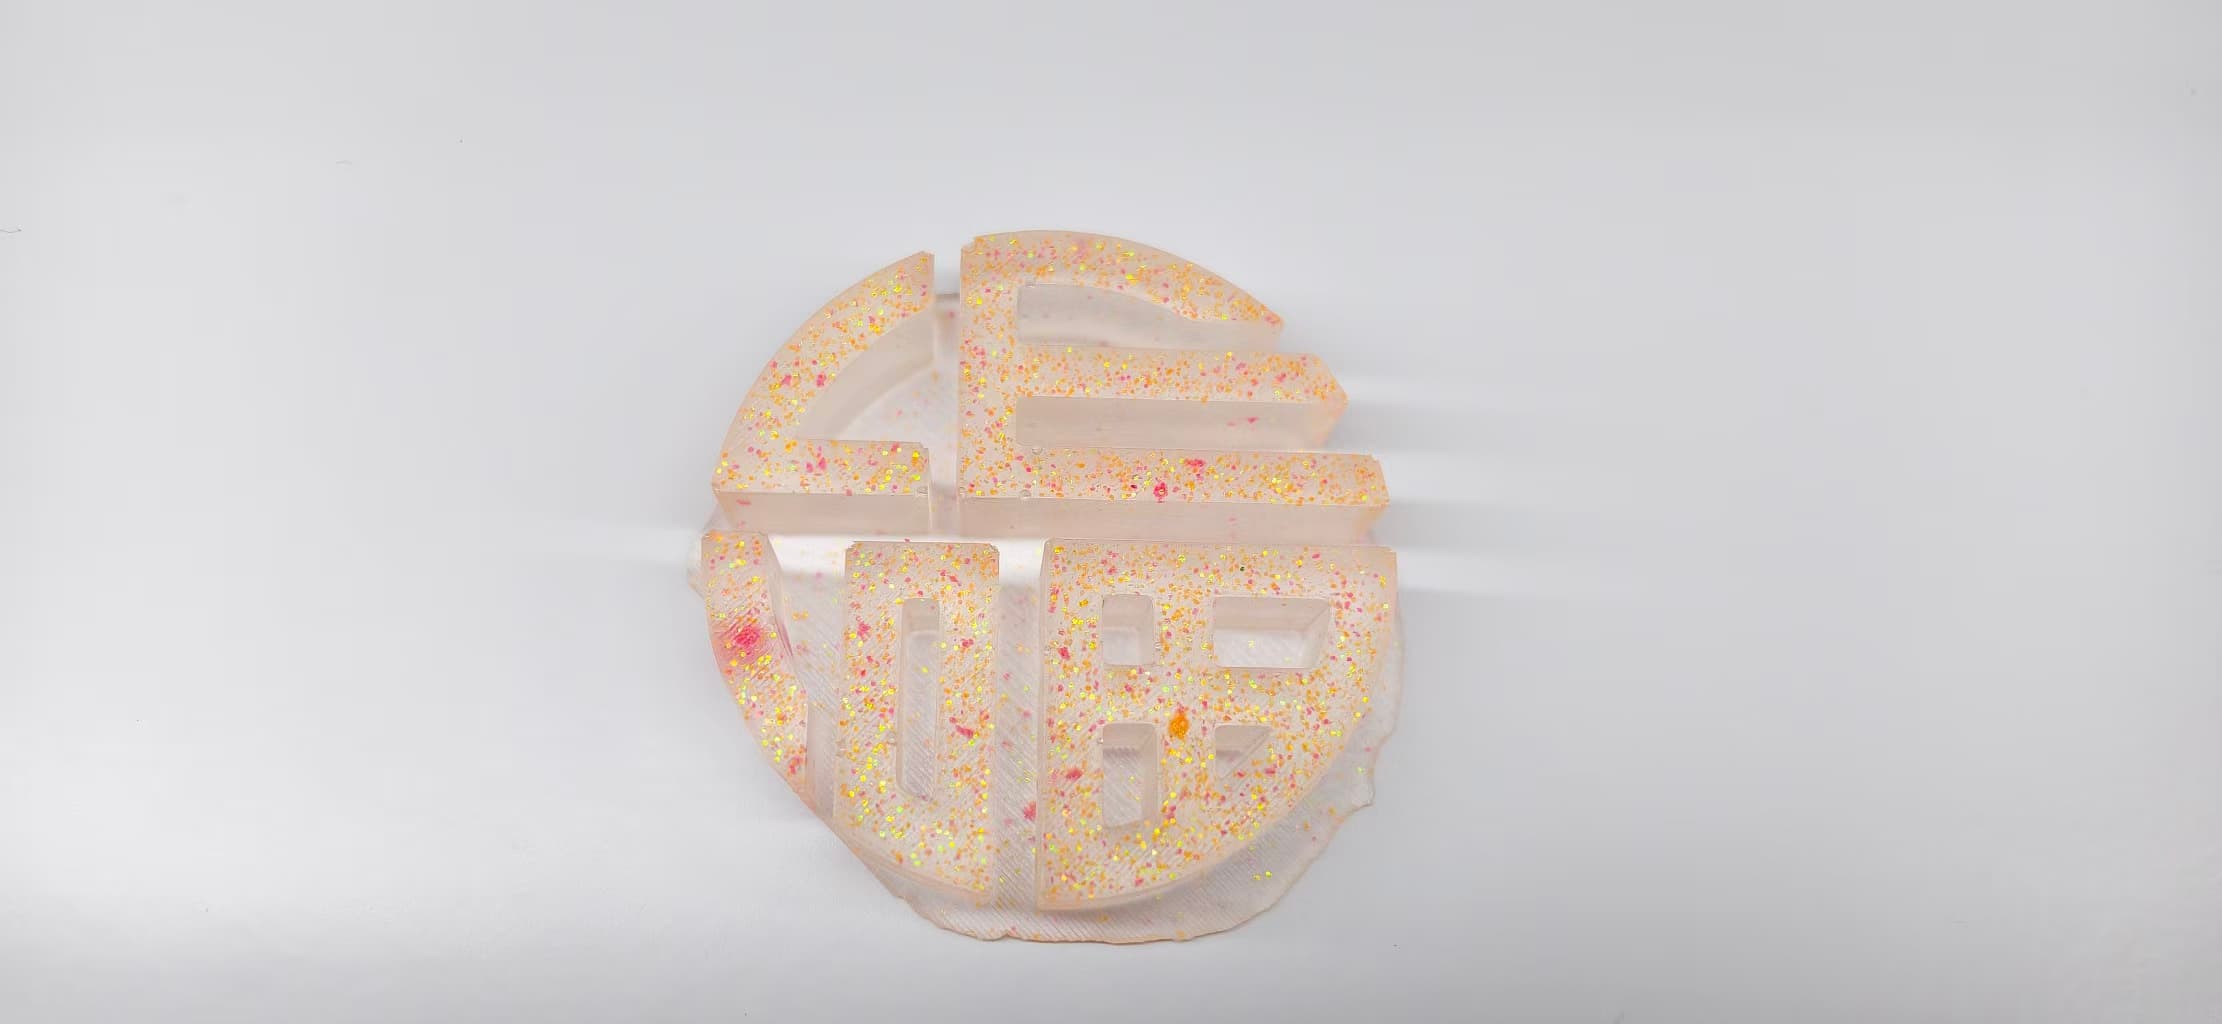
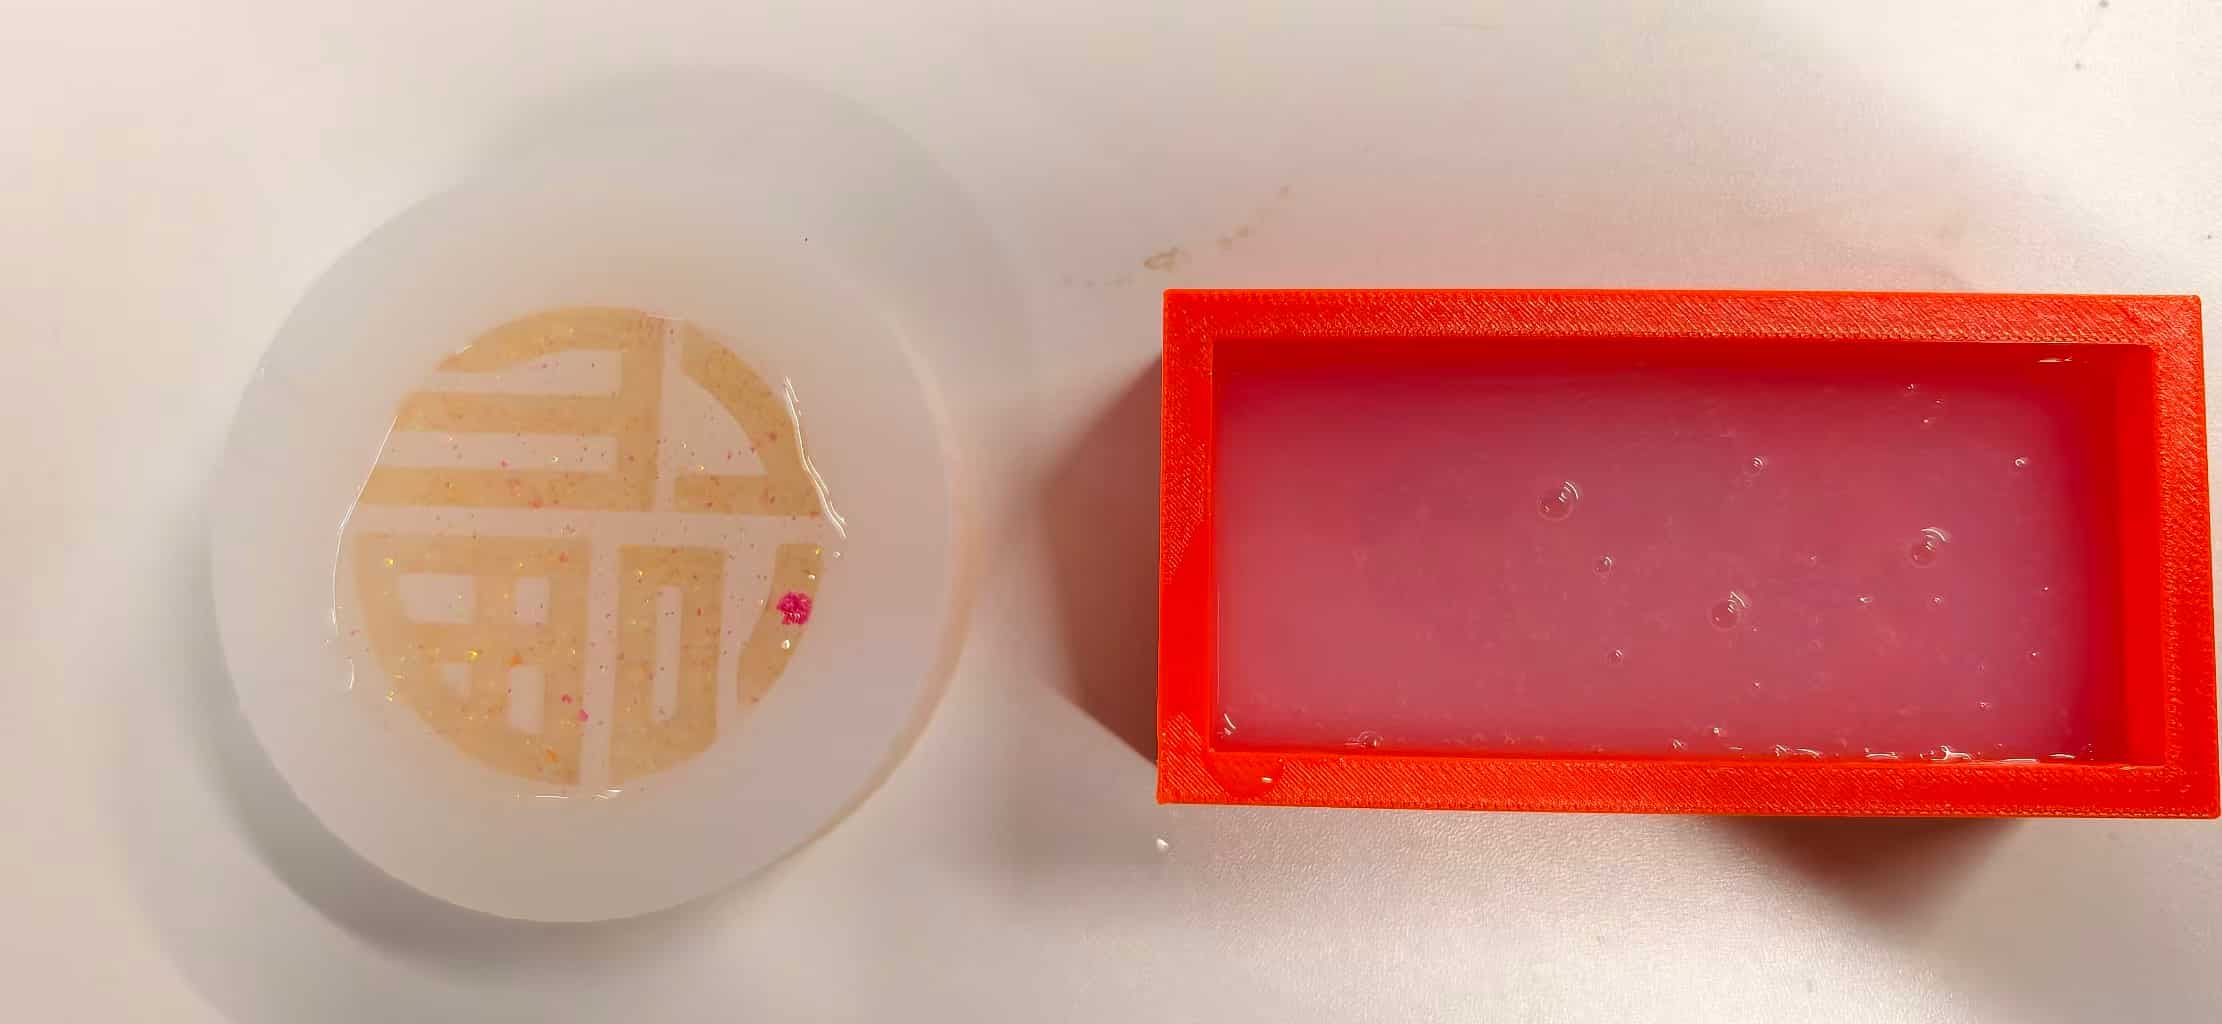
The result was a complete success. I made two of these pieces, and both demolded cleanly. The finished Fu characters have a deep, crystal-like quality, the glitter catches the light from within the resin, giving them an almost gem-like appearance. Of everything produced this week, these are the pieces I'm most proud of.
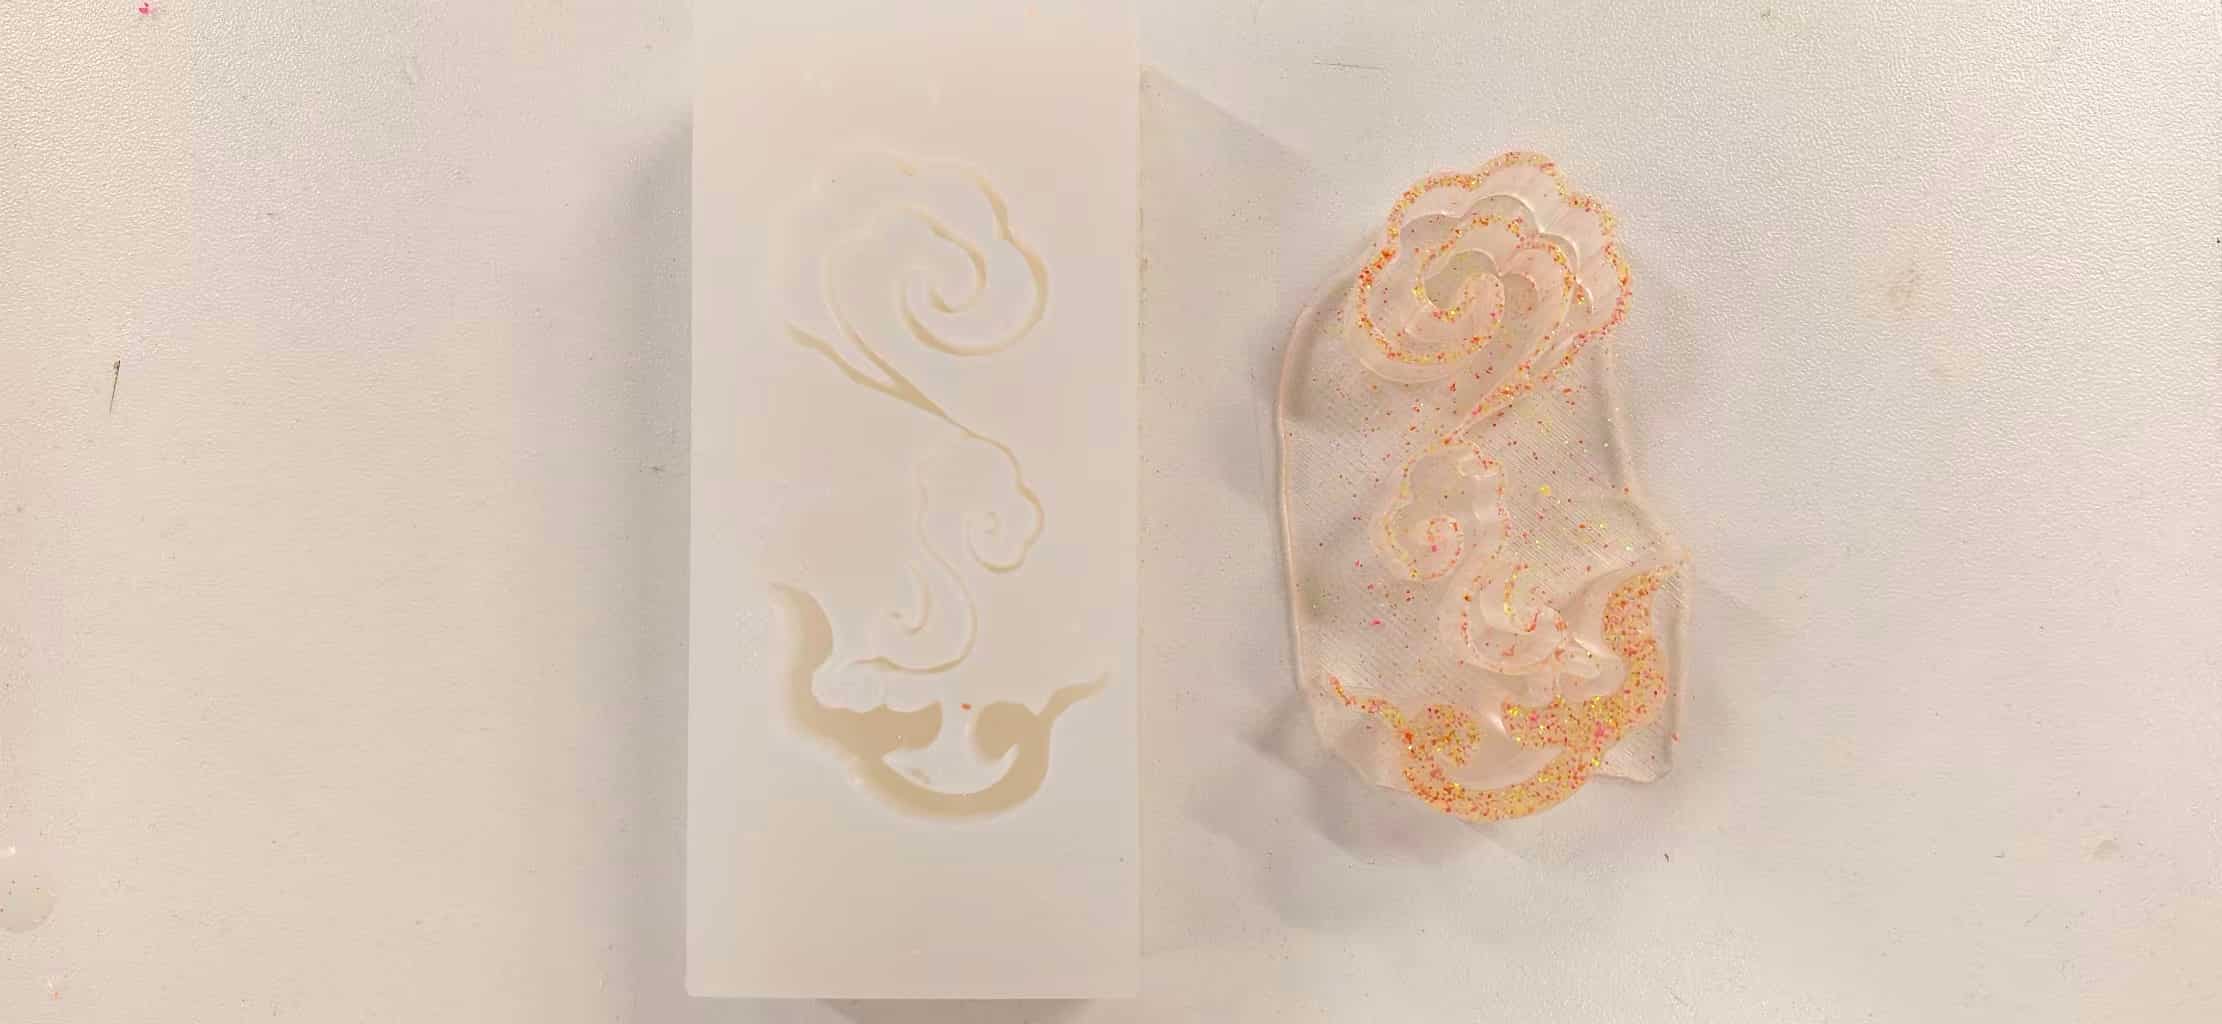
Attempt 3: The Red Cloud Pattern
Encouraged by the Fu result, I decided to revisit the cloud pattern. This time I printed the mold in red filament and incorporated a key piece of advice from Tim: reduce the overall height of the mold. A shallower cavity means less resin volume to cure and, in theory, less stress on delicate features during demolding. Thanks, Tim genuinely good advice.

The AB resin mixing went smoothly. The pour looked clean and the 24-hour wait felt promising.
Demolding, however, was where the challenge revealed itself. The 祥云 line patterns I had drawn were very thin, fine enough to look delicate and beautiful in CAD, but that same fineness made the lines fragile in the physical cast. Releasing the mold itself was already difficult because of those slender grooves; then, when it came time to demold the finished cast, the delicate lines made extraction even harder. Any impatience risked snapping one of those hair-thin ridges.
By working incrementally, releasing a few millimetres at a time, bending the silicone gently away from the surface, I managed to extract the piece intact.
The result is a partial success. The cloud shape reads clearly, the overall form is quite nice, and the red mold left a good surface finish on the cast. But when placed next to the Fu pieces, the thinner lines and more delicate geometry make it feel more fragile, and it doesn't quite have the same dramatic visual impact.
Problems and fixes (quick recap)
| Problem | Fix | Lesson |
|---|---|---|
| Gap between base and cloud at ~30% print | Stopped print; merged surfaces in CAD; resliced | Fix the model, not just the slicer |
| Excess supports | Better geometry + reslice | Cleaner masters = faster finishing |
| 祥云 mold: poured silicone without mixing curing agent | No fix in the cup — rubber never solidified; reset protocol for next pour | Catalyst isn't optional; read ratio before pouring |
| Fu mold: second pour with correct Part A + catalyst (by weight) | Tim reminded me to mix properly; batch cured | Checklist + scale beats confidence |
| Casting Attempt 1: poured AB resin without hardener | Cleaned out uncured sticky resin (very difficult); restarted with correct 3:1 ratio | Same failure pattern as silicone — two-part systems require both parts |
| Casting Attempt 3: cloud pattern lines too thin → hard to release mold and demold cast | Worked very slowly and carefully; extracted intact | Thicker lines demold more forgivingly; beauty and fabrication must co-design |
| Original cloud mold height too tall | Reduced mold height for Attempt 3 on Tim's advice | Shorter mold = less resin volume, less stress on fine features |
Final result
The casting chapter now has a completed scorecard across all three attempts.
The yellow cloud mold produced nothing useful, a repeat of the catalyst-forgetting error, this time with resin instead of silicone. The cleanup was painful but delivered a clear lesson.
The circular Fu molds delivered the highlight of the week: two crystal-like, gem-quality cast pieces with glitter suspended inside, clean demolds, and a finish that genuinely exceeded expectations.
The red cloud mold yielded a partial success: an intact, nicely shaped piece that required very slow, careful demolding due to the thin line patterns. It's a usable result, and the lesson it leaves behind (thicken the lines for the next iteration) is a concrete improvement for next time.
The full molding and casting arc from a silicone pour that never set, to a mold that cured properly, to cast pieces ranging from failure to gem-quality is exactly the kind of iterative process this week was designed to teach.
Common pitfalls (things I’m watching next time)
- Undercuts in the positive that lock the silicone or the cast part.
- Trapped air in deep relief—pour technique and vent paths matter.
- Ignoring draft on vertical walls—demold fights are real.
- Skipping release agent to “save time.”
- Guessing mix ratios instead of weighing.
Reflection
This week felt like closing loops, except molds and resins don't forgive skipped steps, and I learned that twice.
The silicone arc set the tone: I was so focused on looking prepared: bench layout, gloves, neat pour photos, that I nearly missed the actual rule: Part A is not a mold until Part B is in the cup at the right ratio. The 祥云 mold gave me that feedback immediately and mercilessly. Tim's correction before the Fu pour mattered because it happened in time: I went into that second pour knowing exactly what "correct" looked like on the scale, and the mold cured.
Then the resin casting arc repeated the lesson in a different key. Attempt 1 with the yellow cloud mold was almost comically familiar: I forgot the hardener, the resin stayed liquid, and cleaning that sticky mess out of the mold was both frustrating and grimly instructive. There is no shortcut around two-part chemistry.
Attempt 2 the Fu pieces was the week's high point. Measuring the 3:1 ratio carefully, folding in the eyeshadow glitter, and then demolding two crystal-clear characters 24 hours later felt like an actual payoff. The glitter idea came from wanting these pieces to feel special, not just functional, and it worked beyond what I expected.
Attempt 3 with the red cloud mold was a quieter kind of learning. The mold height reduction (Tim's advice again) was smart. The thin linework was my oversight: what looks elegant in a 2D sketch can become a demolding nightmare once cast in rigid resin. Working slowly and carefully saved the piece, but the real lesson is upstream, design for the demold, not just the drawing.
Looking back, the throughline is consistency: the same principle (respect both parts, think about release before you pour) applies at every stage. I expect to carry all of this into the final project.
Status
- Design / CAD: Mold A (Fu) and Mold B (祥云) modeled in Onshape with dimensions as listed above.
- 3D-printed masters: Re-printed successfully after fixing the base–pattern gap; light burrs only.
- Silicone 祥云 (rectangular cloud): Failed (poured without mixing curing agent); silicone never solidified.
- Silicone Fu (circular): Succeeded after mixing Part A + catalyst by weight on Tim's guidance; rubber cured.
- Casting Attempt 1 (Yellow Cloud): Failed forgot hardener; uncured resin cleaned out manually.
- Casting Attempt 2 (Circular Fu): Succeeded two crystal-clear glitter Fu pieces demolded cleanly after 24 h cure.
- Casting Attempt 3 (Red Cloud): Partial success intact piece extracted with slow careful demolding; thin lines identified as the key issue to address in the next iteration.
Downloadable Files
Paths below are repository-relative (same style as my other weekly pages). In GitLab, open the file and use Download or Raw, or clone the repo to get everything.
2D pattern (Inkscape)
3D-printed mold positives (STL)