2. Computer Aided Design
Assignment No.2
- Model (raster, vector, 2D, 3D, render, animate, simulate, ...) a possible final project.
- Detail how to compress your images and videos.
- Post a description with your design files on your class page.
Learning Outcomes
This week I want to gain experience using 3D design tools by exploring what works for me.
With a final project idea in mind, I intend to start modelling my final project idea.
I want to find the best way to compress my files and intend to use different programs and find what works well for my needs.
Previous Experience
This week we take a dive into the many tools available for computer aided design. Again I start from the ground up with no previous experience using design or modelling tools.
2D
Keynotes

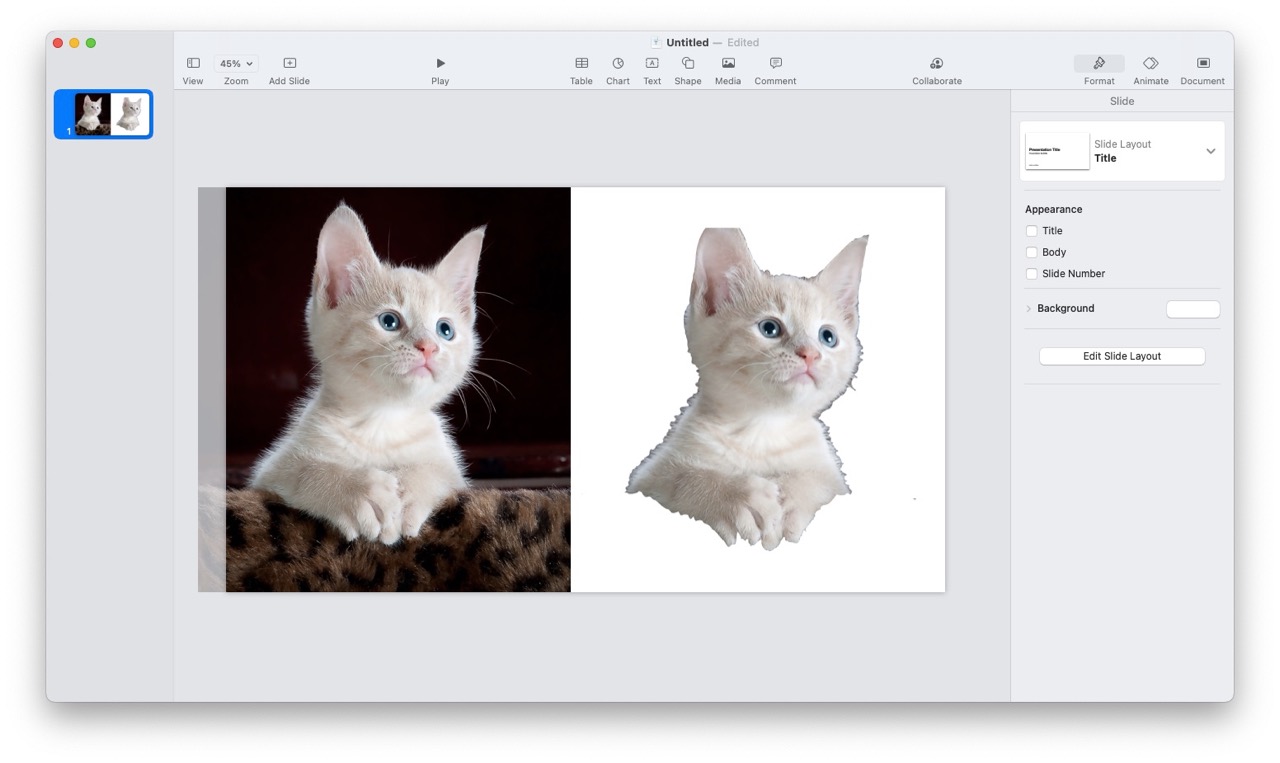
A great way to edit images on mac is to use their pre-installed app, keynotes. With this app you can copy an past you image to a canvas and then continue to use their edit features. So far I have been using it to add remarks such as underlining, adding arrow marks to photos and in the example below I was able to remove the background of a photo simply using their instant alpha button.

So far i'm happy using this tool for photo editing and it works well for what I need, It also allows me to export the file as a JPEG, so i don't have to worry about compressing later on down the line.
Inkscape

Inkscape is a free and open-source vector graphics editor for traditional Unix-compatible systems such as GNU/Linux, BSD derivatives and Illumos, as well as Windows and macOS. Inkscape is a useful tool for creating bitmaps that can be used when vinyl cutting. I used keynotes to get rid of the background first and then with inkscape i was able to use the trace bitmap feature. You can then adjust the settings until you get a perfect negative for cutting.

Cuttle
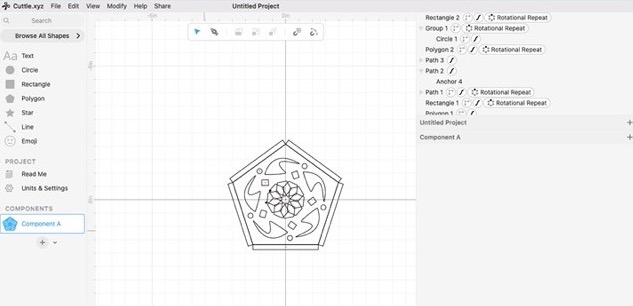
Cuttle Is a web-based design tool for digital cutting machines. The tool allows you to generate custom SVGs in seconds with templates, or use the editor to make your own designs. I watched a few tutorial videos and had a go at designing a hexagon with tabs that could later be laser cut and made into a polyhedron. The UI was quite nice and the modify features with repeat rotation make building patterns quite easy.
3D
Fusion 360
 I downloaded Fusion 360 with the help of home brew using the command ->brew install fusion 360.
After a brief overview at Waag, I have been using youtube and Fusion 360 fundamentals Training videos to get started on learning how to 2D and 3D sketch and model.
First things first, start with a box...

Define the lines to make the shape a constraint and extrude...

Playing around with adding objects and cutting using different shapes and Importing parts from the inventory.
After playing around I tried to construct a potential final project idea and that's when the fun was sucked out of me. Not knowing the basics can get quiet frustrating, like building a lid for an extruded box instead of, as I later discovered, sketching directly from the surface you wish to build on.

Limitations
FreeCad
Unfortunately FreeCad seemed very sluggish on my computer, I have an old Macbook Air from 2017, the icon would jump around a lot, but the app wouldn't open. I downloaded using homebrew and after deleting I went to their official site to download, but there wasn't much difference. I did get a chance to open the app in the end, but for me it didn't seem as user friendly as fusion and the thought of wasting time on start up made it clear that I wouldn't continue trying for this assignment. Maybe something to try in the future, with a better laptop and few time constraints.
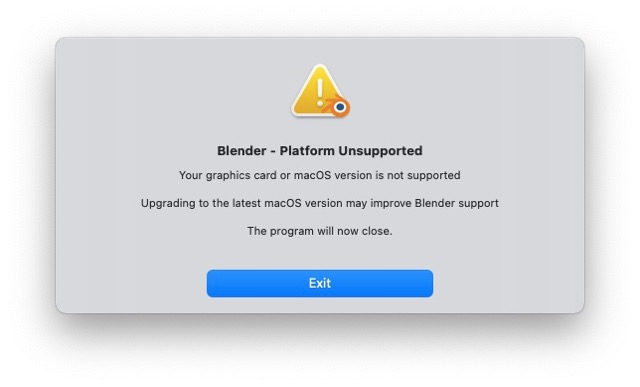
Blender

Unfortunately the same can be said with Blender, I was unable to try the app, looked cool during our Waag demo though.
File Conversion
Image Magick

This week we were also asked to learn how to upload and compress our images.
I downloaded ImageMagick using Brew in the command terminal ->brew install image magick
To convert images you first type convert then the file name and ending plus a new file name with the new format you want. For example: convert cat.png cat.jpg Of course in most cases you will keep the same name and just change the format.
You can also compress image files using the following commands:
convert name.jpg -scale 50% name.jpg First, write the file name, then add how much you want to reduce the size (in this case is 50%), and then the name of the compressed file. If you want to replace the existing file you would use the same name and if you want to keep both the old an new file, then you would use an alternate name for the compressed file.
Personally, I don't like using imagemagick, as I'm quite new to the terminal I doesn't come naturally to me to find files and compress them this way. When i'm taking screenshots for my documentation they generate a name such as Screenshot 2024-02-01 at 11.21.17, so to not have a visual aid to identify the files that need to be compressed is almost impossible.
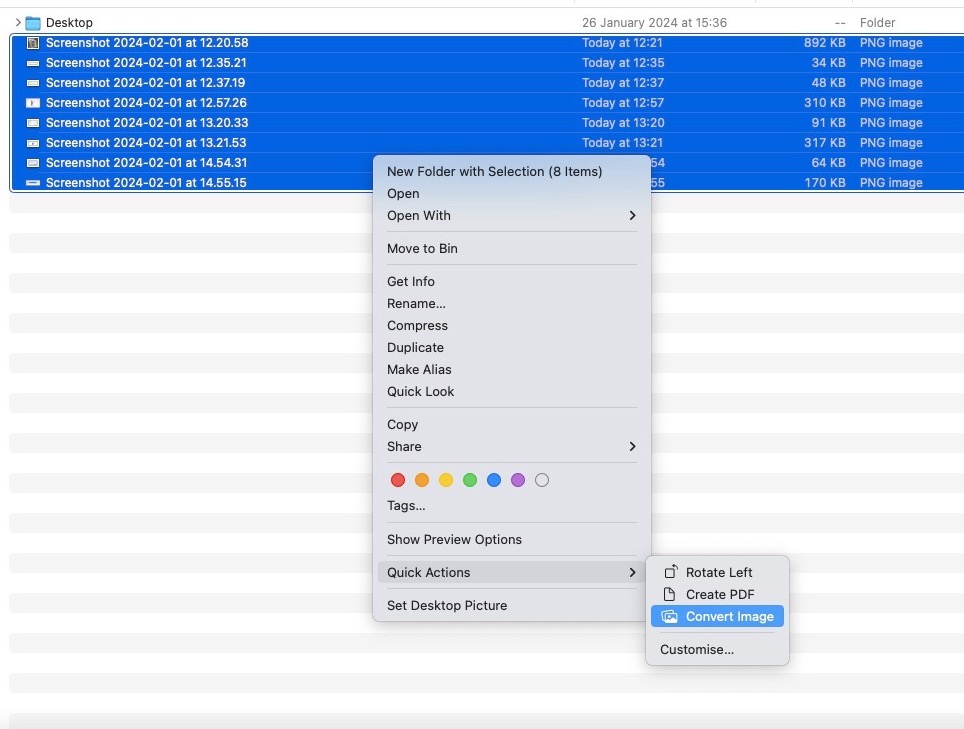
Quick Actions - Mac
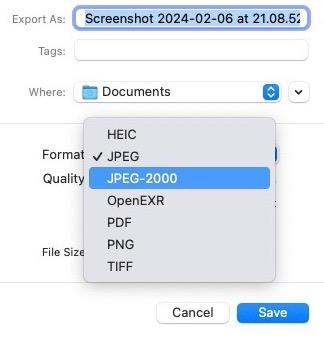
For me, what simple when I have many screen shots that I've taken throughout the day, is to use Quick actions. Firstly it helps to give a visual aid as not all of the screen shots or photos you take are going into your documentation. Once I know what files i want to compress I simply highlight them, right click and then select quick actions. This then gives me the option to convert image, I select the JPEG format and the size (usually the medium or large depending on the KB) and convert to JPEG. For now I think this is better than using the terminal where you rely on knowing each image title before you convert it.
I did find an issue when exporting unsupported files using the mac, markdown doesn't seem to see JPEG 2000 files, so make sure you select the correct JPEG format.
Extensions
Something to go in the project management week 1, but something I discovered this week was the visual studio extensions. The spell checker is essential for me, you just have to download the extension from your VS homepage and then your markdown files generate squiggle lines when you make mistakes.

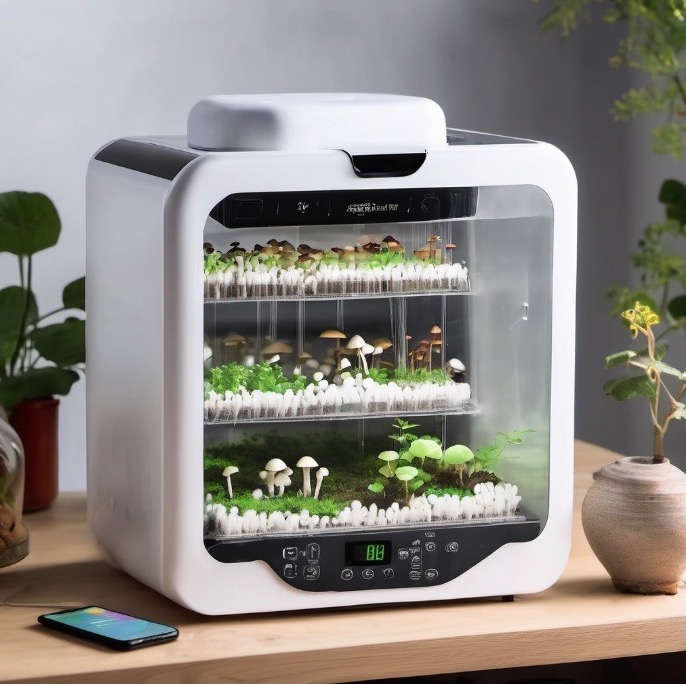
AI
Last week we saw how fellow students generated Images of their final projects using AI tools. I wanted to do the same to see what would turn out and after all the work put in to trying to 3D model for the first time, it's quiet demoralizing seeing AI generate such detailed illustrations in a matter of seconds. I went to pixlr Image generator where you can enter a text description or upload a sketch for the images you want, below are the results.

Final Project
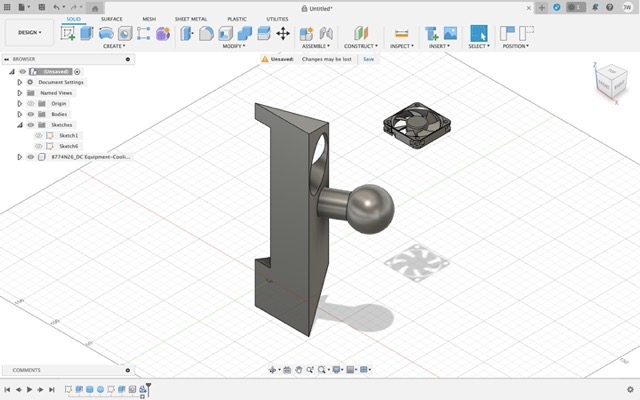
So... here's my first attempts at designing a final project.
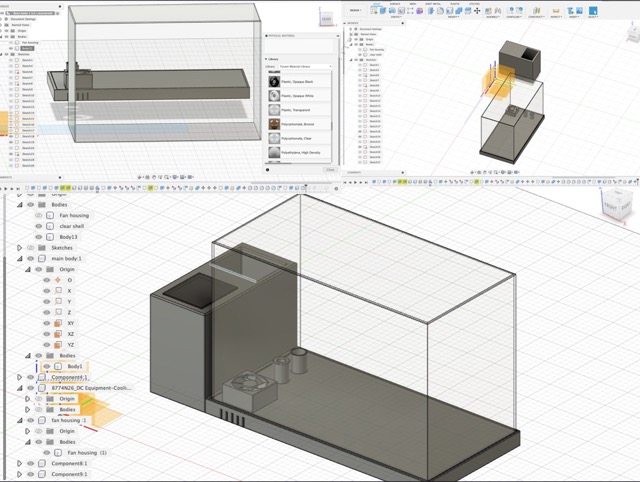
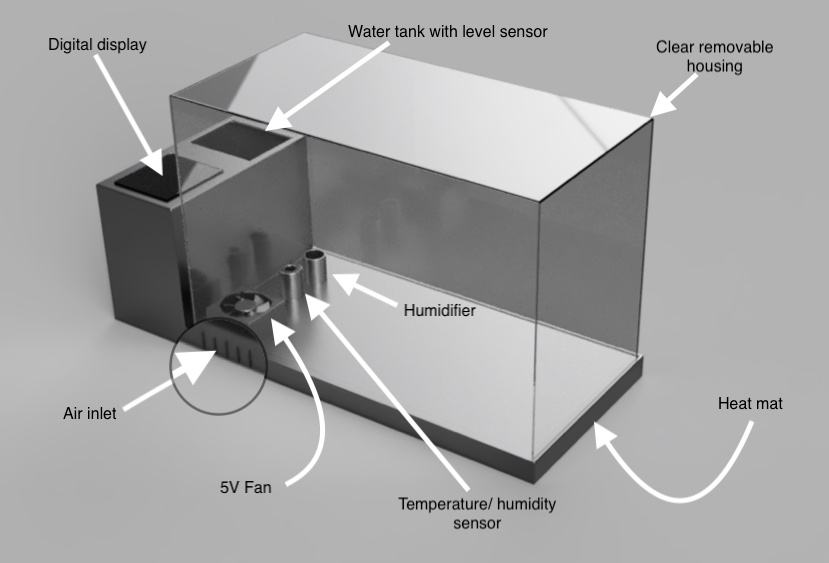
The plan was to have an animated version showing the fan in motion and a potential humidifier at work, but with the license I have on fusion I was unable to generate simulations. The humidifiers I found in the parts list were quite large and not the sort of thing i'm looking to replicate, so I could'nt fit that into the design. You will also see the material in the render, the default setting is metal, that won't be the case for the final project and I should have changed the base to plastic, but I do like the shinny affect. Lot's to improve on, but happy to have something that resembles my previous sketch.
Reflection
Rome wasn't build in a day
More over, they didn't have CAD, crazy!
I think it has been a nice introduction to modelling tools, but it's not something you could master in one week. There has been lots of frustration and ultimately learning, which is why I'm here. There's tonnes more to learn and I'm looking forward to building on from this week.