
6. Embedded programming
Overview
This week's group assignment was to consult the datasheet of the microcontroller we used in week 4. In my case I used the Xiao RP2040. We compared the performance and workflow of this microcontroller and others. You can consult the group page in the following link.
Microcontroller: Seeed Xiao-Rp2040
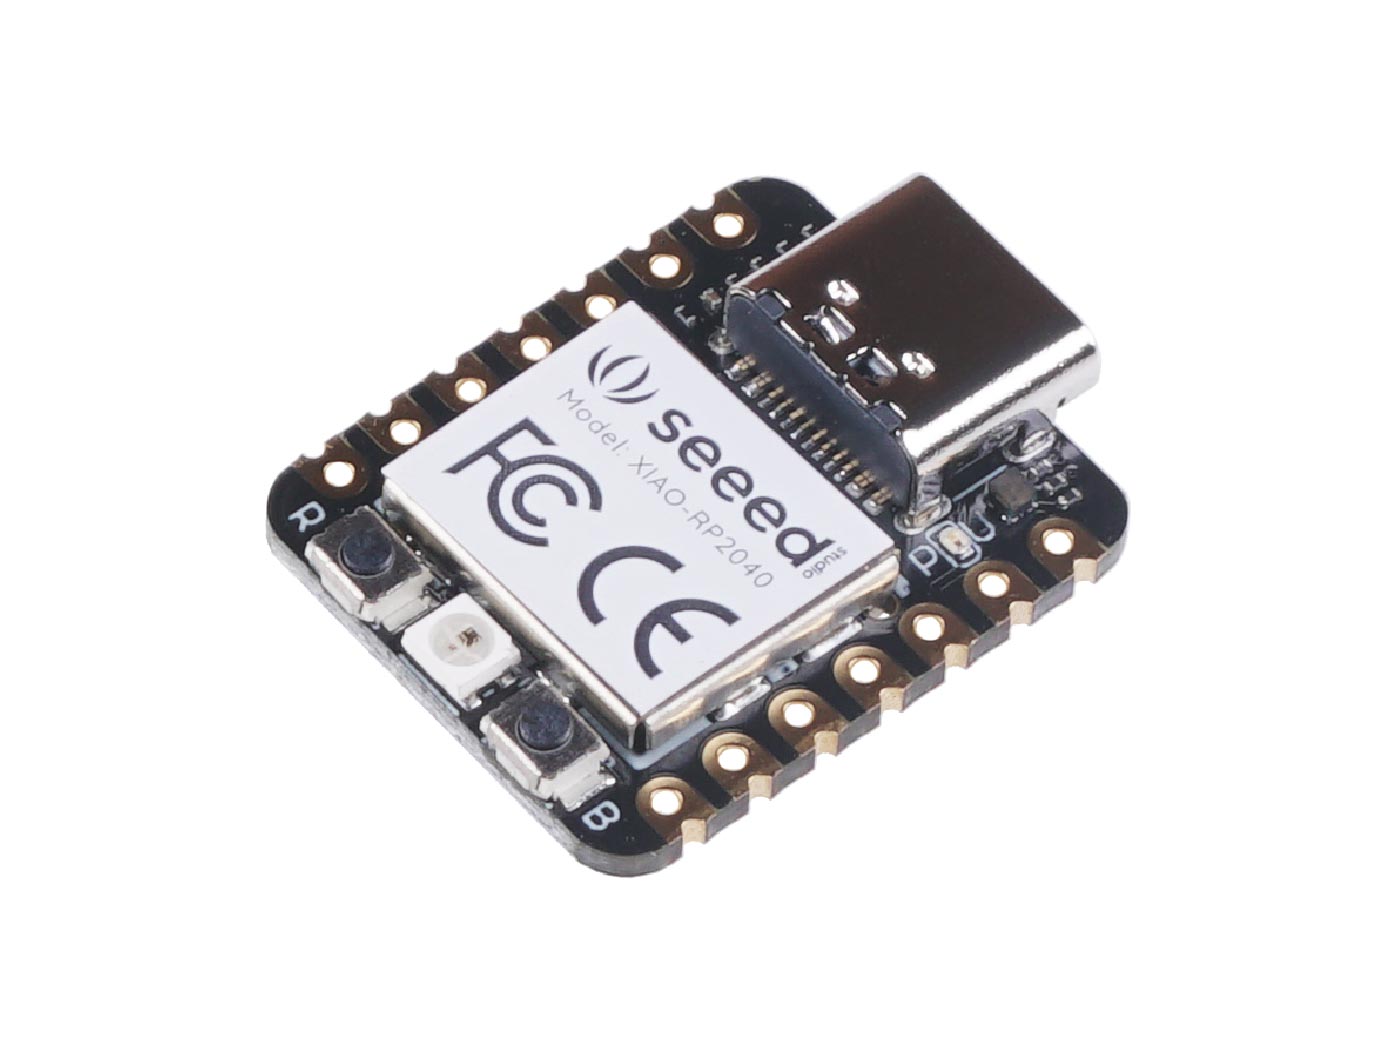
The Xiao RP2040 is a compact and powerful microcontroller designed for electronics projects and IoT applications that require a
small form factor and efficient processing capabilities. Equipped with a dual-core ARM Cortex M0+ processor that can run at up to 133 MHz,
it offers an optimal combination of power efficiency and processing performance.
This microcontroller is highlighted by its on-board memory, with 264KB of SRAM and 2MB of Flash memory,
providing ample space for complex program execution and data storage. One of the key features of the Xiao RP2040 is its flexible compatibility;
it supports a variety of programming platforms, including Micropython, Arduino and CircuitPython, making it accessible.
Features
Powerful MCU
Dual-core ARM Cortex M0+ processor, flexible clock running up to 133 MHz
Rich on-chip resources
264KB of SRAM, and 2MB of on-board Flash memory
Flexible compatibility
Support Micropython/Arduino/CircuitPython
Easy project operation
Breadboard-friendly & SMD design, no components on the back
Small size
As small as a thumb (20x17.5mm) for wearable devices and small projects.
Multiple interfaces
11 digital pins, 4 analog pins, 11 PWM Pins, 1 I2C interface, 1 UART interface, 1 SPI interface, 1 SWD Bonding pad interface.
Specifications
| Item | Value |
|---|---|
| CPU | Dual-core ARM Cortex M0+ processor up to 133MHz |
| Flash Memory | 2MB |
| SRAM | 264KB |
| Digital I/O Pins | 11 |
| Analog I/O Pins | 4 |
| PWM Pins | 11 |
| I2C interface | 1 |
| SPI interface | 1 |
| UART interface | 1 |
| Power supply and downloading interface | Type-C |
| Power | 3.3V/5V DC |
| Dimensions | 20x17.5x3.5mm |
Hardware Overview
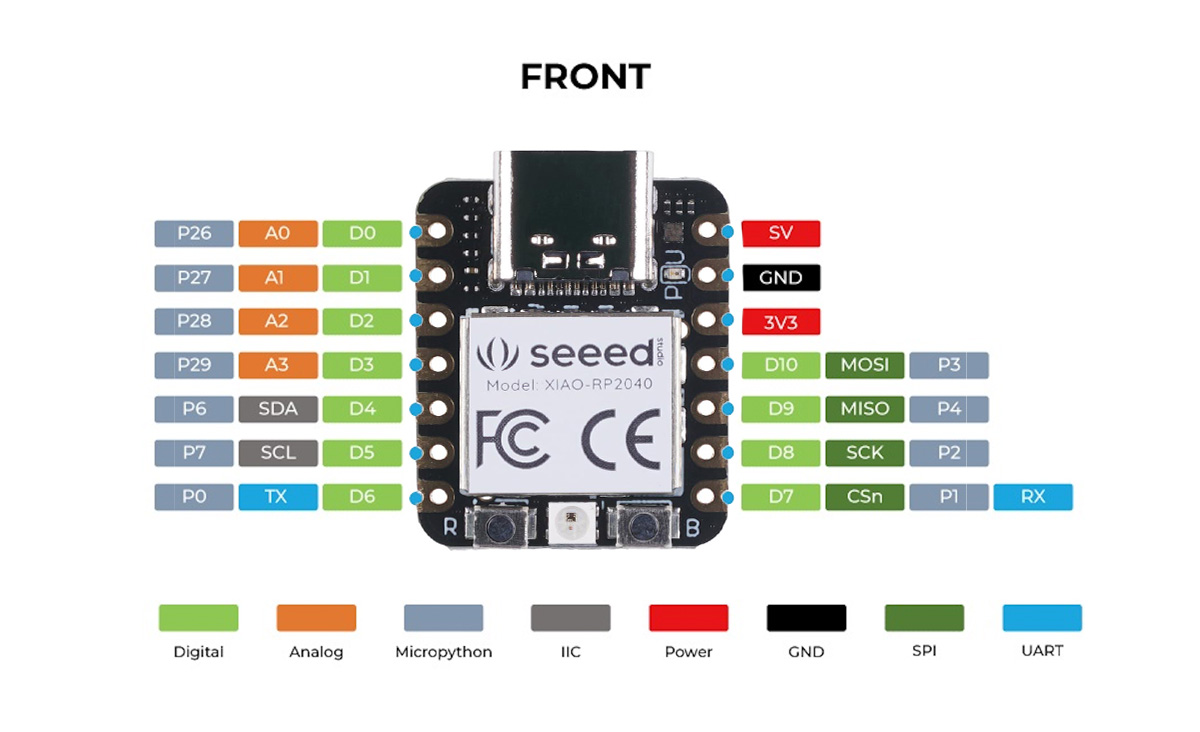
To know which pins to use when I was programming I had to check the microcontroller documentation. In the documentation I found an image that showed me all the hardware of the microcontroller and this helped me.
How to connect the board to my computer?
The steps to follow to connect the microcontroller to the computer are:
- Connect a type C cable to the Xiao.
- Long press button "B".
- Connect the other side of the cable to the computer.
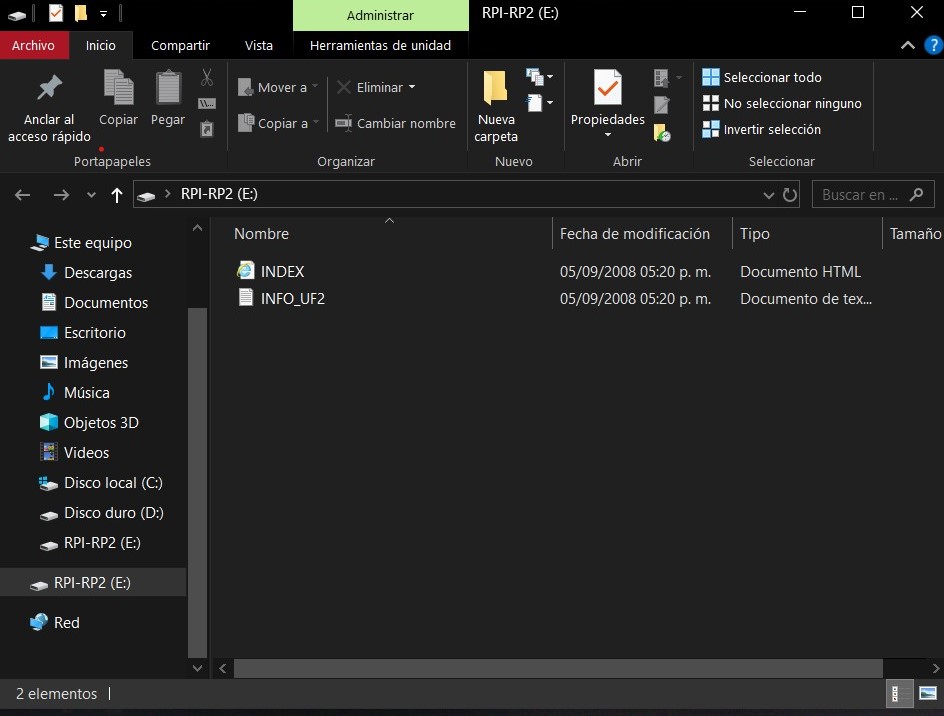
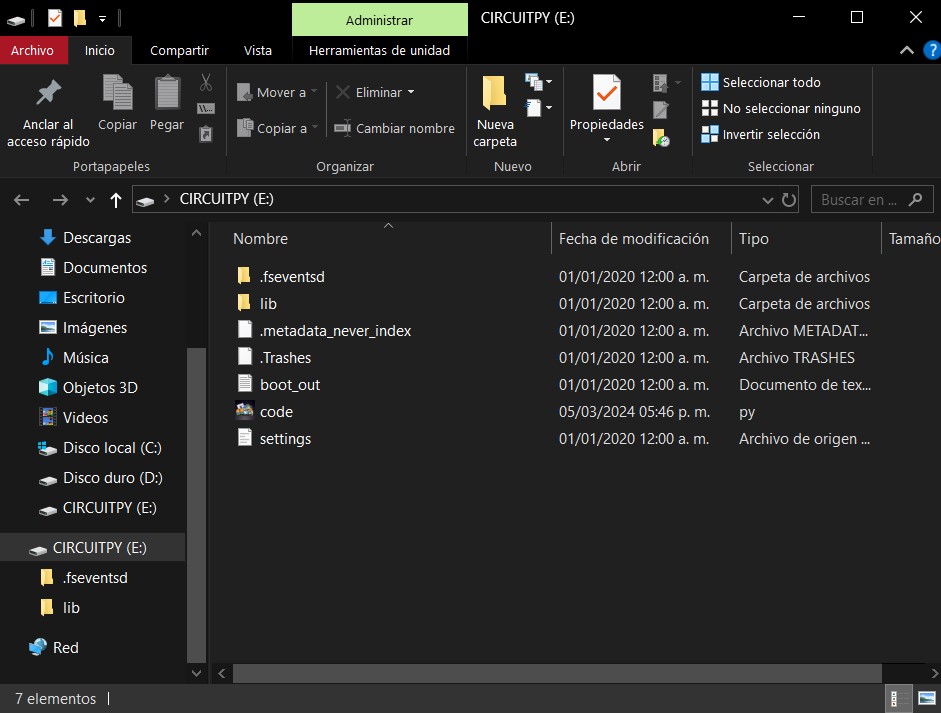
- Finally, it will show a disk driver.
If all goes well, you will get the following on your computer:
Depending on which program we use (Arduino IDE or CircuitPython) we will make some modifications.
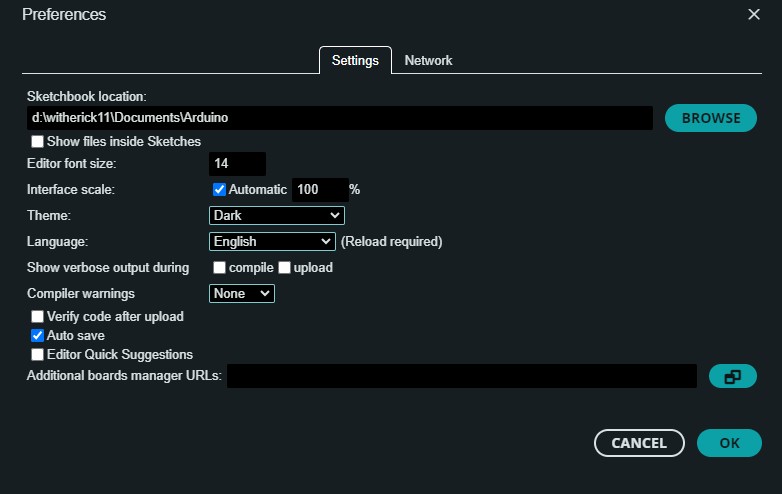
For Arduino IDE you have to select File > Preferences, and fill in additional URLs of the Board Manager with the url below:
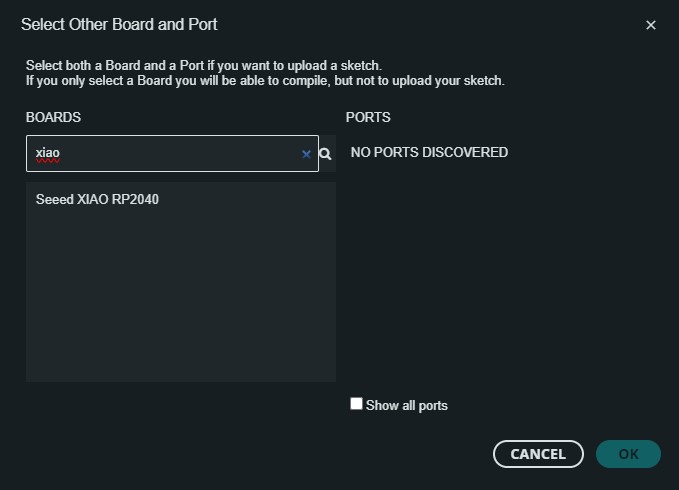
Finally, select the option Select board and search the name of the board.
For CircuitPython we will have to download a file to install CircuitPython on the board. At the end we will see the following:
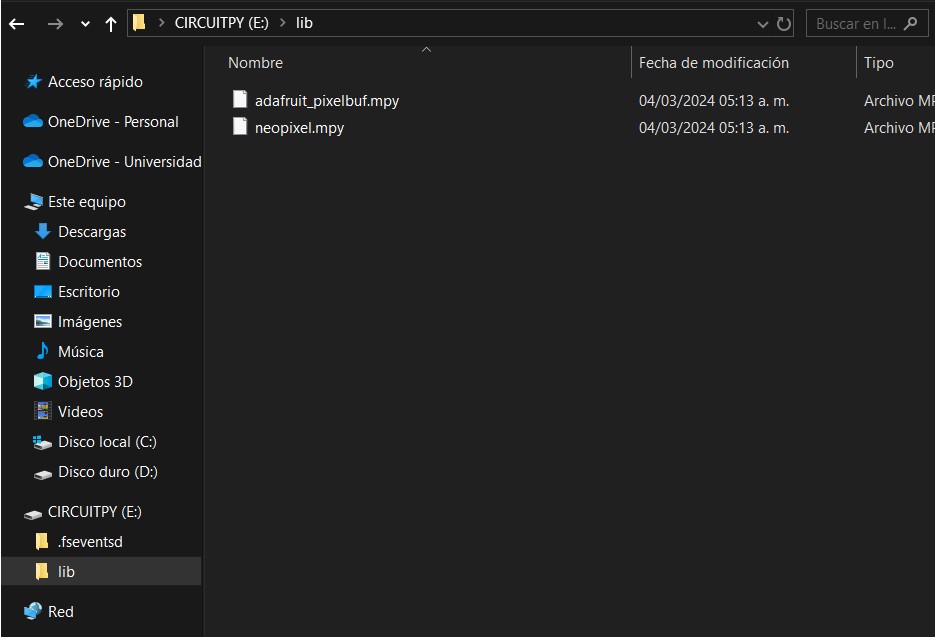
To finish with the configuration, we will install the libraries to use the neopixel included with the Xiao-RP2040.
Arduino IDE
Arduino IDE uses mainly a C/C++ based programming language, with some specific libraries and functions provided by Arduino to simplify the development of projects on Arduino boards. This language is based on the fundamental principles of C/C++ and is tailored to interface with components and peripherals typically used in electronics and robotics projects.
Installing Arduino IDE
To install Arduino IDE it is necessary to go to the official software page for installation. You can consult the page here.
After downloading the software, the next step is to install the program on your computer. The installation process is very simple.

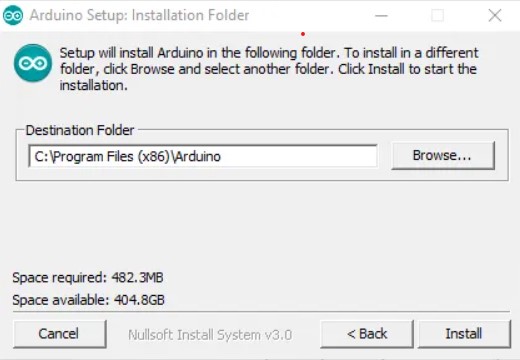
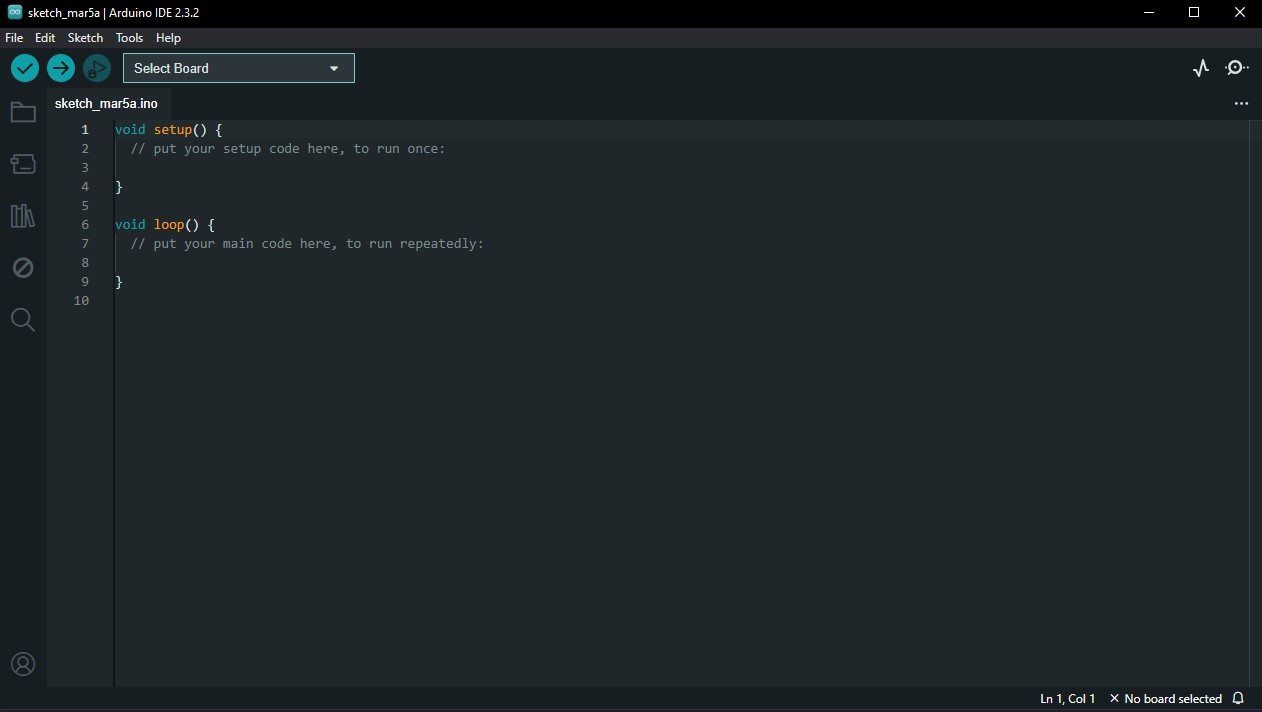
When finished, the following screen will appear:
Code: Lighting sequences
For Arduino, I made a program with different patterns using the leds (including the rgb led). I only made one program because I'm not used to work with C++ syntax. I usually use more Python.
For this program, I used all the LEDs I have on my board, both the Xiao-RP2040 LEDs and the other three LEDs I soldered. The sequences are changing with the button I have on the board. The first sequence is a fast sequence, all the leds turn on quickly. The second sequence is slow. The third sequence increases the speed a little bit. The fourth sequence changes the direction. The fifth sequence turns on all the LEDs together quickly. Finally, it turns off.
Here is my code:
    #include <Adafruit_NeoPixel.h>
    #define NUM_PIXELS 1 // Number of NeoPixel LEDs
    #define PIN 12 // Pin connected to the NeoPixel
    #define POWER 11 // Pin controlling power to the NeoPixel
    #define BUTTON_PIN D1 // Pin connected to the button

    Adafruit_NeoPixel pixels(NUM_PIXELS, PIN, NEO_GRB + NEO_KHZ800);

    // Array containing the pins for the non-NeoPixel LEDs
    const int ledPins[] ={25, 26, D6, D7};
    // Ensure this matches the number of elements in ledPins
    const int numLeds = 4;
    int buttonState;
    int lastButtonState = LOW;
    int currentSequence = 0; // Tracks the current sequence to be displayed

    void setup(){
            pinMode (POWER, OUTPUT);
            digitalWrite (POWER, HIGH); // Activates power to the NeoPixel

            pixels.begin(); // Initializes the NeoPixel LED

            for (int i = 0; i < numLeds; i++) {
                pinMode(ledPins[i], OUTPUT); // Sets each LED pin as an output
            }
            pinMode(BUTTON_PIN, INPUT); // Sets the button pin as an input
    }


    void loop() {
        buttonState = digitalRead(BUTTON_PIN); // Reads the current state of the button

        // Detects a button press (rising edge)
        if (buttonState == HIGH && lastButtonState == LOW) {
            delay(50); // Debounce to prevent reading the button press multiple times
            currentSequence = (currentSequence + 1) % 7; // Cycles through 7 sequences
            // Wait for button release to avoid multiple increments
            while(digitalRead(BUTTON_PIN) == HIGH) {
                delay (10);
            }
        }

        lastButtonState = buttonState; // Updates the last button state for the next loop iteration

        // Executes the current lighting sequence based on the value of currentSequence
        switch (currentSequence) {
            case 1: fastSequence(); break;
            case 2: slowSequence(); break;
            case 3: sequence1(); break;
            case 4: sequence2(); break;
            case 5: simultaneousBlink(); break;
            case 6: zigzag(); break;
            case 7: turnOff(); break;
        }
    }

    // Fast Sequence
    void fastSequence() {
        for(int i = 0; i < numLeds; i++) {
            digitalWrite(ledPins[i], HIGH); // Turns on the LED
            delay(100); // Short wait for a quick sequence
            digitalWrite(ledPins[i], LOW); // Turns off the LED
        }
        pixels.setPixelColor(0, pixels.Color(193, 72, 72)); // Sets the NeoPixel to a fast green color
        pixels.show();
        delay(100); // Keeps the color for a short time
        pixels.clear(); // Turns off the NeoPixel
        pixels.show();
    }

    // Slow Sequence
    void slowSequence() {
        for(int i = 0; i < numLeds; i++) {
            digitalWrite(ledPins[i], HIGH); // Turns on the LED
            delay(500); // Long wait for a slow sequence
            digitalWrite(ledPins[i], LOW); // Turns off the LED
        }
        pixels.setPixelColor(0, pixels.Color(214, 226, 36)); // Sets the NeoPixel to a slow blue color
        pixels.show();
        delay(500); // Keeps the color for a long time
        pixels.clear(); // Turns off the NeoPixel
        pixels.show();
    }

    // Sequence 1
    void sequence1() {
        for(int i = 0; i <= numLeds; i++) {
            if (i < numLeds) {
                digitalWrite(ledPins[i], HIGH); // Turns on each non-NeoPixel LED
            } else {
                pixels.setPixelColor(0, pixels.Color(61, 189, 16)); // Sets NeoPixel LED to green
                pixels.show(); // Updates NeoPixel to display the color
            }
            delay(250); // Waits 250 milliseconds
            if (i < numLeds) {
                digitalWrite(ledPins[i], LOW); // Turns off each non-NeoPixel LED
            } else {
                pixels.clear(); // Clears the NeoPixel LED (turns off)
                pixels.show(); // Updates NeoPixel
            }
        }
    }

    // Sequence 2
    void sequence2() {
        for(int i = numLeds; i >= 0; i--) {
            if (i < numLeds) {
                digitalWrite(ledPins[i], HIGH); // Turns on each non-NeoPixel LED in reverse order
            } else {
                pixels.setPixelColor(0, pixels.Color(27, 226, 232)); // Sets NeoPixel LED to blue
                pixels.show(); // Updates NeoPixel to display the color
            }
            delay(250); // Waits 250 milliseconds
            if (i < numLeds) {
                digitalWrite(ledPins[i], LOW); // Turns off each non-NeoPixel LED
            } else {
                pixels.clear(); // Clears the NeoPixel LED (turns off)
                pixels.show(); // Updates NeoPixel
            }
        }
    }


    // Simultaneous Blink
    void simultaneousBlink() {
        for (int i = 0; i < 5; i++) {
            for (int pin : ledPins) {
                digitalWrite(pin, HIGH);
            }
            pixels.fill(pixels.Color(27, 86, 232)); // Sets to a yellow color
            pixels.show();
            delay(200);
            for (int pin : ledPins) {
                digitalWrite(pin, LOW);
            }
            pixels.clear();
            pixels.show();
            delay(200);
        }
    }

    // Zigzag
    void zigzag() {
        for (int i = 0; i < numLeds; i+=2) {
            digitalWrite(ledPins[i], HIGH);
            if (i+1 < numLeds) digitalWrite(ledPins[i+1], LOW);
        }
        delay(250);
        for (int i = 0; i < numLeds; i+=2) {
            digitalWrite(ledPins[i], LOW);
            if (i+1 < numLeds) digitalWrite(ledPins[i+1], HIGH);
        }
        delay(250);
    }

    // Turn Off
    void turnOff() {
        for (int i = 0; i < numLeds; i++) {
            digitalWrite(ledPins[i], LOW);
        }

        pixels.clear(); // Sets all NeoPixel LEDs to off (black)
        pixels.show(); // Updates the NeoPixel to display the change
    }
Result
CircuitPython
To program in Python install MU editor in the following link.
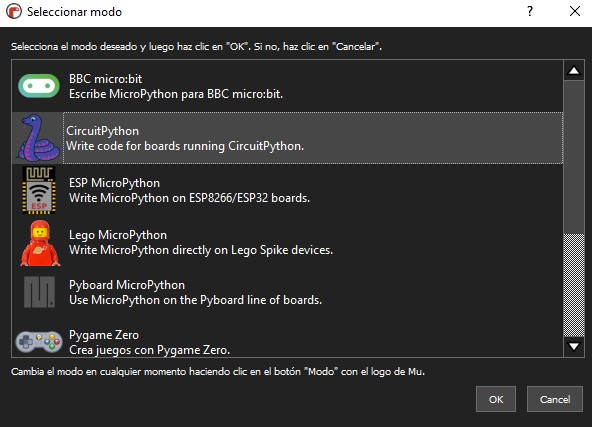
After downloading it, we select CircuitPython at the end of the installation, as shown in the image:
Code: 4-bit counter
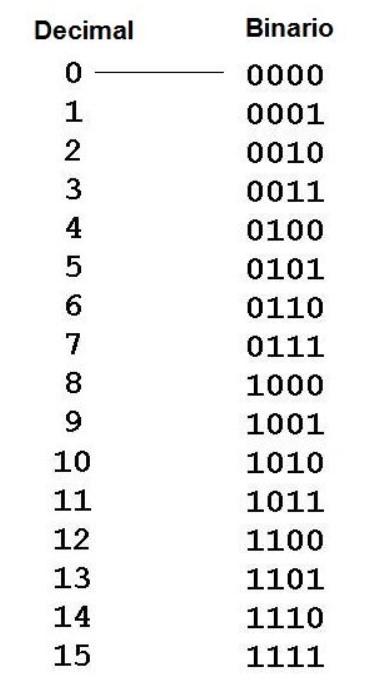
Python is a language I use more frequently as opposed to C++. So I know more of its syntax and I don't find it difficult to program in this language. The code I made is a 4-bit counter. To make it I used the three leds I soldered and the rgb led. As first value I take the neopixel (or rgb) led. Then I used the other three leds. Each time I press the button, the leds light up and go from 0 to 15. The following image is a support to test the code on the board.
Here is my code:
    import board
    import digitalio
    import time
    import neopixel

    # Pin configuration
    BUTTON_PIN = board.D1
    LEDS_PINS = [board.D7, board.D6, board.D0]
    NUM_PIXELS = 1
    PIXEL_PIN = board.NEOPIXEL

    # Button initialization
    button = digitalio.DigitalInOut(BUTTON_PIN)
    button.direction = digitalio.Direction.INPUT
    button.pull = digitalio.Pull.DOWN

    # Regular LEDs initialization
    leds = [digitalio.DigitalInOut(pin for pin in LEDS_PINS]
    for led in leds:
        led.direction = digitalio.Direction.OUTPUT

    # NeoPixel initialization
    pixels = neopixel.NeoPixel(PIXEL_PIN, NUM_PIXELS, brightness=0.5)

    # Counter and button state initialization
    counter = 0
    button_state = False

    def decimal_to_binary(n, size):
        binary_list = []
        while n > 0:
            remainder = n % 2
            binary_list.append(remainder)
            n //= 2
        while len(binary_list) < size:
            binary_list.append(0=
        binary_list.reverse()  # Reverse the list to have it in the correct order
        return binary_list

    def Combinations(n):
        combinations = []
        for i in range(2 ** n):
            list = decimal_to_binary(i, n)
            combinations.append(list)
        return combinations

    def update_leds(combination):
        # Update regular LEDs based on the first three bits
        for i, led in enumerate(leds):
            led.value = combination[i]
        # Update the NeoPixel based on the fourth bit
        if combination[3]:
            pixels.fill((255, 0, 0))  # Turned on, red
        else:
            pixels.fill((0, 0, 0))  # Turned on, red

    # Get all combinations for 4 bits (3 regular LEDs + 1 NeoPixel)
    combinations = Combinations(4)/span>

    while True:
        # Detect button press
        if button.value and not button_state:
            button_state = True
            update_leds(combinations[counter])
            counter = (counter + 1) % len(combinations)  # Increment the counter and loop it within the range
        elif not button.value and button_state:
            button_state = False  # Reset the button state when released
        time.sleep(0.01)
Result:
Code: Lighting sequences
The following code does the same as the code I did in Arduino IDE. I did it to make a comparison between both languages using the same code.
    import board
    import digitalio
    import time
    import neopixel

    # Pin configuration
    NUM_PIXELS = 1
    PIXEL_PIN = board.NEOPIXEL
    BUTTON_PIN = board.D1
    led_pins = [board.D0, board.D6, board.D7]
    numLeds = len(led_pins)

    # Setup
    pixels = neopixel.NeoPixel(PIXEL_PIN, NUM_PIXELS, brightness=0.5, auto_write=True)
    button = digitalio.DigitalInOut(BUTTON_PIN)
    button.direction = digitalio.Direction.INPUT
    button.pull = digitalio.Pull.DOWN
    leds = [digitalio.DigitalInOut(pin) for pin in led_pins]
    for led in leds:
        led.direction = digitalio.Direction.OUTPUT

    current_sequence = 0
    last_button_state = button.value

    # Fast sequence
    def fast_sequence():
        button_was_pressed = False
        while not button_was_pressed:
            for led in leds:
                led.value = True
                time.sleep(0.1)
                led.value = False
                # Check if button state changed
                if button.value != last_button_state:
                    button_was_pressed = True
                    break

                # Light up NeoPixel with red color, then turn off
                pixels.fill((193, 72, 72))
                pixels.show()
                time.sleep(0.1)
                pixels.fill((0, 0, 0))
                pixels.show()
                if button.value != last_button_state:
                    break

    # Slow sequence
    def slow_sequence():
        for led in leds:
            led.value = True
            time.sleep(0.5)
            led.value = False

        # Light up NeoPixel with yellow color, then turn off
        pixels.fill((214, 226, 36))
        pixels.show()
        time.sleep(0.5)
        pixels.fill((0, 0, 0))
        pixels.show()

    # Sequence 1
    def sequence1():
        for i in range(numLeds + 1):
            if i < numLeds:
                leds[i].value = True
            else:
                # Light up NeoPixel with green color
                pixels.fill((61, 189, 16))  # Green
                pixels.show()
            time.sleep(0.25)
            if i < numLeds:
                leds[i].value = False
            else:
                pixels.fill((0, 0, 0))
                pixels.show()

    # Sequence 2
    def sequence2():
        for i in range(numLeds, -1, -1):
            if i < numLeds:
                leds[i].value = True
            else:
                # Light up NeoPixel with blue color
                pixels.fill((27, 226, 232))  # Blue
                pixels.show()
            time.sleep(0.25)
            if i < numLeds:
                leds[i].value = False
            else:
                pixels.fill((0, 0, 0))
                pixels.show()

    # Simultaneous blink
    def simultaneous_blink():
        for _ in range(5):
            for led in leds:
                led.value = True
            pixels.fill((27, 86, 232))  # Yellow
            pixels.show()
            time.sleep(0.2)
            for led in leds:
                led.value = False
            pixels.fill((0, 0, 0))
            pixels.show()
            time.sleep(0.2)

    # Turn off
    def turn_off():
        for led in leds:
            led.value = False
        pixels.fill((0, 0, 0))
        pixels.show()

    while True:
        button_state = button.value
        # Check for button press and update sequence
        if button_state != last_button_state and button_state:
            current_sequence += 1
            if current_sequence > 6:
                current_sequence = 0
            time.sleep(0.1)
        last_button_state = button_state

        # Execute the sequence based on current_sequence value
        if current_sequence == 0:
            fast_sequence()
        elif current_sequence == 1:
            slow_sequence()
        elif current_sequence == 2:
            sequence1()
        elif current_sequence == 3:
            sequence2()
        elif current_sequence == 4:
            simultaneous_blink()
        elif current_sequence == 5:
            turn_off()

        time.sleep(0.01)
advantages and disadvantages of each language: C++ and Python
Advantages of Arduino IDE
- Wide compatibility: Arduino IDE is compatible with a wide range of Arduino boards.
- Performance: By programming in C/C++, Arduino IDE can offer superior performance in terms of speed and resource efficiency.
- Low-level control: It provides more fine-grained control over the hardware, which is useful for projects that need hardware-level optimizations.
Disadvantages or Arduino IDE
- Learning curve: It can be more difficult to learn compared to Python.
- Slower development: Writing and debugging in C/C++ can take longer than in higher-level languages such as Python.
Advantages of CircuitPython
- Easy to learn: Python is known for its clear and simple syntax, making CircuitPython an excellent choice for beginners.
- Rapid development: Python makes it easy to write code more quickly, which speeds up the development of prototypes and projects.
- Interactivity: CircuitPython supports real-time code editing, allowing developers to modify and test their code directly on the device without the need for recompilations.
- Libraries: You have access to a growing library of modules and software that can simplify development.
Disadvantages or CircuitPython
- Performance: CircuitPython can be slower than C/C++ because it is an interpreted language.
- Resource usage: It may require more system resources, such as memory, which can be a problem on resource-constrained devices.
The conclusion I reached was the following: For someone not so familiar with programming your best option is to use Python for programming because of its ease of use. However, if you need performance and control for a more complex project Arduino IDE might be more suitable.