6. Embedded Programming
For this week I will be using the PCB made on week 3, by adding an extension to control some leds with buttons for a game. Programmed in two different programming language (Circuit Python and Arduino).
Group Recap
If you want to read the Group Page, Click Here.
Architectures Syntax Rules
| Type | Python | C++ |
|---|---|---|
| Variables and Data Type | Are dynamically typed | Must be declared with and explicit data type |
| Control Structures | Simple, use of indentation | Use of braces with control statements |
| Functions | Using def with arguments | Specify the return |
| Comments | With # for single line and ''' ''' for a block | With // for single line and /* */ for a block |
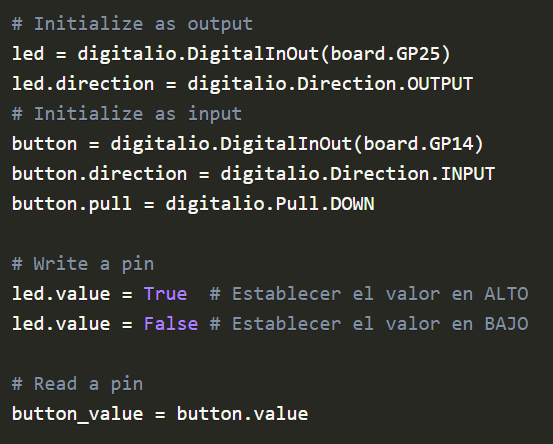
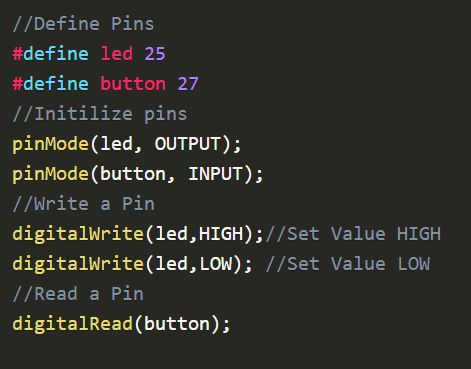
GPIO (General Purpose Input Output)
|
 |
 |
| Delay | Import time and with time.sleep() in seconds | Delay() in miliseconds |
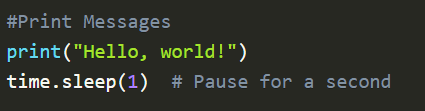
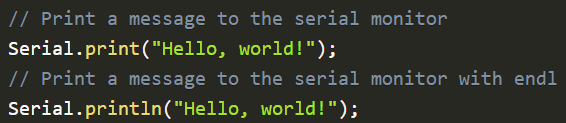
Printing
|
 |
 |
What I'm doing
I will be re-creating the game Simon. By having 4 color leds and buttons. The main purpuse of the game is to enter the sequence shown previously in the exact same order using visual memory. Each level the sequence will be shown faster until you fail or complete all the levels.
Circuit Python
Circuit Python is aderivate of Python used for microcontrollers.
If you want to program it using Circuit Python it will be done using MU Editor.
and this UF2 file: Seed_Xiao
Having this installed follow the steps:
- Click the Boot button on the Xiao
- Connect it to the computer, wait until it opens the Files Explorer
- Release the button
- Copy and Paste the UF2 file
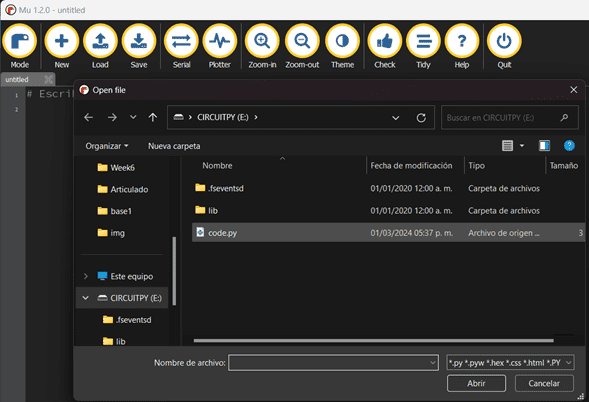
On the MU Editor you will click on Load and select the code.py file that appears on the Xiao, whenever you make a change or want to run the code, click on Save and it will start running it self.
Code explanation
We import the libraries used for the practice.
- Import Board: access to pins
- Digitalio: digital inputs/outputs on the board
- Random (randit): generate random integers numbers on a range
- Time (sleep): to pause the program certain time in seconds
							import board
							import digitalio
							from random import randint as R
							from time import sleep as d
We create the 4 buttons and declare them as inputs on certain board pin.
							buttonC1 = digitalio.DigitalInOut(board.D5)
							buttonC1.direction = digitalio.Direction.INPUT

							buttonC2 = digitalio.DigitalInOut(board.D10)
							buttonC2.direction = digitalio.Direction.INPUT

							buttonC3 = digitalio.DigitalInOut(board.D9)
							buttonC3.direction = digitalio.Direction.INPUT

							buttonC4 = digitalio.DigitalInOut(board.D8)
							buttonC4.direction = digitalio.Direction.INPUT
Create the 4 leds and declare them as outputs and its board pin.
							ledC1 = digitalio.DigitalInOut(board.D0)
							ledC1.direction = digitalio.Direction.OUTPUT

							ledC2 = digitalio.DigitalInOut(board.D2)
							ledC2.direction = digitalio.Direction.OUTPUT

							ledC3 = digitalio.DigitalInOut(board.D3)
							ledC3.direction = digitalio.Direction.OUTPUT

							ledC4 = digitalio.DigitalInOut(board.D4)
							ledC4.direction = digitalio.Direction.OUTPUT
We initialize 2 arrays for the buttons and the leds. This helps to reduce operations
because they have a similar behavior.
							arr_Buttons = [
								buttonC1,
								buttonC2,
								buttonC3,
								buttonC4
							]

							arr_Leds = [
								ledC1,
								ledC2,
								ledC3,
								ledC4
							]
We create 2 flags to track the state of the game.
Also an empty list of levels and the number of levels there will be.
And 2 different delays for pausing the code.
							b_Lose = False
							b_Correct = False

							arr_Levels = []
							maxLevels = 8

							delay = 0.55
							delayP = 0.25
We create different functions to control de behavior of the leds. This helps to simplify the code in the Loop just by calling the action.
- newLevel: return a random number (0-3)
- controlLed: set the led according to the value
- ledFill: turn on a specific led
- ledUnfill: turn off the specific led
- ledsON: turn on all the leds
- ledsOff: turn off all the leds
- blinkLeds: On/Off leds on specific time
							def newLevel():
								return R(0, 3)

							def controlLed(index: int, value: bool):
								arr_Leds[index].value = value  # Turn on the selected LED

							def ledFill(value):
								arr_Leds[value].value = True  # Turn on the selected LED

							def ledUnfill(value):
								arr_Leds[value].value = False

							def ledsON():
								for led in arr_Leds:
									led.value = True

							def ledsOFF():
								for led in arr_Leds:
									led.value = False

							def blinkLeds(times):
								for i in range(times):
									ledsON()  # Turn on all LEDs
									d(delayP)
									ledsOFF()  # Turn off all LEDs
									d(delayP)
Start to generate functions of changing the level, win or lose.
- nextLevel: every next level it blinks 1 time
- Win: turn on all the leds and blink 3 times
- Lose: turn on all the leds ad start to turn them off 1 by 1
							def nextLevel():
								blinkLeds(1)

							def Win():
								for led in arr_Leds:
									led.value = True
									d(1)
								blinkLeds(3)

							def Lose():
								for led in arr_Leds:
									led.value = True
								d(2)
								for led in arr_Leds:
									led.value = False
									d(1)
Now we can start all the game on the While True: part.
							while not b_Lose and len(arr_Levels) < maxLevels:
							nextLevel()
							arr_Levels.append(newLevel())

							for level in arr_Levels:
								controlLed(level, True)
								d(delay)

								controlLed(level, False)
								d(delay)

							for level in arr_Levels:
								i = 0
								b_Correct = False
We create another loop to verify which button is pressed and compare it to the leds list.
							while not b_Correct and not b_Lose:
								while arr_Buttons[i].value:
									ledFill(i)
									if i != level:
										b_Lose = True
									else:
										b_Correct = True

								ledUnfill(i)

								if i < len(arr_Buttons) - 1:
									i += 1
								else:
									i = 0

							if b_Lose:
								break

						delay -= 0.05
For the final part it verify the state of the game for the last conditions (Win/Lose).
							if b_Lose:
								Lose()
							else:
								Win()

							delay = 0.5
							arr_Levels.clear()
							b_Lose = False
							d(1.5)
Complete Code for Simon
Arduino
Arduino is an open source creation platform easy to use for hardware creations, it's based on C/C++.
If you want to use it with C++ in Arduino IDE you will need to install Arduino.
And have the Library of the Xiao (check Week4) in the part of Code and test.
- Click the Boot button on the Xiao
- Connect it to the computer, wait until it opens the Files Explorer
- Release the button
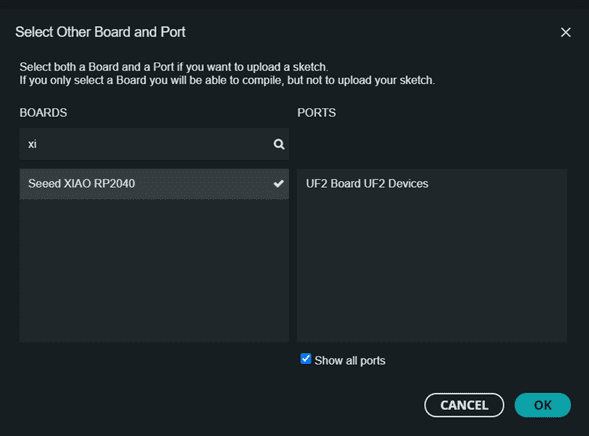
- Open Arduino
- Where you select the Board, select the Xiao
- Click on Show all ports
- Select the UF2
- Load the code
*Note: there is another way to change between modes instead of desconecting the cable, prssing the boot button, etc. The other way is: once is connected, press and hold the boot button then press once the reset button. Now it's ready!
For changing the code I made in .py it was kind of tricky, fisrt of all because of the dynimic arrays I used. So in arduino it will be a number of array defined, also generating the random number was dificult cause I need to use a seed that generates the number based on the timer of the Xiao when the button is pressed.
Code explanation
#define is used in C/C++ to define a macro (symbol replaced with a value).
In this case we define the buttons and the leds, continuously by the pin.
							#define buttonC1 D5
							#define buttonC2 D10
							#define buttonC3 D9
							#define buttonC4 D8

							#define ledC1 D0
							#define ledC2 D2
							#define ledC3 D3
							#define ledC4 D4
Const int array[] declare an array of int type, and can't be changed (const).
There are created for both buttons and leds.
							const int arr_Buttons[] = {buttonC1, buttonC2, buttonC3, buttonC4};
							const int arr_Leds[] = {ledC1, ledC2, ledC3, ledC4};
							bool b_Lose = false;
							bool b_Correct = false;

							int arr_Levels[4];
							const int maxLevels = 4;

							float delayT = 550;
							float delayP = 250;
In the Setuo() we initialize the hardware.
							void setup() {
								Serial.begin(9600);
								int x;
								for (int i = 0; i < 4; i++) {
								  pinMode(arr_Buttons[i], INPUT);
								  pinMode(arr_Leds[i], OUTPUT);
								}
								while(!digitalRead(D5)){
								  x=micros();
								  randomSeed(micros());
								}
							  }
After the setup we can start defining our funtions for the game.
							int newLevel() {
								int x = random(0, 4);
								Serial.print(x);
								return x;
							}
							void controlLed(int index, bool value) {
							  digitalWrite(arr_Leds[index], value);
							}
							void ledsON() {
							  for (int i = 0; i < 4; i++) {
								digitalWrite(arr_Leds[i], HIGH);
							  }
							}
							void ledsOFF() {
							  for (int i = 0; i < 4; i++) {
								digitalWrite(arr_Leds[i], LOW);
							  }
							}
							void blinkLeds(int times) {
							  for (int i = 0; i < times; i++) {
								ledsON();
								delay(delayP);
								ledsOFF();
								delay(delayP);
							  }
							}
We define our funtions for the game.
							void nextLevel() {
								blinkLeds(1);
							  }
							  void Win() {
								for (int i = 0; i < 4; i++) {
								  digitalWrite(arr_Leds[i], HIGH);
								  delay(1000);
								}
								blinkLeds(3);
							  }
							  void Lose() {
								for (int i = 0; i < 4; i++) {
								  digitalWrite(arr_Leds[i], HIGH);
								}
								delay(1000);
								for (int i = 0; i < 4; i++) {
								  digitalWrite(arr_Leds[i], LOW);
								  delay(1000);
								}
							  }
In the mainloop is where all the game will be running all the time.
							int k = 0;
							while (!b_Lose && k < maxLevels) {
								arr_Levels[k] = newLevel();
								nextLevel();
								for (int i=0; i< maxLevels; i++){
								Serial.print("I: ");
								Serial.print(i);
								Serial.print("Value: ");
								Serial.print(arr_Levels[i]);
								Serial.print(" | ");
								}
								Serial.println();

								for (int i = 0; i < (k+1); i++) {
								controlLed(arr_Levels[i], true);
								delay(delayT);

								controlLed(arr_Levels[i], false);
								delay(delayT);
								}
Now we have to check the button is pressed correctly
							for (int i = 0; i < (k+1); i++) {
								int j = 0;
								b_Correct = false;

								while (!b_Correct && !b_Lose) {
								  while (digitalRead(arr_Buttons[j])) {
									digitalWrite(arr_Leds[j], HIGH);
									if (j != arr_Levels[i]) {
									  b_Lose = true;
									} else {
									  b_Correct = true;
									}
								  }

								  digitalWrite(arr_Leds[j], LOW);

								  if (j < maxLevels - 1) {
									j += 1;
								  } else {
									j = 0;
								  }
								}

								if (b_Lose) {
								  break;
								}
							  }

							  delayT -= 50;
							  k ++;
For the last part is to send to the final conditions (WIN/LOSE) and restore the initial values.
							if (b_Lose) {
								Lose();
							  } else {
								Win();
							  }
							  delayT = 500;
							  b_Lose = false;
							  delay(1500);
Complete Code for Simon
Language Comparison
In this case I can do both codes in different language without changing a lot of things. The main changes where the declarations of inputs, outputs,
functions definition and For cicles. Beside that I faced some issues that I solved by printing in the serial monitor, as the random funtion,
in circuit python I generate a random number with a simple funtion and its library, but for arduino it uses a seed to generate the random, at first I put it in an analog read but it didn't
worked so after some help of my instructor we implement to start the count up once a button (D0) is pressed. So this makes very difficult to repeat.
As you might think I prefer Circuit python but I understant the sacrifice of speed in case of doing something bigger, that needs more processing speed.
I will be using Arduino for my final project due to the sign interpretation, such as the trained model for detecting all the signs.
But in conclusion, it's up to your habilites of programming and the use of it that defines which is better.
First Test
After having the code I will test it using a Protoboard for verify the code and find errors before making the PCB.
PCB Board and Case
Like i needed more leds and buttons I will create a new PCB using Fusion and Roland.
Design in Fusion
I know this week isn't about electronics design, so I will be breif in how to use Fusion360 fot it.
When you create a new file you will find the main window, something like this:
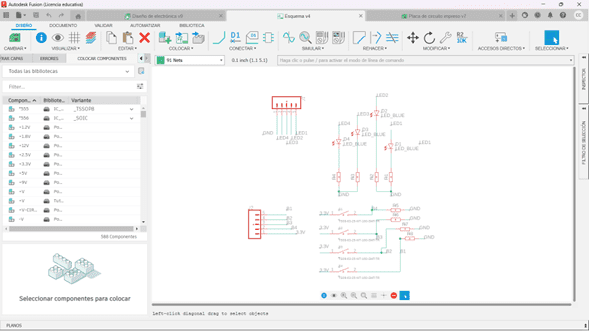
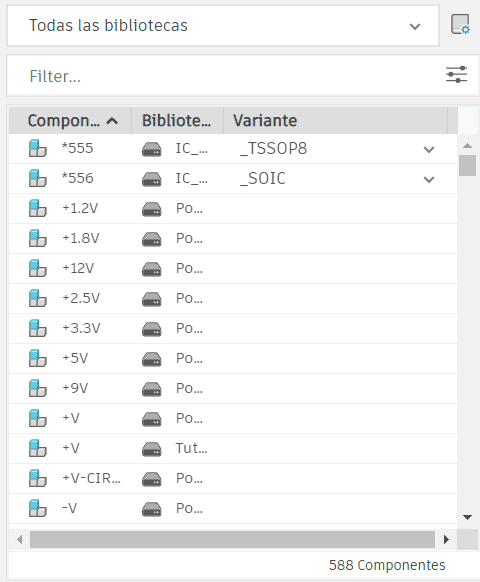
There you can find on the left side all the components and on the top side the conections and lables. For my PCB I insert leds, buttons and resistors of the 1206 meassure, also the head pins for later on soldering pins.
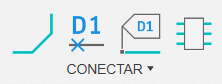
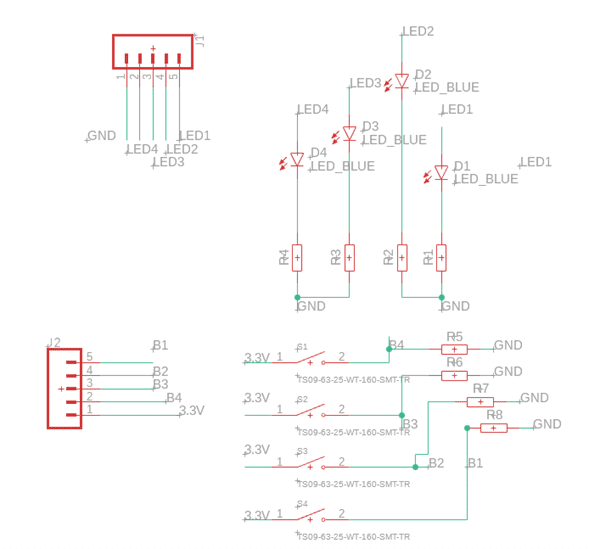
When we got all the conections we can create a board. You will get a black view with red (components). Now it all about conecting the lines, but don't worry the software tell you where it goes youonly have to order it.
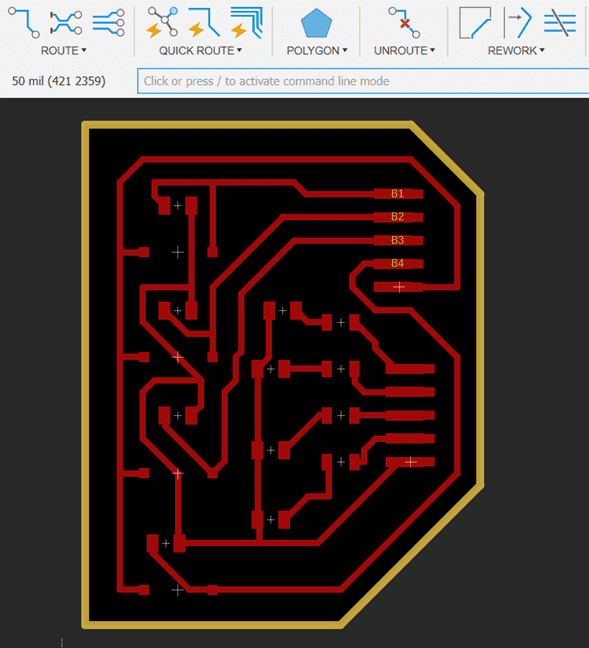
Once you completed all the conections and gave a shape to the board, on the top bar you have to search export and select image.


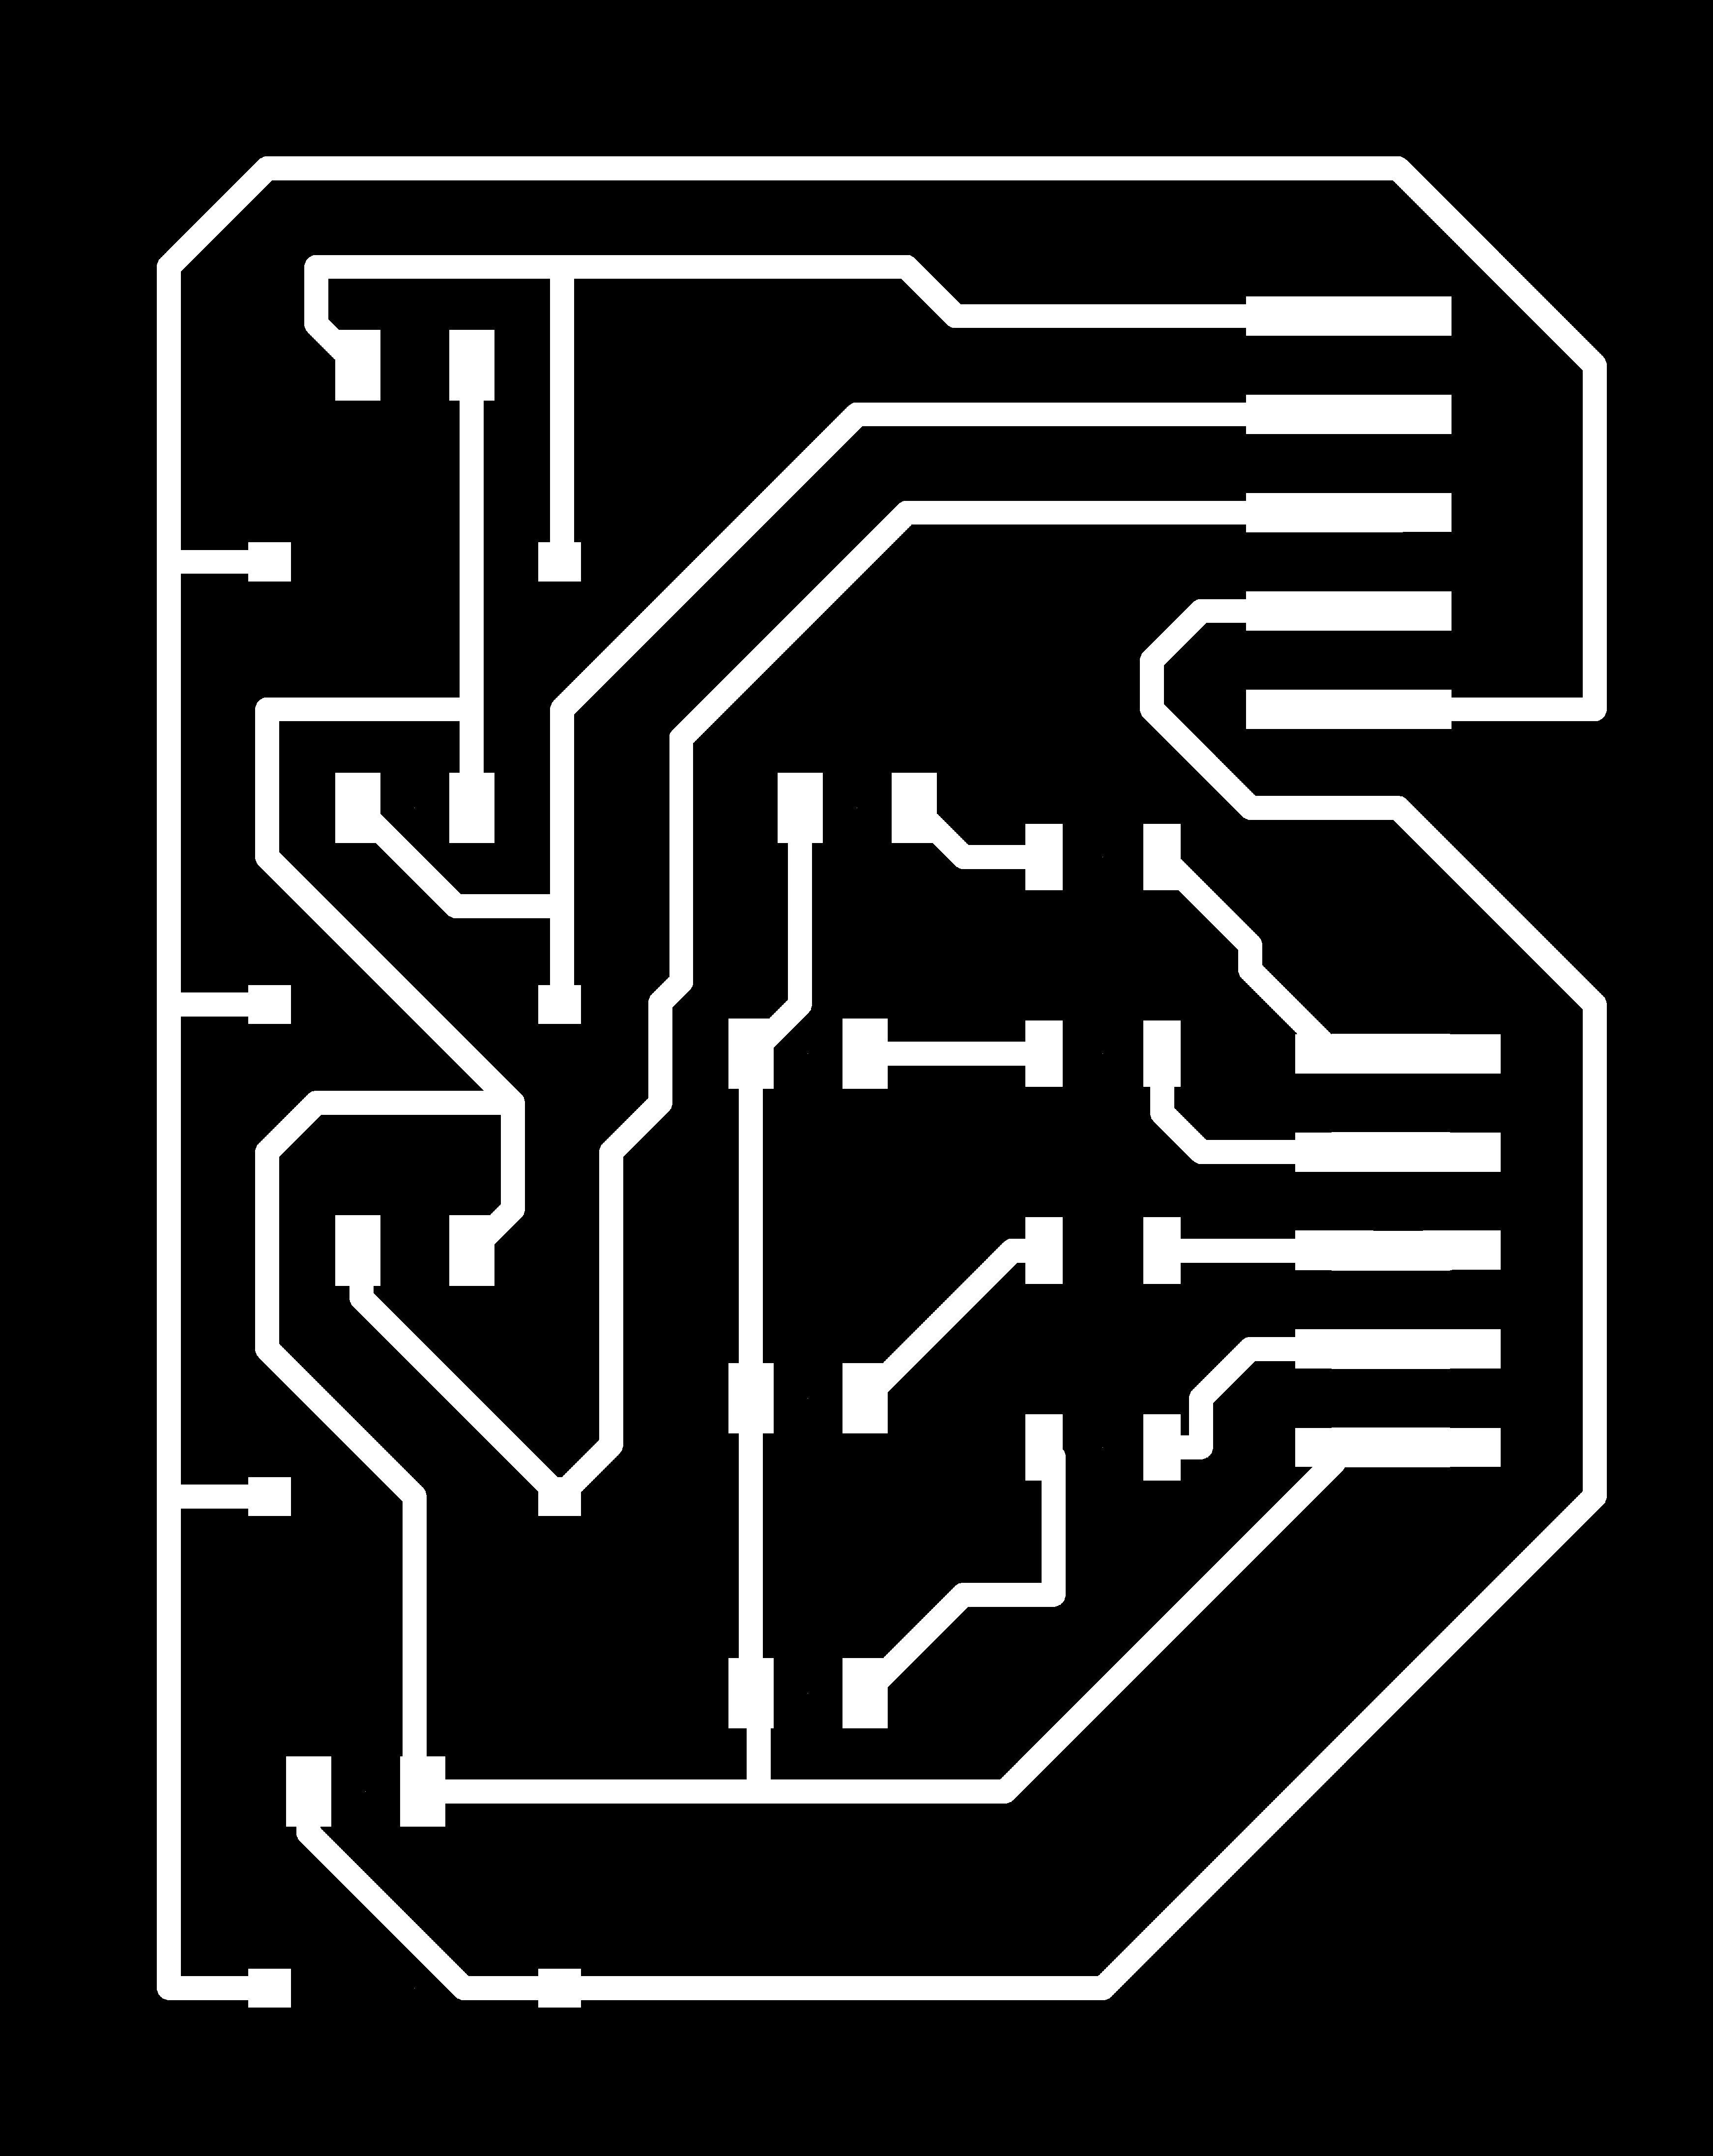

Final
Now it is time to trace and cut it.

After cutting the first one (right) I realized I used the wrong fottprint for the pins, they where too small. So I had to change it to be bigger.

Now that its done I solder all the components. Resulting this way:
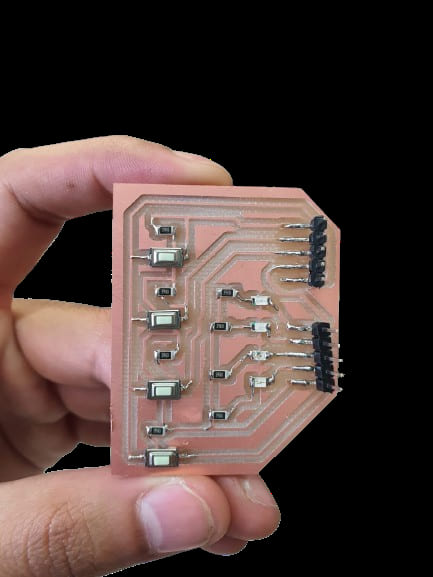
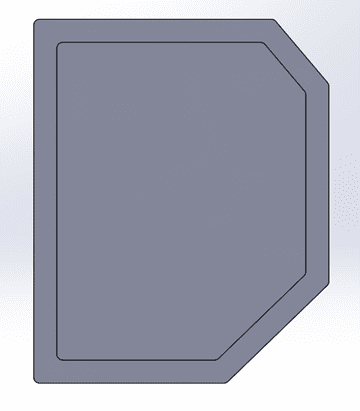
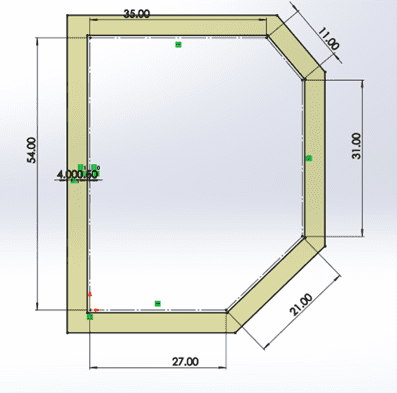
For esthetics I made a case using solidworks and printing it in PLA using the ender printer. Designing
After having the PCB, take the meassurements and create a contour with the 0.5mm of PLA expansion. Give it a PAD and save it as an .stl


We can see all the Code, PCB and Case. Running the code of Simon.
Files