14. Interface and Application Programming
In this week it will be involve the design and building of an User Interface (UI) and implement it with use of a hardware. For example, I will use QT Design to create an app to control a LED, a Servo and read the data of a DTH11 sensor and display it in the app.
Group Page
Qt Designer
Download here
Is a graphical User Interface (GUI) design tool for creating apps. It is used for mobile, desktop and embedded systems.
It is used with drag and drop design with buttons, sliders, text, lables, etc.
QT simplifies the process of UI design in a more efficient way.
How to use it
1
When opening it for the first time you will have this window:

In there you can chose some of the templates on the first window and the screen size. In this case we can use default size to be adjustable later on.
2
Now on the left side we can see different items we can drag into the canva:
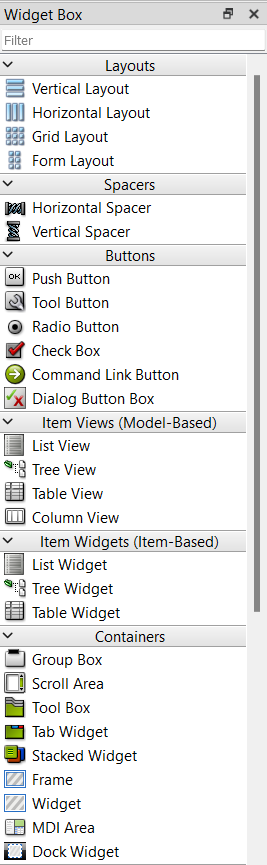

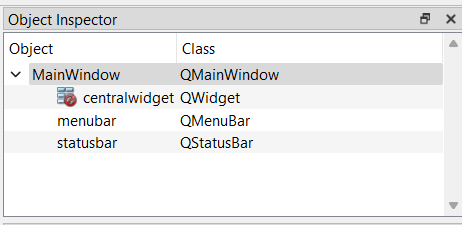
On the top right side we have the object inspector, every time we add an item il will appear here.

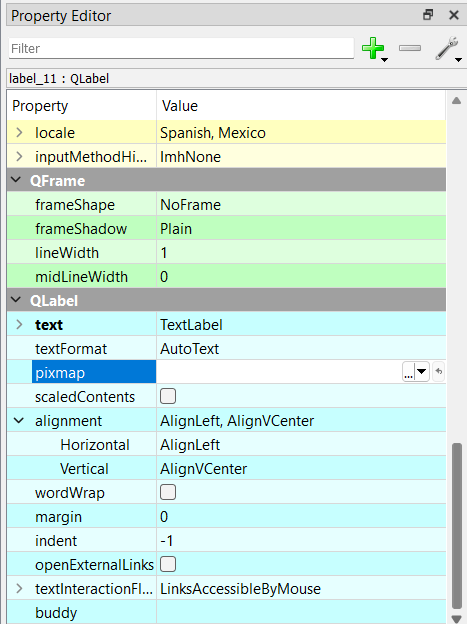
On the button right side we have the property editor in case we can manually change the layout, size, font, etc.

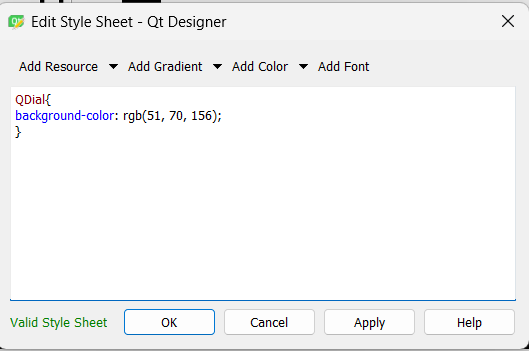
3
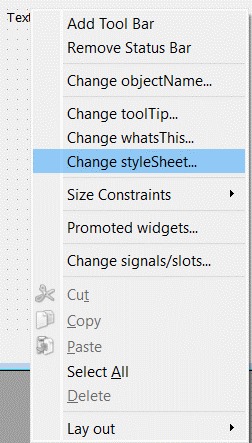
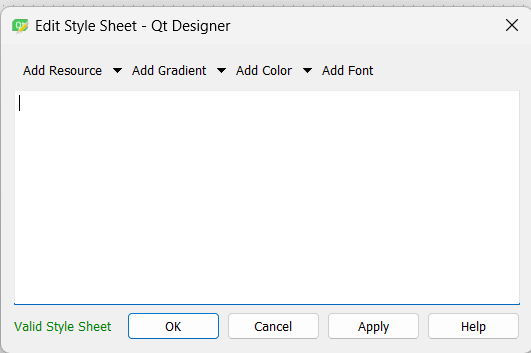
When you have an object on the canva you can Right Click on it and select the Change StyleSheet, this will open a window where you can add CSS code for modifying it.
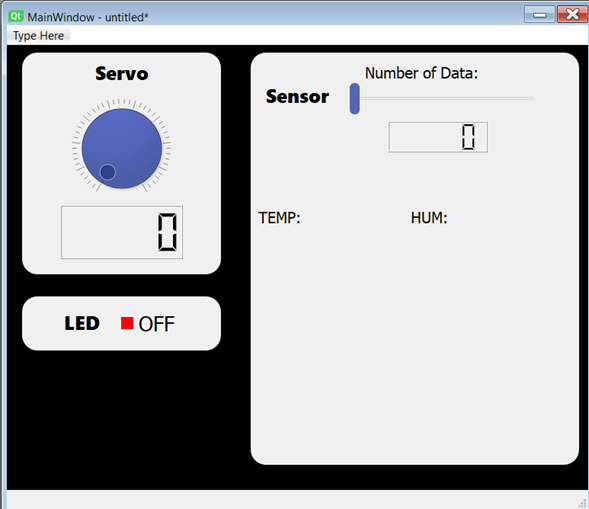
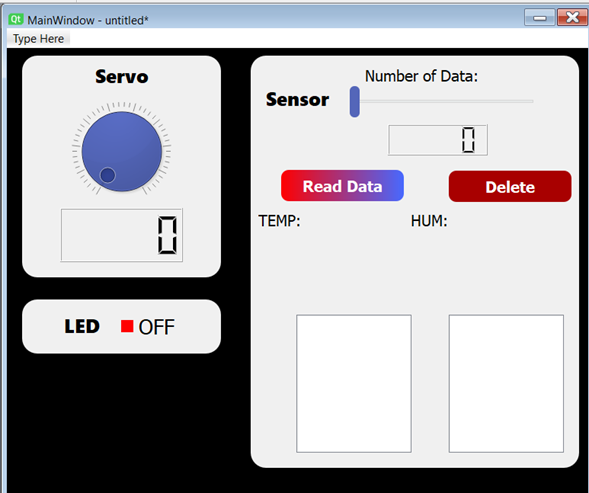
NOW LETS CREATE OUR APP, when finished it will have to look something like this:

App
Step 1:
We will add a LABEL, erease the text and change the style sheet to a black color. Then we will change it size to
cover all the window.


Step 2:
Now we will do something similar for 3 different lables, each one will contain a different action (LED, SERVO, SENSOR).

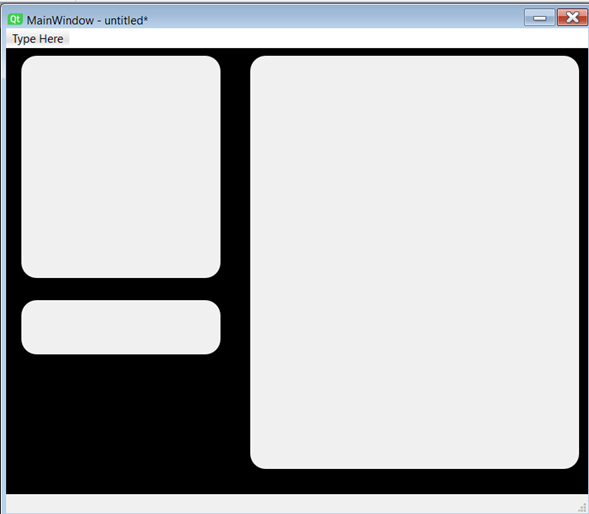
In here we will give a border radius of 20 px.
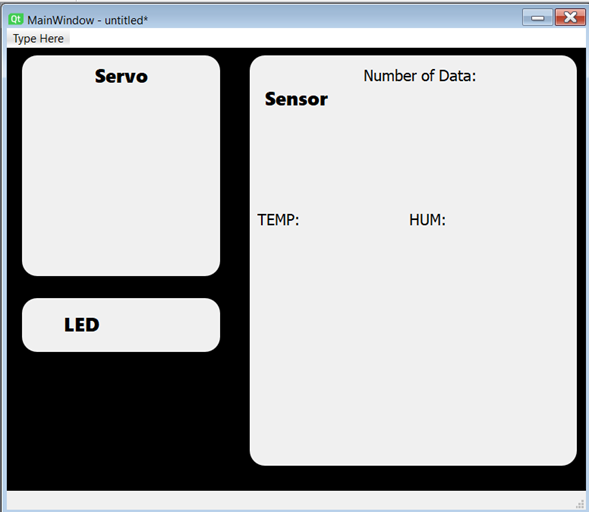
Step 3:
Now we will add 6 LABELS where we will type:
- Servo with Segoe UI Black, 15 with Kerning.
- Sensor with Segoe UI Black, 15 with Kerning.
- LED with Segoe UI Black, 15 with Kerning.
- Number of Data with MS Shell Dig 2, 12 with Kerning.
- TEMP: with MS Shell Dig 2, 12 with Kerning.
- HUM: with MS Shell Dig 2, 12 with Kerning.
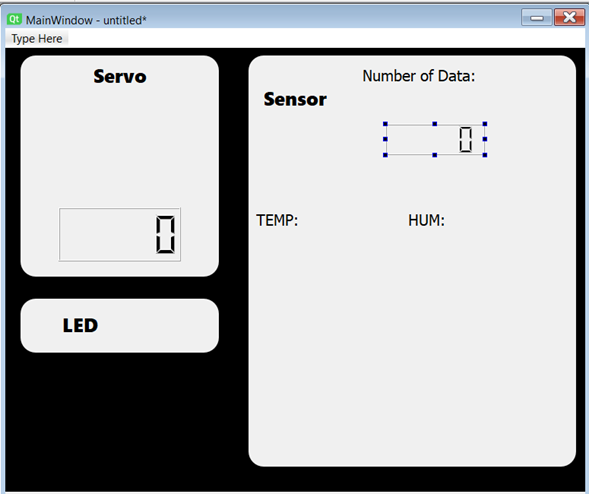
Now add 2 LCD Numbers for diplaying a value, in this case the servo position and the number of data.
Step 5:
We will add a DIAL that controls the Servo, we will change its color and format.
And select the notchesVisibles on the bottom side of the property editor.

Step 6:
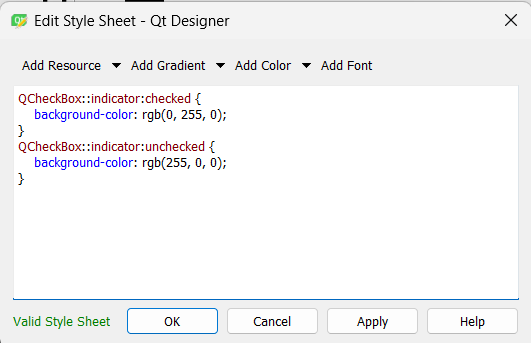
Add a CHECK BOX that will change the state of the LED. Write OFF on it.
By changing the style sheet we can make the box change its color when checked.

Step 7:
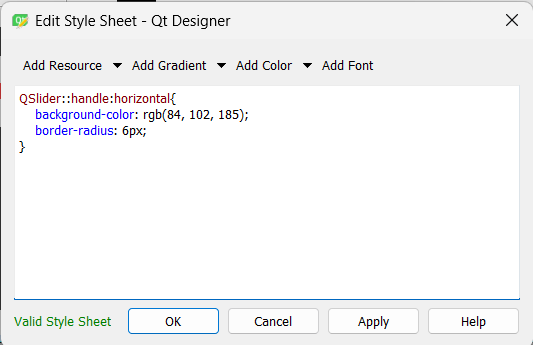
Add an HORIZONTAL SLIDER to select the number of data.
We change its color to match the dial and give a radius.
Step 8:
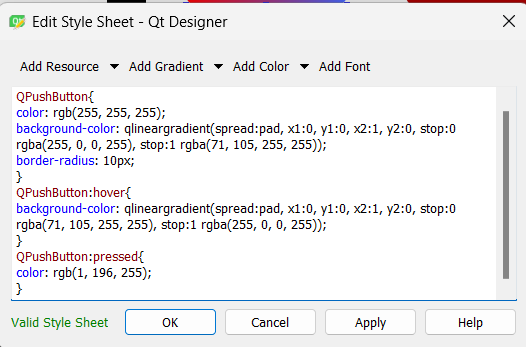
We will add 2 PUSH BUTTONS that will send the data to the app or delete them.
With the first button we will change the label to Read Data, with this style:

With the second one will change the label to Delete, with this style:


Step 9:
Add 2 LIST WIDGET, in here the data will be display on a list.
Step 10:
For last adding some images, for this it is important to have the images on the same folder where the QT is.
You will add 3 LABELS and on the Property Editor, there is a section where it says pixmap, by clicking the arrow you can browse the image you want.
Libraries and formats
When saving the QT File it has a format of .ui, but with help of Python and some Libraries we can change it.
On the CMD we will run Python and install Pyq6 with: pip install Pyqt6
After having this we can change the format very easily: pyuic6 -x "name.ui" -o "name.py"
After running this line we will get a python code, I will be using VSCode for running the app.
Python Code
When creating apps sometimes we need to change some desing or display something else, if we modify the file que just
create and later on we make some changes we will lose everything.
So we will create a new file "app" to separate hardware and design.
APP Code
This is the main code where we will declare the variables and what we will do.
						from interfaz import *

						class MainWindow(QtWidgets.QMainWindow, Ui_MainWindow):
						    def _init_(self, *args, **kwargs):
						        QtWidgets.QMainWindow._init_(self, *args, **kwargs)
						        self.setupUi(self)

						if _name_ == '_main_':
						    app = QtWidgets.QApplication([])
						    window = MainWindow()
						    window.show()
						    app.exec()
App new
After adding all the parameters we will change and send them to the serial comunication we have this explained code:
						from sensfab import *
						import serial
						import time

						class MainWindow(QtWidgets.QMainWindow, Ui_MainWindow):
							def __init__(self, *args, **kwargs):
								QtWidgets.QMainWindow.__init__(self, *args, **kwargs)
								self.setupUi(self)

								self.serial = serial.Serial('COM5', 9600)

								self.numdatos = 0
								self.potpos = 0
								self.todo = ""
								self.lista = []
								self.temperatura = 0
								self.humedad = 0
								self.ledstate = 0

								self.horizontalSlider.valueChanged.connect(self.numdatos_func)
								self.dial.valueChanged.connect(self.pot_func)
								self.pushButton.clicked.connect(self.leer)
								self.pushButton_2.clicked.connect(self.borrar)
								self.checkBox.clicked.connect(self.led)

							def numdatos_func(self):
								self.numdatos = self.horizontalSlider.value()
								self.lcdNumber_2.display(self.numdatos)

							def pot_func(self):
								self.potpos = self.dial.value()
								self.lcdNumber.display(self.potpos)
								self.senddata()

							def leer(self):
								for i in range(self.numdatos):
									self.todo = self.serial.readline().decode('utf-8')
									self.lista = self.todo.split(",")

									if len(self.lista) >= 2:
										self.temperatura = self.lista[0]
										self.humedad = self.lista[1]
										print(float(self.temperatura))
										print(float(self.humedad))
										self.listWidget.addItem('Temperatura: ' + self.temperatura + ' °C')
										self.listWidget_2.addItem('Humedad: ' + self.humedad + ' %')
									else:
										print("Invalid data format:", self.todo)

									time.sleep(1)

							def borrar(self):
								self.listWidget.clear()
								self.listWidget_2.clear()
								self.lista.clear()

							def led(self):
								if self.checkBox.isChecked():
									self.ledstate = 1
									self.checkBox.setText("ON")
								else:
									self.ledstate = 0
									self.checkBox.setText("OFF")

								self.senddata()

							def senddata(self):
								print("enviando datos...")
								data = f"{self.potpos},{self.ledstate}"
								self.serial.write(data.encode())
								print(data.encode())
								print("se enviaron datos")

						if __name__ == '__main__':
							app = QtWidgets.QApplication([])
							window = MainWindow()
							window.show()
							app.exec()
Arduino Code
As Python can only run in computers and not in Hardware we need to use Arduino to manipulate the external Hardware (LEd, SERVO, SENSOR).
This is the code, the same way using serial to comunicate with the app in Python:
						#include DHT.h
						#include Servo.h

						#define DHTPIN D2
						#define DHTTYPE DHT11

						Servo myservo;
						int servopos = 0;
						int LED = D0;
						bool ledstate = false;

						DHT dht(DHTPIN, DHTTYPE);

						void setup() {
							Serial.begin(9600);
							pinMode(LED, OUTPUT);
							myservo.attach(D4);
							dht.begin();
						}

						void loop() {
							if (Serial.available() > 0) {
							servopos = Serial.parseInt();
							ledstate = Serial.parseInt();
							myservo.write(servopos);
							digitalWrite(LED, ledstate);
							}

							float t = dht.readTemperature();
							float h = dht.readHumidity();
							String data = String (t) + "," + String(h);
							Serial.println(data);
						}
Results
On the left side we have the app we just created running in python.
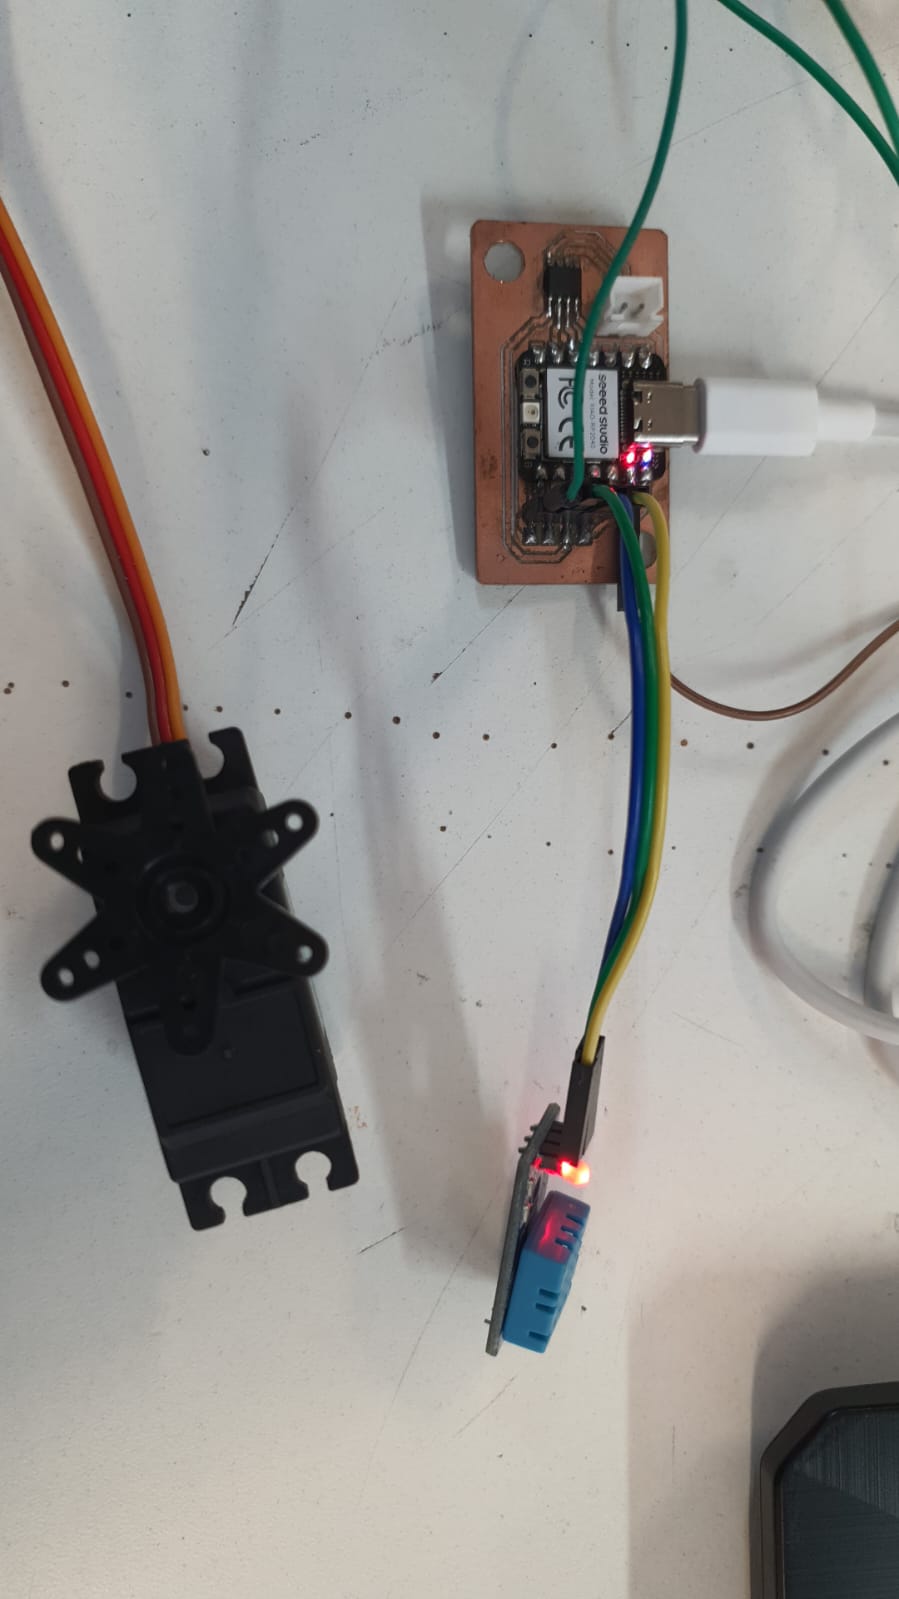
On the right side it is running on the Xiao Rp 2040 with the LED in DO, Servo and DTH11.
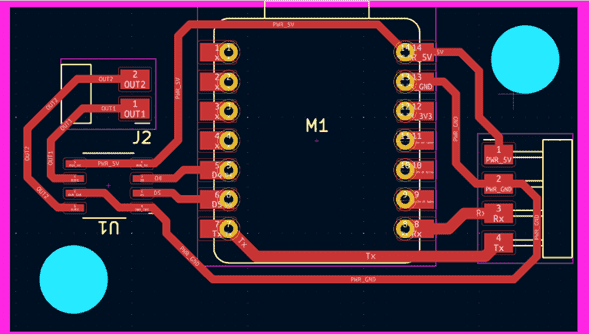
Lets do it with our Speaker Board
As we use a Bluetooth on our speaker board, we can use RX and TX as the data for the sensor and the servo.
Here is the schematic of the PCB:
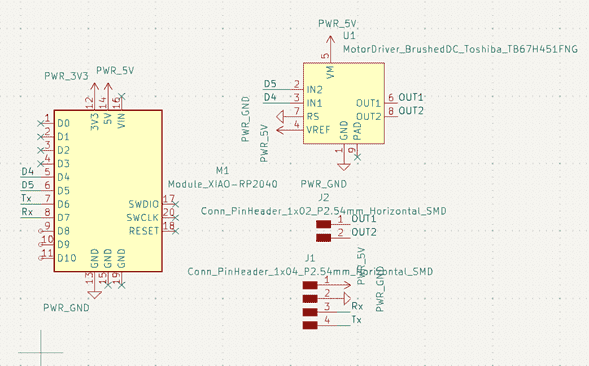
Using pins D6 and D7 we change our code to something like this:
						#include DHT.h
						#include Servo.h

						#define DHTPIN D7
						#define DHTTYPE DHT11

						Servo myservo;
						int servopos = 0;
						int LED = LED_BUILTIN;
						bool ledstate = false;

						DHT dht(DHTPIN, DHTTYPE);

						void setup() {
							Serial.begin(9600);
							pinMode(LED, OUTPUT);
							myservo.attach(D6);
							dht.begin();
						}

						void loop() {
							if (Serial.available() > 0) {
							servopos = Serial.parseInt();
							ledstate = Serial.parseInt();
							myservo.write(servopos);
							digitalWrite(LED, ledstate);
							}

							float t = dht.readTemperature();
							float h = dht.readHumidity();
							String data = String (t) + "," + String(h);
							Serial.println(data);
						}
Once changed the code and connect everything it should run the same.
All the files of the speaker can be found on the final proyect page.
Files