3D Scanning & Printing
Group assignment
- Test the design rules for your 3D printer(s).
-
Document your work on the group work page and reflect on your individual page what you learned about characteristics of your printer(s).
3D printing, also known as additive manufacturing, is a manufacturing process that creates three-dimensional objects from a digital file by building up layers of material until the final product is complete.
Here in TechWorks, there are different kinds of 3D printing technologies. For the FDM technology we will characterize PRUSA and ULTIMAKER-S5:

Before start operating on the machine, always we should follow the safety instruction:
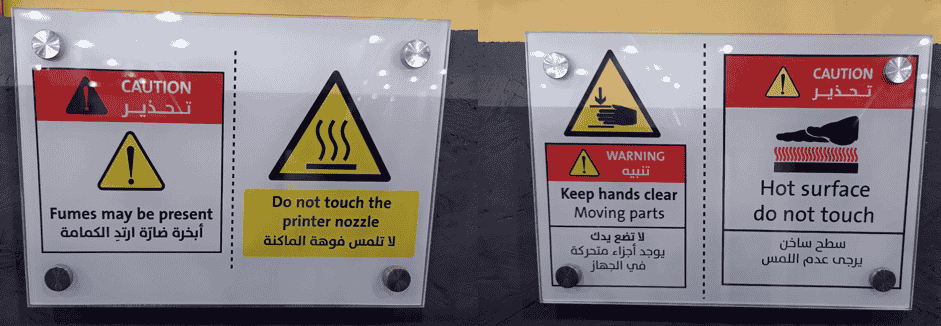
Every 3D printer, have capabilities like print resolution, volume of the build plate, nozzle diameter etc., those capabilities affects on the result of the 3D printed model, in this assignment, we will discover the ULTIMAKER-S5 and PRUSA capabilities by printing different tests with different settings
To start discovering, we had to download the tests files, all files extension should be .STL, so we can import them to CURA; CURA is a software, which is a slicer used to slice the 3D model into layers, each layer have a set of coordinates that tha 3D printer will follow.
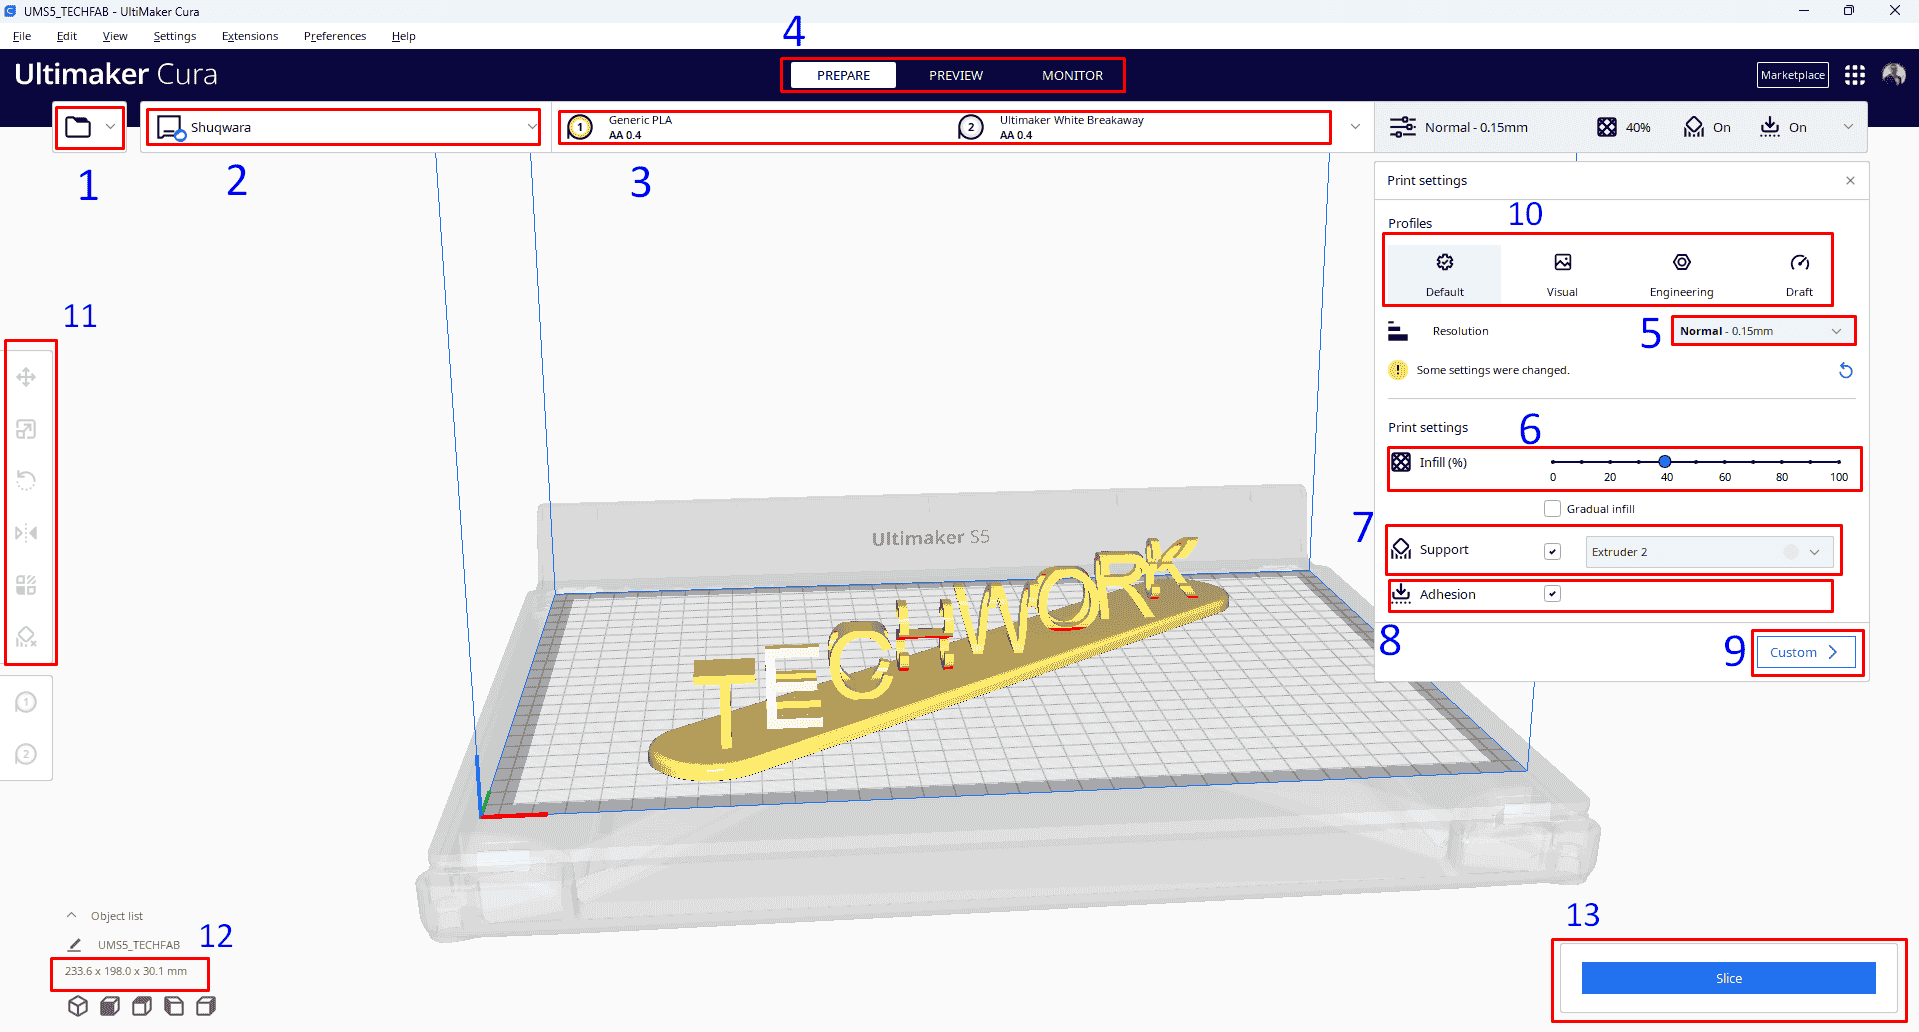
CURA has clear interface as shown below:
- 1: Open a file.
- 2: Choose the printer type.
- 3: Choose material and nozzle.
- 4: Prepare shows the model while preparing, Preview shows how tho model looks like after slicing, Monitor to track the model while printing and this only with camera provided printers.
- 5: Layer height or resolution.
- 6: Infill amount and if we clicked on gradual, the infill will start from low percentage to the maximum.
- 7: Enable support or not and choose the support nozzle.
- 8: Enable Adhesion or not.
- 9: To customize more settings.
- 10: choose the purpose of the part, if it's engineering to have precise parts with accurate dimension, or visual so the surface quality that mostly matters, or just draft to see how the model looks like.
- 11: Tools to change the model location on build plate, scale ,rotate multiply, mirror and block setting to make exceptional settings for certain areas.
-
12: Dimension of the model in, X,Y,Z.
After we choose the print settings, we click on slice, and from preview tab we can see the result of slicing to check if everything goes right, then we can print directly using cloud or save the file to the disk:
The image below how the support looks like, and the number of layer with addition to print time needed and the amount of filaments:

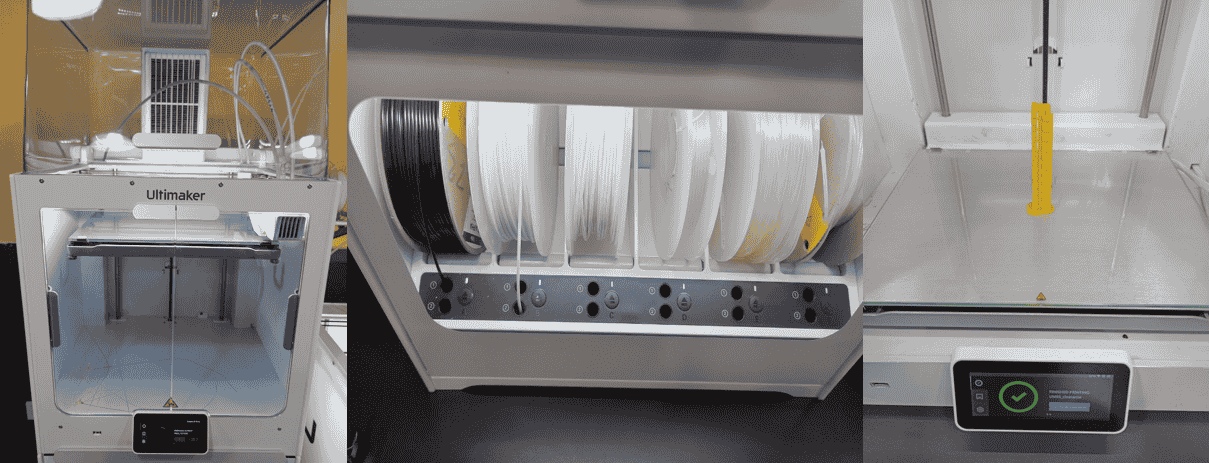
After preparing the models on cura, we had to prepare the printer as well, so we inserted the filaments, then make sure the nozzle diameter is correct then we send the model by cloud or by USB, and after the print has done, we can confirm the removal as shown below from the left:
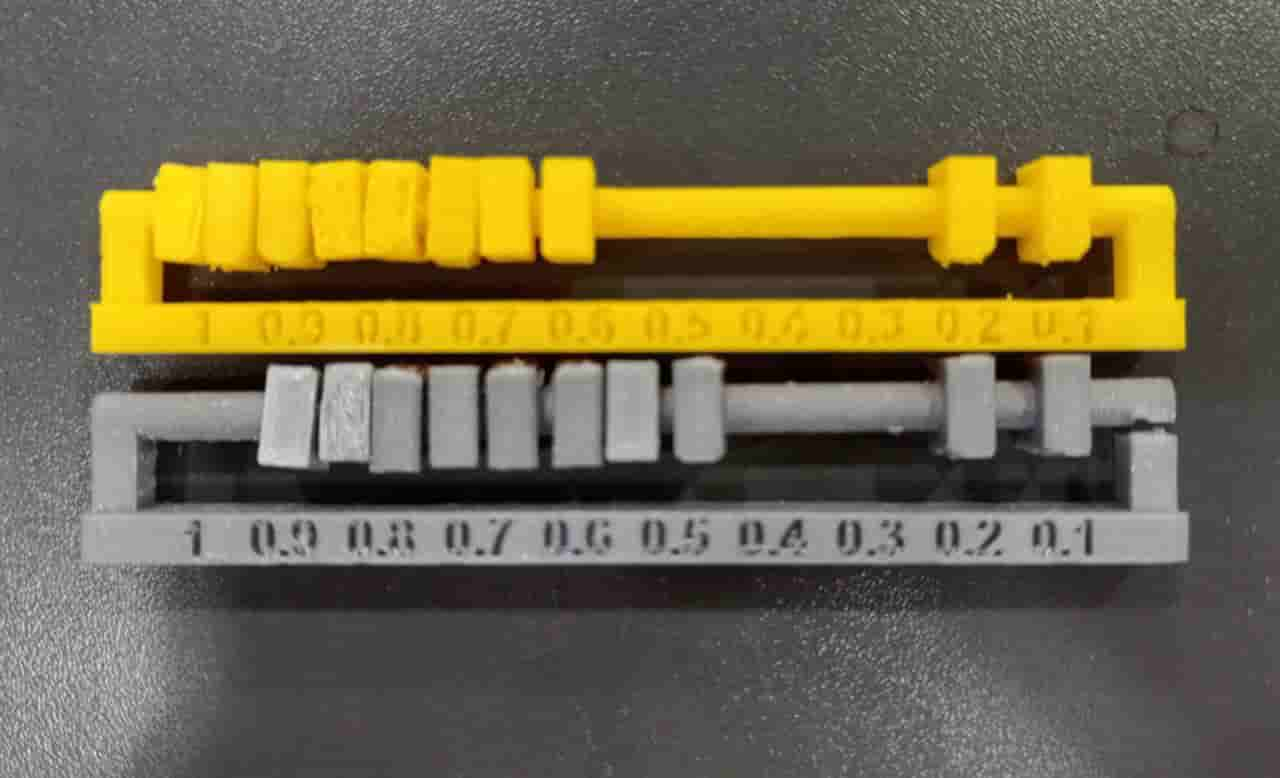
For all tests the infill was 20%, layer height or resolution 0.2 and 70mm/s speed, now the first test was clearance test with support only and brim on prusa. For both tests (gray for prusa, yellow for ultimaker) the clearance 0.2 or 0.1 was not enough to keep the square sliding and the square and the rod welded together:
The second test was the bridge on prusa with brim only, and it showed a good bridging at distance 180mm and below:

The third test was the bridge on ultimaker with brim only, and also it showed a good bridging at distance 180mm and below:

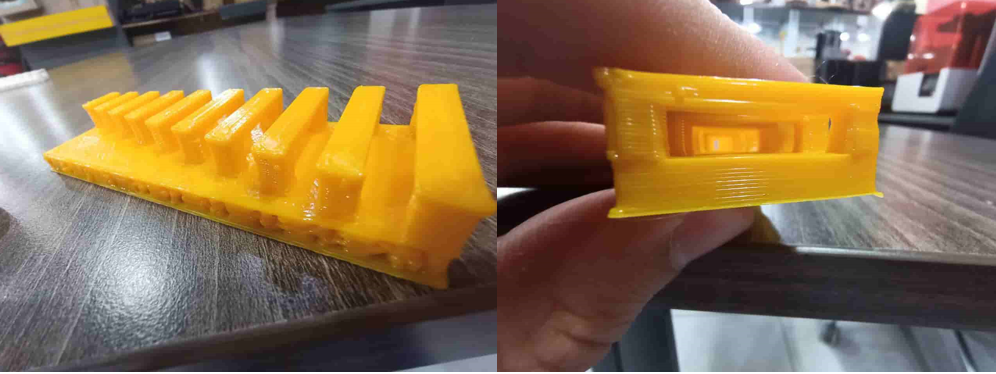
The bridge test with 0.8 nozzle on ultimaker with brim, was impressive, the dimension of some sides not accurate
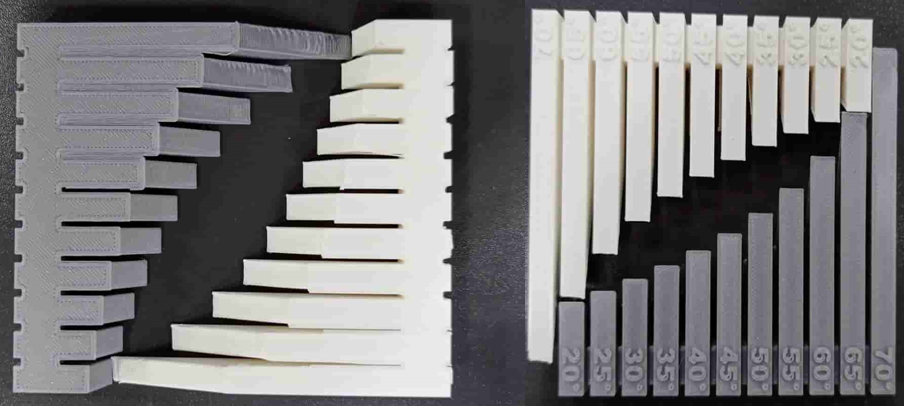
For the fourth test was the overhang test with brim only, (gray for prusa, white for ultimaker) for prusa it showed a good quality and stands without support up to 60 degrees and ultimaker was up to 65:
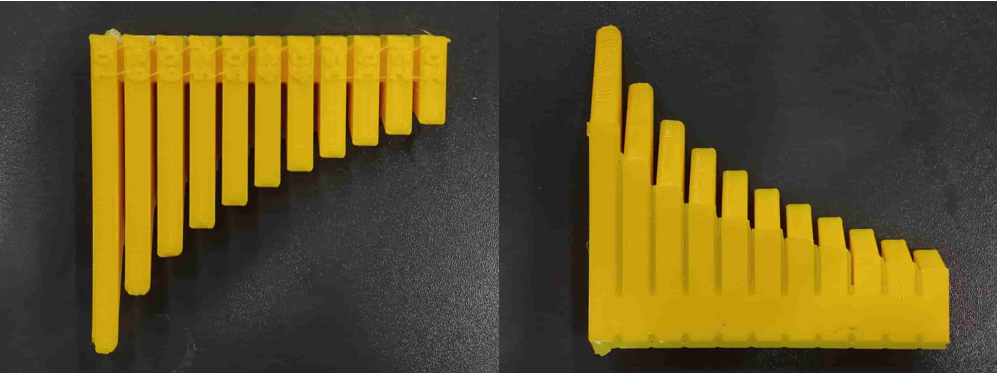
We tried also to test the overhang on ultimaker with 0.8m nozzle diameter and brim, it was interesting to test it the surface was amazing up to 50 degrees, but the numbers was not clear well to read:
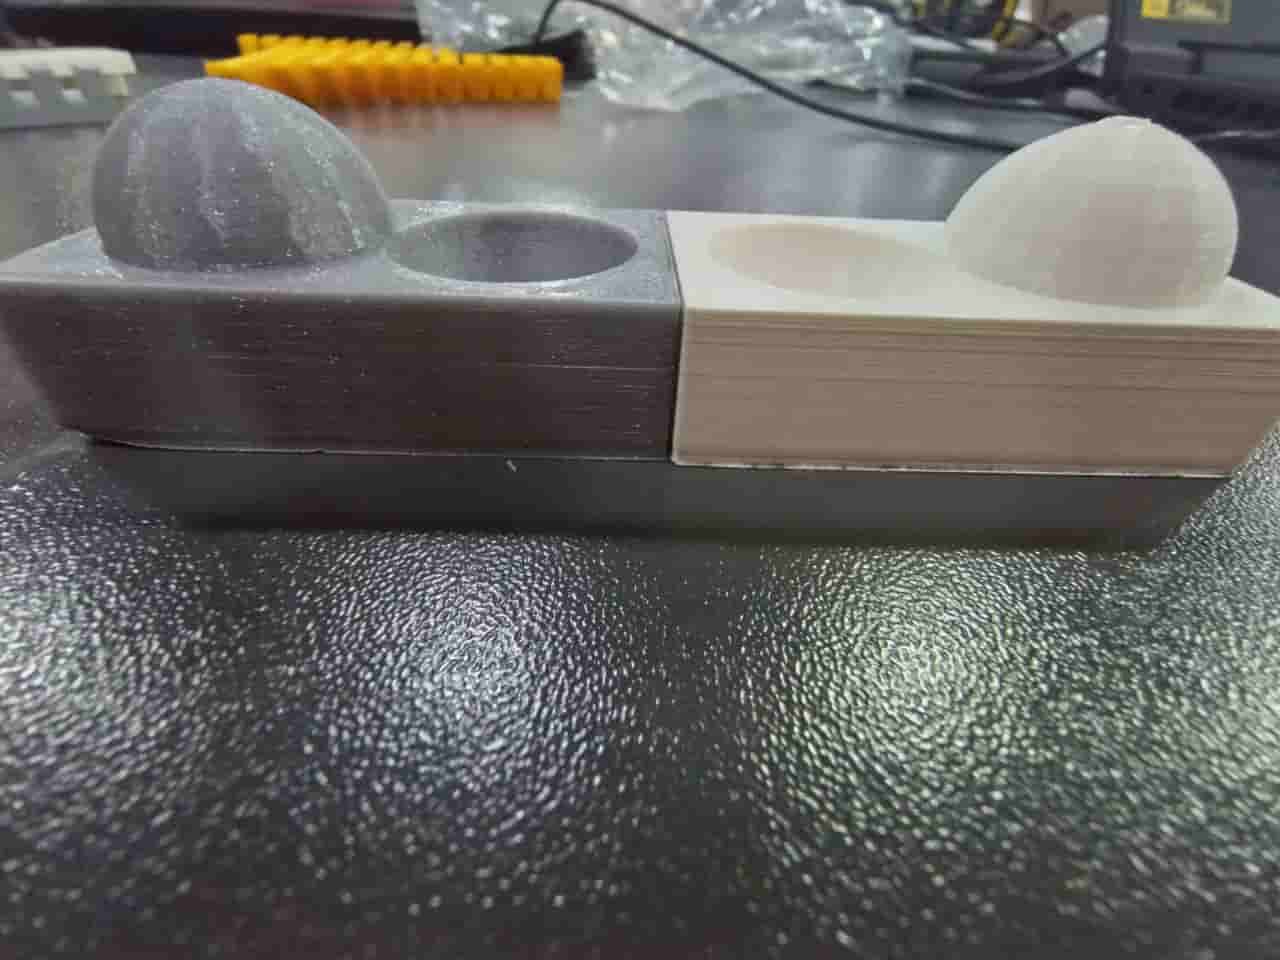
For the fifth test, it was the surface finish test; the gray one was for Prusa and the white for Ultimaker, we used the brim on Ultimaker only, and we noticed that without the brim, a slight warping happened to the part that did not have a brim, but for the surface quality booth test shows good quality.
individual assignment:
3D Printing
For 3D printing assignment I have designed a couple of things with Fusion 360. First I designed a Ring to print it using SLA technology. it could not be milled because it has a very small holes all around, so the milling tool could not reach them in all angles.
After I designed the body, I converted it into mesh, so it could be easily edited then I exported the mesh as .stl file by right click on the mesh > save as mesh
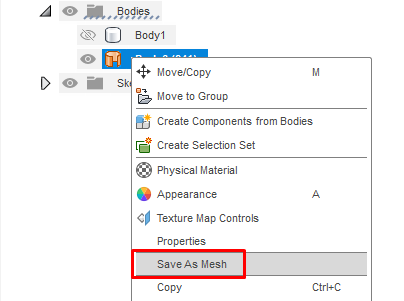
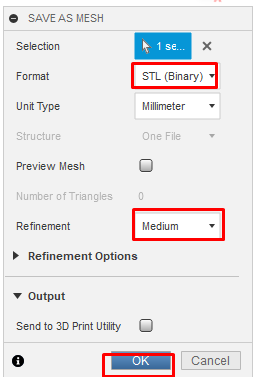
Then chose the binary and medium refinement > then ok:
For designing the ring, I have used the spline, then I navigated to solid> create> pipe to make the solid ring then from the same list I used Tours shape then adjusted the height so it could be in the middle then I combined them using combine from modify tab and after that, from mesh tab, from create > tesselate and proceeds with default settings to convert the body into meshes, then from modify > Reduce with density 0.01 then from modify > convert mesh and finally I saved the mesh by following the previous steps.
After I designed it I converted it to mesh so I can edit it easily, then after I exported the body I have used a voronator that helps to convert the body into voronoied shape and video below shows how the design looks like, worth to be mentioned that the diameter of the ring is parametric so anyone now could make his own ring!
The second design is ball in a ball, I designed it on fusion 36, the details of the outer wall and the ball inside makes it could not be milled.
I have used loft command to connect between two planes and the revolve to make a revolute circle with addition of construction planes to help while sketching as shown below, the ball could be scaled up or down using fusion 360 or any other softwares like cura, meshmixer and 3D Builder.
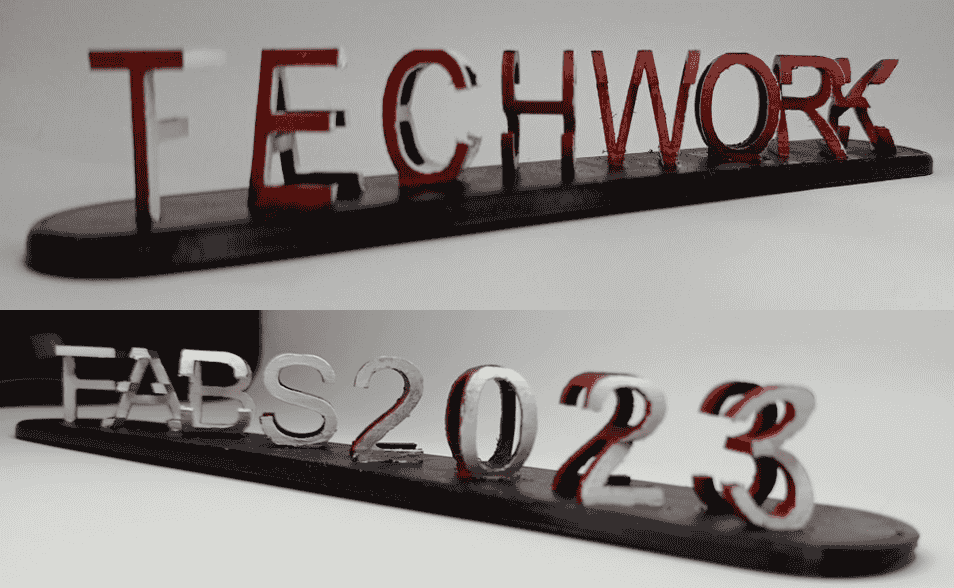
The third design was a desktop sign with Techworks and FABS2023 name at the same board, could not be milled because of the undercuts of the letters.
I have used the text command in order to write the two words then using intersection I have deleted the rest of the intersected parts and only kept the diagonal words as shown below:
To start printing with SLA Form 3B+ machine I had to prepare the model on Preform software:
- 1: Tools bar, to setup the model automatically, to scale model, rotate, generate support and print.
- 2: Layers slider, view positions.
- 3: Define printer, material type and layer height.
- 4: Print details, time, number of layers and the amount of material needed.
- 5: Shows the printability of the object, and shows the warnings.
- 6: Build plate volume.

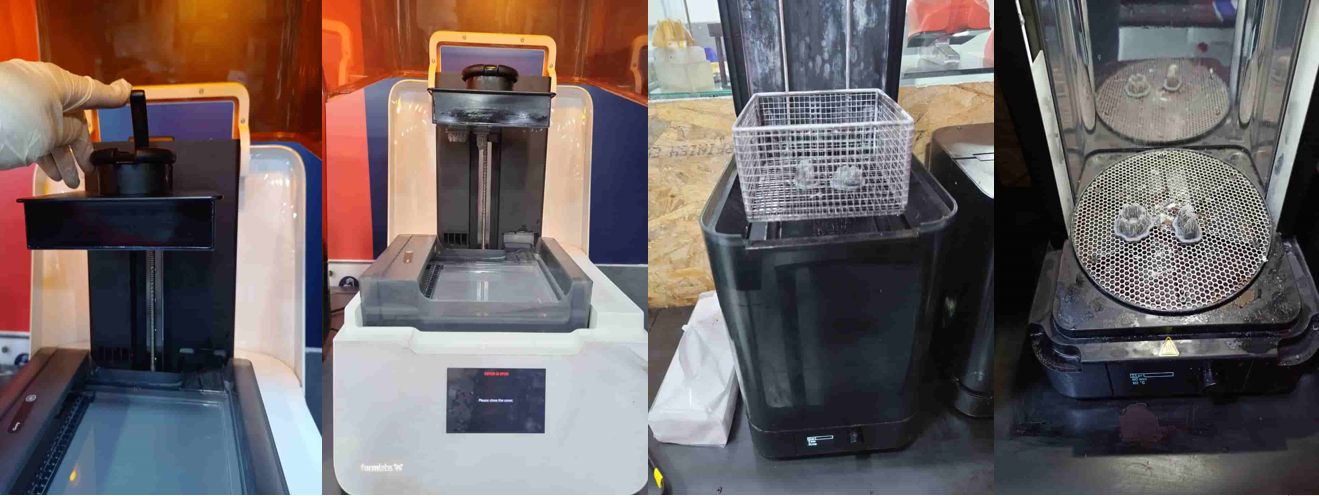
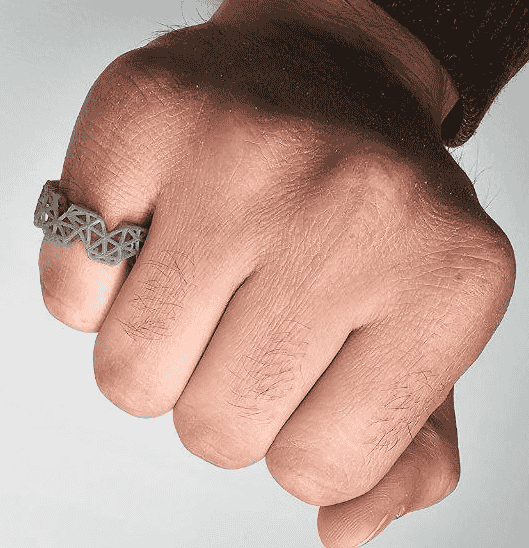
I chose the gray resin for the ring, with 0.015mm layer height and autogenerated the support; after preparing the model, I send it to the machine; after it finishes, it will be ready for post-processing. The post-processing includes washing the object in alcohol to remove all resin remaining on the surface, then curing to improve the material's properties, such as mechanical and chemical. There are a helpful links to guide about how much time to wash and cure. The picture below (from the left), the first picture shows how to install build plate, the second shows the print after it finished and the rest are the washing and curing machine respectively:
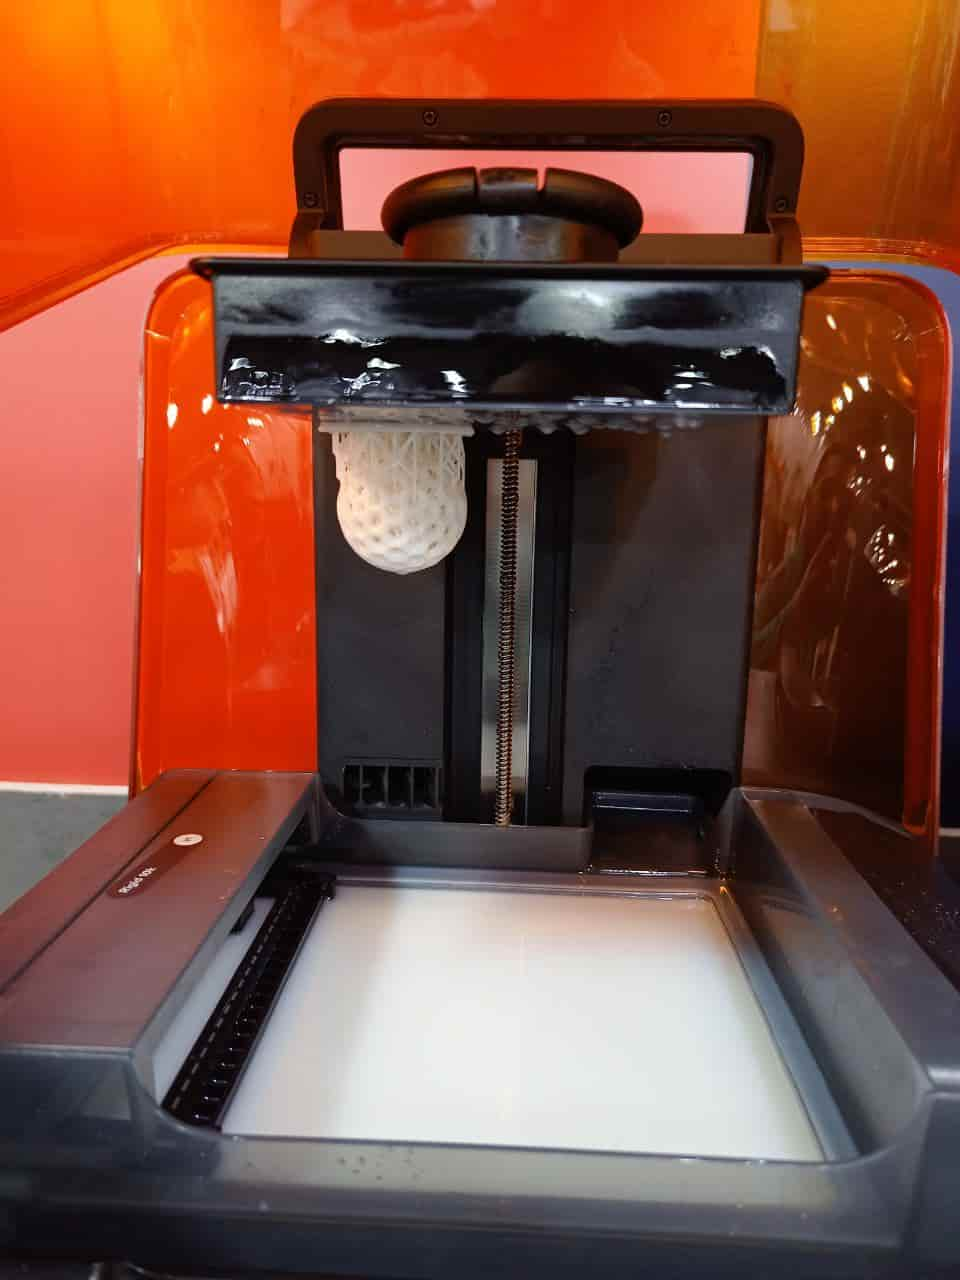
For the Ball in the ball, I printed it also with same settings of the ring but with rigid 10k resin:
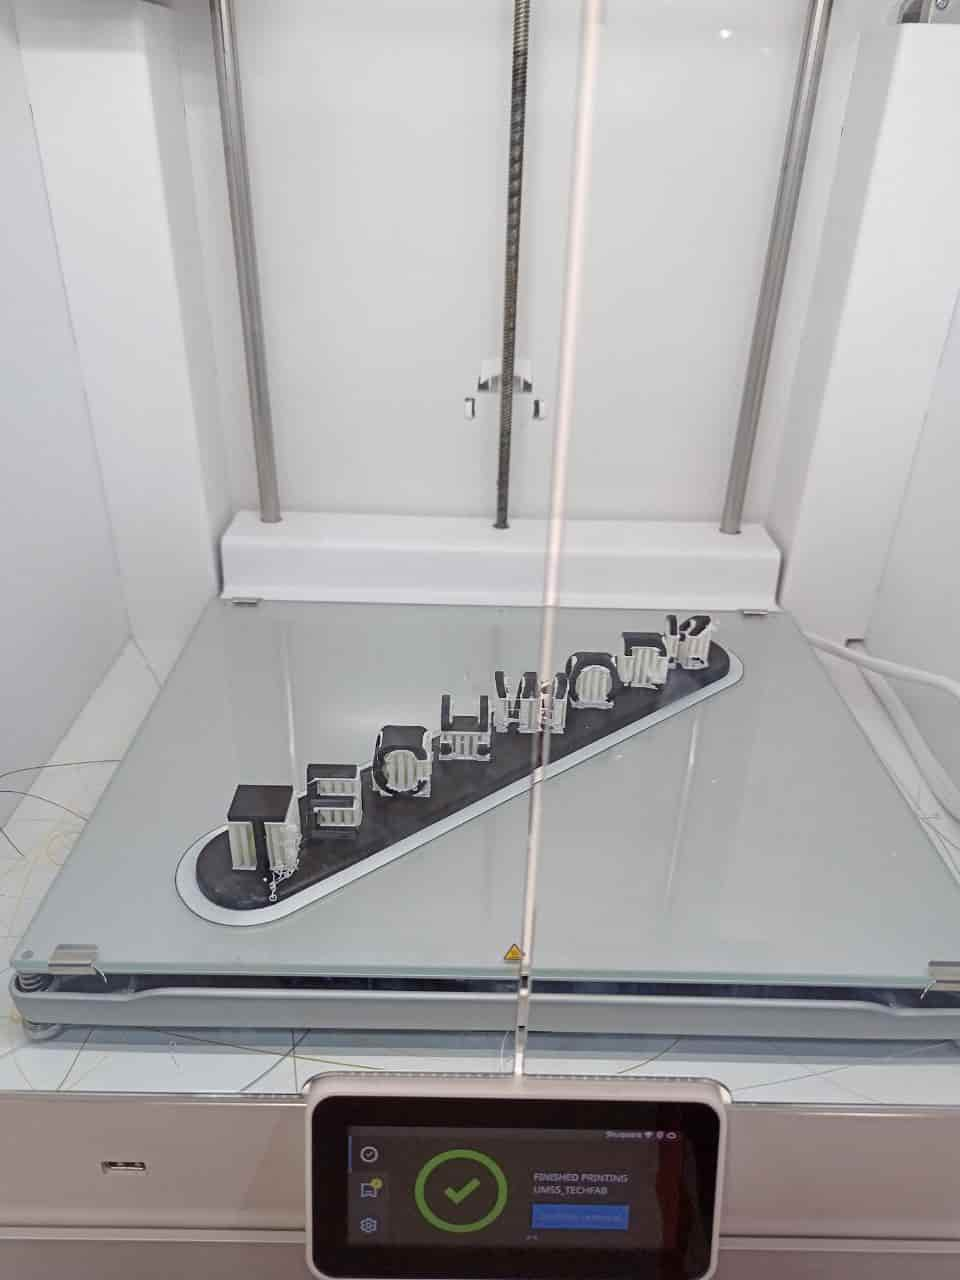
The final print was on FDM but I chose 2 types of materials, PLA for the body and the Breakaway for the support and brim with 0.2mm layer height and 30% infill.
I used the the breakaway filaments , because it is easy to remove, and since I have undercuts and hard to reach areas it could be a good choice, also I used the same material as a brim, the brim is a single layer around the base of the model that helps the object to adhere well and avoid unsticking of the model while it is printing.
3D Scanning
There are a lot of applications and softwares that could be used to 3D scan objects, one of them is Artec Studio 17
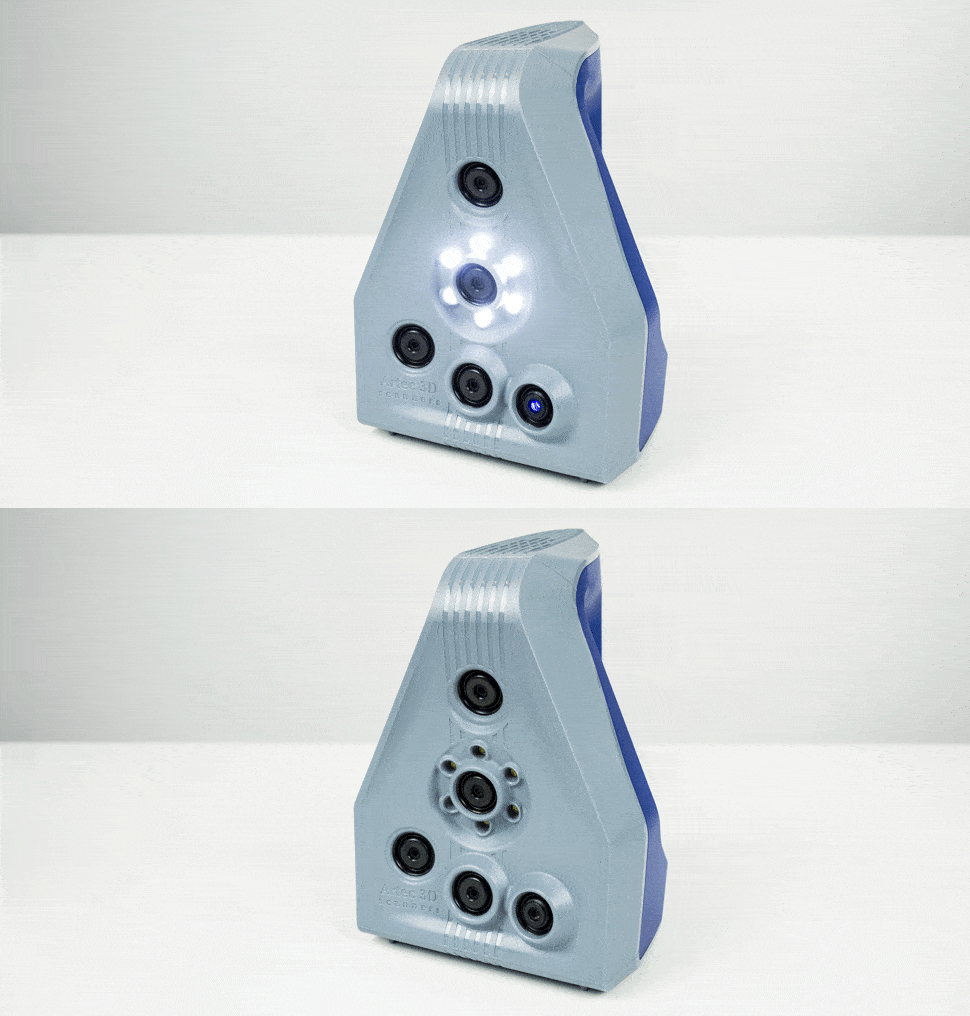
Artec Studio 17 is an advanced 3D scanning and data processing software designed to work seamlessly with various Artec 3D scanners, including the Artec Spider which we got here in TechWorks.
The Artec Spider is a high-resolution handheld scanner, perfect for capturing small and intricate objects with an amazing precision.
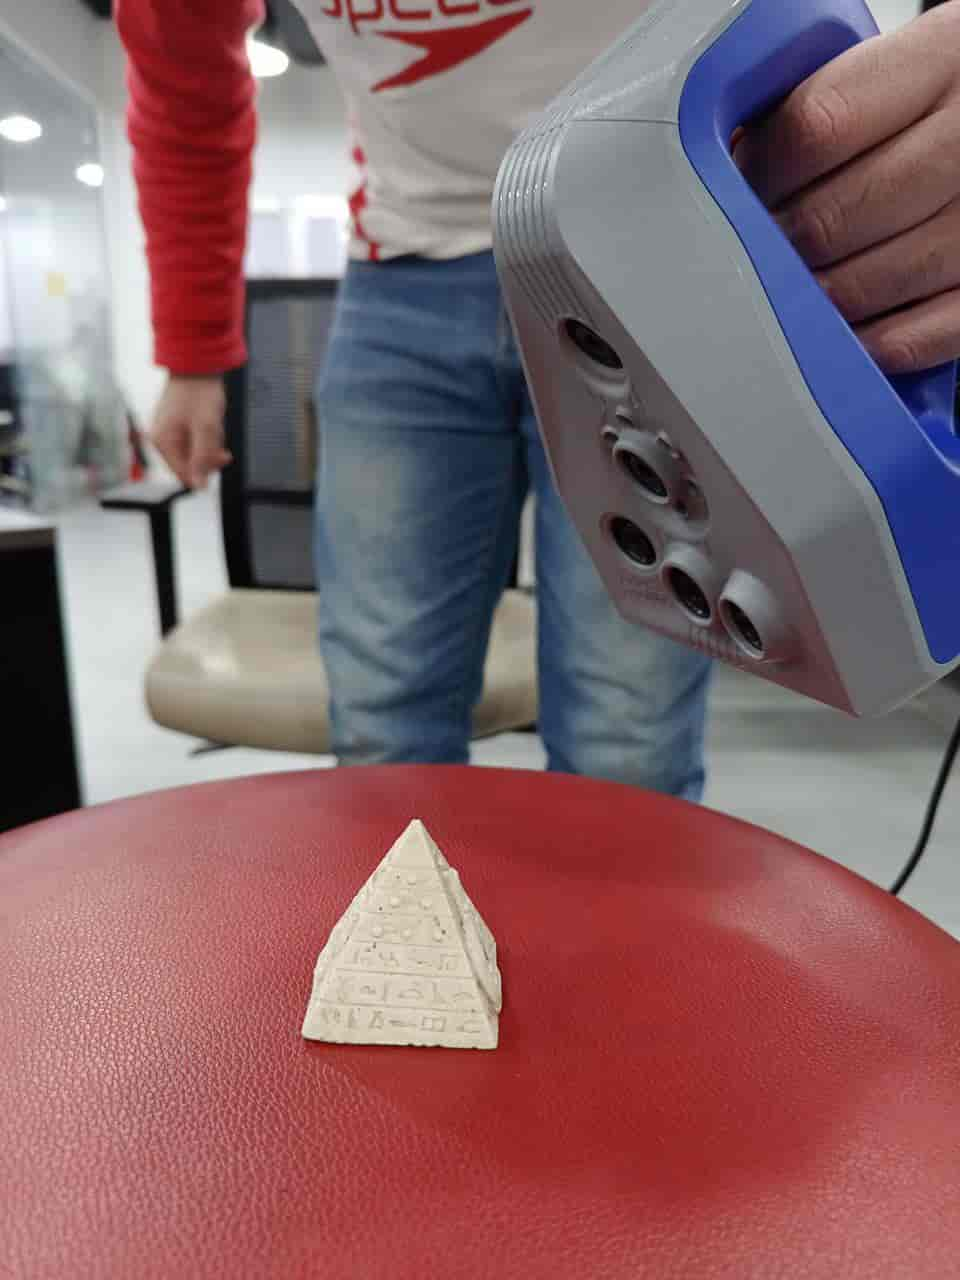
I had to prepare the part that I need to scan which is a small pyramid, I put it on a rotation chair that allows me to scan the object easily
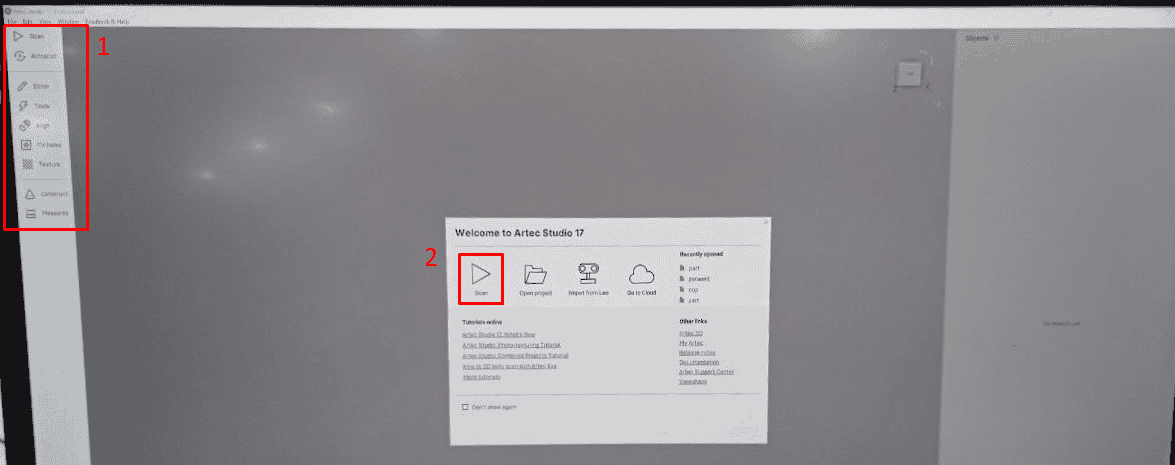
From the image below we can see on the left the edit menu and 2 is the start scanning button
I have connected the scanner to the pc then I have pressed on the scan button to start scanning as shown below:
I made 2 scans one for the four facades of the pyramid and the second was to the base, after the scanning is done I cleaned the scan from any extra parts that are not from the model then using Autopilot it converted to a 3d mesh object and there is a helpful video that shows the process.
The picture below, shows how the 2 scans was then before cleaning scans I aligned them to check if they could be aligned or not > cleaning the first and second scans > alignment of the two scans > the final body:

The video below shows the result of the Autopilot of the model:
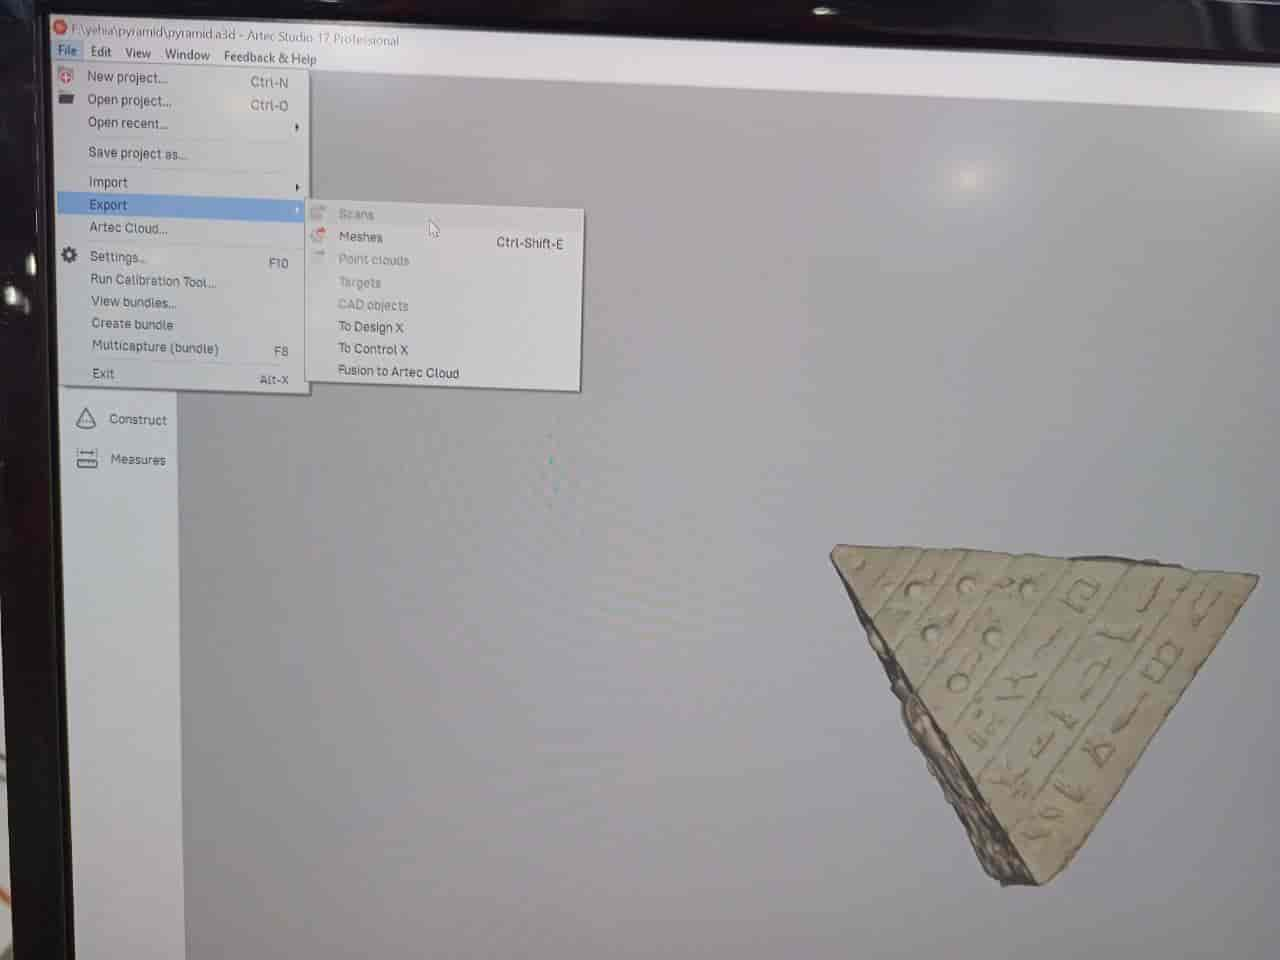
After that I exported the scanned object as .STL so I can prepare it to print on cura following the previous steps, but the difference is, and because it has a small details I have decided to print it with 0.25mm nozzle diameter instead of 0.4mm an 0.1 layer height instead of 0.2mm and with 50mm/s speed without support:
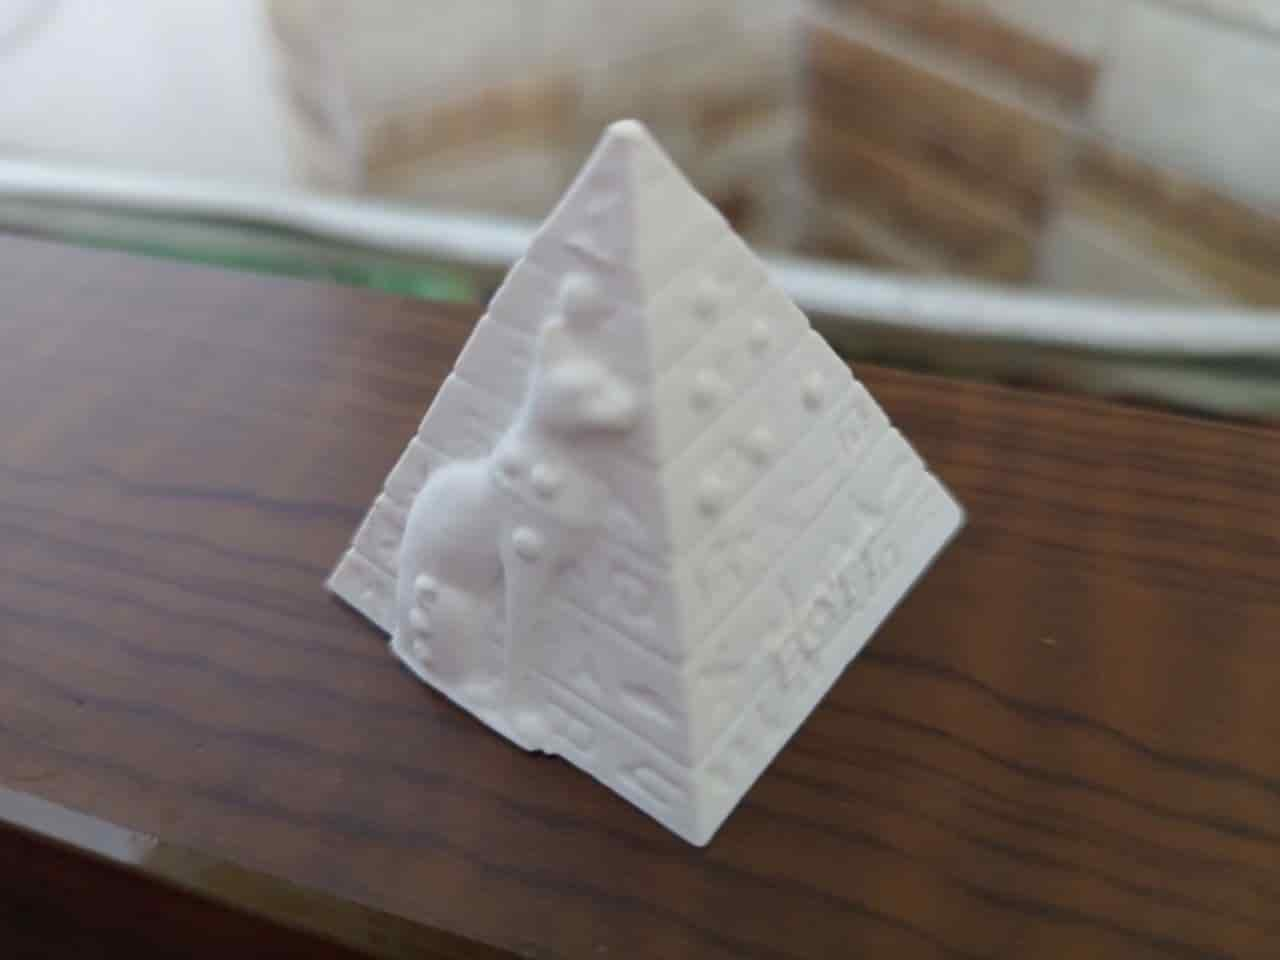
The final model!
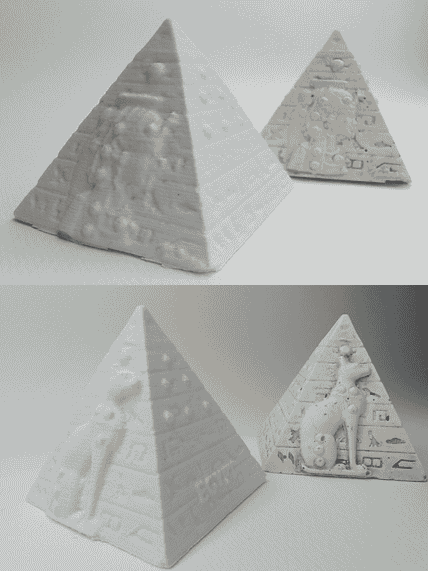
Hero Shots!
Conclusion
For 3D printing, although this technology have a great potential in the industry but still it has a limitation such as surface finish, size, material and speed of printing. so It's important before designing a model, to choose whether it will be 3D printed or manufacture with other technologies, this in turn will help to make benefit from this technology and try as much as possible to avoid the limitation, and as an example the designer should avoid as much as possible the over hangs above 60 degree, or to keep minimum clearance between parts,
Here a useful tips for 3D printing:
- 1:It's important to ensure that the print bed is leveled properly to ensure that the first layer of the print is adhered correctly.
- 2: Cleaning the print bed before each print, making sure that the print bed is clean and free from any dust or debris so important to have a successful print.
- 3: Using the correct filament is very important because a different filaments means different melting points and properties, so it's important to choose the right one for the model.
- 4: Using proper supports and adhesion like brim in a smart way to prevent warping and ensure that the print comes out correctly.
- 5: Always checking for errors or problems using the slicing software is a gaming rule. This will help to identify any issues before printing and avoid wasting time and material.
- 6: 3D printing is a skill so the one should be patient and practice on as much as possible models to slice and prints and with time it will become easier and easier.
-
7: The last but not least, always the one should follow the safety rules of the space or the manufacture to have a happy safe print.
For 3D Scanning, it's very important tool to to capture complex shapes and geometries that may be difficult or impossible to measure accurately using traditional measurement methods. but even with the high potential it comes with limitation and challenges such as issues with accuracy, resolution, and data processing, as well as the high cost of equipment and expertise required to operate and maintain it.
Here a useful tips for 3D scanning:
- 1: Before start scanning it is important to choose the right scanner, different scanners means different object or environment to scan.
- 2: Right preparing the object for scanning is the half way to have a successful scan, trying to avoid reflective surfaces or obstructions that could interfere with the scanning process.
- 3: Using reference points, such as targets or markers, to help the scanner accurately align and stitch together multiple scans. These reference points should be placed strategically around the object or environment to ensure complete coverage.
- 4: Post processing is very important to get an accurate result, cleaning the scan and aligning them properly will be reflected on the final result.
-
5: As always it is important to practice as much as possible and follow the guidelines by the manufacture to have safe usage and happy scan!
