Final Project, 3D Printing
For 3D printing, I made three parts, the flange, interface housing and foots.
The flange was made from blue TPU95A with the following setting:
1- Layer Height:0.2mm.
2- Infill percentage: 90%
3- Adhesion: Brim(7mm) diameter.
4- Print speed: 35 mm/s
5- First layer speed& Brim speed: 25 mm/s
6- Build plate temperature: 60C
7- Without support.
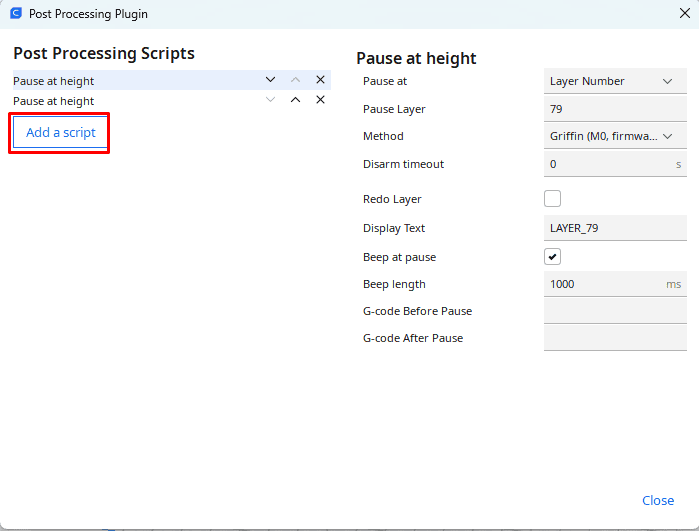
I wanted to pause the print at certain layer number to put the nuts, to do this I modified the gcode
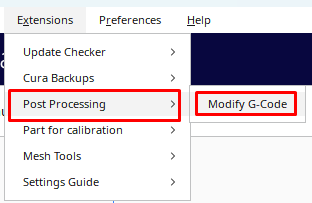
From add script I added a pause at layer height option then I put the layer number and the method is Griffin with zero disarm out:
While it is printing, the pausing worked I have put the nut and make it continue:
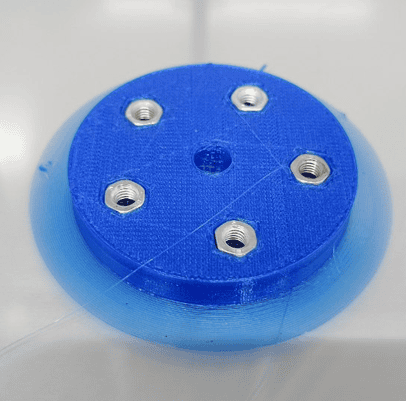
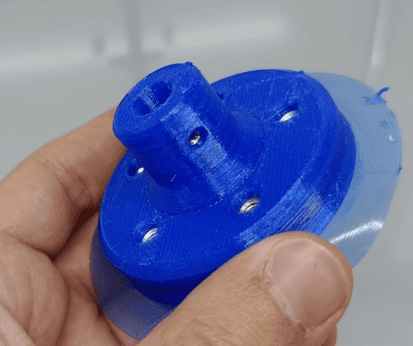
The final piece:
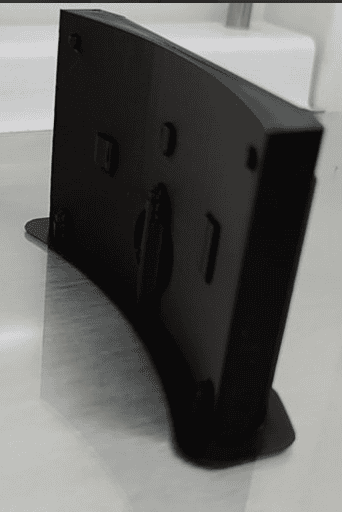
The second piece was the interface housing using black PLA with the following settings:
1- Layer Height:0.2mm.
2- Infill percentage: 20% (Exception in the support blocker was 50%)
3- Adhesion: Brim(7mm) diameter.
4- Print speed: 60 mm/s
5- First layer speed& Brim speed: 35 mm/s
6- Build plate temperature: 60C
7- With support.(Exception in some areas).
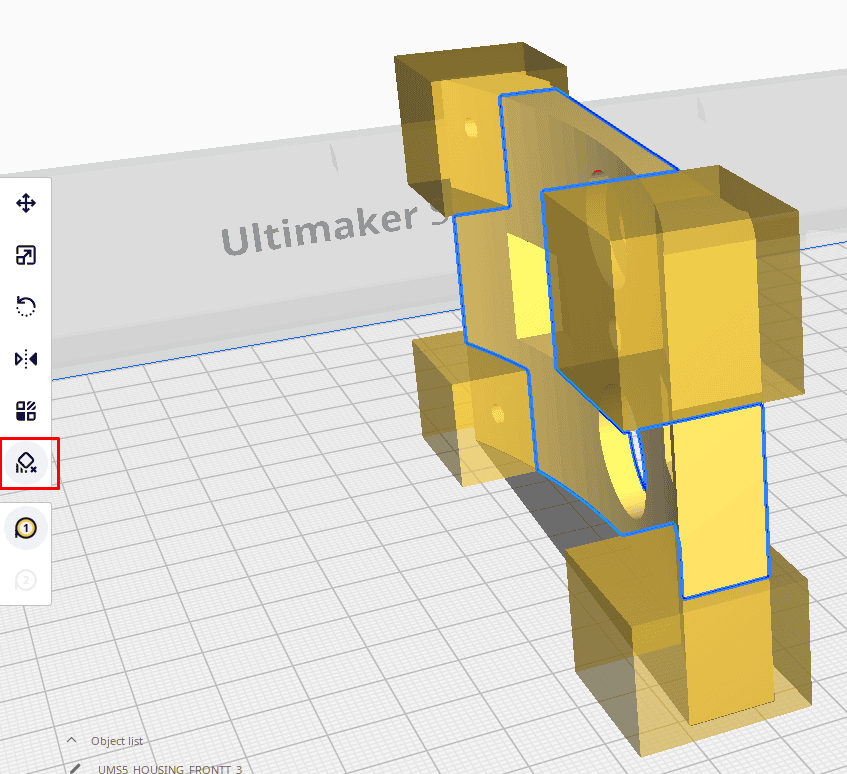
Because I did not need to make the all body with 50% infill, and also I wanted to control the location of the supported areas, I used the support blockers in the corners.
To add the support blockers, from the left tool bar I chose the support blocker, the double click on the left mouse on the body, it will add the block where I click, the block scale and location also could be modified from the same tool bar:
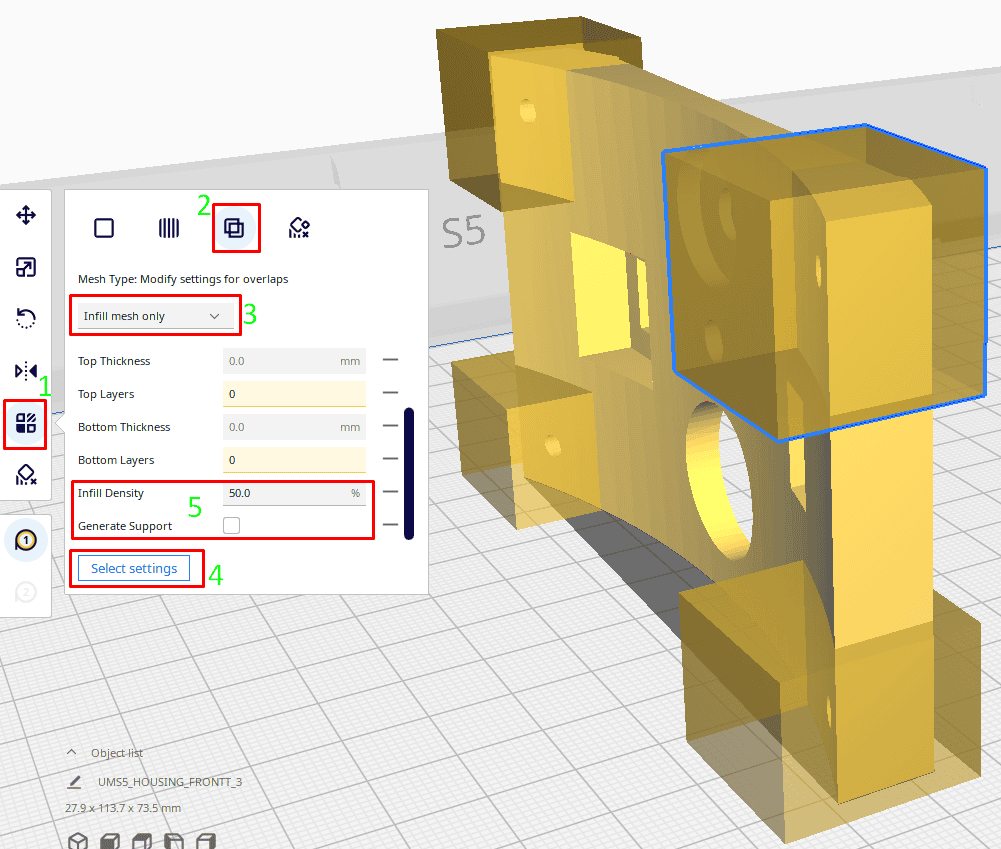
As the below image, I selected the box then select settings I can choose any setting I want to preview, I set the infill as 50% with no support:
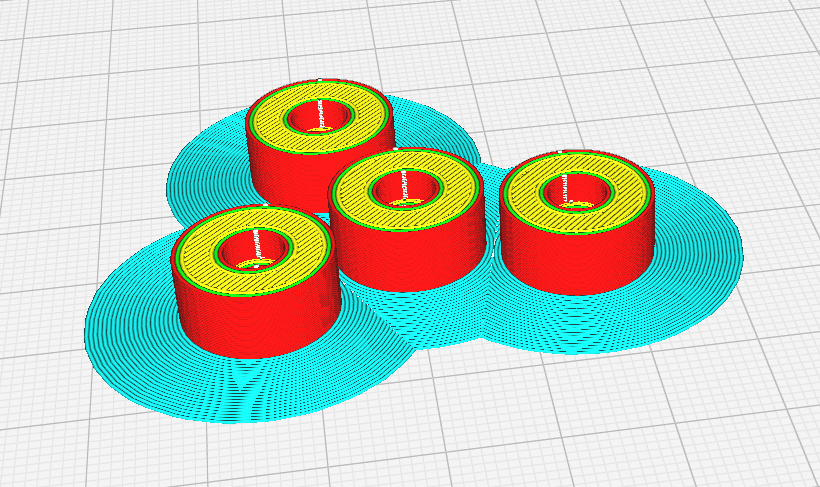
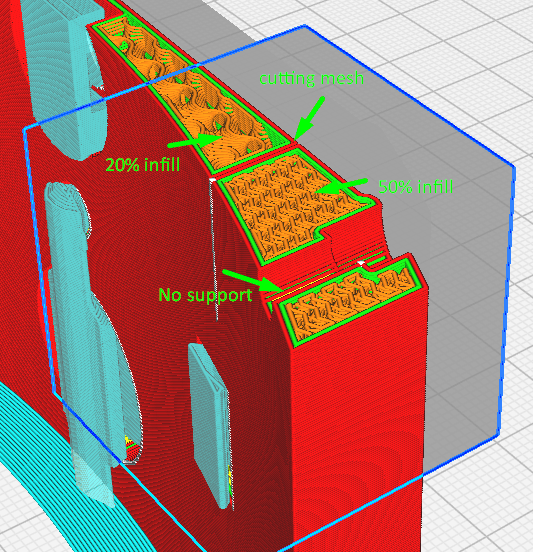
The slicing result:
Final Result:
Last part was the stops or the foots of the body, made also from TPU95A with the following settings:
1- Layer Height:0.2mm.
2- Infill percentage: 90%
3- Adhesion: Brim(7mm) diameter.
4- Print speed: 35 mm/s
5- First layer speed& Brim speed: 25 mm/s
6- Build plate temperature: 60C
7- Without support.
Unluckily I don't have now photos for them after printing, but here the slicing result: