14. Interface and application programming
The process of linking several hardware or software components together to communicate and exchange data is referred to as interface. In computer programming, interfacing usually involves creating an interface layer between two or more software components to enable them to interact with each other. The interface layer acts as a translator or mediator, allowing different software components to communicate and exchange information in a standardized way.
Application programming, on the other hand, involves creating software applications that can run on a computer or mobile device. It involves writing code that defines the behavior of the application and its user interface, as well as integrating with other software components and systems.
GUI
GUI stands for Graphical User Interface. It is a type of user interface that allows users to interact with electronic devices through graphical elements such as icons, buttons, and windows. In a GUI, users can interact with the device using a pointing device such as a mouse, touchpad, or touchscreen, to select and manipulate graphical elements on the screen.
GUIs are commonly used in software applications, operating systems, and mobile devices. They provide a user-friendly interface for interacting with complex software and hardware systems. Examples of popular GUIs include Microsoft Windows, Apple macOS, and mobile operating systems such as Android and iOS.
In Python, GUIs can be developed using various libraries, including Tkinter, PyQt, wxPython, and PyGTK. Tkinter is a built-in GUI library in Python that provides a simple way to create GUI applications. It is easy to learn and provides a wide range of GUI widgets such as buttons, labels, textboxes, and menus.
Python
Python is a high-level, interpreted programming language. It is simple and straightforward to read, making it simple to learn and utilise. Programming styles supported by Python include procedural, object-oriented, and functional programming.Python has many libraries and frameworks for various applications such as data analysis, machine learning, web development, and scientific computing.
Python Tkinter
Tkinter is a standard Python library for creating graphical user interfaces (GUIs). It provides a set of tools for building graphical interfaces that can run on Windows, Macintosh, and Unix systems.It is a cross-platform toolkit, which means that you can write a GUI application once and have it run on multiple platforms without modification. In Python, Tkinter is the standard way to create GUI applications, and it comes pre-installed with most Python distributions.
My Plan
My plan is to use the board I created for the week 11 input devices for this week assignemnt.The board was created in which 4 nos of phototransducer is used to measure the light intensity. In my final project, which is based on solar tracking, solar panels will tilt according to the sun’s position to receive the most light. So I made the decision to move forward. I made the decision to use Python.
So I am going to make a UI which show a ball moving between all the 4 co-ordiates. Initially the ball will be on the center of the canvas and depending on the intensity of the light hit over the 4 sensors, the ball moves toward the side of the co ordinates in the canvas.
Building UI
After going through the tutorials and gaining a basic understanding of Thinter GUI design using Python, I started to make UI to control my Input device Week Project.
I created the Python code for the UI with the VS coding IDE. To acquire the final UI, numerous test runs are required.I used numerous online documents and examples.I can make the user interface (UI) run as a Windows application by typing “python “file name”.py” in the VS Code console.
Below mentioned are the examples I tried in the development of my GUI.
Images show how to print a text in GUI. Code also mentioned.

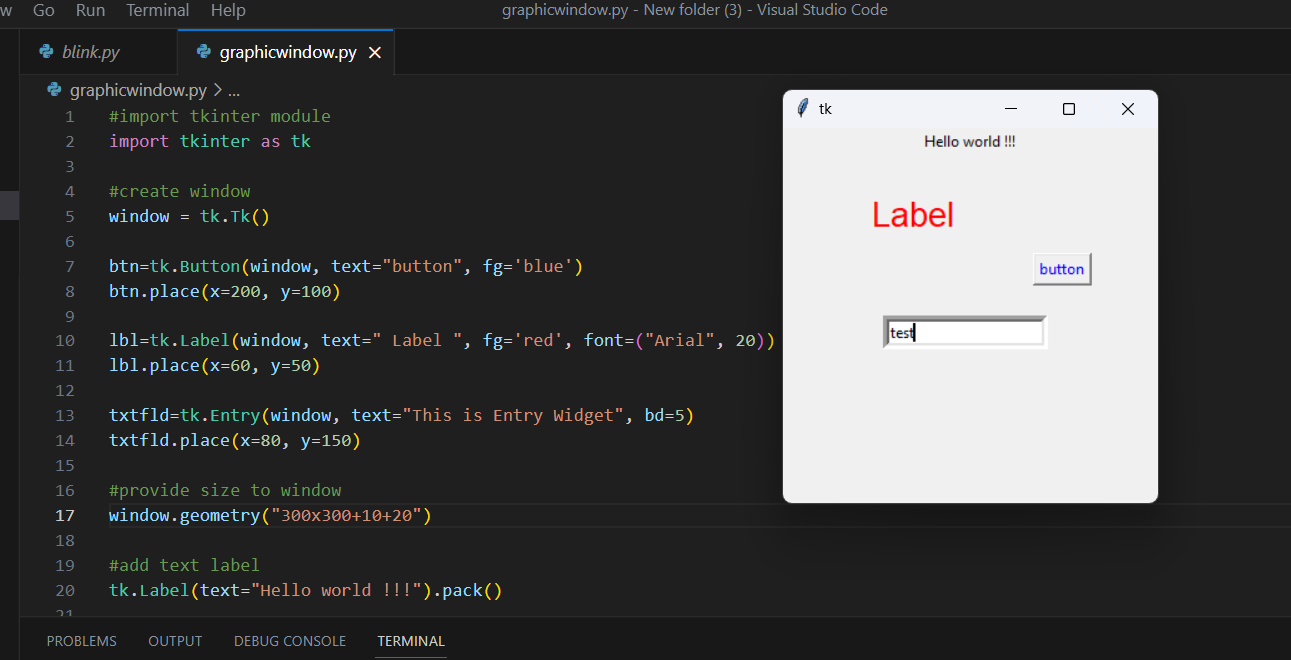
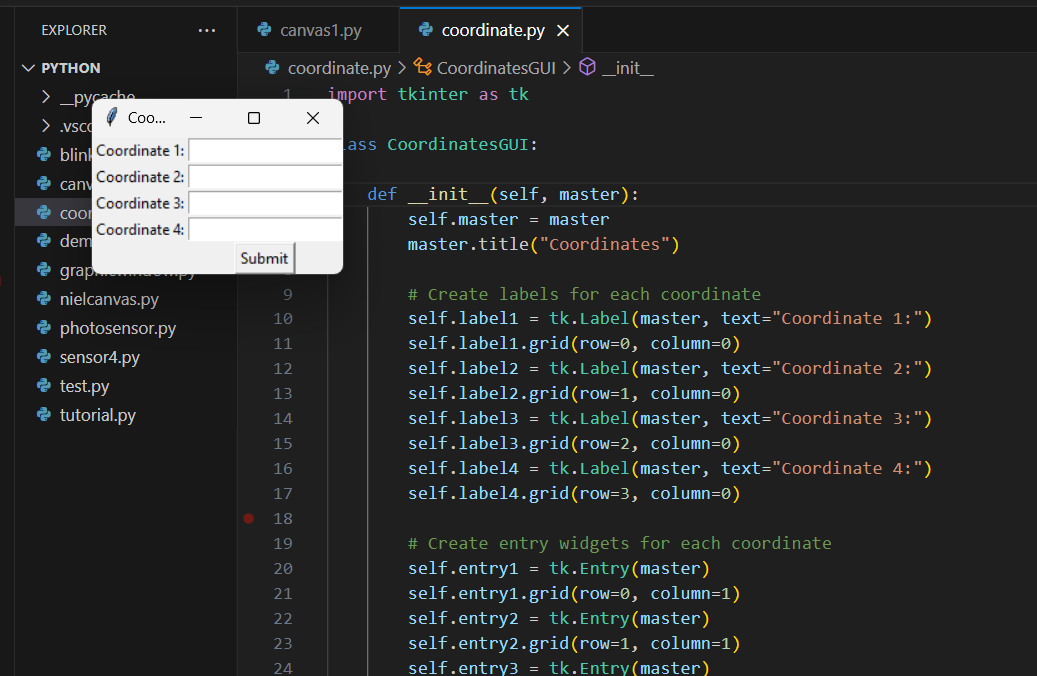
Images shows how to make a “label”, “button” and “input test field”.Please see the code.
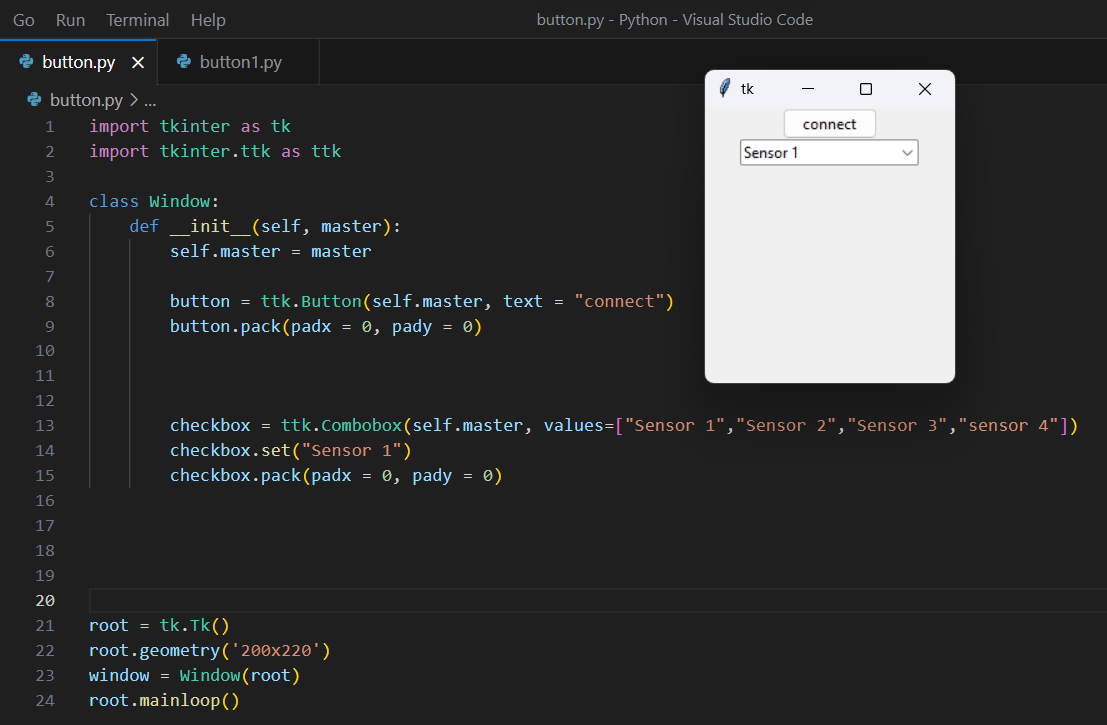 Created a drop down menu for selecting the sensors
Now going to creat graphic window.
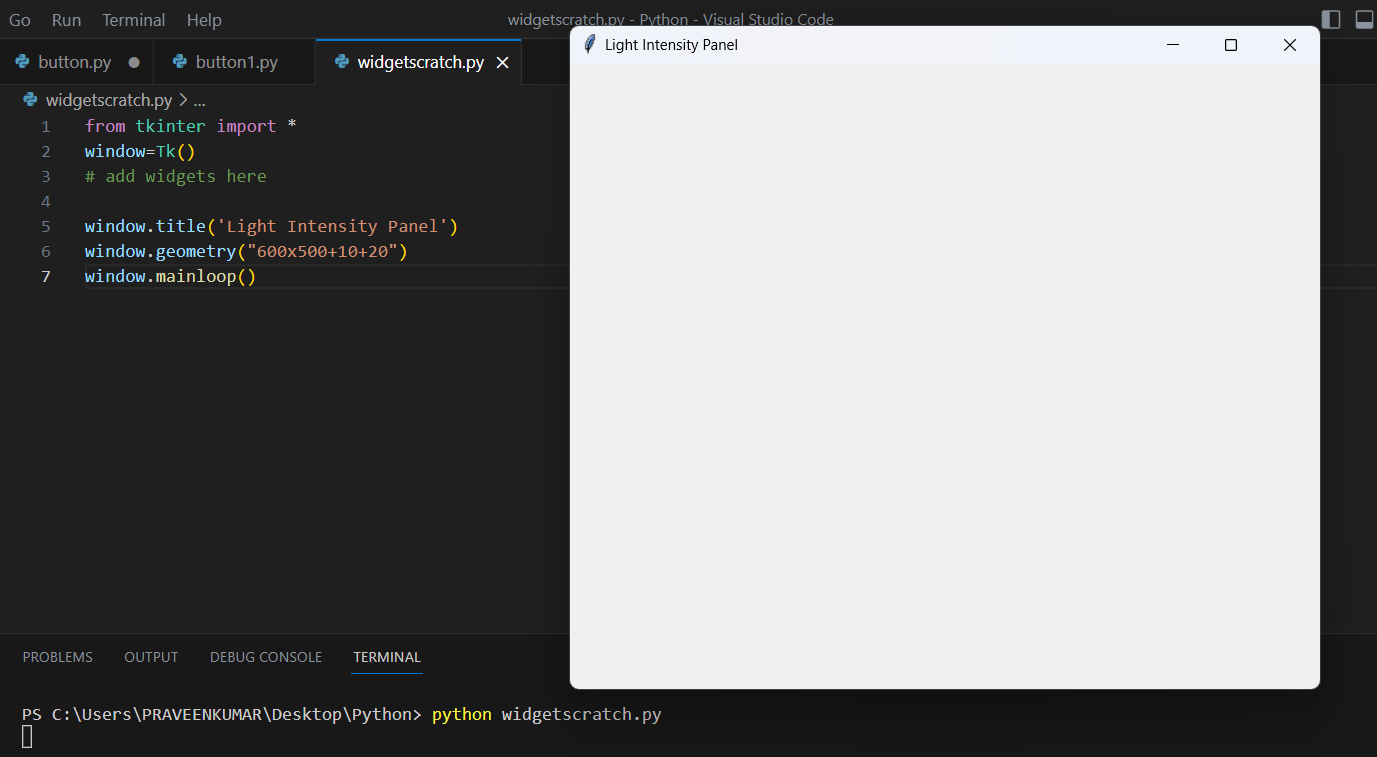
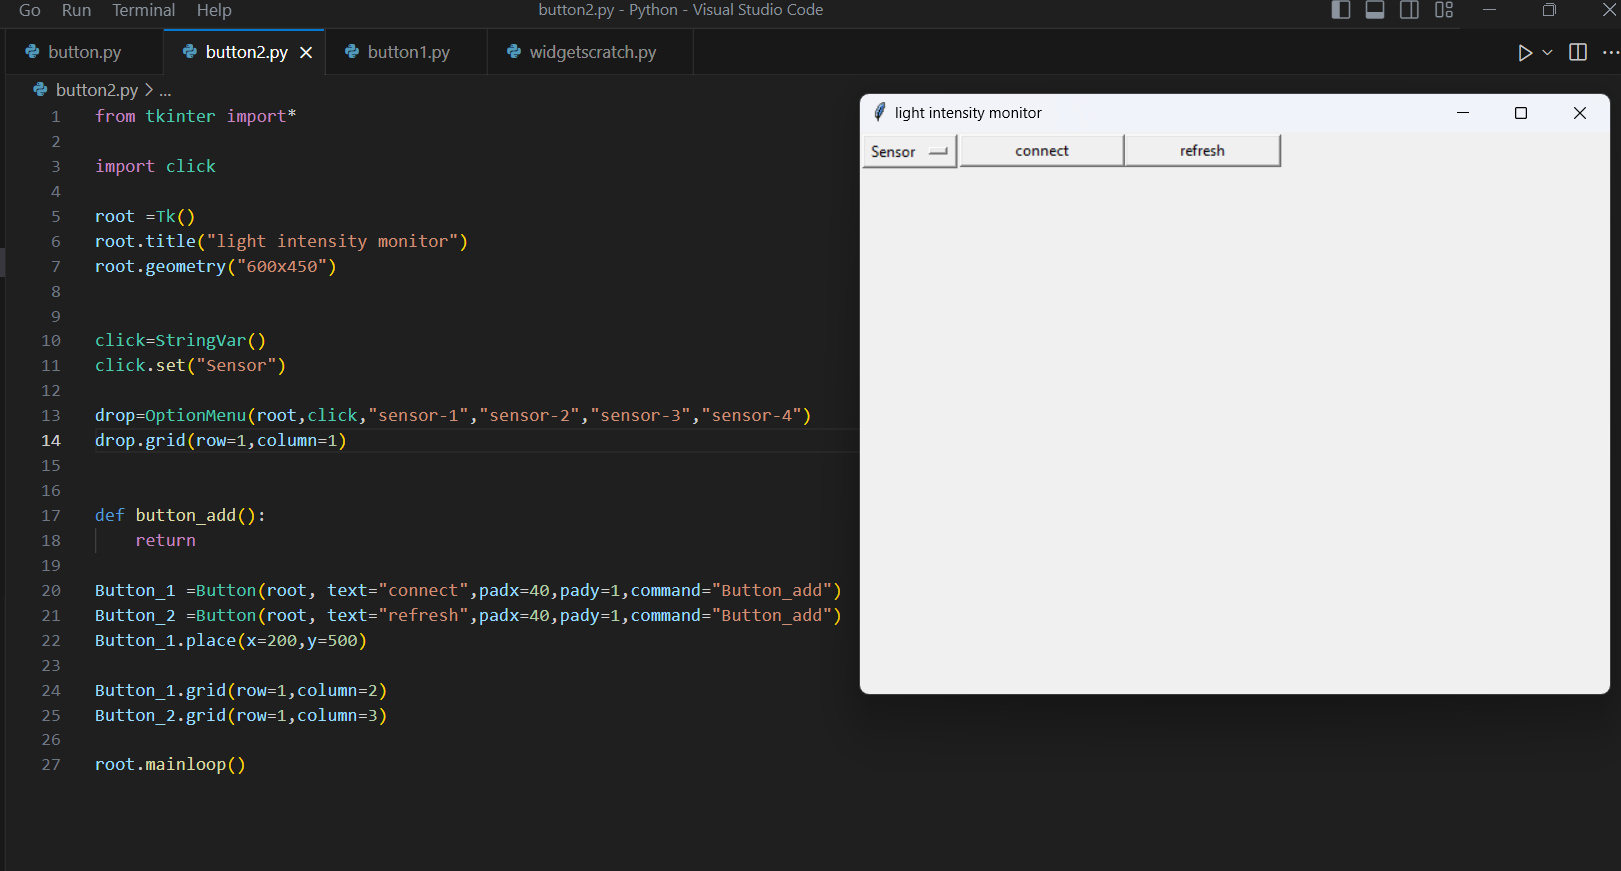
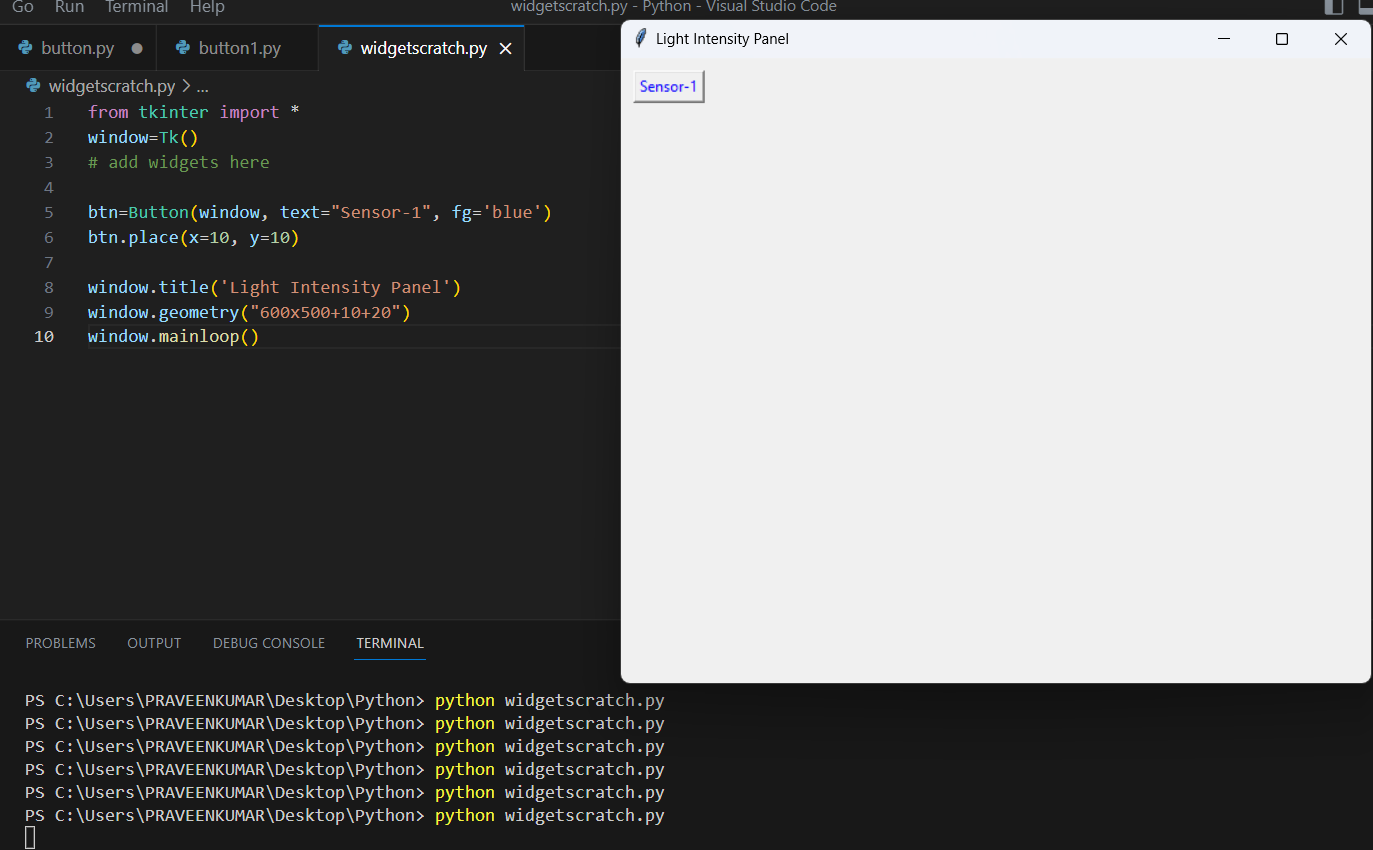 This is the graphic window I created for my GUI with a button.
Next I added two more button to connect the COM port and refresh button.
This is the graphic window I created for my GUI with a button.
Next I added two more button to connect the COM port and refresh button.
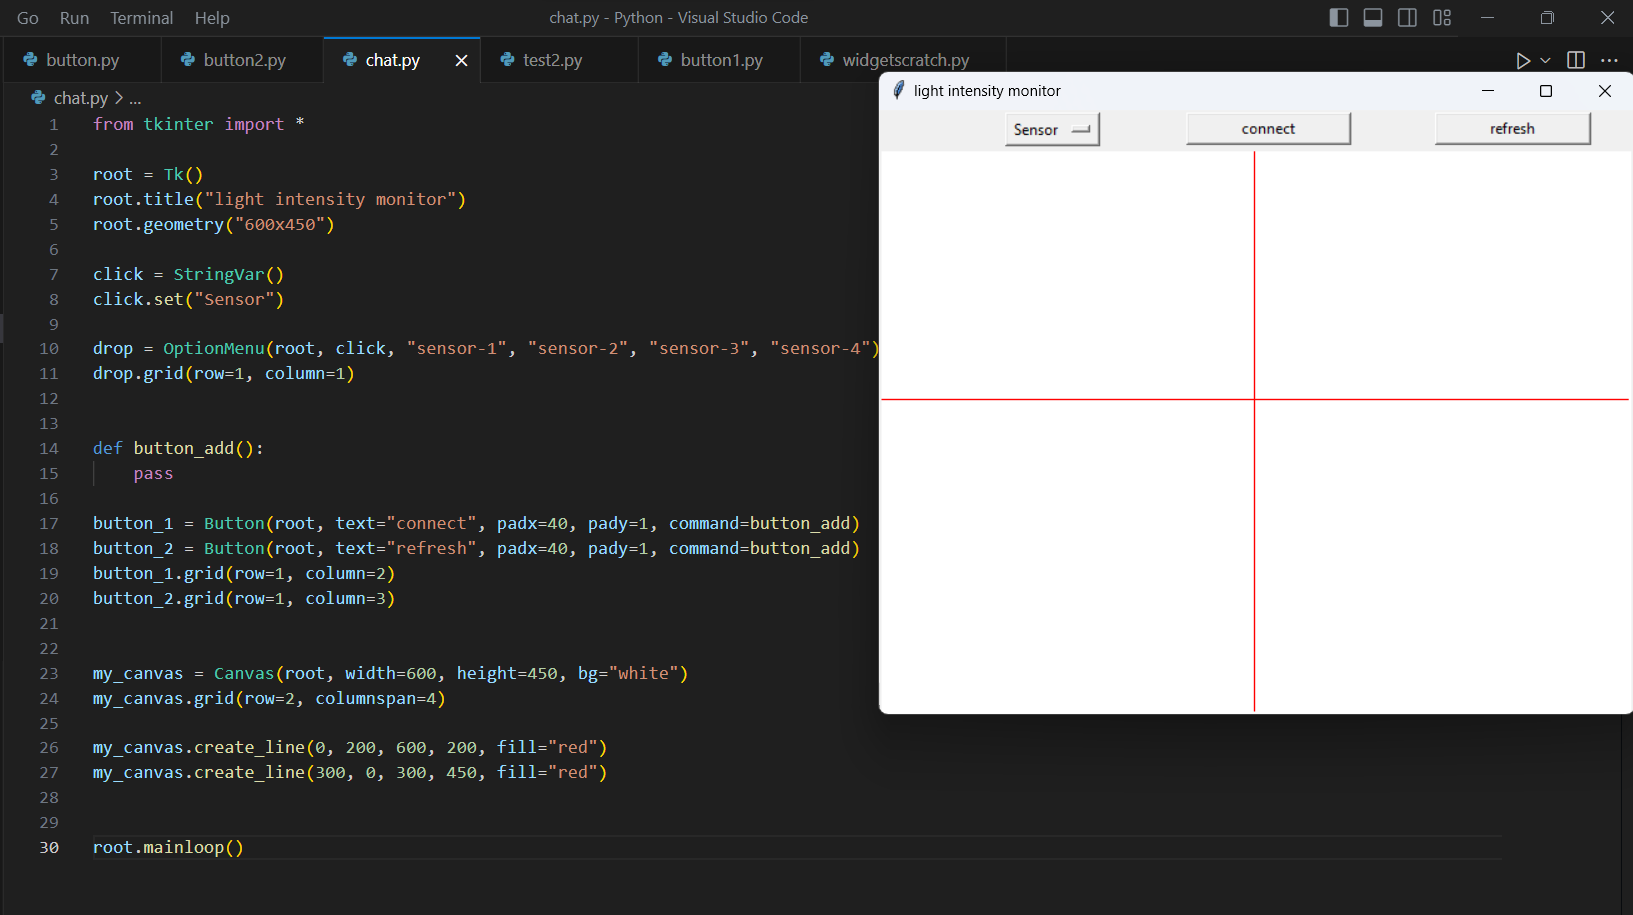
 Next I created one vertical line and one horizontal line to divide the screen into 4 co-ordinates.Also align the button equally on the top on the canvas.
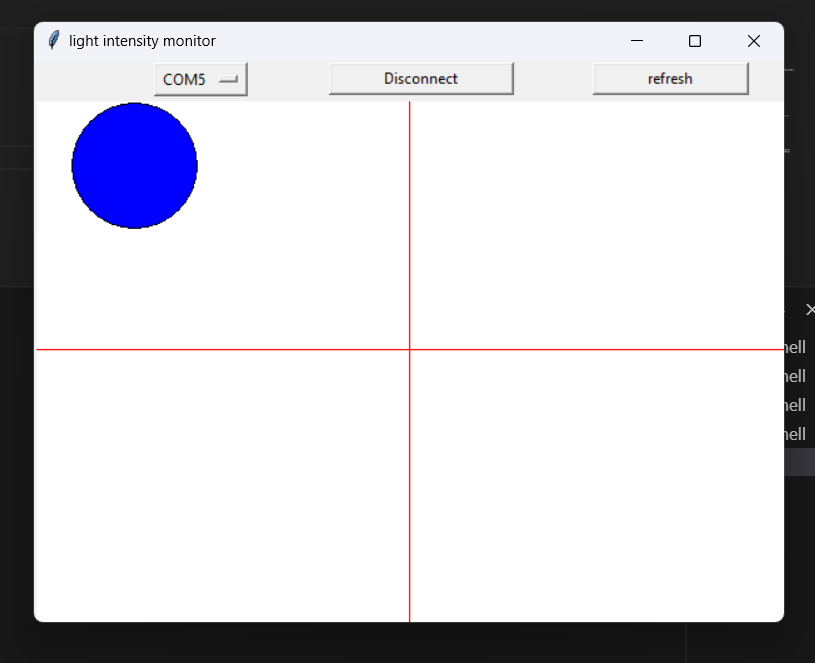
Then I created a blue ball and placed it at the center of the co-ordinate.
 The video shows when connected to the port and hot refresh button, the COM port will be visible in the first button, if not it shows “No port”.
Aurdino IDE Code:
NOw I am using the code which I had used in my . (Input week assignment.)
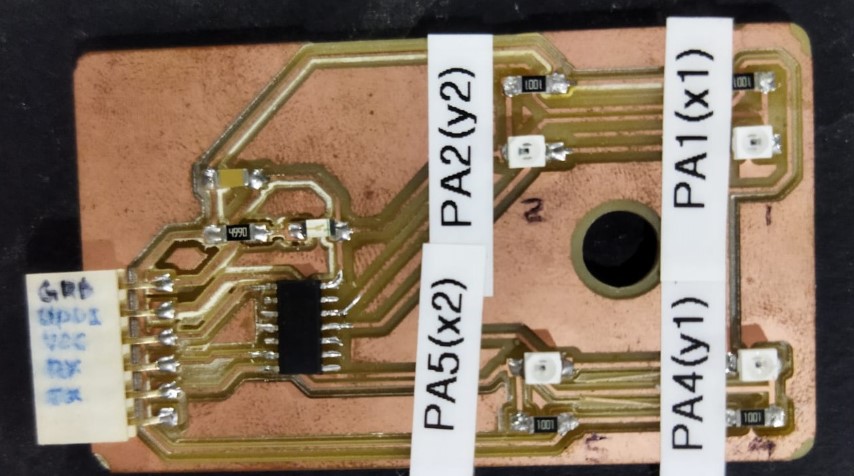
Here I taged sensors PA1, PA2, PA3 & PA4> I keep PA1 and PA5 in first and 4th qudrant and PA# and PA5 in thrid and fourth qudrant.
int PA1 = 8;
int PA2 = 9;
int PA4 = 0;
int PA5 = 1;


void setup() {
  Serial.begin(115200);
}

int sensor_1,sensor_2,sensor_3,sensor_4;

void loop() {

  // Serial.print("PA1:");
  // Serial.print(analogRead(PA1));
  // Serial.print(" ");

  // Serial.print("PA2:");
  // Serial.print(analogRead(PA2));
  // Serial.print(" ");

  // Serial.print("PA4:");
  // Serial.print(analogRead(PA4));
  // Serial.print(" ");

  // Serial.print("PA5:");
  // Serial.println(analogRead(PA5));

int sensor_1 = map(analogRead(PA1), 0, 1024, 100, 0);
int sensor_2 = map(analogRead(PA2), 0, 1024, 100, 0);
int sensor_3 = map(analogRead(PA4), 0, 1024, 100, 0);
int sensor_4 = map(analogRead(PA5), 0, 1024, 100, 0);


  Serial.print("PA1:");
  Serial.print(sensor_1);
  Serial.print(" ");

  Serial.print("PA2:");
  Serial.print(sensor_2);
  Serial.print(" ");

  Serial.print("PA4:");
  Serial.print(sensor_3);
  Serial.print(" ");

  Serial.print("PA5:");
  Serial.println(sensor_4);

  delay(100);
}
Serial Code:
This code is saved seprately and saved as serial.py, which was called in my UI code.
import sys
import glob
import serial


def serial_ports():
    ports = ['COM%s' % (i + 1) for i in range(256)]

    result = []
    for port in ports:
        try:
            s = serial.Serial(port)
            s.close()
            result.append(port)
        except (OSError, serial.SerialException):
            pass
    return result


if __name__ == '__main__':
    print(serial_ports())
UI Code
from tkinter import *
from Serial import serial_ports
import threading
import serial
import time

connected = 0
x1 = 0
x2 = 0
y1 = 0
y2 = 0

root = Tk()
root.title("light intensity monitor")
root.geometry("600x450")


options = ["No ports"]

def getPorts():
    options = serial_ports()
    print(options)
    if len(options) == 0:
        options =["No Ports"]
    drop['menu'].delete(0, 'end')
    selected.set("")

    # Add new items to the list
    print(options)
    for item in options:
        drop["menu"].add_command(label=item , command=lambda: selected.set(item))
        print(item)
    selected.set(options[0])

selected = StringVar(root)
selected.set(options[0])

drop = OptionMenu(root, selected, *options)
drop.grid(row=1, column=1)

getPorts()


def refreshPort():
    getPorts()

def connectPort():
    global Board
    global connected
    port_ = selected.get()
    print(port_)
    if not connected:
        # arduino = serial.Serial(port=port_, baudrate=115200, timeout=0.01)
        try:
            Board = serial.Serial(
                port=port_, baudrate=115200, timeout=0.01)
            print("Connected to " + port_)
            connected = 1
            button_1.config(text="Disconnect")
        except:
            print("Cant connect")

    else:
        connected = 0
        Board.close()
        print("Disconnected from " + port_)
        button_1.config(text="Connect")


button_1 = Button(root, text="connect", padx=40, pady=1, command=connectPort)
button_2 = Button(root, text="refresh", padx=40, pady=1, command=refreshPort)
button_1.grid(row=1, column=2)
button_2.grid(row=1, column=3)

def move_circle(dX,dY):
    x1, y1, x2, y2 = my_canvas.coords(circle)
    dx = 300 - (x1 + x2) / 2
    dy = 200 - (y1 + y2) / 2
    my_canvas.move(circle, dx, dy)


    my_canvas.move(circle, dX, dY)

    # time.sleep(0.1)


# to read data from the Board

def dataEncode(Data):
    global x1, x2, y1, y2
    charArray = Data.split()
    # print(len(charArray))
    if len(charArray) >= 4:
        print(charArray[1])
        for item in charArray:
            # Split the string into location and value parts
            parts = item.split(":")
            sensor = parts[0]
            value = int(parts[1])
            if sensor == "PA1":
                x1=value
            if sensor == "PA5":
                x2=value
            if sensor == "PA4":
                y1=value
            if sensor == "PA2":
                y2=value
        print(x1, x2,y1, y2)
    dx=x1-x2
    dy=y1-y2
    move_circle(dx,dy)


def dataRead():
    if connected:
        data = Board.readline().decode().strip()
        print(data)
        dataEncode(data)
    time.sleep(.1)  # Sleep for 1 second to simulate work
    threading.Timer(0, dataRead).start()

dataRead()

my_canvas = Canvas(root, width=600, height=450, bg="white")
my_canvas.grid(row=2, columnspan=4)

my_canvas.create_line(0, 200, 600, 200, fill="red")
my_canvas.create_line(300, 0, 300, 450, fill="red")


circle = my_canvas.create_oval(250,250,350,150,fill="blue")

root.mainloop()
This explane how the application communicate.
-
dataEncode() function:
-
It takes a string called Data as input.
- The string is split into smaller parts using spaces as separators.
- If there are at least 4 parts, it prints the second part.
- It loops through each part and splits them into two using “:” as a separator.
- The first part is assigned to a variable called sensor, and the second part is assigned to a variable called value as an integer.
- Based on the value of sensor, it assigns value to one of four global variables (x1, x2, y1, or y2).
- It prints the current values of the four variables.
- It calculates the differences between x1 and x2 (dx) and y1 and y2 (dy).
-
Finally, it calls a function named move_circle() and passes dx and dy to it.
-
dataRead() function:
-
It appears to read data from a serial port using an object named Board.
- If a variable named connected is True, it reads a line of data from the serial port, prints it, and passes it to the dataEncode() function.
- It then waits for 0.1 seconds and calls itself again using a timer.
-
This creates a loop to continuously read data from the serial port and process it with dataEncode().
-
Canvas creation:
-
It creates a canvas object named my_canvas with a width of 600 pixels and a height of 450 pixels, and sets the background color to white.
- he canvas is placed in a grid layout in the third row, spanning across all four columns.
- Two red lines are drawn on the canvas: one from the top left to the top right, and another from the center to the bottom.
- Lastly, a blue circle is drawn on the canvas, centered at (300, 200) with a radius of 50 pixels.
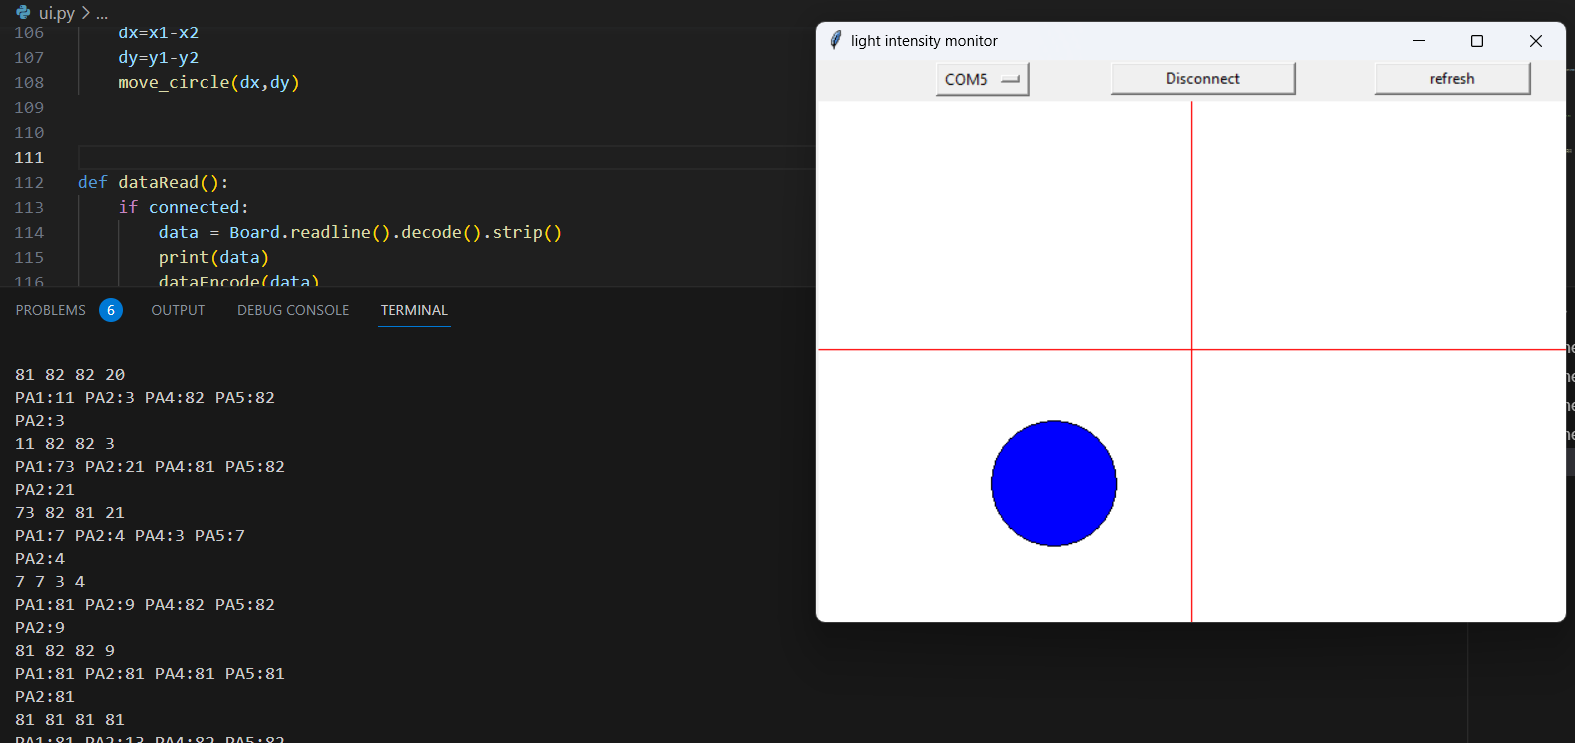
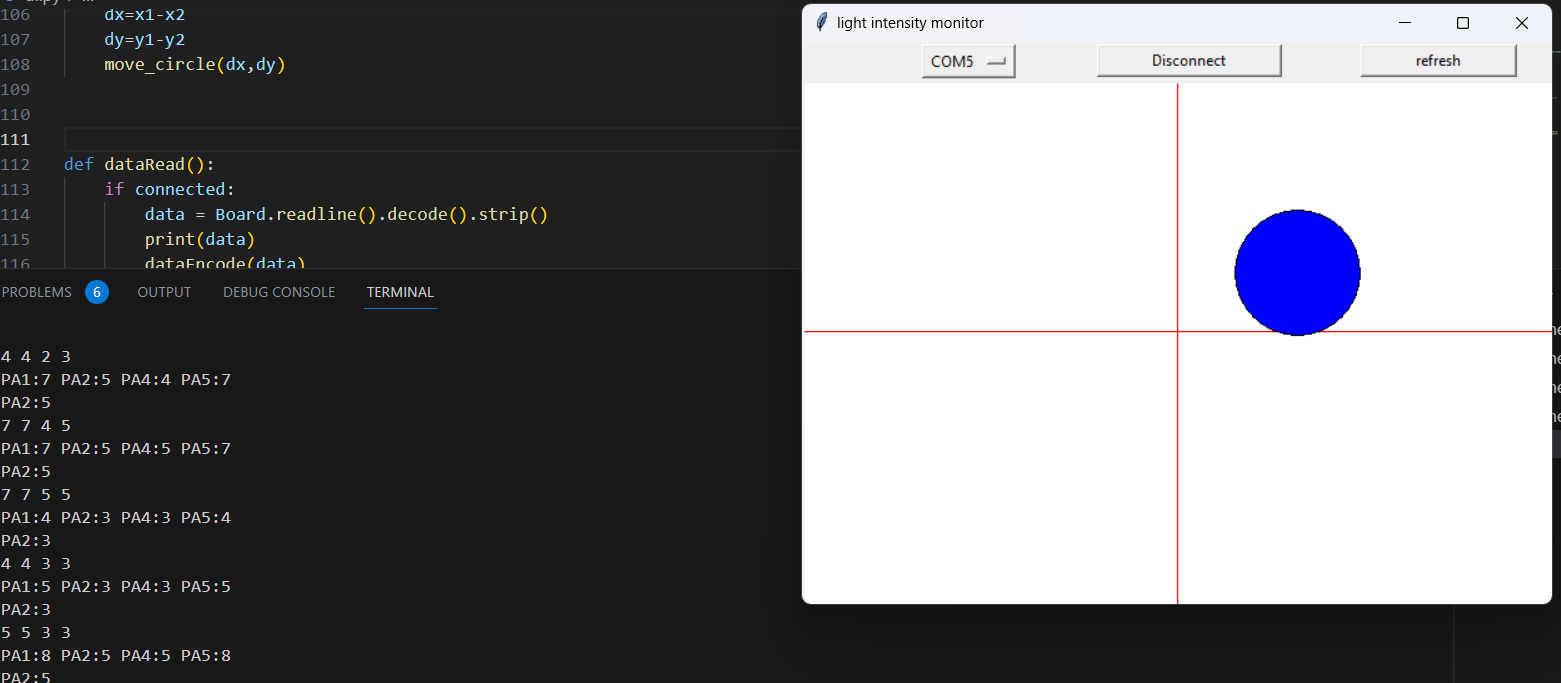
Below shows images give the information about which sensor receives more intensity.I used my mobile torch light for this. Placed a 3D printed shade which I made on my input week. This will block the light while moving the torch from one cordinate to another.