5. 3D Scanning and printing
Objectives
. Designing and 3D printing an object
. 3D scanning an object
Group Assignment(Group Assignment link.)
Test the design rules for your 3D printer.
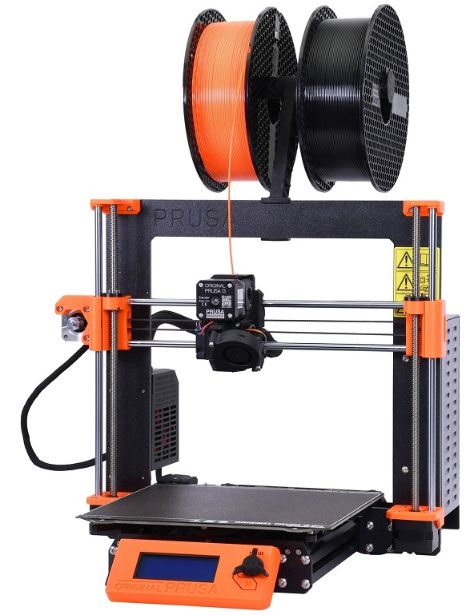
3D PRINTING
3D printing is a process of creating three-dimensional objects from a digital file using a printer that builds up the object layer by layer. It is also known as additive manufacturing because the object is created by adding material layer by layer until the final shape is achieved. 3D printing has a wide range of applications, from prototyping and product design to medical and dental applications, art, and architecture.
It is also called as Rapid prototyping, which is a process of quickly creating a physical model or prototype of a product using 3D printing or other similar technologies. It allows for quick iteration and testing of designs without the need for expensive tooling or manufacturing processes. This can help to speed up the product development process and reduce costs. Rapid prototyping is commonly used in industries such as product design, engineering, and manufacturing.
FDM stands for Fused Deposition Modeling, which is a type of 3D printing technology. In FDM, a printer extrudes a thermoplastic filament, which is melted and deposited layer by layer to create the final object. This is one of the most common 3D printing technologies and is often used for rapid prototyping and small-scale production.
Different types of 3D printing technologies.
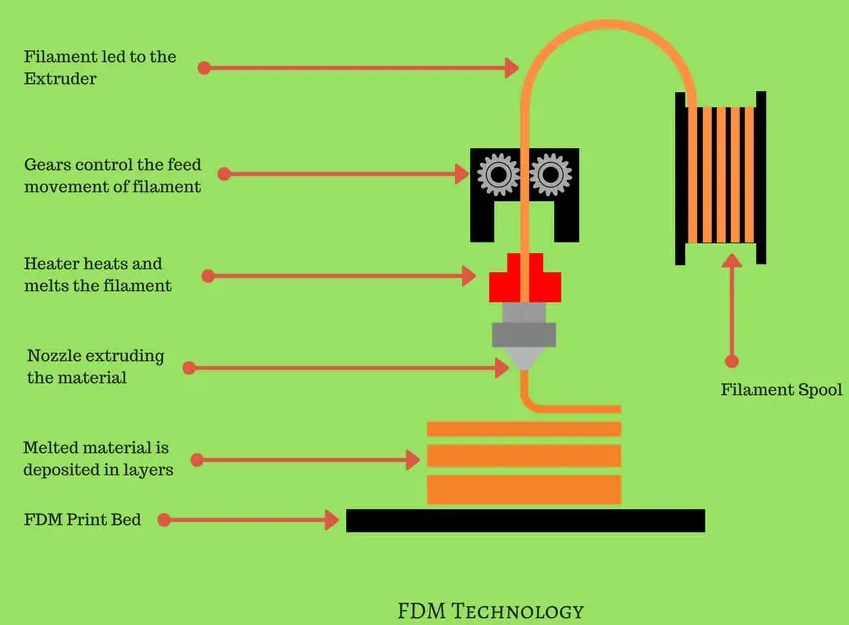
- Fused Deposition Modeling (FDM): a printer extrudes a thermoplastic filament, which is melted and deposited layer by layer to create the final object. This is one of the most common 3D printing technologies and is often used for rapid prototyping and small-scale production.
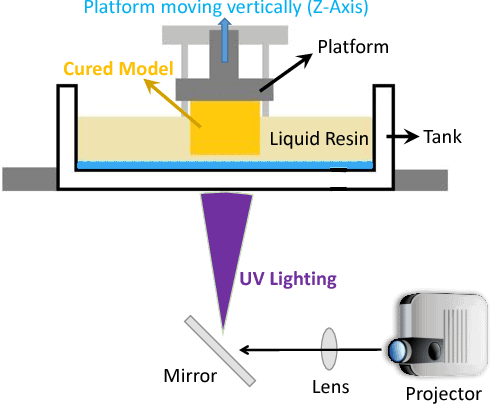
- Stereolithography (SLA): a printer uses a UV laser to cure a liquid resin, building up the object layer by layer. This technology is capable of producing high-resolution prints with fine detail.
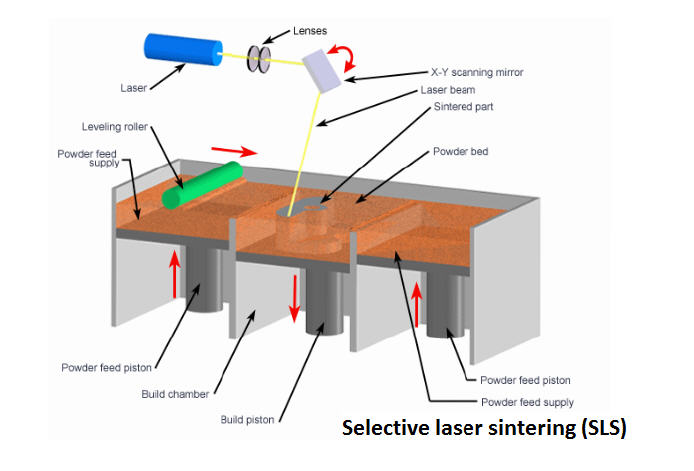
- Selective Laser Sintering (SLS): a printer uses a laser to sinter powdered material, typically nylon or metal, into a solid object. This technology is capable of producing strong, durable parts with complex geometries.
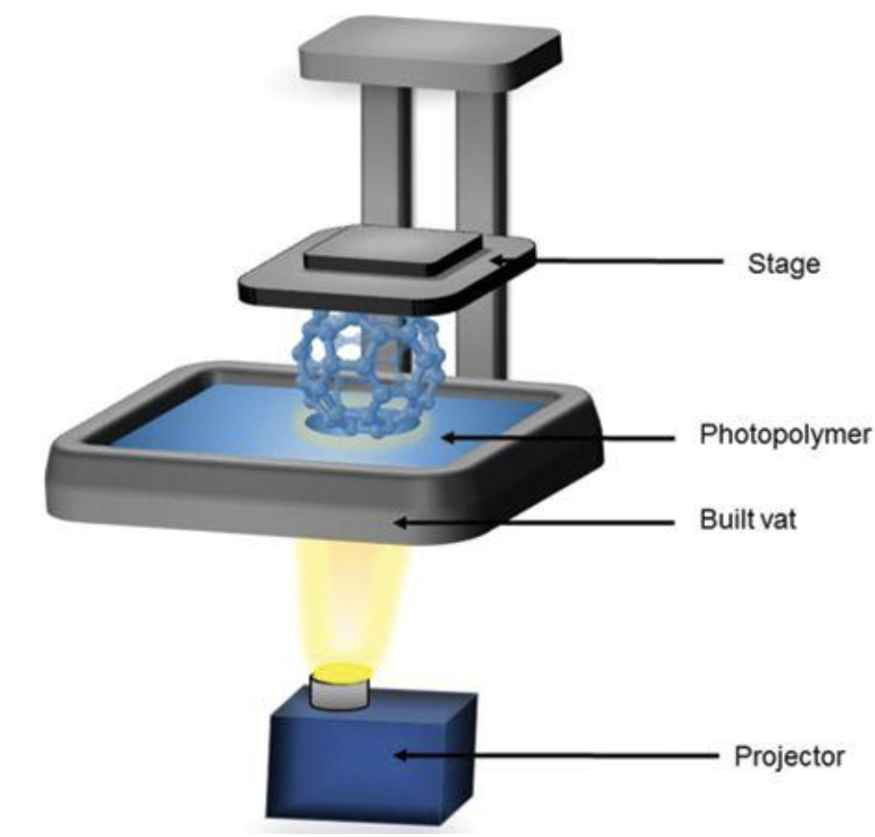
- Digital Light Processing (DLP): similar to SLA, a printer uses a projector to cure a liquid resin, building up the object layer by layer. DLP printers can produce high-resolution prints with faster print times than SLA printers.
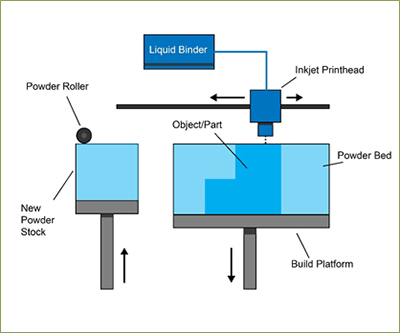
- Binder Jetting: a printer deposits a liquid binding agent onto a bed of powder material, layer by layer, bonding the material together to create the final object. This technology is capable of producing full-color prints and is often used in the production of metal parts.
SLICER
A slicer is a software tool used in 3D printing to convert a 3D model into a series of 2D layers that can be printed layer by layer. The slicer software generates a set of instructions, called G-code, that the 3D printer uses to create the physical object. The slicer allows the user to customize several printing parameters such as infill patterns, layer height, print speed, and support structures.
There are several slicer software options available for 3D printing, including:
Cura: A popular open-source slicer developed by Ultimaker. It is free to use and offers a range of advanced features.
PrusaSlicer: Another popular open-source slicer developed by Prusa Research. It is specifically designed for Prusa 3D printers but can be used with other printers as well.
Simplify3D: A paid slicer software that offers a range of advanced features and customization options. It is a popular choice among professionals but comes at a higher cost.
Slic3r: An open-source slicer developed by Alessandro Ranellucci. It is free to use and offers a range of features, including support for multiple extruders and customizable support structures.
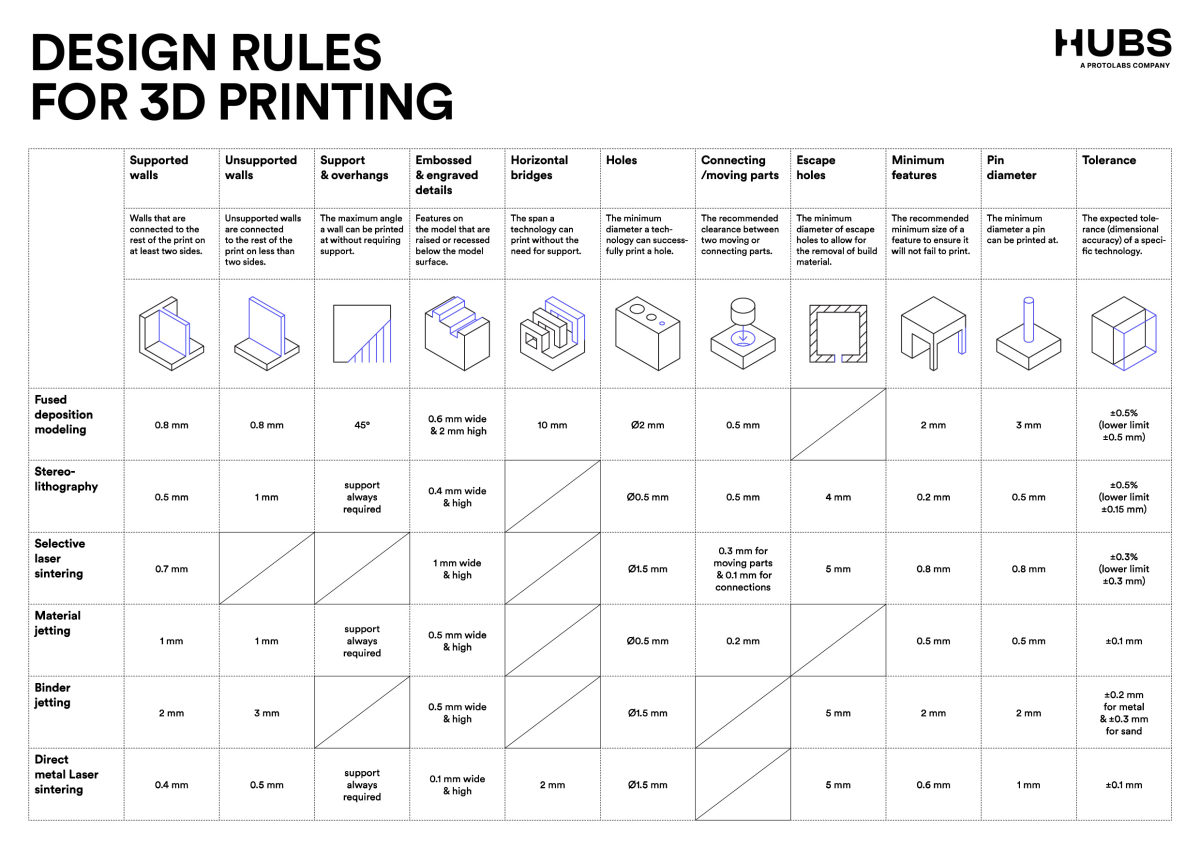
Design Rules for 3D printing:
- Make sure that the model is manifold, meaning that it is a closed, watertight object.
- Avoid overhangs greater than 45 degrees without support structures.
- Ensure that the walls of the model are thick enough to be printable.
- Use fillets or chamfers to avoid sharp corners and edges.
- Check for intersecting or overlapping geometries.
- Minimize the use of bridges, as they can be difficult to print accurately.
- Avoid small details that may not be visible or printable.
Materials used for 3D printing
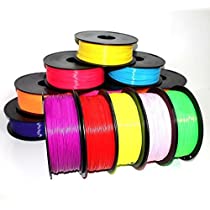
- PLA (polylactic acid): A biodegradable, plant-based material that is easy to print with and produces low emissions.It is a popular choice for beginners due to its ease of use and low cost. However, it can be brittle and may not be suitable for high-stress applications.
- PETG (glycol-modified PET) is a strong, durable material that is commonly used for water bottles and food packaging. It has good impact resistance and is more flexible than PLA. PETG is also resistant to high temperatures and UV light, making it suitable for outdoor applications. However, it can be more difficult to print with than PLA and may require a heated bed.
- ABS (acrylonitrile butadiene styrene): A strong, durable material commonly used in manufacturing
- PET (polyethylene terephthalate): A strong, flexible material commonly used for water bottles and food packaging
- Nylon: A strong, flexible material that is commonly used for mechanical parts and industrial applications
- TPU (thermoplastic polyurethane): a flexible, rubber-like material that is commonly used for phone cases and other accessories
- Metals: Certain printers can print with metal powders, which are then sintered together to create metal objects
- Wood: Some printers can print with wood-based filaments, creating objects with a wood-like look and feel
Idividual project
Designing and 3D printing an object.
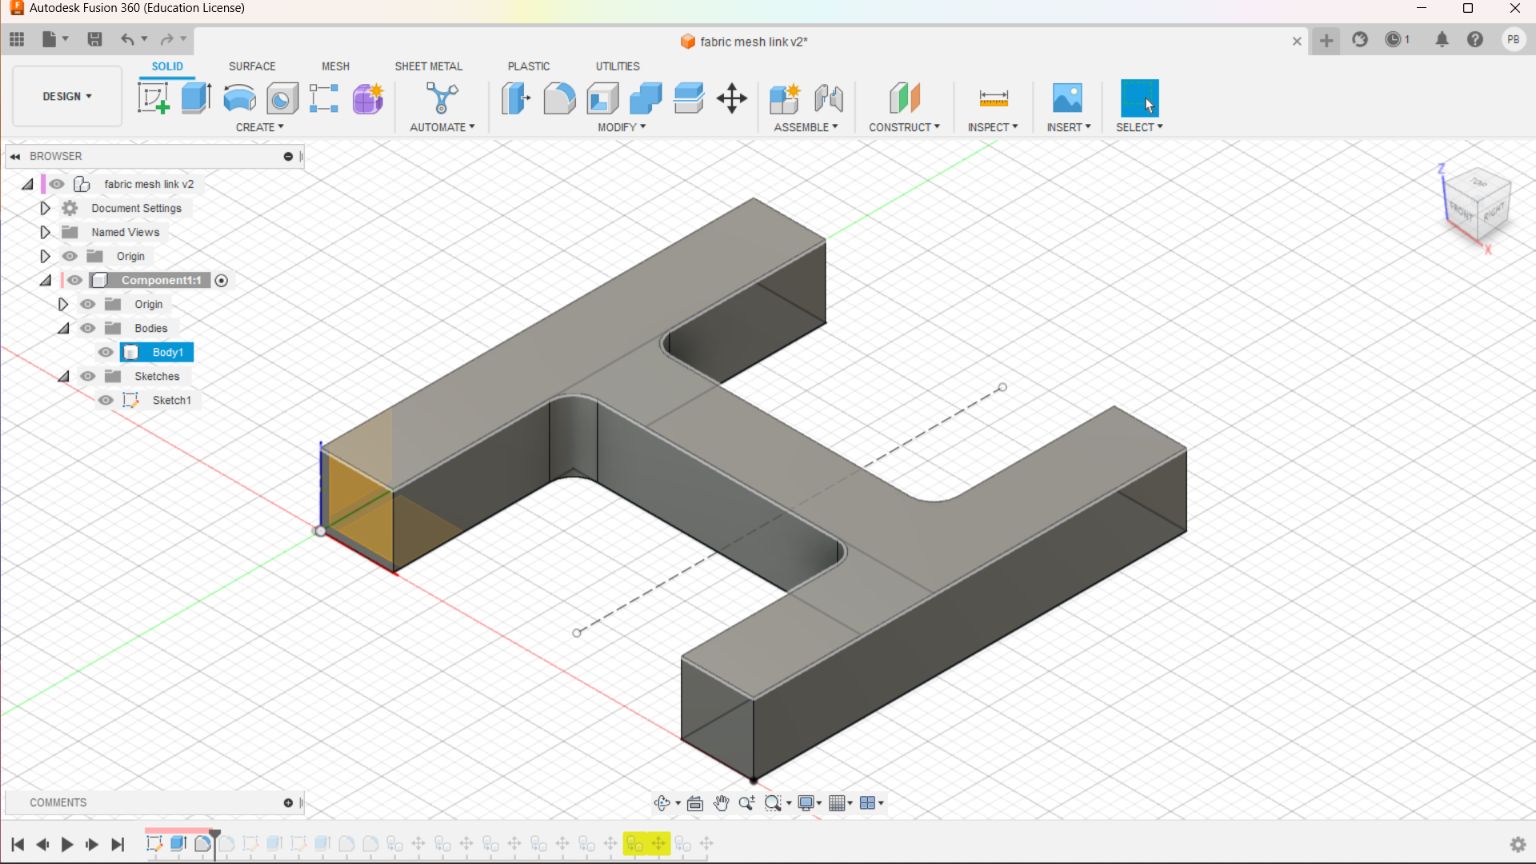
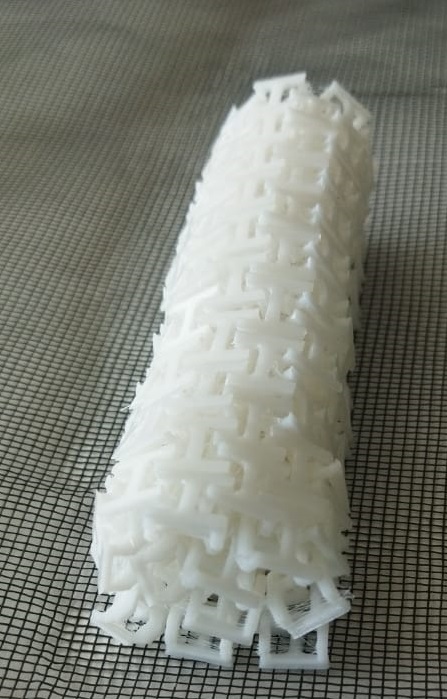
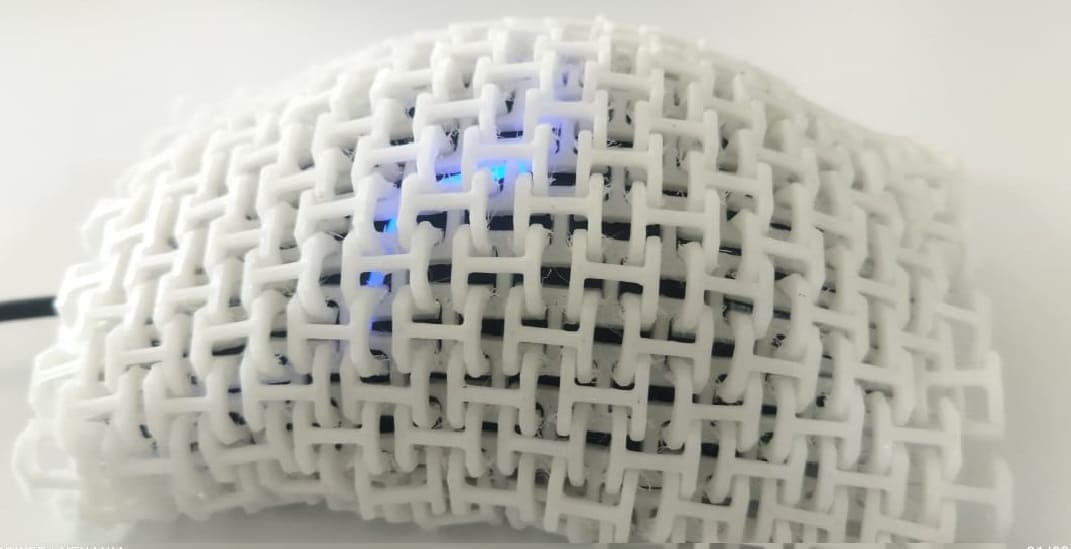
I started designing an object which cannot be made by milling machine.
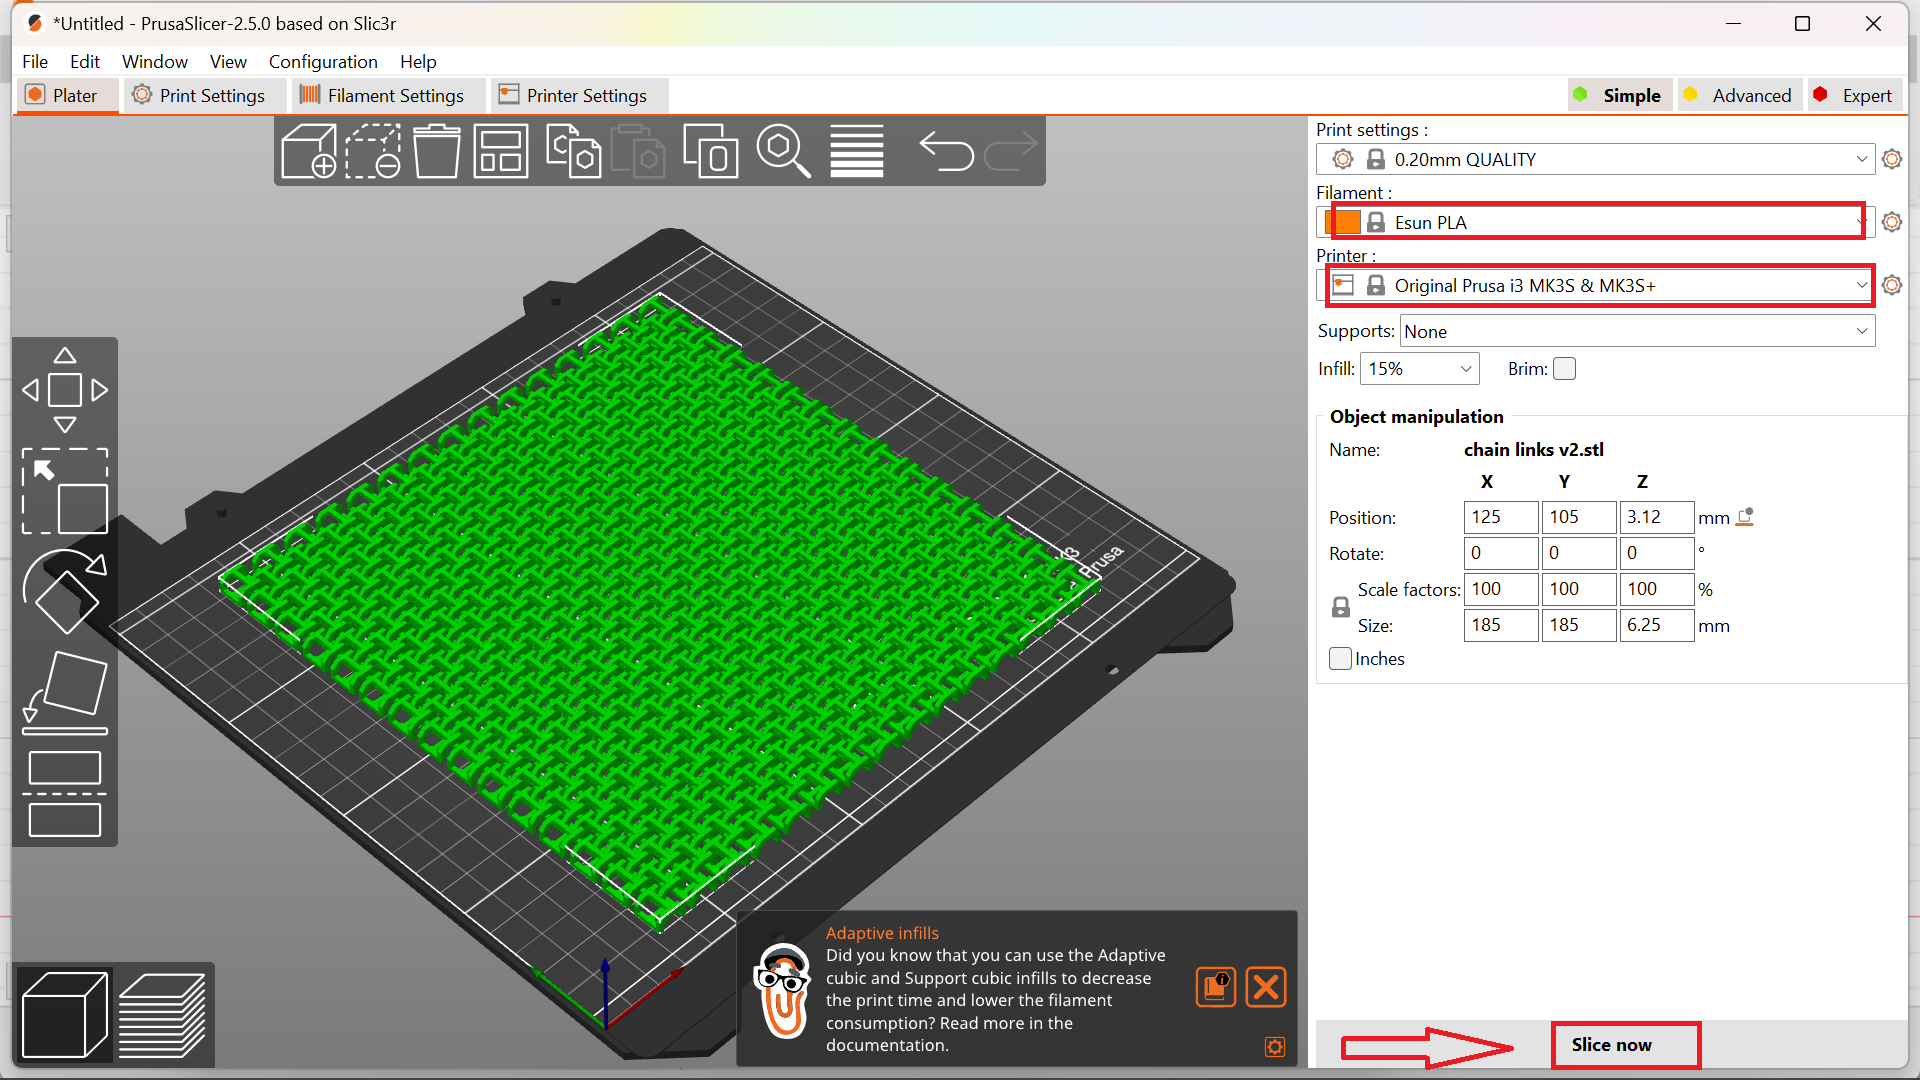
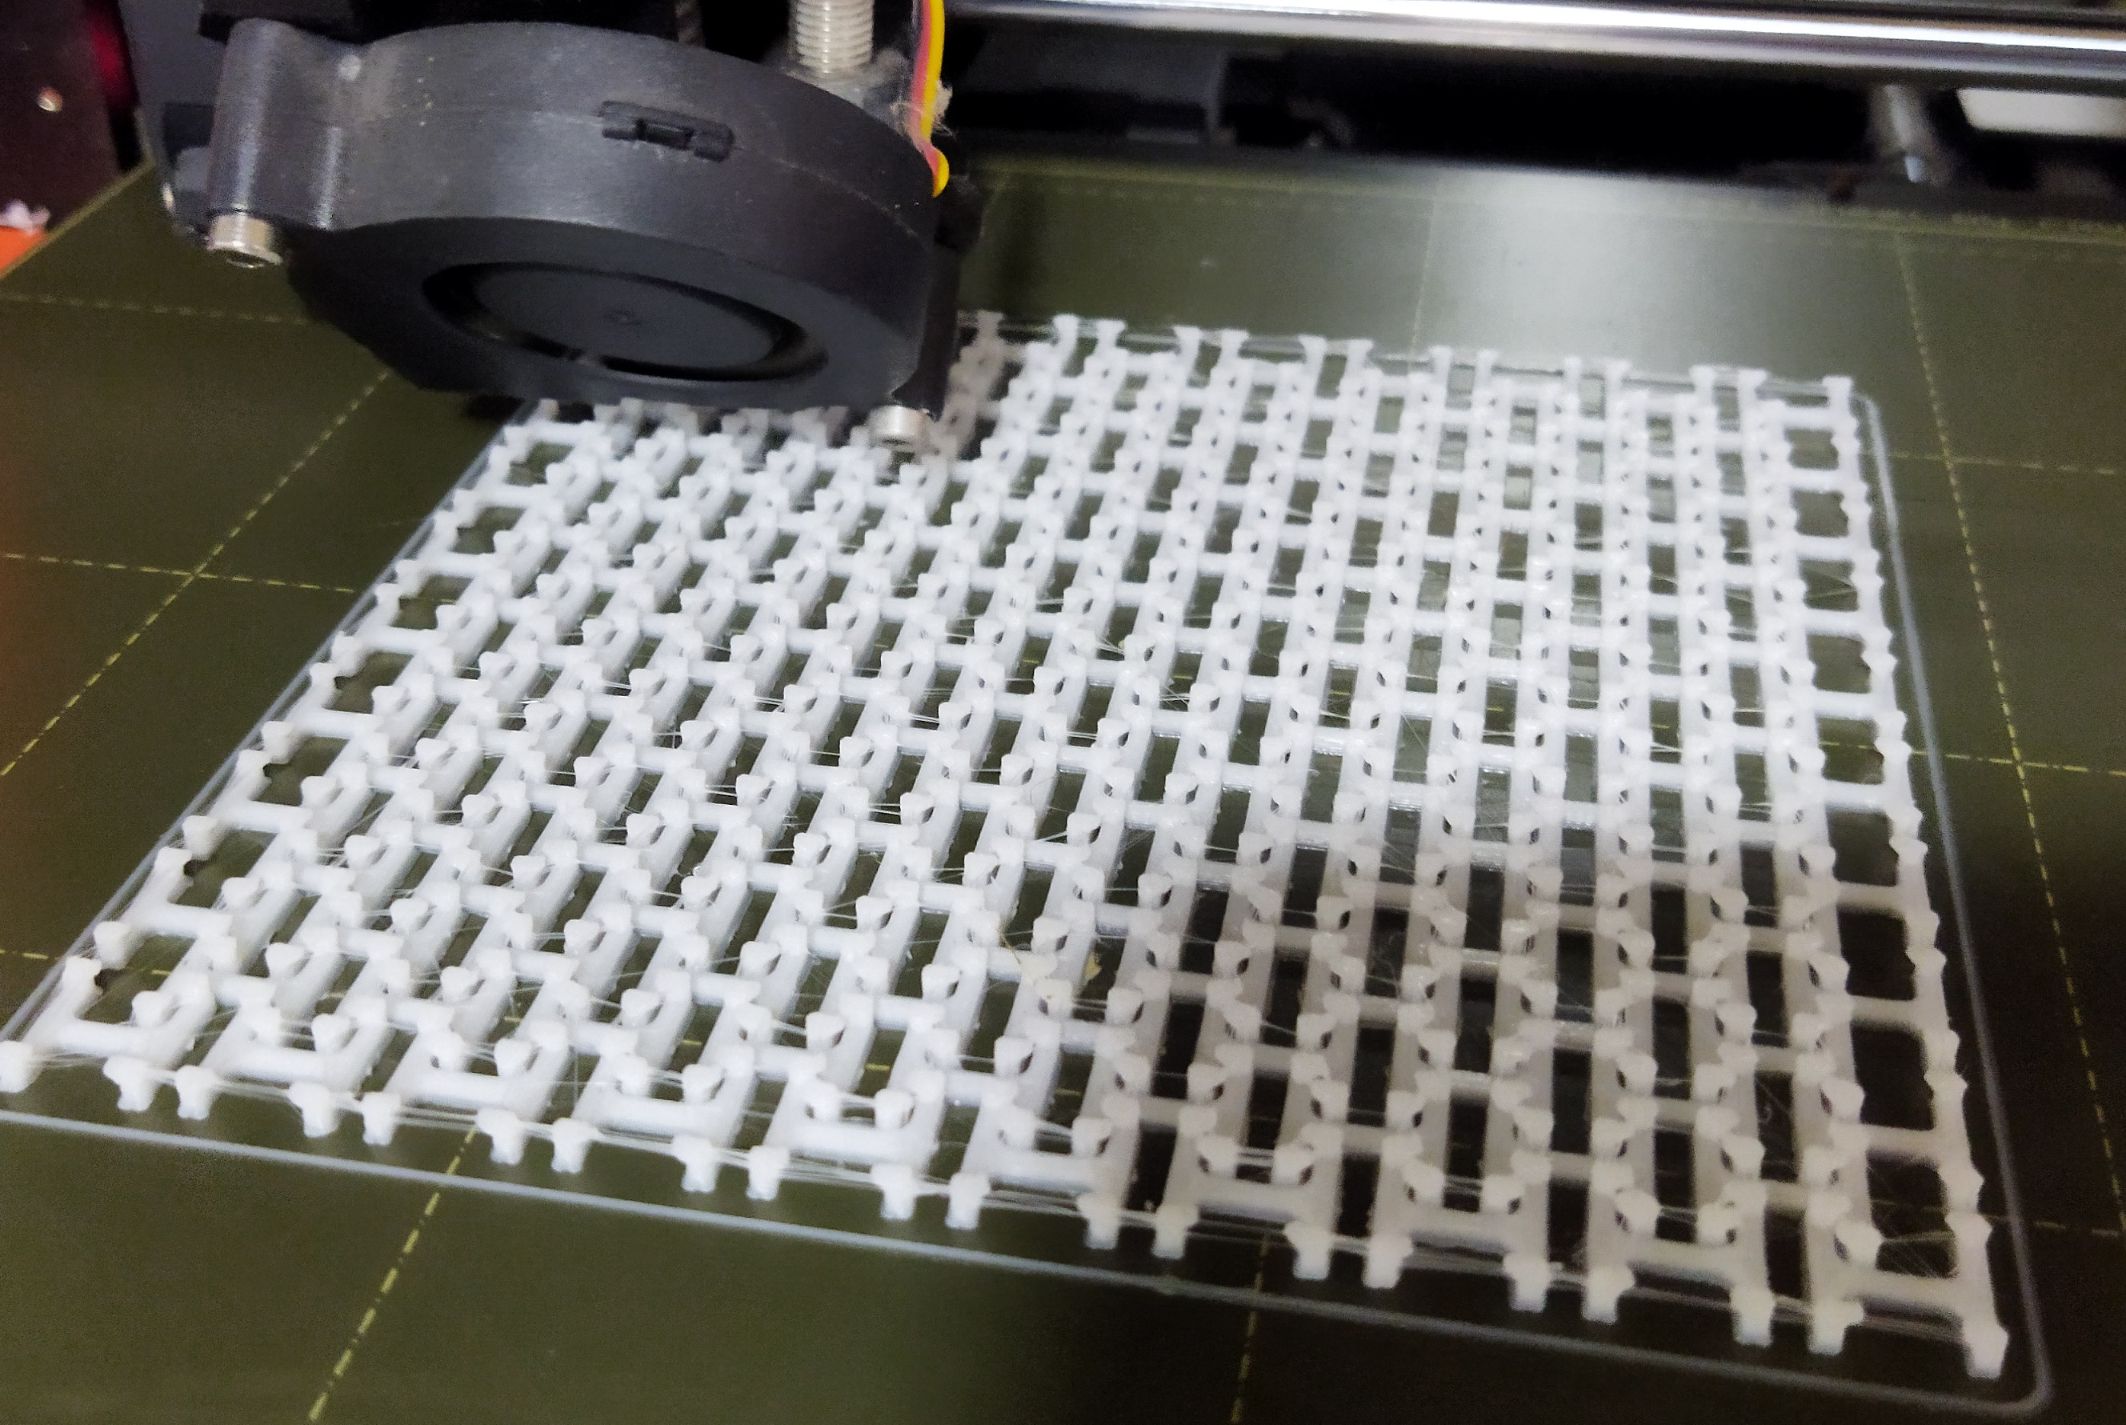
I took an image from “UltiMaker Thinkiverse in which a Chainmail - 3D Printable Fabric done by flowalistik “.From this image I made a drawing in Fusion 360 giving various parameter.
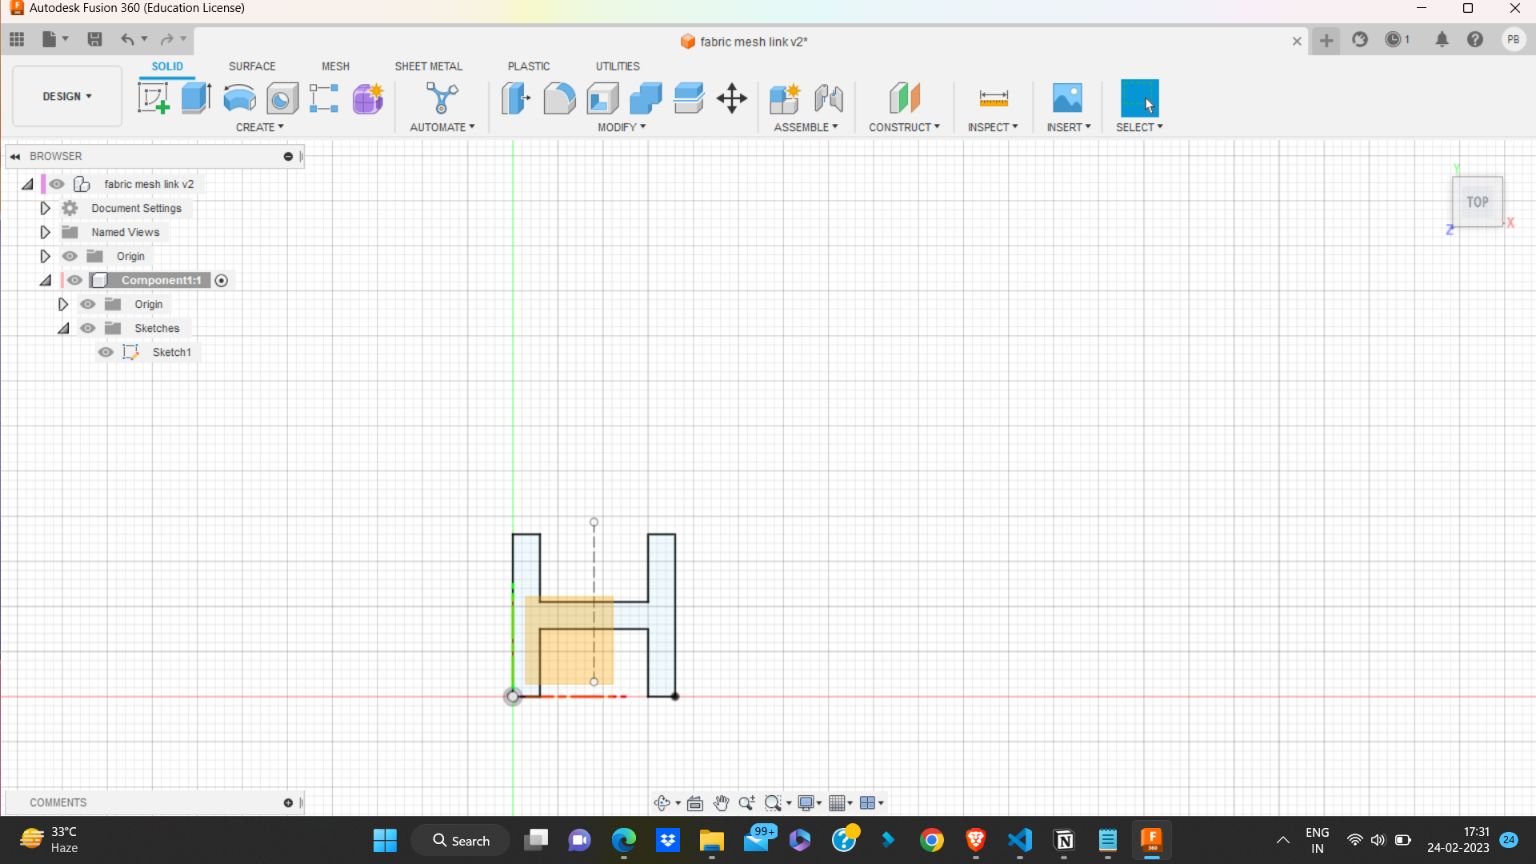
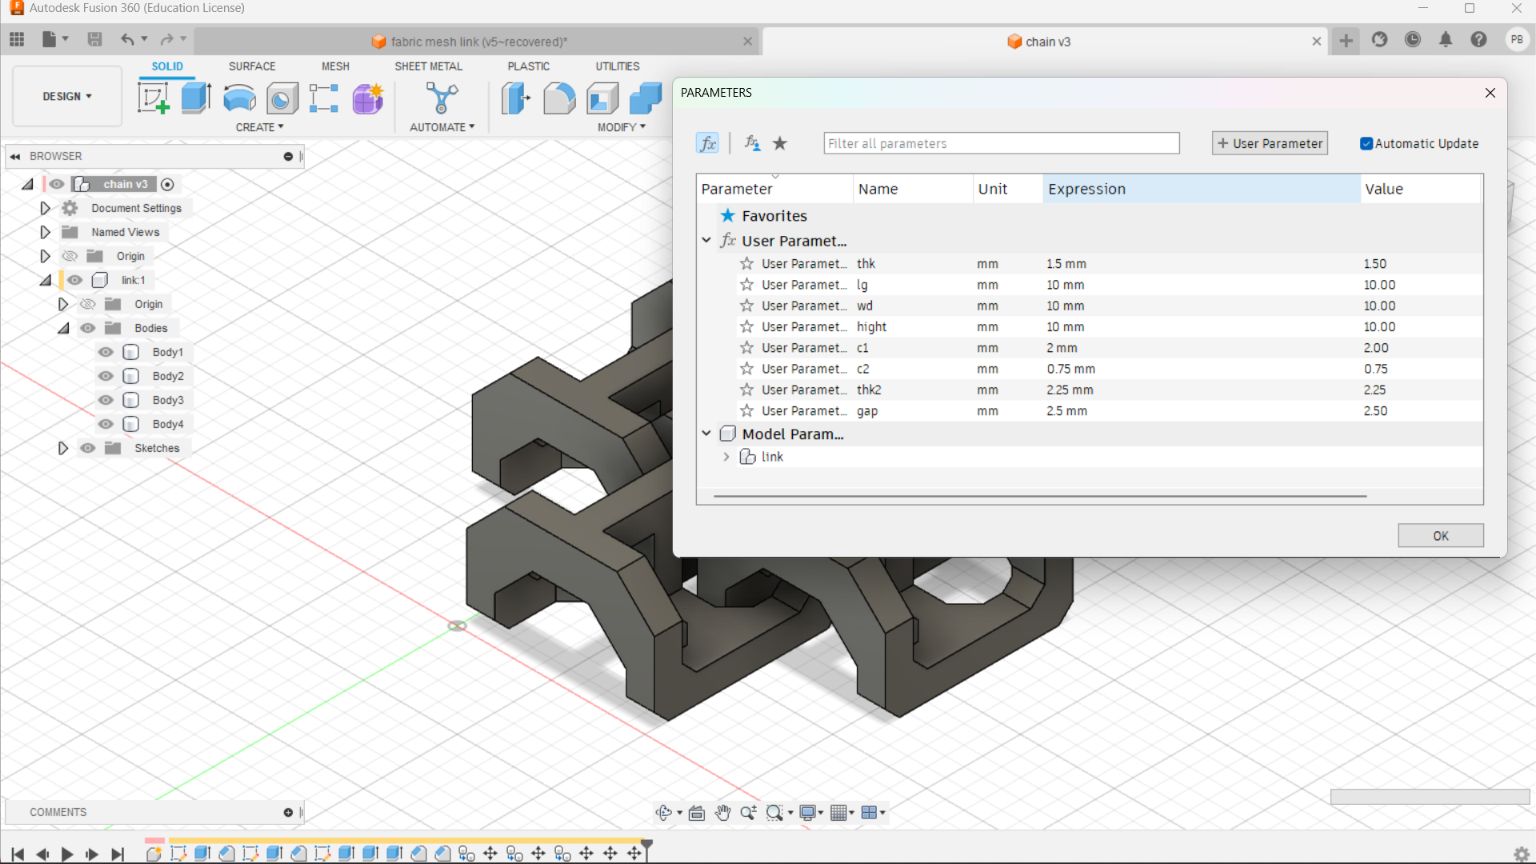
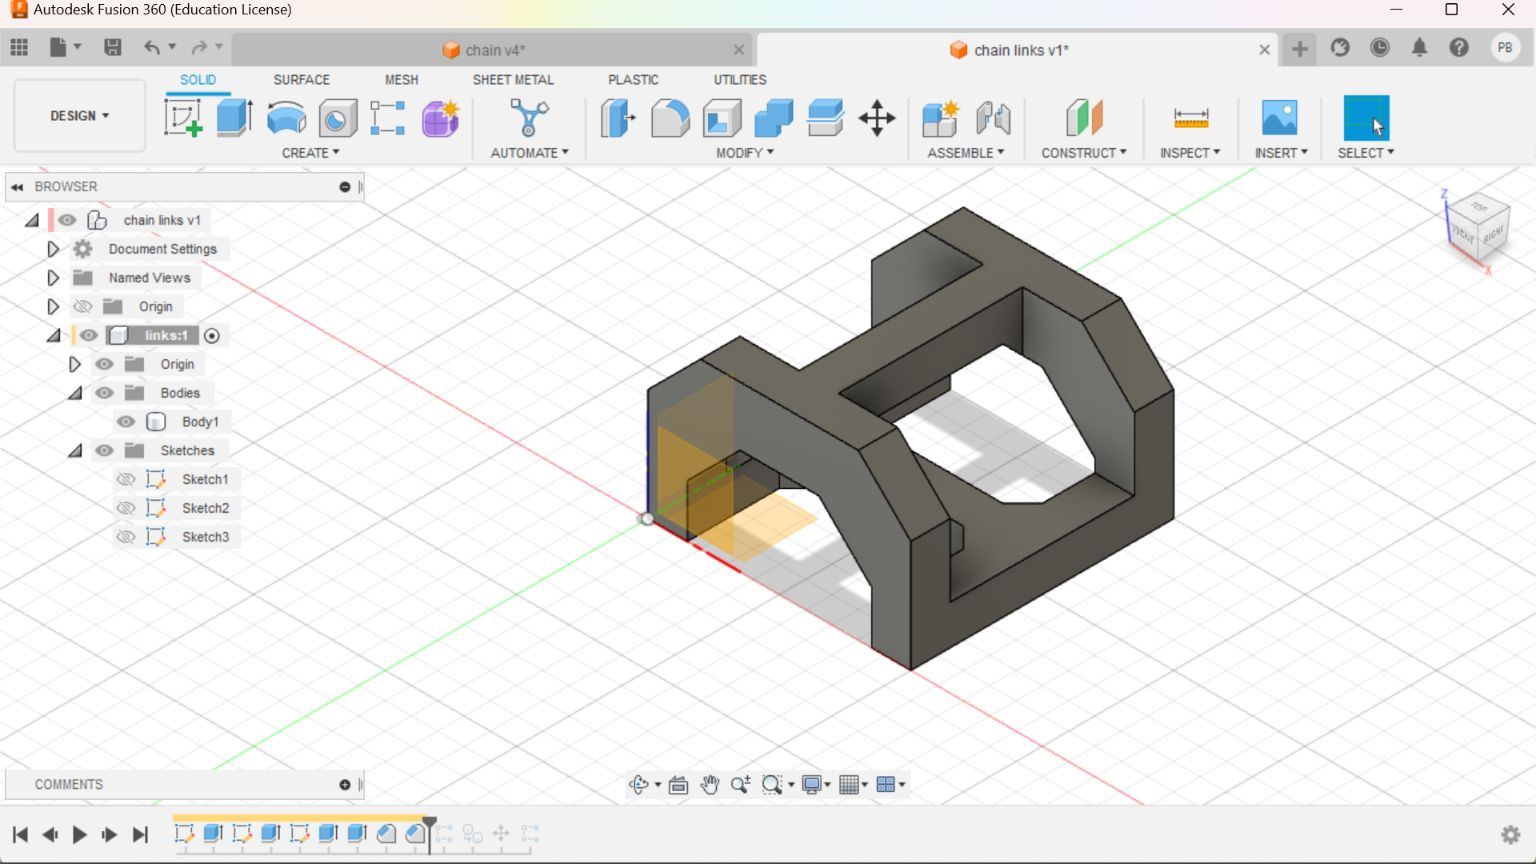
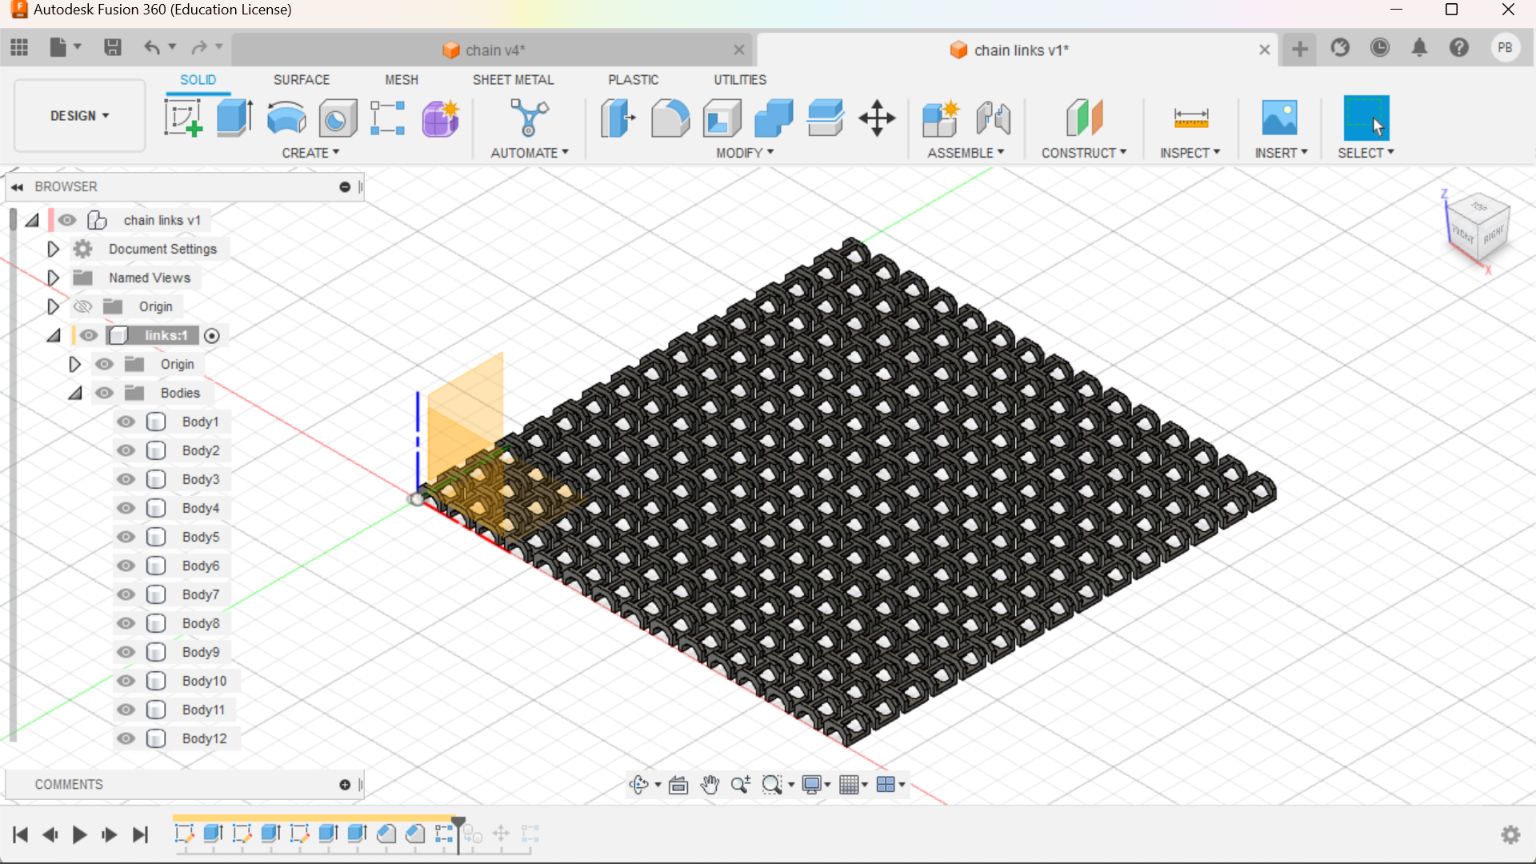

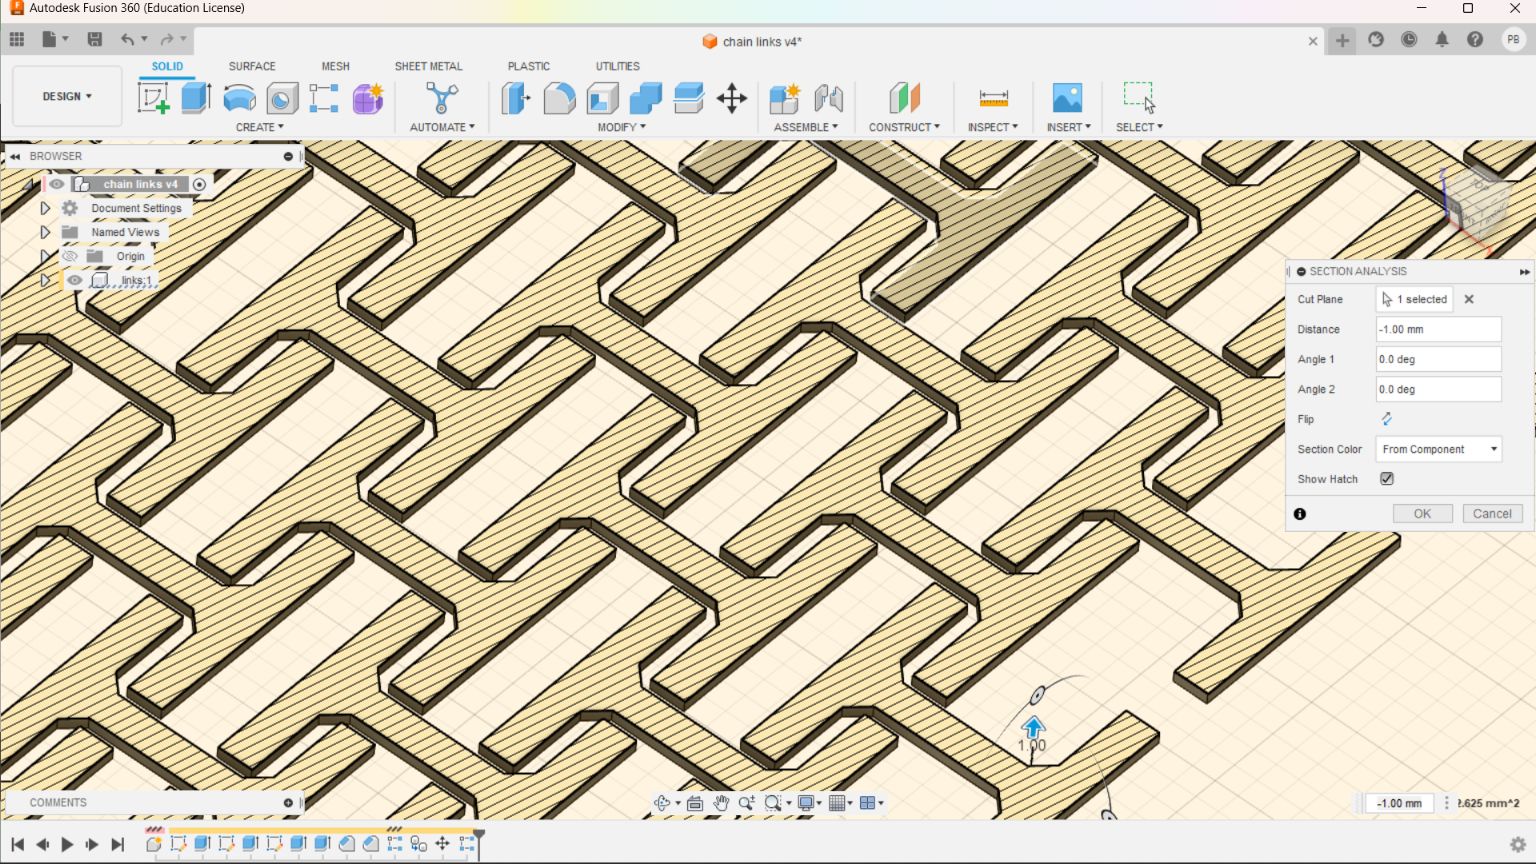
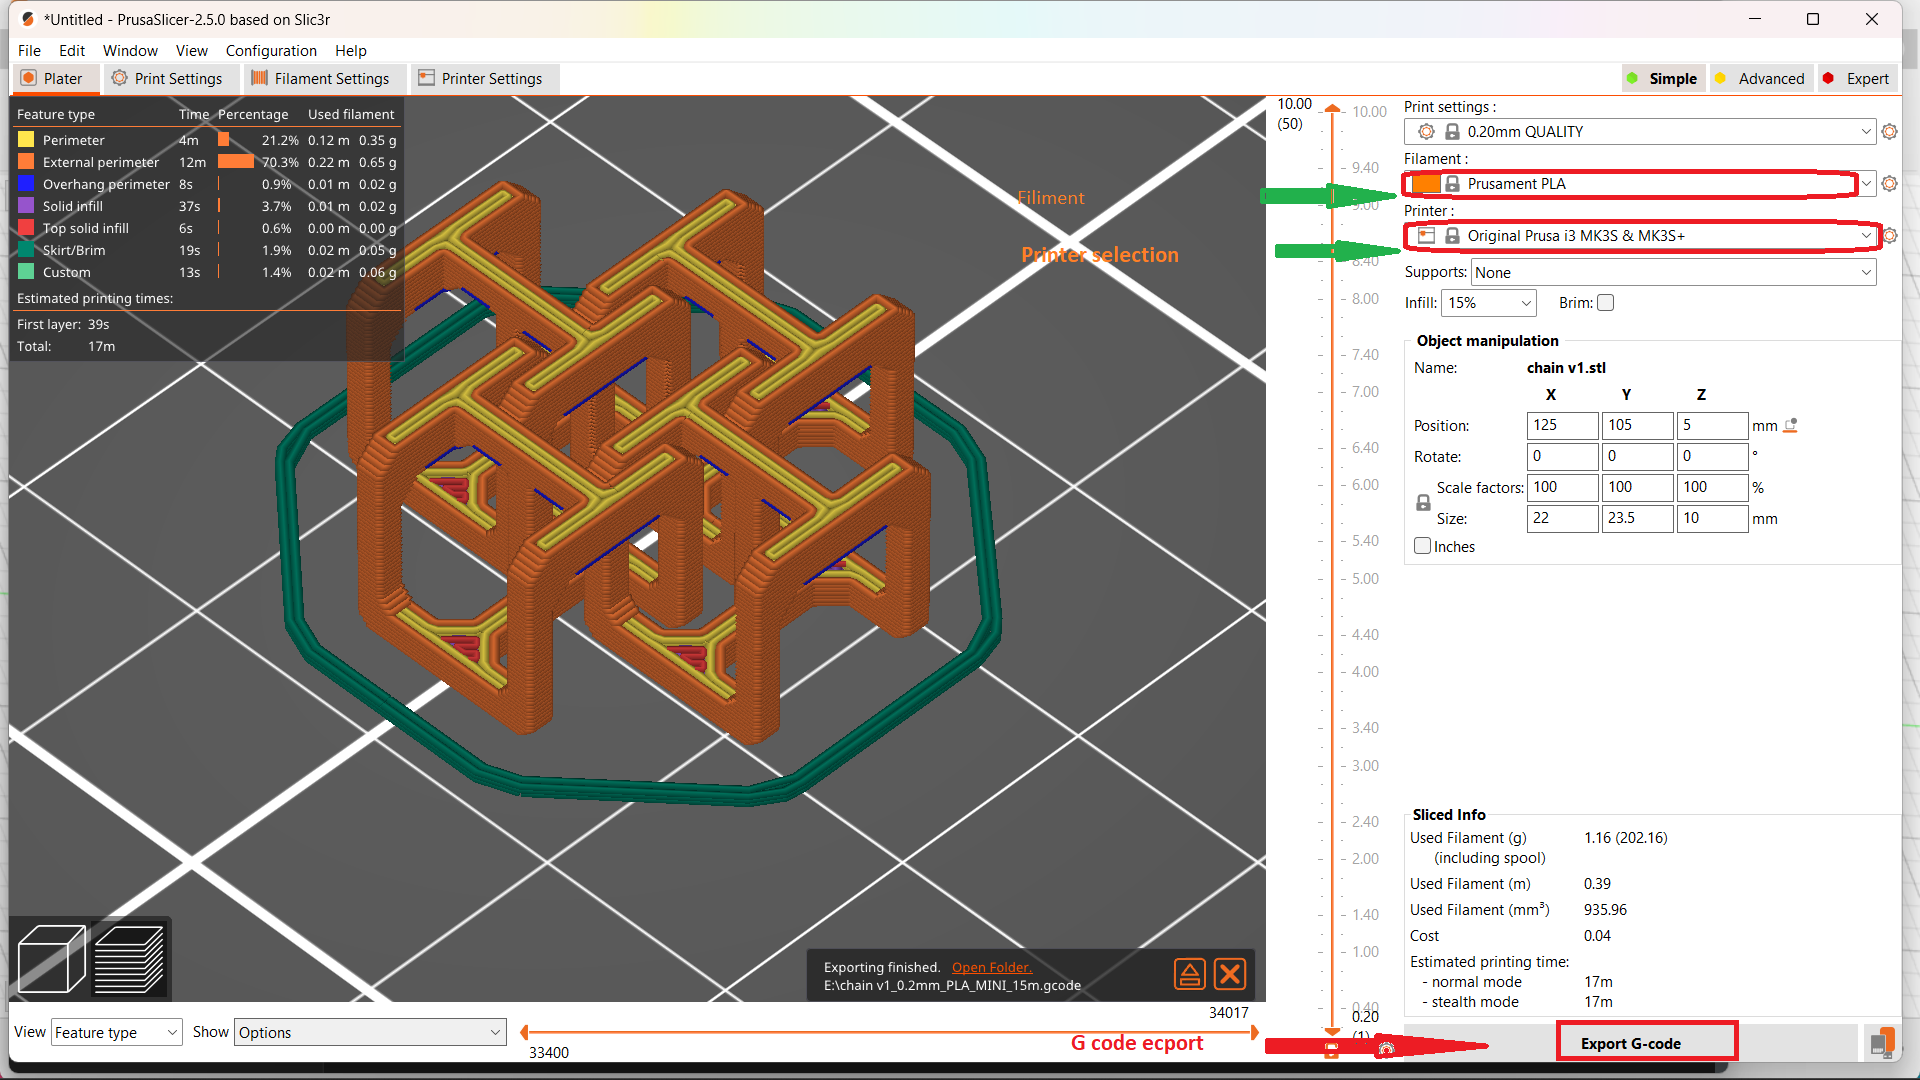
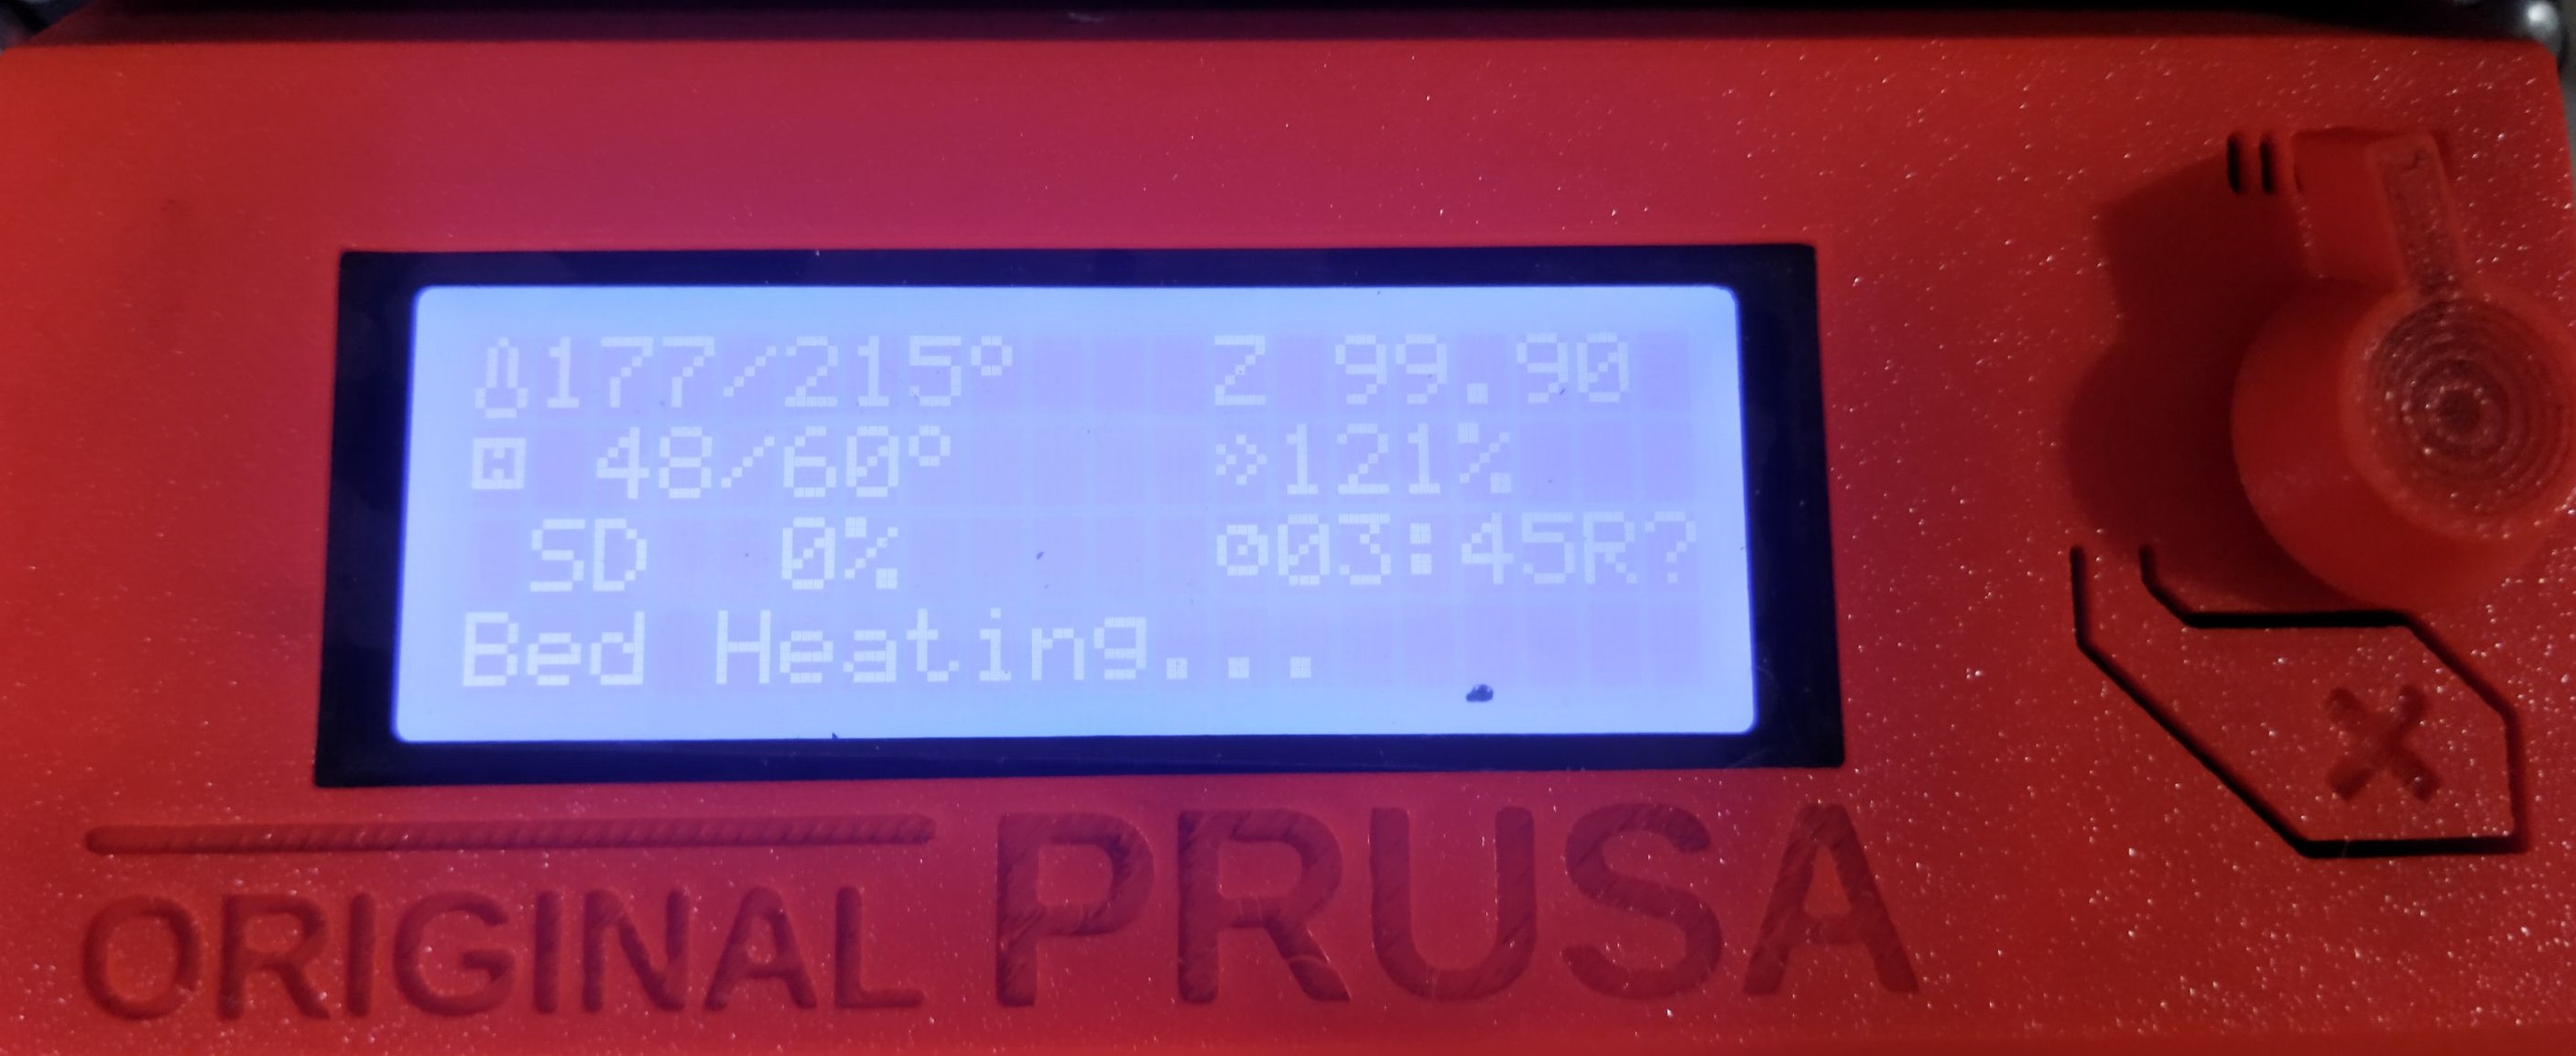
This drawing was converted to STL format and sliced in Pursa slicer application for coverting it to G code file which can be read by the Prusa 3D Printer.I choose grey colour PLA coil for printing. Initially I made only 4 link to check the various factors.
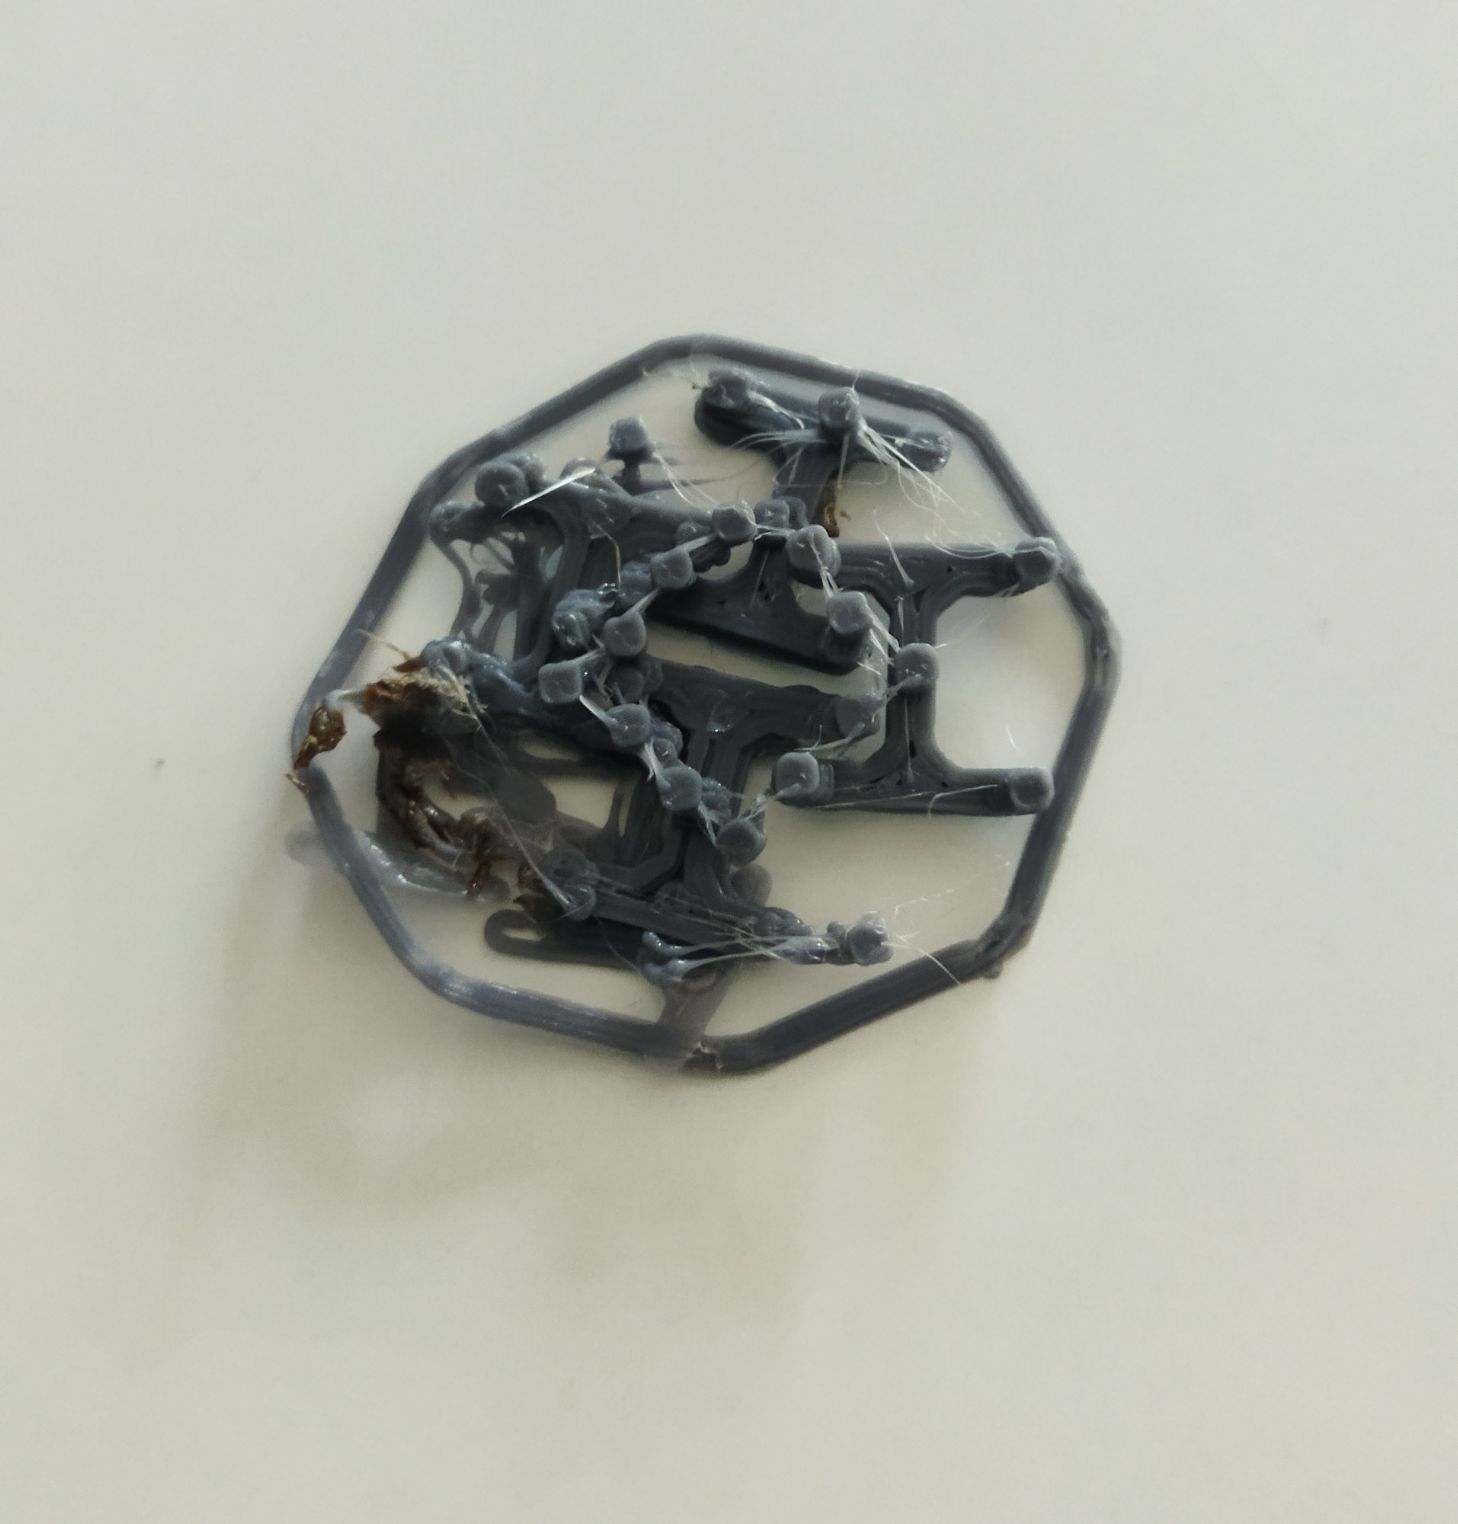
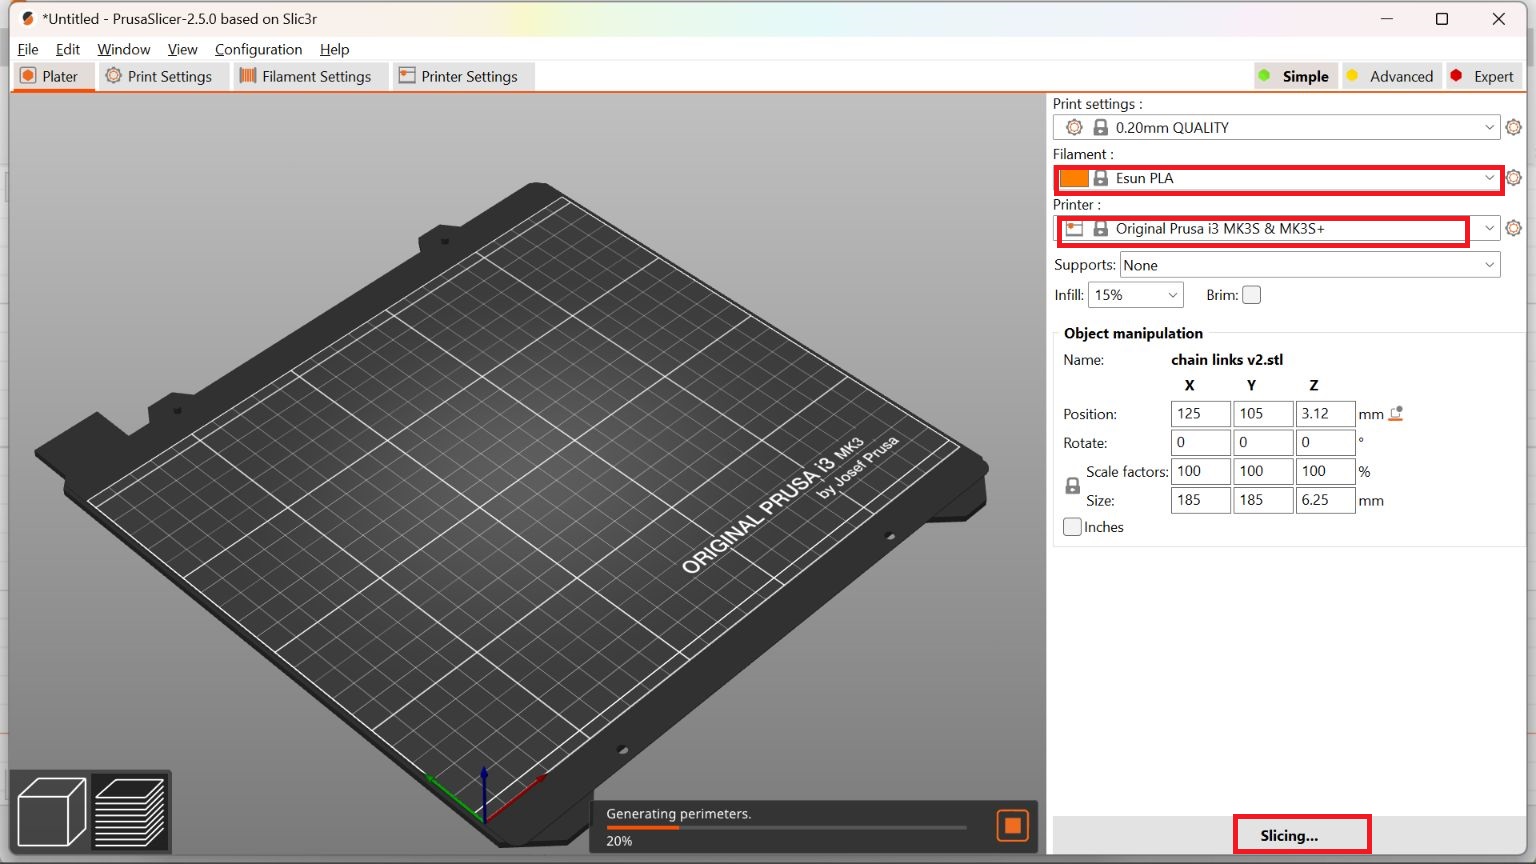
 First attempt was failed due to wrong selection of printer.
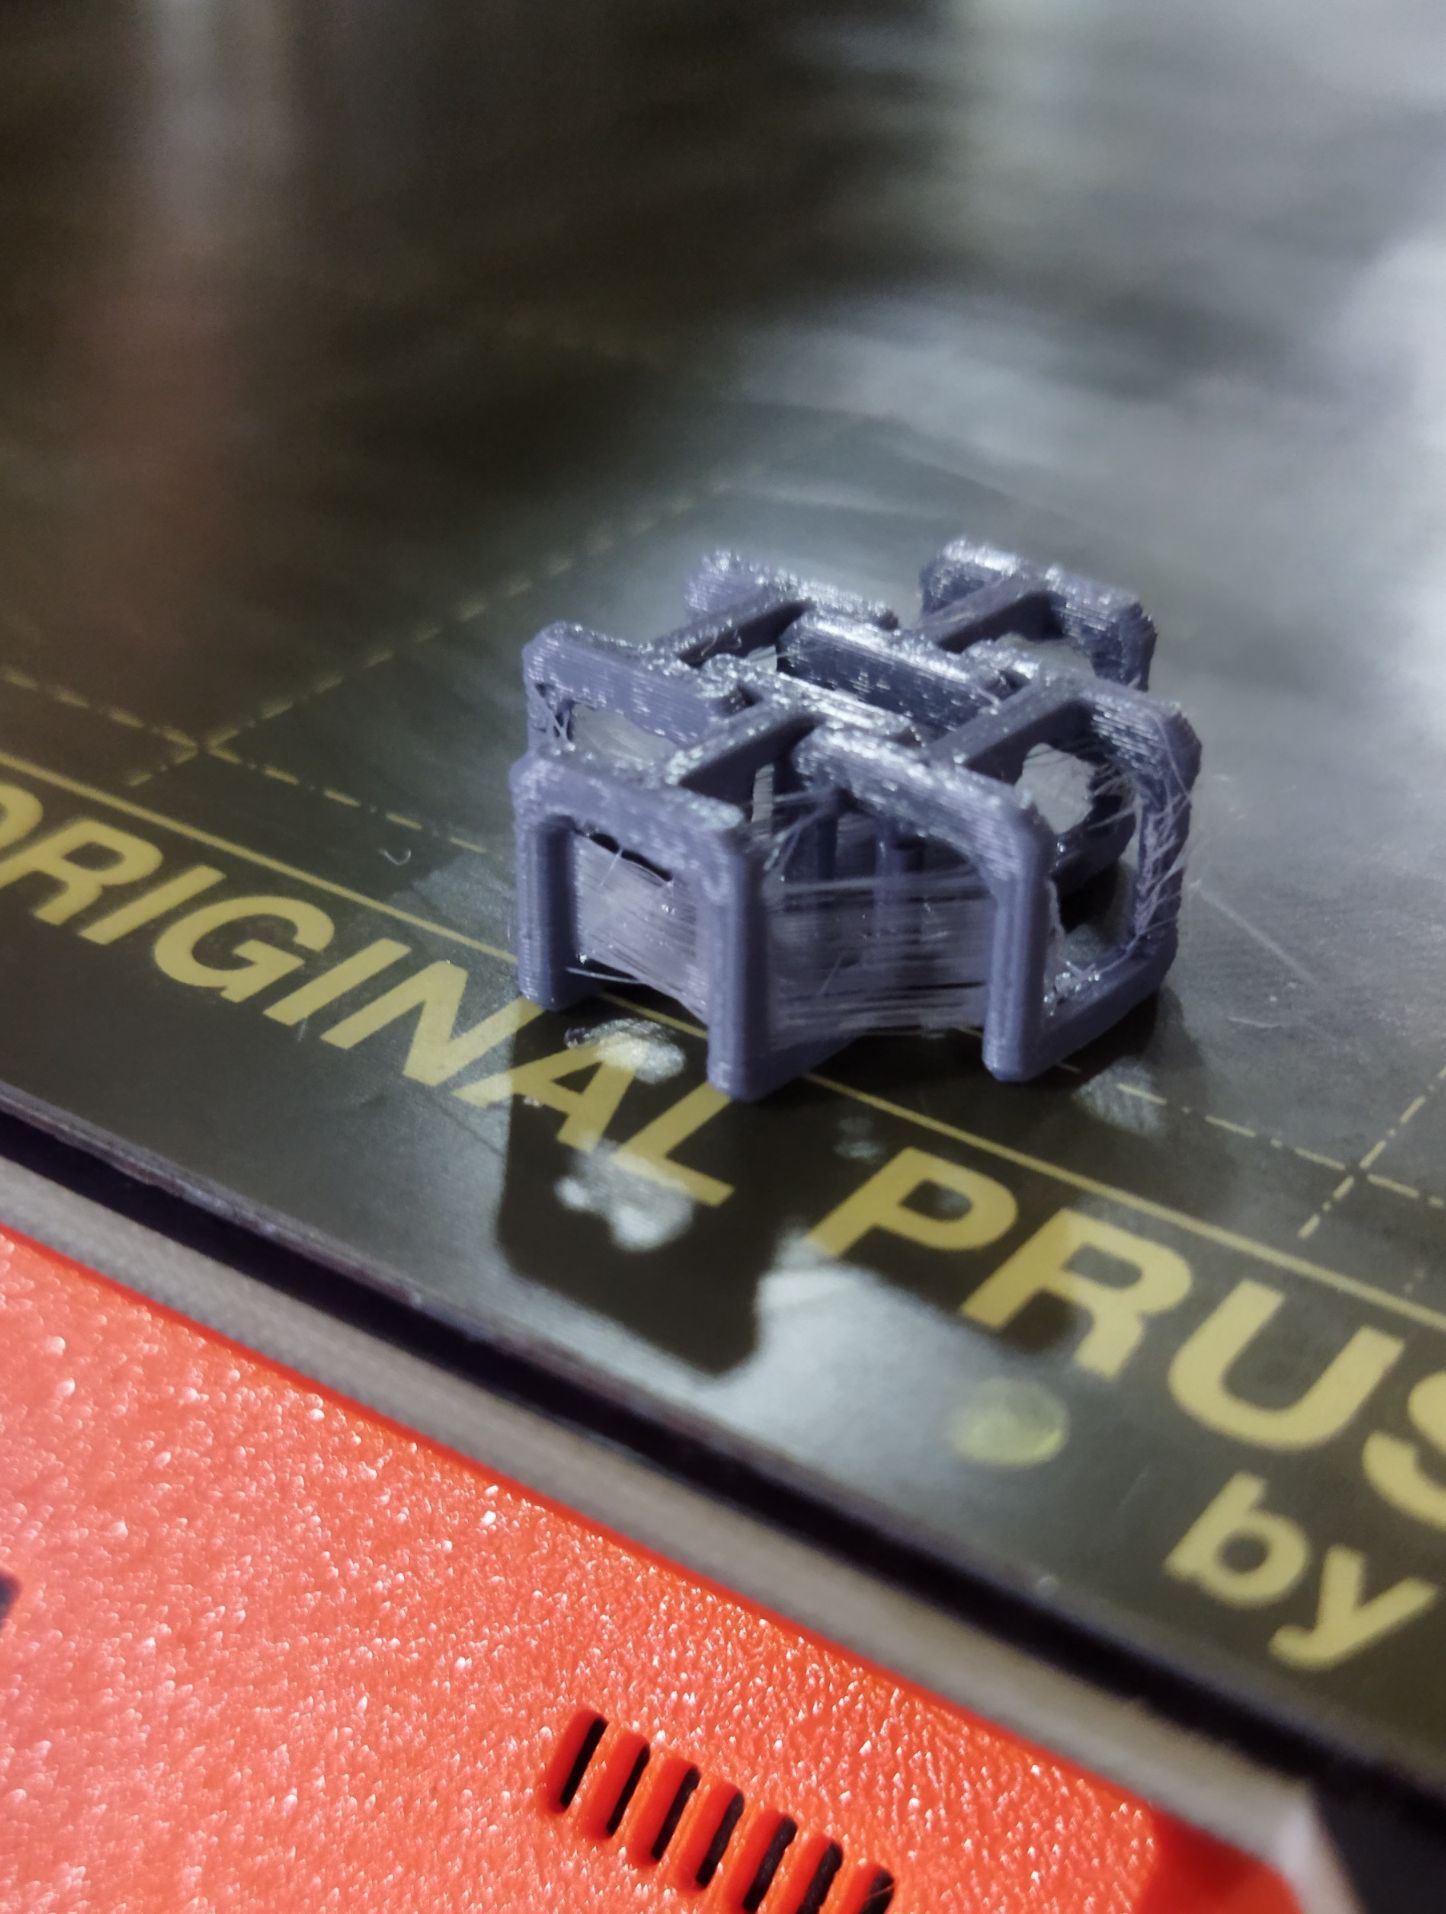
Later I selected the wright one and made my first sample.It took only 12 min to print. It was quit a little big one of height 10mm and our instructer Jogin ask me to reduce the height to 6mm of the link.So by varing various paramenter I made another one.
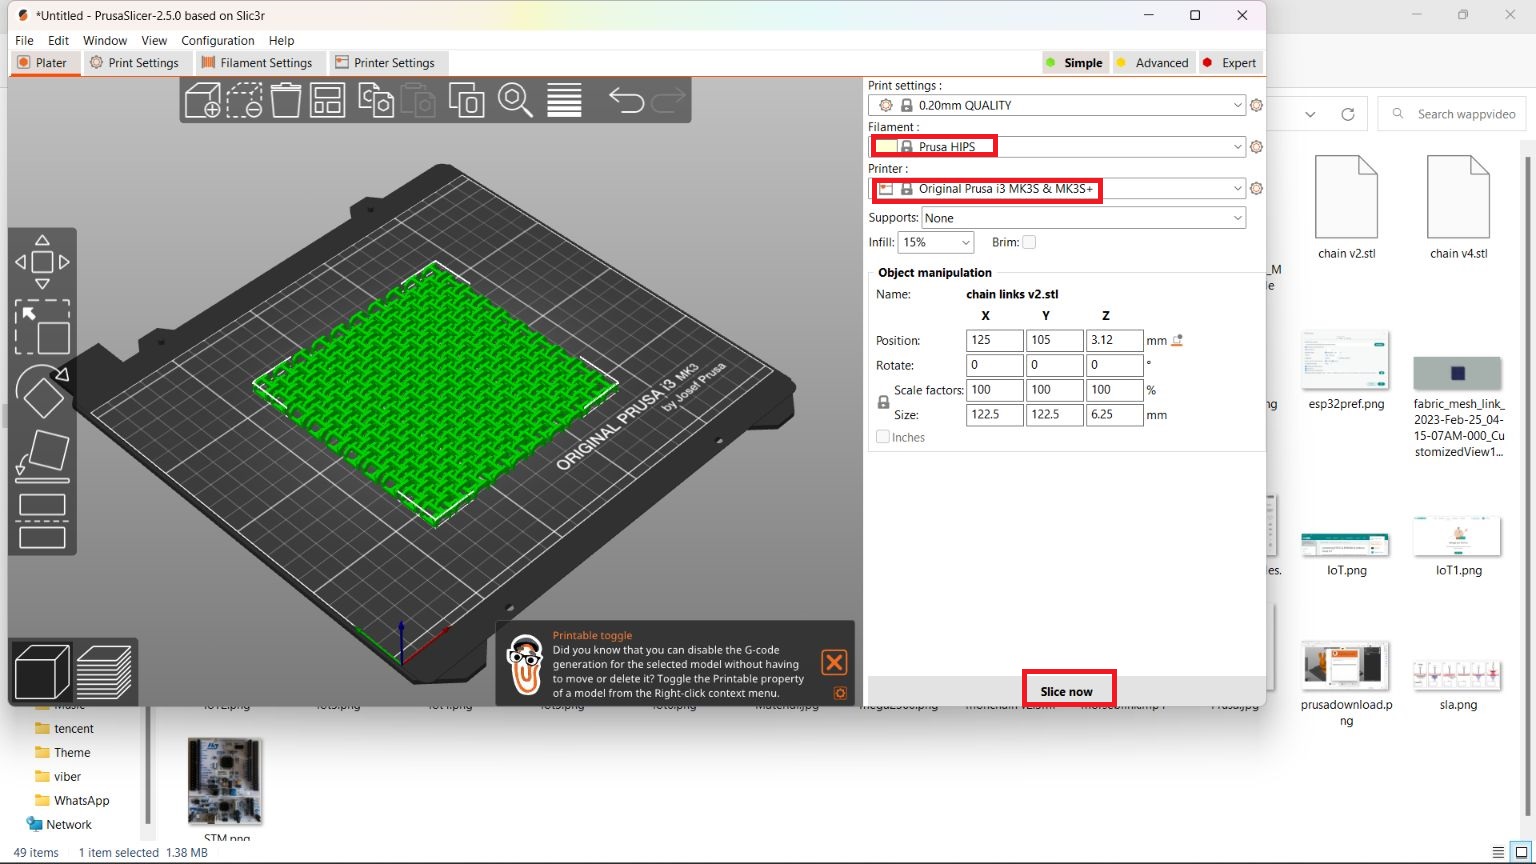
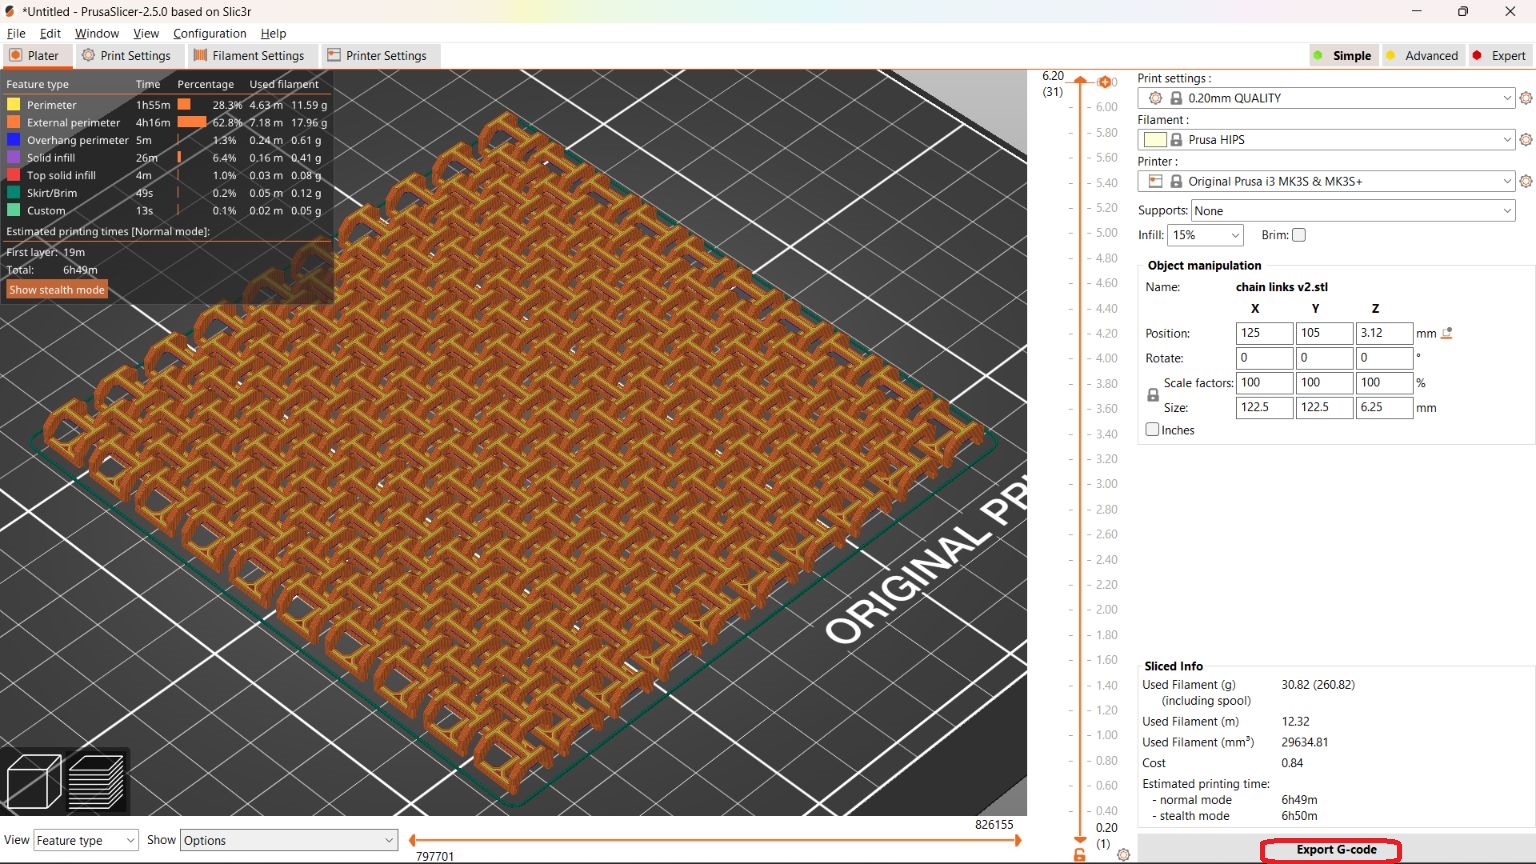
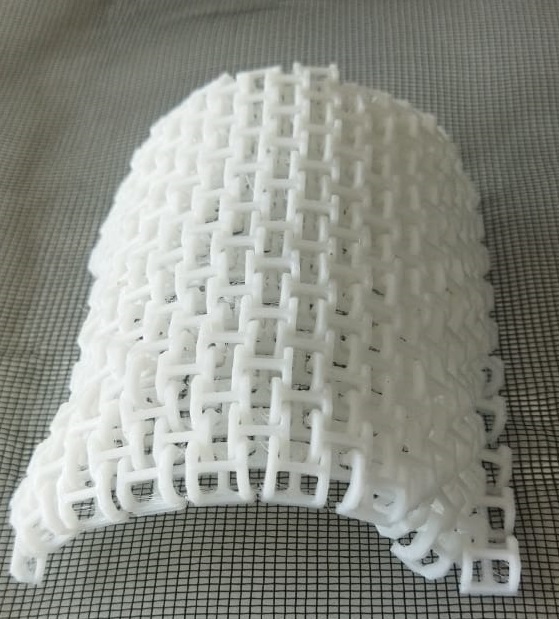
 Later I planned to print in 190mm x190mm size. For that I used another material called HIPS. Printing temperature: 210-230°C
Bed temperature: 70-100°C. But the printing was not processed due to error in the bed temprature. Also the printing time show was about 16 hrs. Hence I reduced the size to 115mm x 115mm, which has a printing time of 4.5 hrs.Here I changed the material to PLA white colour.
The print was good and some of the links are sticked, which I cleaned up with knife.
Later I planned to print in 190mm x190mm size. For that I used another material called HIPS. Printing temperature: 210-230°C
Bed temperature: 70-100°C. But the printing was not processed due to error in the bed temprature. Also the printing time show was about 16 hrs. Hence I reduced the size to 115mm x 115mm, which has a printing time of 4.5 hrs.Here I changed the material to PLA white colour.
The print was good and some of the links are sticked, which I cleaned up with knife.
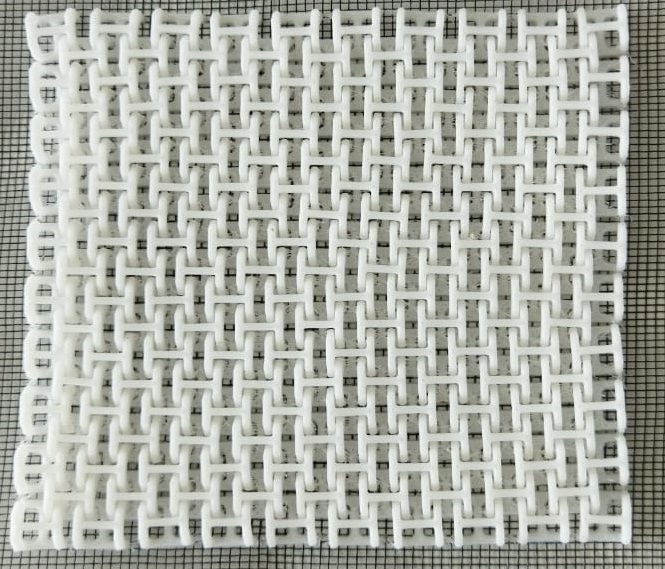

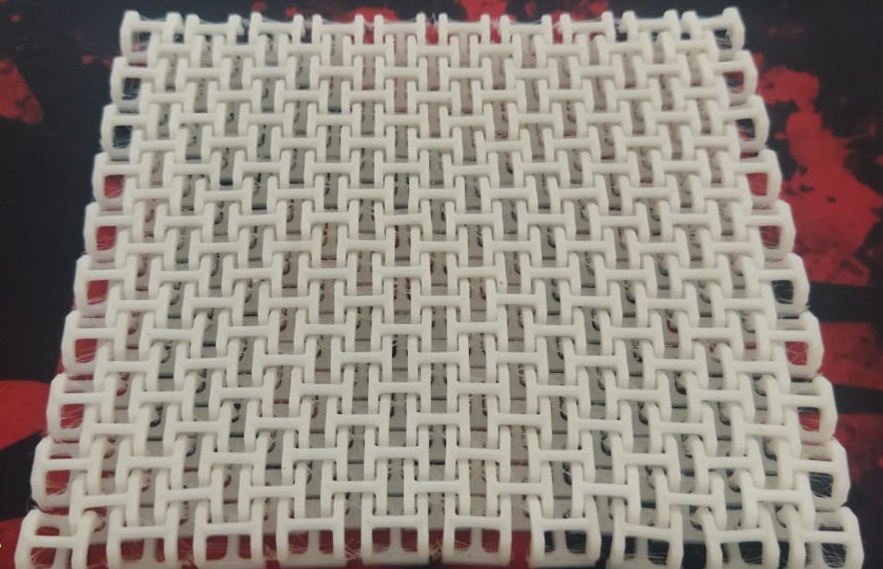 Top side
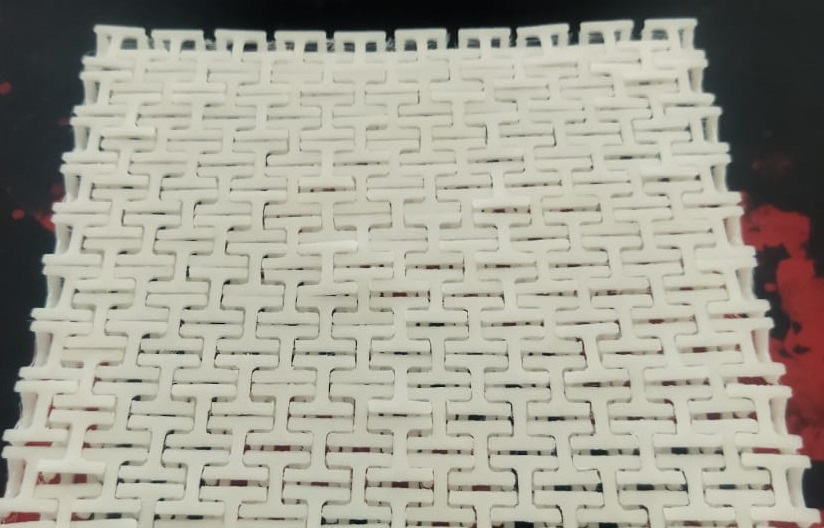 Base side
 Placed over the mouse
3D SCANNING
3D scanning is a process of capturing real world object’s data like shape, dimensions and possibly its appearance. The data collected can be converted into a digital 3D model.
To do 3D scanning we need a 3d scanner. In our super fab lab we have’Artec Leo’ an advanced 3d scanner .
ARTEC LEO
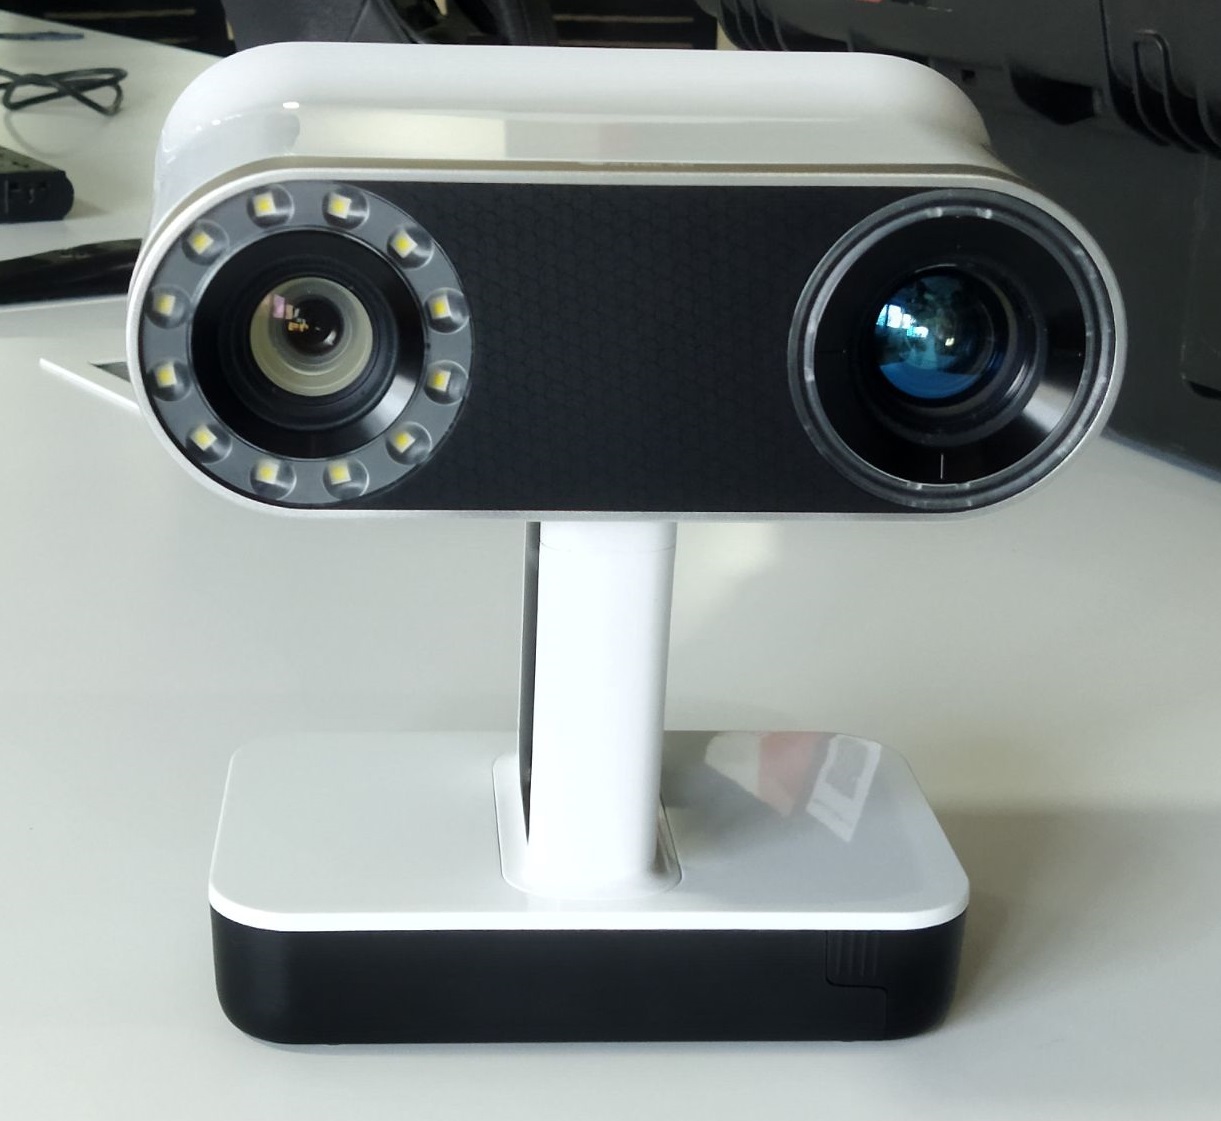

Artec Leo is a professional 3D scanner developed by Artec 3D, a leading developer and manufacturer of 3D scanning hardware and software solutions. The Artec Leo scanner is a handheld device that uses structured light technology to capture high-quality 3D scans of objects, people, and environments in real-time. It features a built-in touch screen display and an intuitive interface, allowing users to easily view, edit, and export their scans on the device without the need for a computer or additional software. The Artec Leo also has an integrated 3D radar that helps to track the scanner’s movement and location in real-time, enabling users to scan large objects and spaces accurately and efficiently. The scanner is widely used in industries such as automotive, aerospace, medical, and entertainment for product design, quality control, inspection, virtual reality, and more.
The Artec leo turned on with a single press of button on the Leo and then started a new project by clicking ‘new project’ on screen. Then I pointed at the carboard chair as the machine instructed and it says ‘Ready to Scan’ then the message disappeared for scanning window.
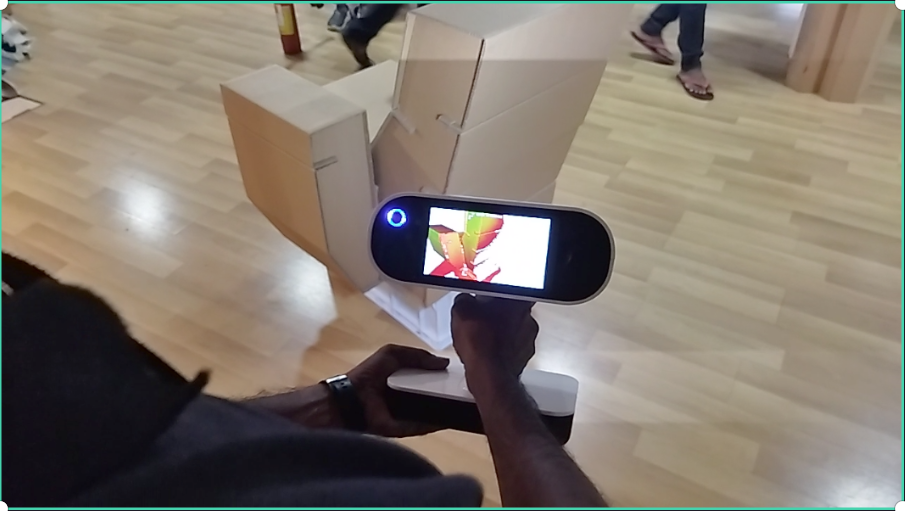
I kept pressing the trigger button on the Leo’s handle to start and continue the scan.The data slowly started to pop up in the screen as I move around the object.
While scanning process the uncovered areas shows in red color or red dots and covered will show green and also if we point too close it will turn to yellow and if it is too far it will shows blue color , keeping in green is the best distance for scanning.
So while continue the scan on the same file a message instructions says to ‘Point at the base and scanned area’.It is searching for areas that it already know.
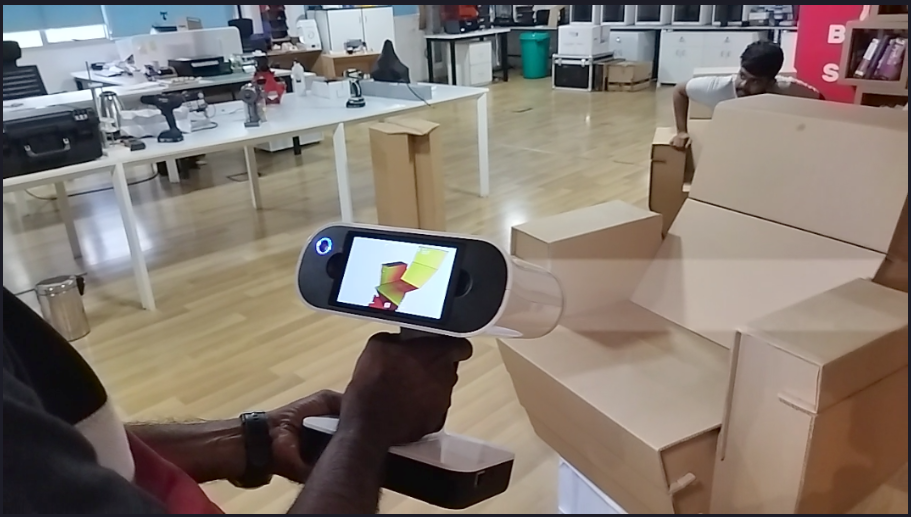 After I shows the scanned area it shows that ‘Ready to scan’ and started to scan.Then I scanned the complete side.
After all the scanning done I connected the Artec Leo to the Desktop PC using an LAN cable.
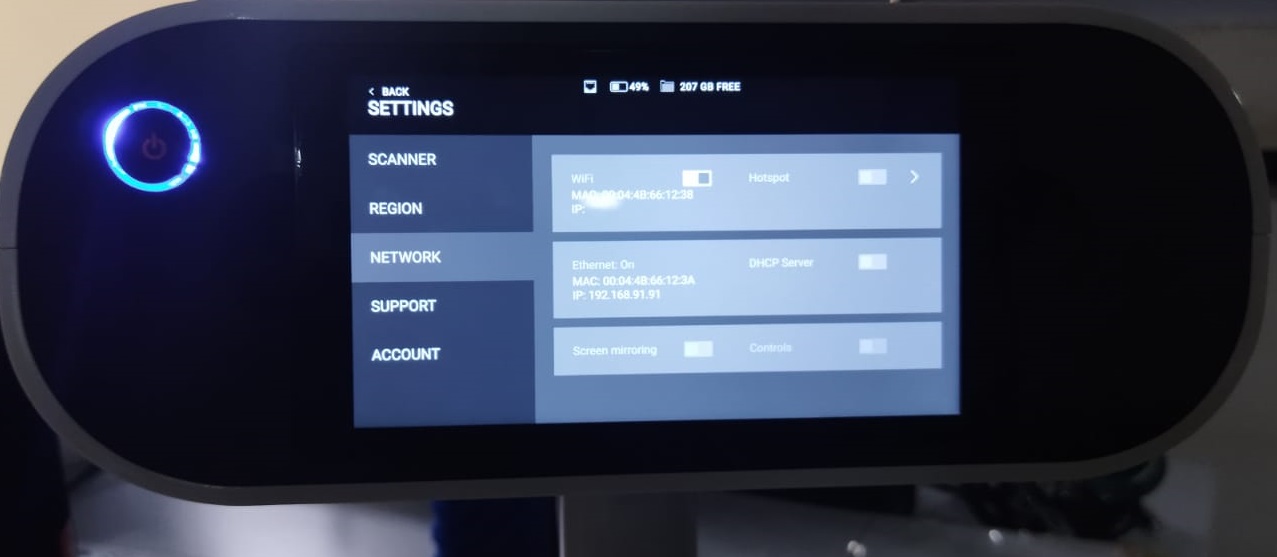
Then opened settings in Artec leo LCD panel and switched the tab to network section and selected the ‘Connect to Leo’ Option.
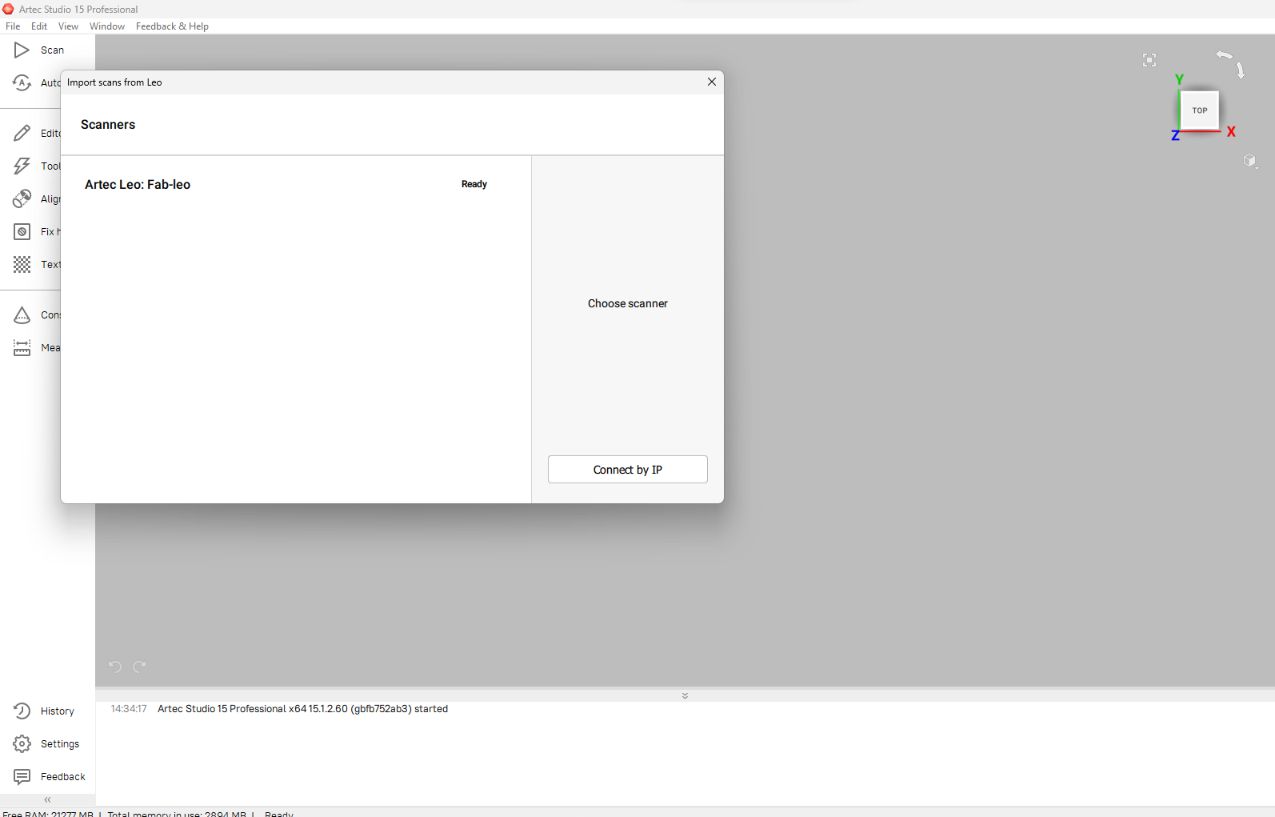
And I opened the Artec Studion then Clicked ‘FIle >> Import >> Leo Project(connect to Scanner)’ for importing the scanned files from the Leo scanner.
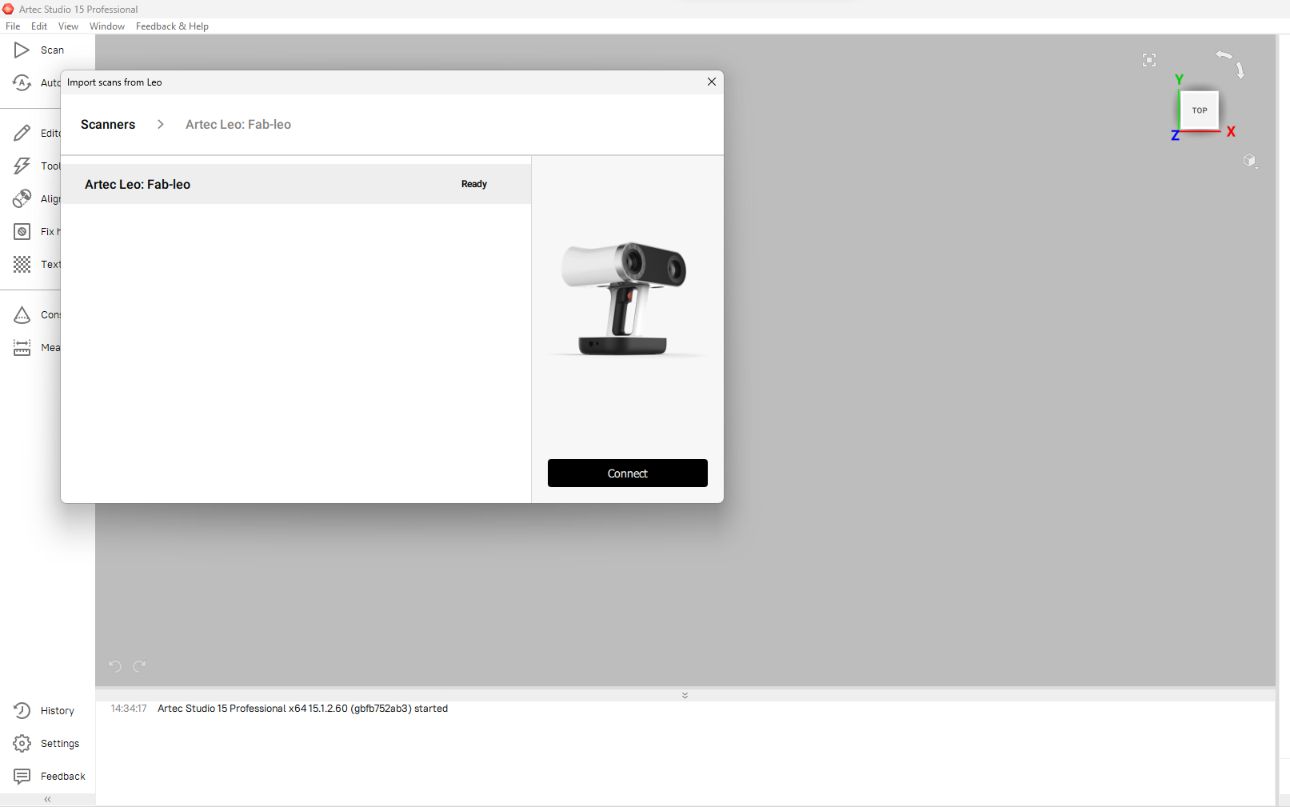
Then in the following window I selected the scanner That appeared in the searching list and clicked ‘connect’.
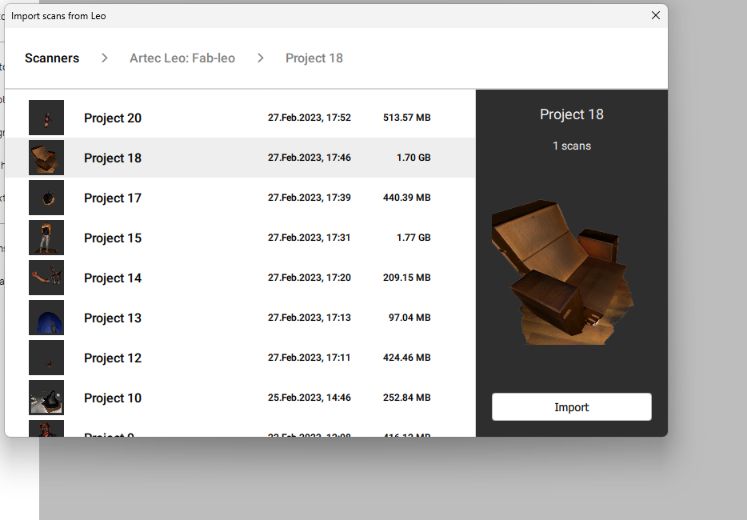
 And then it shows the Projects scanned by the Leo scanner ,I chose the project scanned by me to import and then clicked the ‘Import’ button.
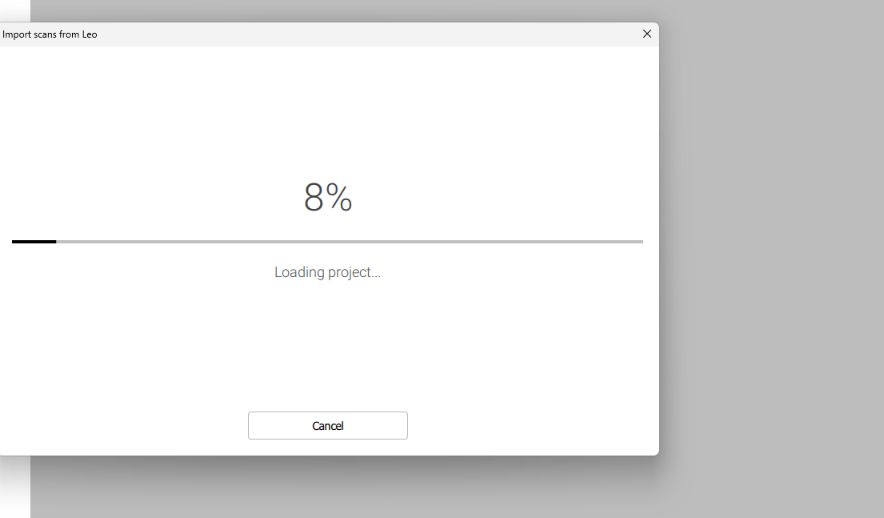
 It started to import the file from the Leo scanner to the studio.
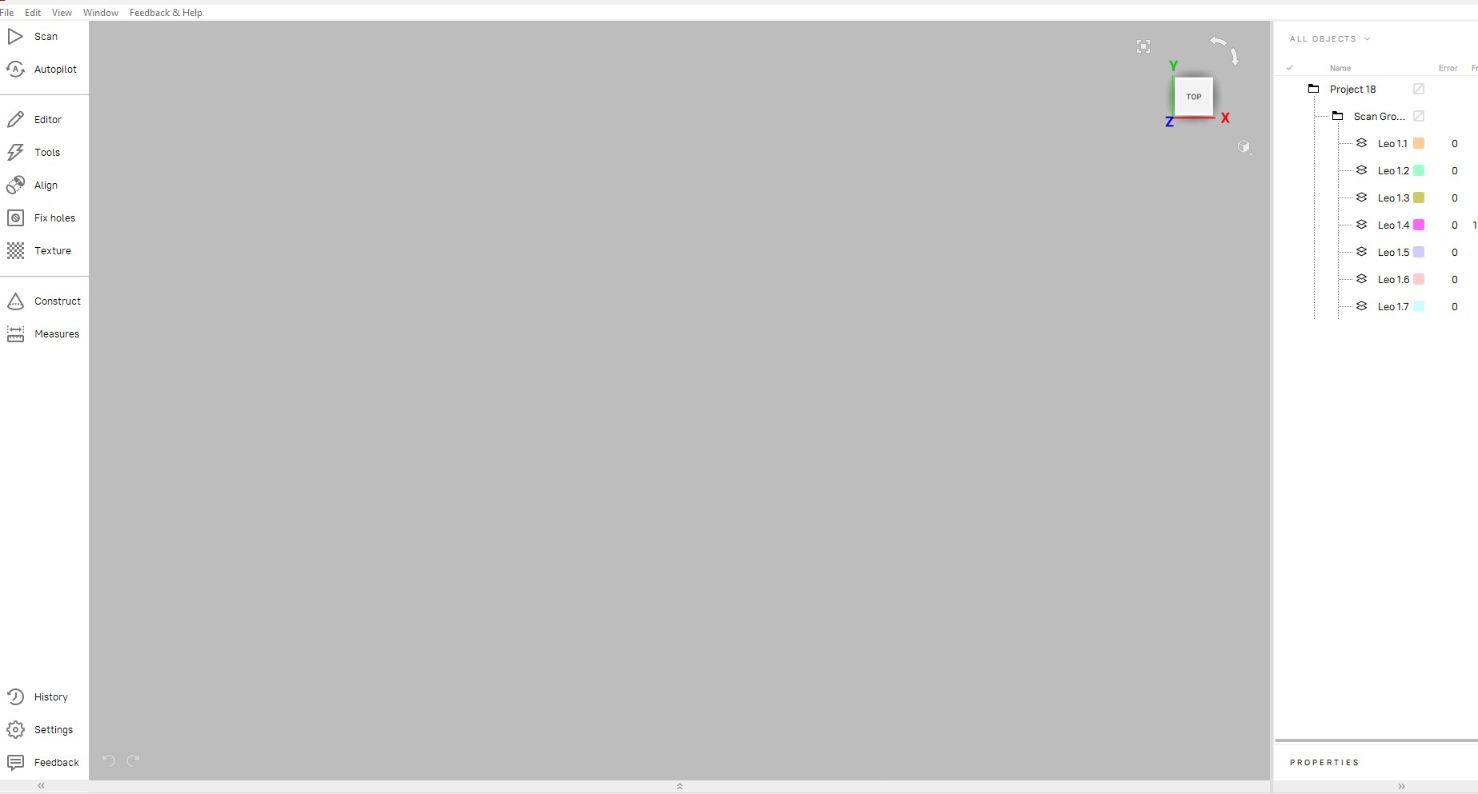 The Scanned files appeared in the left browser of the Artec studio its time for postprocessing. The Artec studio has many postprocessing features .I proceed with Manual.
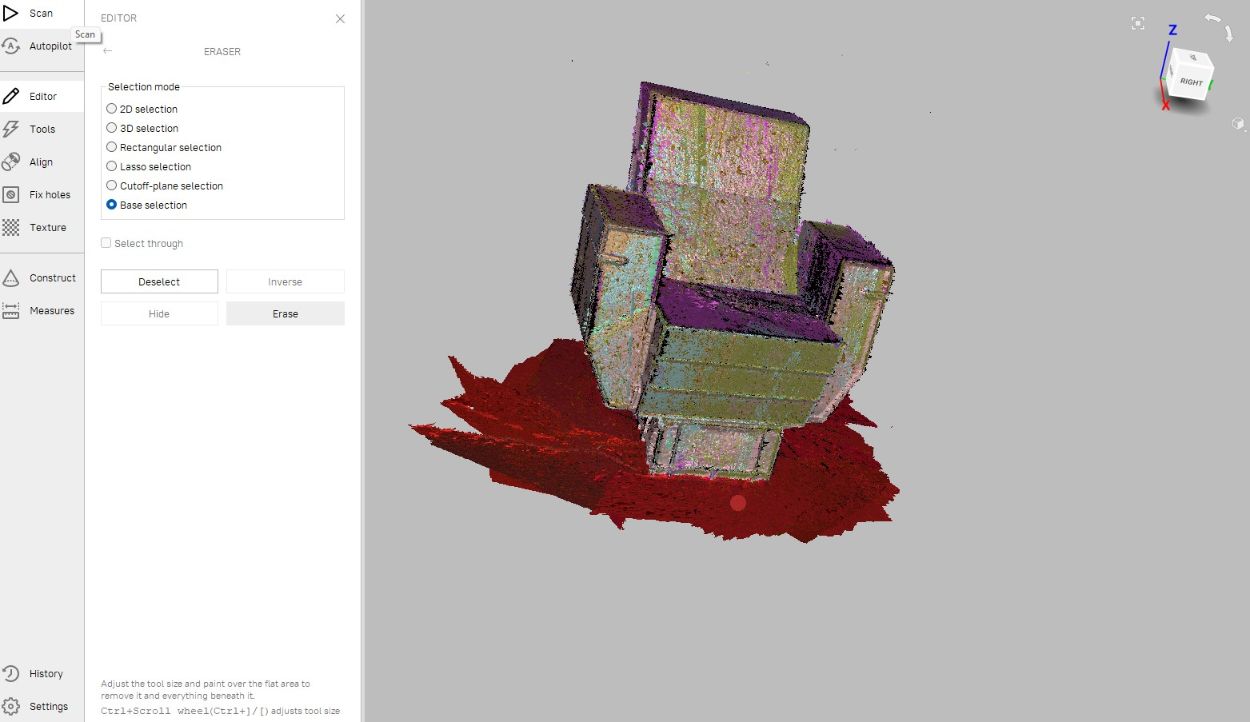
Next in the Editor option it asks to crop unwanted dots from surrounding.I used BASE SELECTION and LASSO SELECTION option for erasing unwated dots and images.
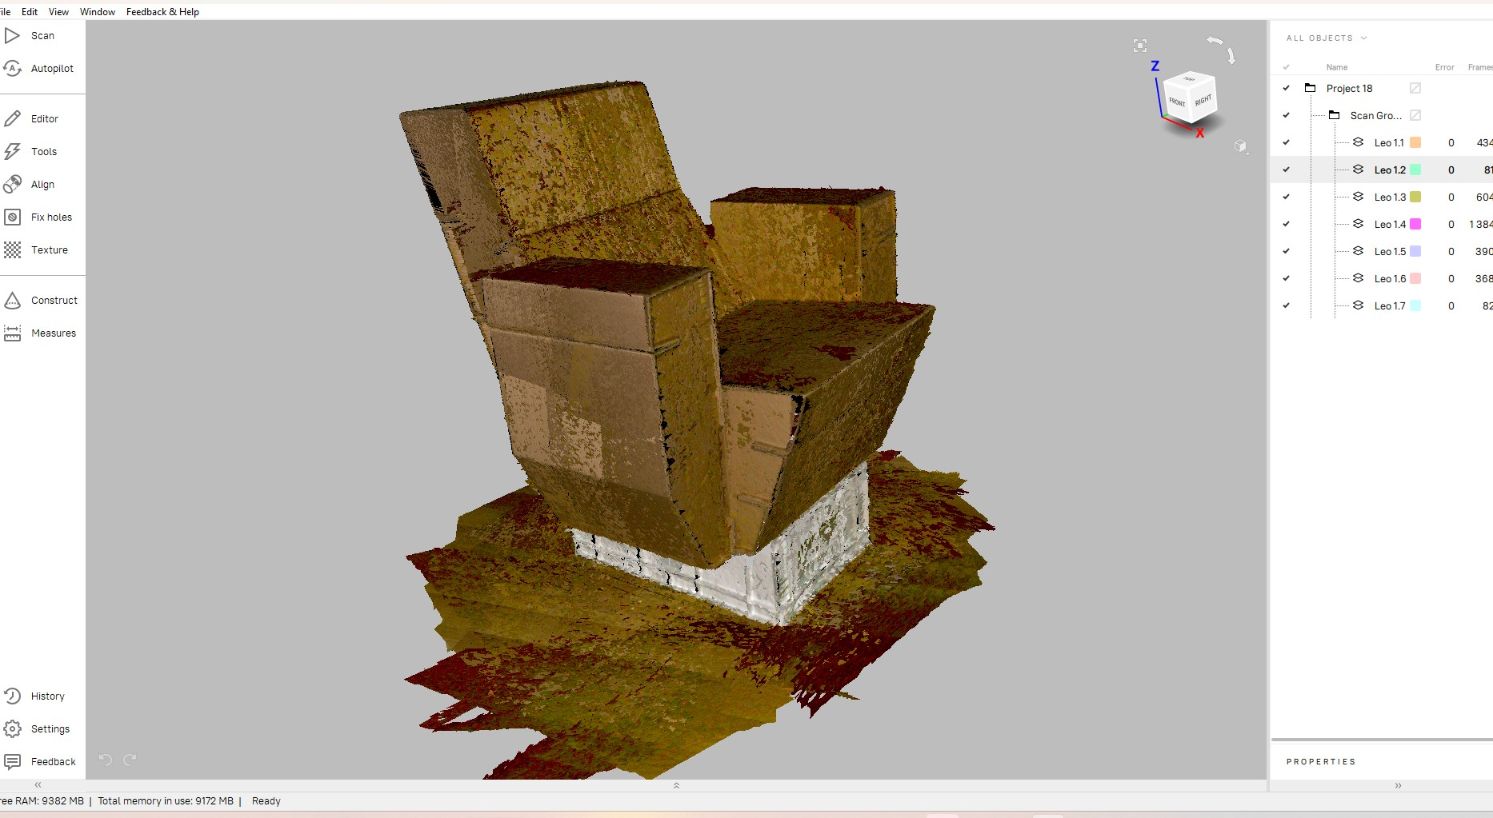
After that I proceed with TOOLS for GLOBAL registraction.
Next I proceed for FAST FUSION, where all the scanned data fused together.
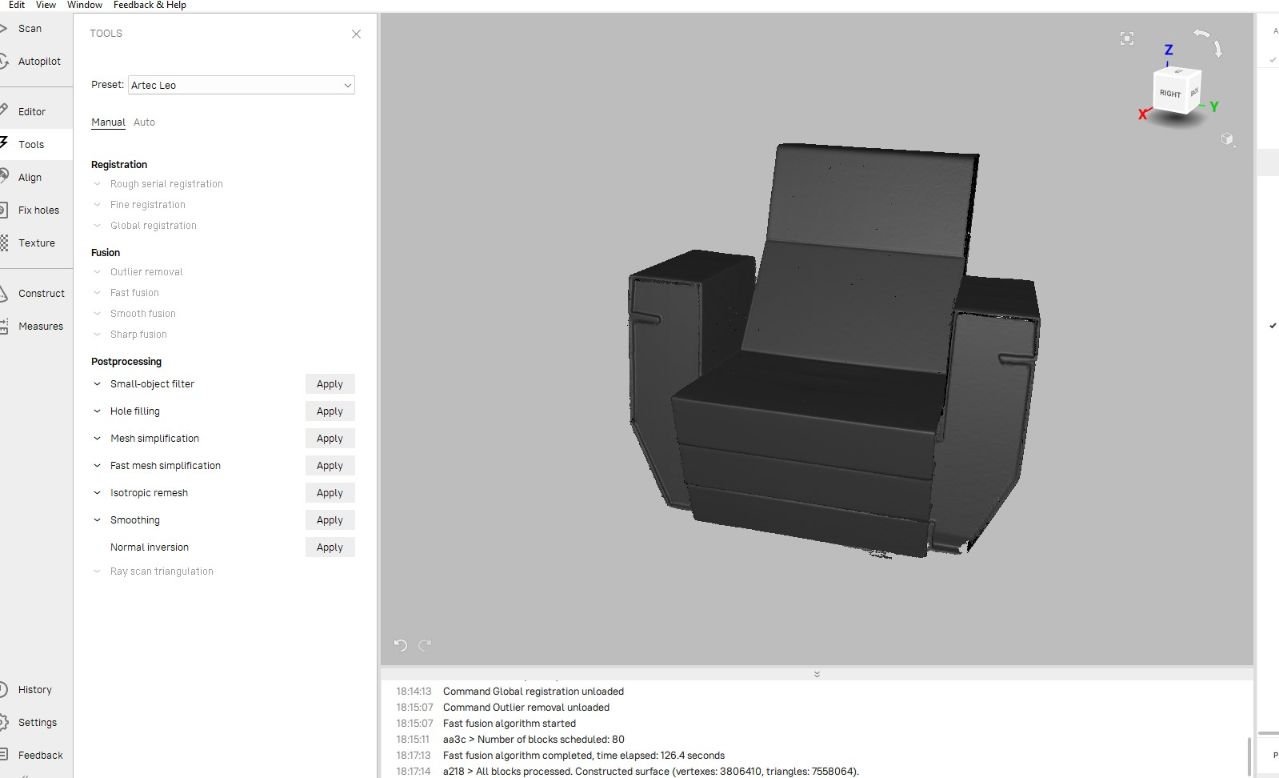
Next I went for Postprocessing features such as “Small-object filter,Hole filling and Mesh simplification”.
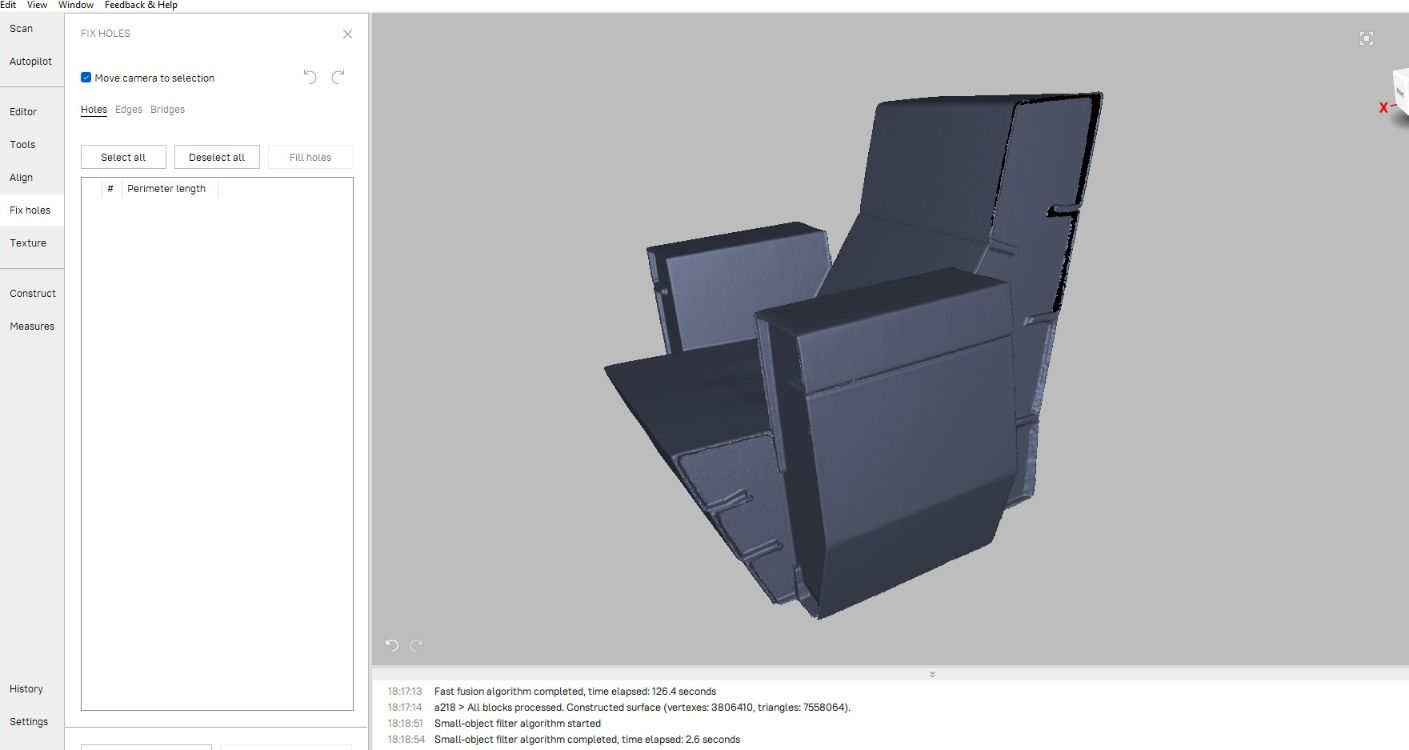 Next I went for hole filling option in FIX HOLE option to fill the larger holes.
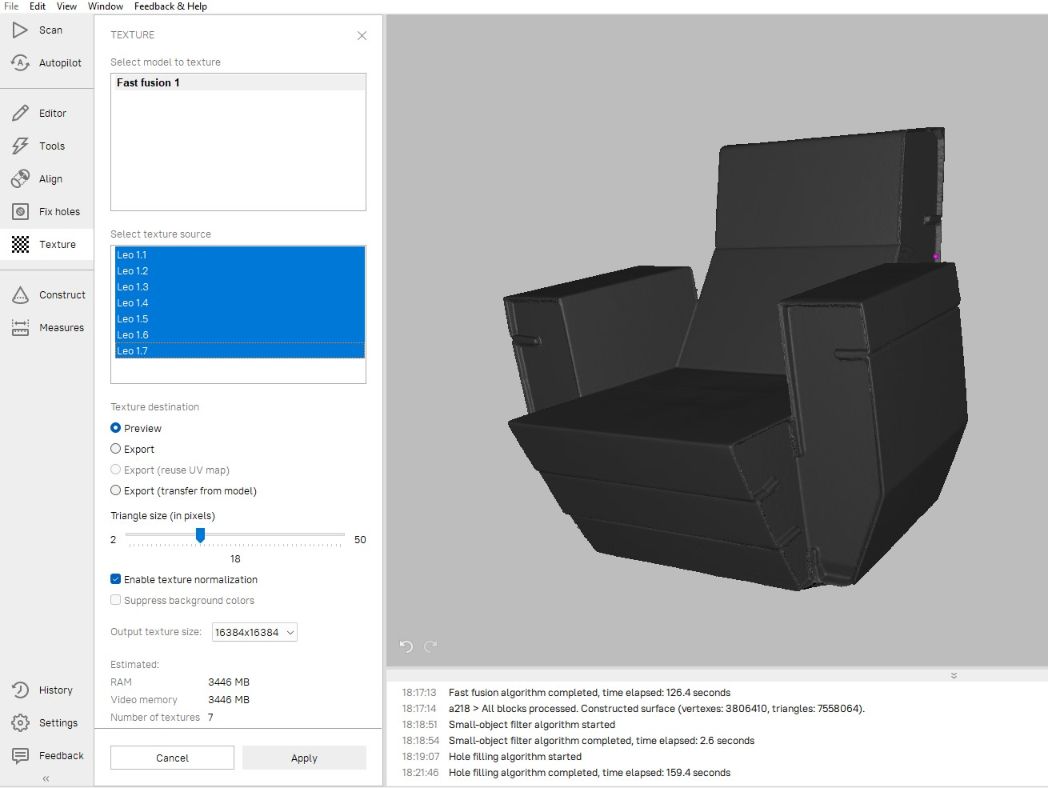
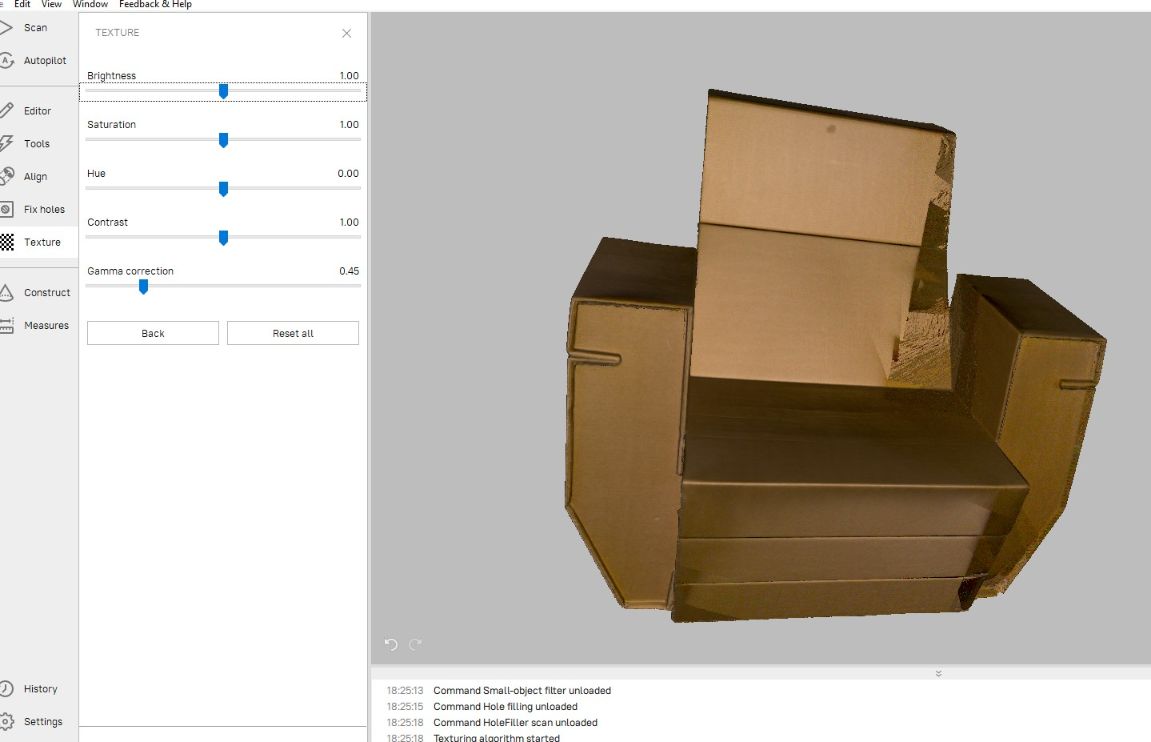
Next is TEXTURE to combine all textures from all the 7 scans I made.
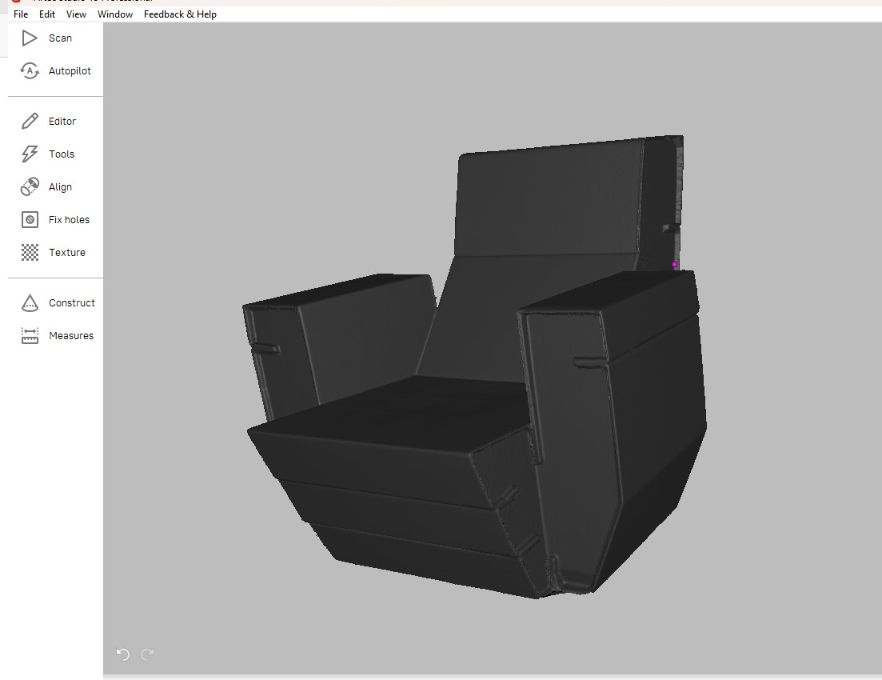
 And finally the model is ready and its look perfect and smooth.
I opened the OBJ mesh