7. Computer controlled machining
Objectives
Make (design+mill+assemble) something big (~meter-scale)
Extra credit: Don’t use fasteners or glue and include curved surfaces.
Group Assignment
Do your lab’s safety training test, runout, alignment, fixturing, speeds, feeds, materials, and toolpaths for your machine. (Group Assignment link.)
CNC router
A computer-controlled cutting device known as a CNC (Computer Numerical Control) router is used to carve and shape a variety of materials, including metal, plastic, and wood. Computer-aided design (CAD) software is used by CNC routers to generate designs, which are then translated into a set of instructions that the router’s computer uses to control the movement of the cutting tool.
Due to their efficiency, accuracy, and precision, CNC routers are frequently used in the metalworking, woodworking, cabinetry, and sign-making sectors. They are also used in prototyping and manufacturing applications for creating components and products with high precision and repeatability.
CNC routers come in a variety of designs, including three-, four-, and five-axis devices. The cutting tool can travel in three directions (x, y, and z) on three-axis machines, but four-axis machines can also rotate the cutting tool around a fourth plane. The ability of five-axis machines to tilt and revolve the cutting tool in various directions enables the creation of intricate cuts and shapes.
Numerous tasks, including cutting, drilling, milling, and engraving, can be completed with CNC machines. They are extensively used to produce intricate and precise shapes and designs in fields like manufacturing, metalworking, and woodworking.
ShopBot PRSalpha 96
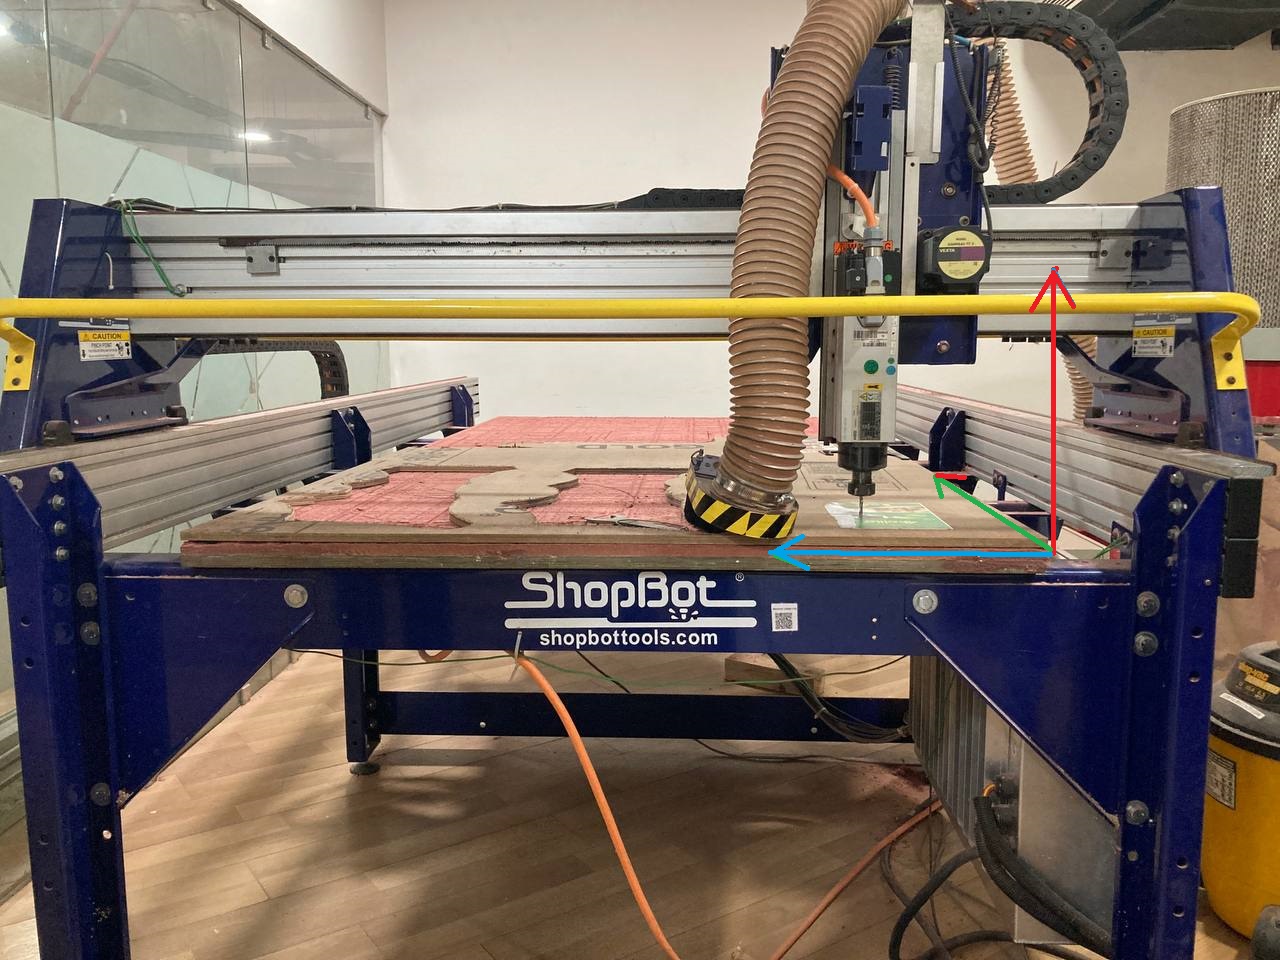
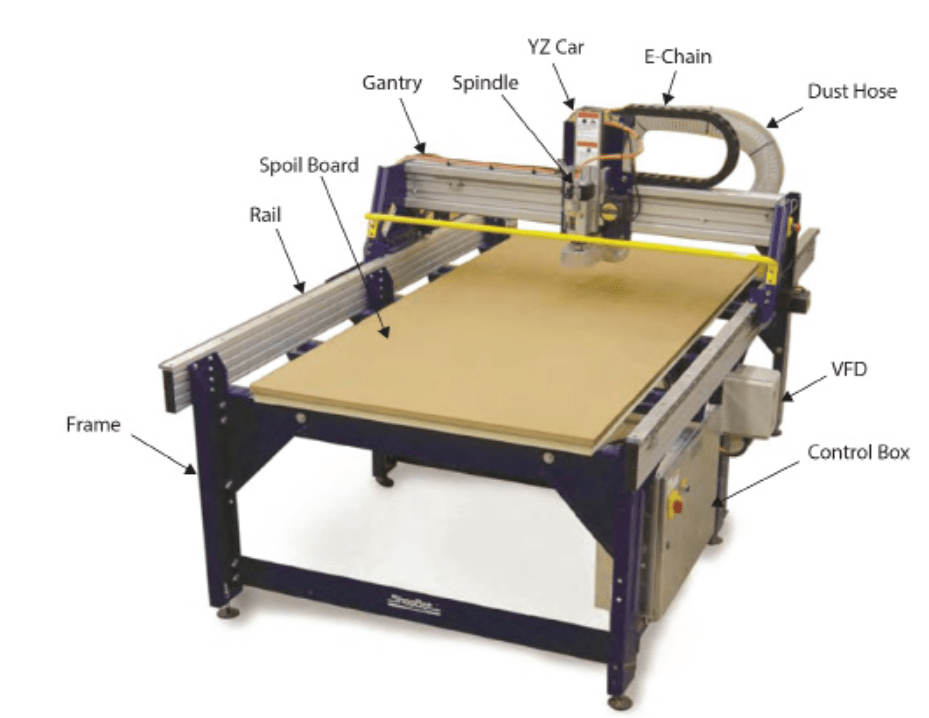
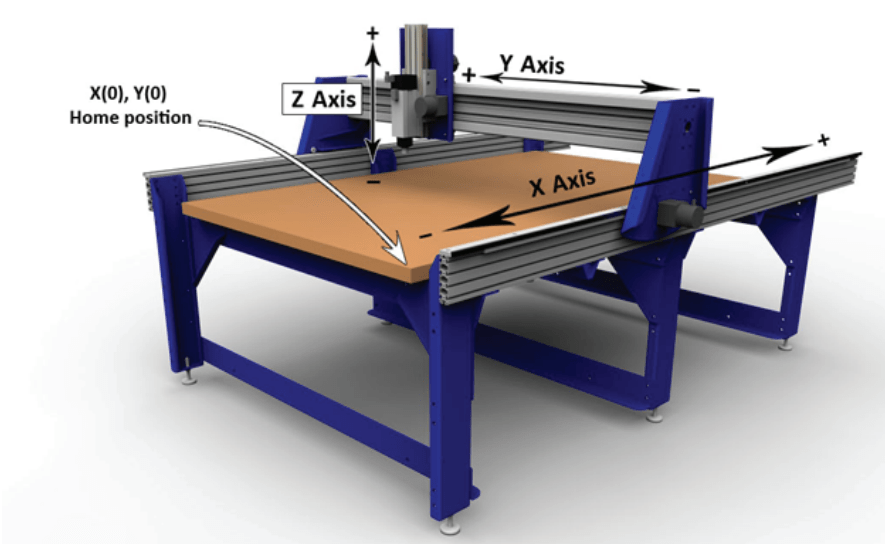
In our facility at Kochi, we have the Shopbot. The Z plane of the three-axis Shopbot machine is perpendicular to the bed. The machine’s length and width are represented by the X and Y axes, respectively.We will add a second sheet of plywood/MDF above the bed that we will refer to as the sacrificing layer in order to have a rigid supporting layer with the job. The millig bit is also safe because the sacrificial layer prevents unwanted interaction with the metal body.The spindle have a speed of 15000 rpm, it has a cutting speed of up to 600 inches per minute (depending on the cutting tool and substance) and a travel speed of 1,800 inches per minute. It has a bed dimension of 4x8 feet and can be used to cut wood, plywood, soft metal, and other materials. Additionally, she shopbot has a dust collection that captures all of the dusts comming out while cutting.For reference, you can use the (beginner’s guide)to use the shopbot.
Indivijual assignment
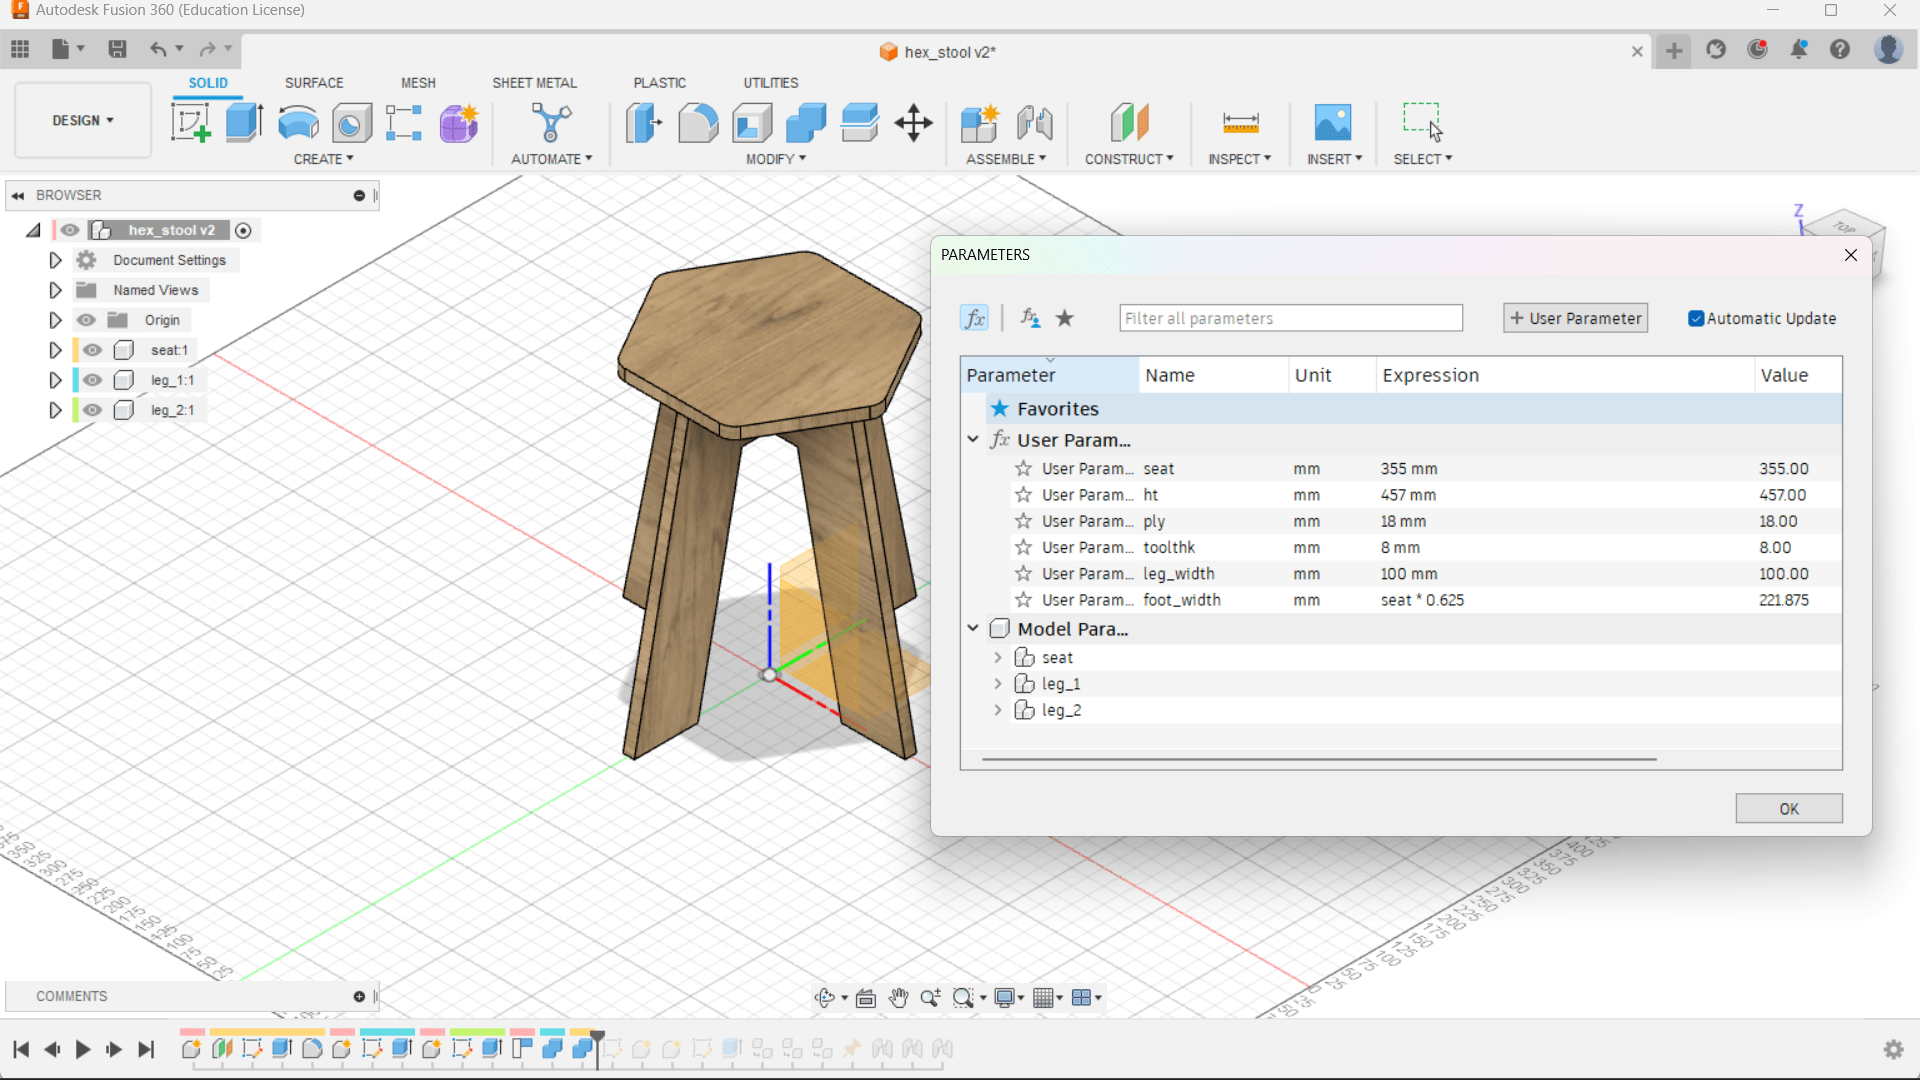
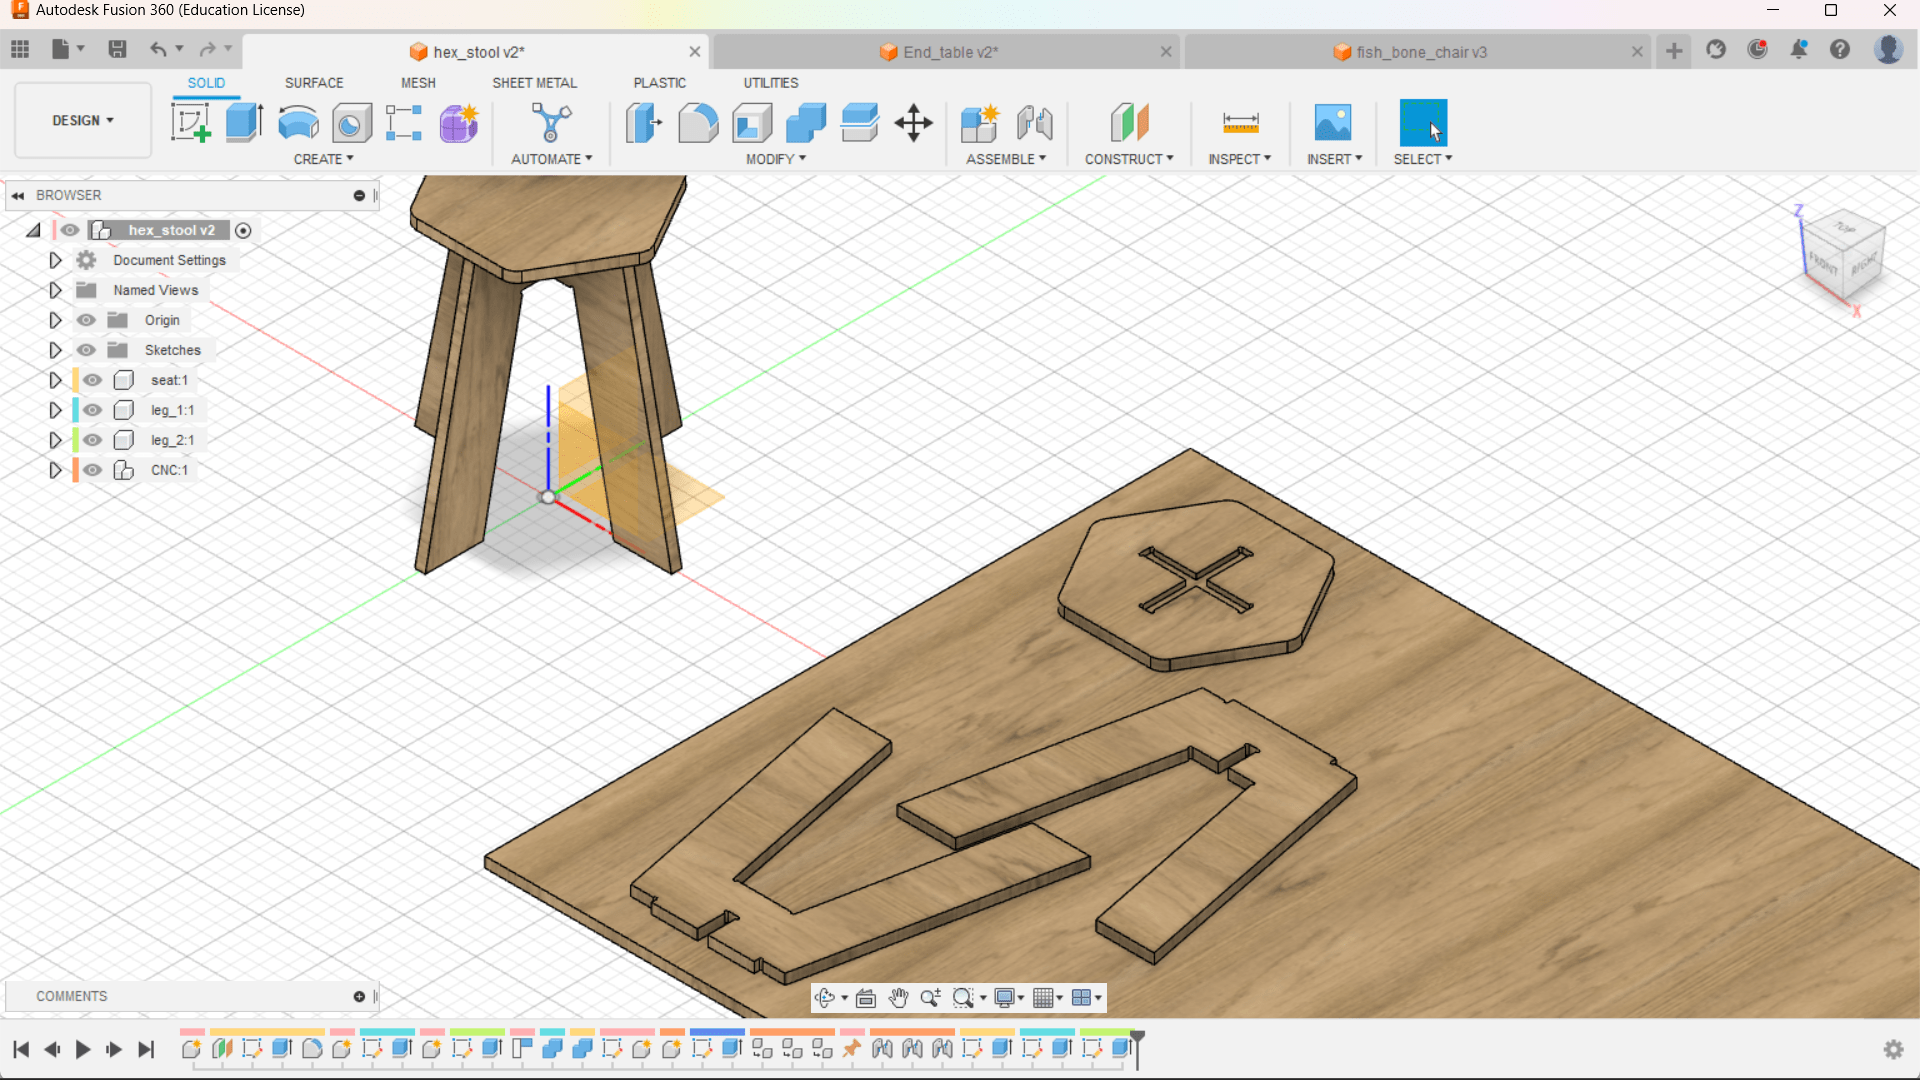
- I intended to develop a simple task that I could use. I therefore decided to construct a stool without the use of fasteners or nails. For this, I consulted instructions on YouTube. (What Make Art)
Dogbone
Dog-bone fillet refers to a technique used to create rounded internal corners in designs where two intersecting profiles form a right angle. It involves removing material from the intersecting profiles to make space for a round fillet, ensuring that the fillet doesn’t extend beyond the intersection. This technique is commonly used to address the limitations of cutting tools or to prevent interference in CNC milling or 3D printing operations. In this work I have done dog bones manually .
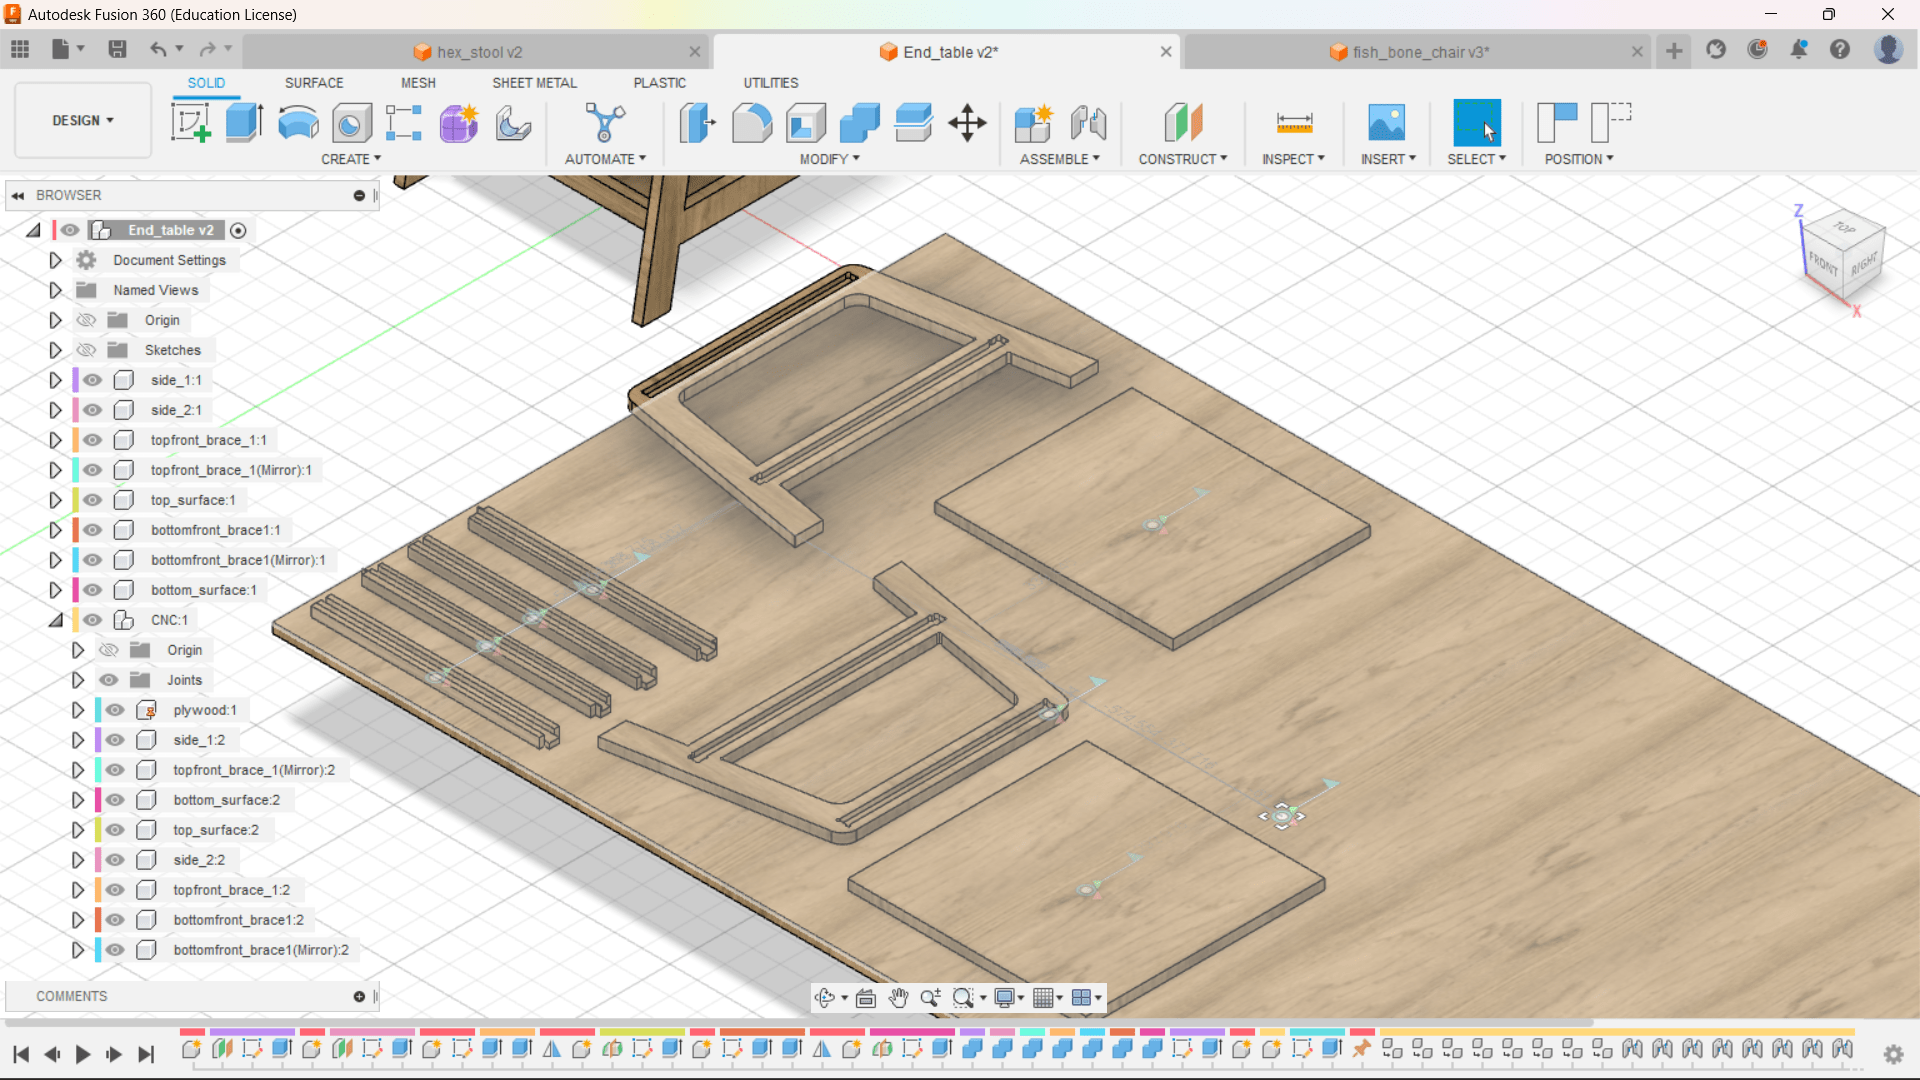
- I then began working on a new undertaking for an end table.I discovered that on YouTube.(What Make Art)
Here I installed the Add In for Dogbones and then added it to Fusion and used it for adding dog bones. This was simple. The tutorial is accessible at this (github) link.

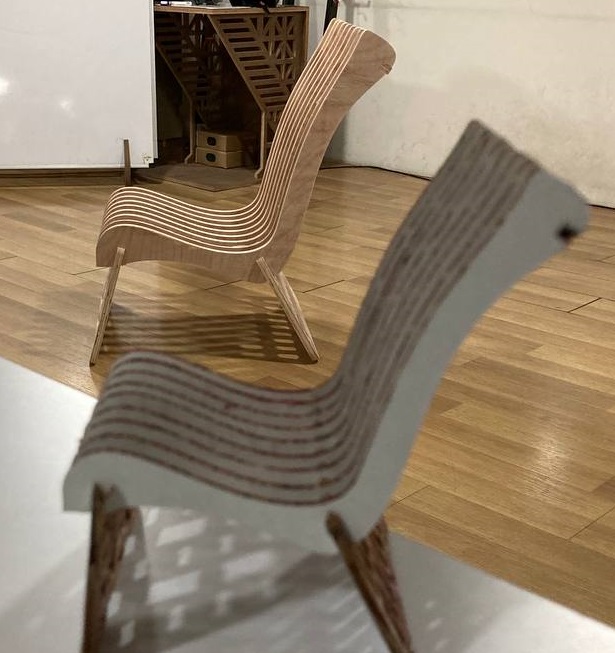
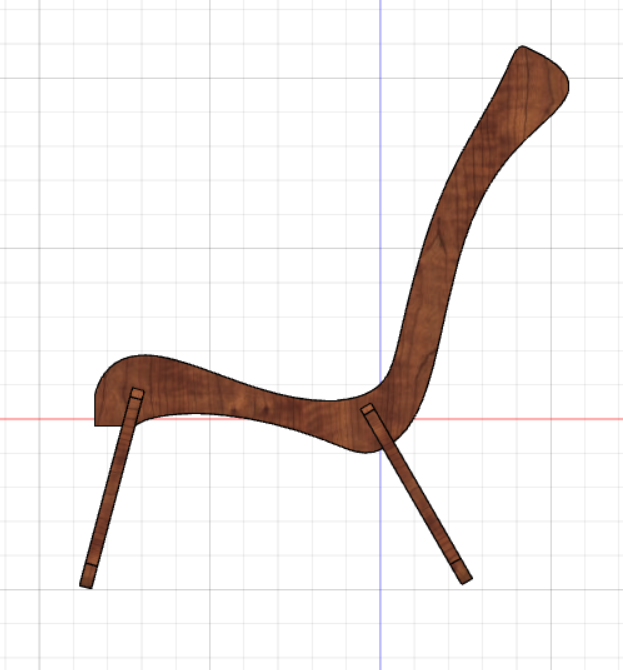
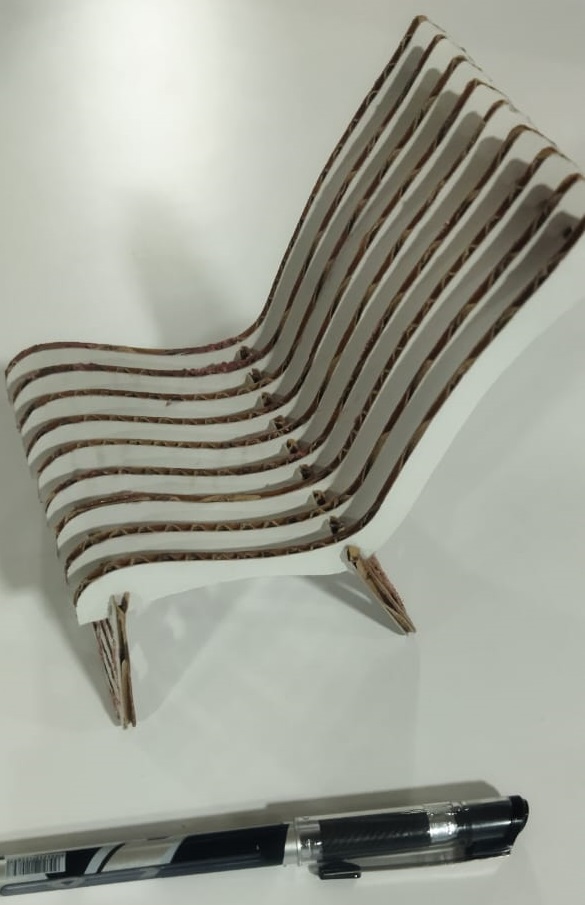
- I then used Pintrest to look for a Fishbone chair. Its surface is curvy. I created it with spline.
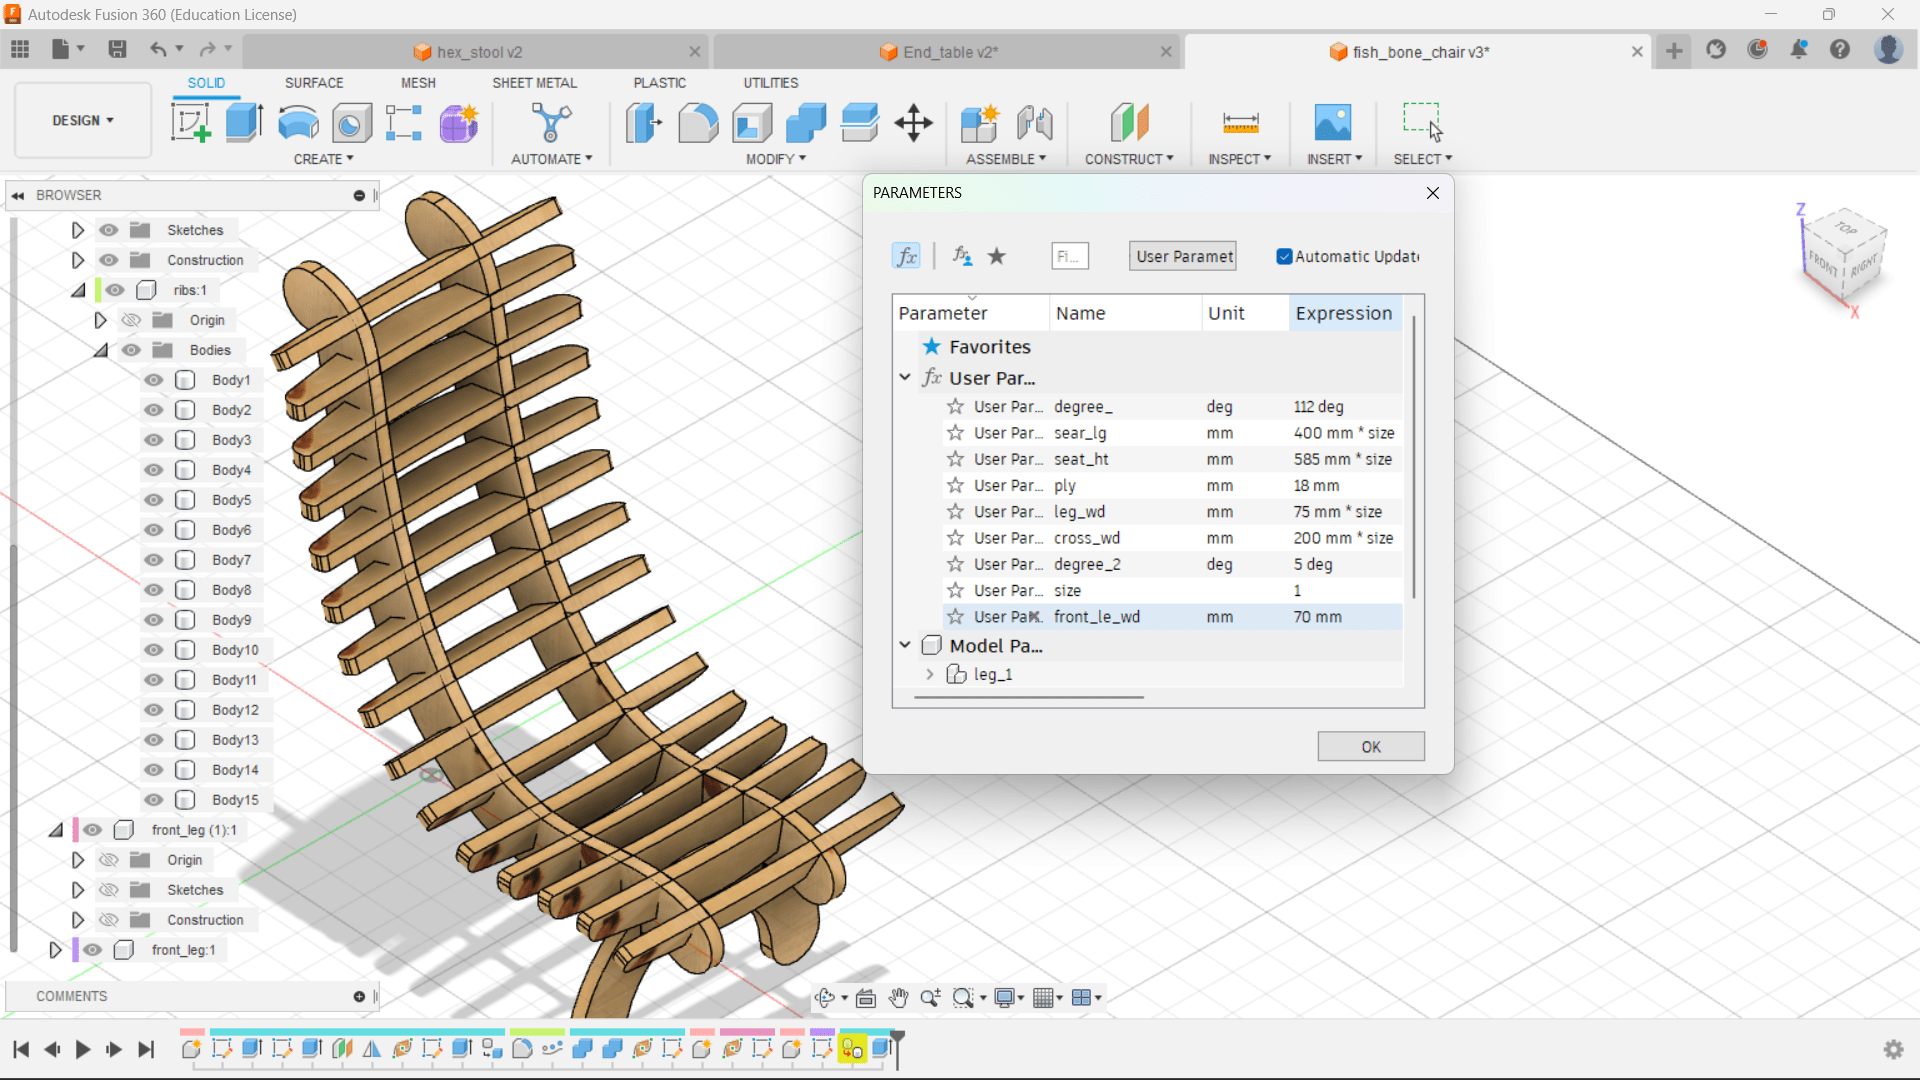
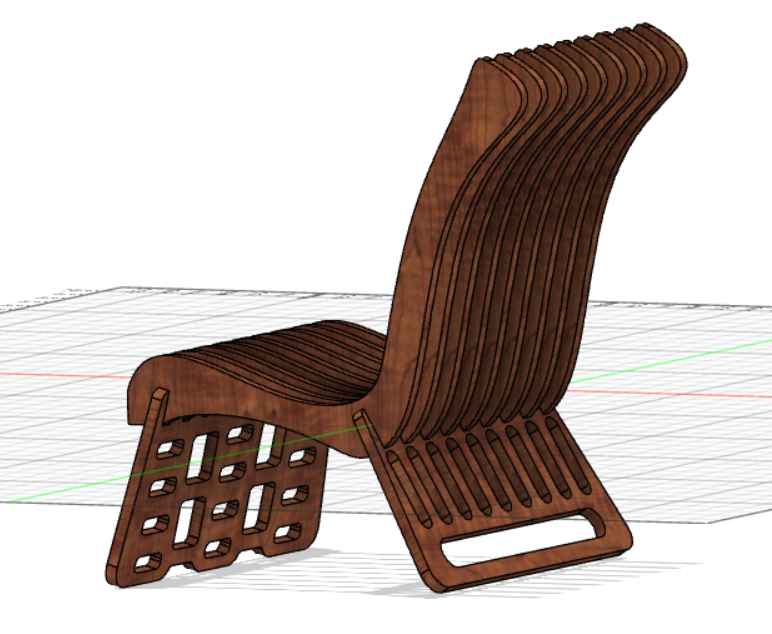
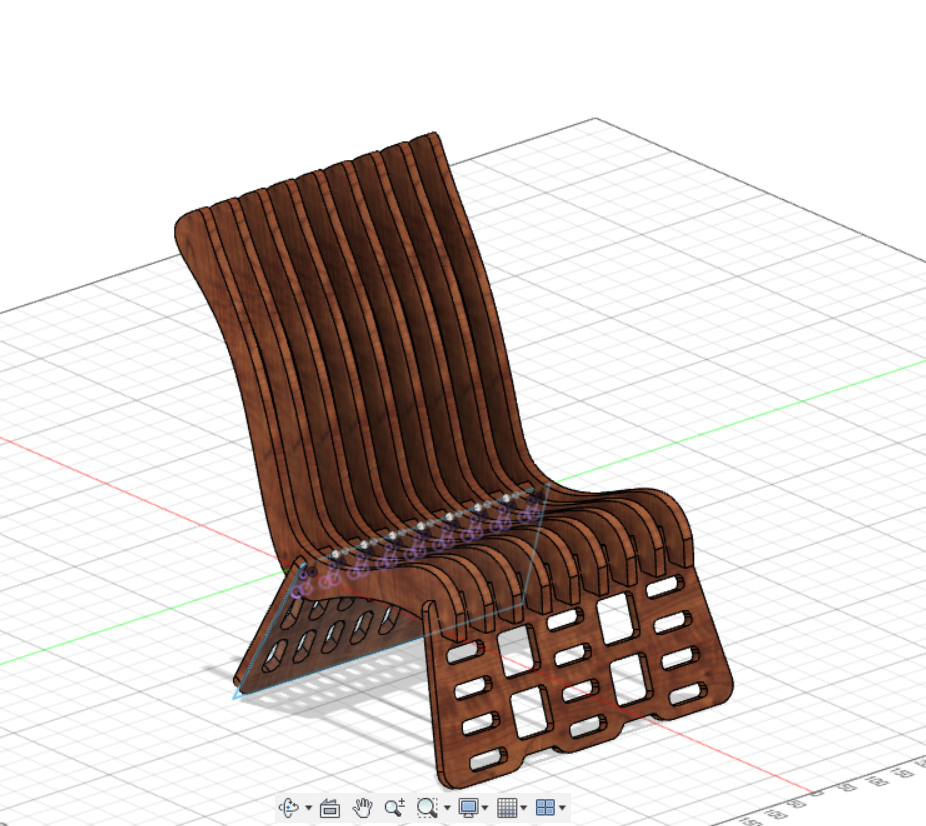
But I am not happy with the design. Hence I search for another one and found out a better one.

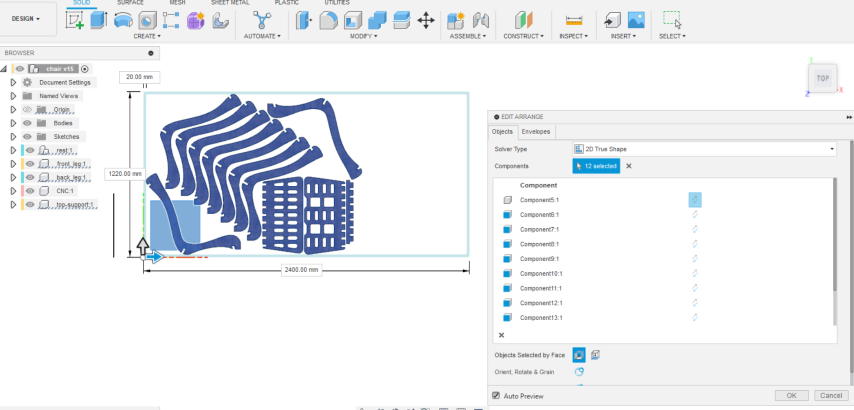
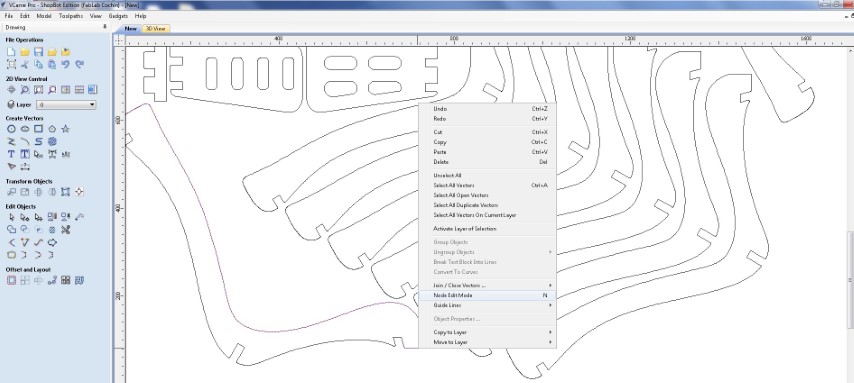
##### Arranging.
Arranging refers to the manual placement of components or parts within an assembly or workspace. It involves positioning the parts in a desired orientation or layout to meet specific design or manufacturing requirements. This can include aligning components, adjusting clearances, or organizing the parts in a logical order.
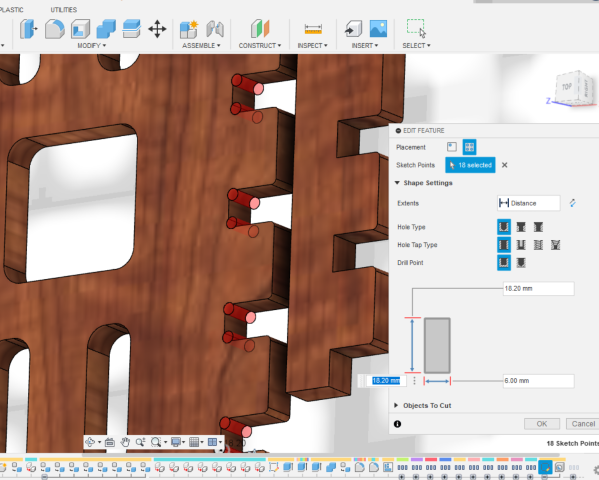
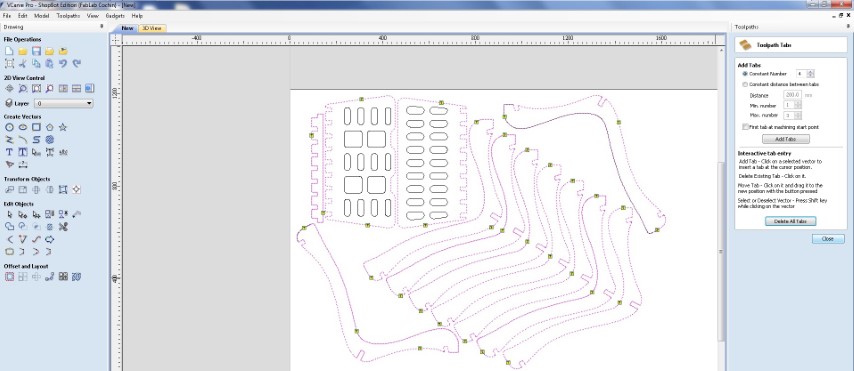
Adding dog-bone.
 Before proceeding to shopbot,my instructor asked me to take a miniature in zund. Usually this is done in laser cutting machine. Here our machine is under maintance.
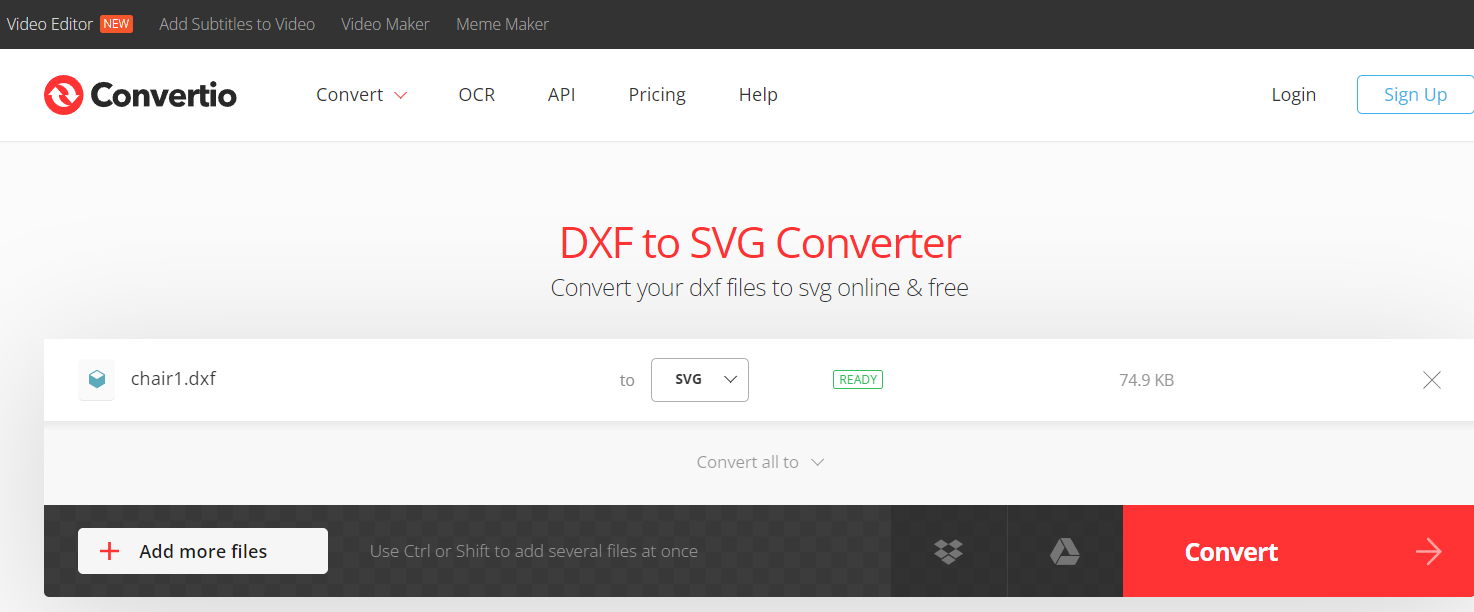
So first I used online converter for converting the file form DXF to SVG
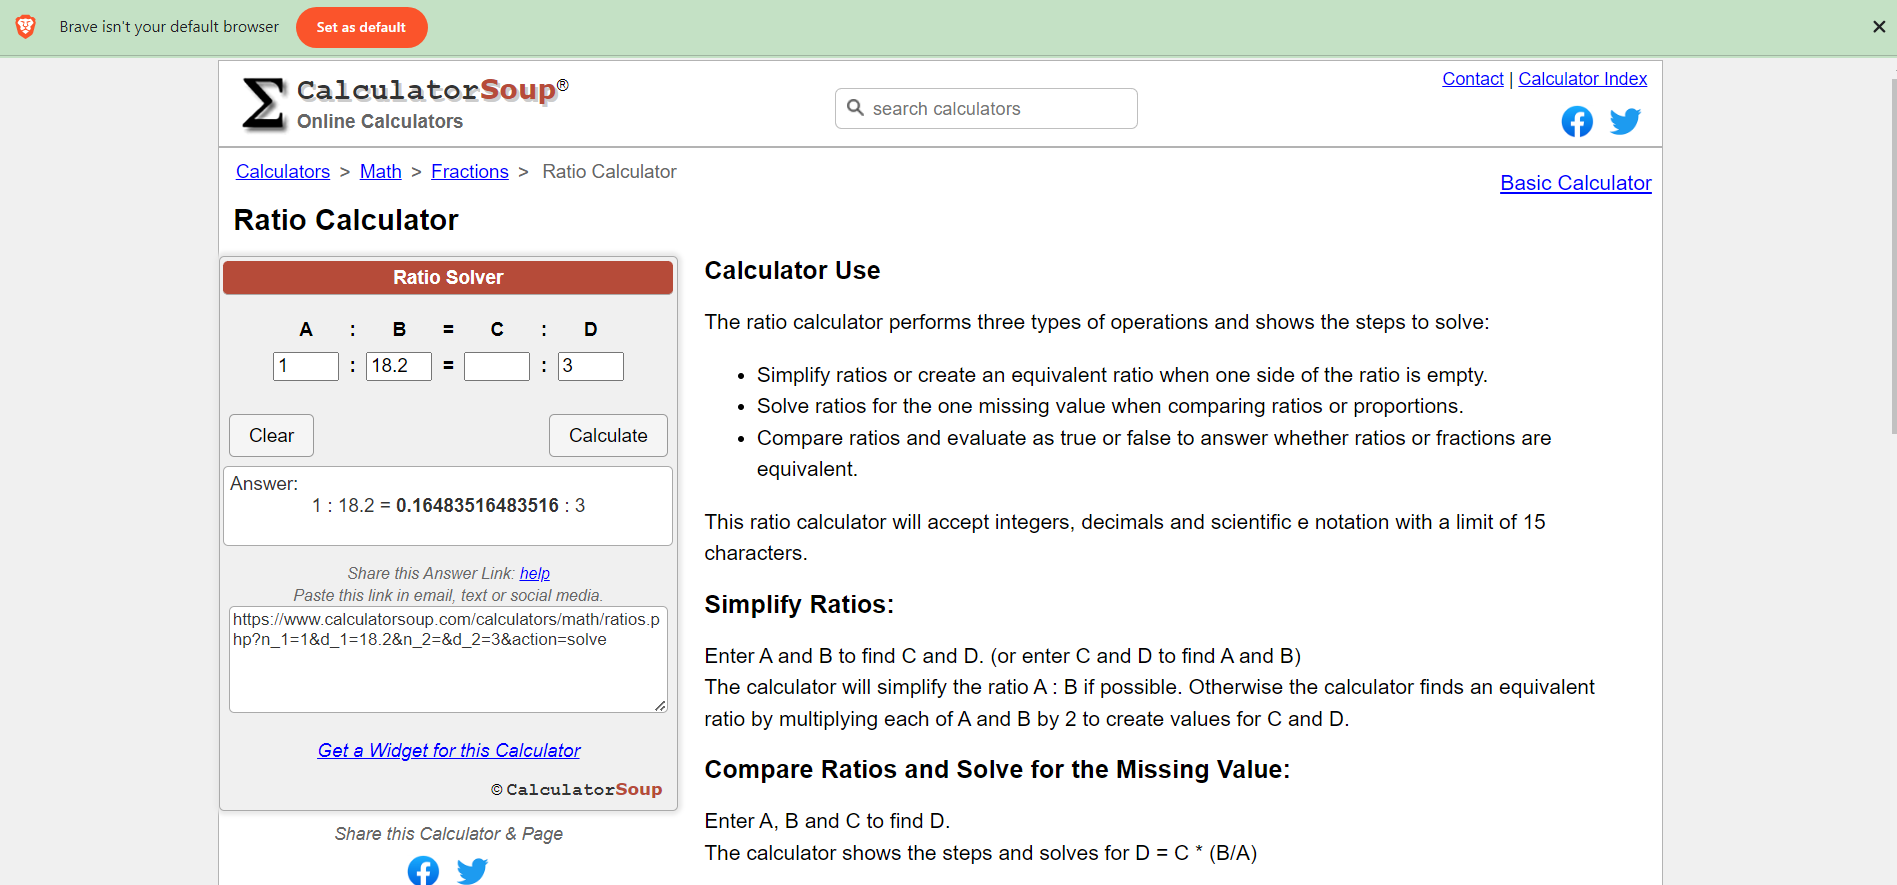
Then I opened the online Ratio calculator and entered the height and thickness one side and other side I gave target thickness to calculate which is 2.87mm.
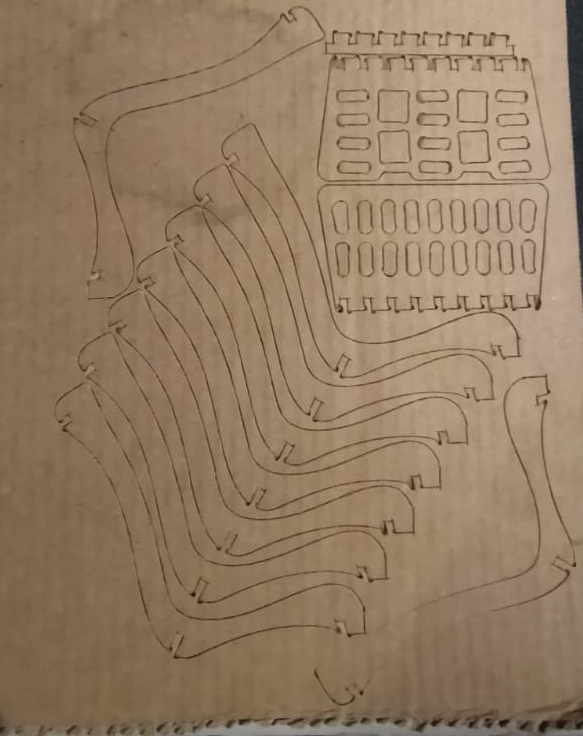
 Then I proceeed to Zund and cut the miniature chair.
This week we are unable to complete the individual project work in shopbot because our Fablab building is undergoing extensive maintenance work and has lost electricity. Since this task will be finished by this weekend, it will be finished by next week.
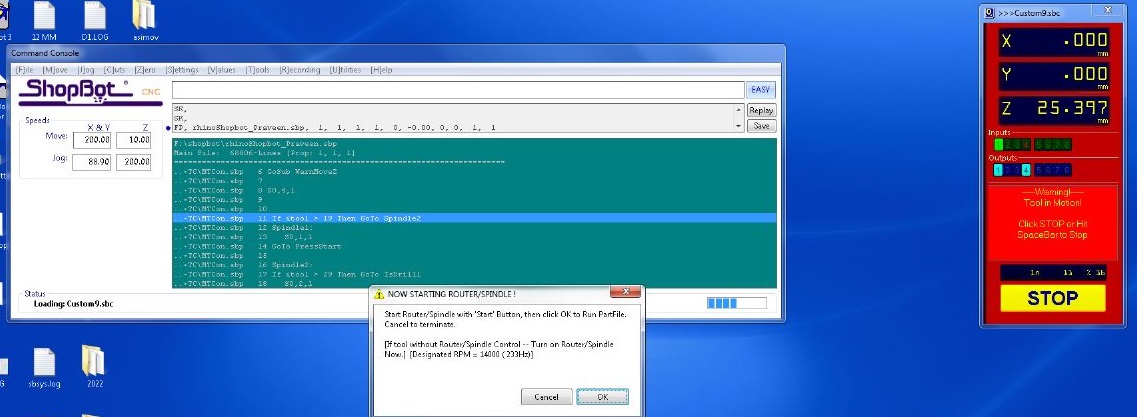
We have started the shopbot work and done successfully.
V - Carve
V-Carve is a computer-aided design (CAD) and computer-aided manufacturing (CAM) software package. It is primarily used for creating 2D and 3D designs and generating toolpaths for CNC (Computer Numerical Control) machines.
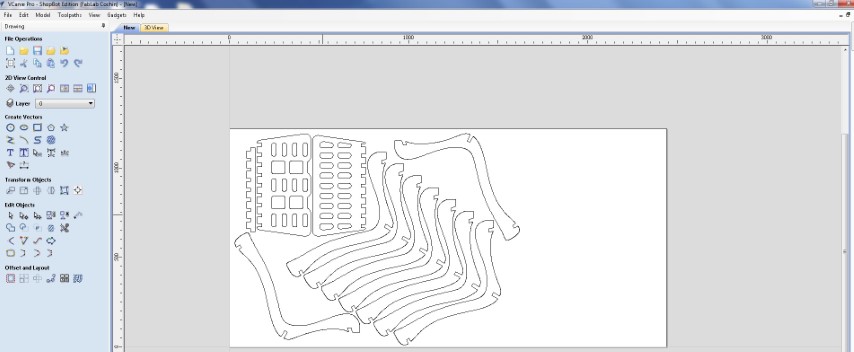
You can import vector graphics, create shapes, add text, and use various editing tools to modify your designs.
V-Carve can create V-carving toolpaths. V-Carving is a technique that allows you to create decorative carvings with varying depths using a V-shaped cutting tool. It also supports engraving toolpaths for adding fine details to your designs.
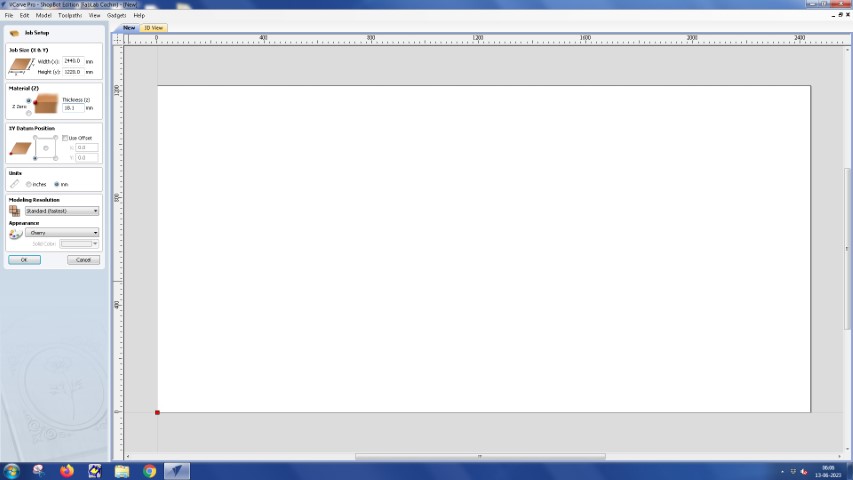
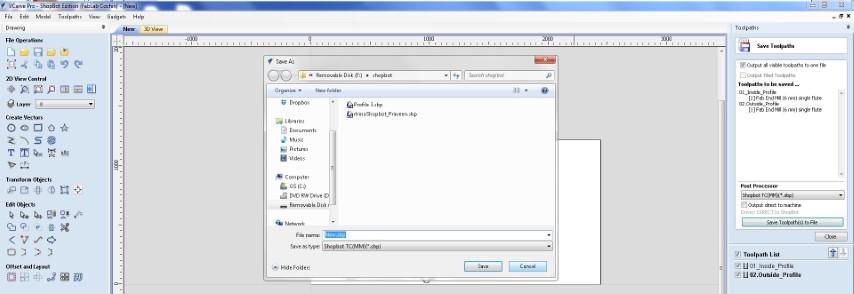
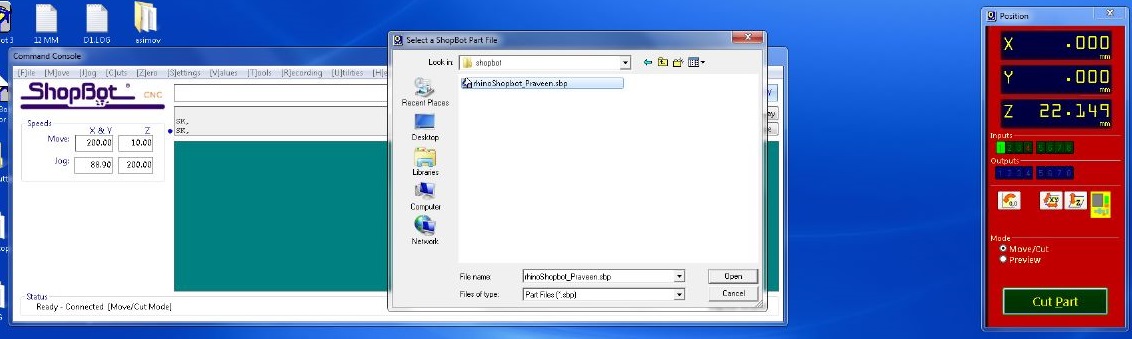
open the shopbot software
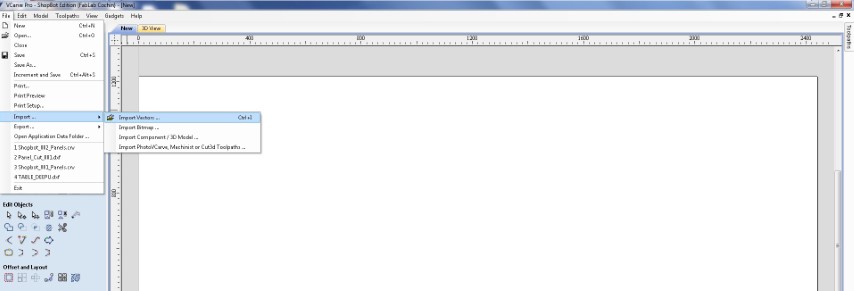
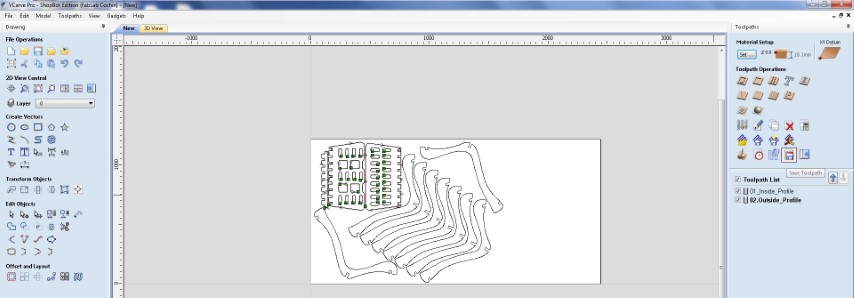
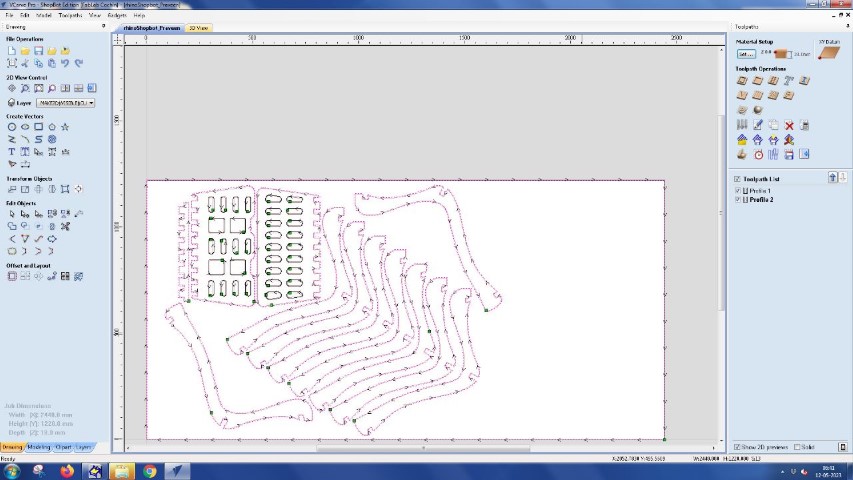
Open V-Carve pro, go to File → Open→ and select the Dxf file . Go to Edit→ Job size, Then set dimensions of the material. and set origin point.

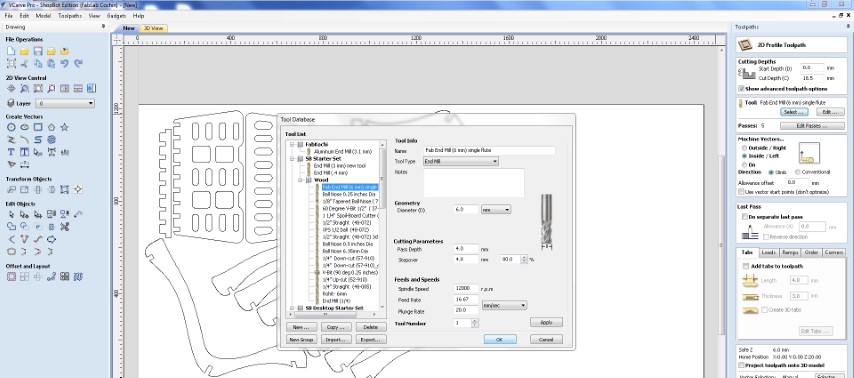
 Adding bit
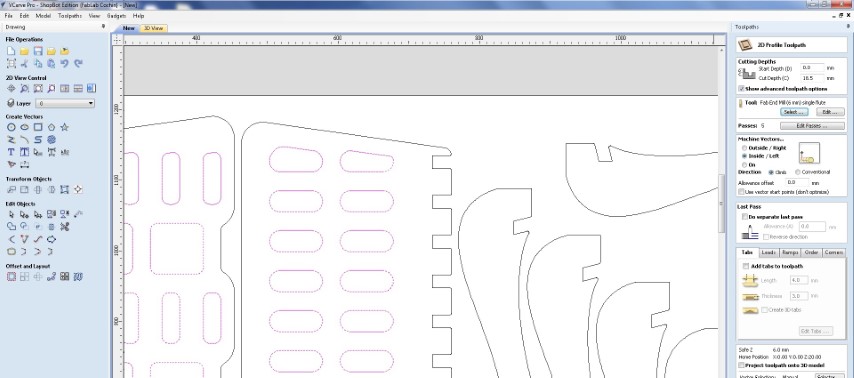
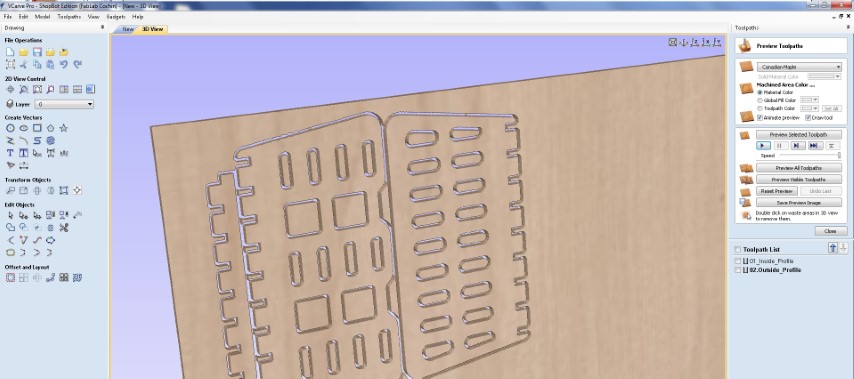
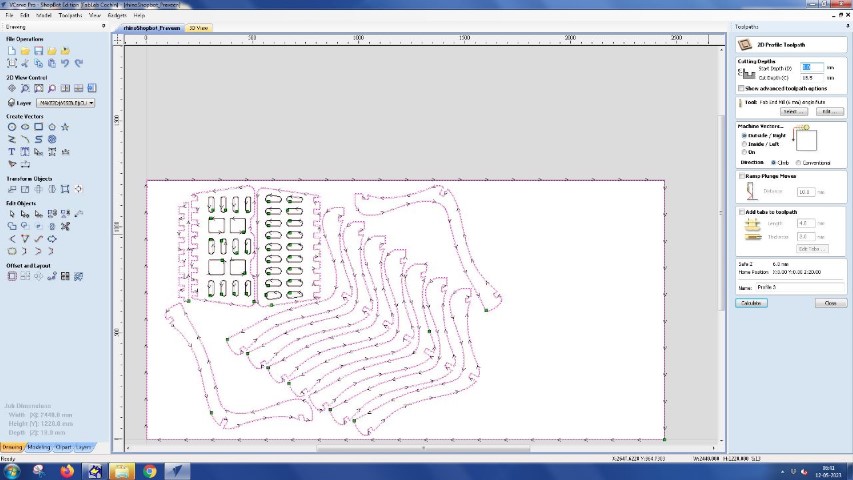
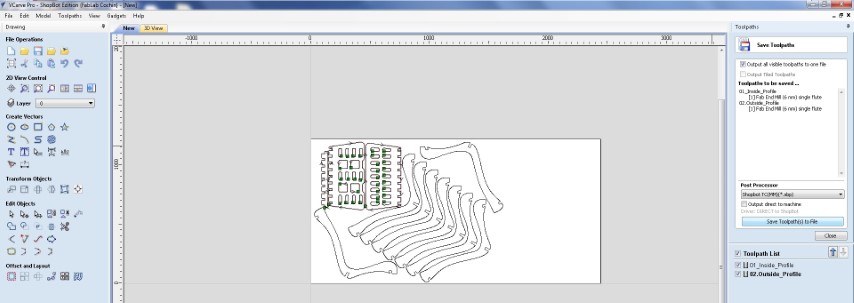
In the opening small window, we can edit properties(select tool, toolpath direction, tab etc,…) I used 6mm 2 flute bit for all operations. After setting all, click on the calculate button. *After creating different tool paths select some toolpaths and click on save button.

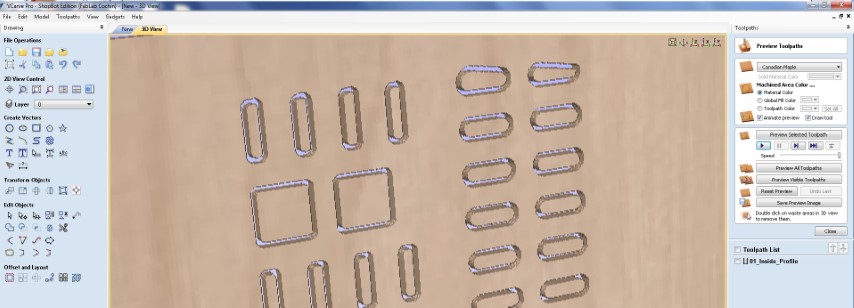
Set the orgin pointby moving the bit over X and Y direction.
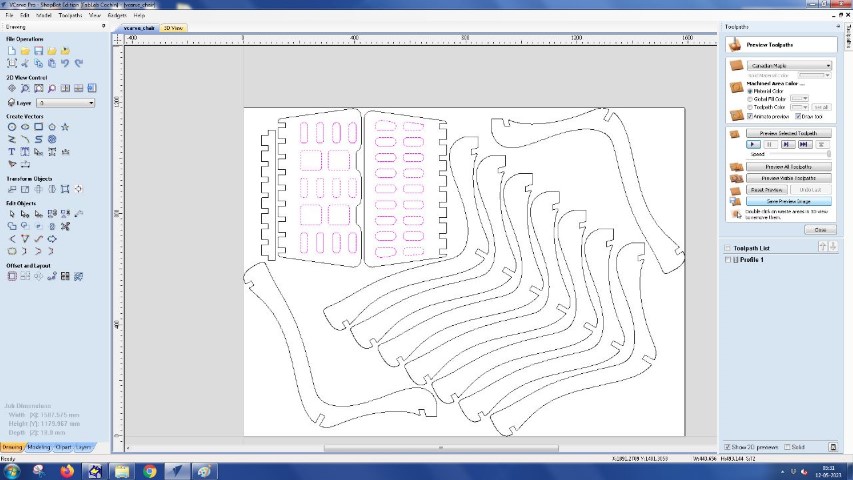
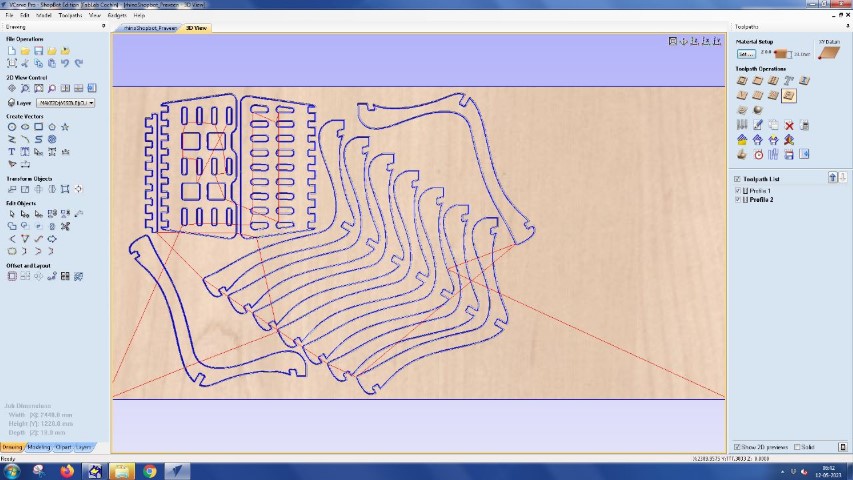
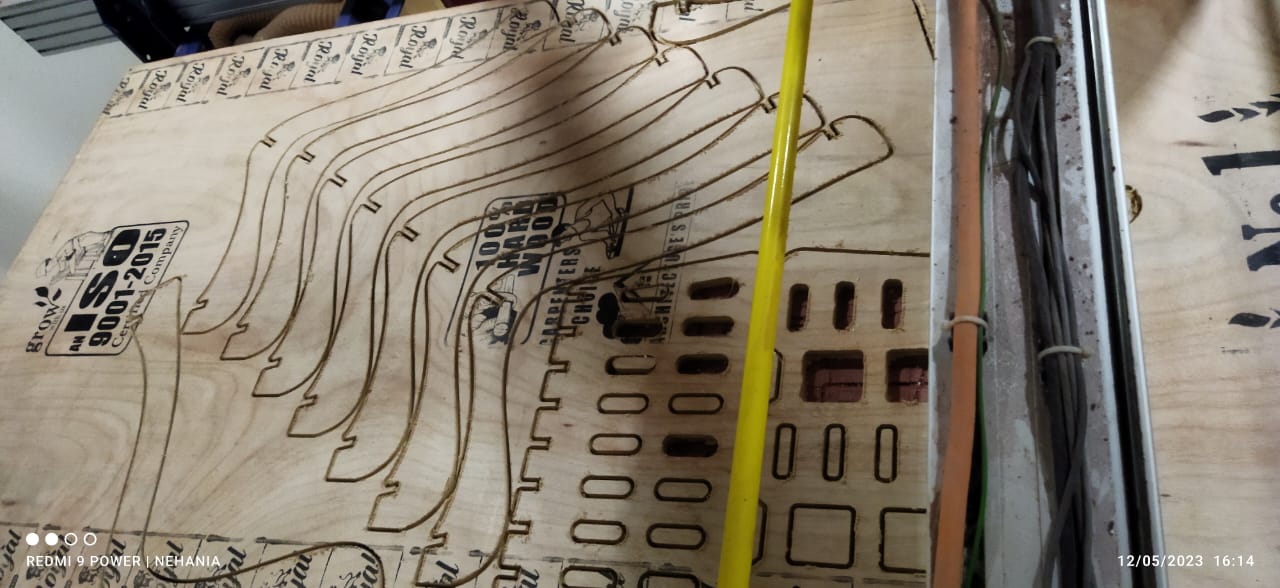
The result is like this.
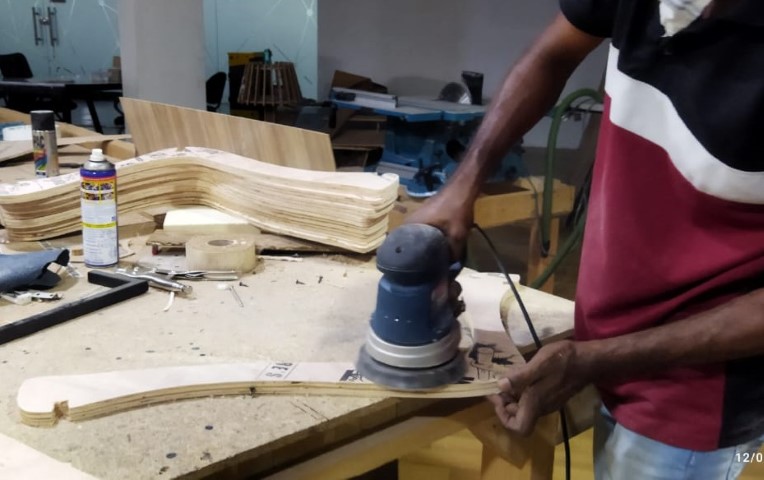
Planned and grinded the edges with planner and file for smooth finish.
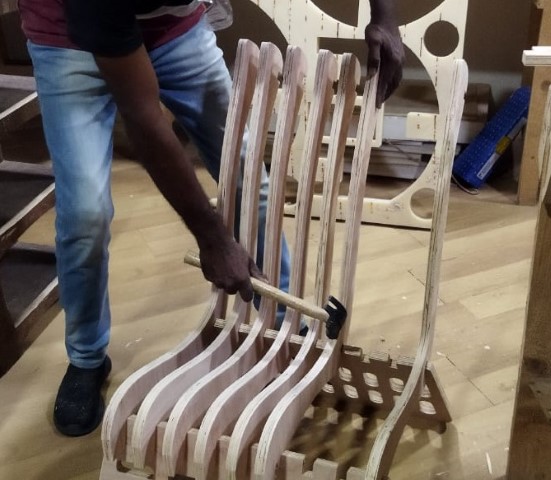
All parts are assembled.
At las t the chair looks like this and it look good both funtionally and design.
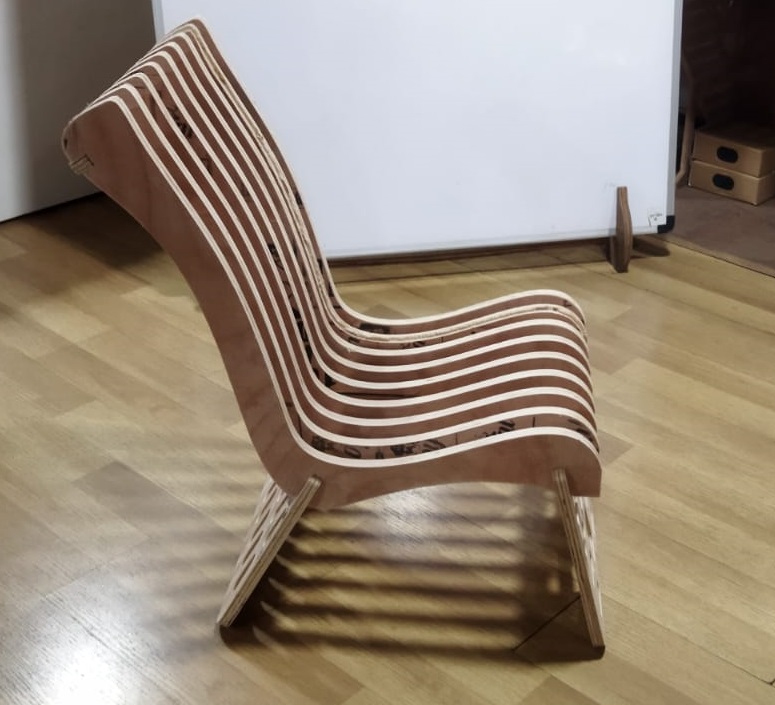
Comparing with miniature chair cut in Zund.