8. Computer controlled machining
Goals
As a group do your lab's safety training test runout, alignment, fixturing, speeds, feeds, materials, and toolpaths for your machine.
You can see our results here. My take away is that CNC is a very powerful machine and that the set up is much more complicated then I expected and is critical to the success of the cut as much if not more then the design.
Individual:
Make (design+mill+assemble) something big (~meter-scale)
Extra credit: don't use fasteners or glue
Extra credit: include curved surfaces
Accomplishment
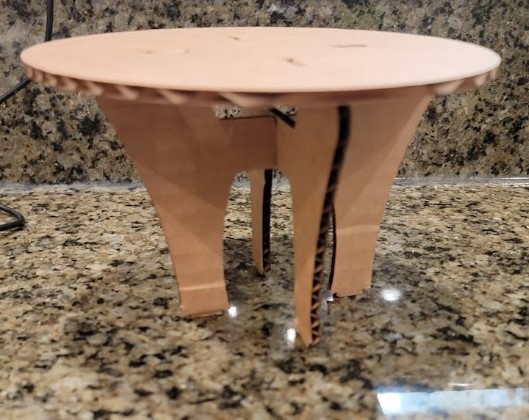
This week I took on making a table that is 30inches high and 48 inches in diameter.
-
I designed a table using parametric approach to ensure we can easily adjust to the wood pieces we get that doesn't use fasteners or glue
-
I learned how to use the manufacturing side of Fusion and make cut paths
-
I Made hardwood glue up panels for the first time and use the Festool Domino to install dowels to strengthen the boards
-
I learned how to run the Shopbot CNC and cut the table [Table top done, legs are in process]
-
I learned how to finish the table
Table design
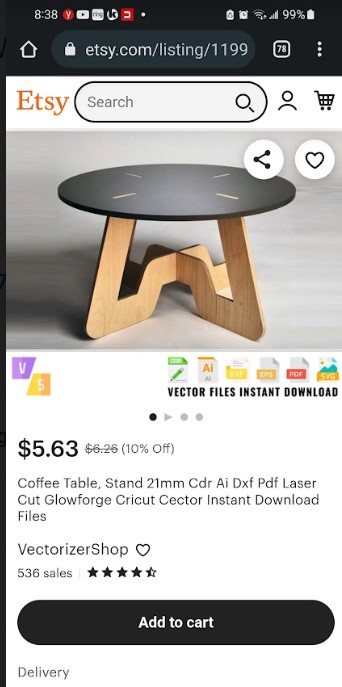
I used the following picture as a basic inspiration for my table
Hight: I started by looking up hight for table and is seems that card and dinning tables are typically 28-32 inches high. Work table are 28-30 inches and so I decided to go with 30 inches
able top size: I decided to go with the biggest I can make which is going to be 48 inches
Floor base: I found on line that the “golden rule” is to have the width of the base at the floor be at least 0.6x the overall height of the table. As this is the minimum I wanted to have a very stable table and decided to use 0.75 as the ratio.
Table leg width: I will use 6 inches
I plan to make this with a glue up of 3/4 inch hardwood planks (see next section)
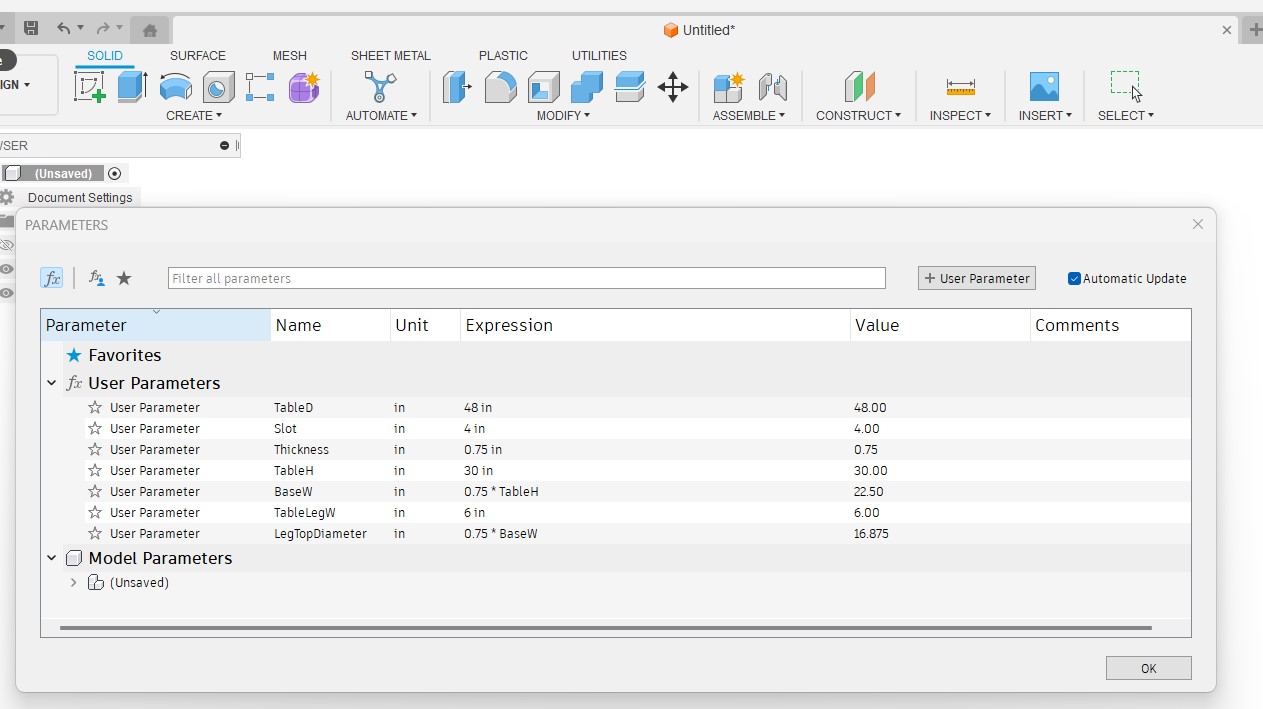
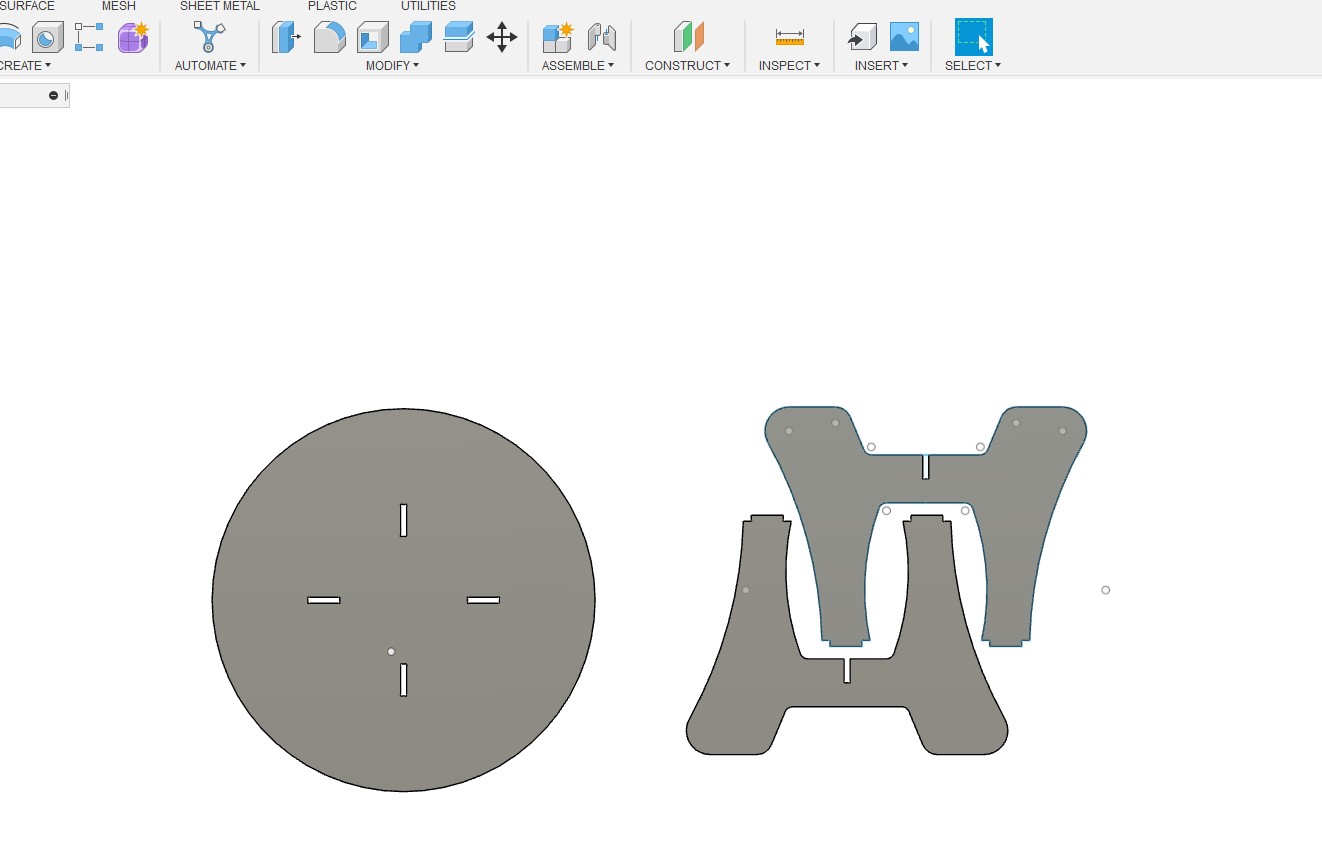
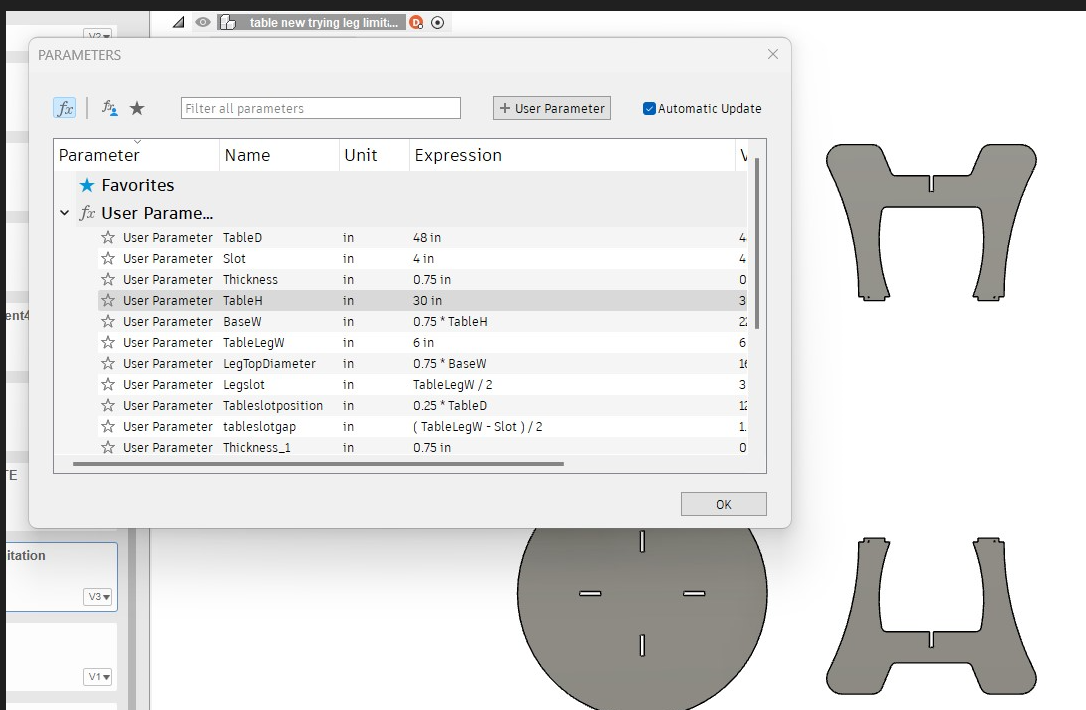
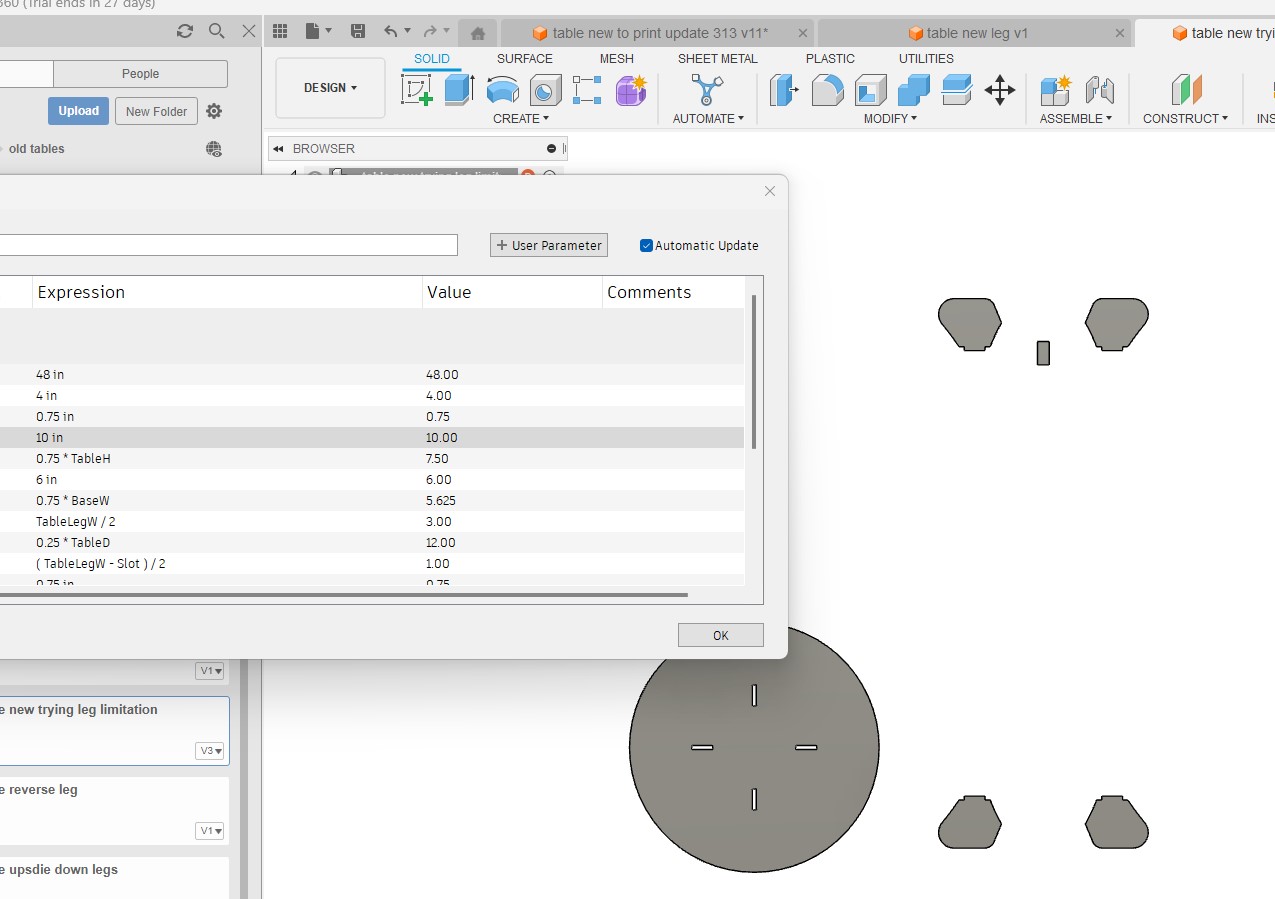
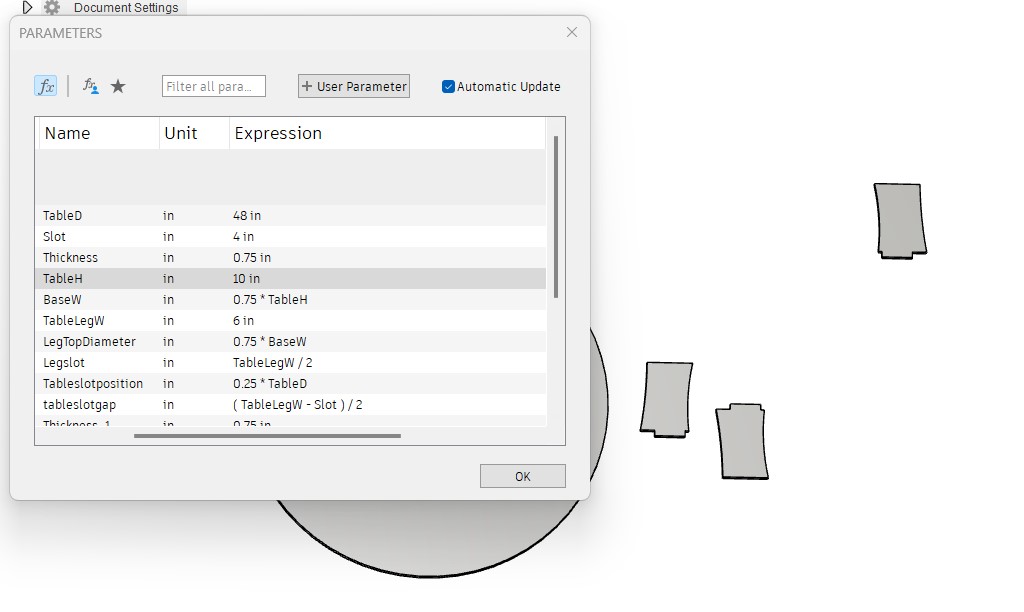
First up a set up a few parameters I plan to use based on the design approach I listed above
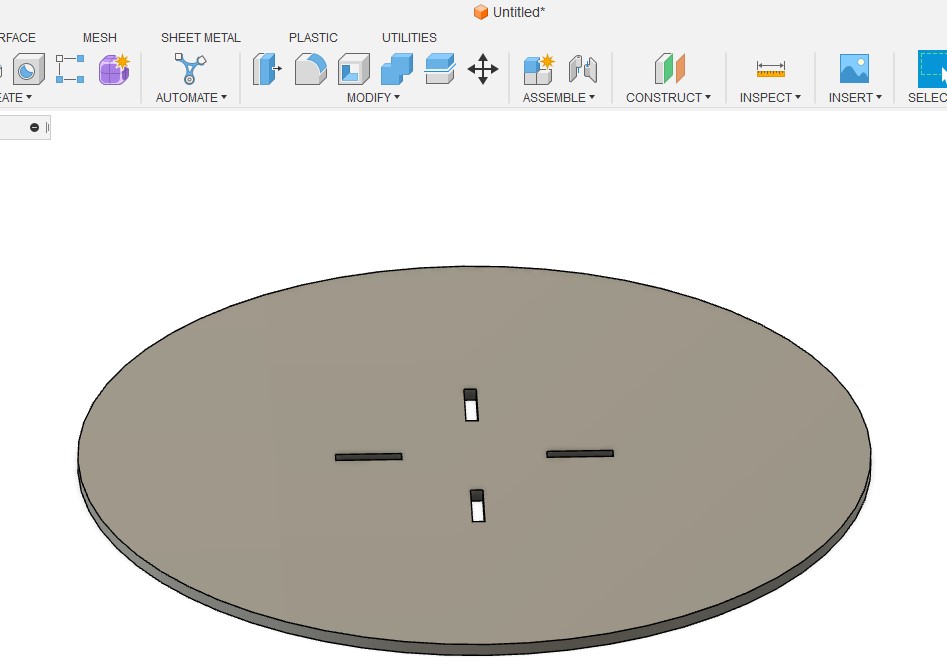
Next I started with the table top and slots
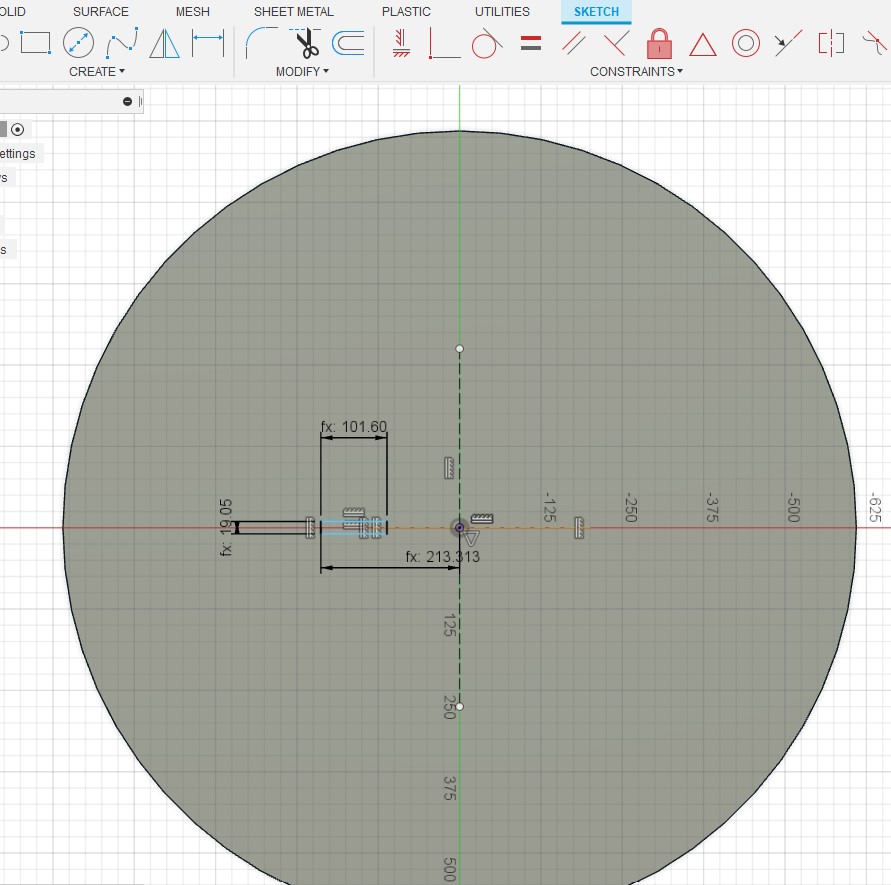
Circular patter repeat make this a quick one
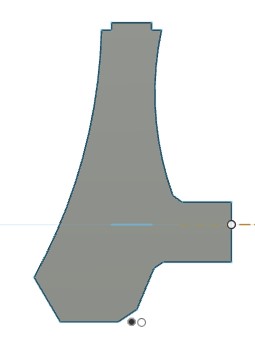
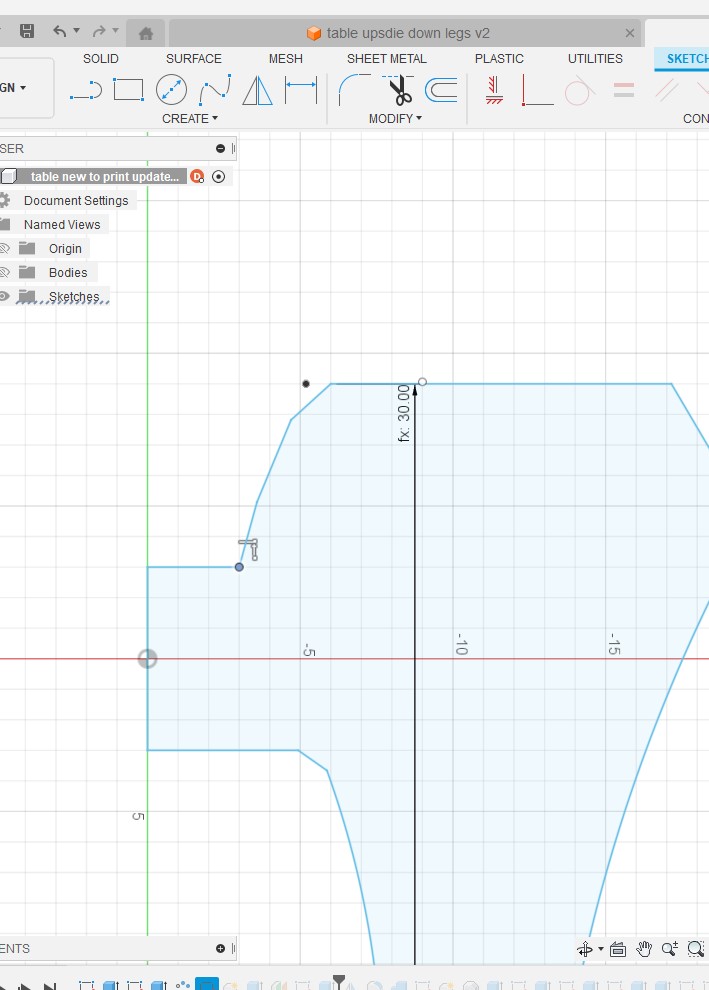
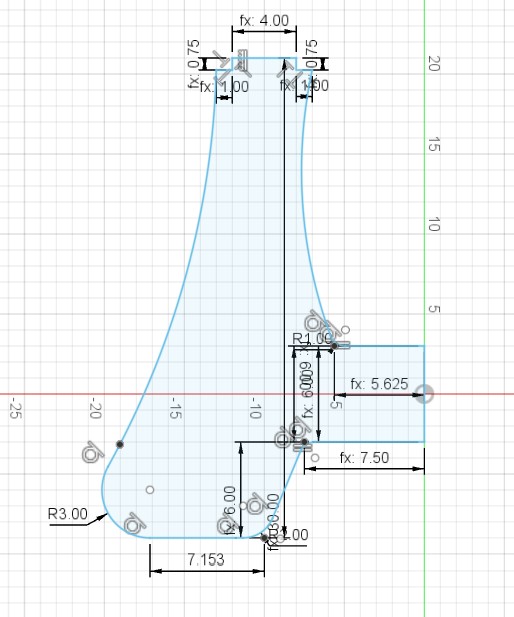
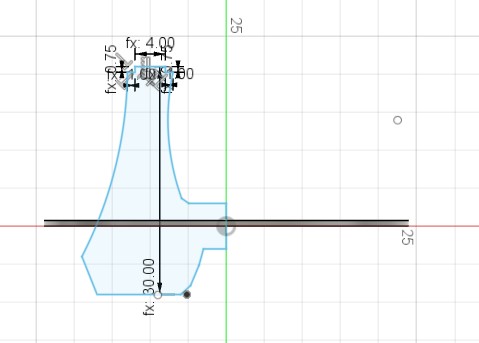
Next I started on the legs and was wanted to ensure the end of the leg can slide into the the slot in the table top
I set up the basic shape and mirrored in the sketch to ensure the legs were symmetrical - this was my first mistake as a later found out that mirroring in the sketch does not work as well a mirroring the extruded part when changing the user defined parameters
I got the legs ready with the cross fit joint
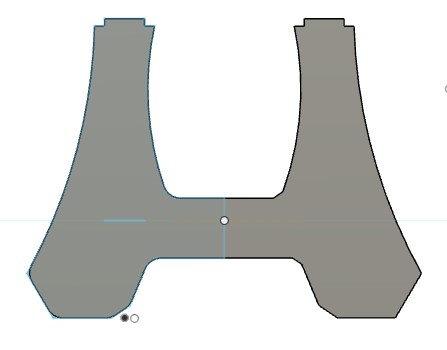
Next I decided to check fit in fusion and good thing I did as I has the slots misaligned
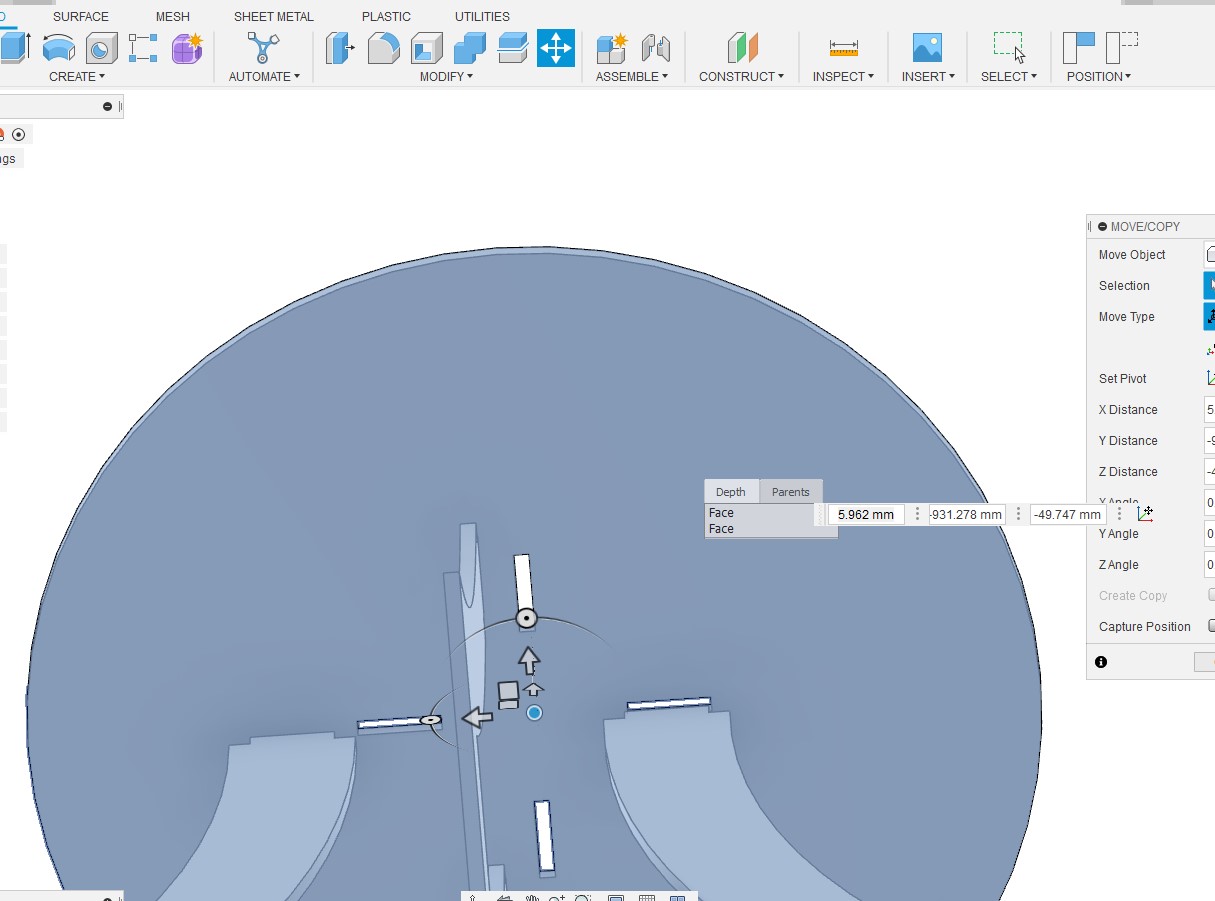
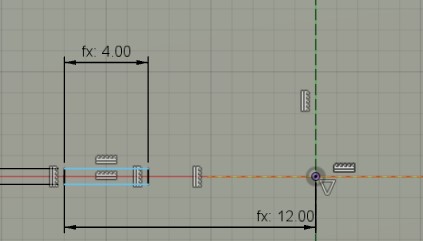
This called for a new parameter and I used sketch dimensions restriction to ensure they will line up
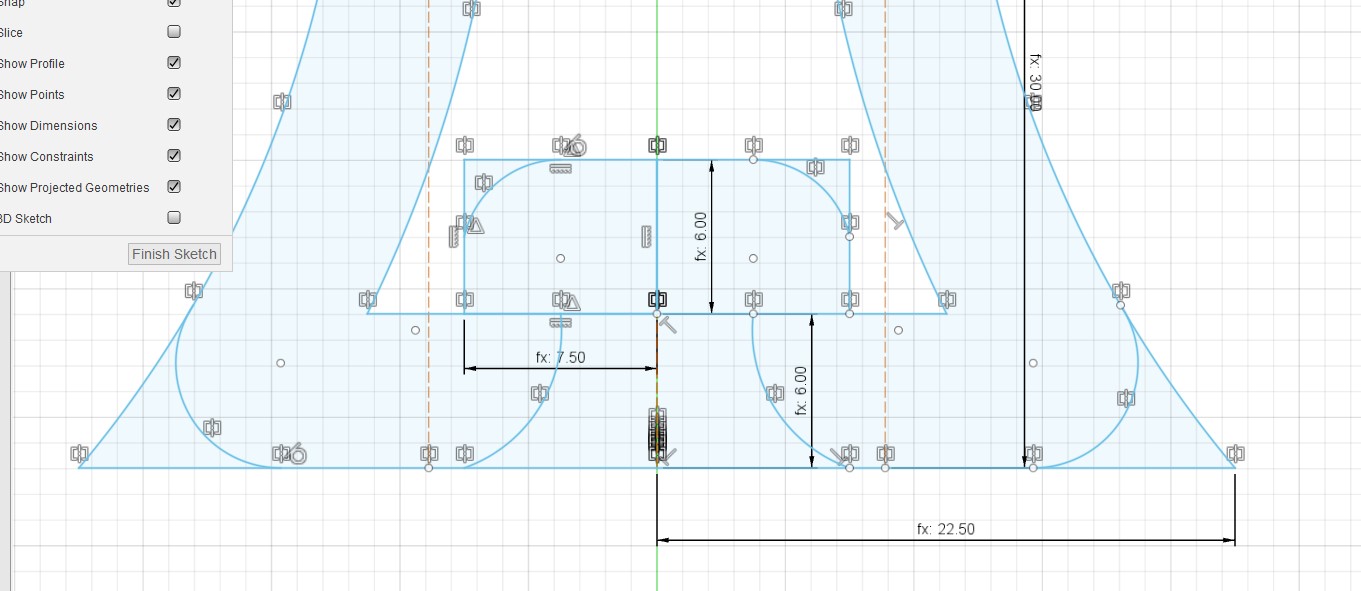
I used the same parameter in the top and leg to ensure alignment
and another check - we are good to go

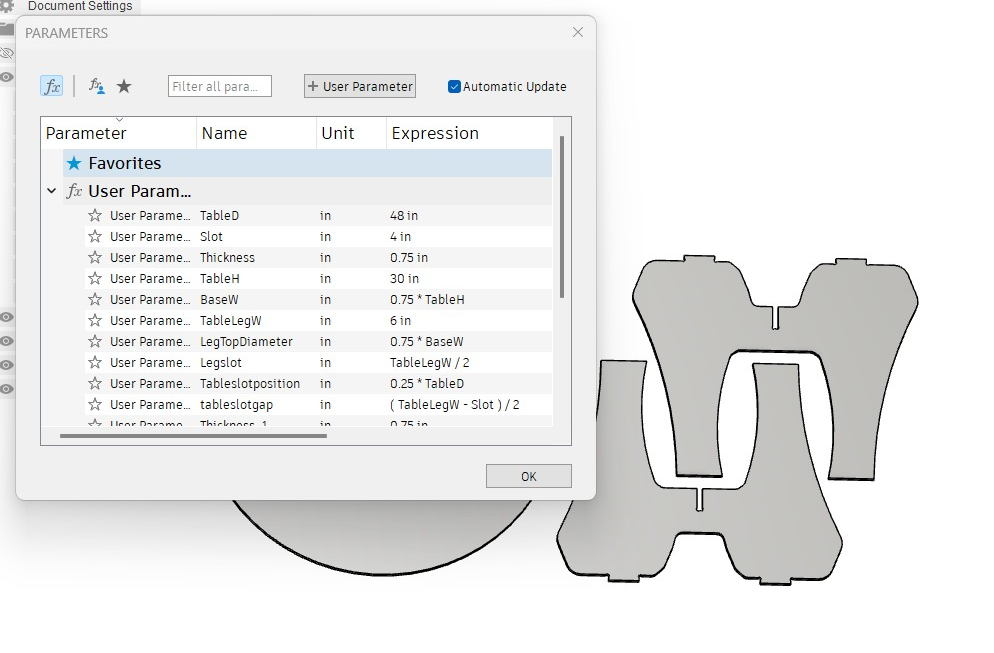
Now that we get that working I decided I really did not like the look of the legs and so it was time for design #2
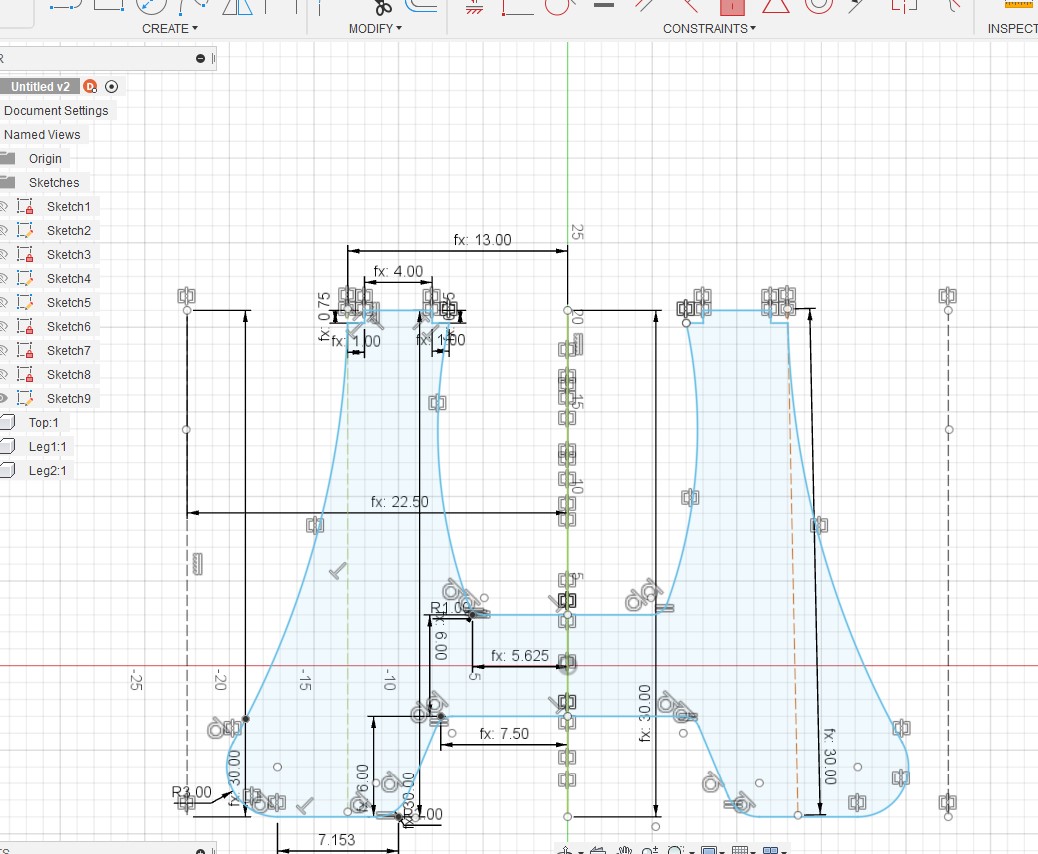
I repeated the steps above and had the next set of legs ready

When I wanted to resize the legs the sketch profile kept coming apart and so after some research I decided to redo this once again the this time to use the 3d mirroring instead of the sketch.
So here we go again
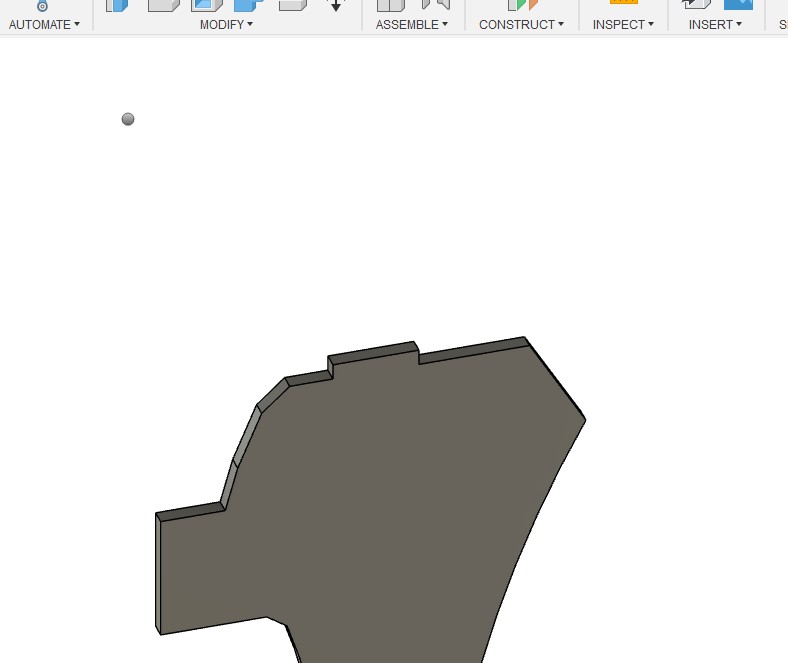
I extruded on this part
then mirrored it in 3D
duplicated and added joint
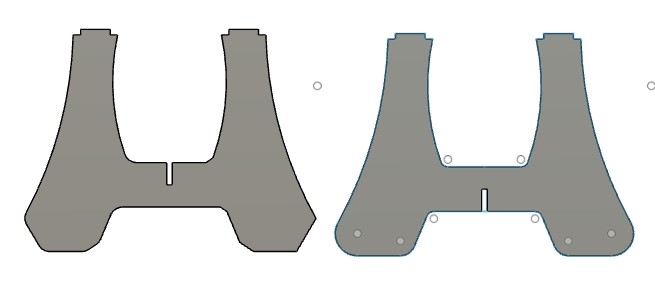
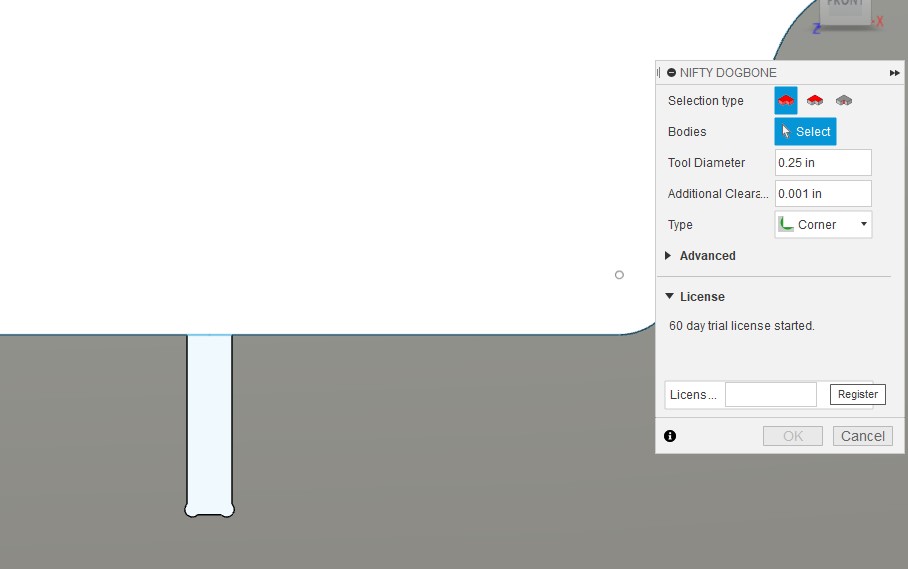
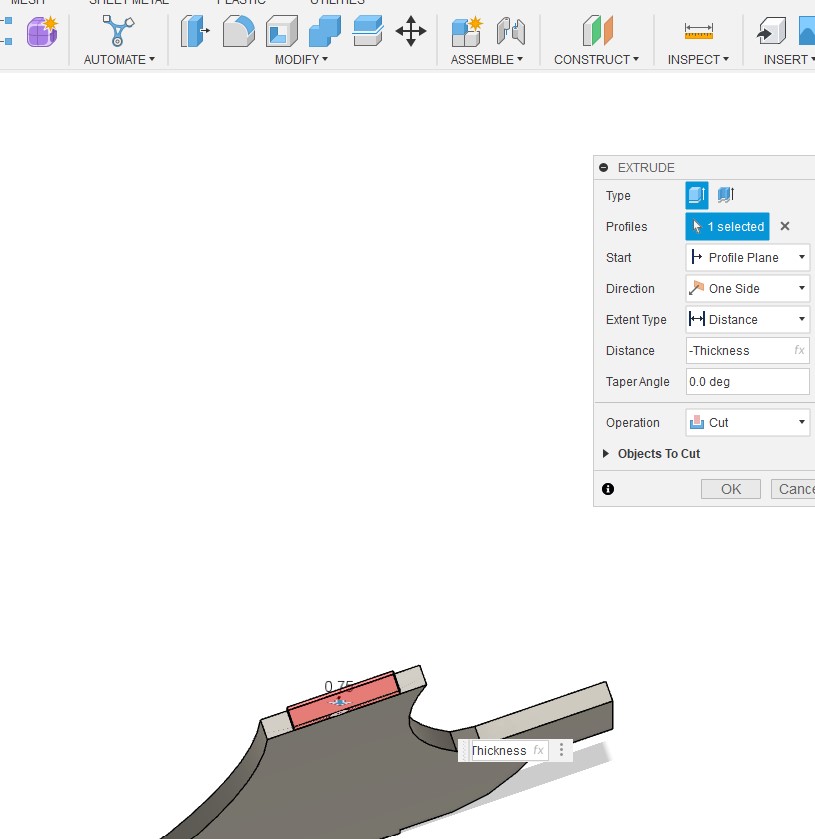
I downloaded a Dogbone add-in for Fusion and got the design ready to cut
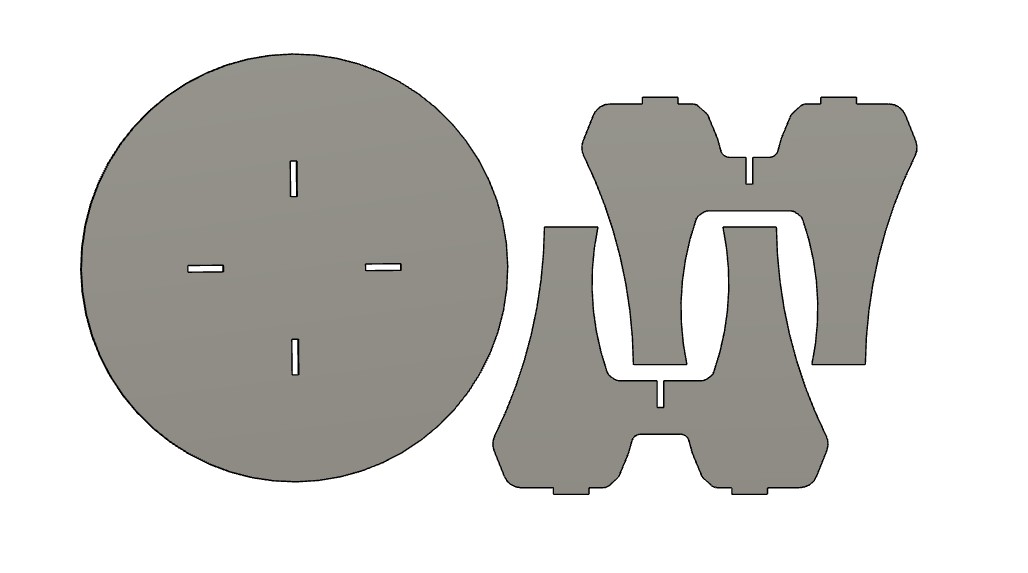
and now we are ready to mock up in the laser cutter
Laser cut mock up
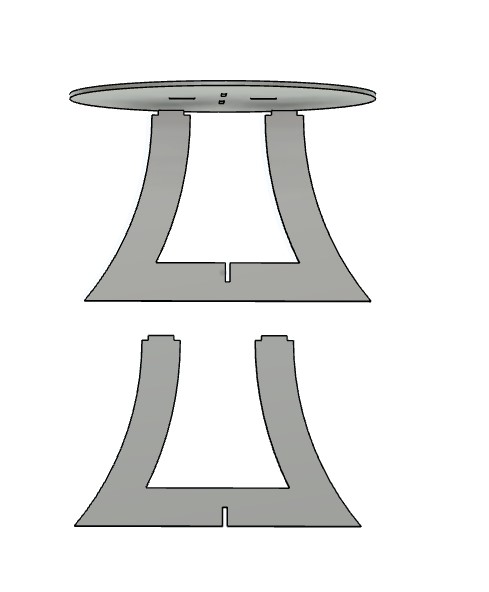
Next I took the basic table design and laser cut a small version to get a feel for fit and look
The table looked nice and legs seem to align well to the table top slots
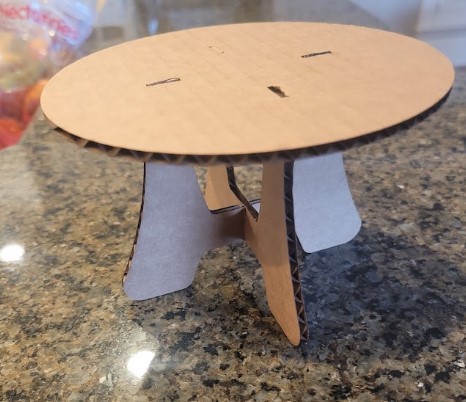
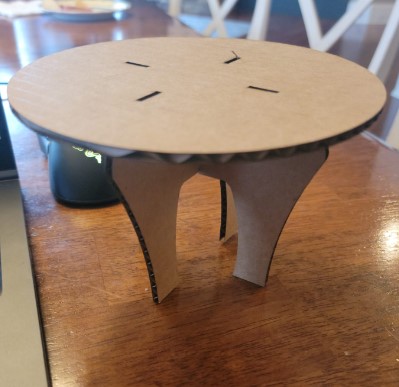
When I showed it to my kids they started playing with it and turn the legs upside down. This looked much better!!!
Now I needed to get back to fusion and redesign the legs.
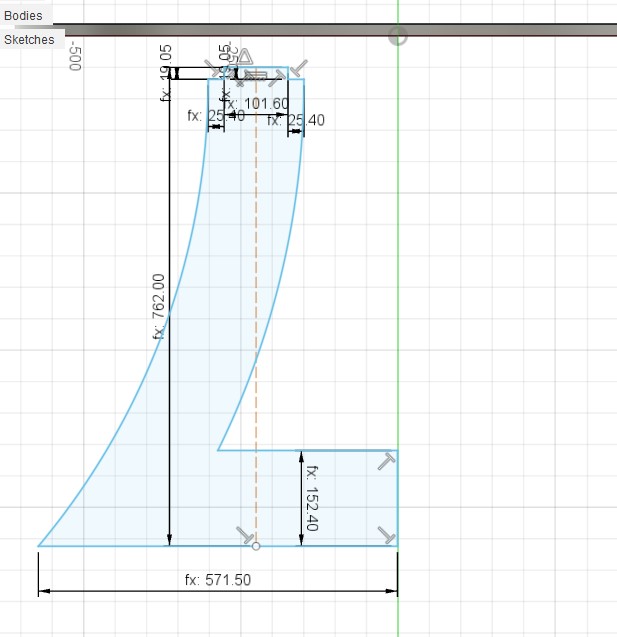
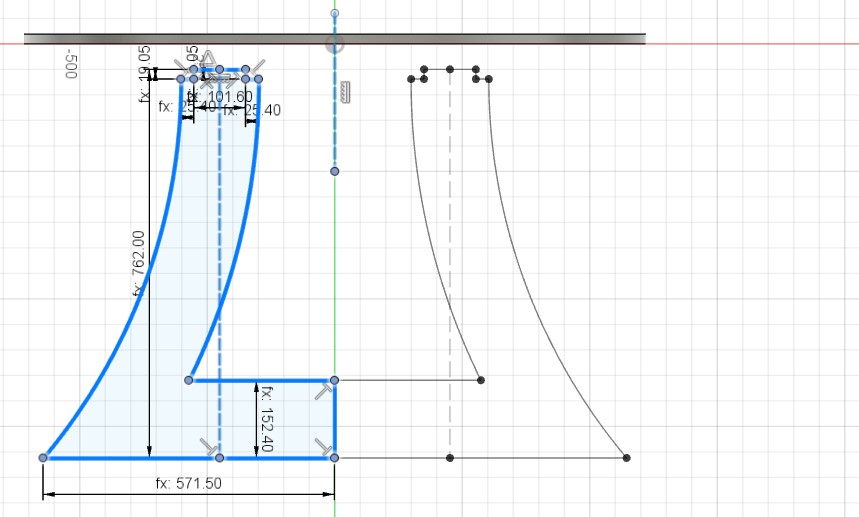
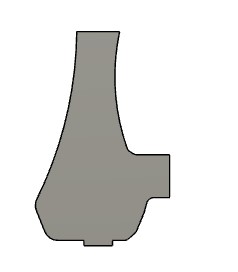
Leg design #2
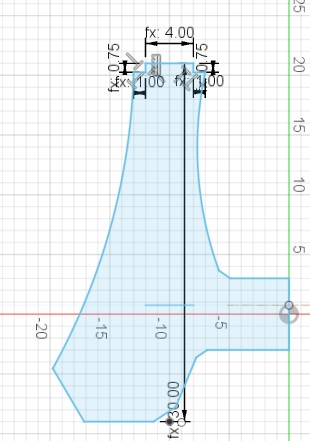
To ensure i keep the slot in place I created a plan on the bottom and projected the
slot on it
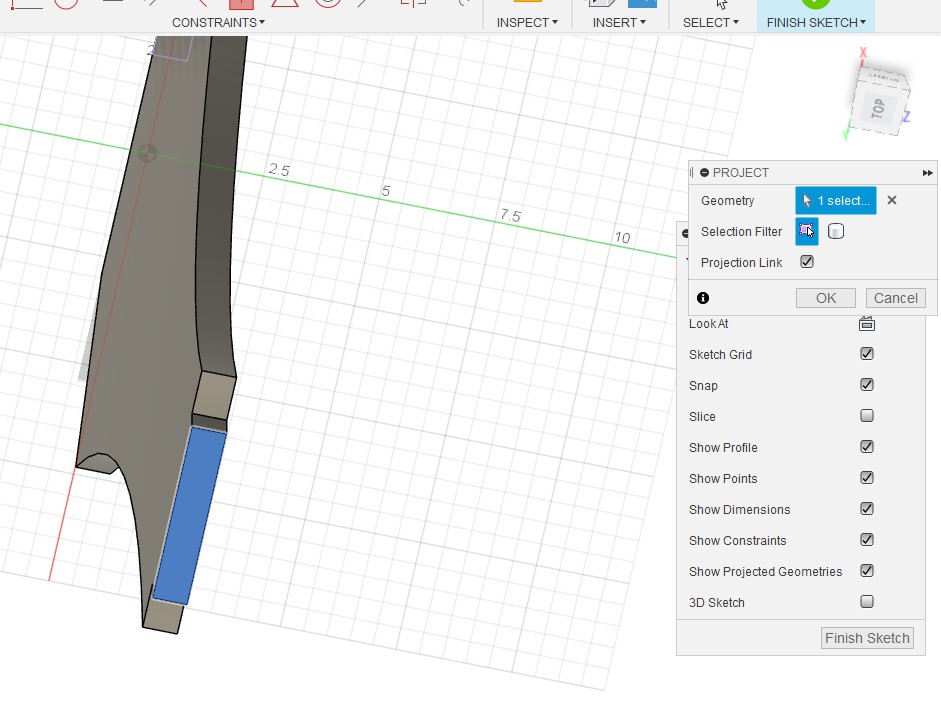
Then I saw that the leg was too narrow in that part
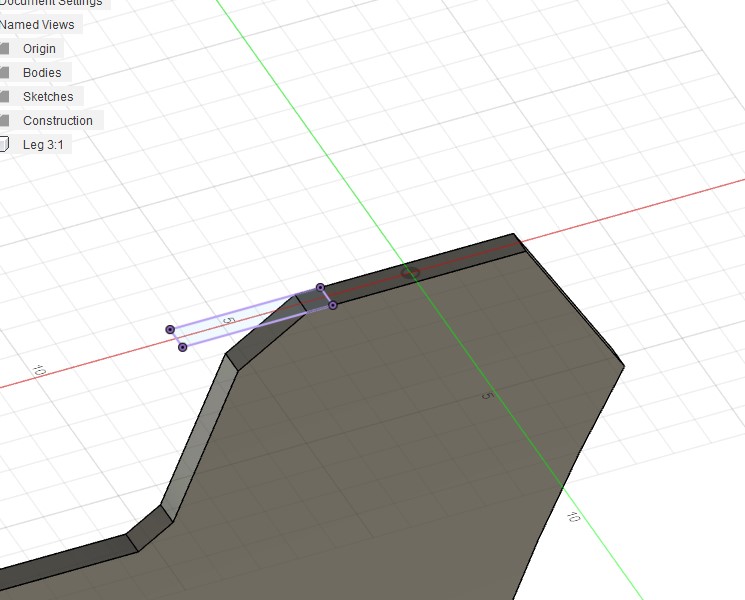
I extruded it but need to get the base back in line
So a went back to the sketch and adjusted it
That looked good
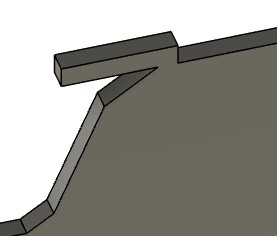
Now I needed to erase the old slot
and this looks
And we are good to go
Cardboard test #2
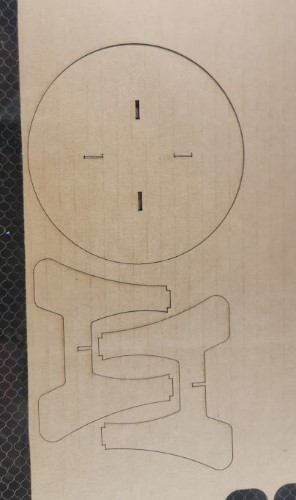
Drawing set to cut
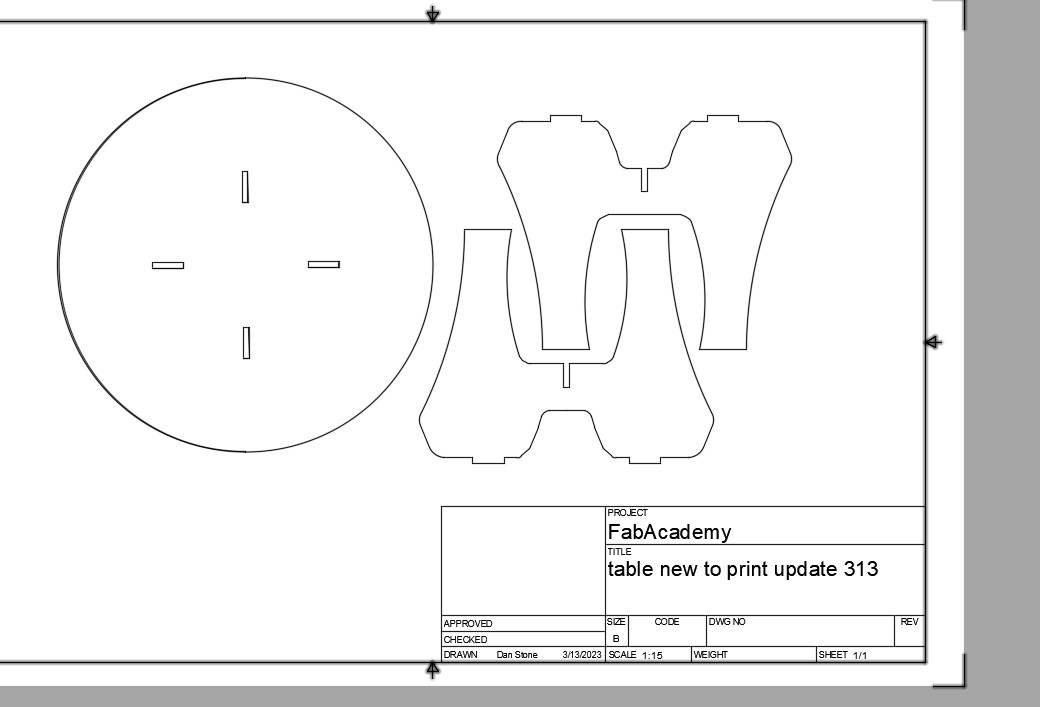
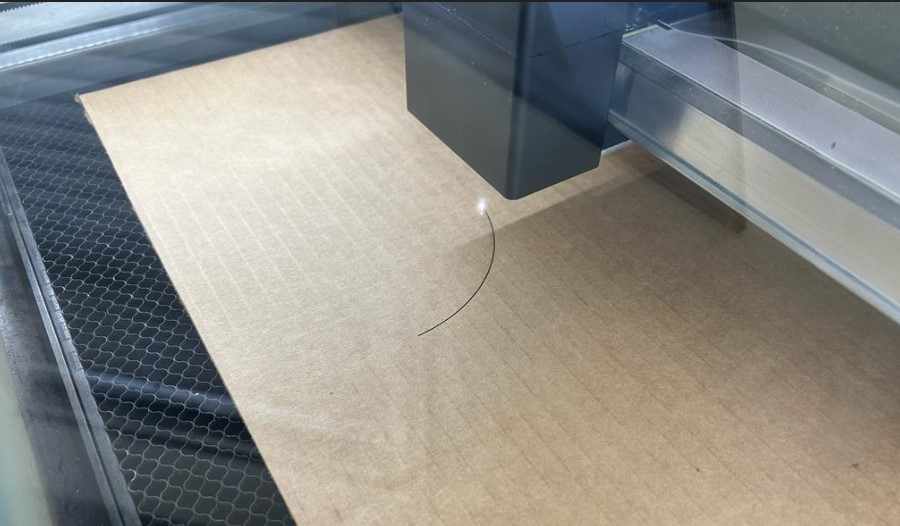
Quick cut on laser
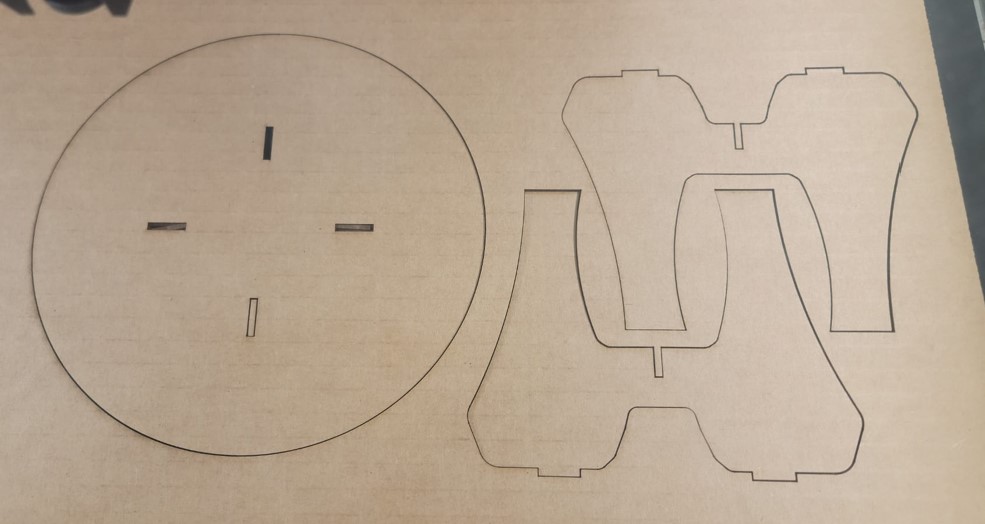
And I think we are ready to cut ...now we just need the wood glue up
Partial parametric design
This was a struggle for me and I only had limited success.
Table top - this was pretty straight forward and thickness, slots side/location, and table top diameter were all working well.
Legs - here I hit a road block. Thickness and slot insert size worked well but when I tried the get the hight / width to work I could not get it working.
I tried constricting the shape completely and it went all crazy.
I also tried scaling after I switch the mirroring in 3D vs. the sketch as I described above but still no go
I also replaced the arcs I used to curve the feet with filet but did not manage to make it work
I designed 2 other leg shapes and still could get it to change hight and keep the shape.
I was running out of time and decided to focus on Parametrics design for the slot and materials thickness that are as most important for this design.
I got that work work and sync between the top and legs.
Wood glue up
Chatting with Dr. Taylor about the table he had a great suggestion of using a glue up of hardwood to take the table to the next level. This was a great opportunity to learn 2 new things:
-
How to glue up hardwood panels
-
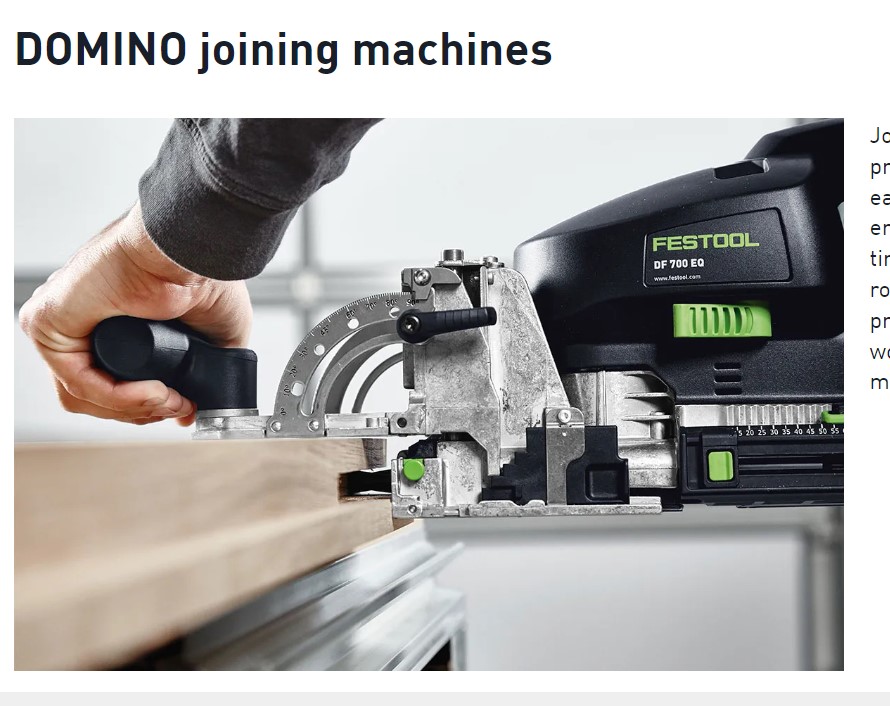
How to use the Festool DOMINO Joiner our lab has.
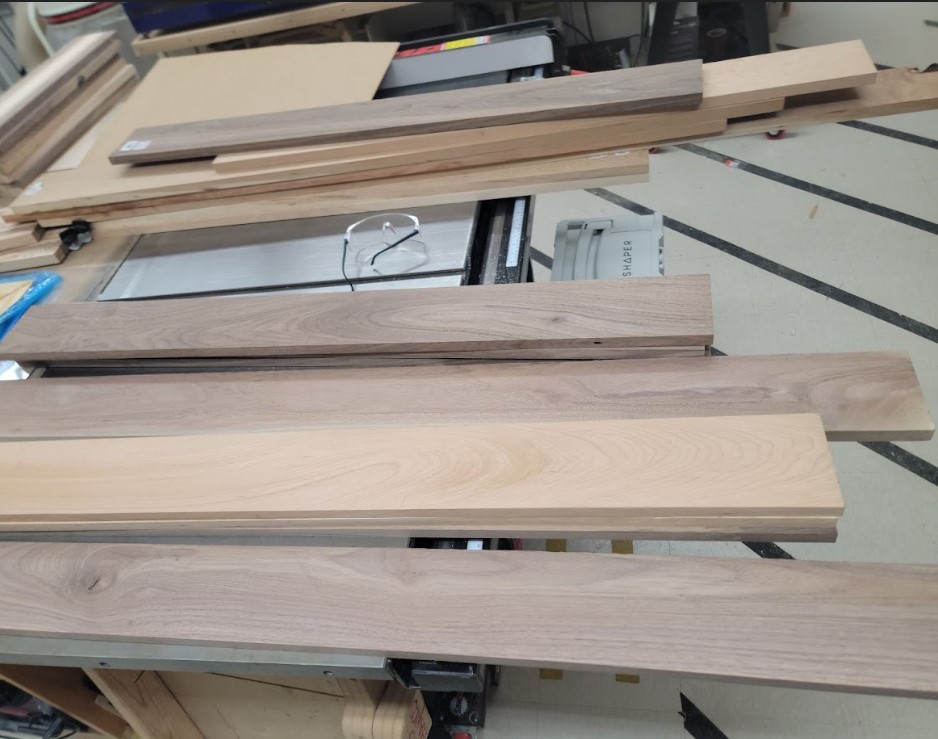
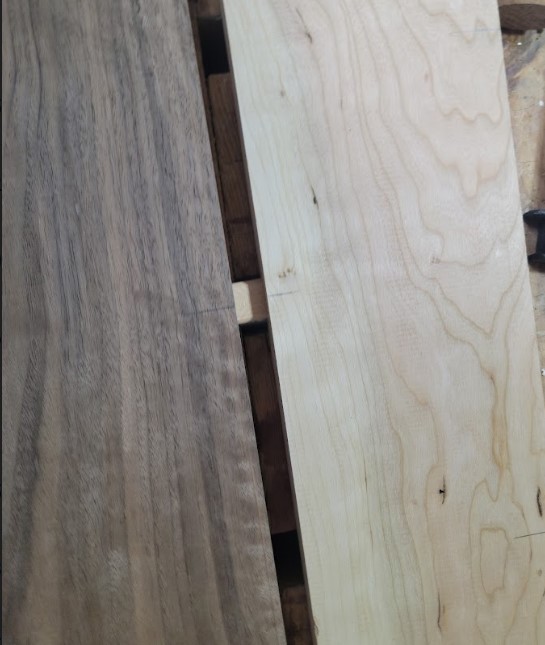
I headed out and got some nice wood planks
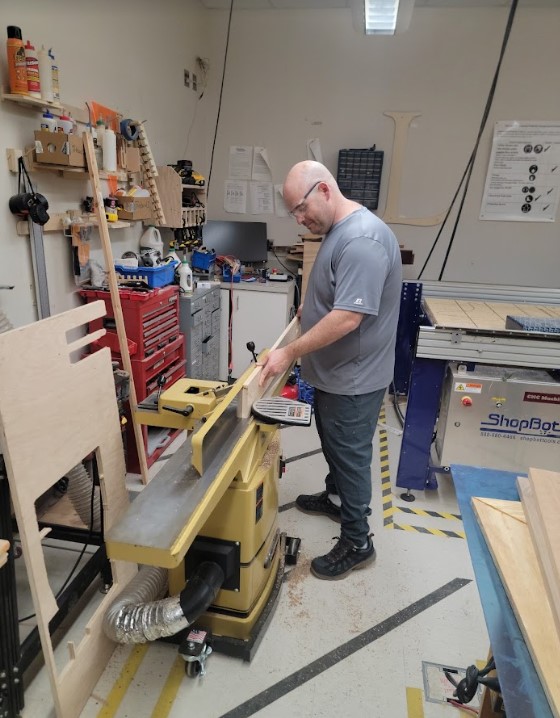
Next was the joiner to make sure the side were nice and flat
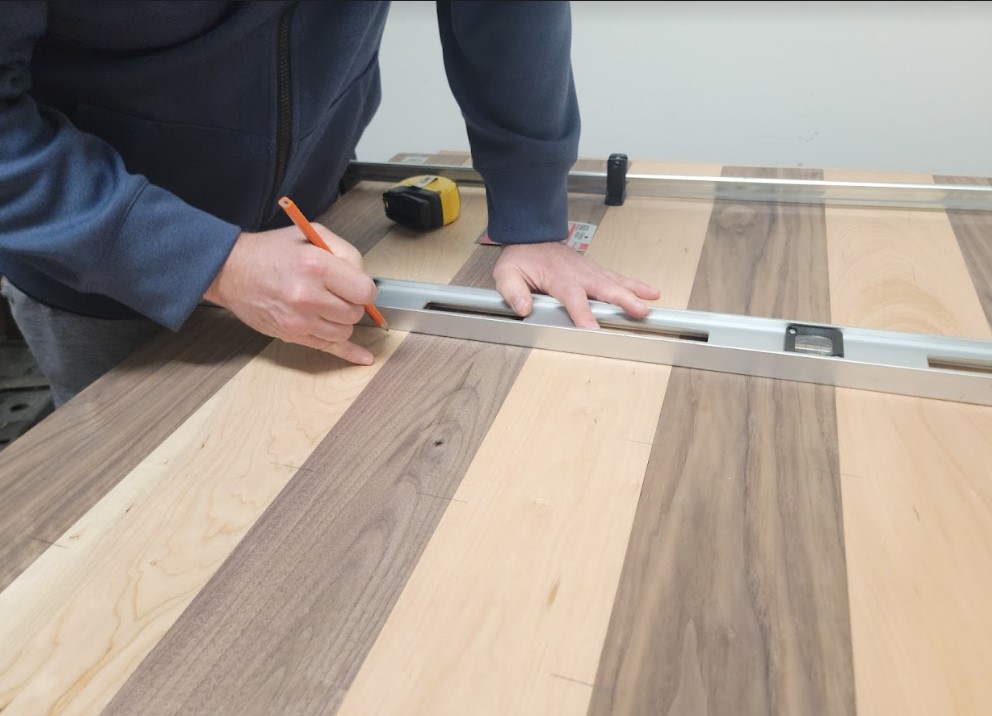
Next OI lined up all the planked to get the patters
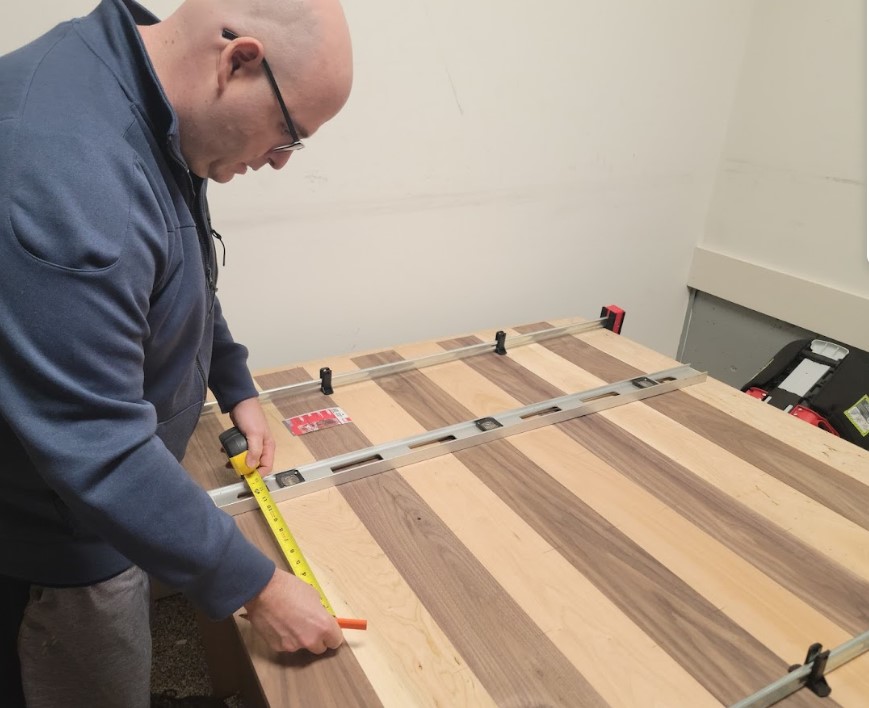
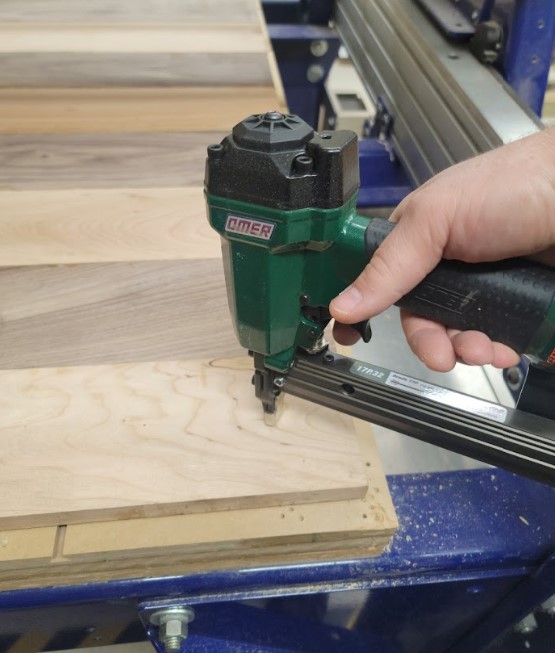
I marked the planked every 8 inches for each place I will put a domino/dowel
Next step was the drill holes at every marking for the dominos/dowels
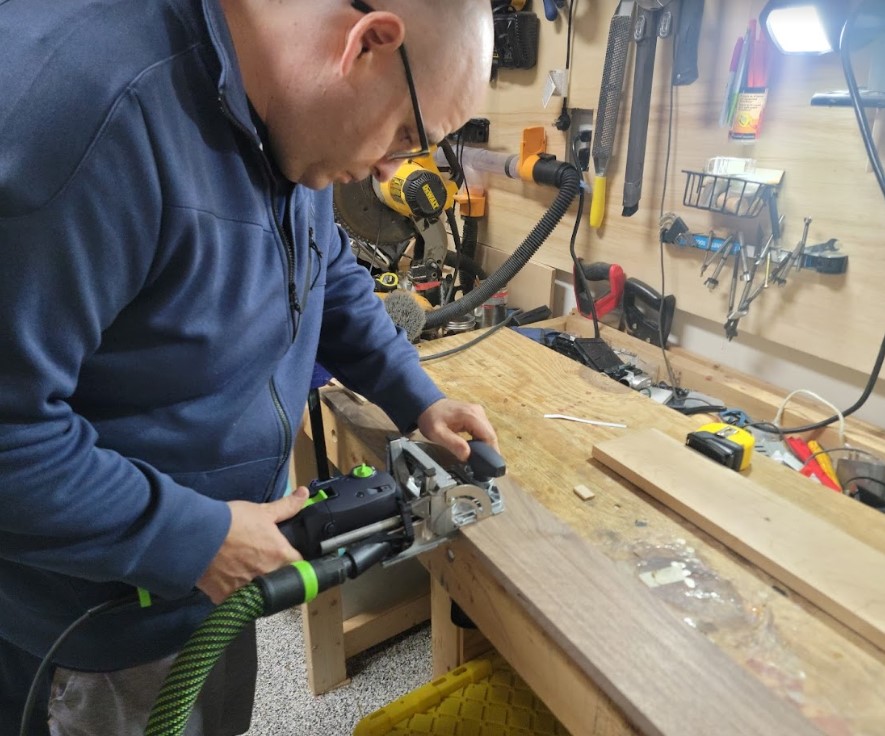
Here you can see the holes
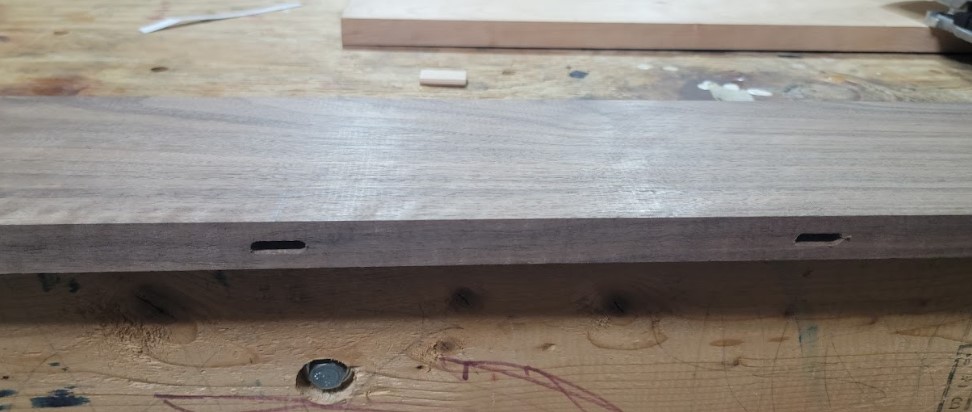
Now I set up each plank put glue and inserted dominos/dowels

You can see how the line up
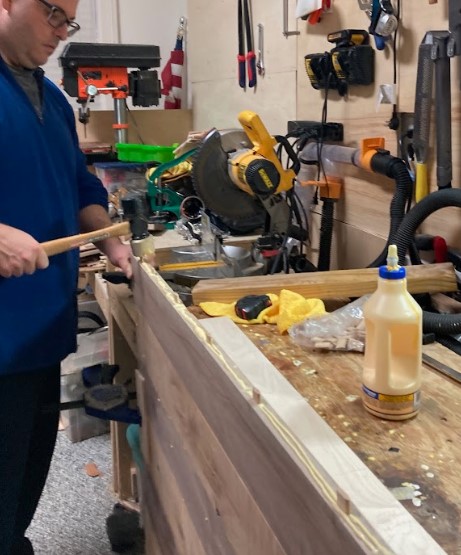
Now started to run through putting in wafter and then inserting next plank and stacking them together.
I found out that it is very important to have the dowels all the way in to ensure a smooth stacking and so you can see I use a maleate to ensure all the dowel are in and then again to put in the next plank
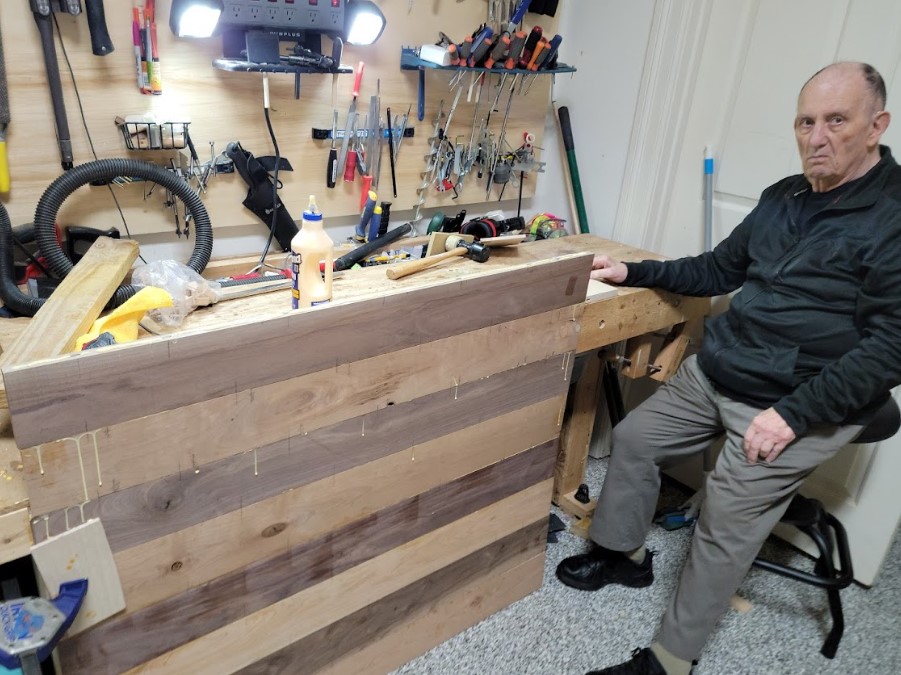
My dad who is 86 was visiting and come into the shop to supervise as I was working. He introduced me to woodworking when I was a childe and while his arthritis does not allow him to do any woodworking we had a good time working together.
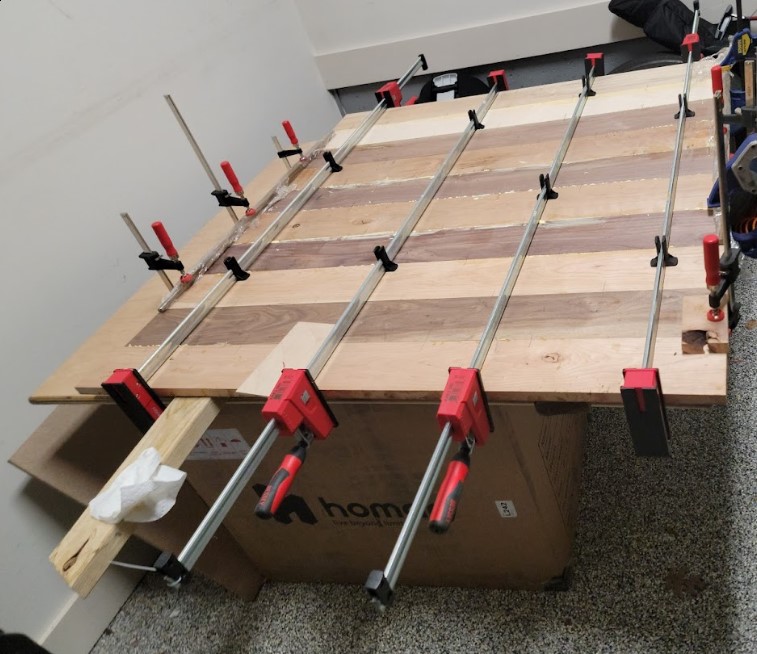
Next I moved to the glues panel to a flat surface and I use 4 long clamps to hold the planks together in addition I use 2 metal bars and smaller clamps on each edge to keep the panel from bowing as much as possible.
Another inspection approved

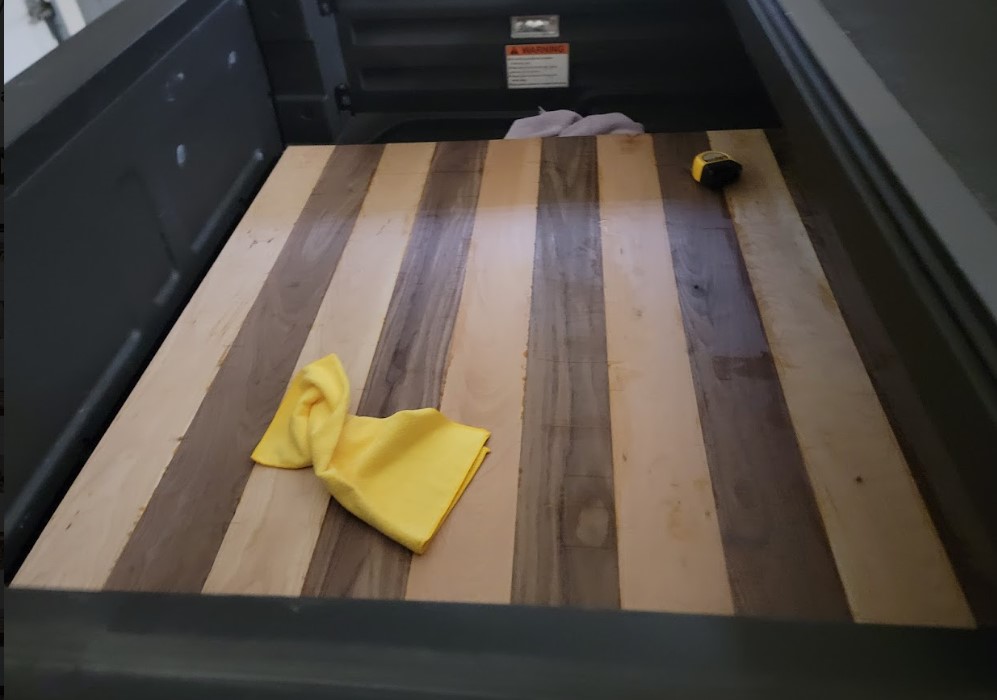
24 hours later the board was dry enough and loaded into my truck to free up the space to work on the next panel for the legs
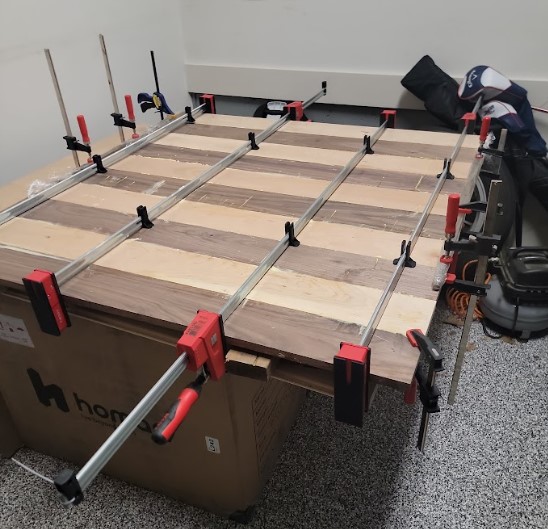
I repeated all the steps above and now panel #2 is drying
Getting files ready to cut
First I needed to add a tool library and the shopbot to post processing.
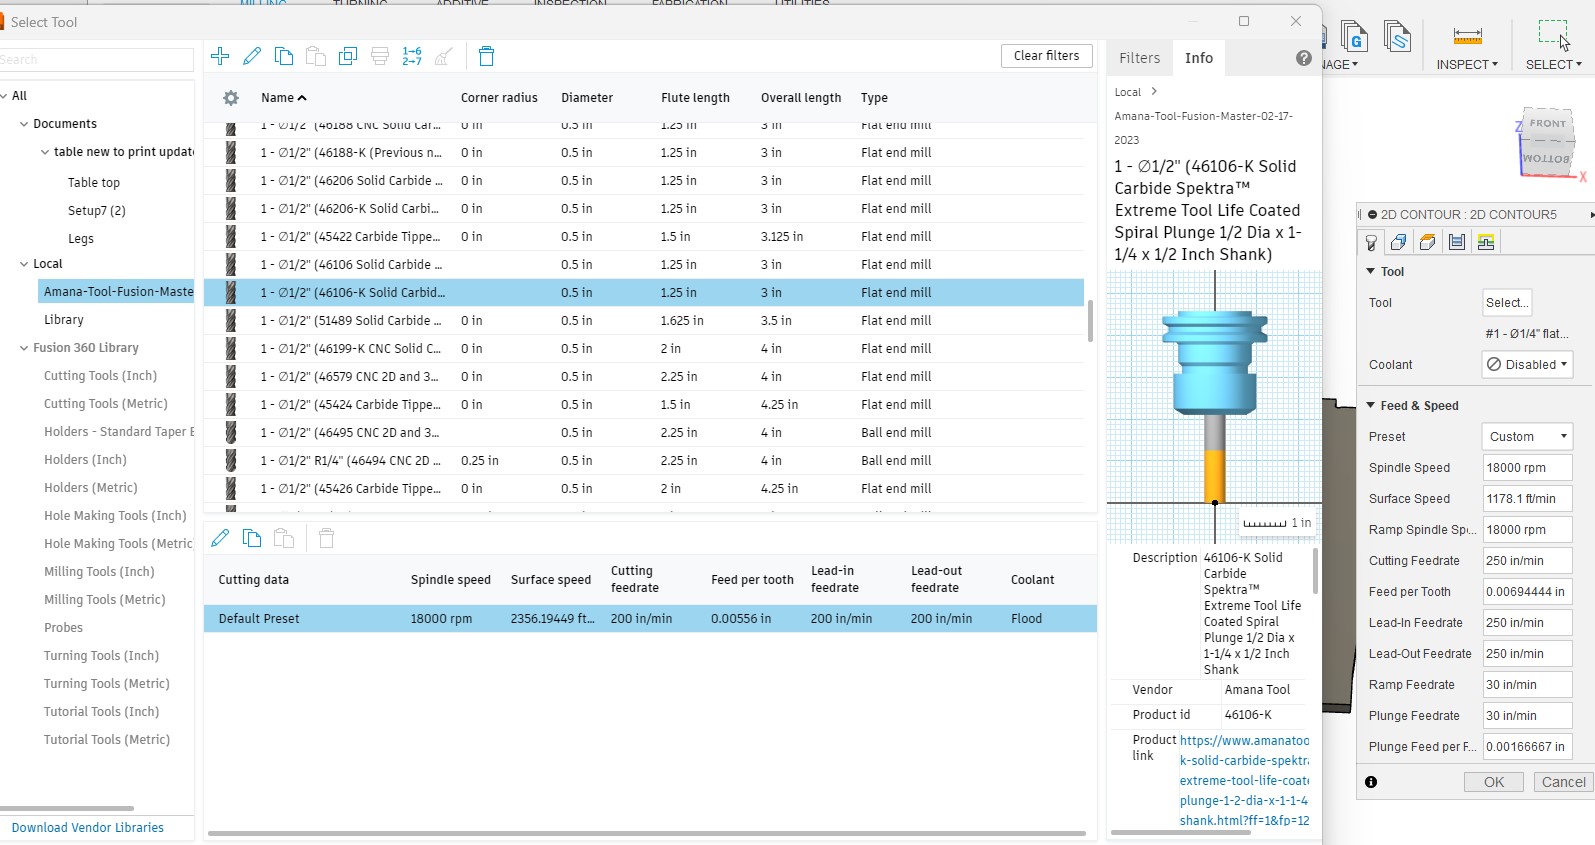
Tool library
You first need to downloaded the tool file here
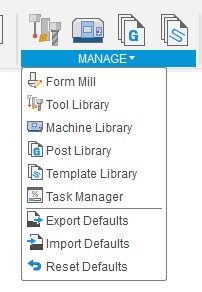
Then you start with the tool library
In local library you right click, click import and select the file you downloaded
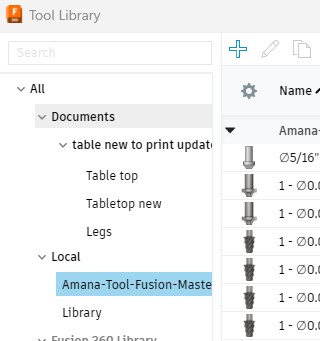
and now you should see the new library show up
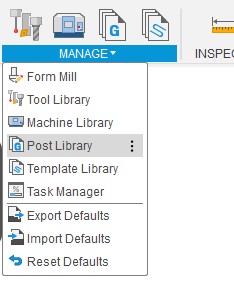
Post processing
Fusion 360 post processing file for shopbot you can find HERE
You start with the Post library
Then you click import and select the file you downloaded
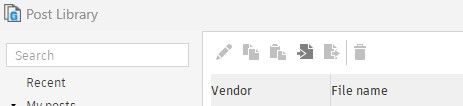
and now you should see the shopbot options show up
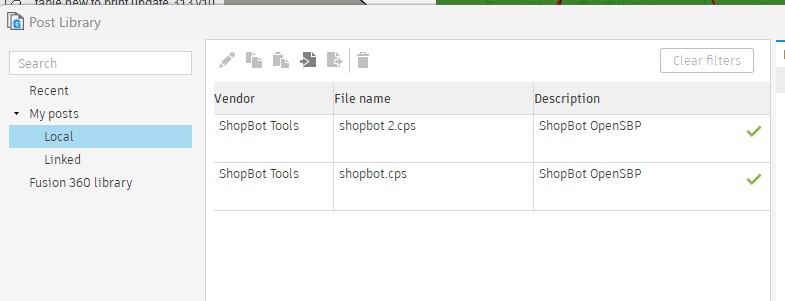
This set up was set up was shared with me by Dylan Ferro and you can see more detail in his page here
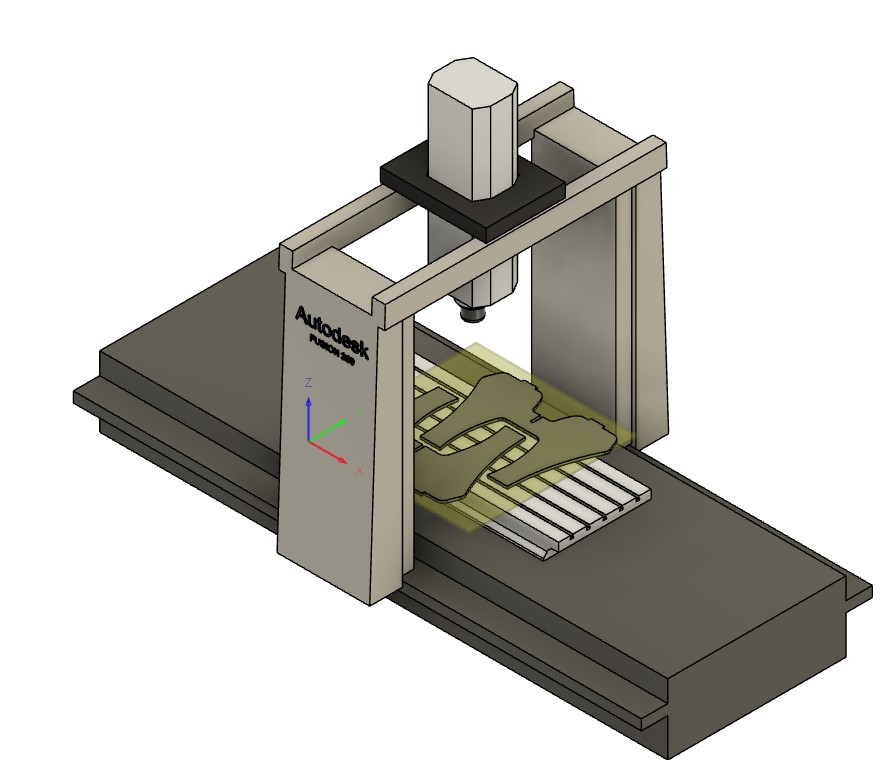
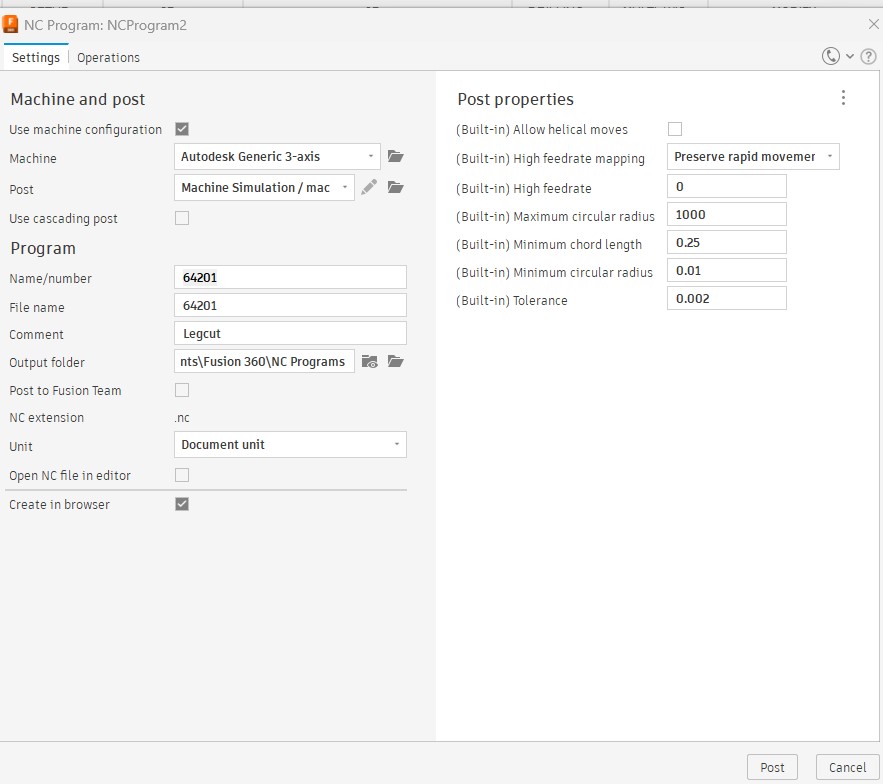
Cut paths set up So now we move into the manufacturing side of Fusion and started a new set up
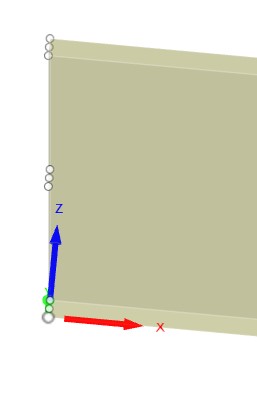
We first needed to choose the Stock point. You can see little while dots on all corners. This will be the starting point to zero the shopbot/start the cut. I choose the bottom left corner.
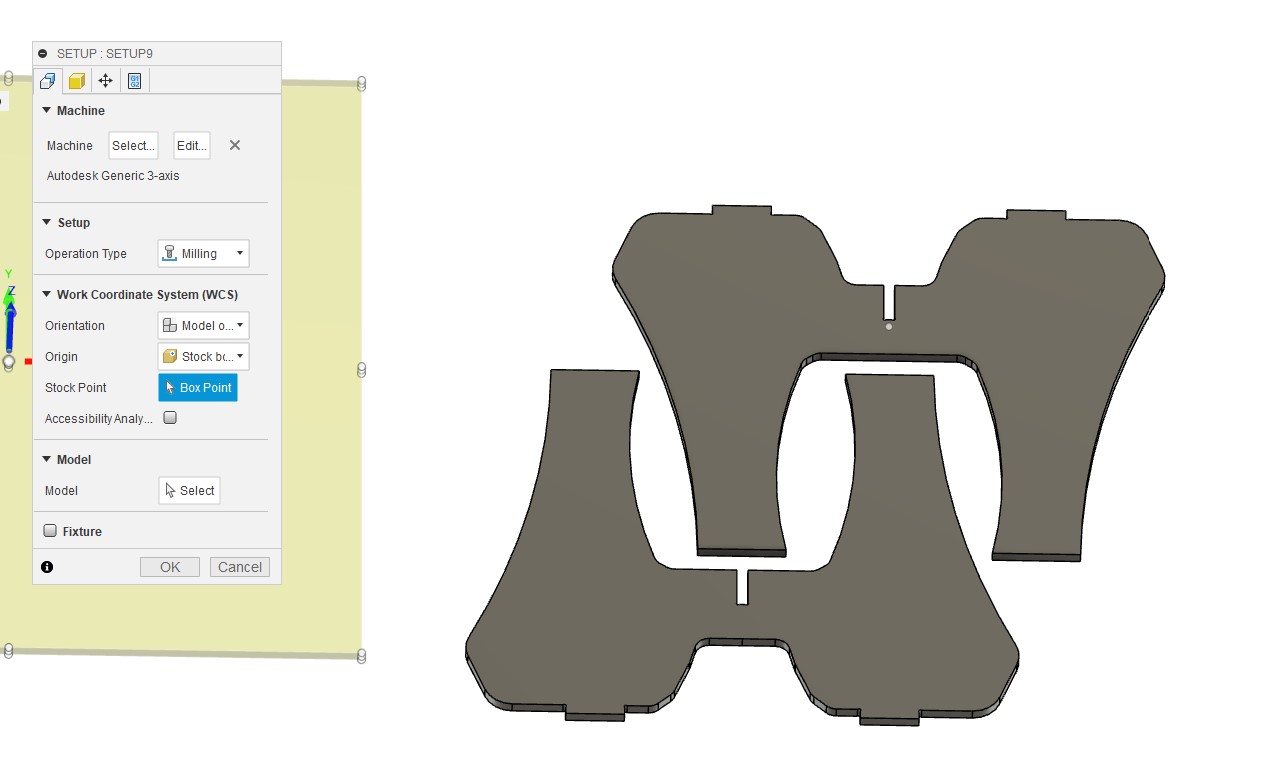
Made sure the axis were set up in line with the machine
Next we to set the stock - I choose Fixed stock from the drop down and put in the measurement 48 x 50 x 0.755
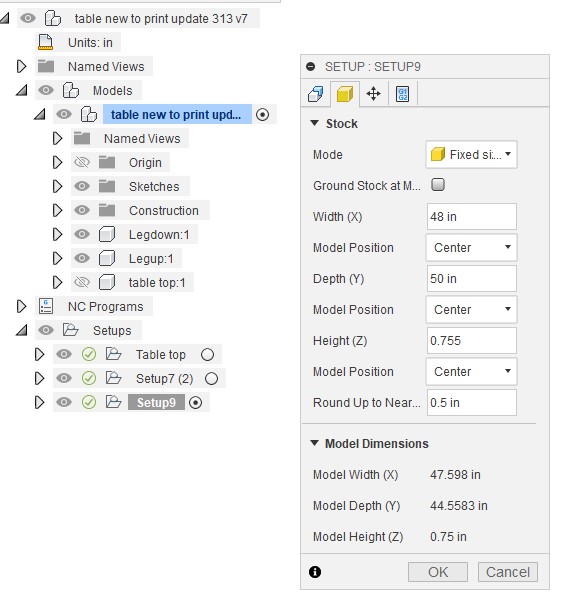
Finally need to set up a number/name for file and description
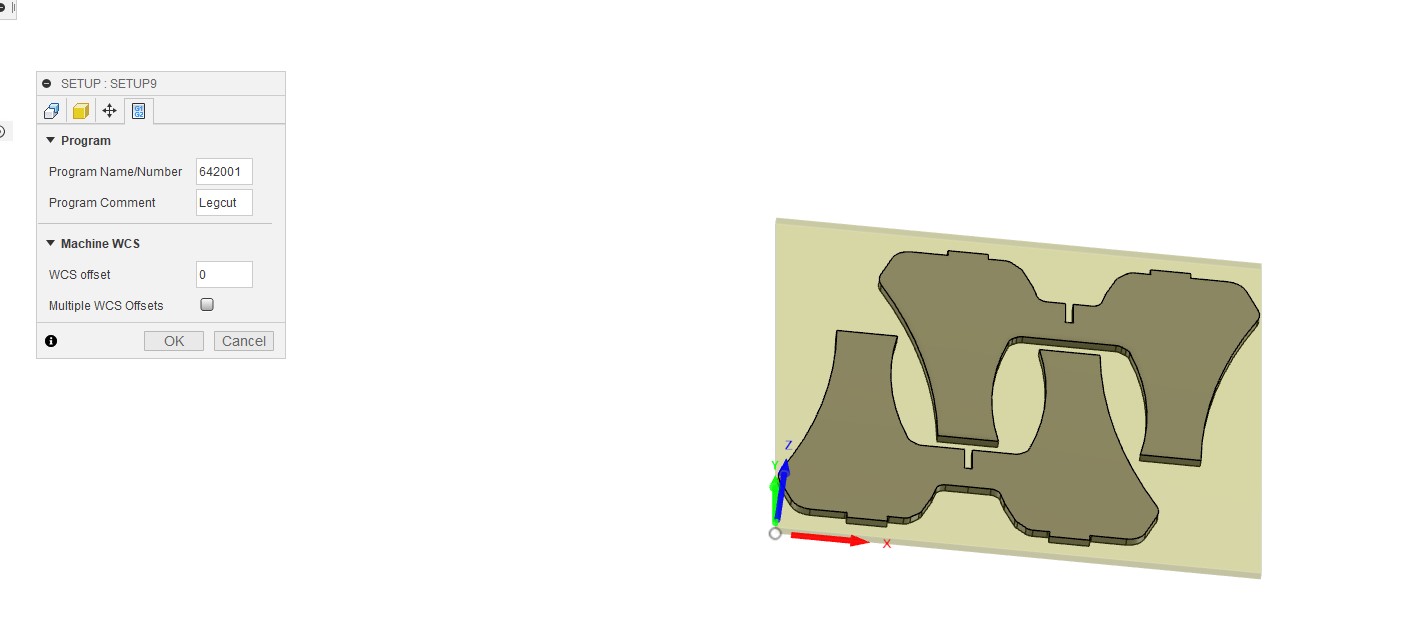
And we can see the set up is done.
Now we need to set up the tool paths - I was only cutting in this design so we needed "2D contours" and first thing we need to do is select the bit - 1/2 inch end mill
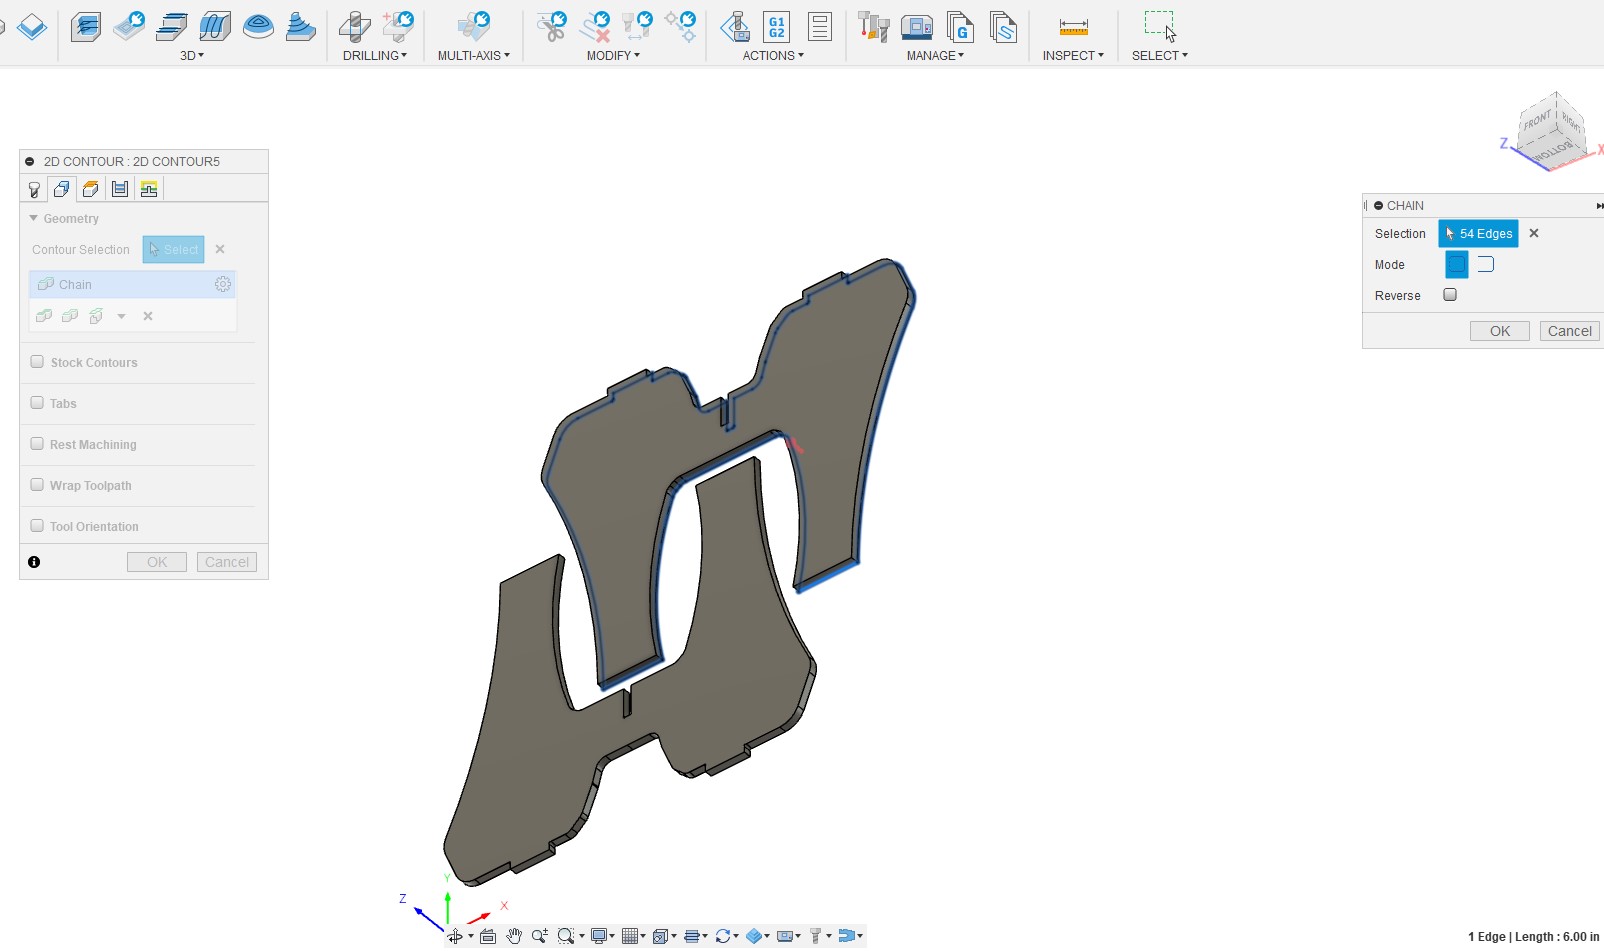
Next you need to choose the outline for the cut you have a number of option but I ended up use Chain

and selecting the bottom profile of the shapes
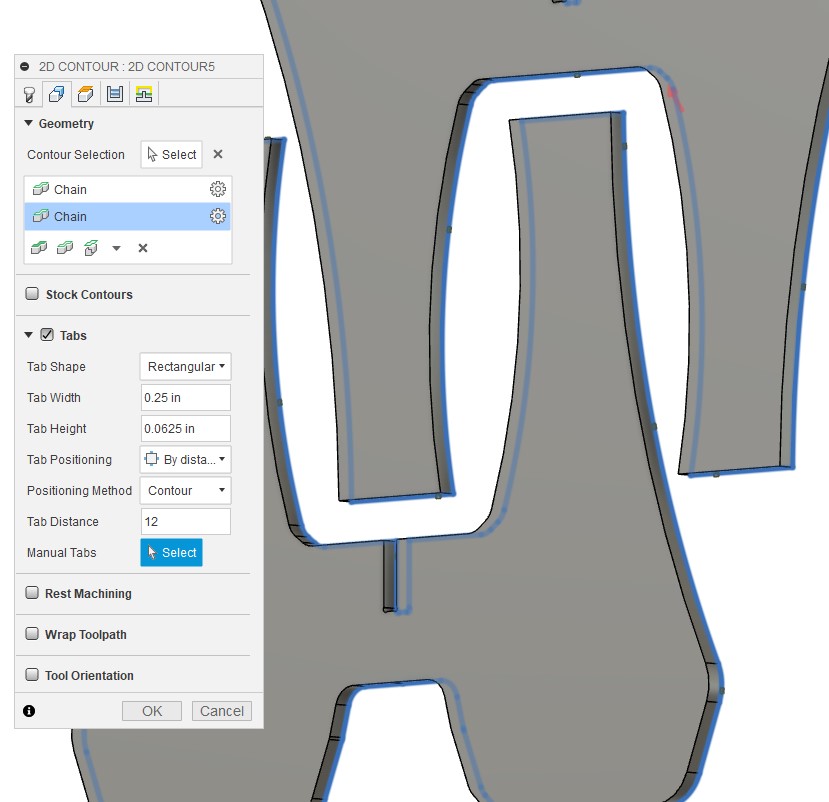
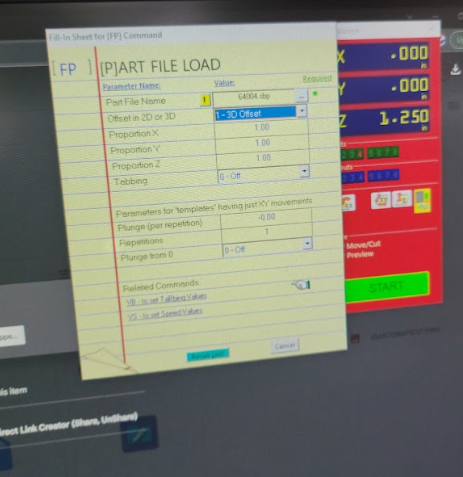
Next we need to put in the tabs - discussing the shape I was cutting with my instructors they 12 inches and 0.25 inches
To be on the safe side I increased the clearance hight to 2 inches and retract highest to 0.5 inches. My instructor suggest I add -0.02 to the bottom to ensure a cut through
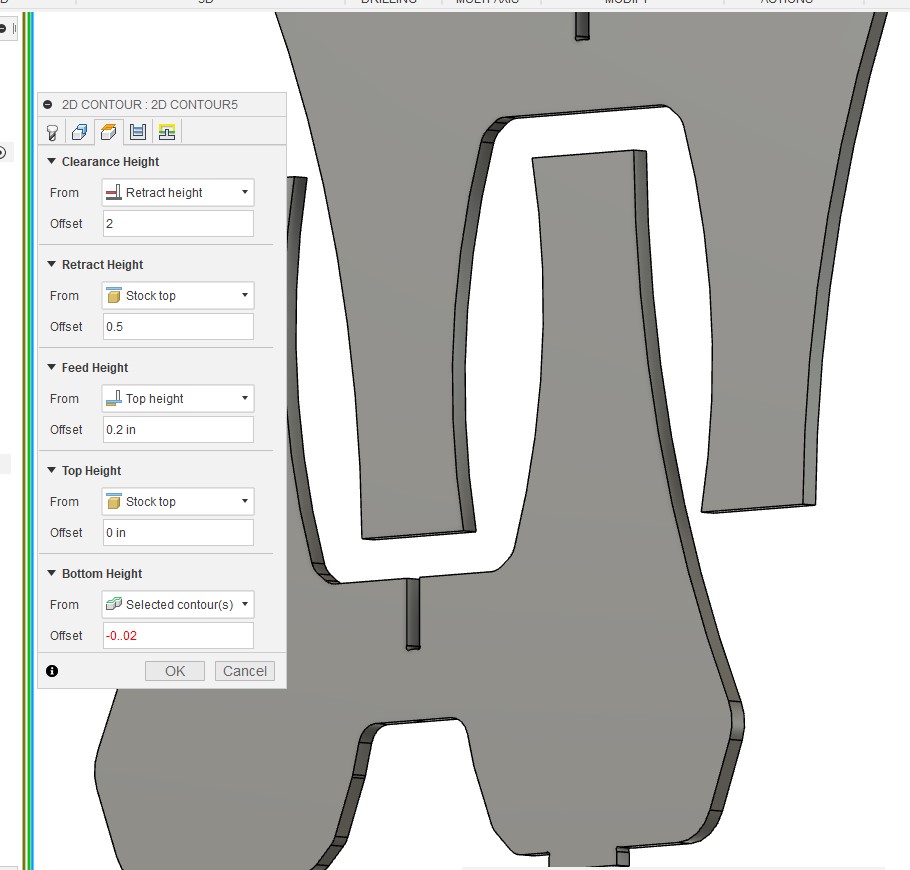
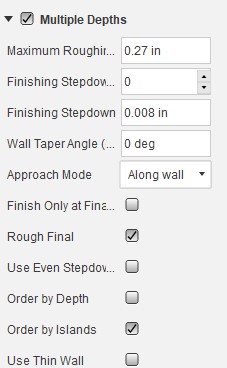
We set the cut depth to a little more then half of the drill bit size from 0.125 to 0.27
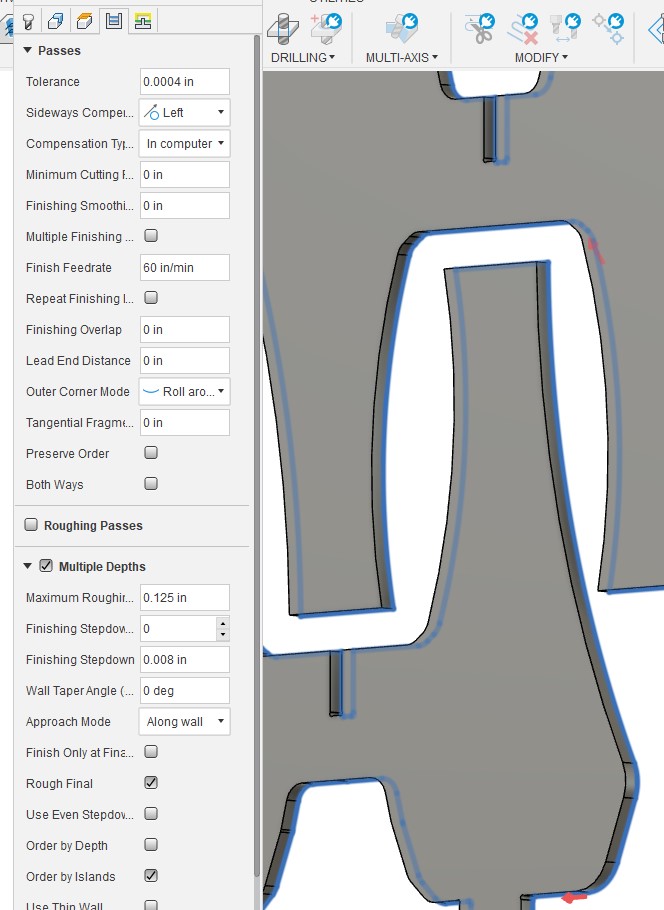
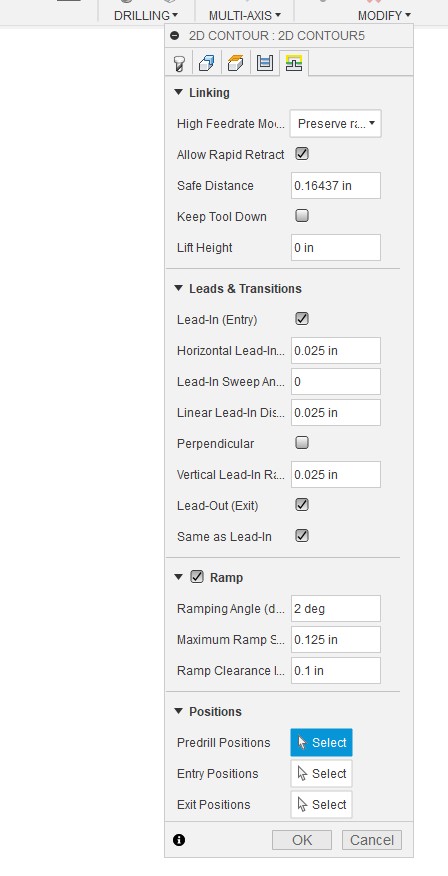
Here we made 2 changes, the Lead in angle to 0 and on the Ramp Angle to 2. This was aimed to ensure we do not have any unplanned marks left by the tool.
Any finally we ran the simulation to make sure it all looked good and then proceeded to Post process and exporet the cut file.
CNC cuts
Workflow: I pretty much following the following work flow we use in the lab
You can see the detailed steps Here
At a high level we had to follow these steps:
Bit
First we had to install the right bit.
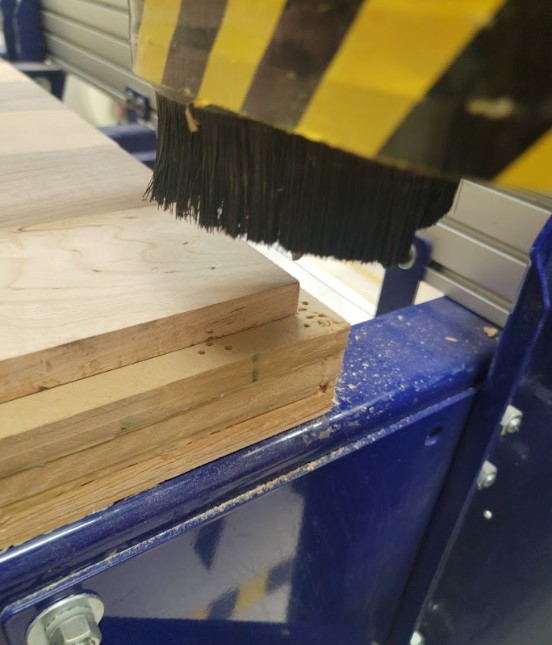
Loading
Loaded the board and attached it in place
X Y Z
Zero out the X, Y and Z.
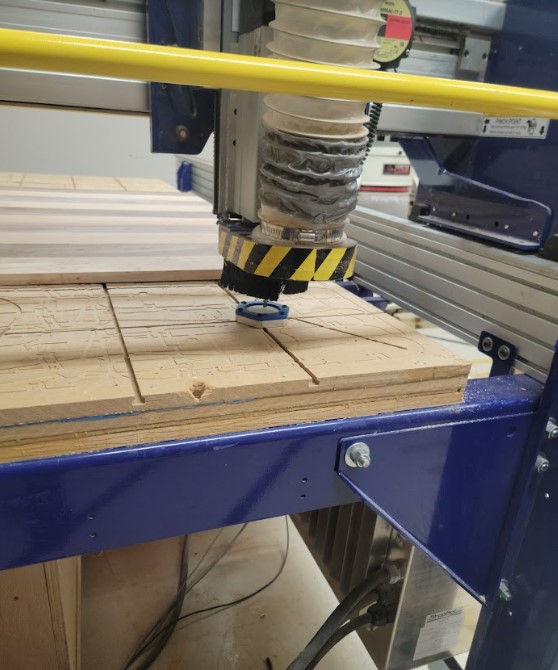
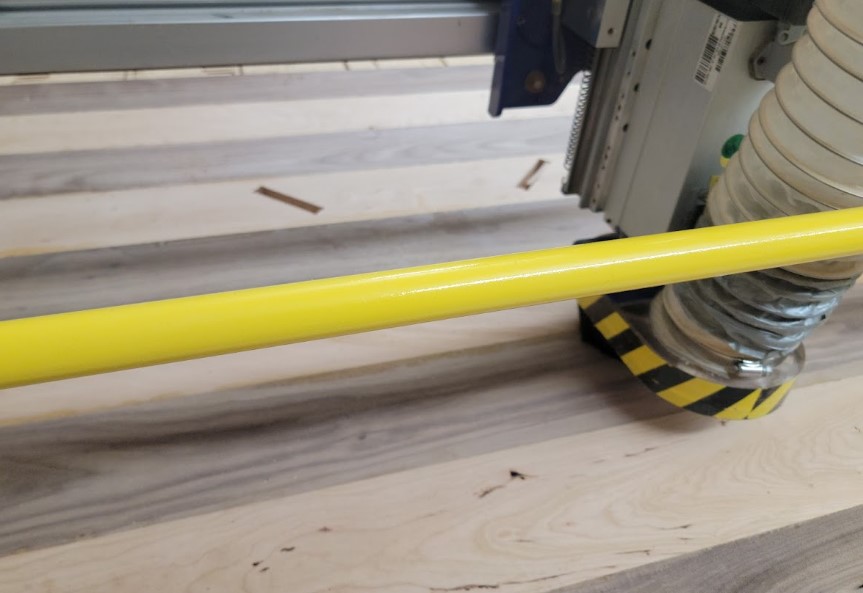
Air cut
Loaded the cut path and ran the cut in the "air" above the board to ensure everything looks right
Run the cut
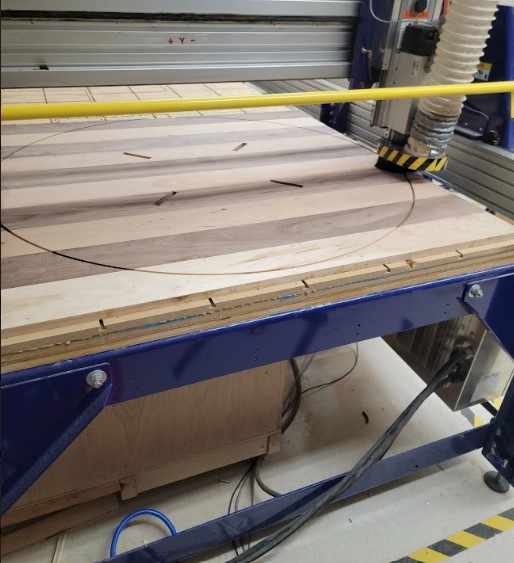
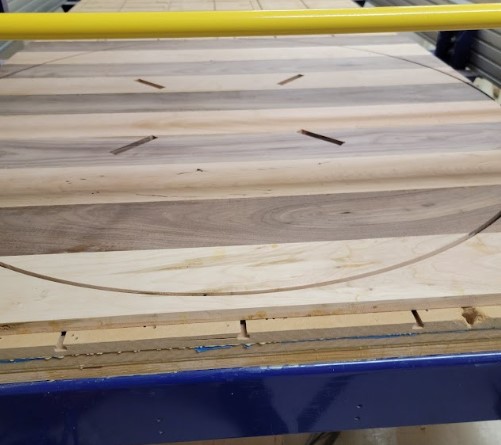
The tabs did their job and we have a table top
Finishing and assembly
Sanding
Now it is time to sand
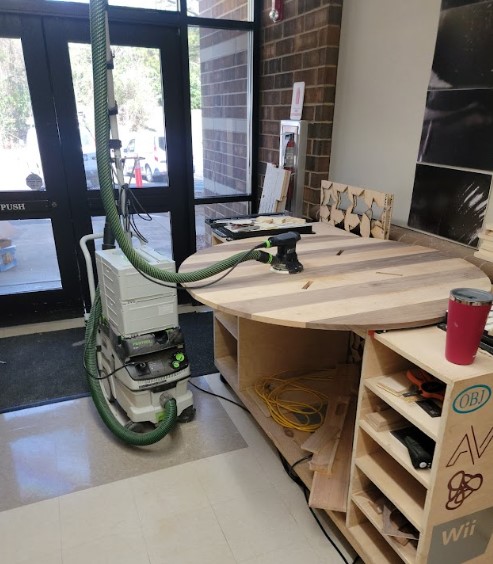

BEFORE
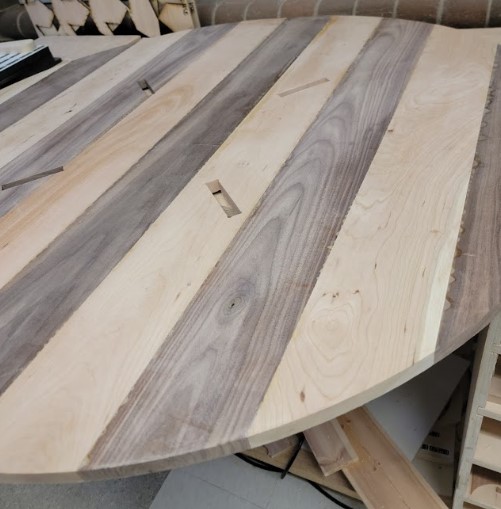
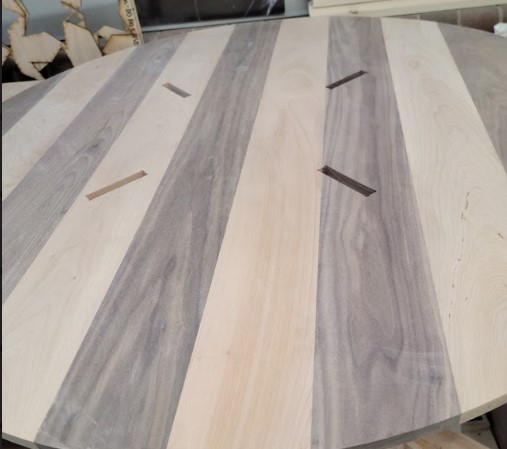
AFTER
Now it is time for assembly
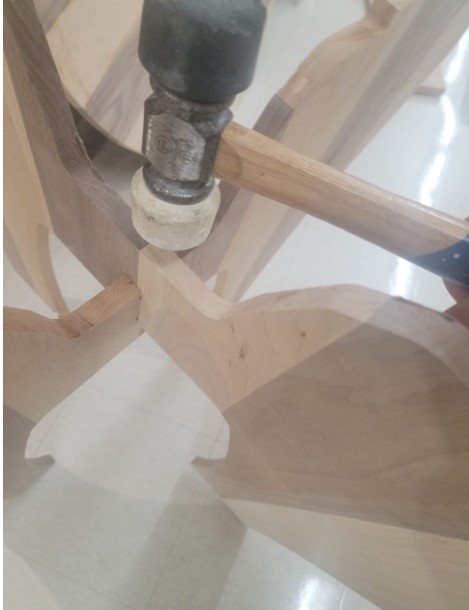
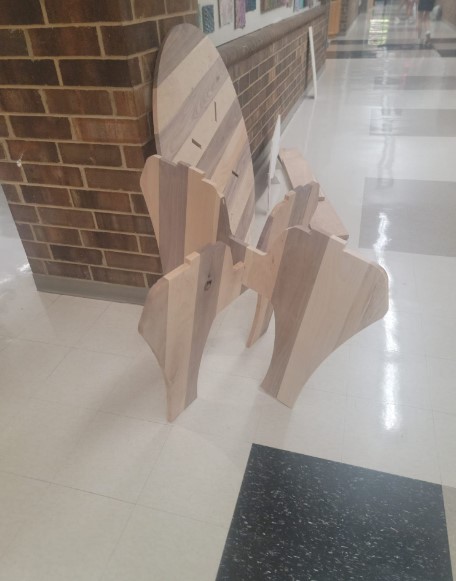
The legs went on relatively easily
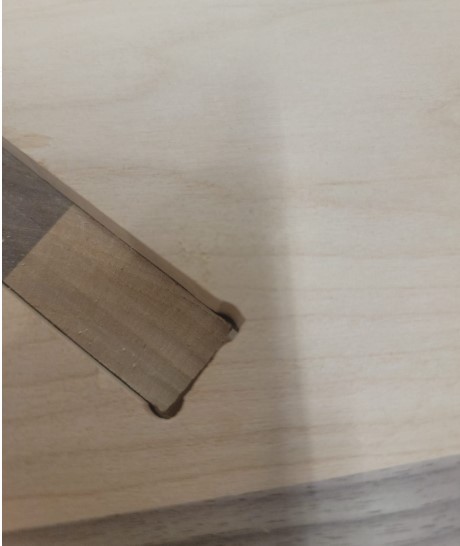
When it came to the top it turned out that one of the cut in the slot was not flush and requireed some sanding
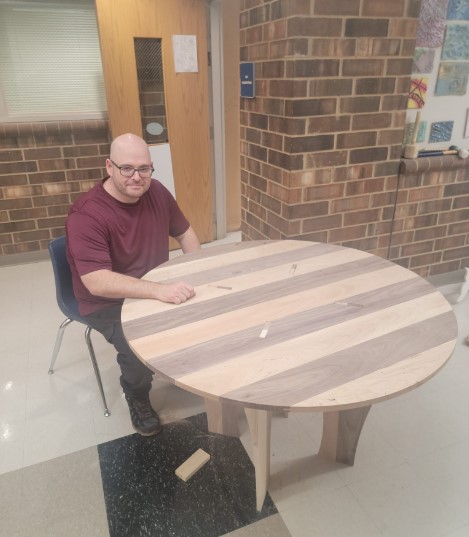
An here is the final product!!

Files for the week Shopbot and Design