5. 3D Scanning and Printing
This time, let’s learn about 3D Scanning and printing.
3D printing
The 3D printing, also called additive manufacturing, is a process of manufacturing objects through the addition of material in successive layers.
Equipment and materials
3d printing process
The first step was to know the cura software
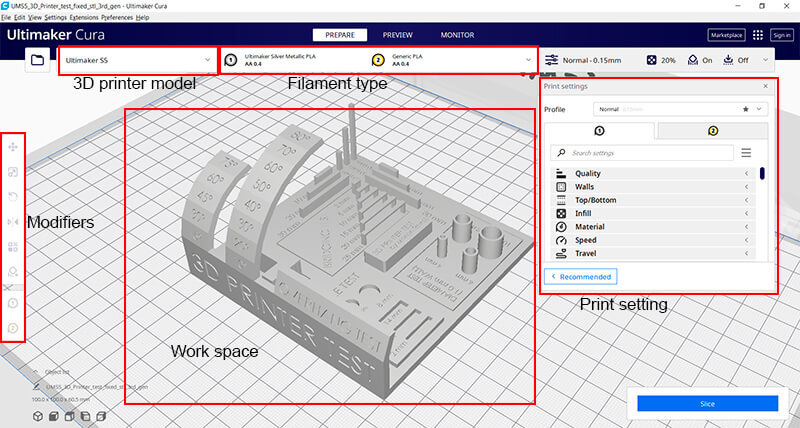
First we’ll make a test print, we are going to print: “All In One 3D Printer test” made by Marian Trpks. You can review his work, Here.
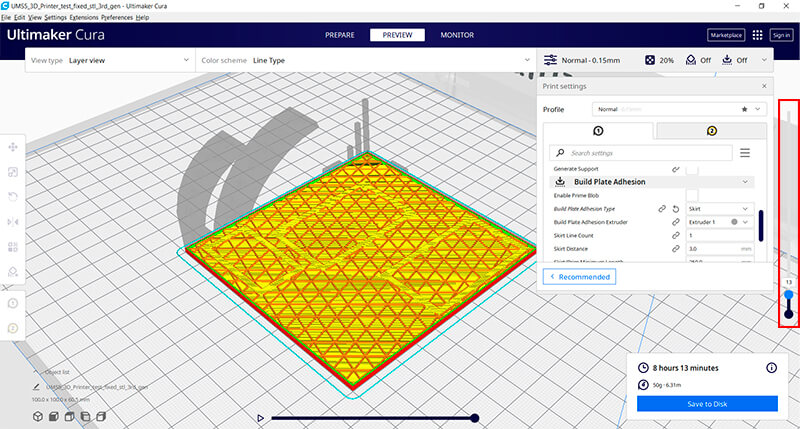
When we click on Slice, the software transforms the solid into a layer scheme.
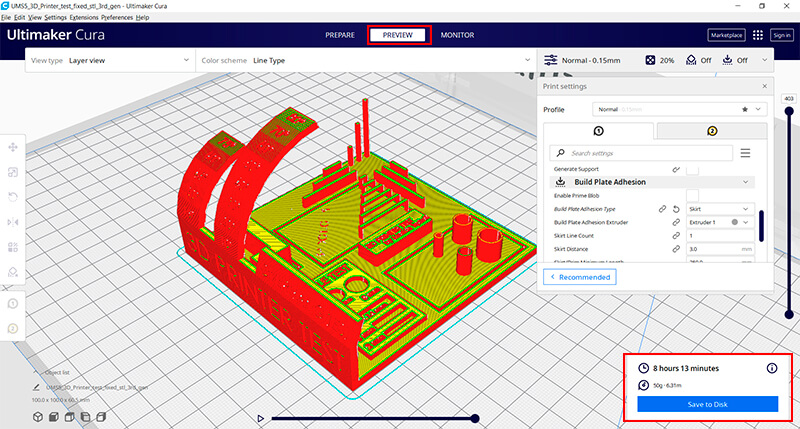
We can also review the characteristics of printing layer by layer, useful to perceive errors or defects that come from the design.
Now at the time of printing our test, we save the file on a pen drive and go to the printer.
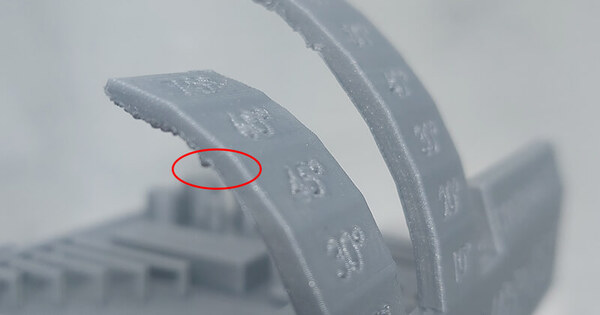
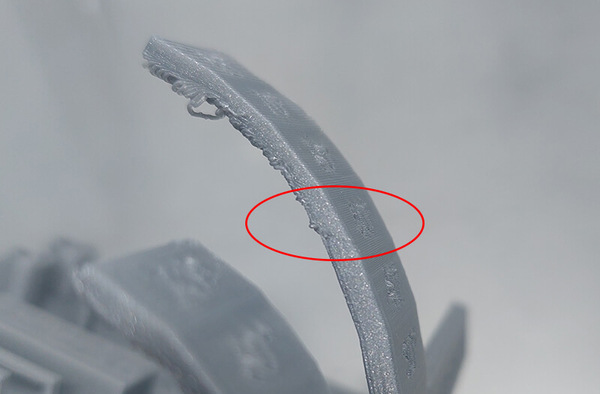
With the test finished, we have some conclusions.
From a certain degree of inclination, layers fall and deformation of the piece is seen.
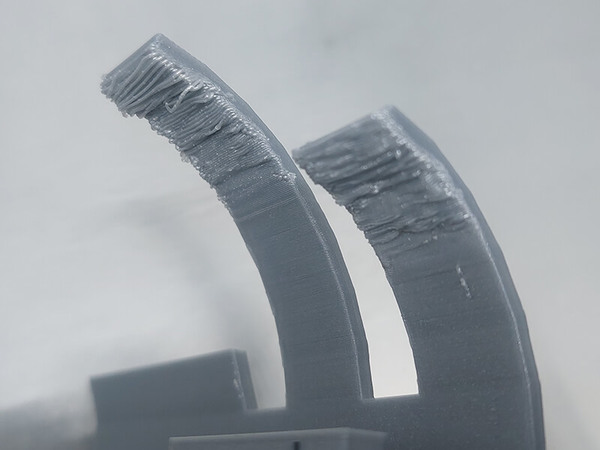
This is perceived from 45 degrees and is noticeable from 50 degrees, so with greater inclinations supports will be needed.
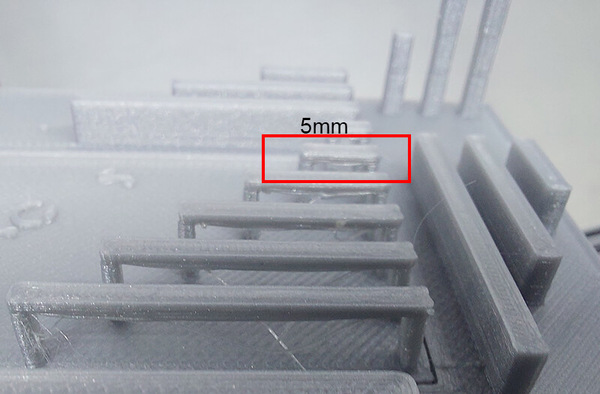
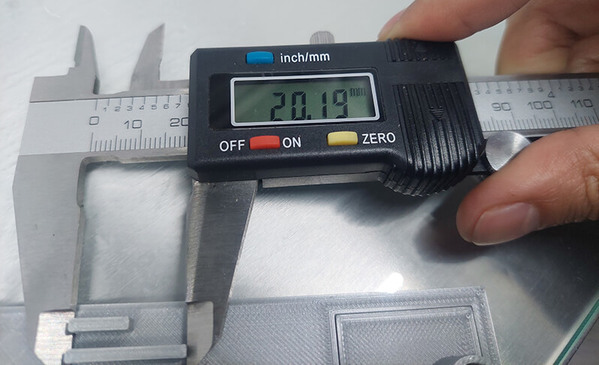
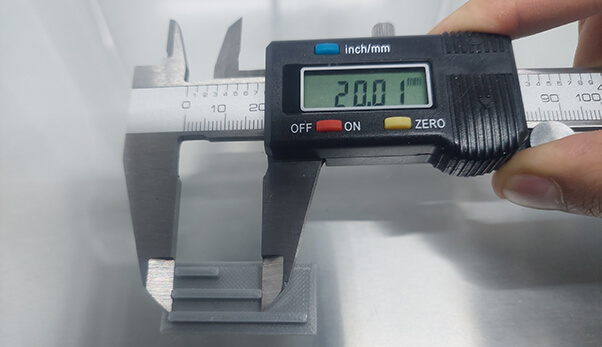
We can also see that the layers do not fall in a distance of 5mm, greater than this measure supports will be needed.
When measuring the parallelepipeds, we can measure an excess of approximately 0.2mm with respect to the ideal measurement.
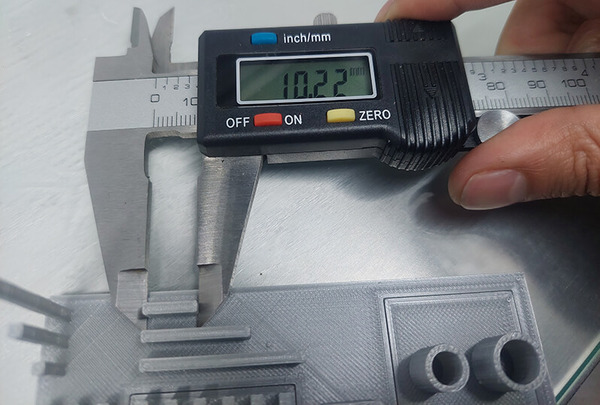
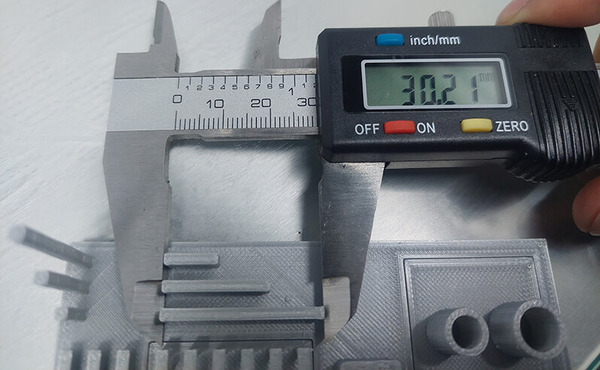
Then, this problem is not of the flow, so I corrected in the software, the parameter of: Horizontal expansion.
The horizontal expansion was reduced by 0.1, because the expansion occurs on both sides, 0.1 on each side, that is why the error is 0.2 when measuring it.
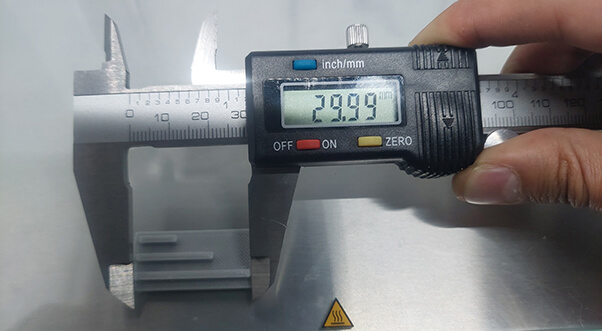
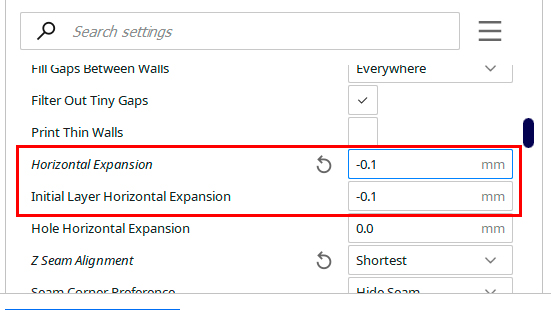
I also printed a cylinder test to check the circular fit. I did this test with a Horizontal expansion setting of: 0, -0.1 and -0.2.
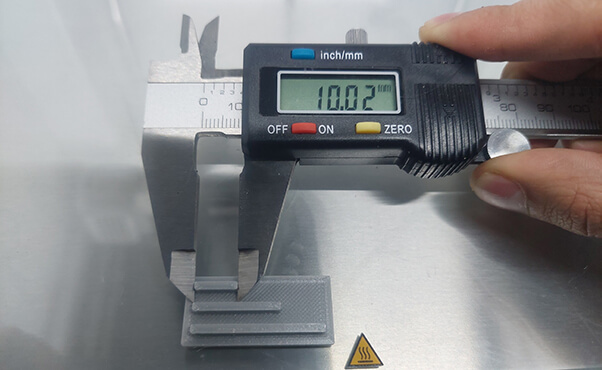
With a horizontal expansion of -0.1, the pieces measure correctly, with an error of +/-0.01, and the circular sockets fit perfectly, with a slight friction. With a horizontal expansion of 0, the piece doesn’t fit, and with -0.2 it’s very loose.
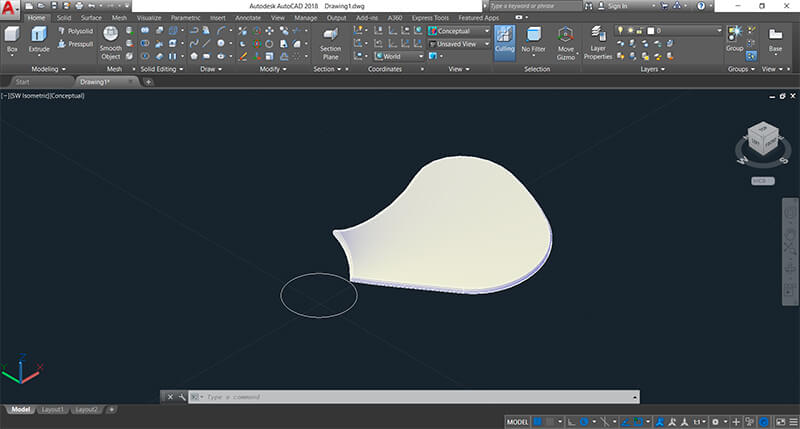
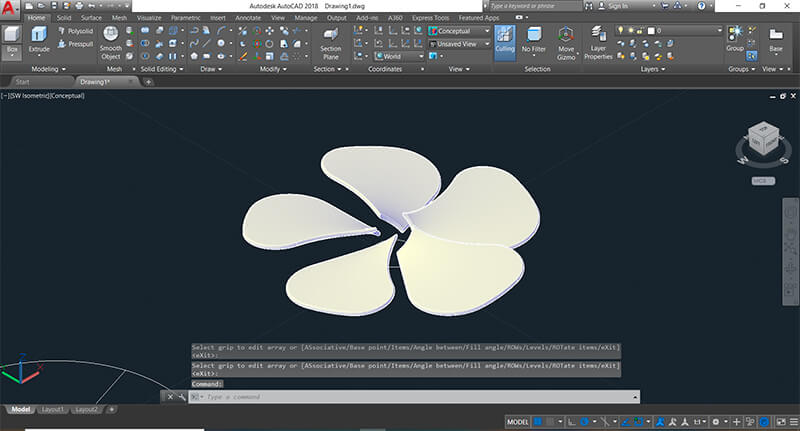
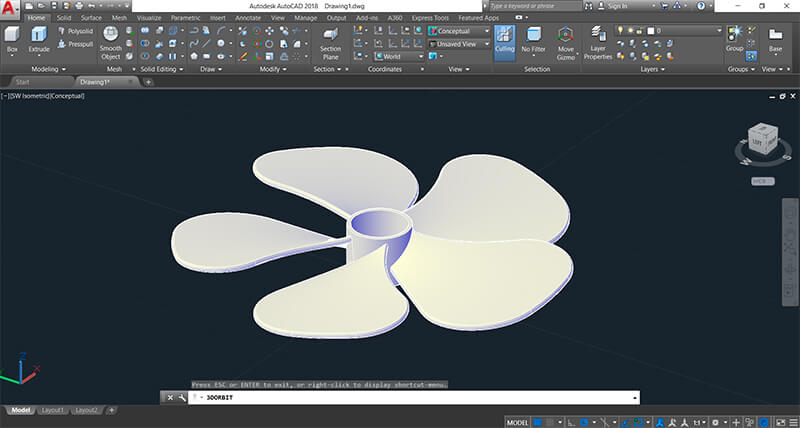
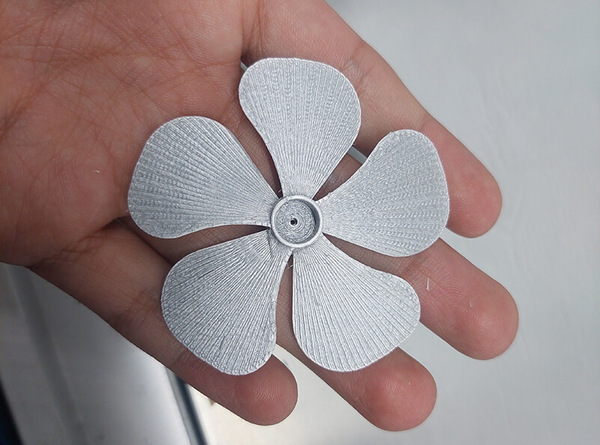
Now, I designed a piece to print, I chose a propeller, since it is not feasible to manufacture a part in this way with a material extraction method.
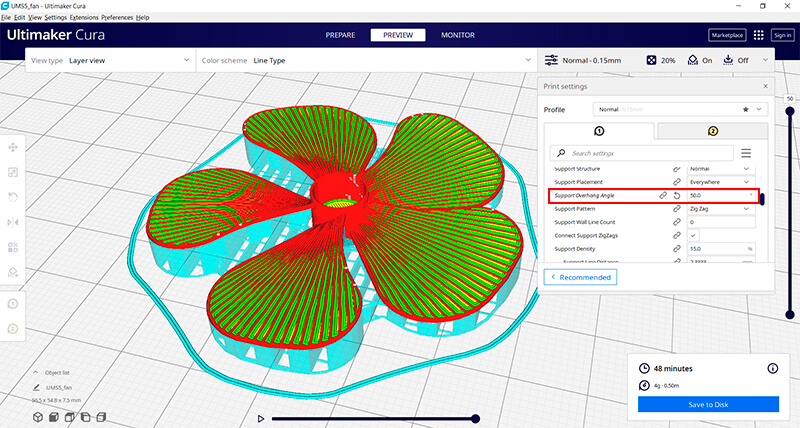
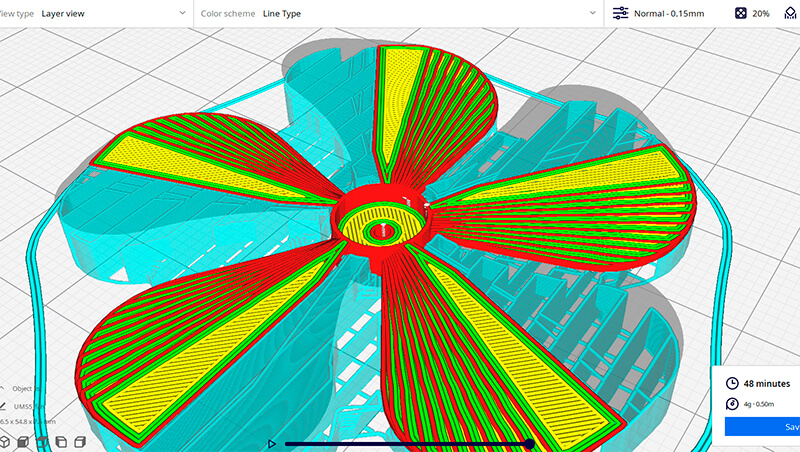
The 3D model must export in STL format, open the 3D model with the cura software, and change some settings, first enable the supports, and set the support angle to 50 degrees.
Now we go to print our model.
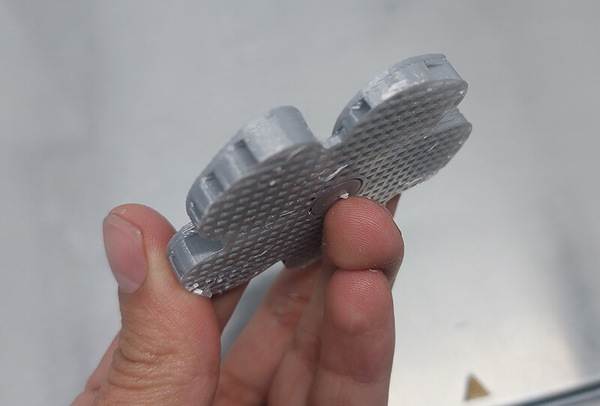
At the end of the printing, we wait for the base of the printer to cool down and with a spatula we remove the piece.
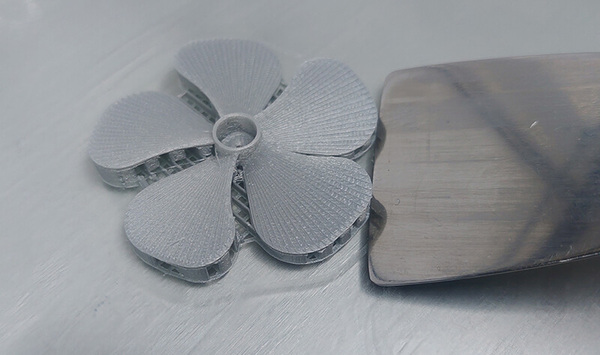
We have to remove the supports.
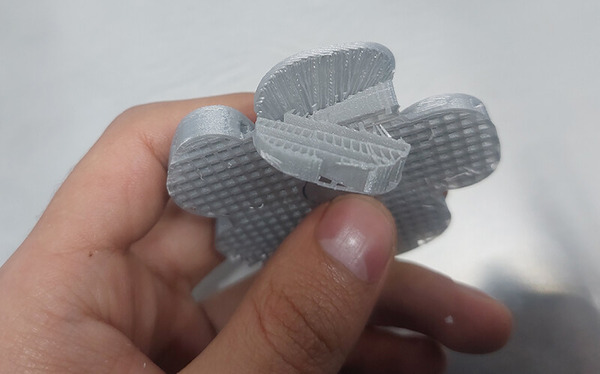
Bottom view.
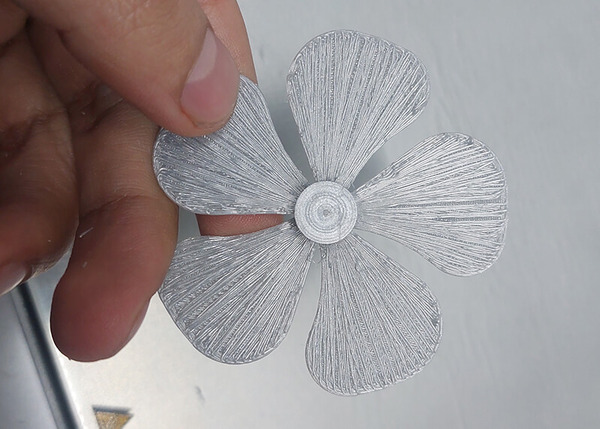
Top view.
I leave all the designs and files about 3D printing here.
- Download the files here
3D scanning
A 3D scanner is a device that analyzes an object or scene to gather data about its shape. The information obtained can be used to build three-dimensional digital models.
Equipment and materials
- 3D Scanner
- An object (yes, an object that we want to scan)
- Blender
3d scanning process
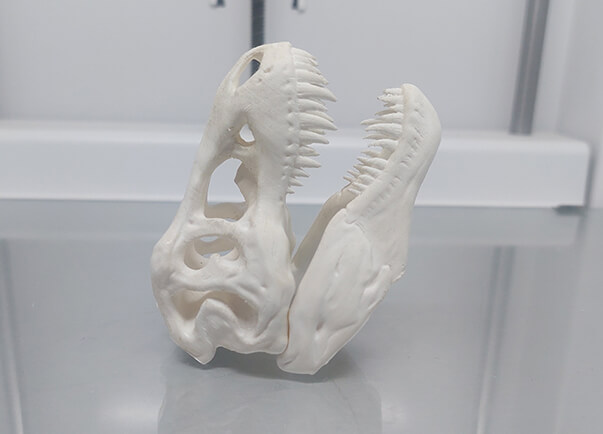
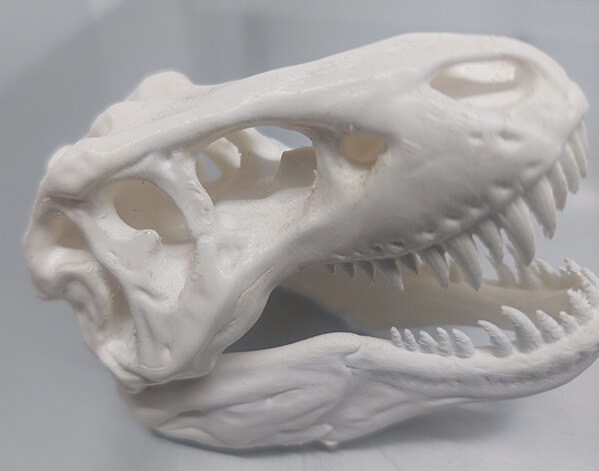
I chose the model of a tyrannosaurus rex skull.
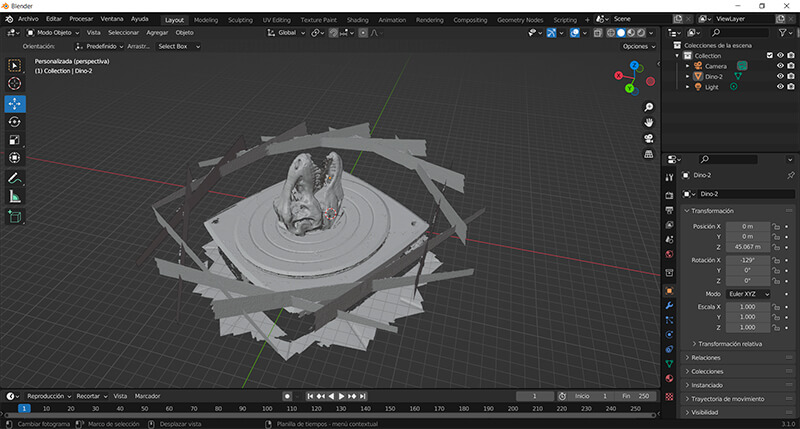
Without further ado, we go on to scan our object, the scanner has a rotating base, which will rotate a certain amount of degrees to be able to take data, repeat this process until completing a full turn, and thus obtain the data of all the angles of the object.
With the result of the scan we have the following:
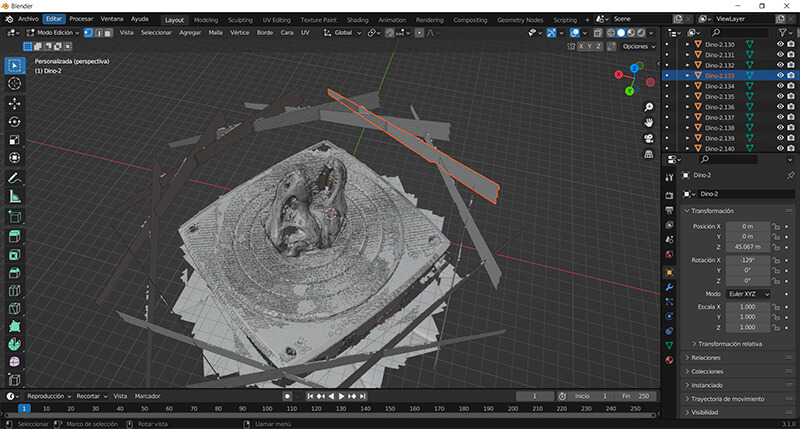
The first thing is to eliminate the free elements or foreign elements to the model.
Also the rotating base.
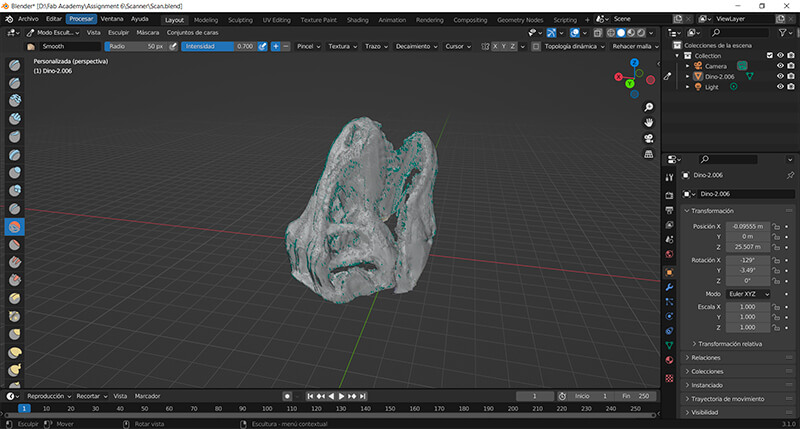
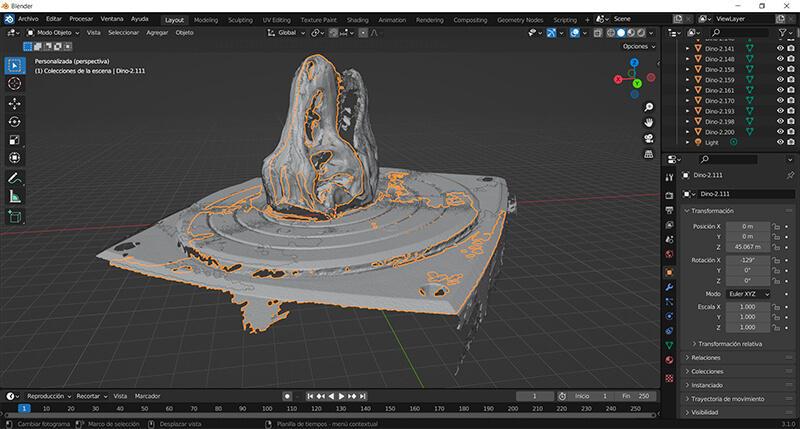
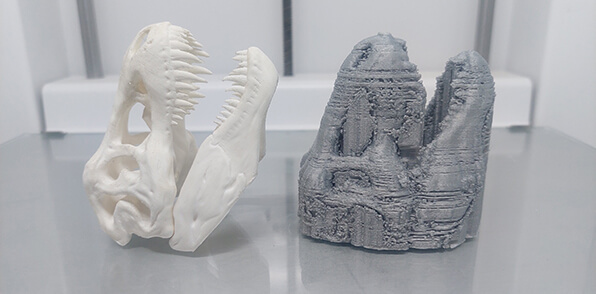
It’s important to export this work in STL format to be able to print it in 3D, but we must also give it some finishes, join sections, smooth the surface, give volume to some areas, etc.
I chose the model of a tyrannosaurus rex, because this model has many details. Even has an internal structure, which the scanner couldn’t capture.
I leave all the designs and files about 3D scanning.
- Download the files here
This is all for this time.