3. Computer Controlled Cutting
Hello! this time, let’s learn about computer controlled cutting.
Laser Cut
Laser cutting is a technique used to cut pieces with a laser beam that is focused on a point, this point is moved to carry out the cutting process.
Let’s start!, on this time, we will work with a laser cutter GCC MG380 Hybrid.
laser cutter GCC MG380 Hybrid
The first thing is to know the equipment,
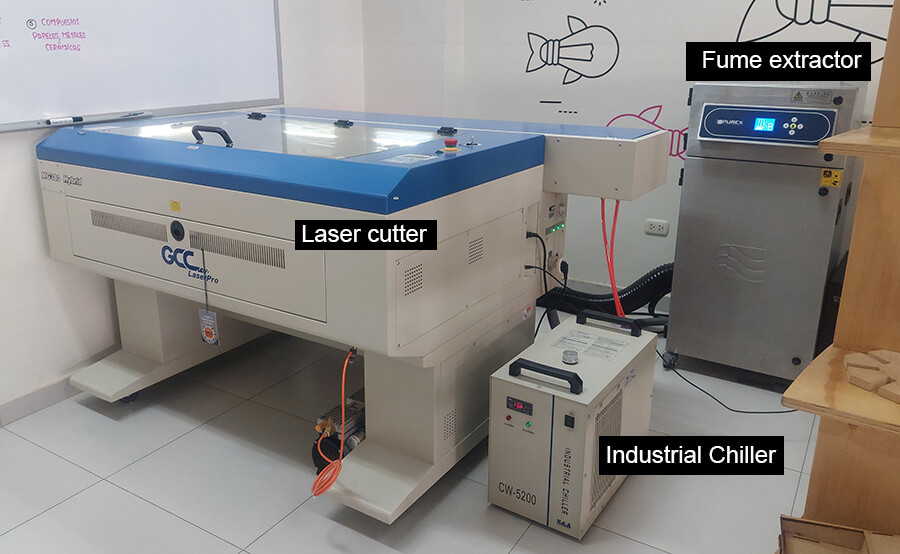
Before starting work, we must identify the following elements: - extinguisher - first aid kit Remember, our safety first.
Focus
Finally, I must mention the focal length, this parameter influences the result of the work, it consists of finding the correct distance between the material and the lens, if the lens is too far from the material the laser will open and blur, giving poor quality to the work, If it is very close, the laser aperture will be high and we will not have a good control of the power.
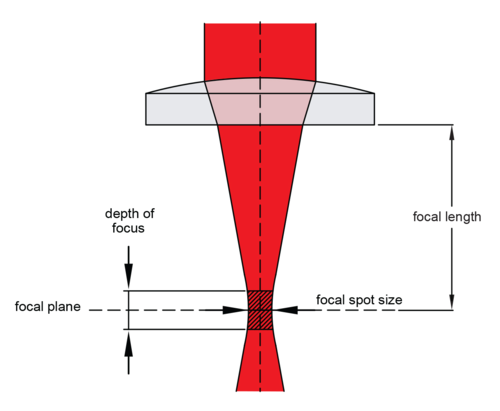
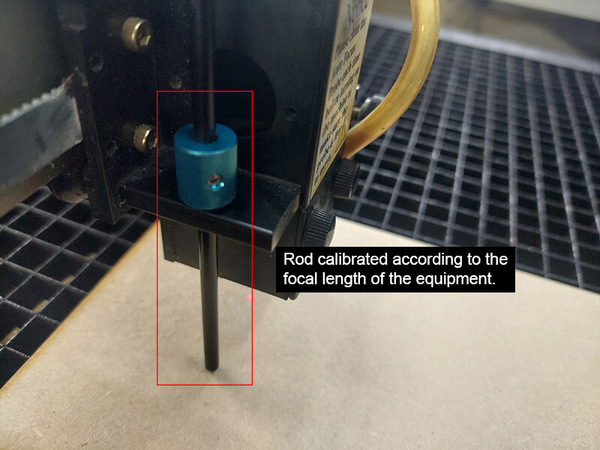
The focal length is very important, you make sure to measure it and if necessary correct it in each job.
Estimate for the notches
Now we start to work, but not with the cutter, first we tested the equipment, I made a square and a circle of 15mm, and I cut them out of 3mm MDF, but with different parameters.
| Case 1 | Case 2 | |
|---|---|---|
| Speed | 4.0% | 3.8% |
| Power | 100% | 100% |
| PPI | X | X |
In the first case, the laser didn’t cut the square, but it could cut the circle, in the second case it could cut both figures.
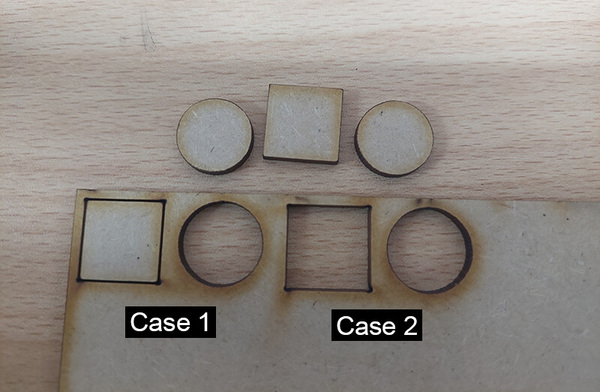
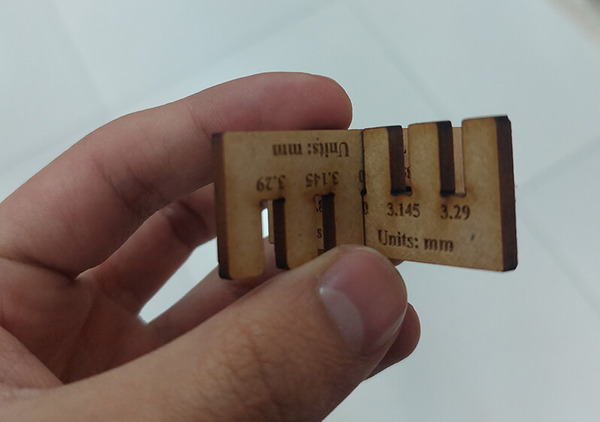
We write down and save the cutting parameters of the second case as a cutting reference for 3mm MDF. Then we measure with a vernier or caliper, the square and the hole
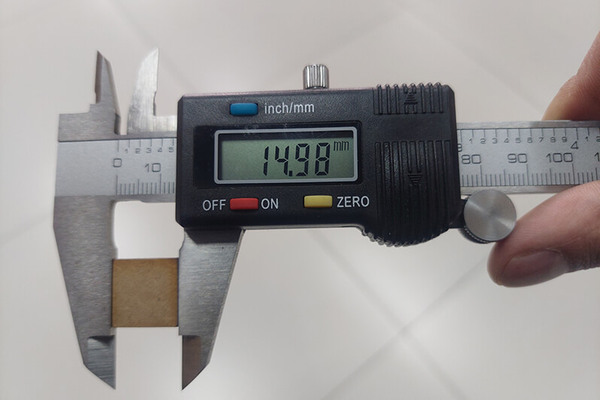
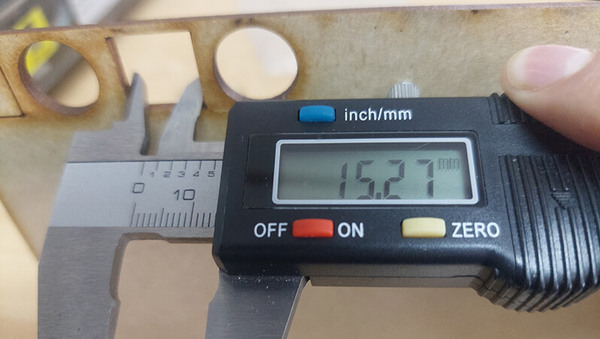
Subtract and divide by two, in my case it’s: (15.27-14.98)/2 = 0.145mm, I used these measurements to draw the estimate for the notches.
Press-fit notch
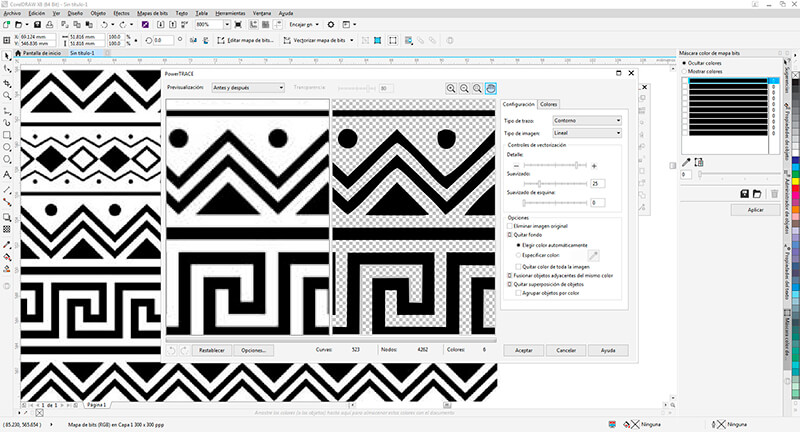
Now, we have to design our joint test. I use Corel Draw to make the design, for several reasons, first, because I wanted to handle text and numbering, second, it is more practical to handle parametric figures, third, the cutter works with this software, also it’s always good to learn to use new software.
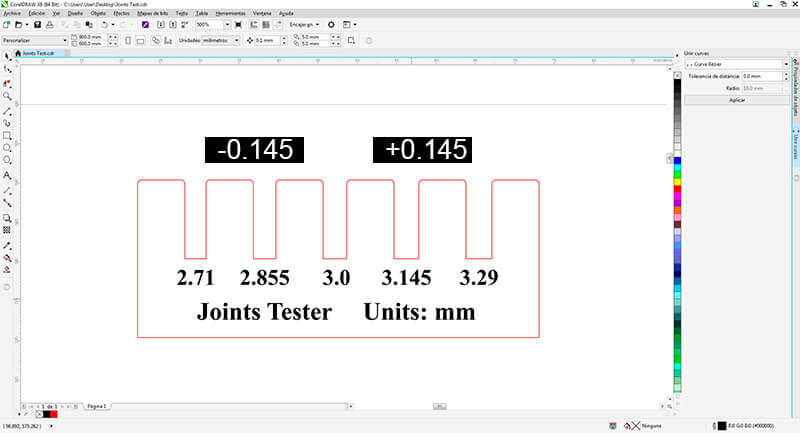
I used two colors, the red color to cut and the black to rasterize.
| Cut (Red) | Raster (Black) | |
|---|---|---|
| Speed | 3.8% | 70% |
| Power | 100% | 100% |
| PPI | X | X |
the raster speed value was a value already worked on previously, later we will see how it affects the speed.
The result with a speed of 70% for the raster was good.
Well!, now I explain to me how is the whole process of laser cutting.
First, we select our design, and press ctrl + P or look for the print option, then, we go to the preferences section.
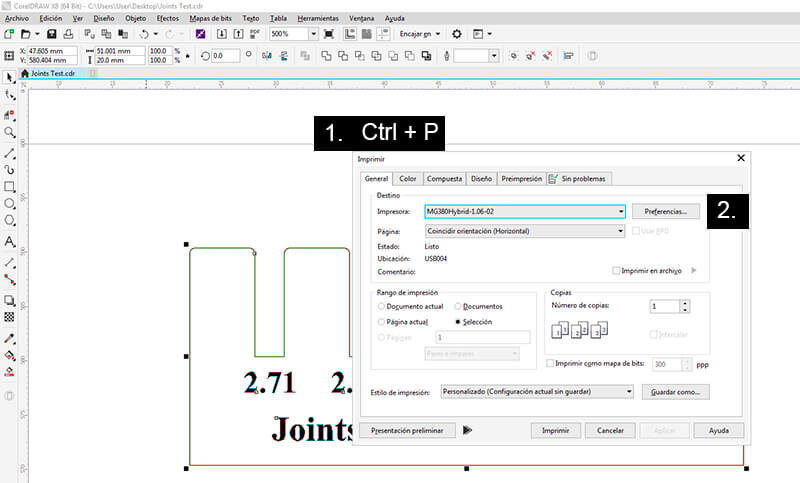
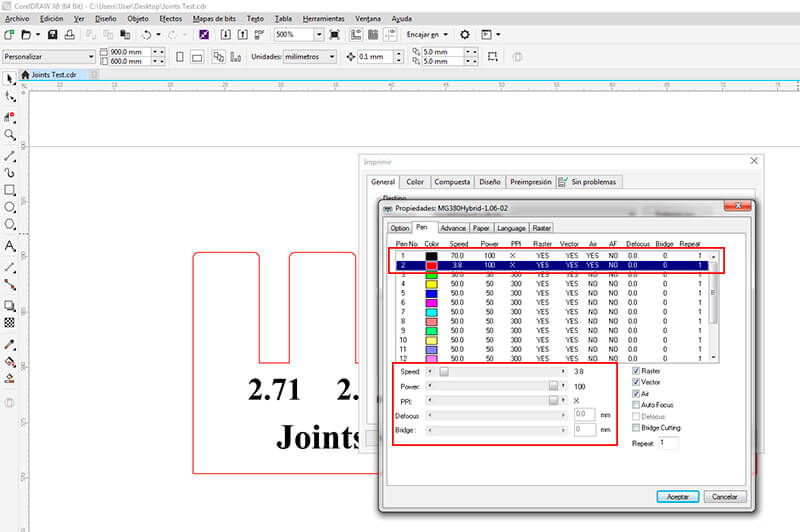
Then, we look for the PEN option, and according to the colors we use in the design, we enter the parameters, remember red is for cut and black for raster.
If we check the panel of the laser cutter, we’ll see that there is a document and it shows some data such as: File name, speed and power.
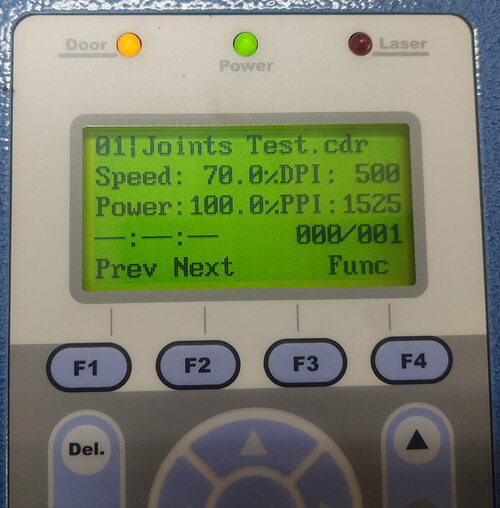
Remember to place the material straight, and position the cutter head on the material at its origin, (top left of the material). If everything is fine, we give start, and the equipment will start working, it’s important to turn on the fume extractor, remember that the process generates gases.
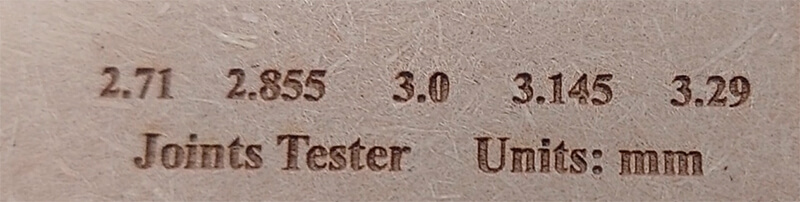
We have to make 2 pieces to verify that everything is fine.
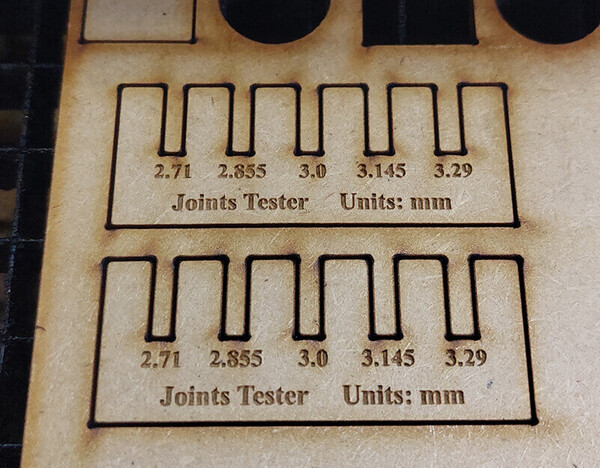
Checking the joints, with a measurement of 3mm it’s loose, but with a measurement of 2.855mm it fits exactly.
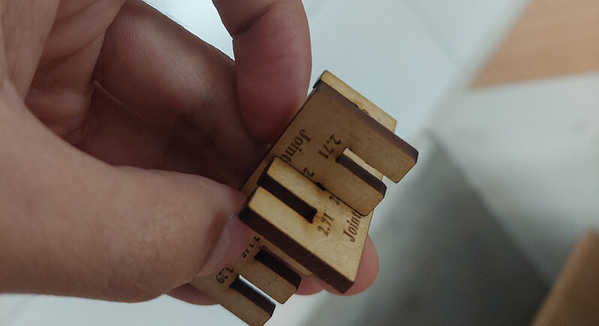
This measurement of 2,855mm will be very important in the future, when we manufacture our pieces for the final project, we’ll need the joints to fit perfectly.
Laser cutter test
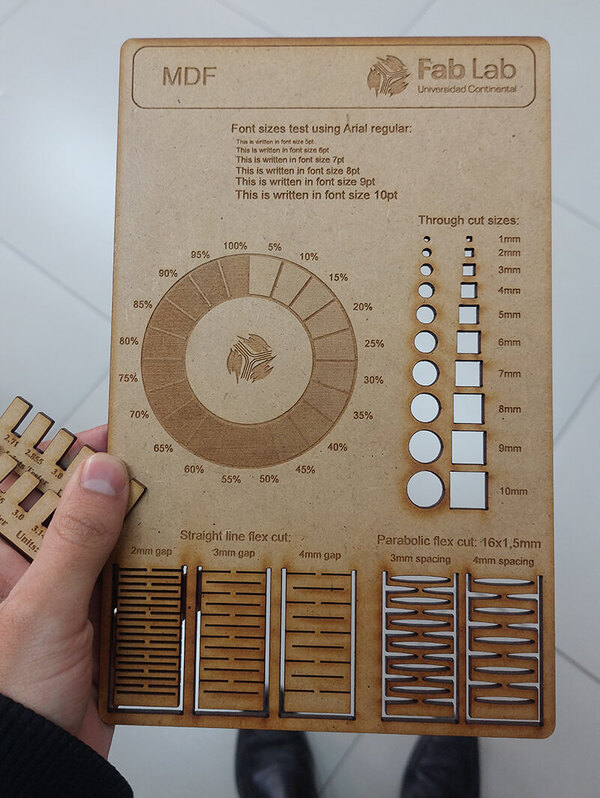
Also, I made a work about laser cutting testing. here the file. We can see aspects such as the appearance of the raster at different speed percentages, also squares with measurements in millimeters seeing the working limits of the laser and even flex techniques for the MDF.
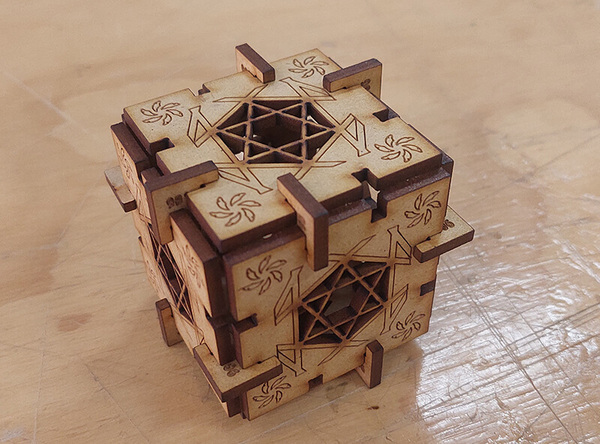
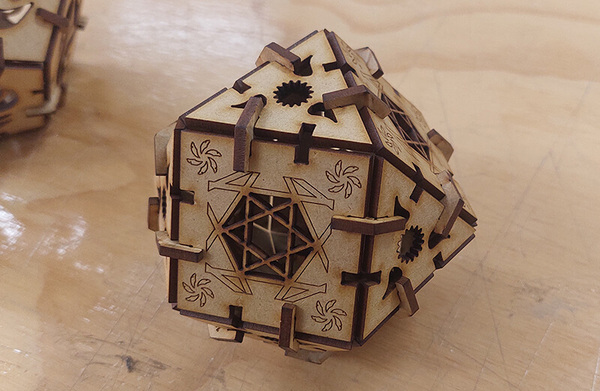
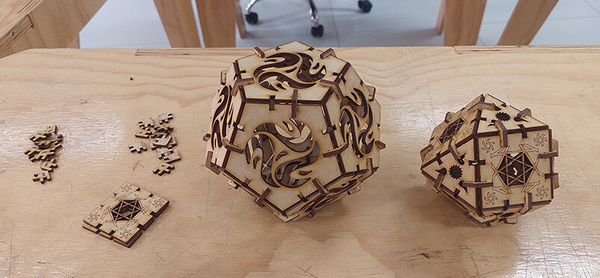
Parametric press-fit construction kit
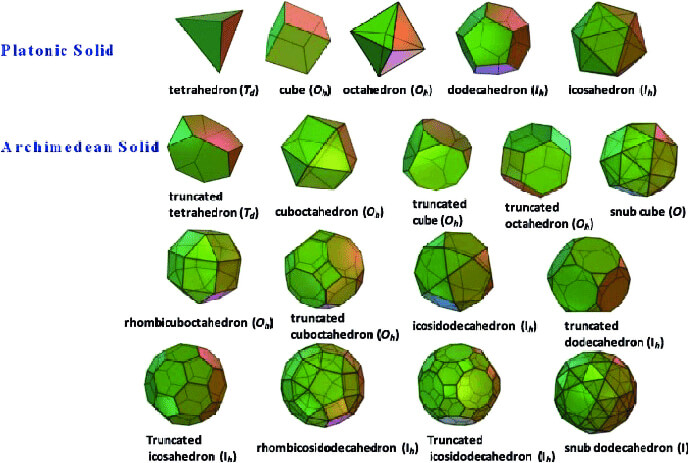
I’ll work on the creation of Platonic and Archimedean polyhedrons. For this we need triangles, squares and pentagons.
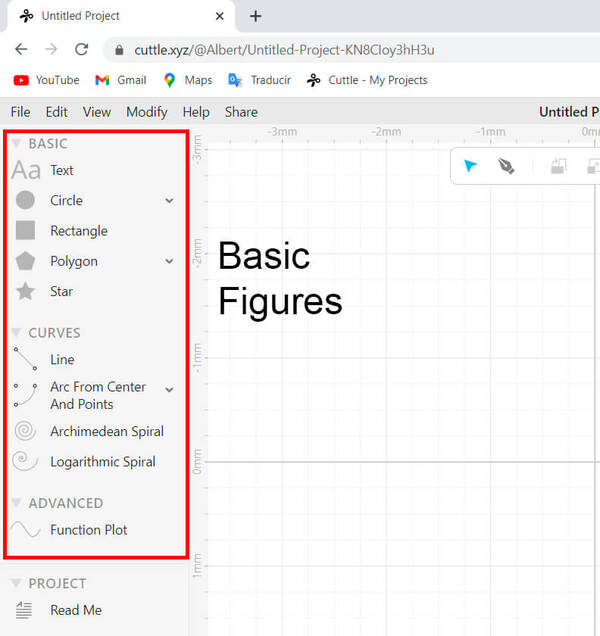
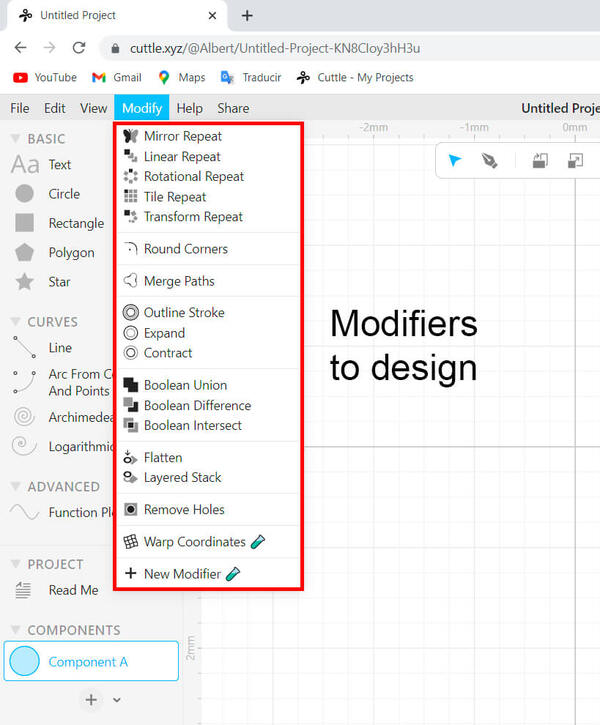
For the design we’ll use the online program: cuttle.xyz
When opening a new project we can find:
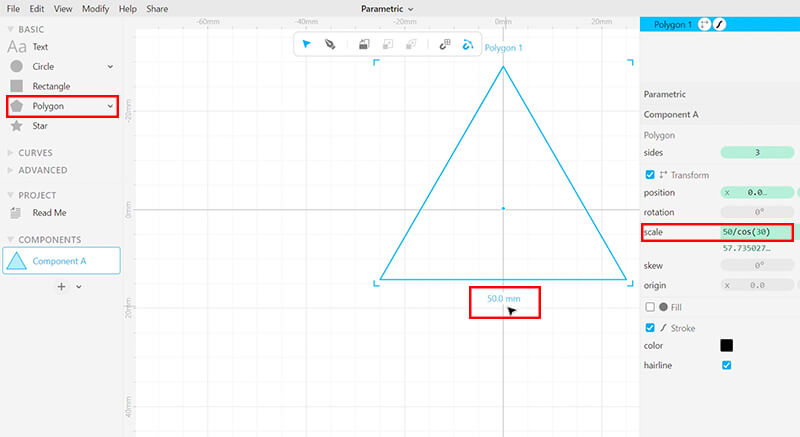
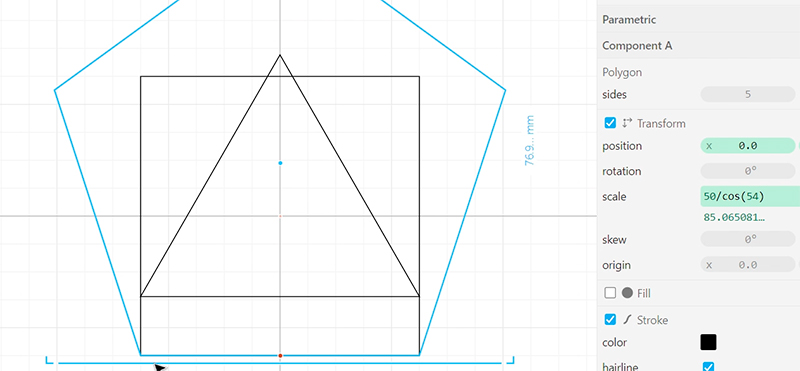
To start we need to design the triangle, square and pentagon, but with the condition that the sides of these figures are equal. I want the solids to be 5mm on a side.
When we draw polygons, the software requires that we indicate the diameter of the circumference where the polygon is inscribed, then we calculate the calculation parameter.
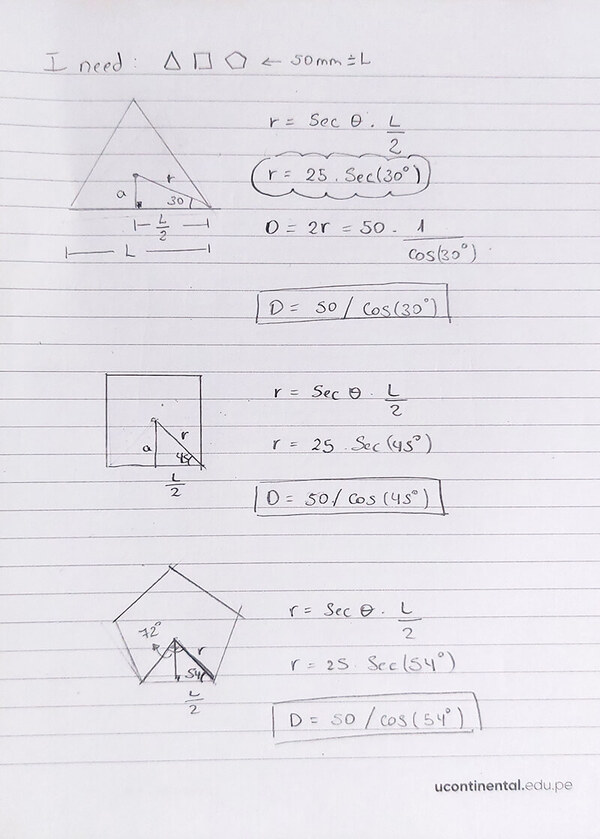
The formula to determine the side of the polygon is: L/cos(angle). Now we go to cuttle and start with the first polygon, the triangle.
All designs can be found on cuttle:
Before continuing we must review the characteristics of the solids, the faces and the angles between the faces.
| Solids | Polygons | Angle |
|---|---|---|
| Cube | 8 Squares | 90.00° |
| Octahedron | 8 Triangles | 109.47° |
| Dodecahedron | 12 Pentagons | 116.57° |
| Cuboctahedron | 8 Triangles, 6 Squares | 125.26° |
There are more solids, you can experiment with more solids, I worked with these 4.
To work on unions, check out the work of Nadieh Bremer, you can meet her and learn from her here.
My joints design:
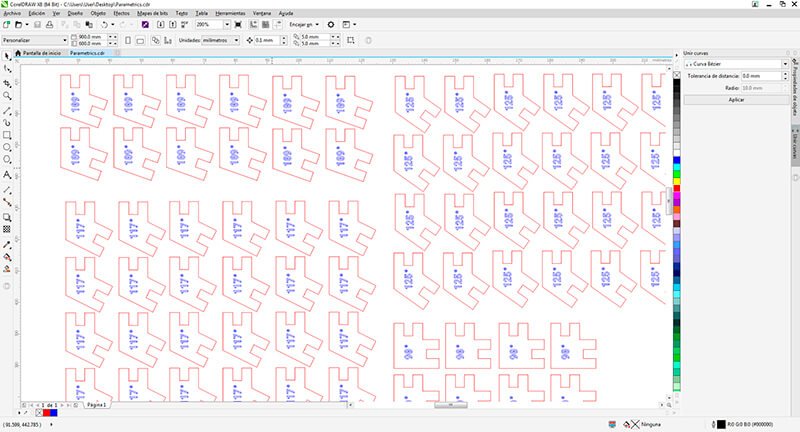
The next step was to export the parts in SVG format, and I worked in Corel draw to prepare the designs for the laser cutting process.
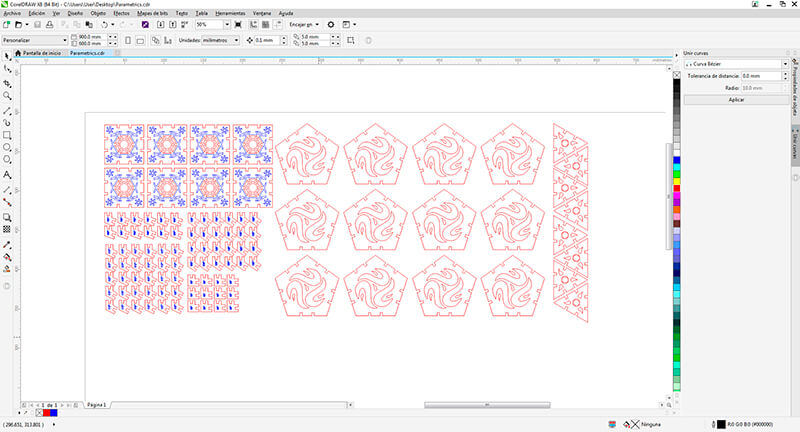
For the cutting process, use the following cutting parameters:
| Cut (Red) | Recorded (Blue) | |
|---|---|---|
| Speed | 3.8% | 100% |
| Power | 100% | 50% |
| PPI | X | 300 |


Vinylcutter
vinylcutter GCC Expert II
The equipment this time is GCC Expert II
Vinylcutter test
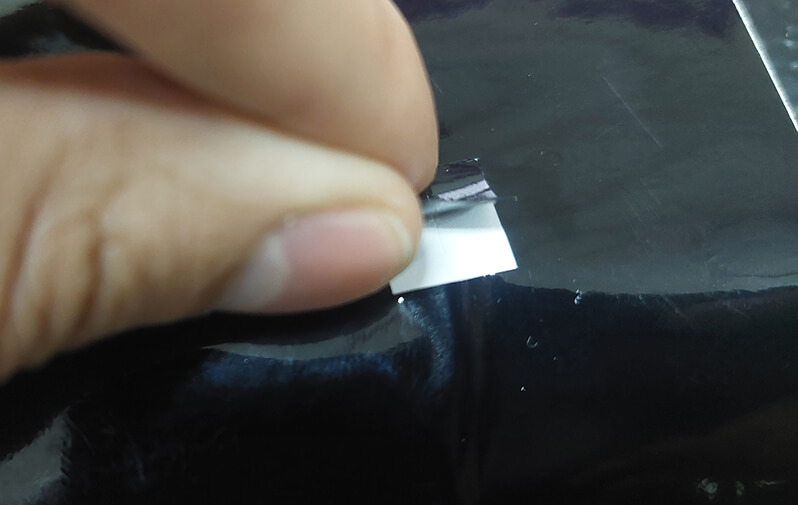
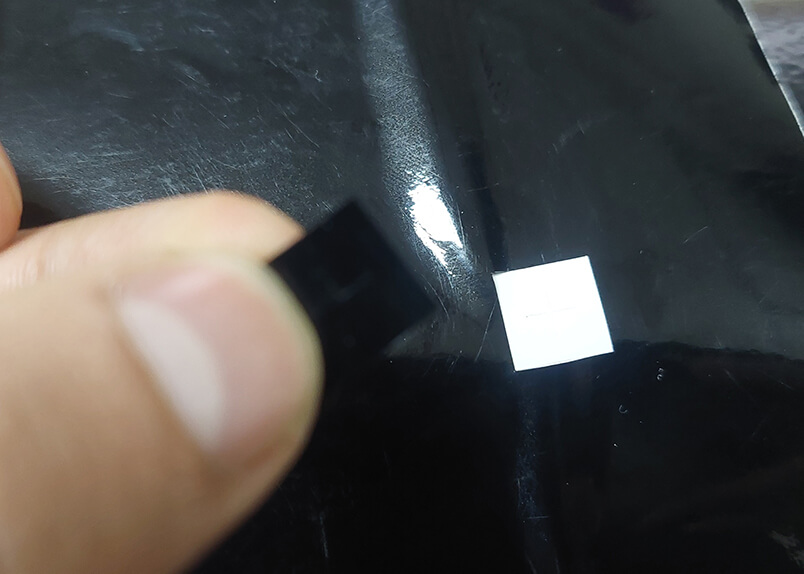
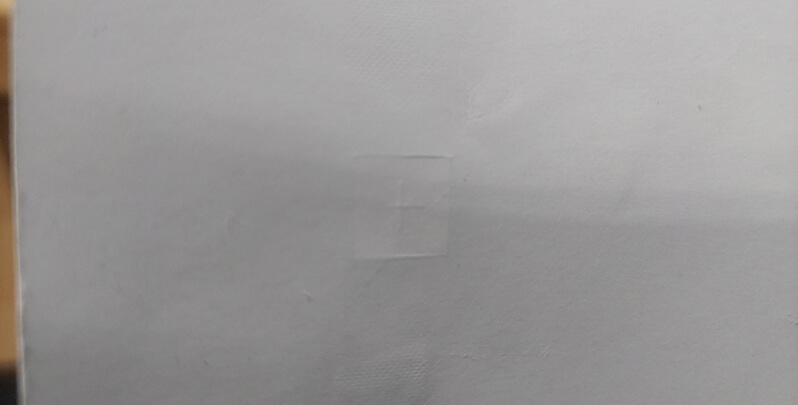
The first thing i did was cut a square on the vinyl. Why?… Because I wanted to make sure that the height of the blade was correct, this is like checking if the focal length on the laser is correct.
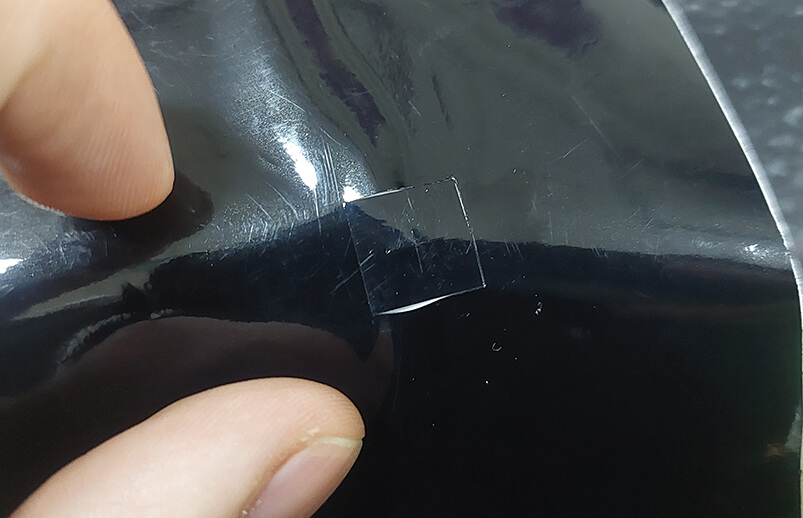
It’s important that you check if I cut only the top layer of the vinyl, and the back is only marked by the pressure on the material.
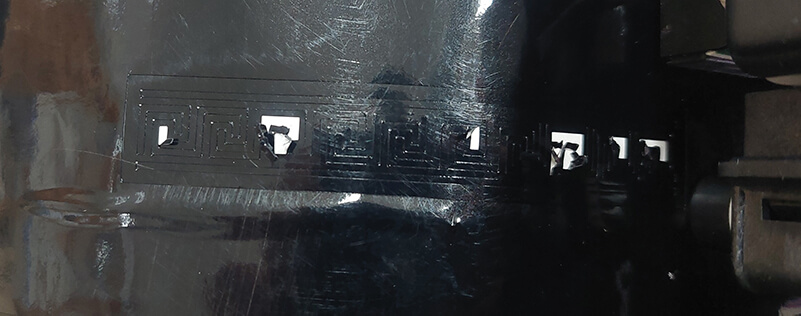
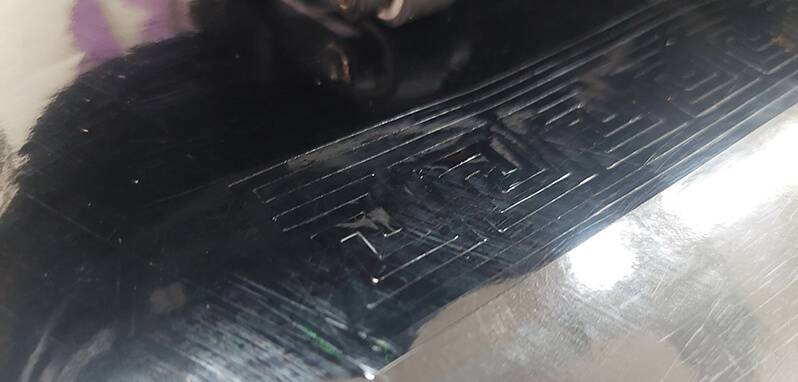
Cutting vinyl
If all is well, let’s start working.
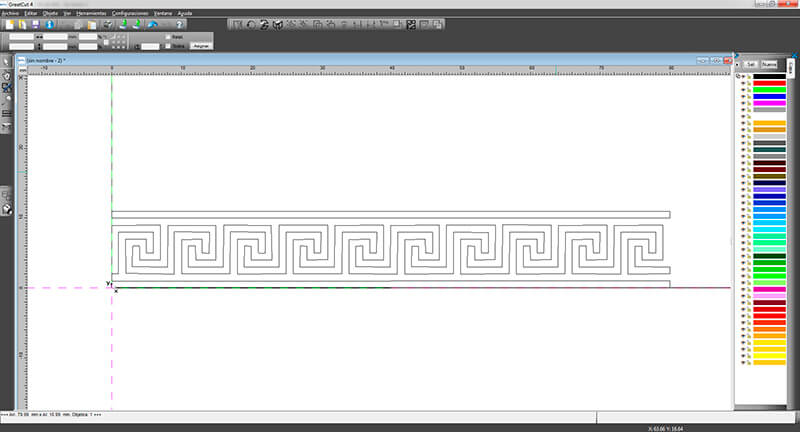
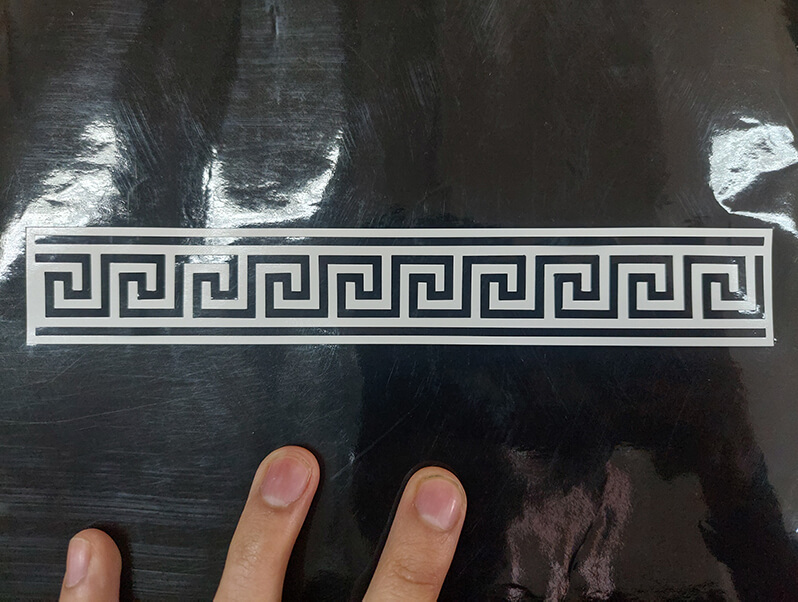
The design of blankets from huancayo, my city, if you do not remember this model you can review the previous assignment.
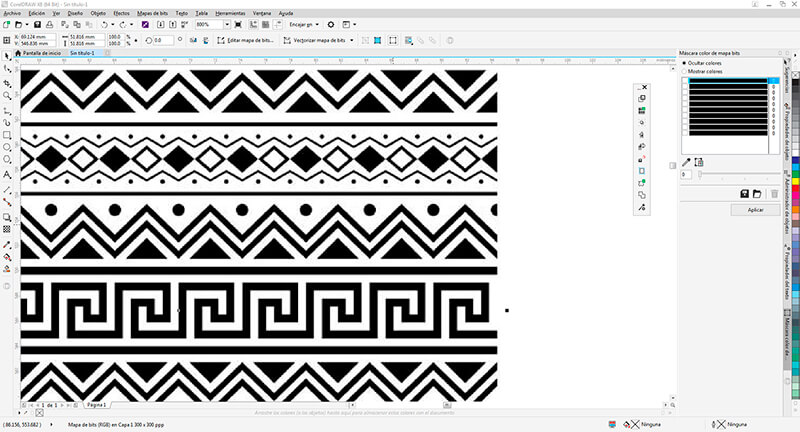
First, vectorize the image and for this test we are going to take only a section of the model.
We’ll test the model with some parameters that it has by default and we’ll study the result.
The values are:
| Control printing | Speed |
|---|---|
| 80g | 30cm/s |
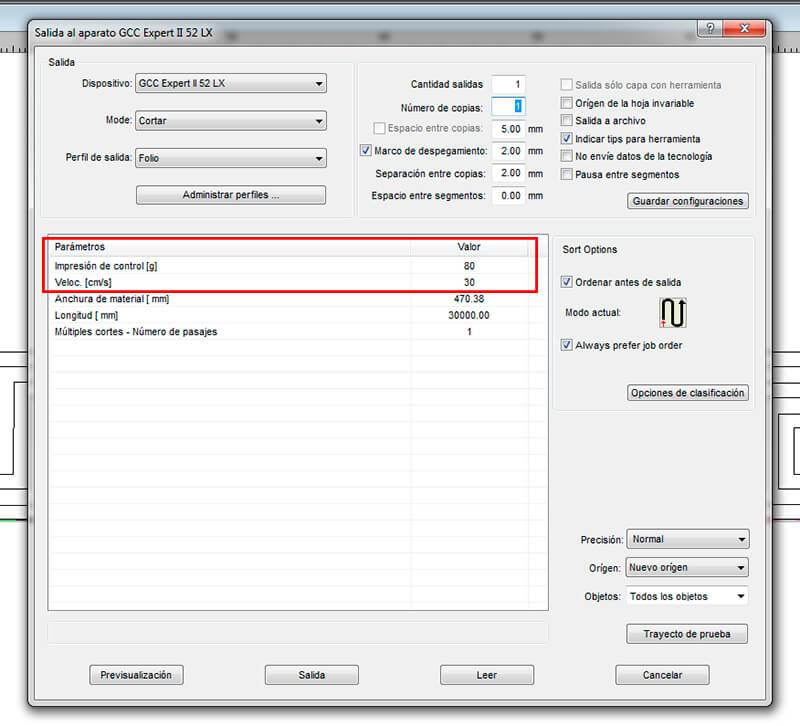
and the result was…
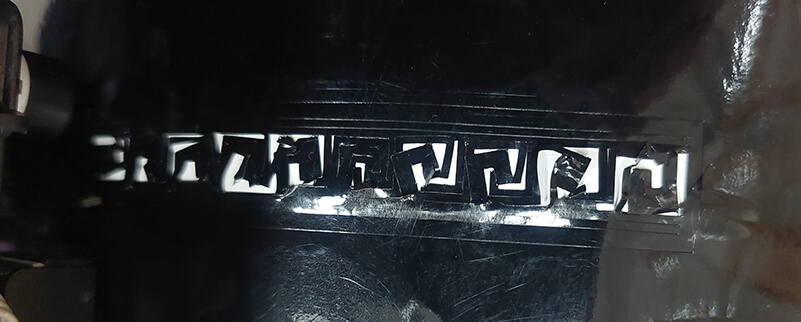
the pressure or control impression is correct, because it cut the first layer,without complications, but in the corners the blade moves the cut layer, then we’ll slow down.
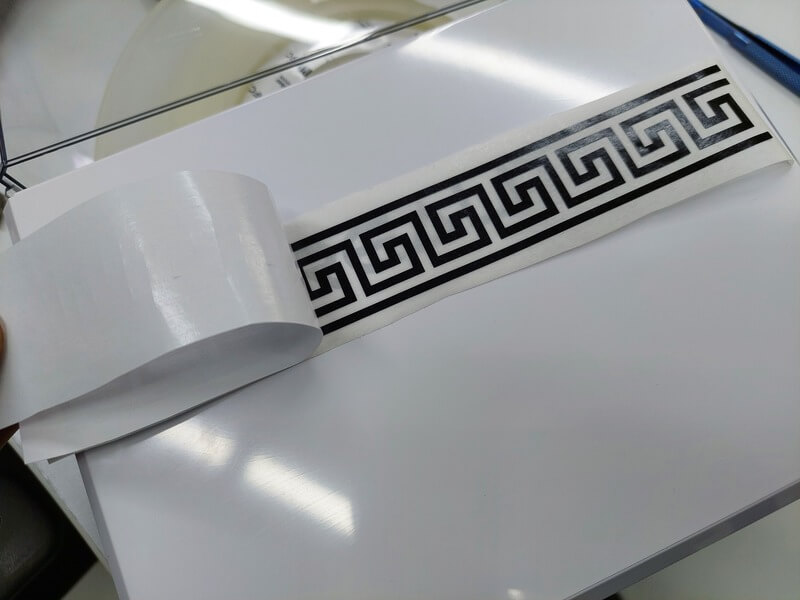
the new values are:
| Control printing | Speed |
|---|---|
| 80g | 10cm/s |
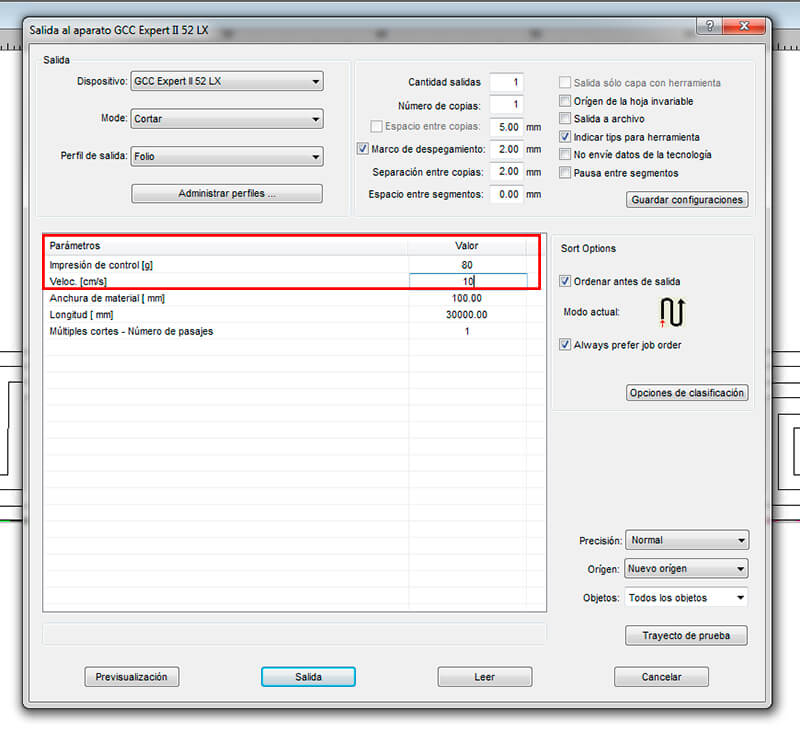
and the result was…
Well!, we have a better result. Now, we are going to make the final cut with the values:
| Control printing | Speed |
|---|---|
| 80g | 5cm/s |
and the result is…
can’t you see?… We aren’t done yet, remove the part that doesn’t correspond to the design.
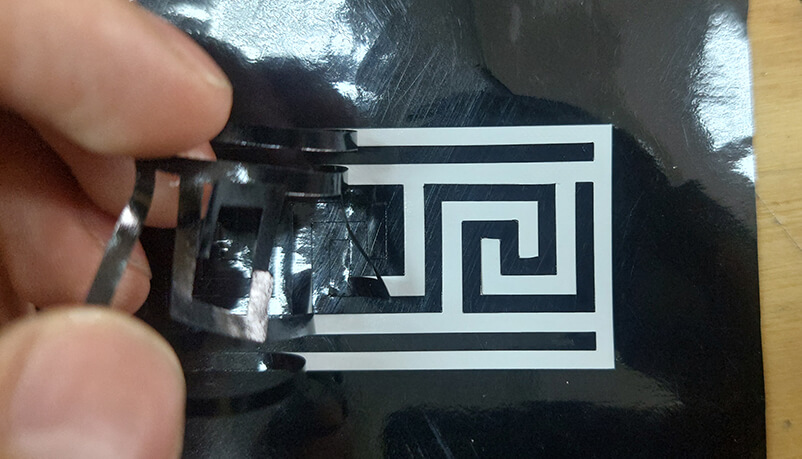
and the final result is:
I cut the area of the vinyl that was useful to me with scissors, and removed the excess, and on this piece I glued some transfer paper.
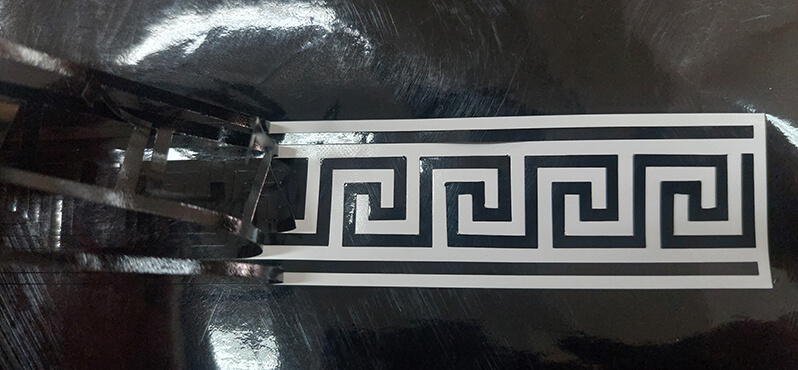
Now cut the surplus of the transfer paper, this paper allows you to remove the vinyl from its surface maintaining the distribution and shape, and it looks like a sticker.
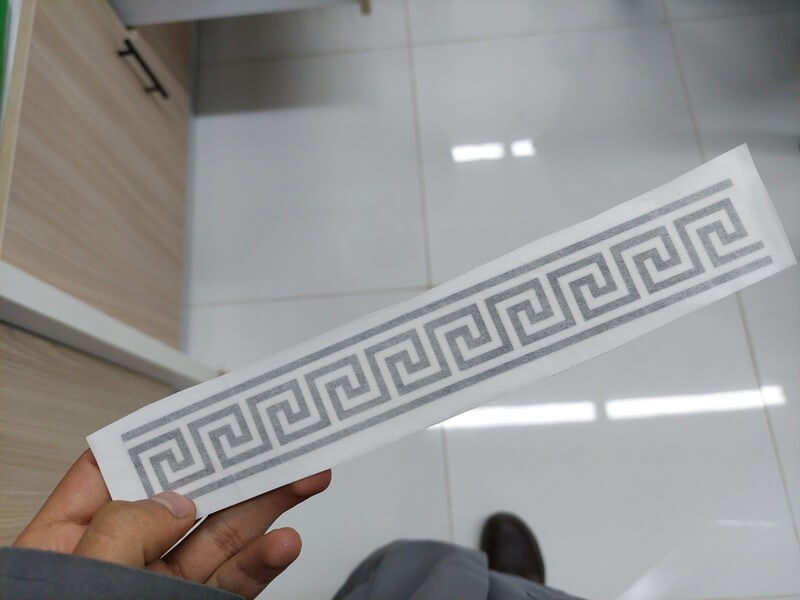
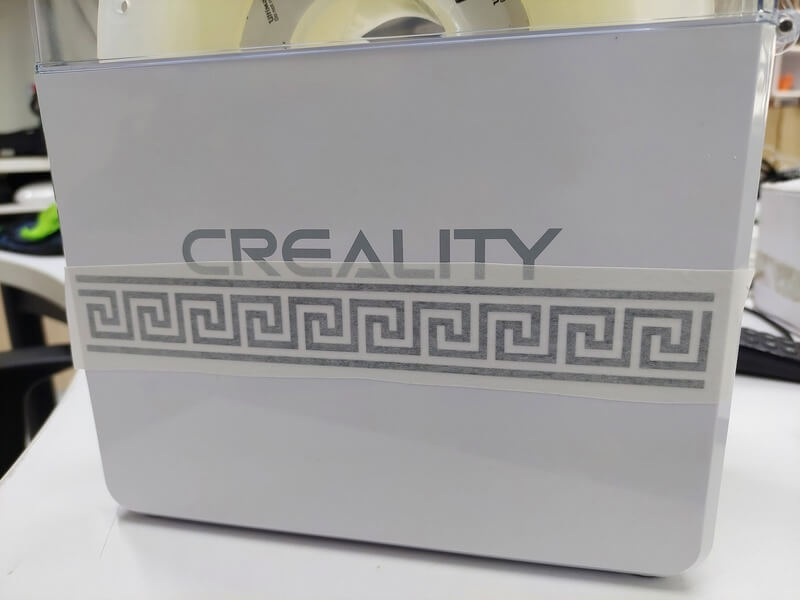
Finally, we transfer our work to the destination surface, once pasted, we carefully remove the transfer paper, as if it were a sticker.
Finally, I leave all the designs.
- Download the files here
This is all for this time.