4. Electronics Production
Hello! this time, let’s learn about electronics production.
Milling Test
The first thing you should do with the milling machine is a test, I did my test but the emotion led me to document the FabISP first, but there are no problems let’s do it.
The work process is the same as described above, we work with Mods CE. My first test gave me the following result, you can laugh :D.
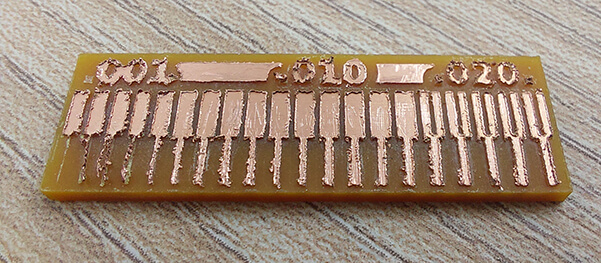
What happened?! Well, the milling cutter is worn, the result is obviously not good, when I saw this, I ordered a new milling cutter, and with this new milling cutter I made the later works including the FabISP.
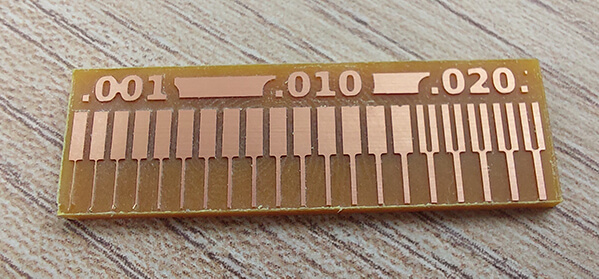
Change? Yep, a big change.
We can see that we have a good result and a precise cut from 0.006” which is equivalent to 0.152mm, and a separation of 0.02” which is equivalent to 0.508mm, approximately.
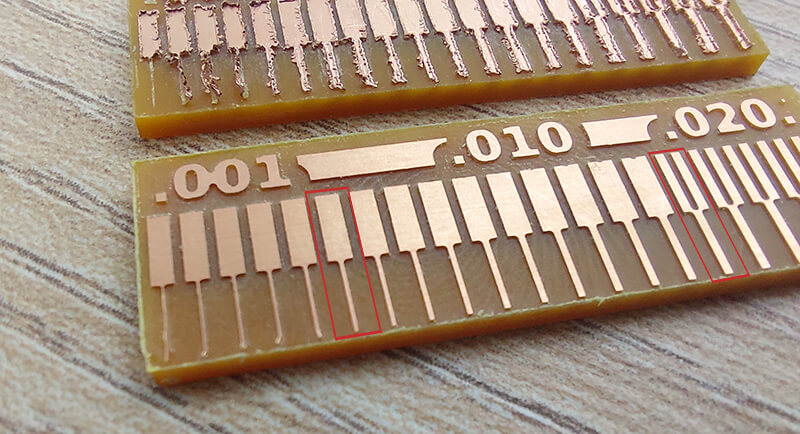
Some reflections that I leave from this task are:
- Although the machine can work tracks of 0.006”, this is not a determining factor to make our designs, it will also influence other factors such as current for example.
- For the separation between tracks, we can take 0.02 as the minimum distance.
- I always forgot to consult, review or follow up on your cutters, they may be worn out, and we can lose a job because of it.
Cutting Parameters
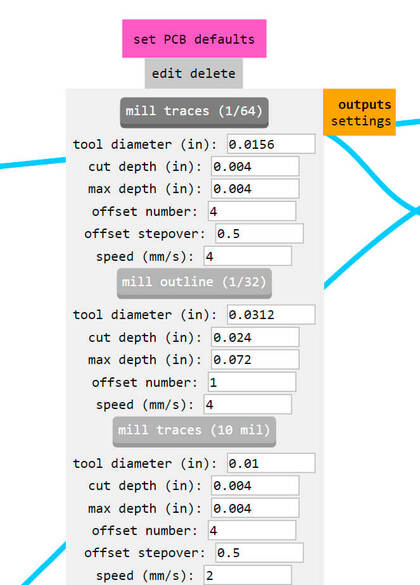
The first thing is to know our tools. We’ll work with:
the milling cutters we use are:
- Milling cutters 1/64 SE 2FL
- Milling cutters 1/32 SE 2FL
CNC milling
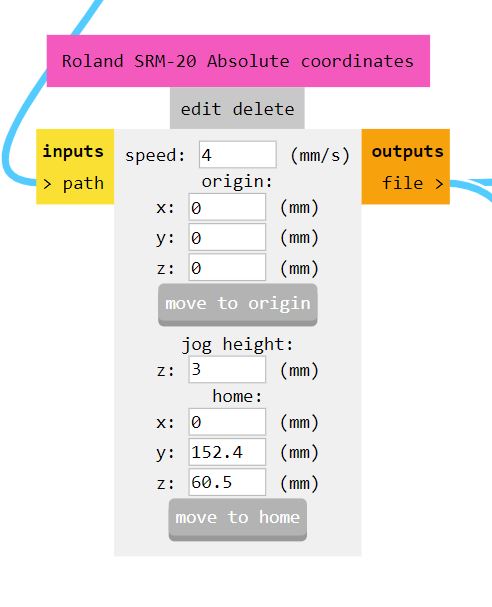
The first step is to determine the origin of the tool. We can do it from the v-panel of the SRM-20.
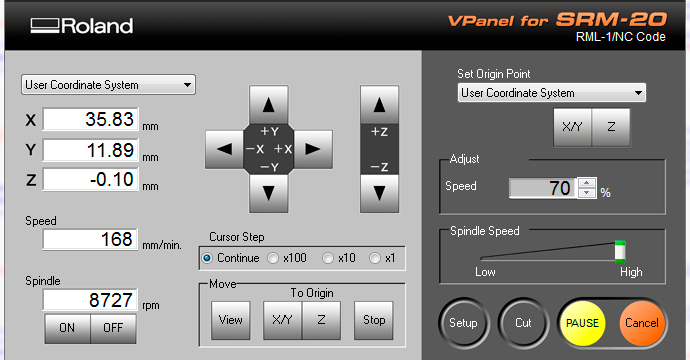
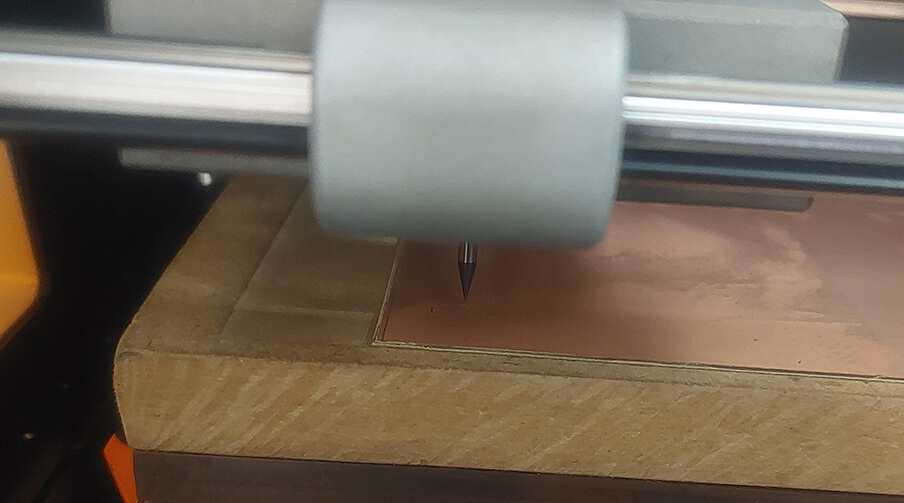
We have to be careful that the tool touches the PCB surface.
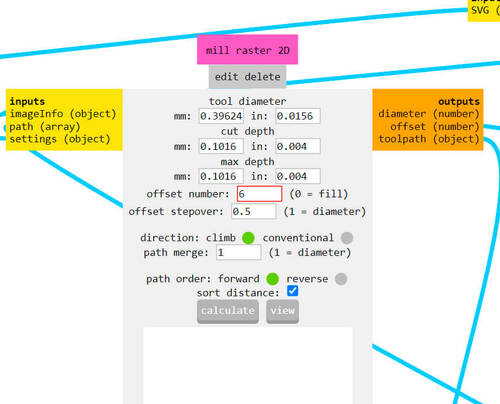
Now, in Mods CE, we must configure and perform a series of actions to obtain the CAM.
The parameters used are:
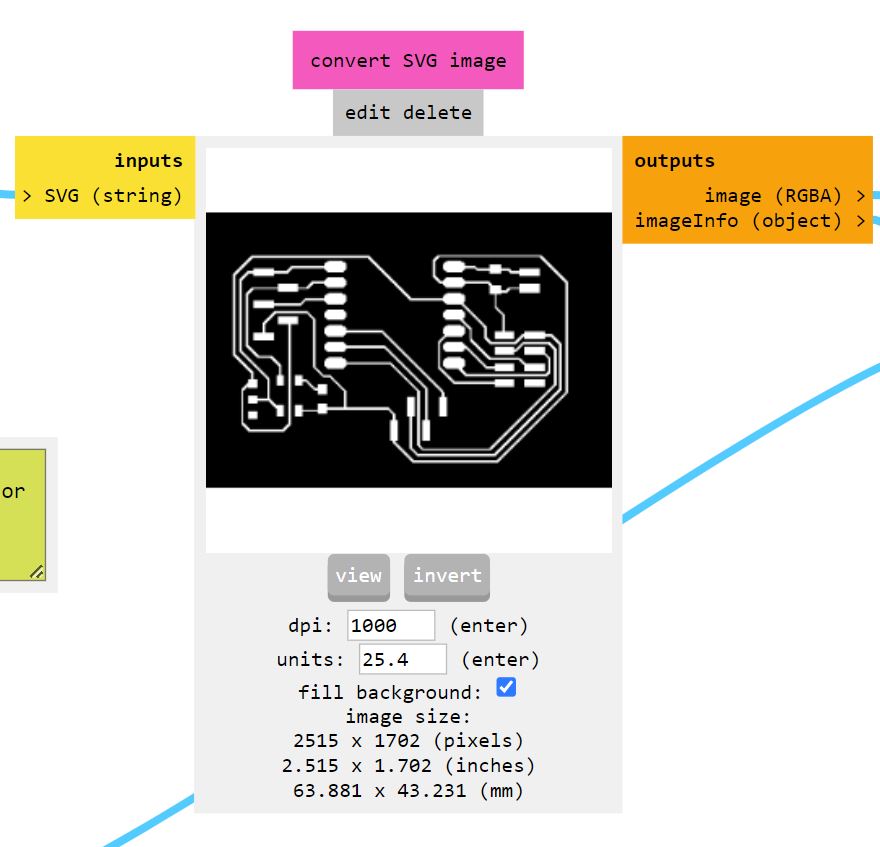
At the end we’ll see the trajectories, it’s always good to review, to avoid errors or incompatibilities.
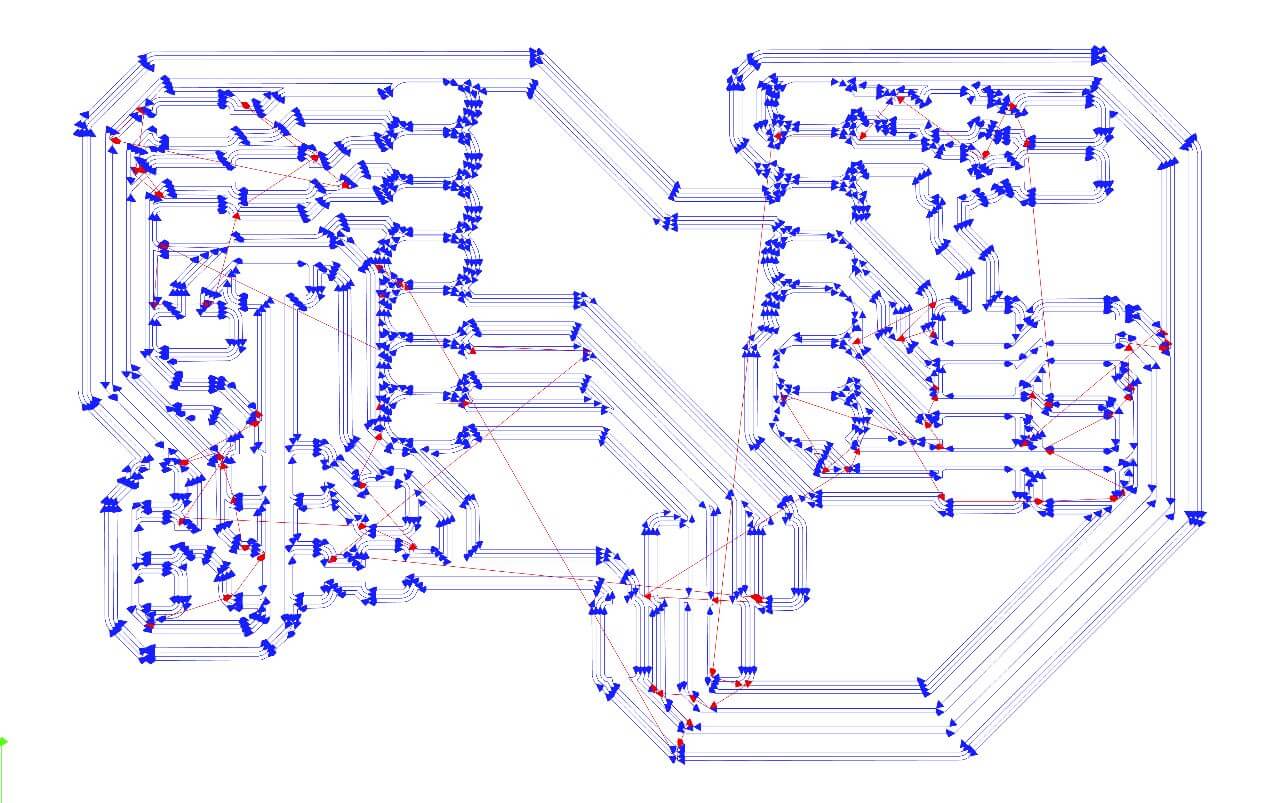
When the equipment starts to mill, it is always good to check if it is milling the material.
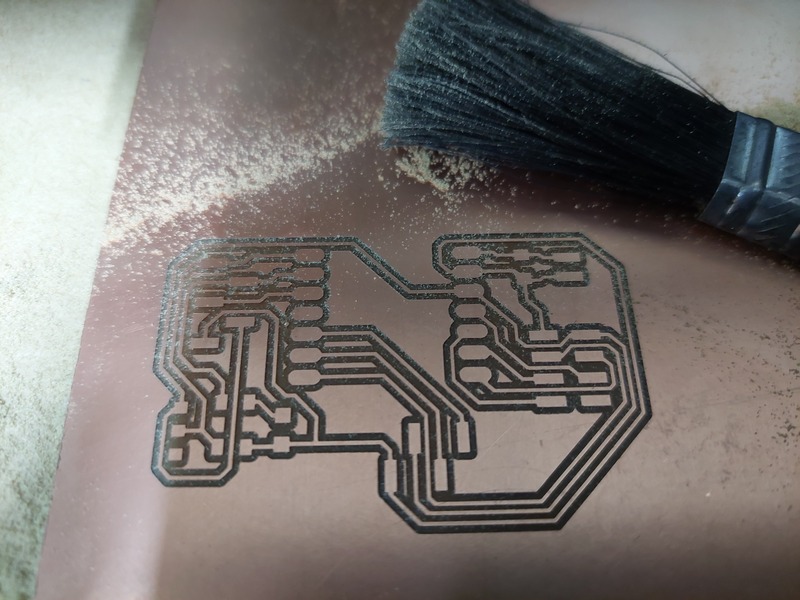
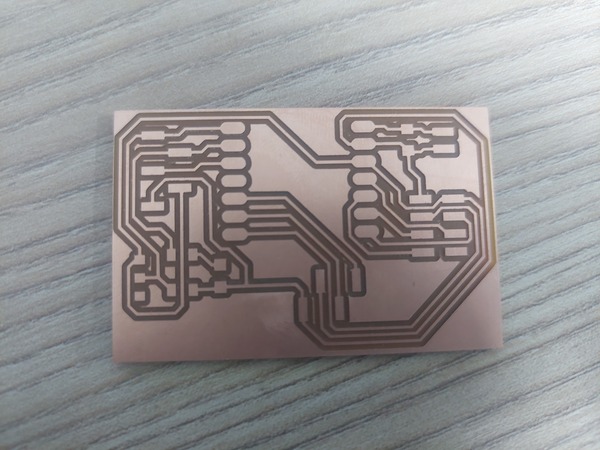
And the result is
Seeeduino Albert. J.
For my seeeduino I need:
| Components | Quantity |
|---|---|
| Seeed XIAO | 1 |
| Capacitor 1uF | 1 |
| Resistor 499 ohm | 1 |
| Resistor 10k ohm | 1 |
| 2x4 Female header | 1 |
| 1x5 Female header | 1 |
| 1x4 Female header | 1 |
| Switch | 1 |
| 1x2 pin Male angle | 1 |
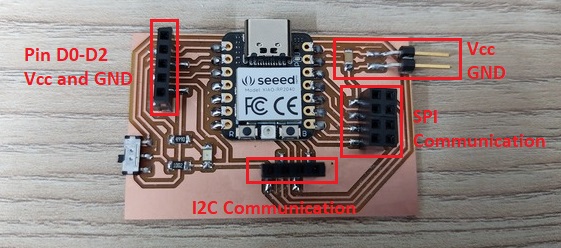
The result is:
We will load our seeeduino with the following code.
int Interrupt = 0;

void setup() {
  pinMode(D0, INPUT);
  pinMode(D1, OUTPUT);
}

void loop() {
  Interrupt = digitalRead(D0);

  if (Interrupt == HIGH){
    digitalWrite(D1, HIGH);
    delay(500);
    digitalWrite(D1, LOW);
    delay(500);
  }
  else{
    digitalWrite(D1, LOW);
  }
}
Finally, I leave all the designs.
- Download the files here
This is all for this time.