15. Interface and application programming
Group assignment:
Compare as many tool options as possible
I researched the following aplications:
- Processing
- S4A (Scratch for Arduino)
Processing
Processing is a flexible software sketchbook and a language for learning how to code within the context of the visual arts. This software can help students, artists, designers, researchers, and hobbyists for learning and prototyping.
Below, I show an example of use, I did a LED control program with a virtual button, when click button, turns on and off LED, the button changes color, green for on led and red for off led.
The heart of the program is in the establishment of serial communication.
Arduino Program
int LedPin=13;
boolean  EstadoLed = false;
void setup() {
  Serial.begin(9600);
  pinMode(LedPin, OUTPUT);
  digitalWrite(LedPin, EstadoLed);
}

void loop() {
  if(Serial.available()){
    char Letra = Serial.read();
    if (Letra == 'a'){
      EstadoLed = !EstadoLed;
    }
    digitalWrite(LedPin, EstadoLed);
  }
}
Processing Program
import processing.serial.*;

boolean EstadoBoton = false;
Serial myPort;
color ColorApagado = color(200,0,0);                    //Red color
color ColorEncendido = color(0,200,0);                  //Green color

void setup(){
  size(400,600);
  myPort = new Serial(this, Serial.list()[0], 9600);    //Serial(parent, portName, baudRate)
}

void draw(){
  background(255);
  if(EstadoBoton){
    fill(ColorEncendido);
  } else {
    fill(ColorApagado);
  }
  quad(100, 200, 100, 400, 300, 400, 300, 200);
}

void mouseClicked() {                                   //if the click is only inside the square
  if(mouseX >= 100 && mouseX <= 300 && mouseY >= 200 && mouseY <= 400){
    EstadoBoton =!EstadoBoton;
    myPort.write('a');
  }
}
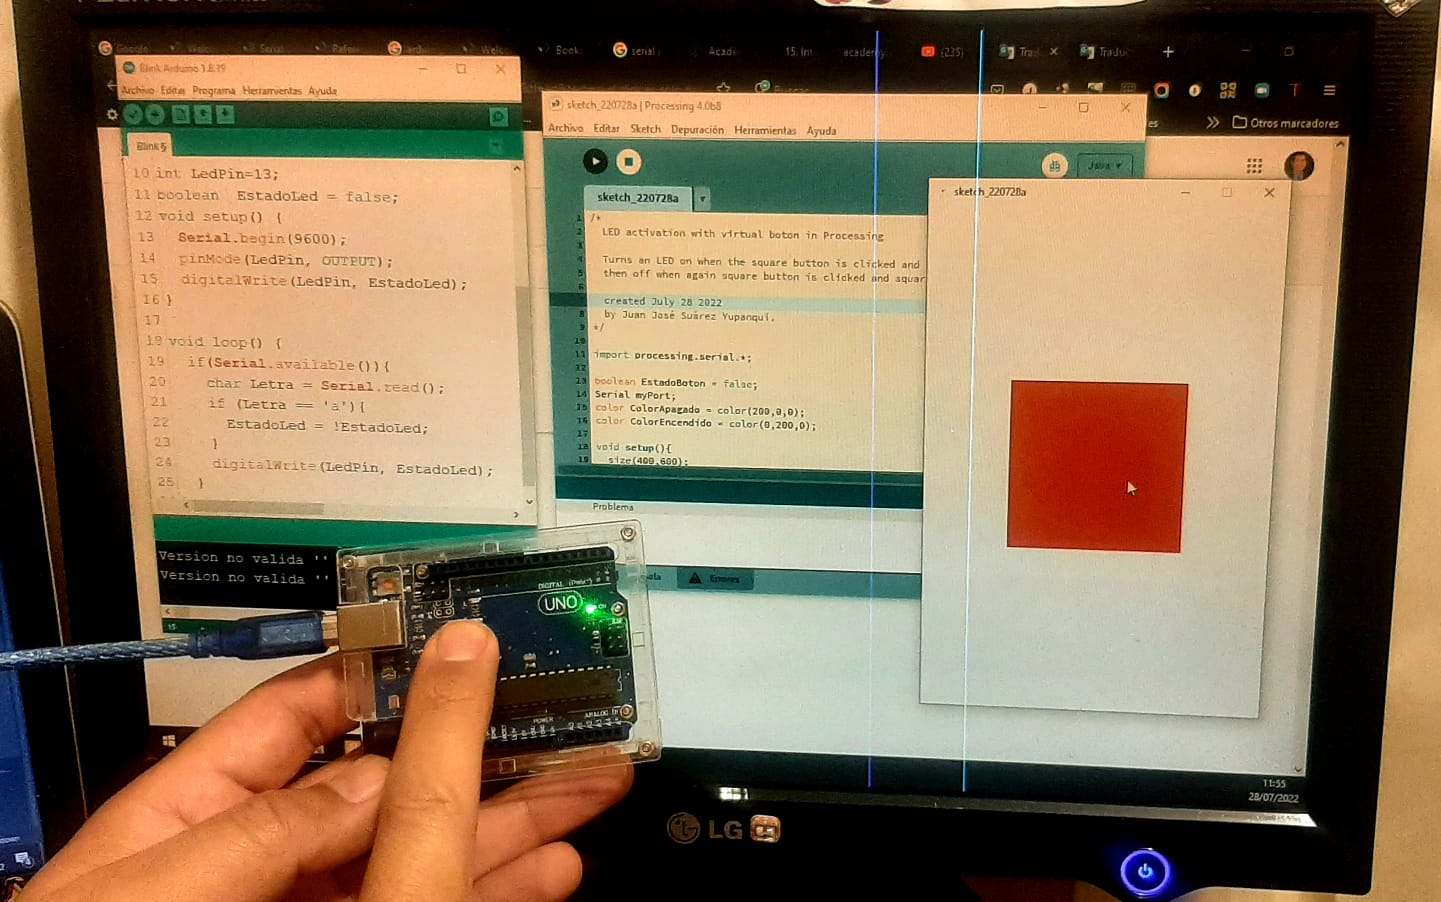
Led OFF and red button.
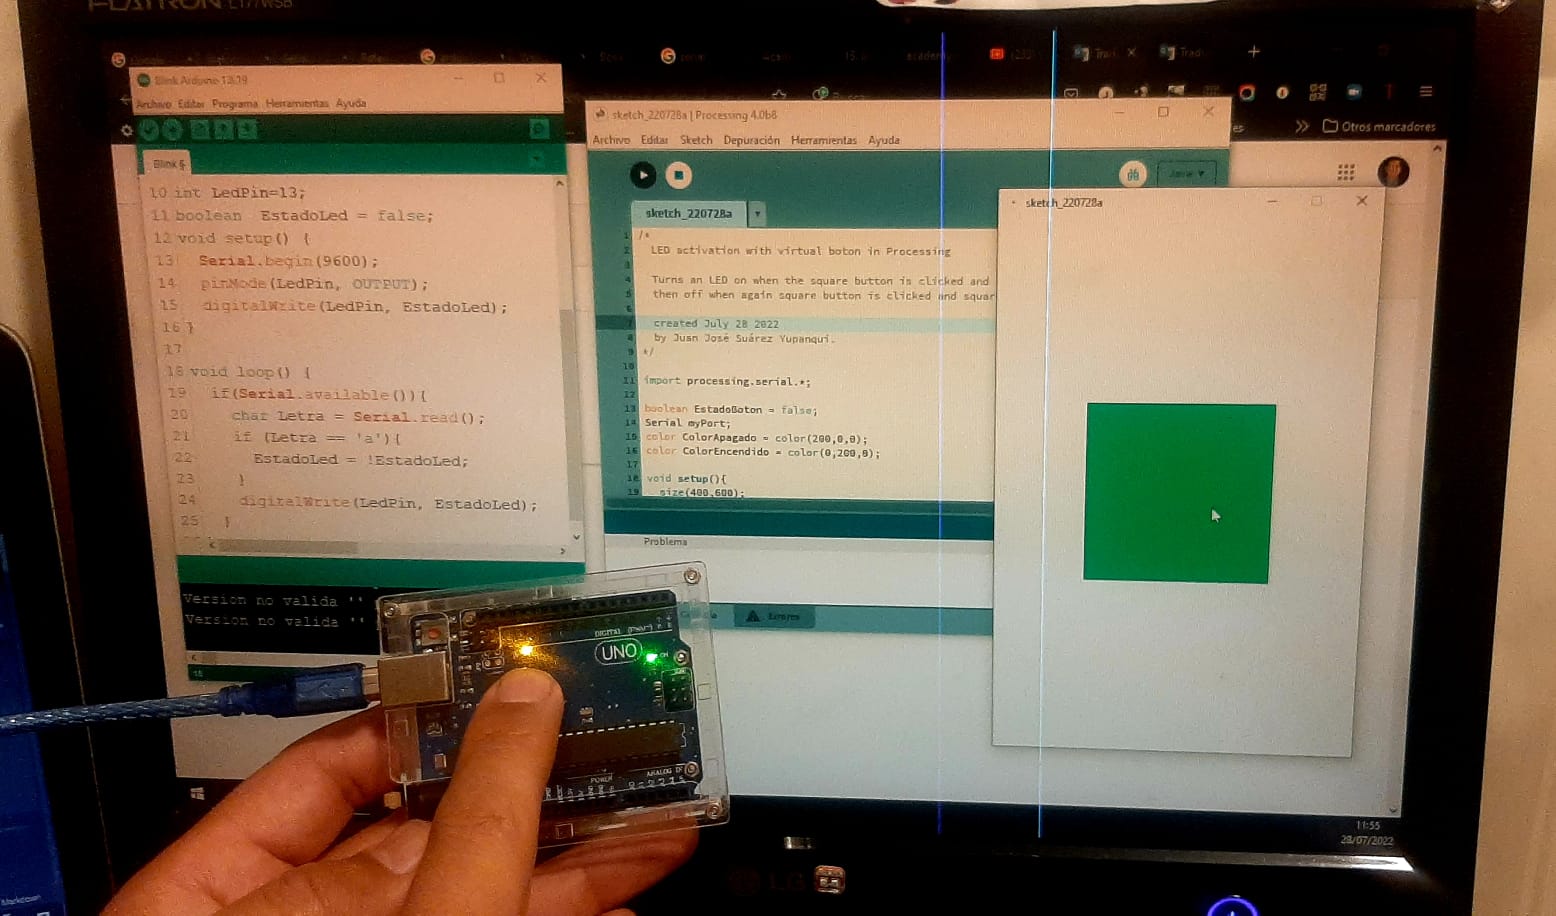
Led ON and green button.
Showing functination of my program.
S4A (Scratch for Arduino)
S4A is a Scratch modification that allows for simple programming of the Arduino open source hardware platform. It provides new blocks for managing sensors and actuators connected to Arduino. The main goal is attracting people to the programming world. S4A provide a high level interface to Arduino programmers with functionalities such as interacting with a set of boards through user events.
Considerations for connectivity:
First, load the firmware into your Arduino UNO board.
Second, components have to be connected in a particular way:
- 6 analog inputs (analog pins)
- 2 digital inputs (digital pins 2 and 3)
- 3 analog outputs (digital pins 5, 6 and 9)
- 3 digital outputs (pins 10, 11 and 13)
- And 4 special outputs to connect continuous rotation servomotors (digital pins 4, 7, 8 and 12).
Finally, S4A interacts with Arduino by sending the actuator states and receiving sensor states every 75 ms, therefore the pulse width needs to be greater than this time period.
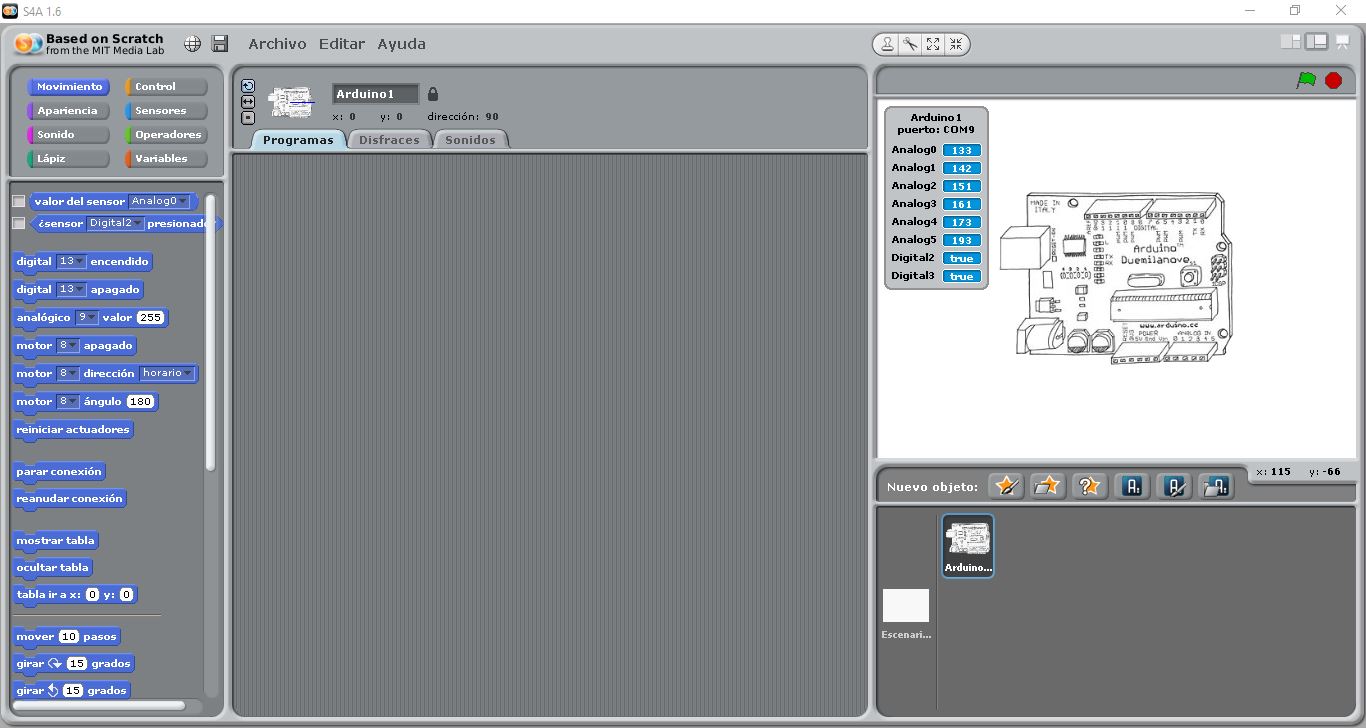
S4A Launch Console.
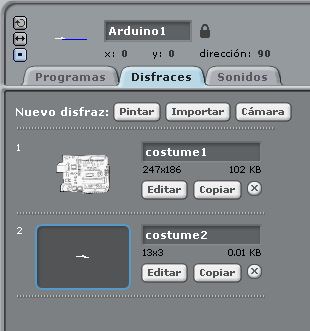
Costume for the data acquisition of the Aduino UNO.
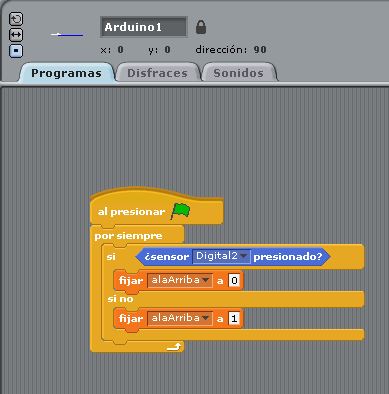
Button state acquisition program.
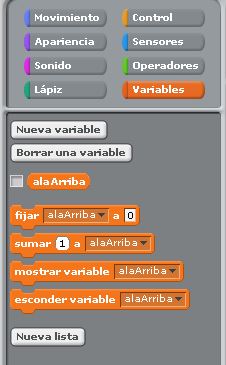
Creating an intermediate variable to interface the Arduino UNO with the bat animation.
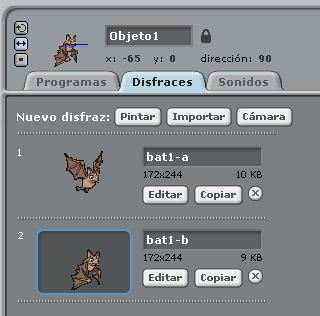
Bat costume.
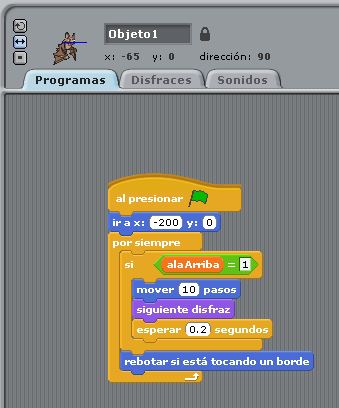
Bat animation program.
Bat flight.
Individual assignment:
Write an application that interfaces a user with an input &/or output device that you made
I made a program in python using kivy, I made an interface with 4 buttons, two buttons to control 2 servomotors and the other two buttons control the forward and reverse of the conveyor belt. After that, I made a program in Arduino language for the ATmega328P, this program receives the data through the serial port and activates the servomotors and stepper.
Python program using Kivy
Python program.
import serial

from kivy.app import App
from kivy.uix.button import Button
from kivy.uix.boxlayout import BoxLayout
from kivy.core.window import Window

class SwitchLED(App):
    def build(self):
        ser = serial.Serial ('COM5',9600)
        Window.size = (800, 300)
        layout = BoxLayout( padding= 10, orientation='horizontal', size=(100,130))
        def accion01(instance):
            if (instance.text == "SERVO METAL"):
                ser.write(b'1');
        def accion02(instance):
            if (instance.text == "SERVO NOMETAL"):
                ser.write(b'2');
        def accion03(instance):
            if (instance.text == "CONVEYOR BELT FORWARD"):
                ser.write(b'3');
        def accion04(instance):
            if (instance.text == "CONVEYOR BELT REVERSE"):
                ser.write(b'4');
        btn01 = Button(size_hint = (.20,.3), text="SERVO METAL", on_press = accion01)
        btn02 = Button(size_hint = (.20,.3), text="SERVO NOMETAL", on_press = accion02)
        btn03 = Button(size_hint = (.20,.3), text="CONVEYOR BELT FORWARD", on_press = accion03)
        btn04 = Button(size_hint = (.20,.3), text="CONVEYOR BELT REVERSE", on_press = accion04)
        layout.add_widget(btn01)
        layout.add_widget(btn02)
        layout.add_widget(btn03)
        layout.add_widget(btn04)
        return layout

if __name__ == "__main__":
    app = SwitchLED()
    app.run()
Arduino program for my ATmega328p board.
#include <Servo.h>

Servo servoMetal;
Servo servoNoMetal;

int Coil01 = 6;
int Coil02 = 7;
int Coil03 = 8;
int Coil04 = 9;
int ServoMetal = 11;
int ServoNoMetal = 10;

bool state01 = false;
bool state02 = false;
bool state03 = false;
bool state04 = false;

int pos01 = 0;
int pos02 = 0;
int espera = 20;

void setup() {
  Serial.begin(9600);
  pinMode(Coil01,OUTPUT);
  pinMode(Coil02,OUTPUT);
  pinMode(Coil03,OUTPUT);
  pinMode(Coil04,OUTPUT);
  servoMetal.attach(ServoMetal);
  servoNoMetal.attach(ServoNoMetal);
}
void loop() {
  if (Serial.available()){
    switch(Serial.read()){
      case '1':
        state01=!state01;
        break;
      case '2':
        state02=!state02;
        break;
      case '3':
        state03=!state03;
        state04=false;
        break;
      case '4':
        state04=!state04;
        state03=false;
        break;
    }
  }
    if(state01){
      for (pos01 = 90; pos01 >= 0; pos01 -= 1) {
        servoMetal.write(pos01);
        delay(15);
      }
      for (pos01 = 0; pos01 <= 90; pos01 += 1) {
        servoMetal.write(pos01);
        delay(15);
      }
      state01=false;
  }
  if(state02){
    for (pos02 = 80; pos02 >= 0; pos02 -= 1) {
      servoNoMetal.write(pos02);
      delay(15);
    }
    for (pos02 = 0; pos02 <= 80; pos02 += 1) {
      servoNoMetal.write(pos02);
      delay(15);
    }
    state02=false;
  }
  if(state04){
    digitalWrite(Coil01,LOW);
    digitalWrite(Coil02,HIGH);
    digitalWrite(Coil03,HIGH);
    digitalWrite(Coil04,LOW);
    delay(espera);
    digitalWrite(Coil01,LOW);
    digitalWrite(Coil02,LOW);
    digitalWrite(Coil03,HIGH);
    digitalWrite(Coil04,HIGH);
    delay(espera);
    digitalWrite(Coil01,HIGH);
    digitalWrite(Coil02,LOW);
    digitalWrite(Coil03,LOW);
    digitalWrite(Coil04,HIGH);
    delay(espera);
    digitalWrite(Coil01,HIGH);
    digitalWrite(Coil02,HIGH);
    digitalWrite(Coil03,LOW);
    digitalWrite(Coil04,LOW);
    delay(espera);
  }
  if(state03){
    digitalWrite(Coil01,HIGH);
    digitalWrite(Coil02,HIGH);
    digitalWrite(Coil03,LOW);
    digitalWrite(Coil04,LOW);
    delay(espera);
    digitalWrite(Coil01,HIGH);
    digitalWrite(Coil02,LOW);
    digitalWrite(Coil03,LOW);
    digitalWrite(Coil04,HIGH);
    delay(espera);
    digitalWrite(Coil01,LOW);
    digitalWrite(Coil02,LOW);
    digitalWrite(Coil03,HIGH);
    digitalWrite(Coil04,HIGH);
    delay(espera);
    digitalWrite(Coil01,LOW);
    digitalWrite(Coil02,HIGH);
    digitalWrite(Coil03,HIGH);
    digitalWrite(Coil04,LOW);
    delay(espera);
  }
}
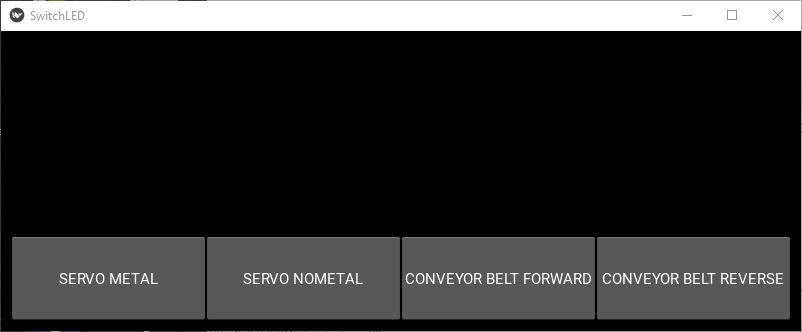
Interface developed with Kivy in Python.
Operating my conveyor belt with my ATmega328p PCB and the graphical interface developed with kivy in Python.