10. Molding and casting
Group assignment:
Review the safety data sheets for each of your molding and casting materials, then make and compare test casts with each of them.
The materials we have used are:
F-20 Silicon Plus

F-20 Silicon Plus is a two-part silicone, platinum-cured or addition type, with a mixing ratio of 1A: 1B in volume. It can cure at room temperature and also under heat. It is a type of food grade silicone and is used mainly for the manufacture of molds.
In summary, the Safety Sheet of this product indicates that for its use and handling it is necessary:
- Good ventilation.
- Wear waterproof gloves, such as butyl rubber, neoprene, or PVC.
- Safety glasses with side shields
Silastic RTV-3481 Mould-Making Base

Release agent in spray bottles. The release agent is silicone-free. Suitable for polyester, epoxy resins, PMMA and polyurethanes. For the construction of molds. Advantages Excellent release CFC-free propellants Wide application field Economic use.
Hazards:
- Extremely flammable.
- Irritating to skin.
- Toxic to aquatic organisms, may cause long-term adverse effects in the aquatic environment.
- Vapours may cause drowsiness and dizziness.
In summary, the Safety Sheet of this product indicates that for its use and handling it is necessary:
- Good ventilation.
- Use only chemical protective gloves with CE marking category III according to EN 374.
- Safety glasses with side shields
Extra credit: try other molding and casting processes.
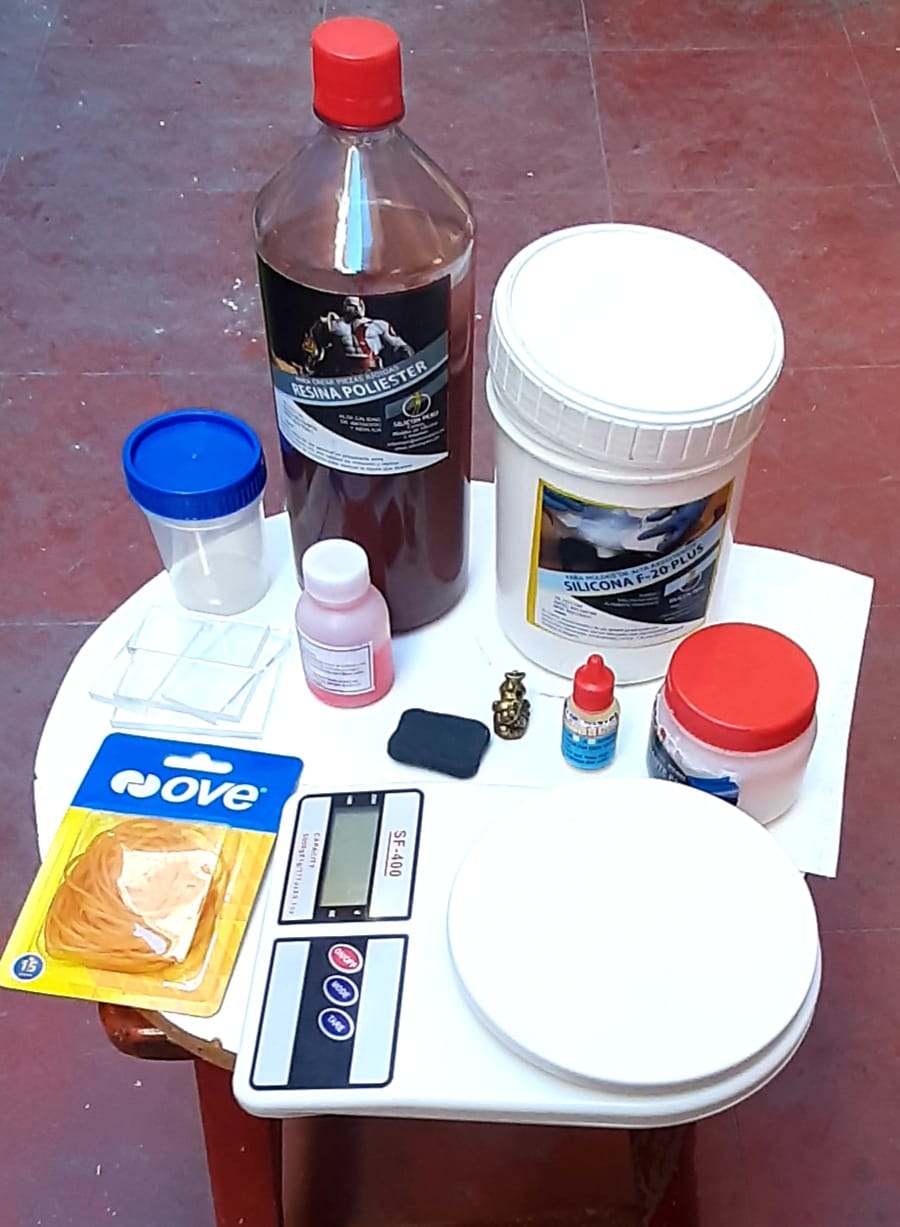
All material to start.
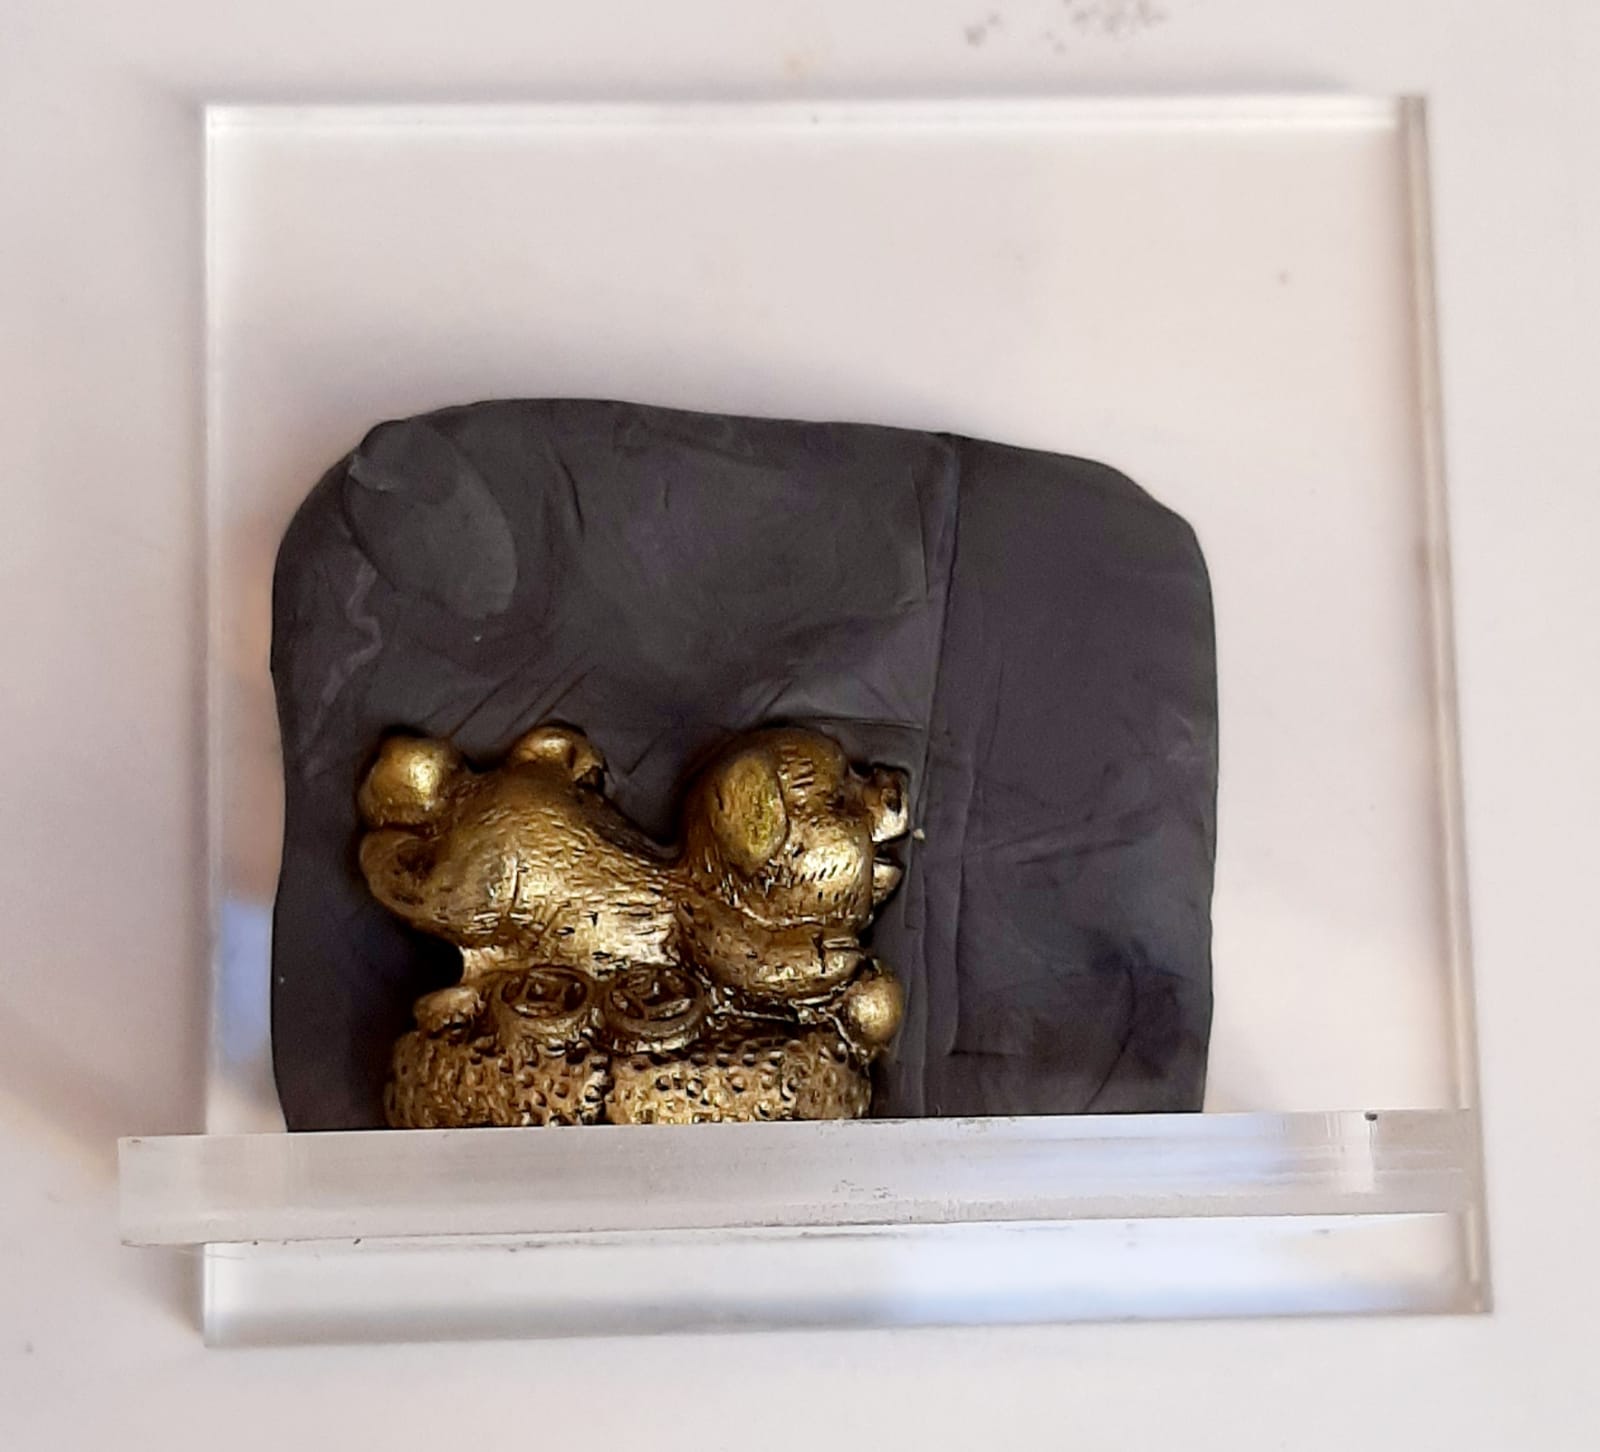
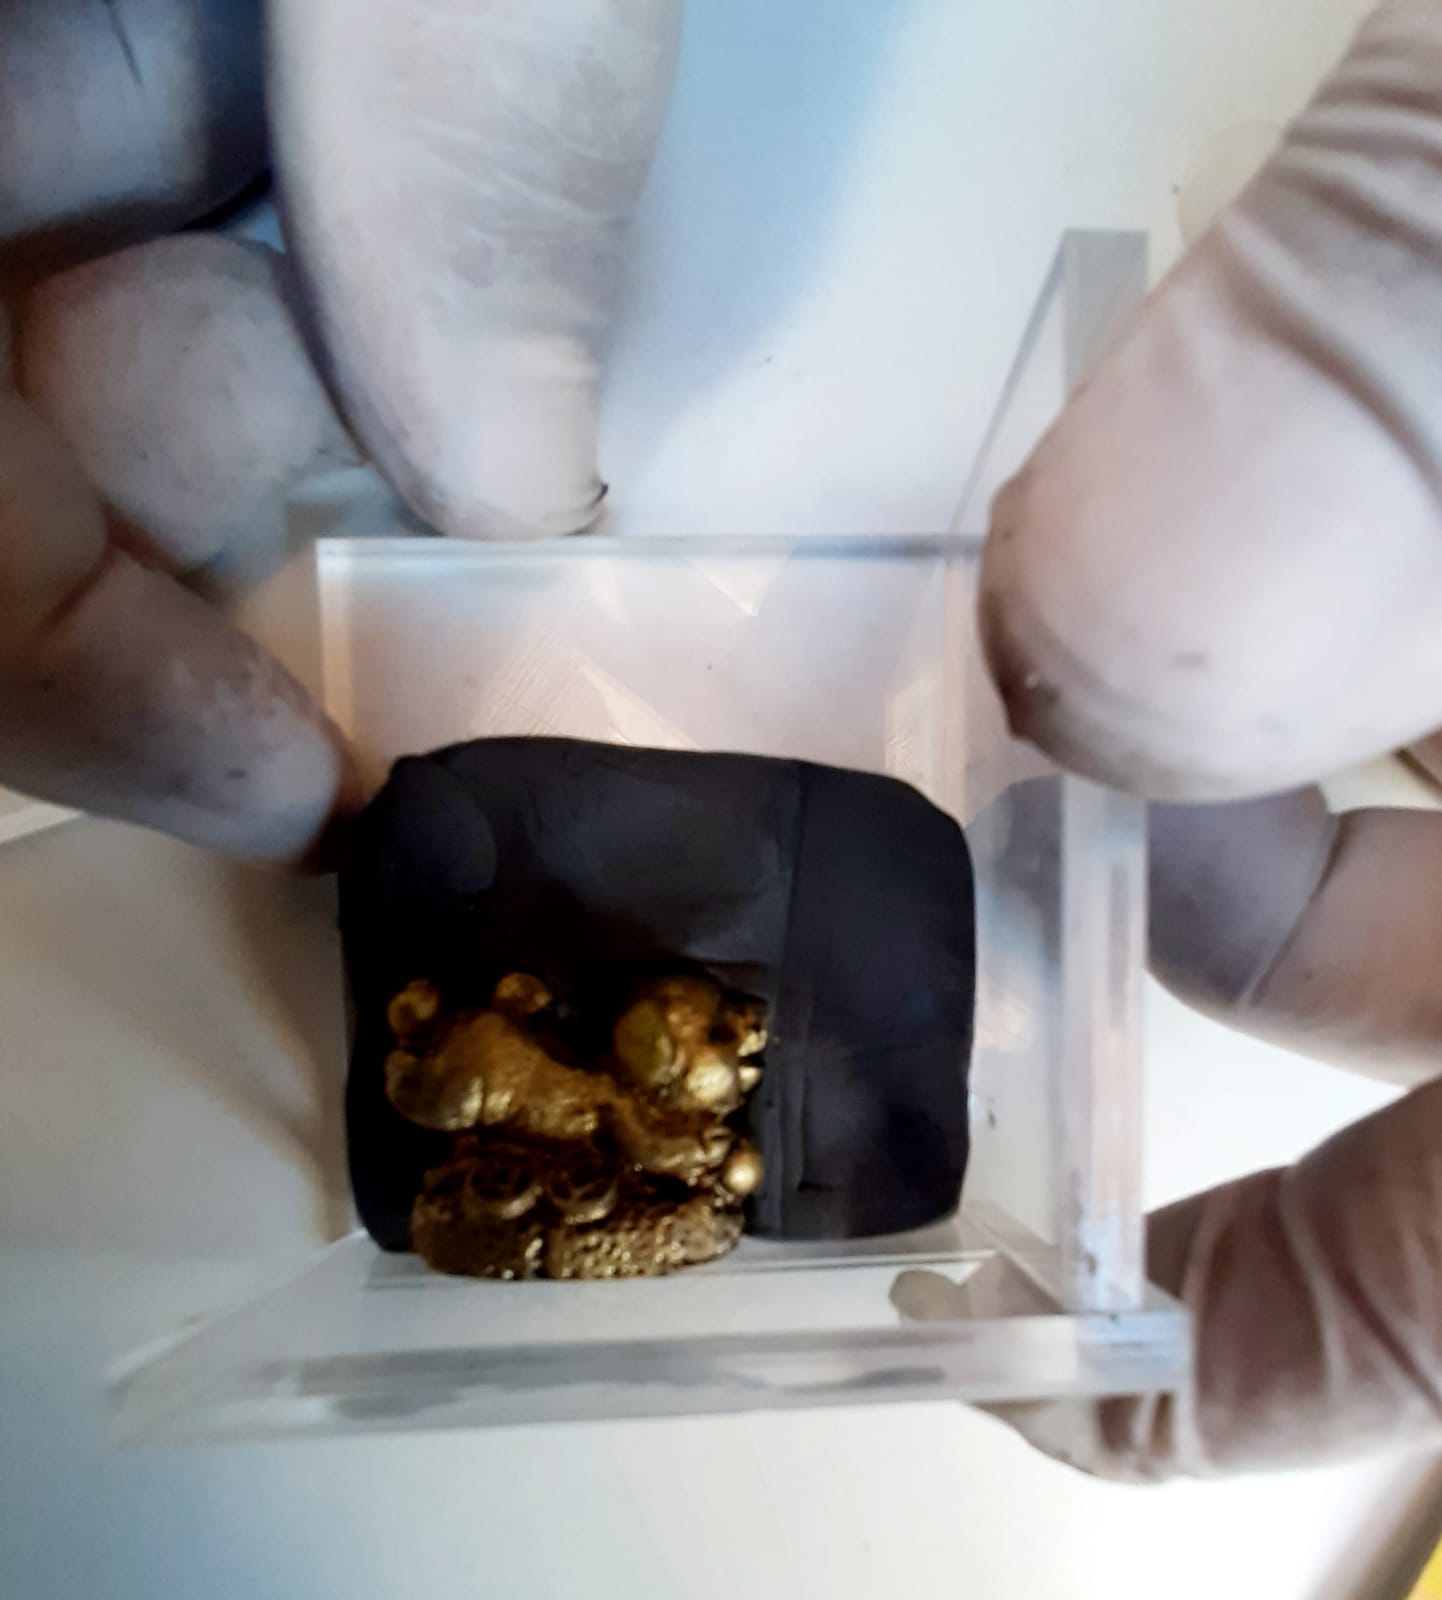
I made the base in industrial mud and I pushed my object until middle.
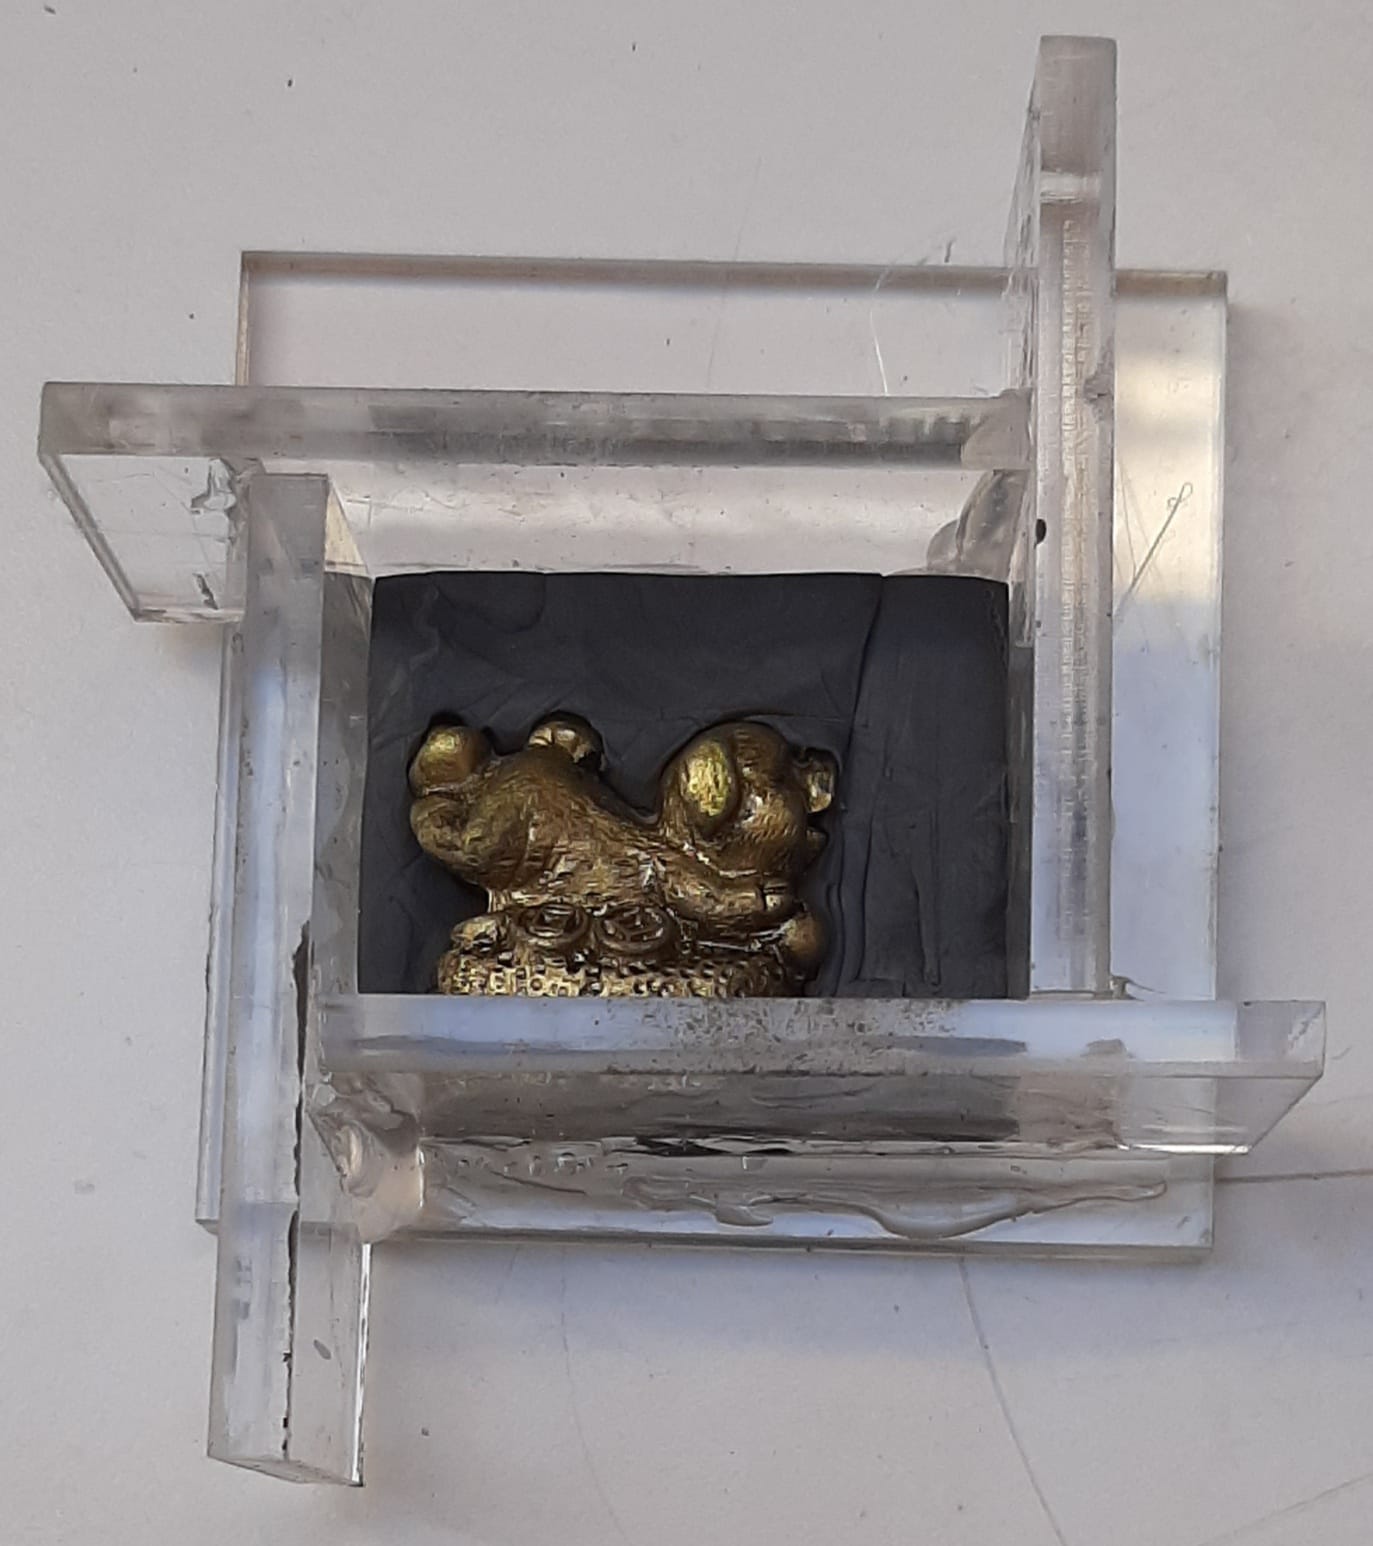
I started to assemble the box.
Box finished.
I made slots so that the mold fits in only one position.
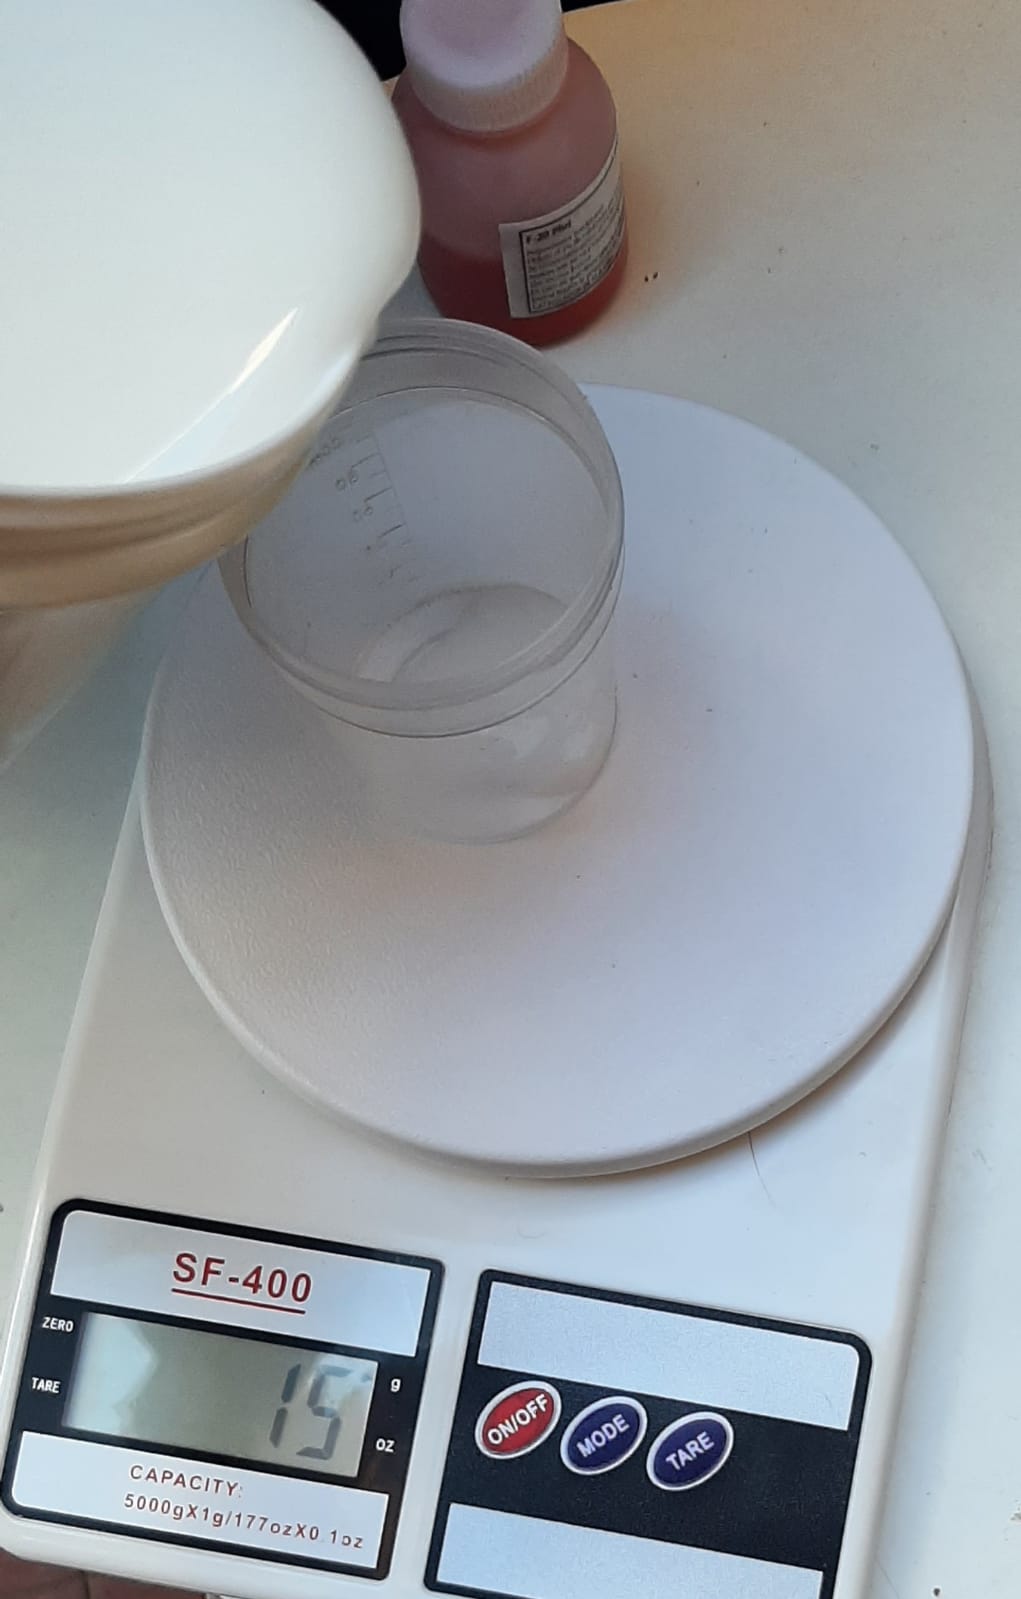
I weighed the empty container to calculate the amount of silicone needed for the mold.
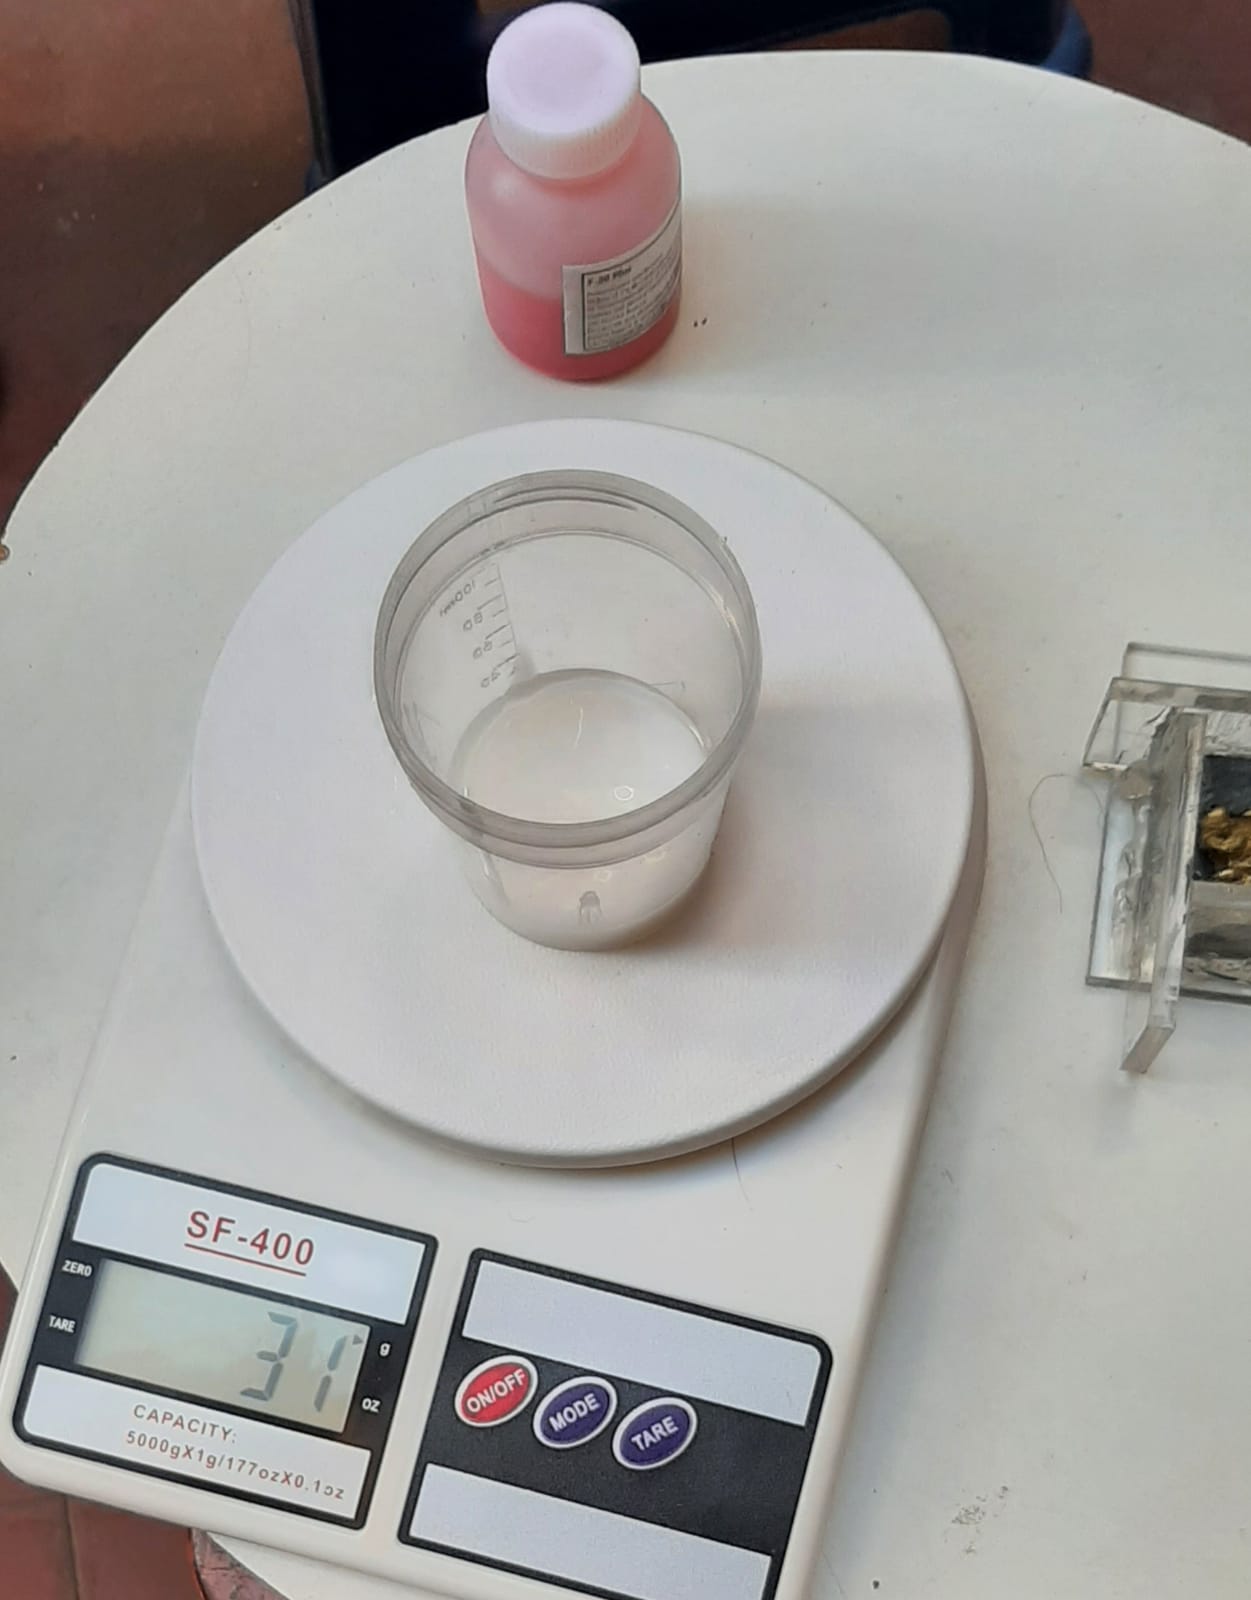
Weight of the container and silicone.
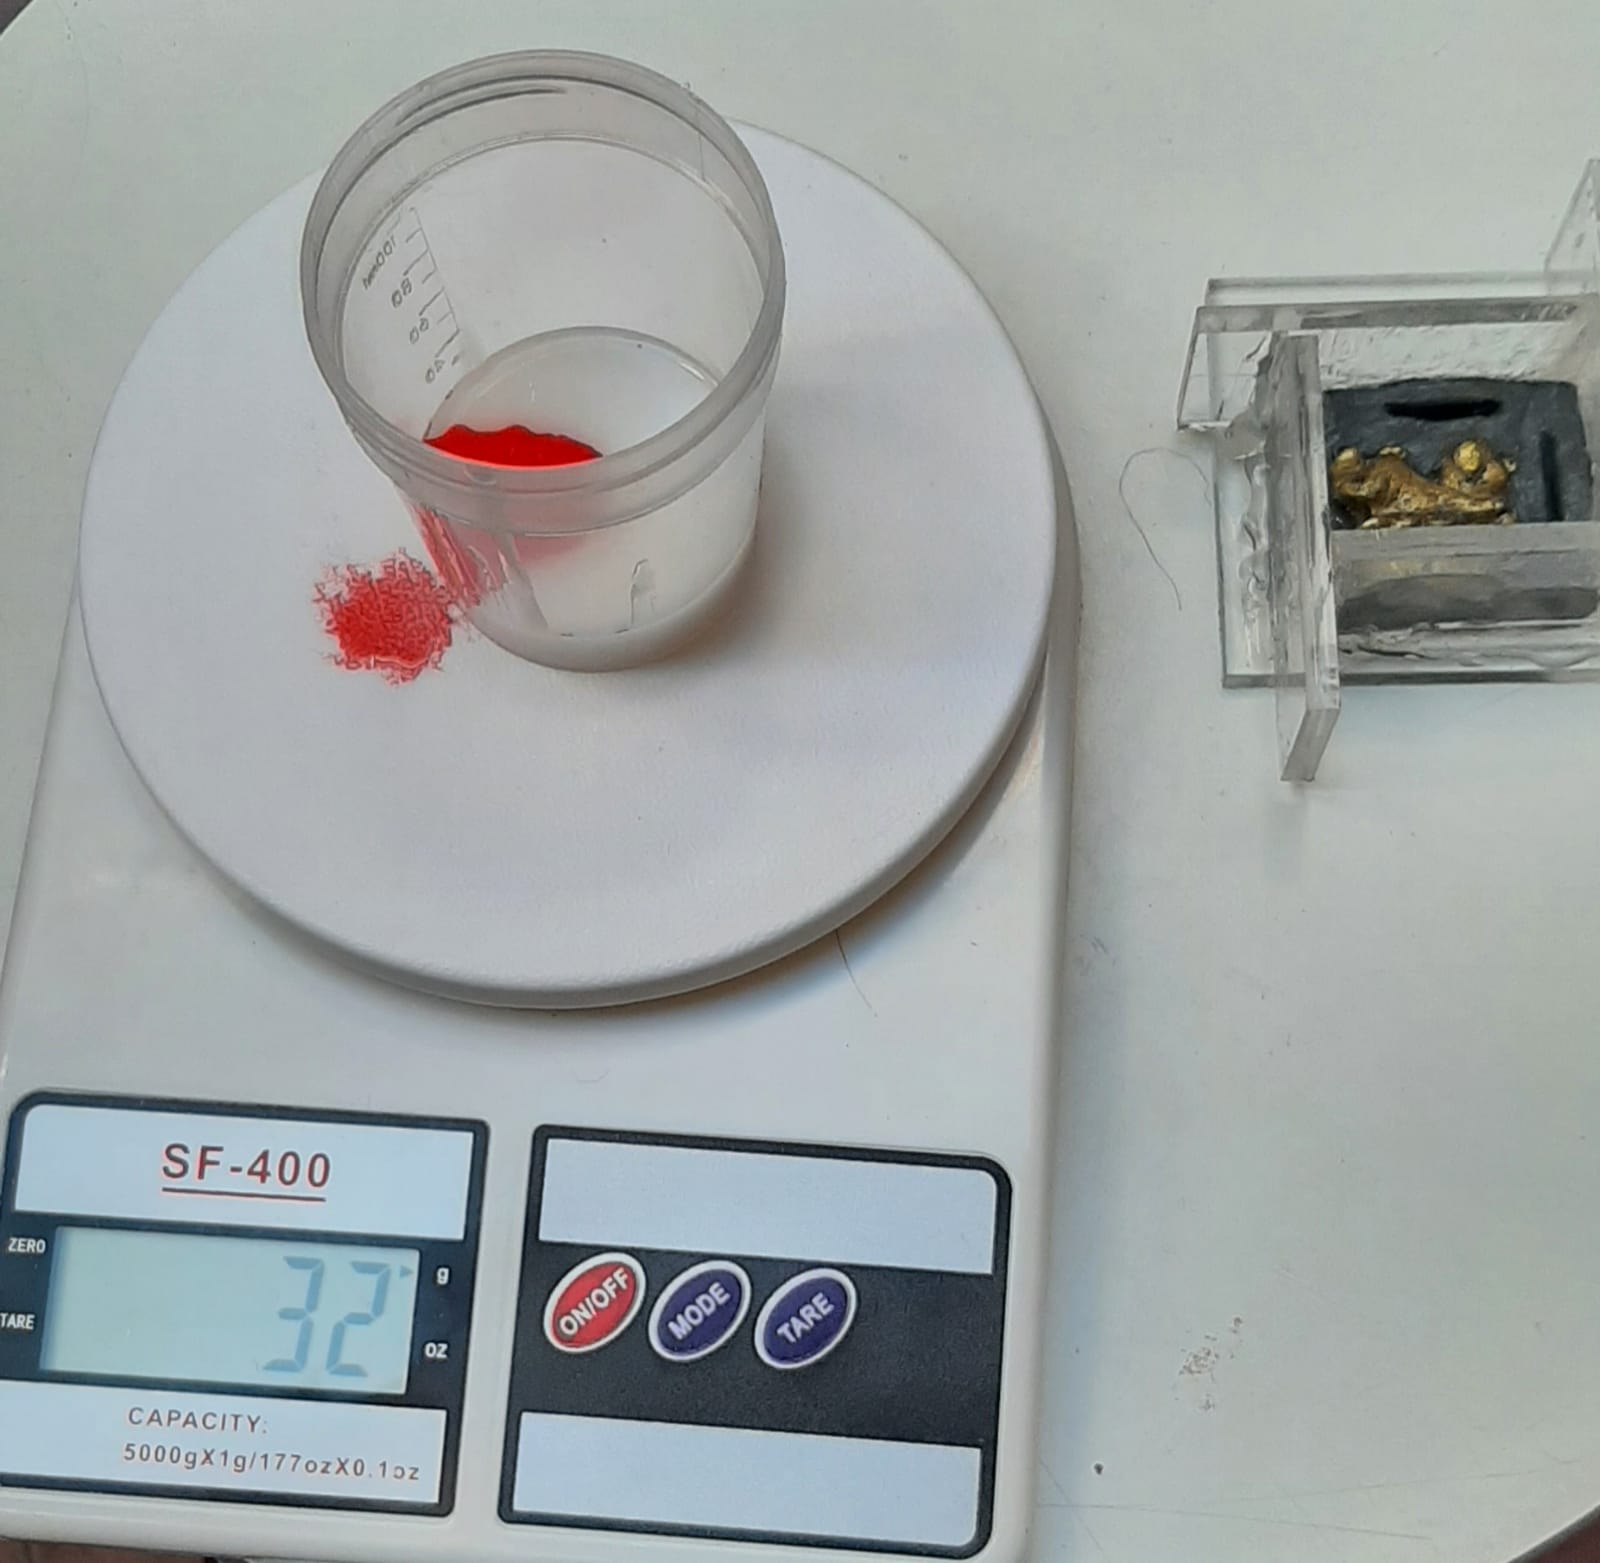
Adding the silicone catalyst.
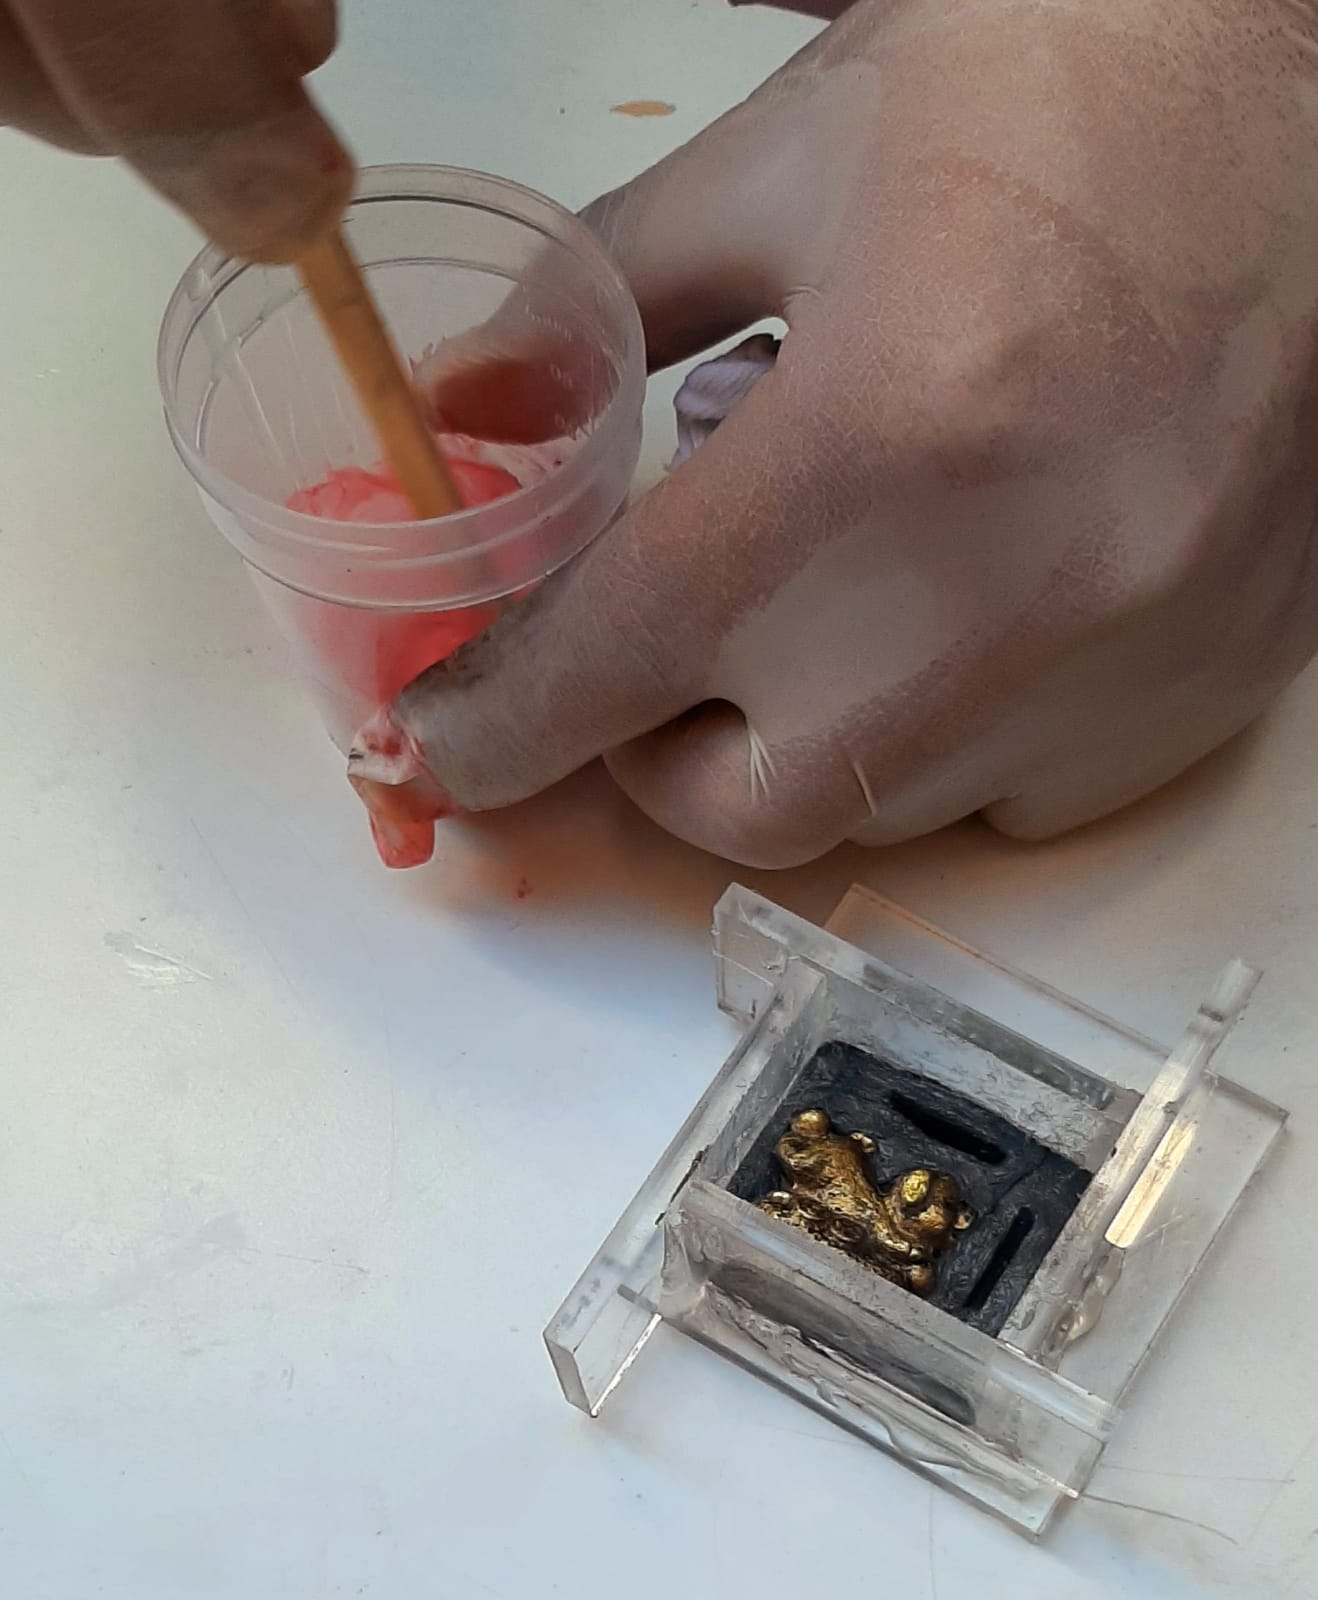
Mixing the silicone with the silicone catalyst.
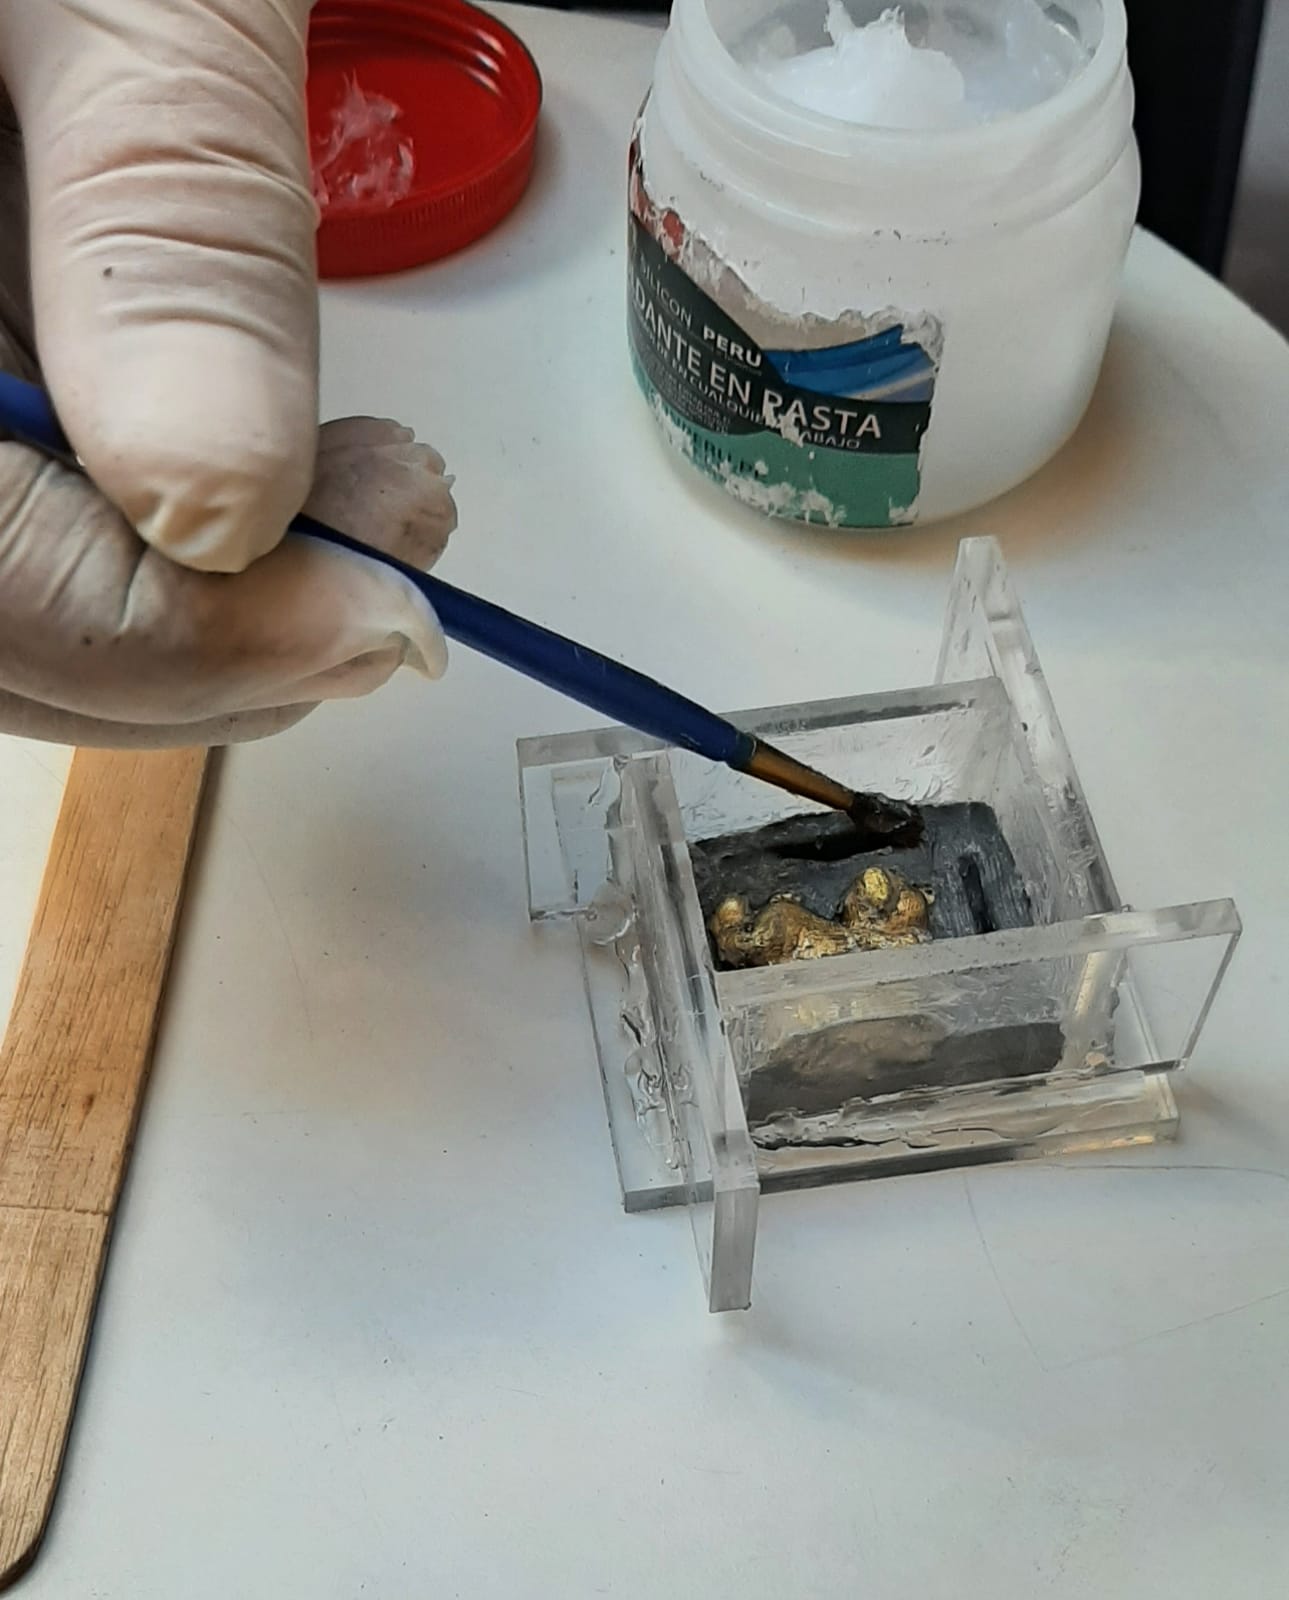
Applying the release agent on all surfaces including the walls of the box.
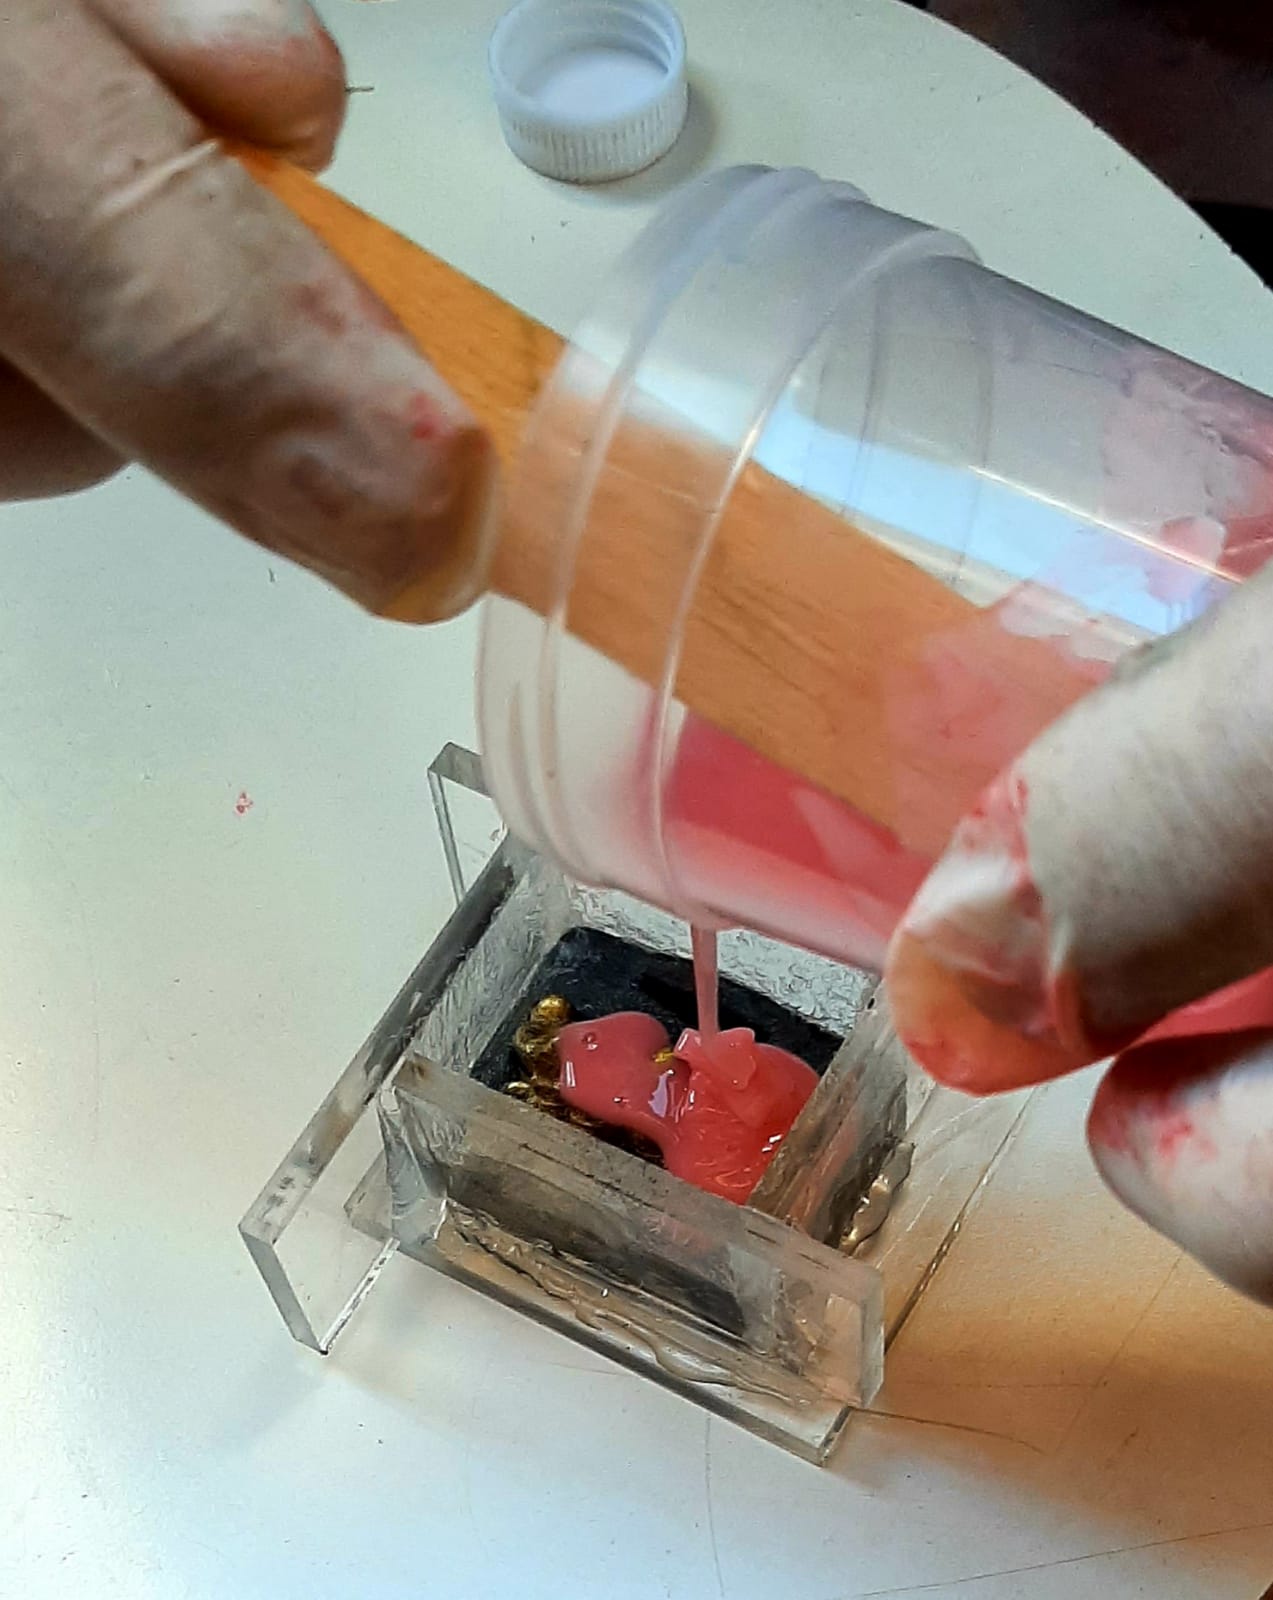
Pouring the prepared silicone into the box.

Waiting for it to dry.
After the silicone dried, I remove the base of the box.
Finishing opening the base of the box.
First half of the silicone mold ready.
We place the object in the first half of the mold to repeat the procedure.
Waiting for the second half of the mold to dry.
Showing the procedure for making a silicone mold.
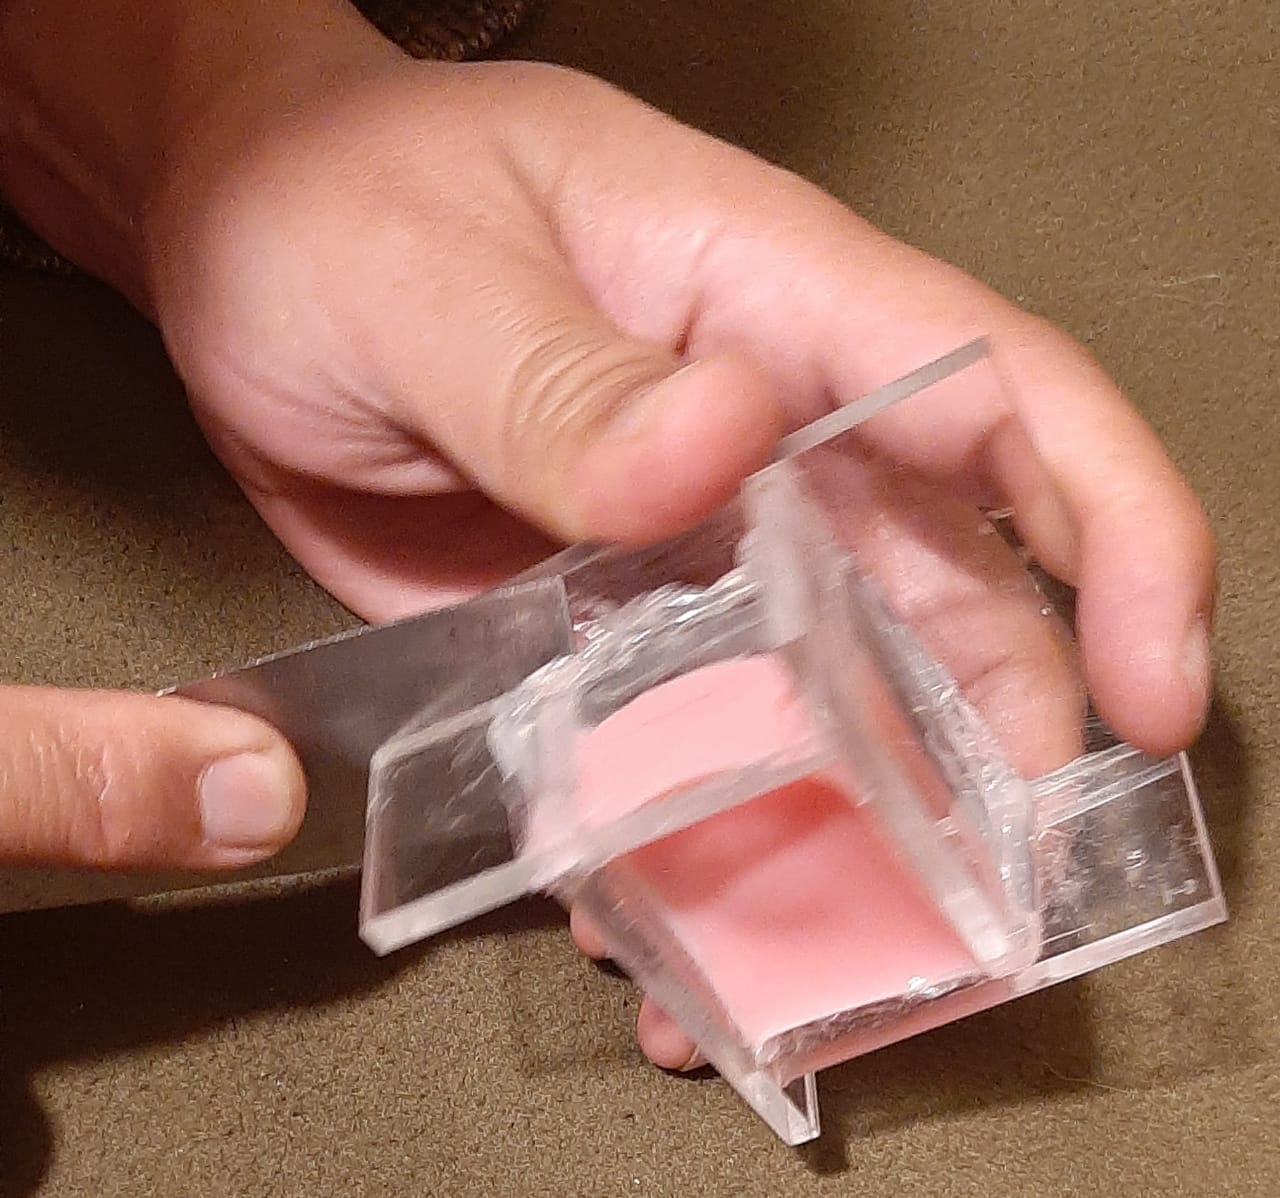
Disassembling the walls of the box.
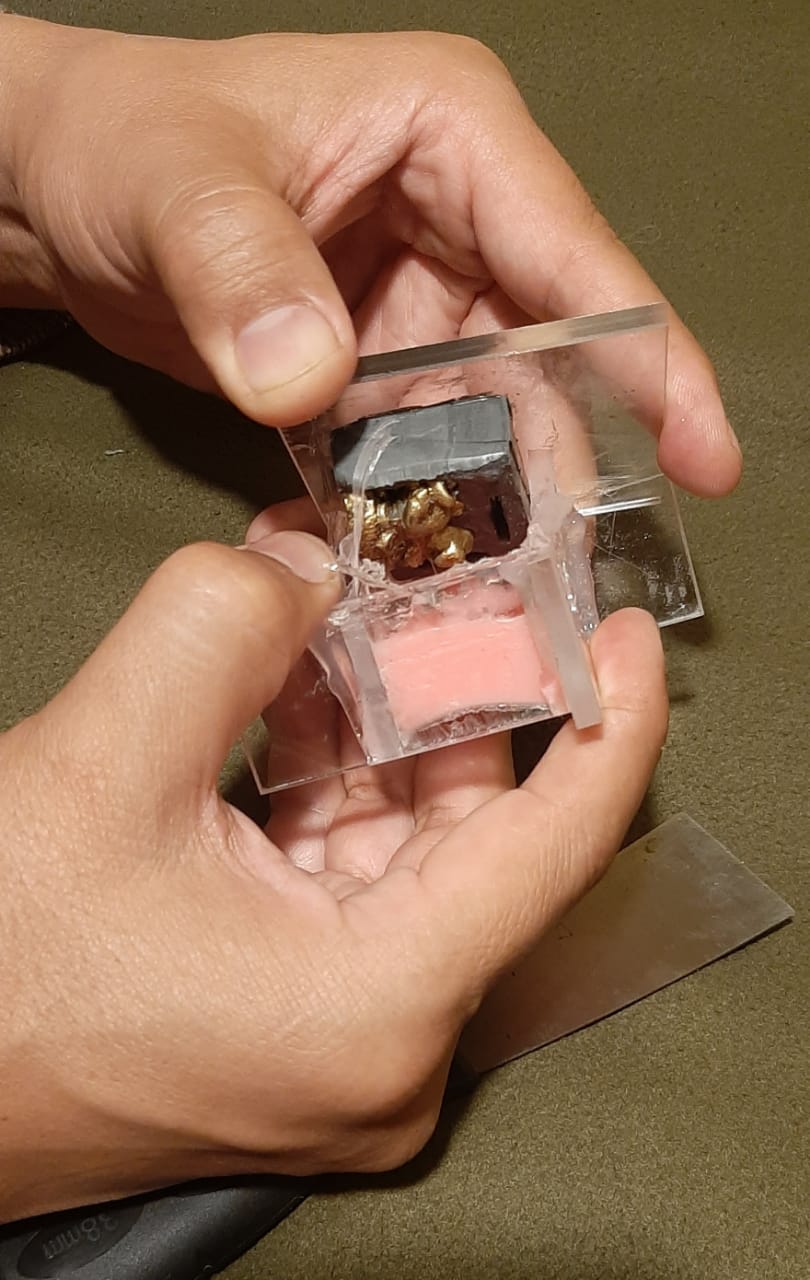
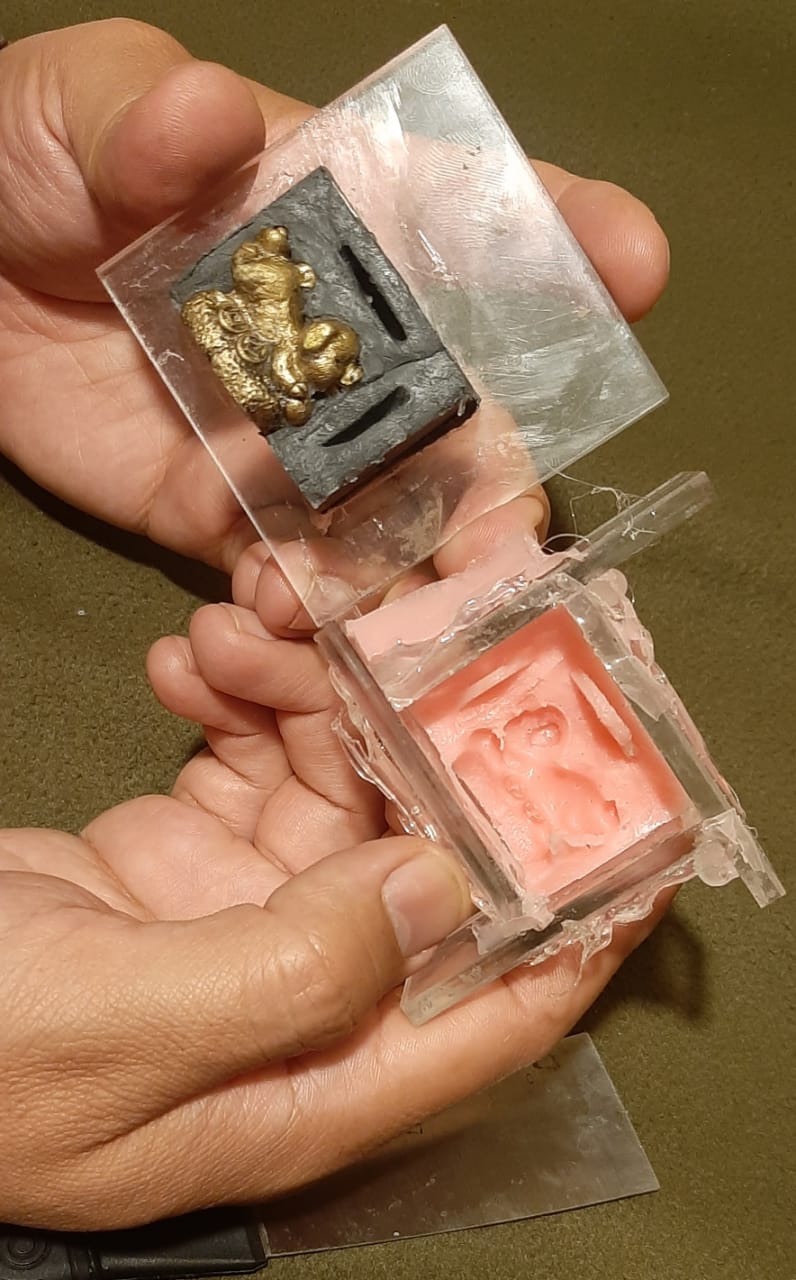
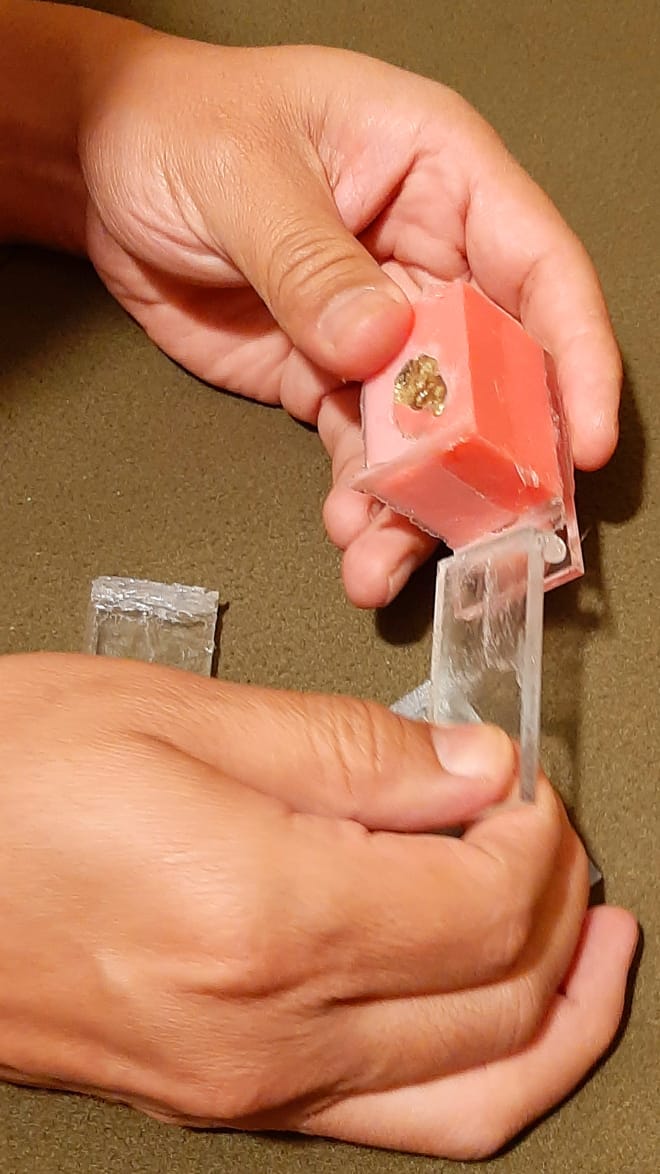
Opening the mold halves and taking out the object.
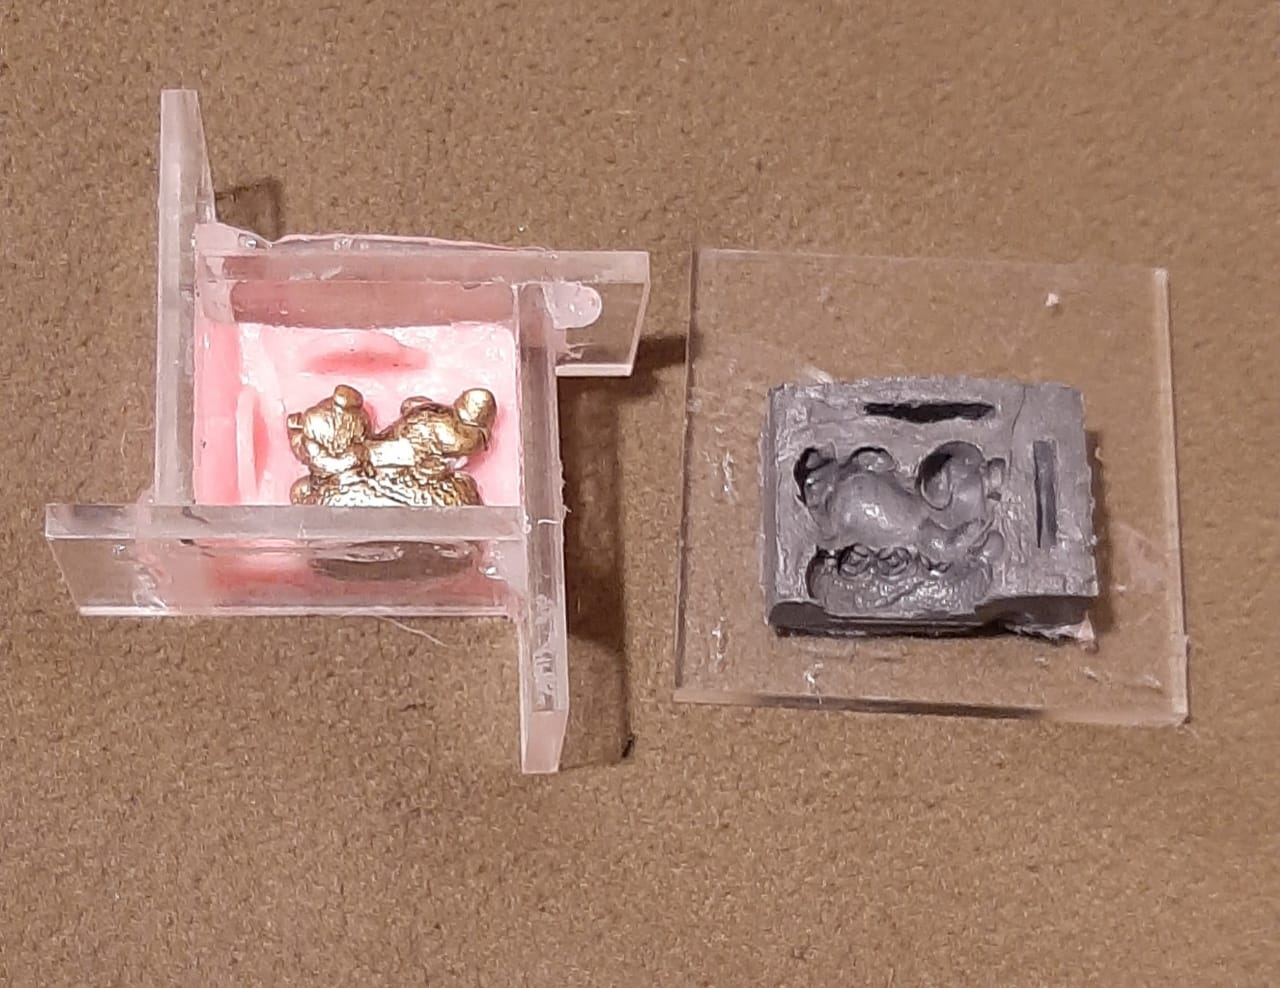
Both halves of the mold and the object.
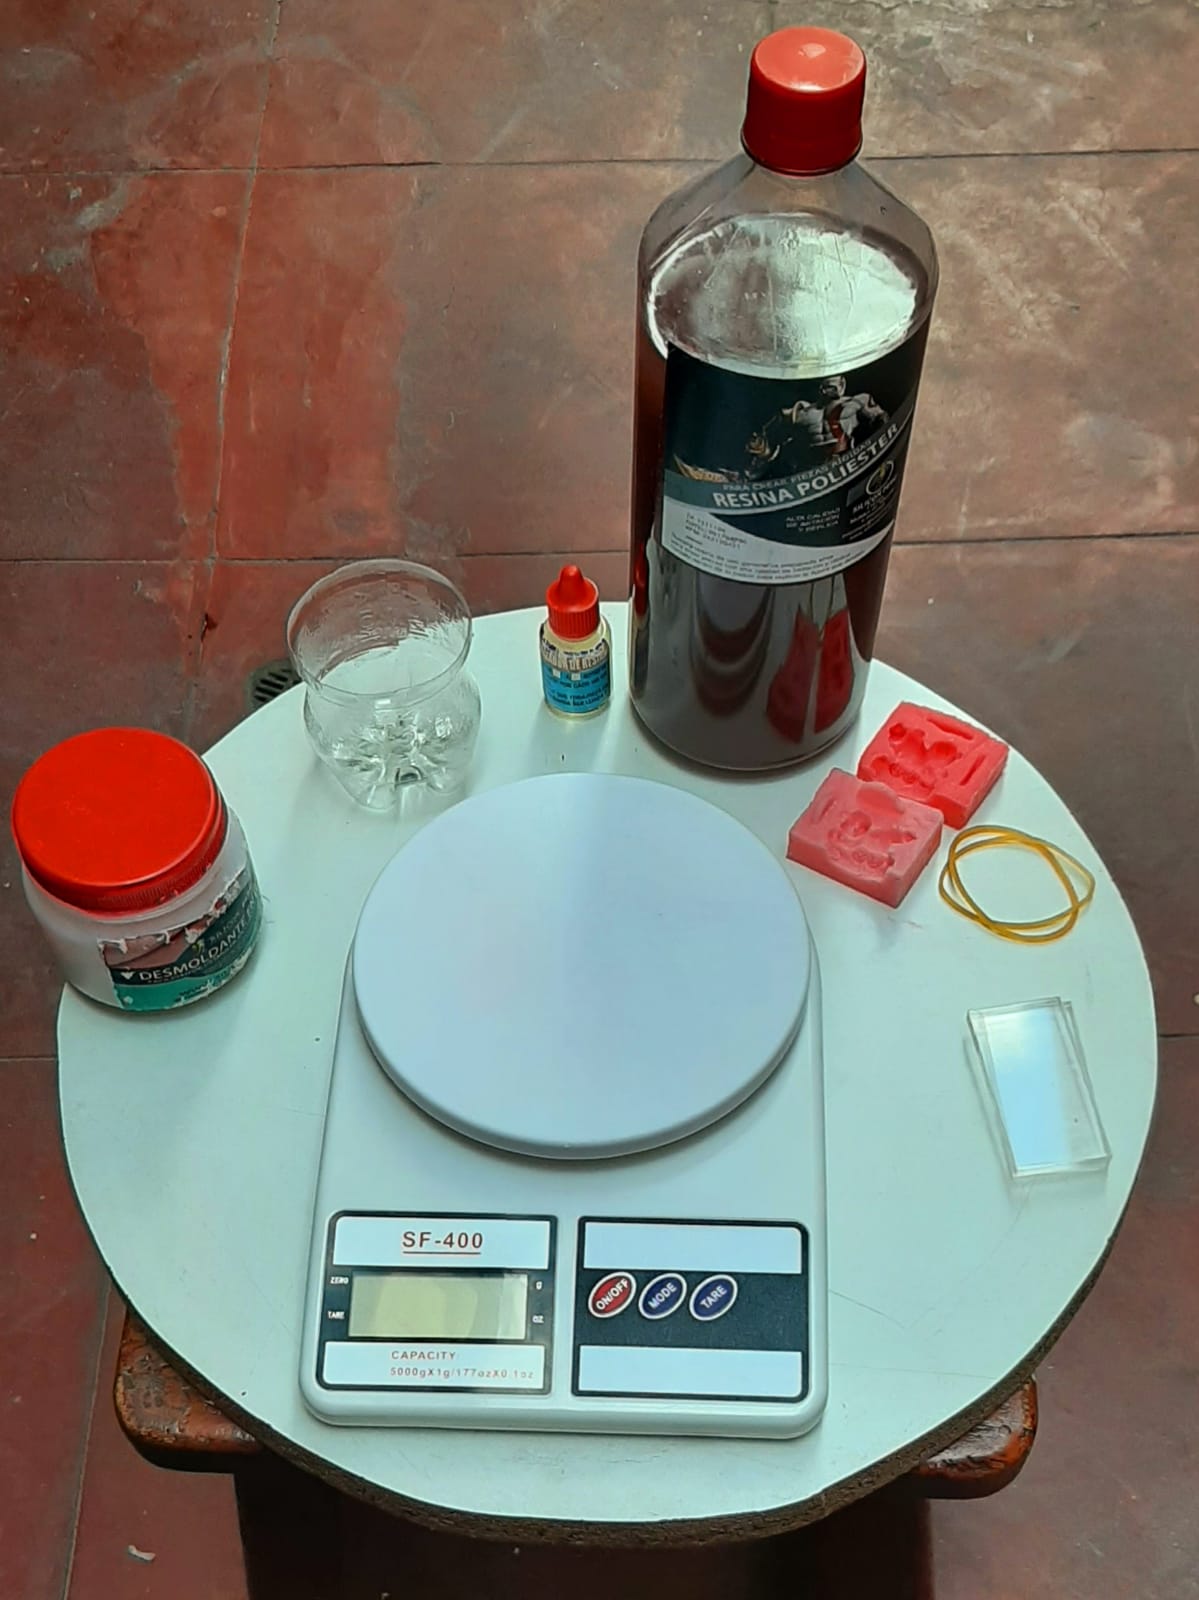
All the materials to replicate the object in silicone.
First, we make the mold.
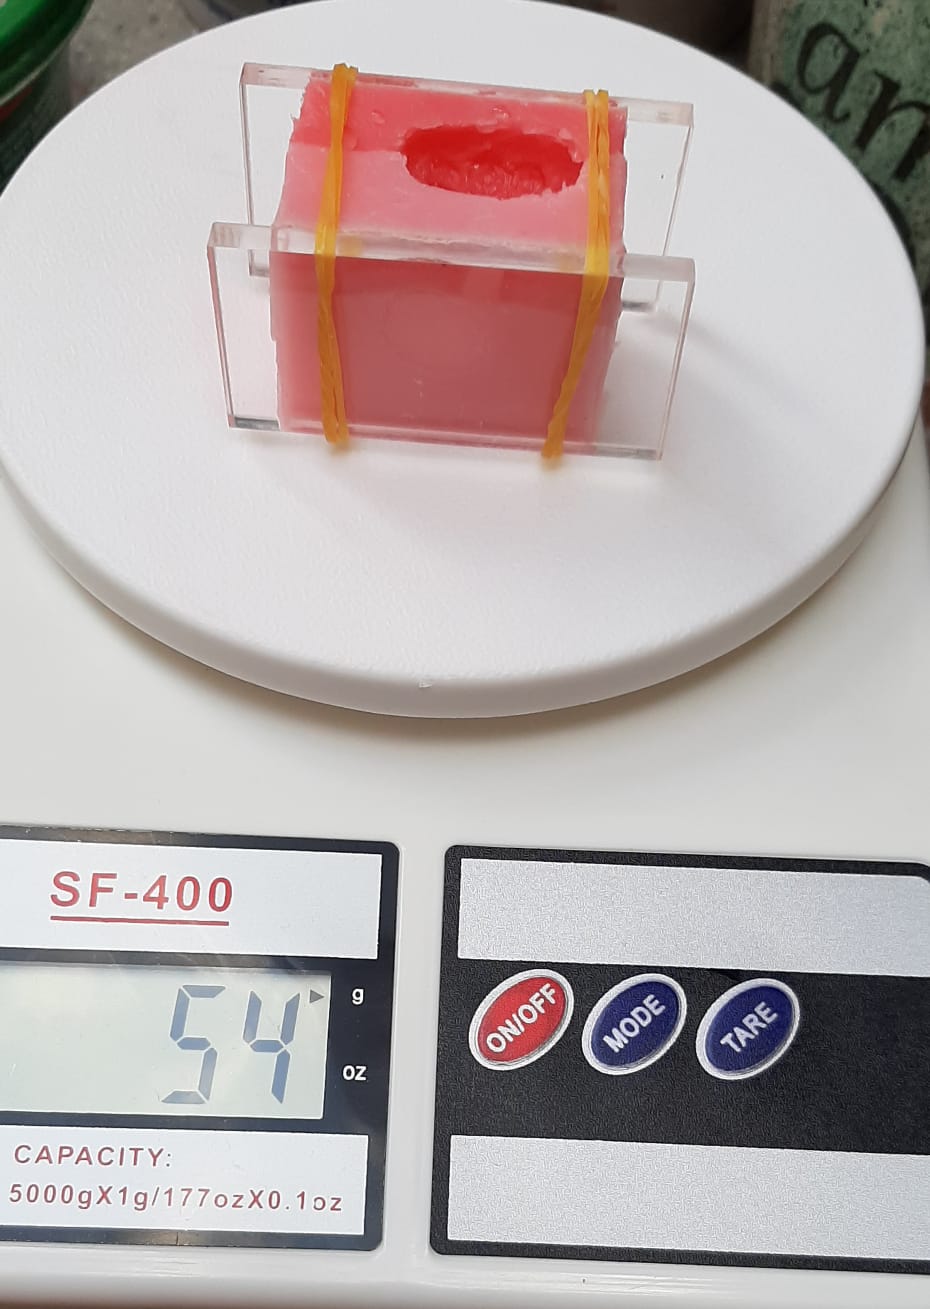
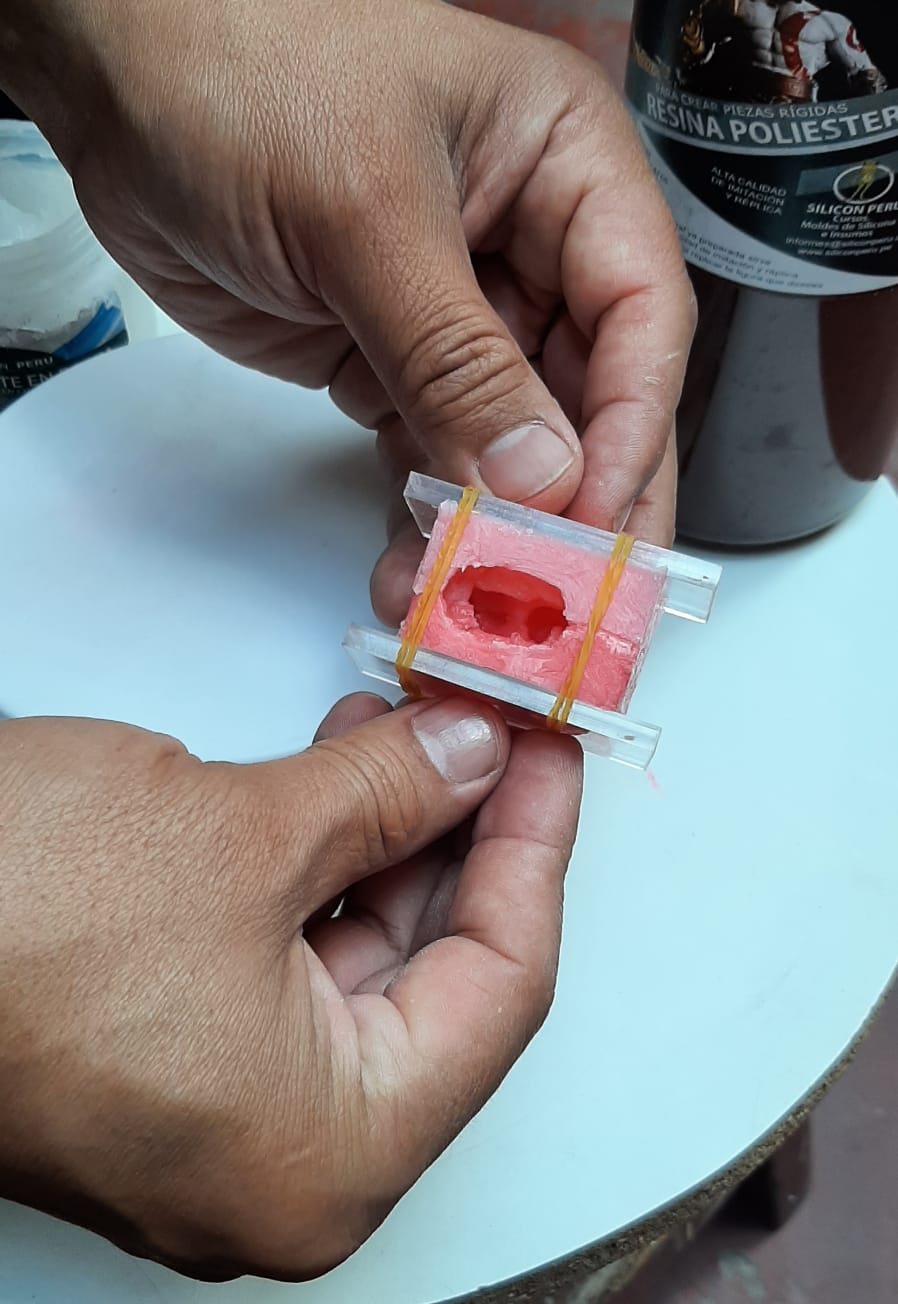
Next, we weigh the whole set with the cavity of the object empty
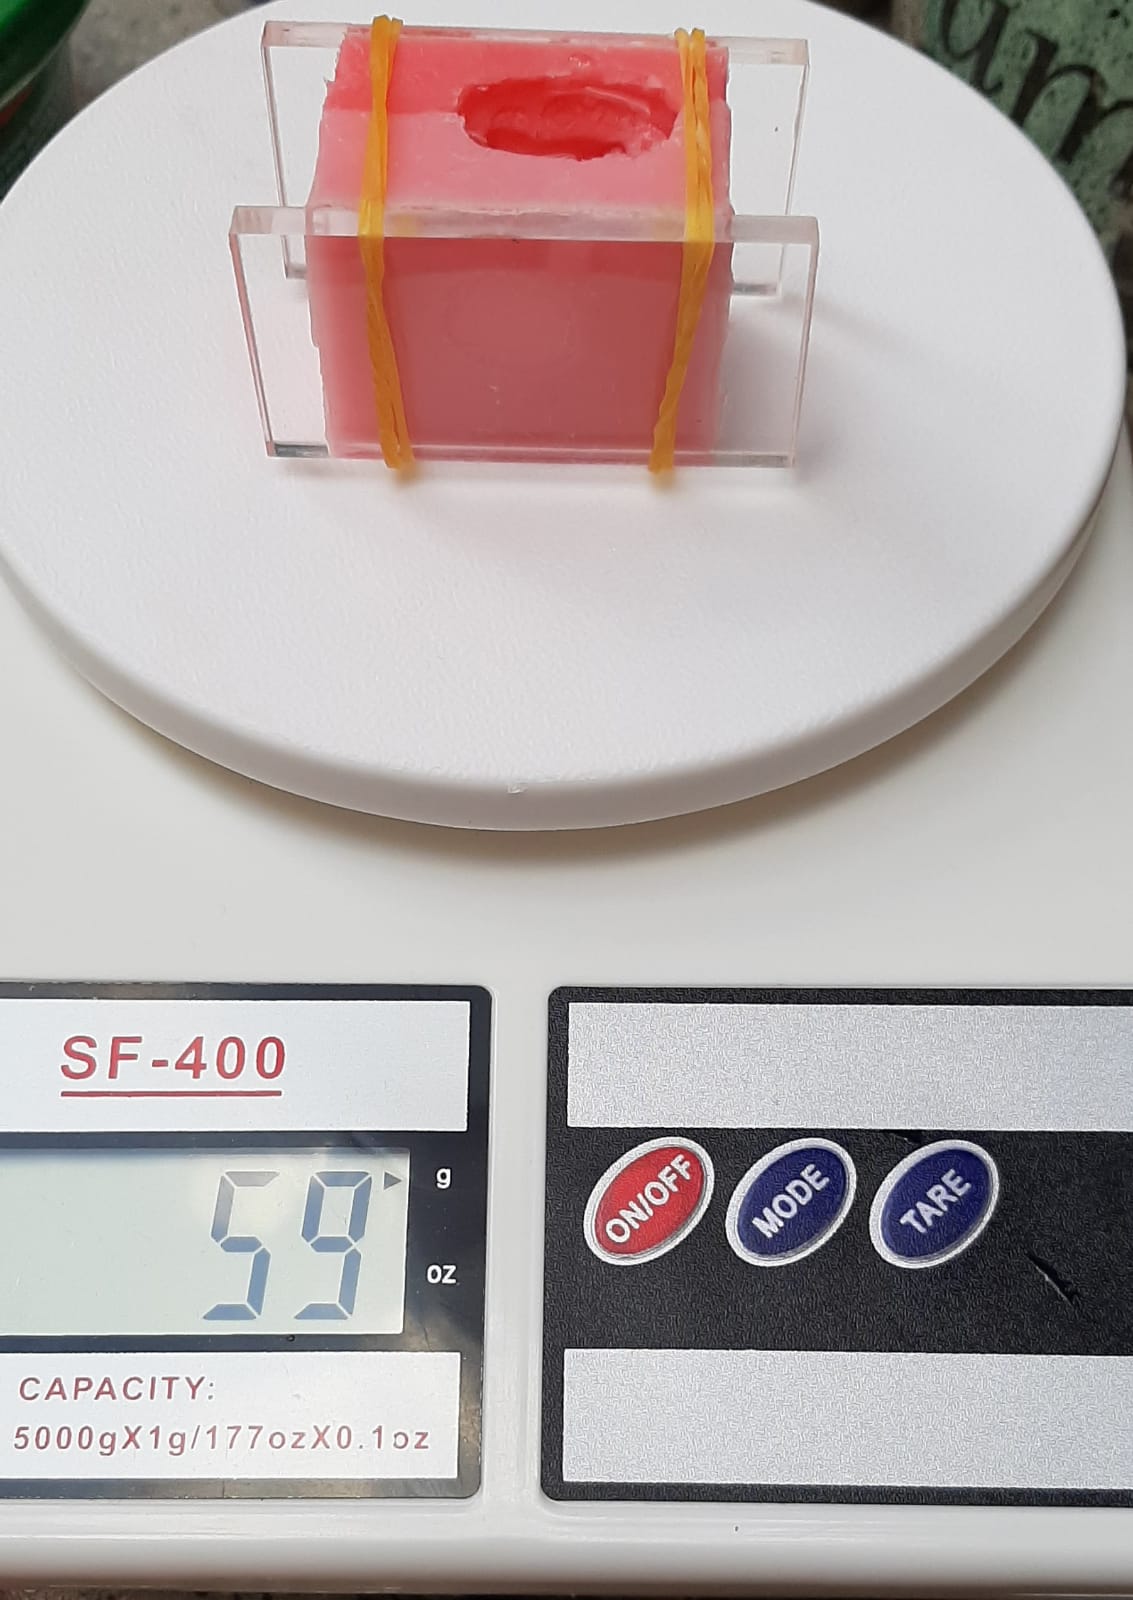
Here, we weigh the entire assembly again, but we fill the cavity of the object with water, to know how much material we must prepare.
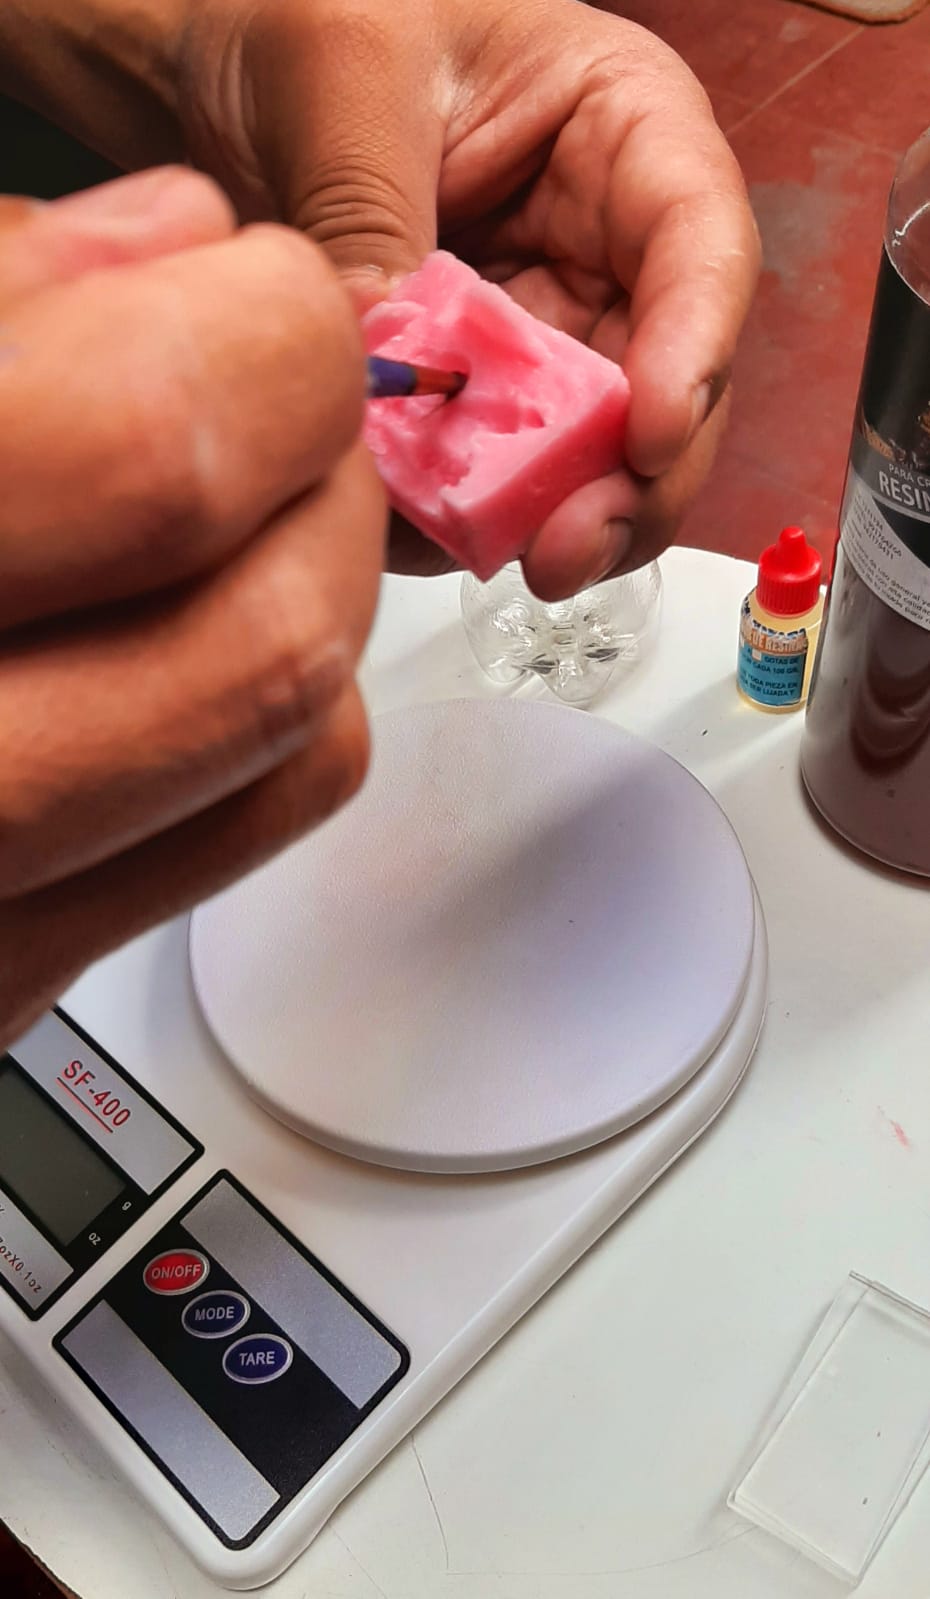
We apply the release grease on both halves of the mold, this time only on the surface of the object to replicate.
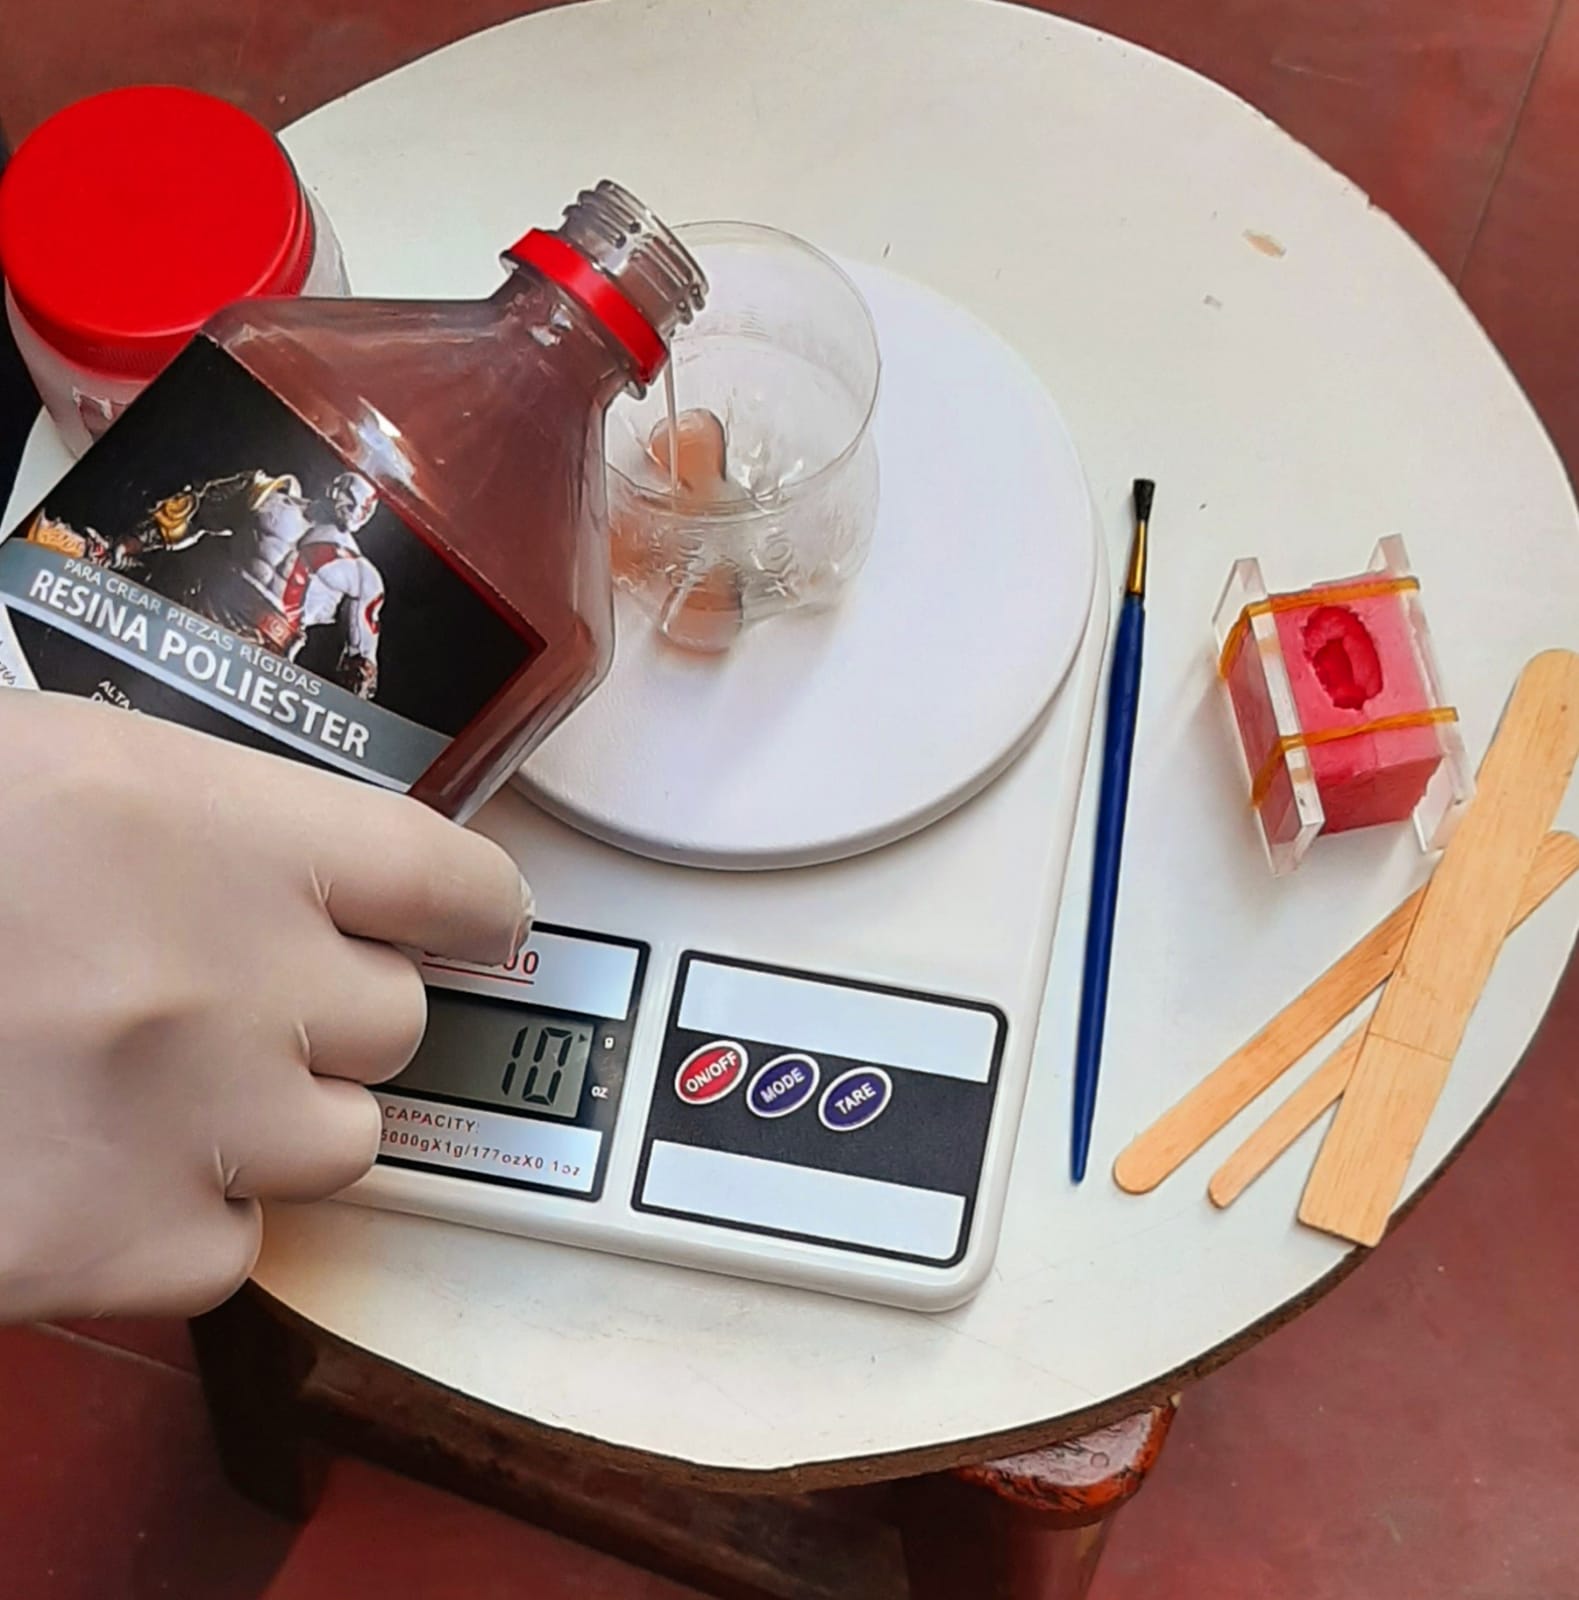
We weigh the necessary polyester resin.

We apply the catalyst for polyester resin.
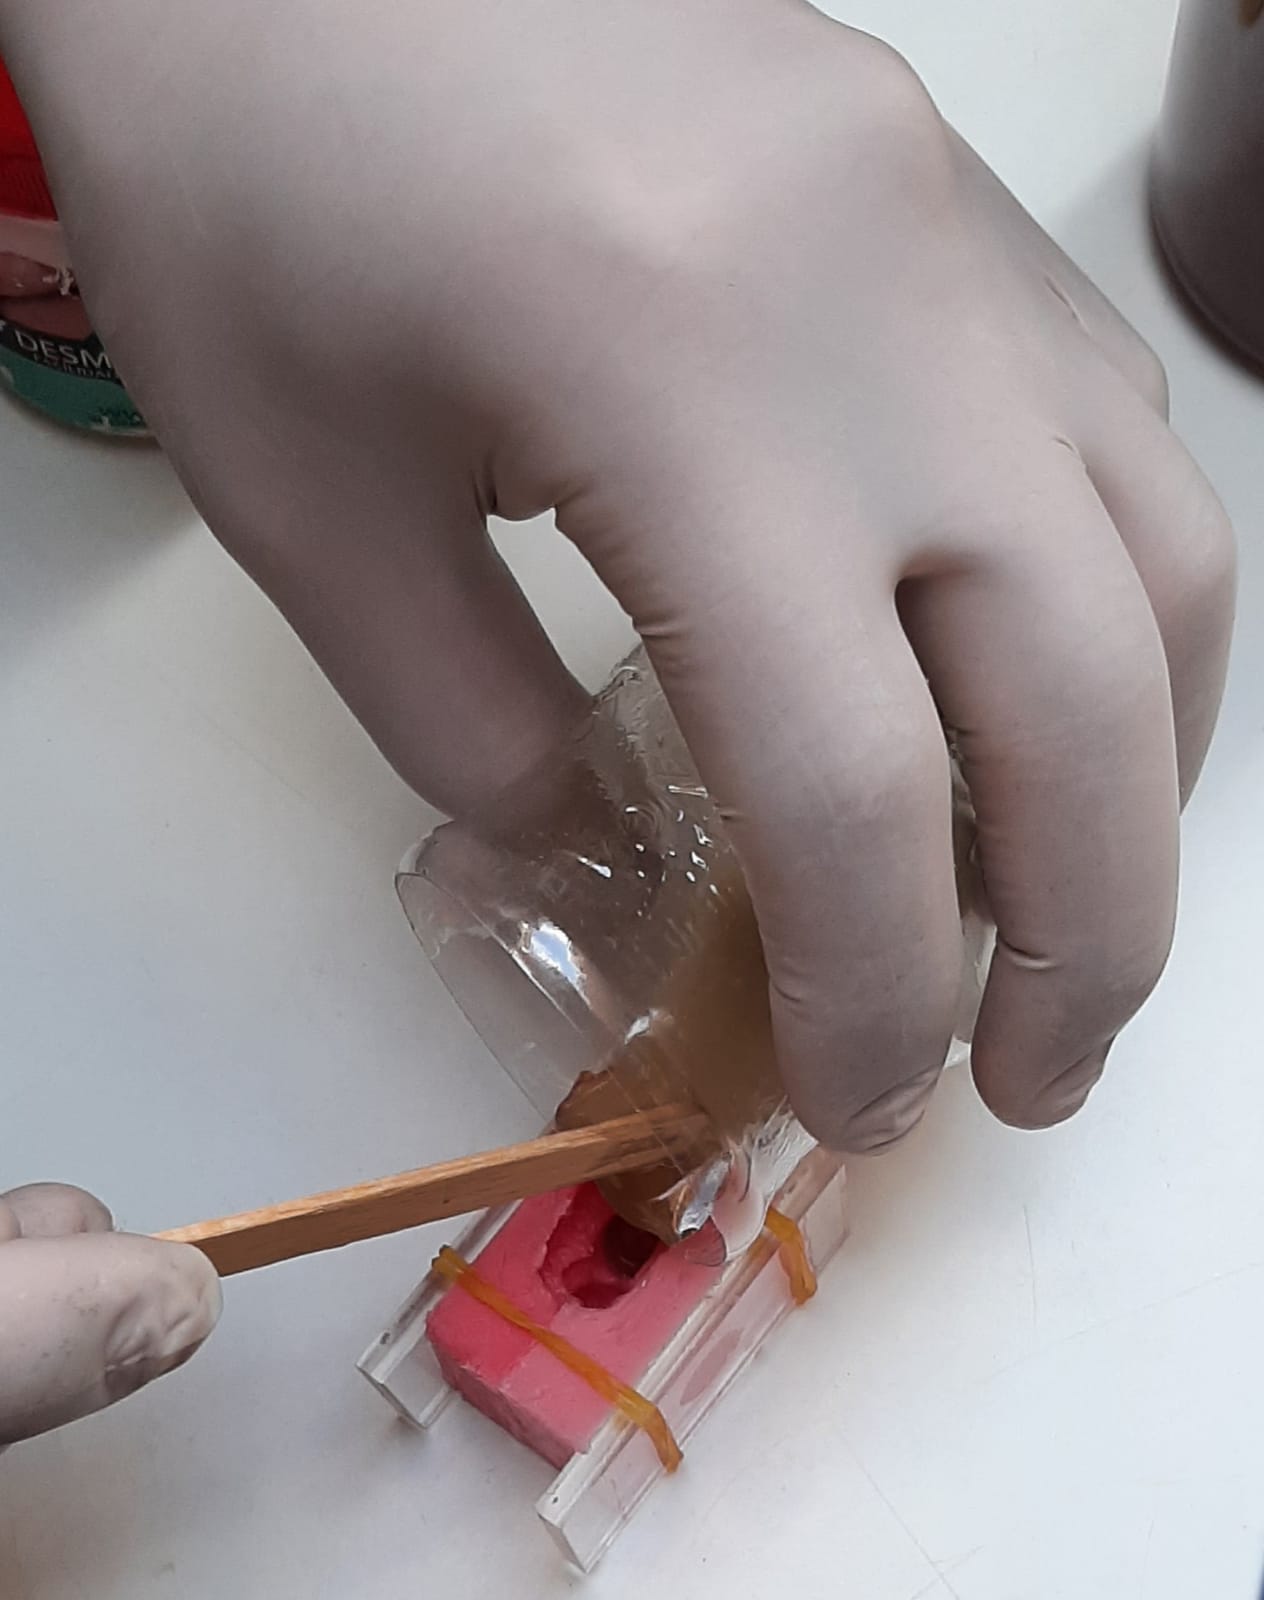
After mixing, we pour the prepared resin into the cavity of the object to replicate it.
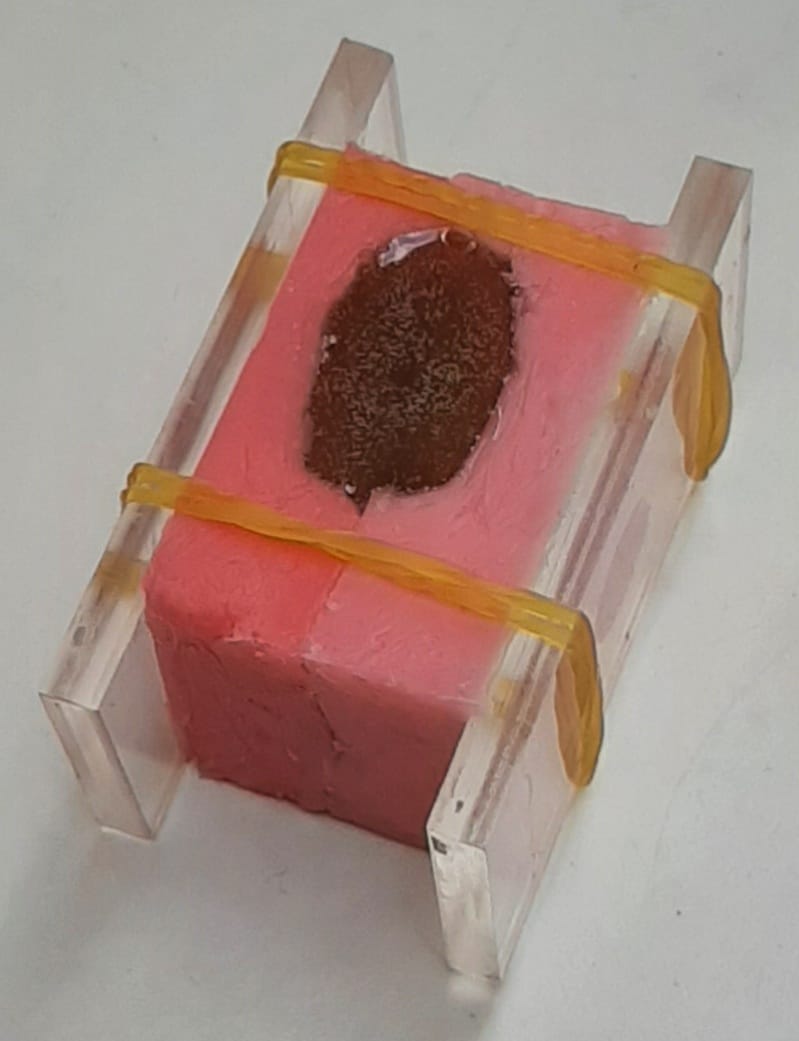
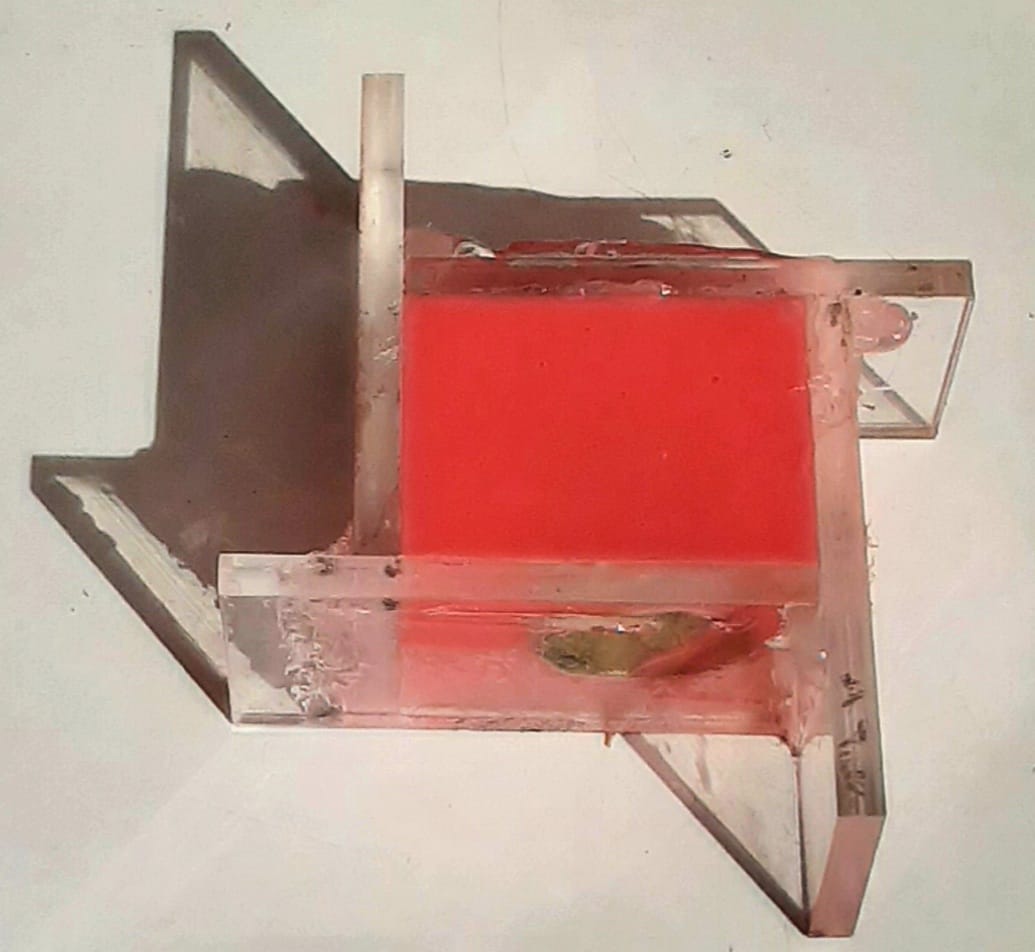
Complete nolde set with the prepared resin still liquid.
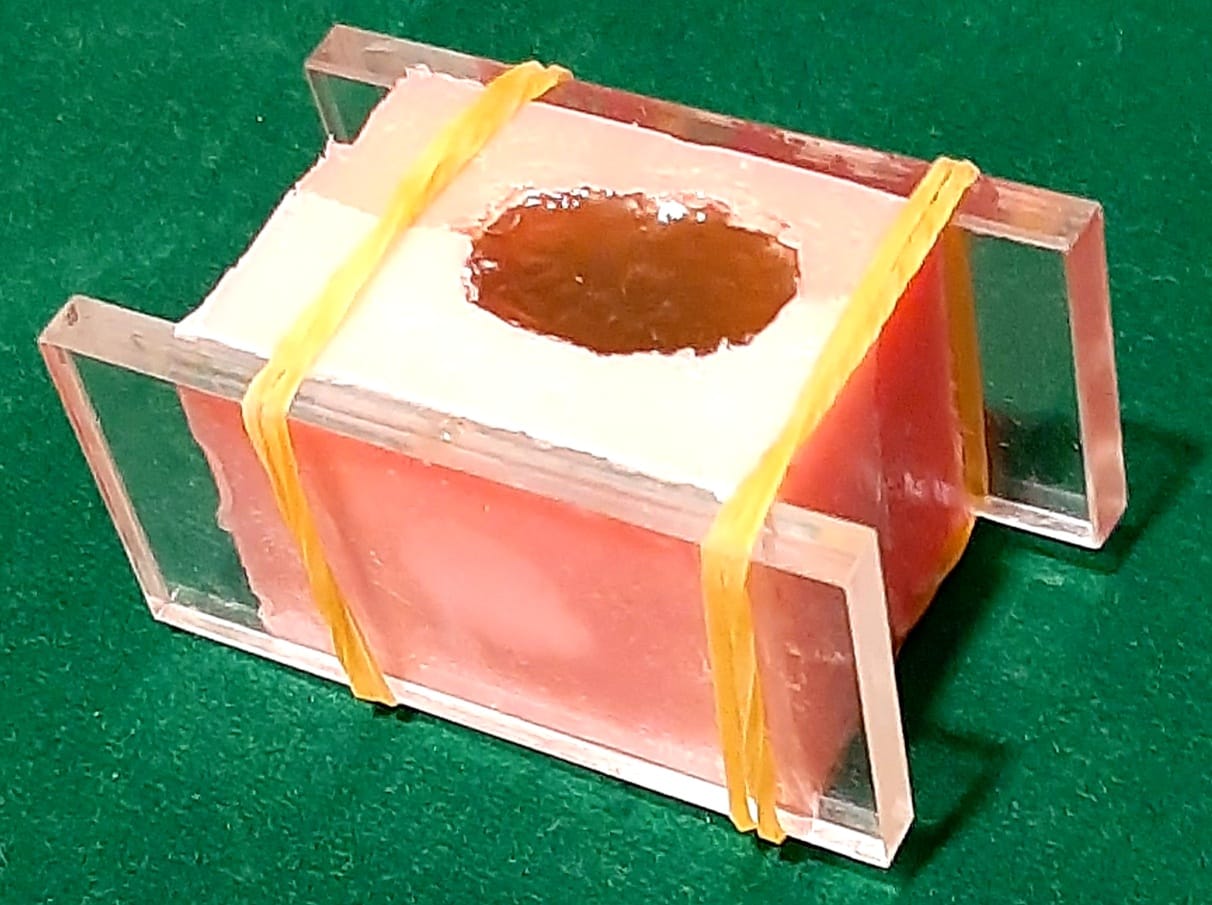
Here, the resin has dried and is ready for demolding.
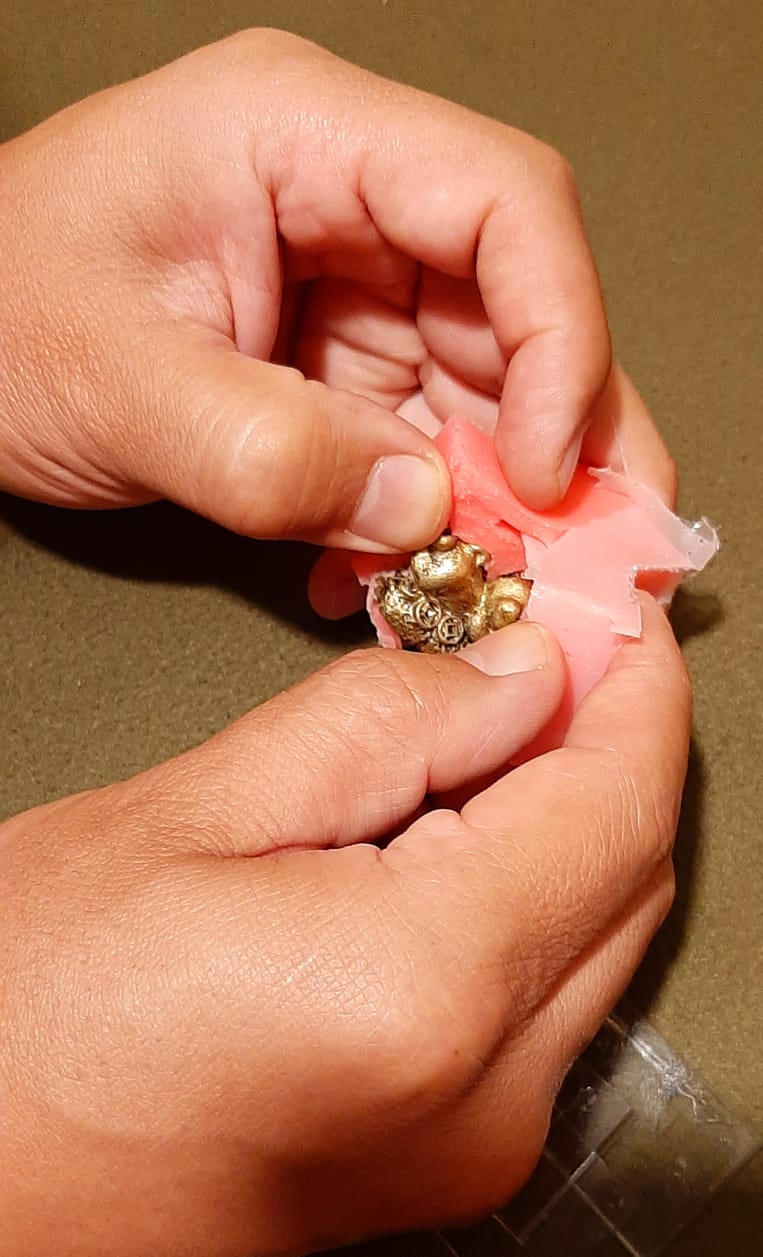
Unmolding the object replicated in polyester resin.
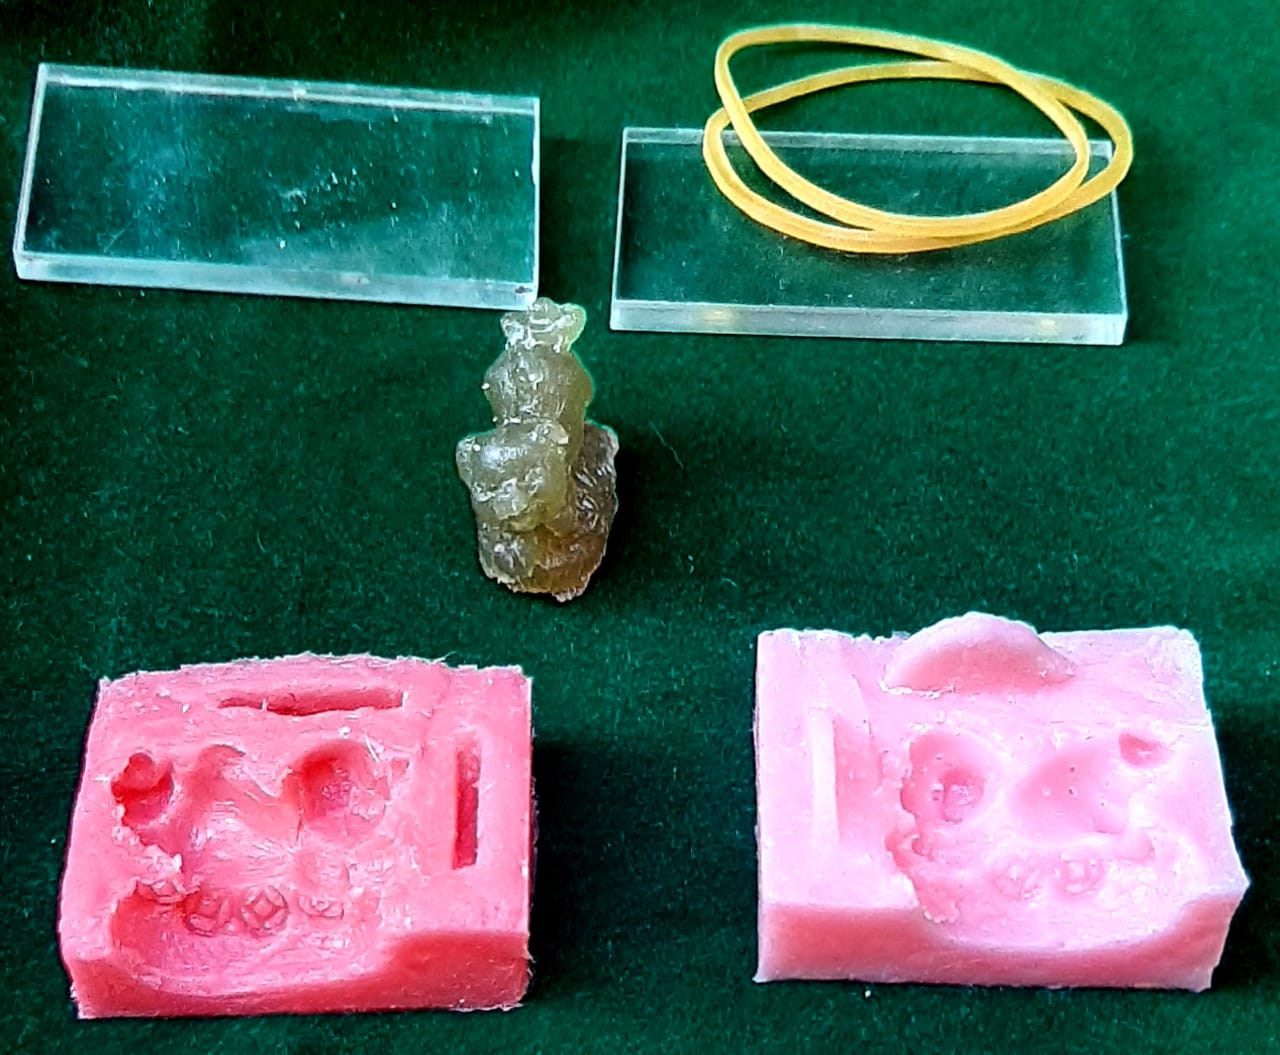
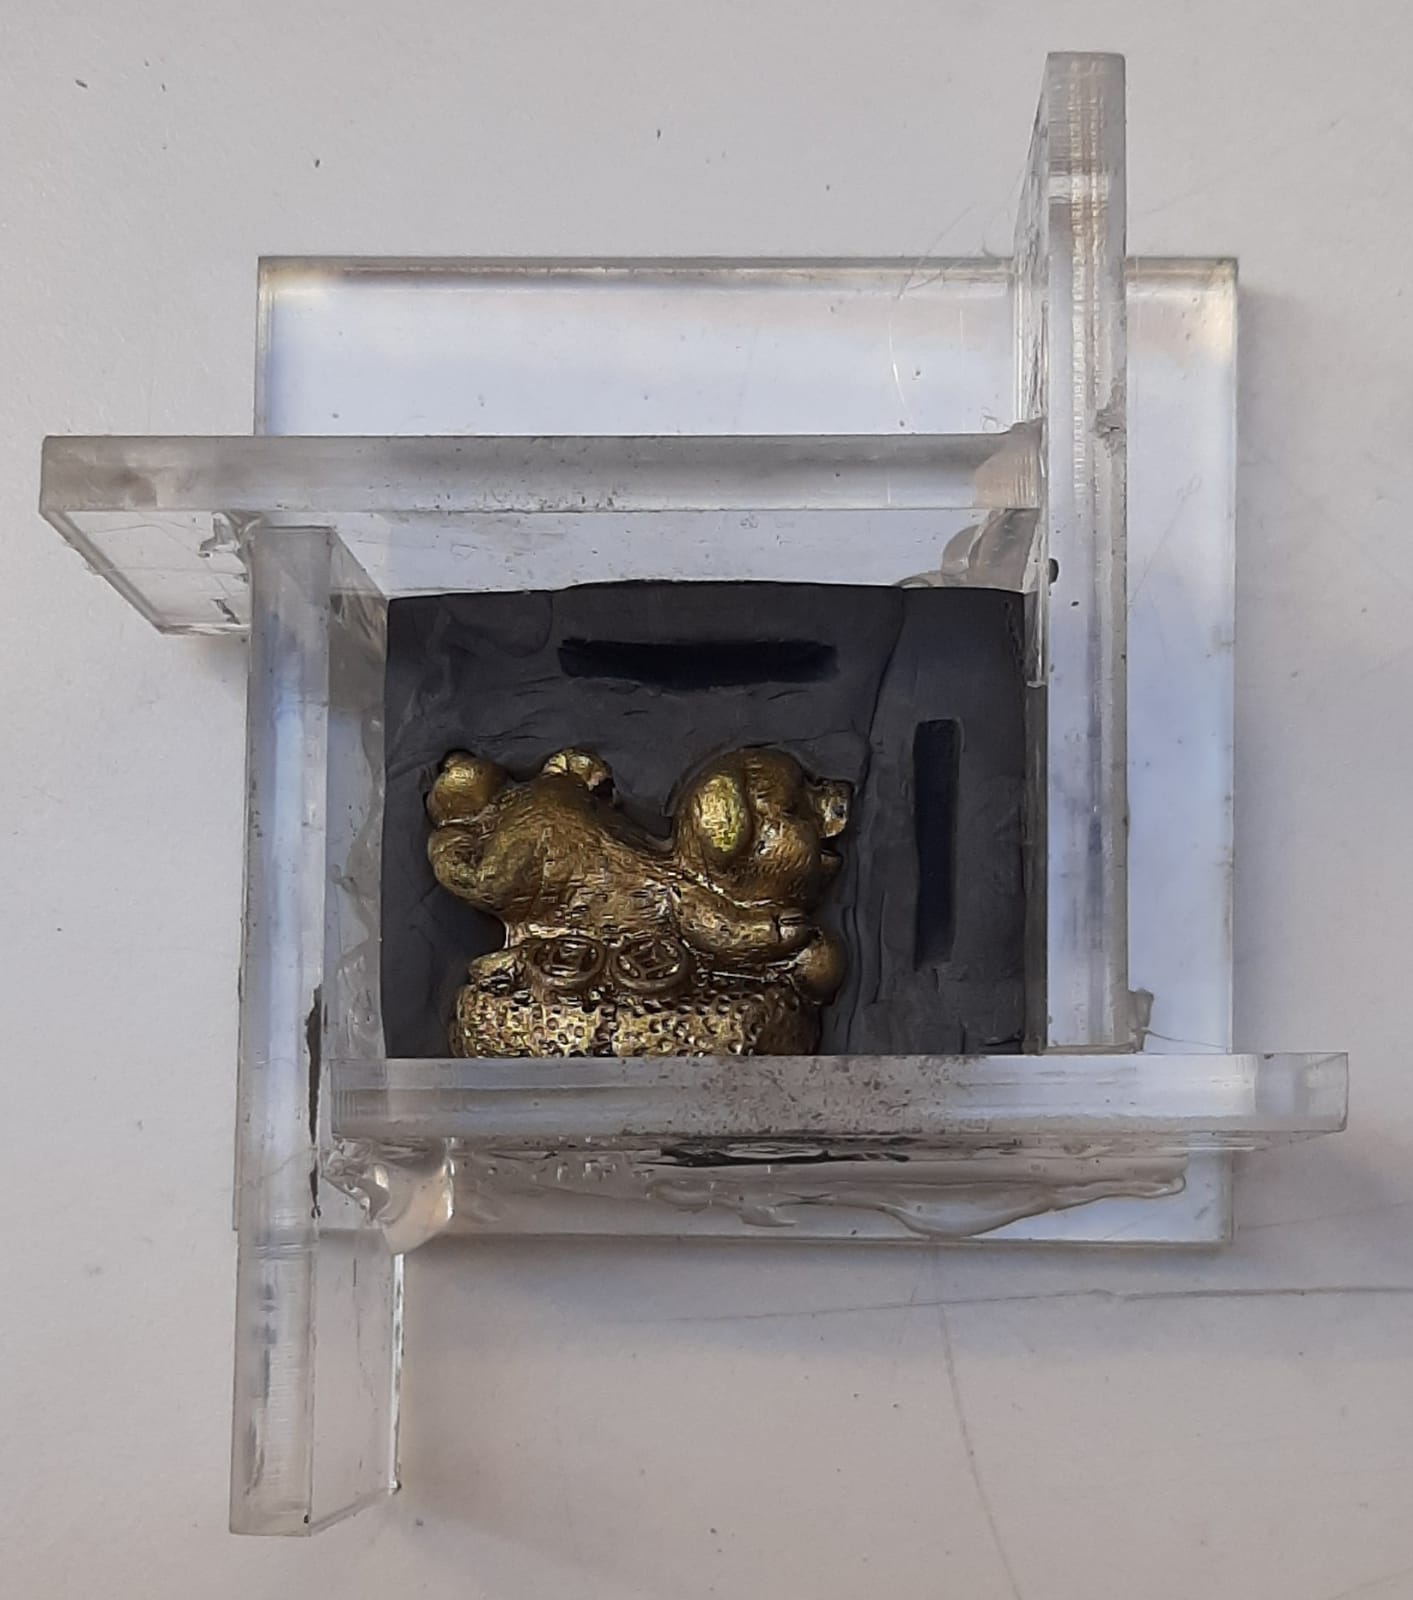
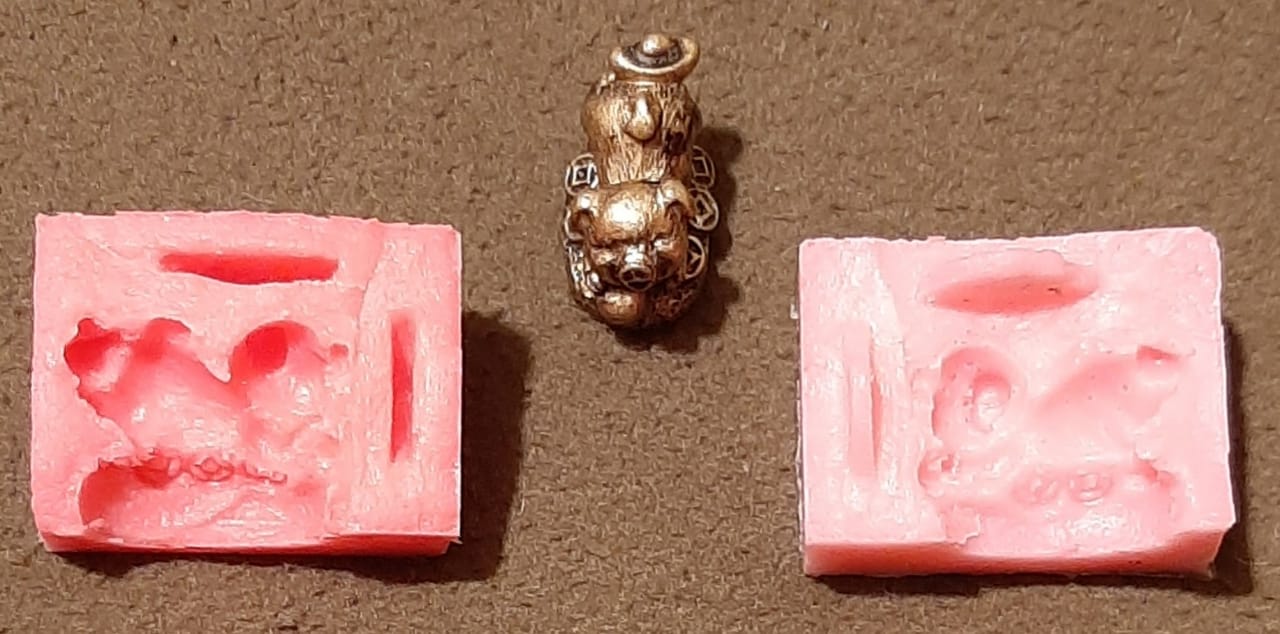
Object replicated in polyester resin and a set of silicone molds.
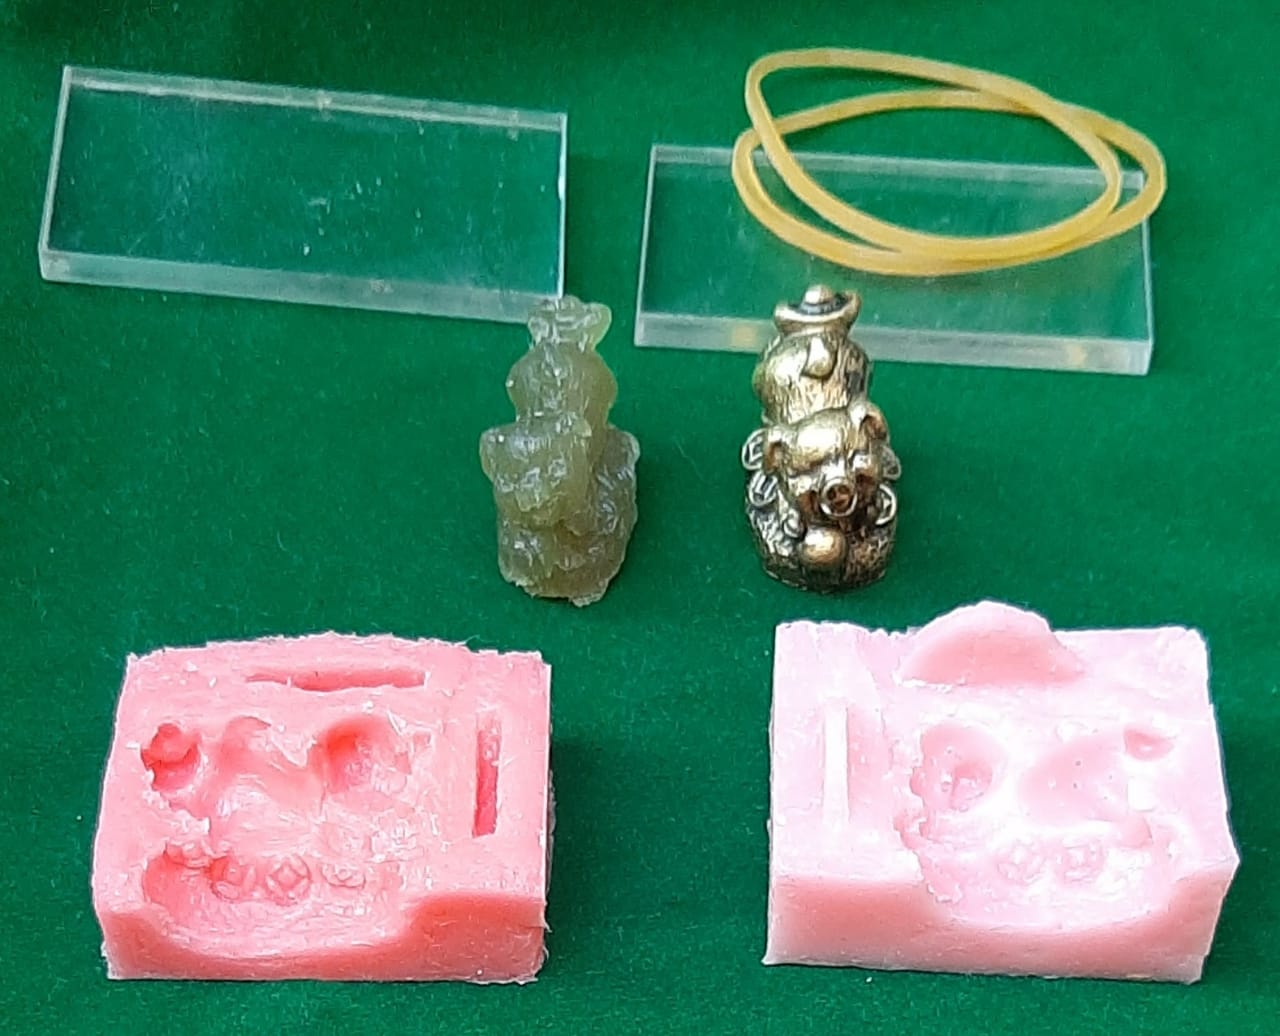
Object replicated in polyester resin together with the original object and a set of silicone molds.
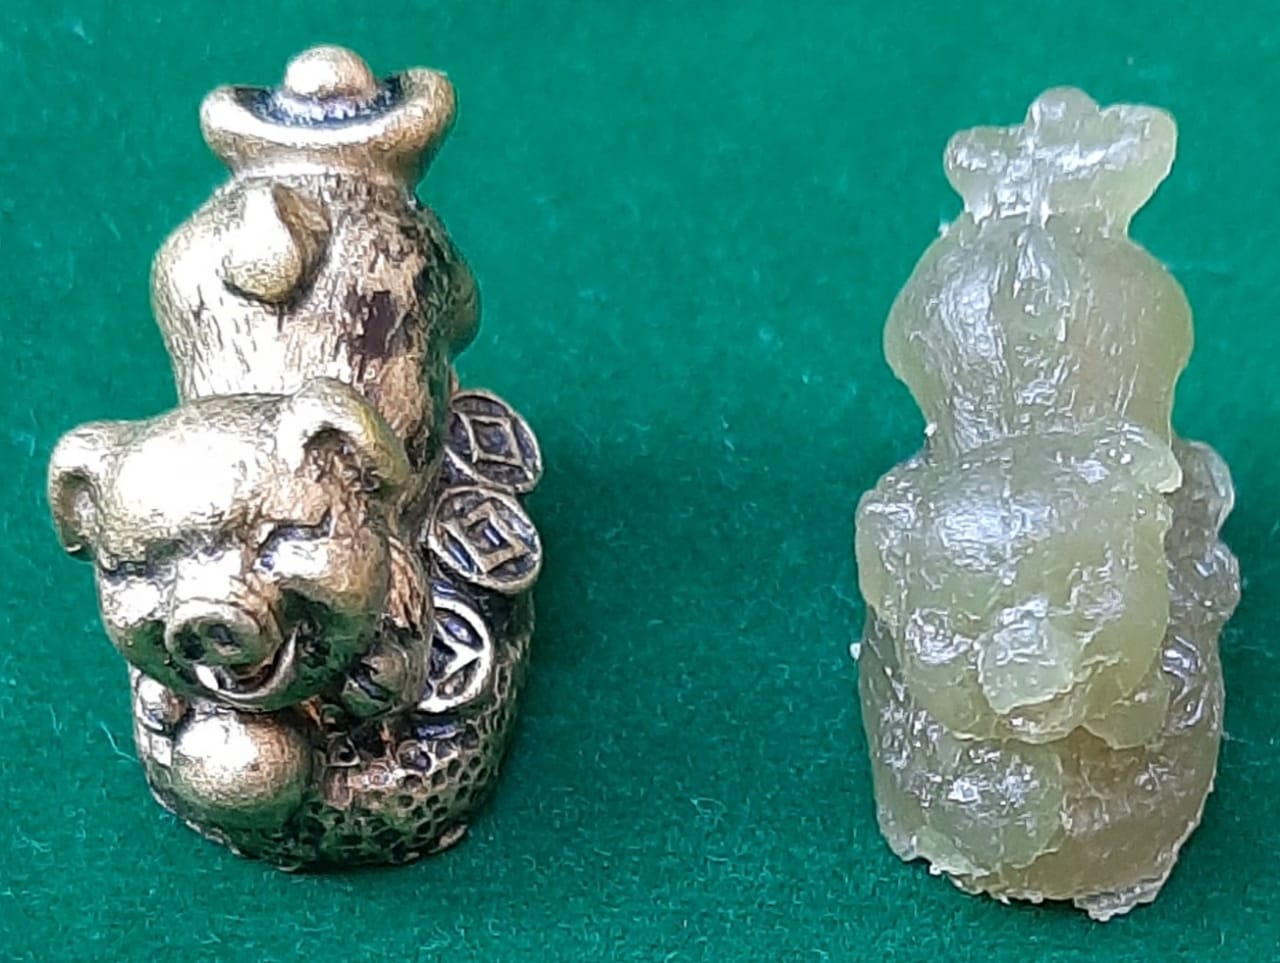
View of the original object and its replica.

Side view of the original object and its replica.
Individual assignment:
Design a mold around the stock and tooling that you’ll be using, mill it (rough cut + three-axis finish cut), and use it to cast parts.
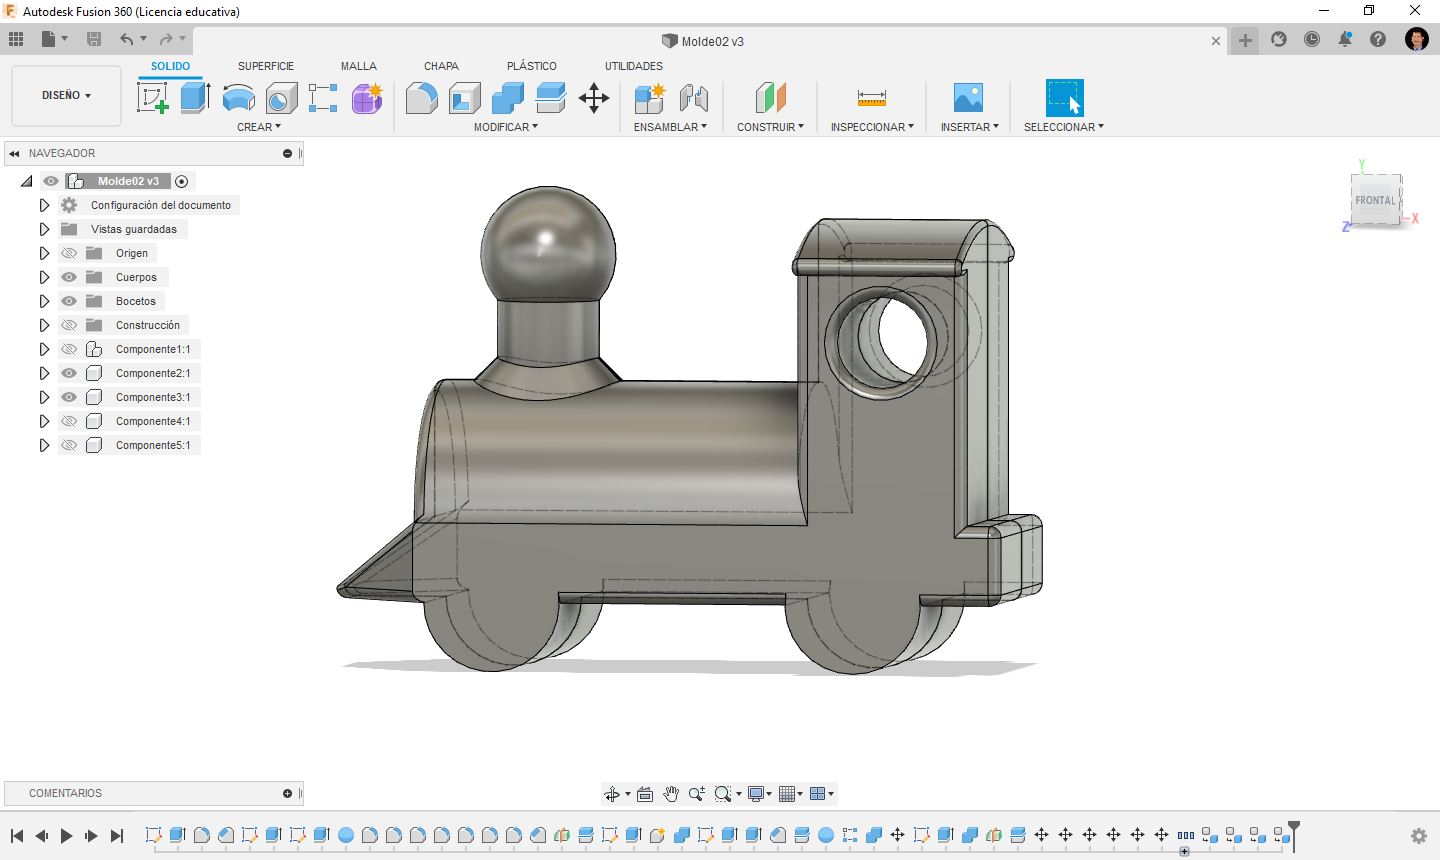
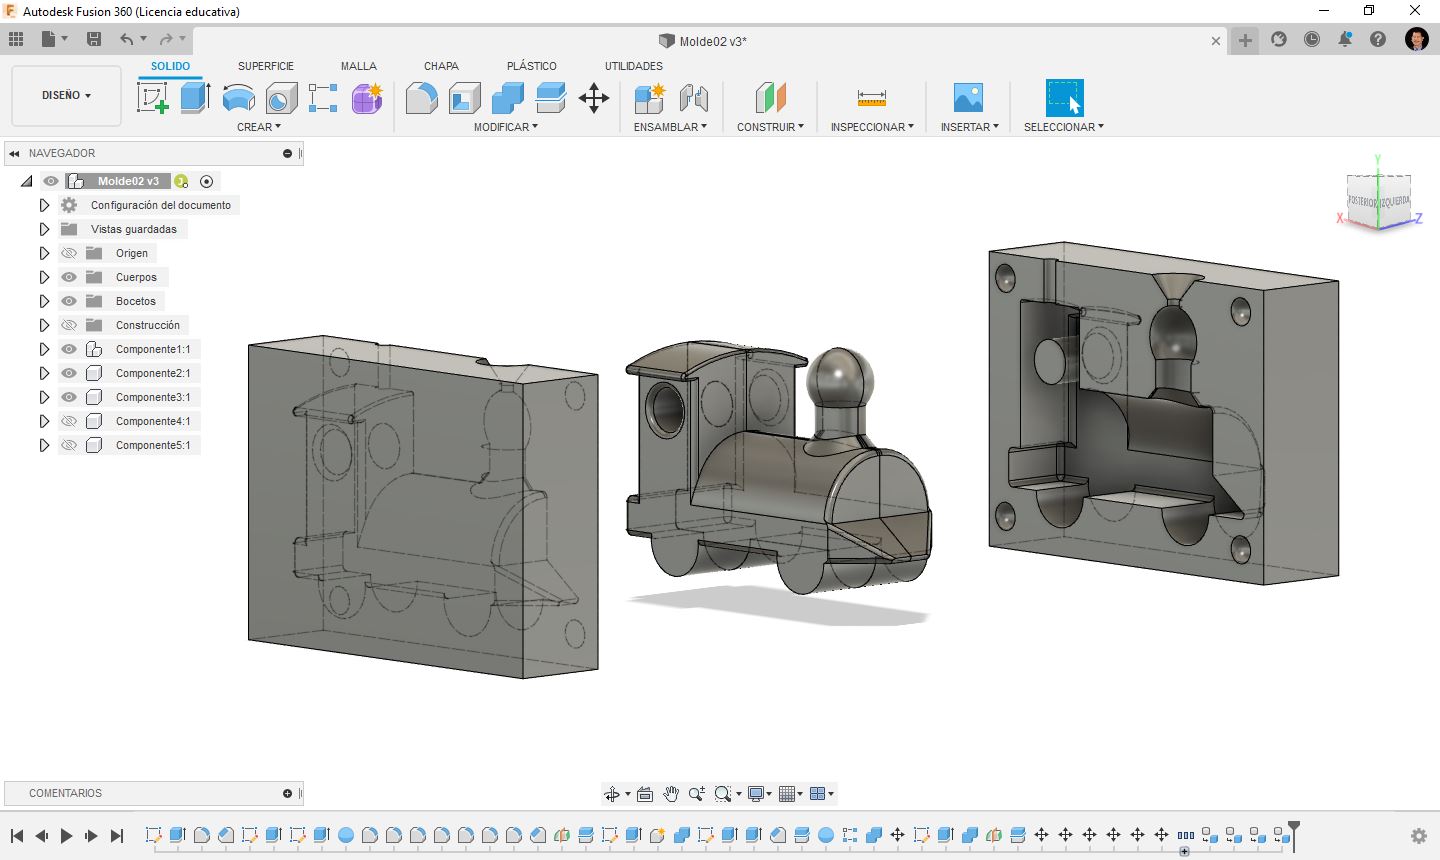
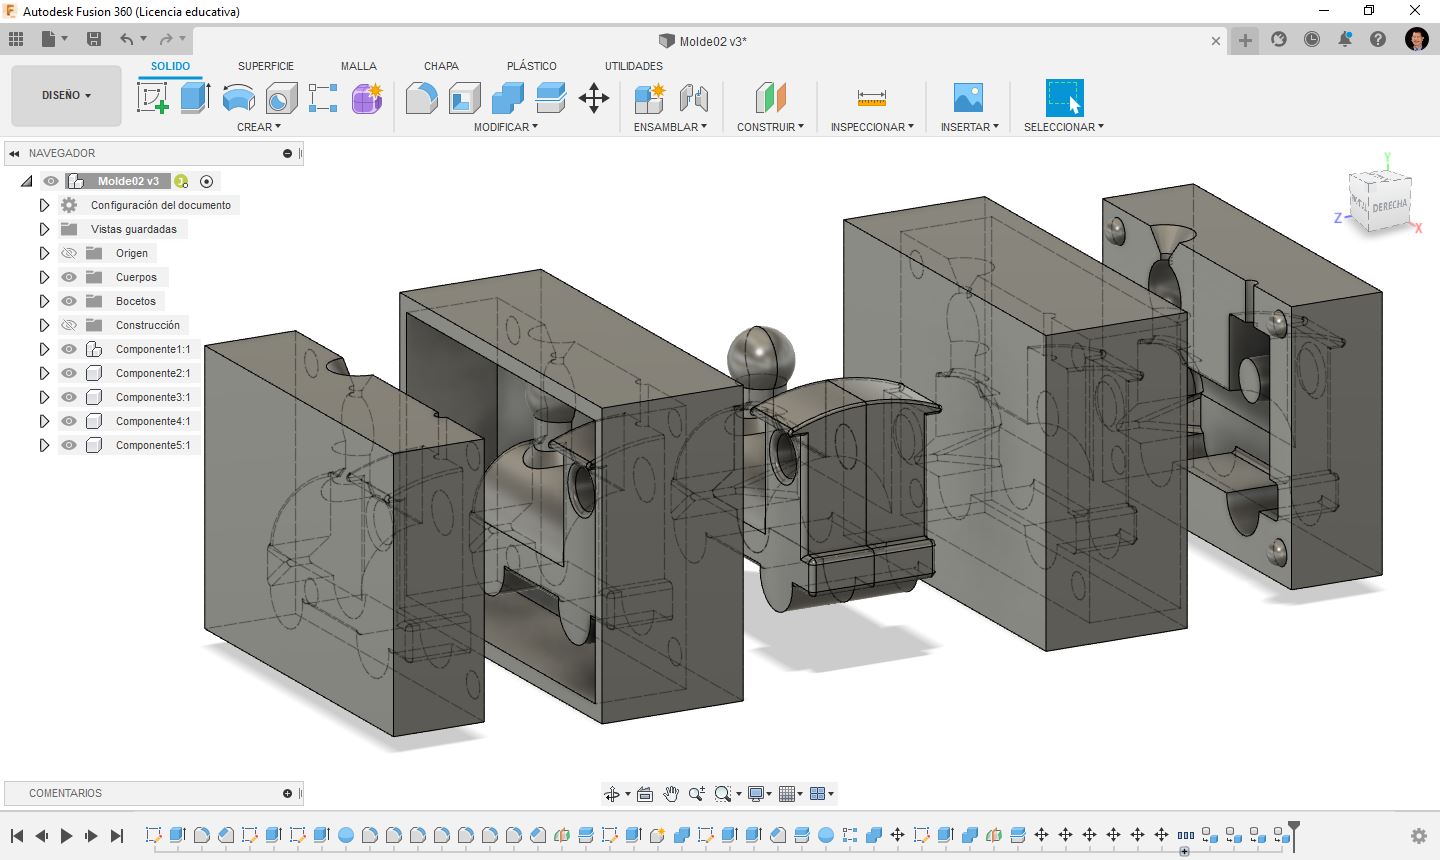
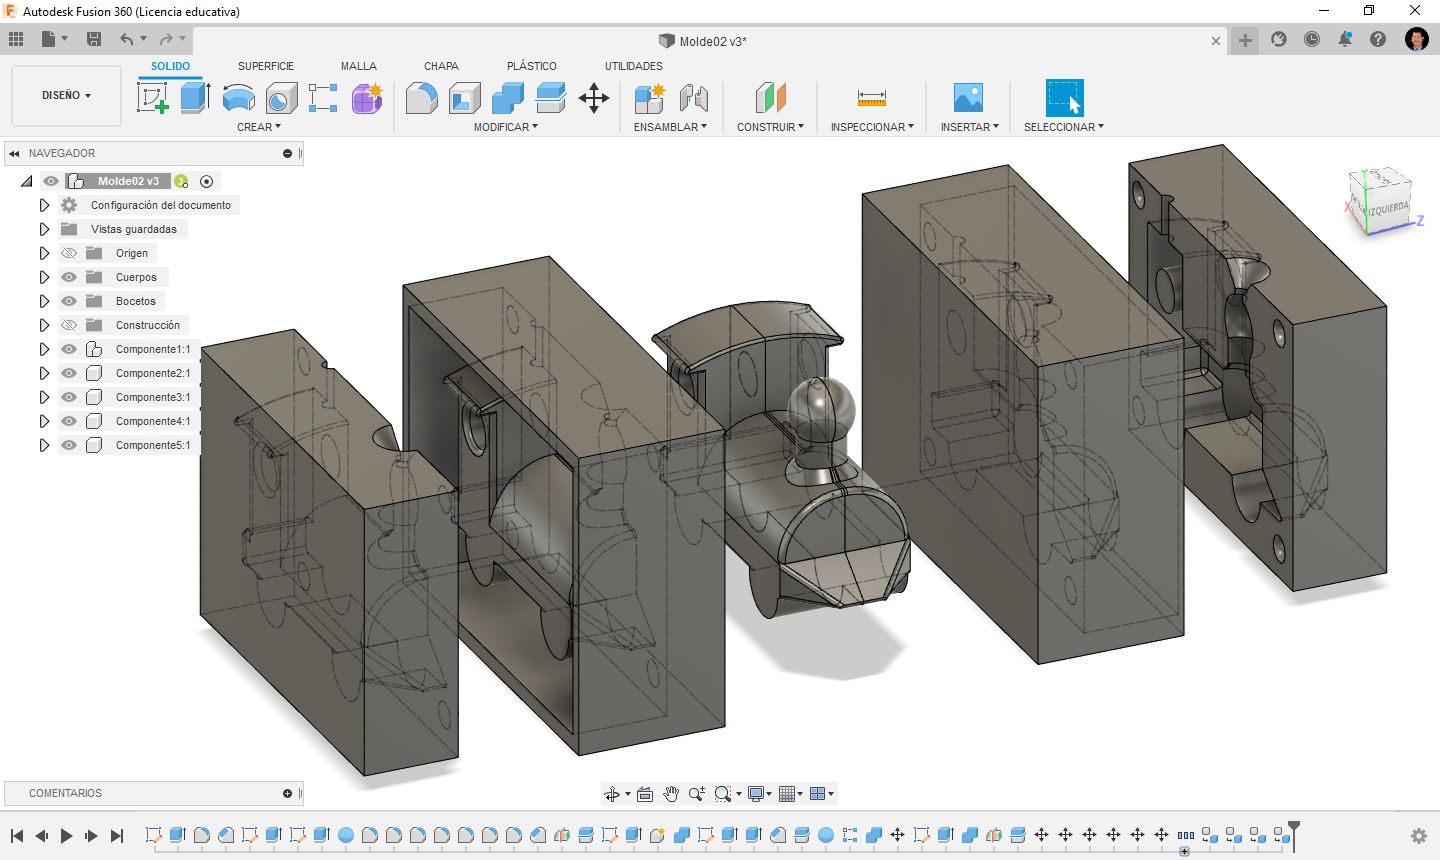
Design a 3D mold.
Object to be made by casting.
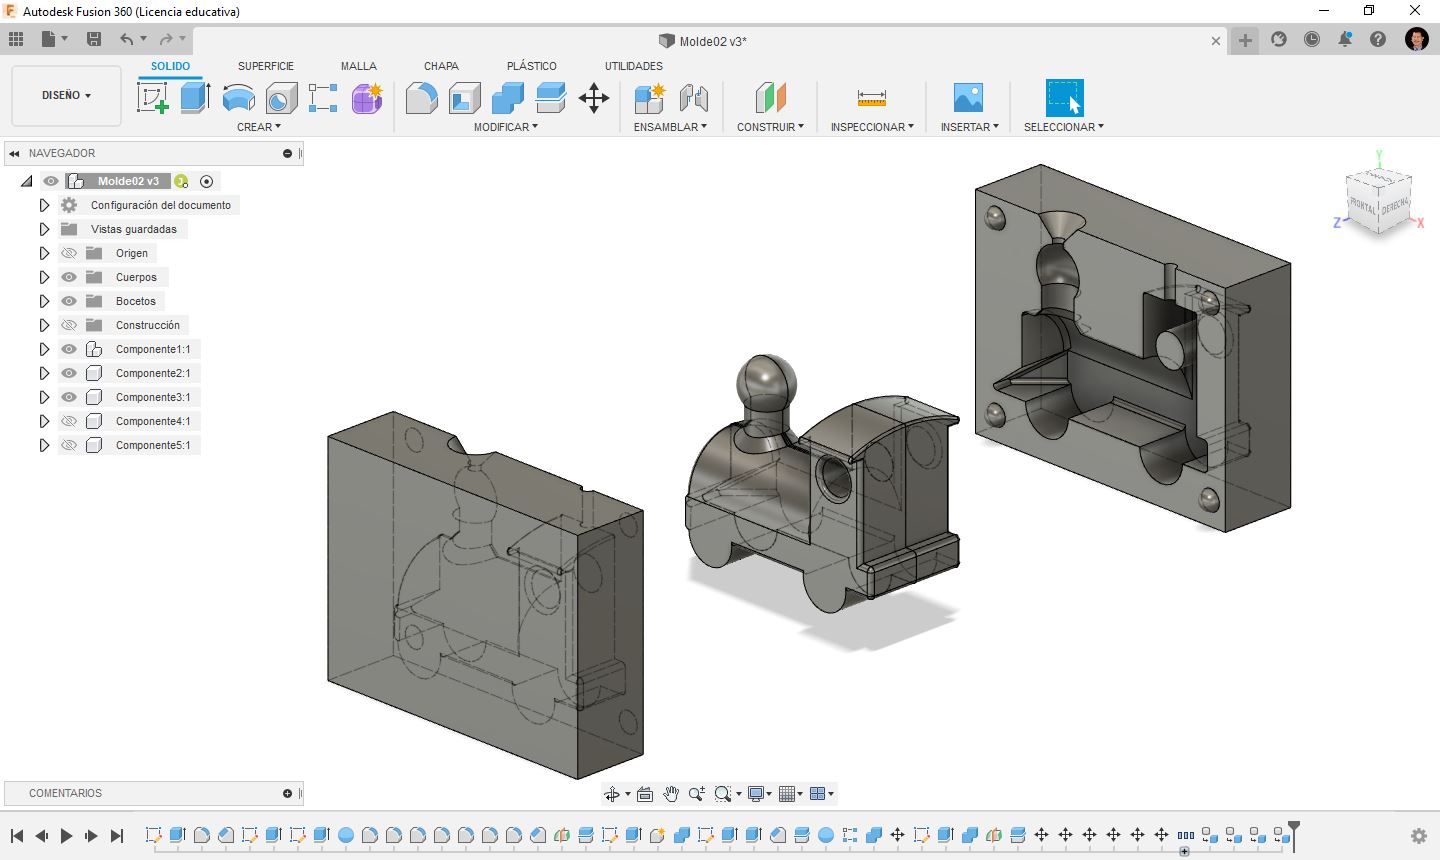
Generation of molds, these molds will be made of silicone
Another view of the molds
Now we generate the molds for the silicone molds, these molds will be machined in paraffin
Another view of the molds that will be machined in paraffin
Animated view of the molds generated from the object to be cast
Mold Making
Rough Cut
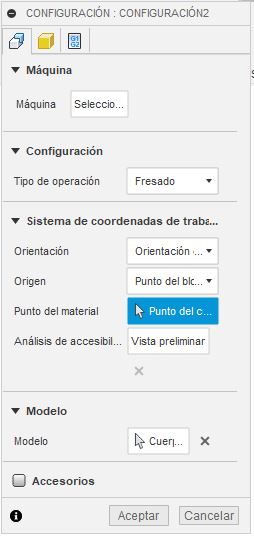
Origin Point Settings
Spindle speed setting, cutting, etc.

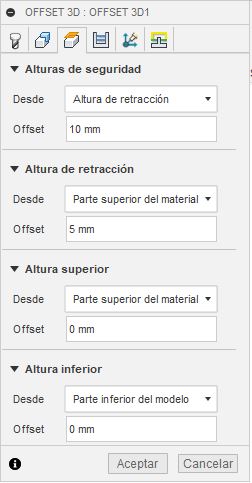
Material and tool heights
Depth of each pass
Way of entering the material
roughing of the paraffin to level the upper face of the material
Three-axis finish cut
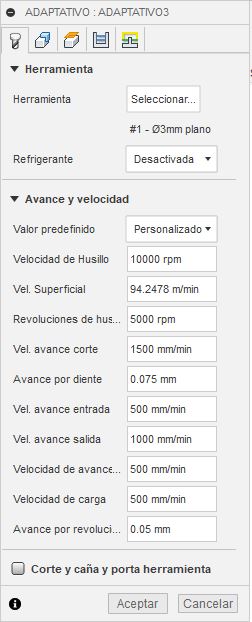
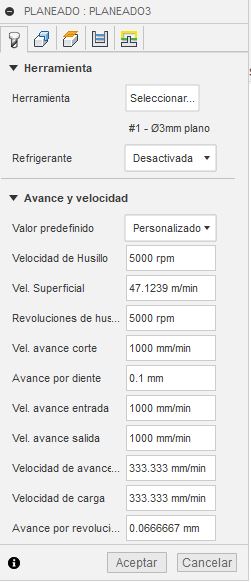
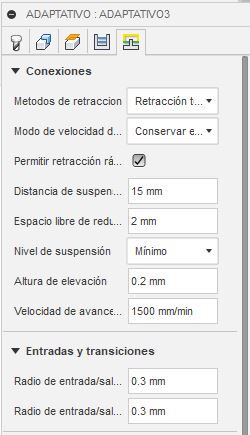
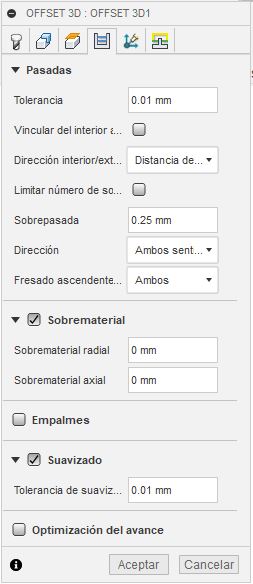
Selection and configuration of start point and speeds for adaptive milling tool

Setting of material and tool heights
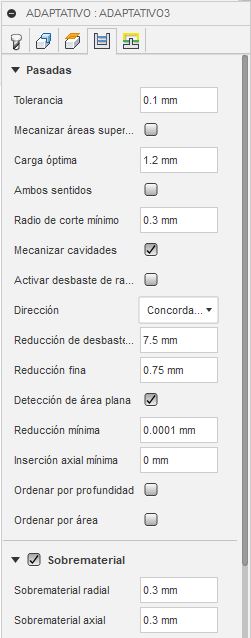
Setting the number of passes
Setting the material input mode
Milling of the mold in paraffin
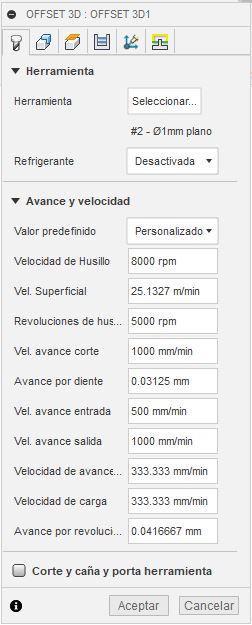
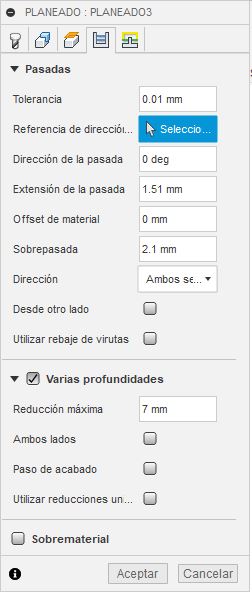
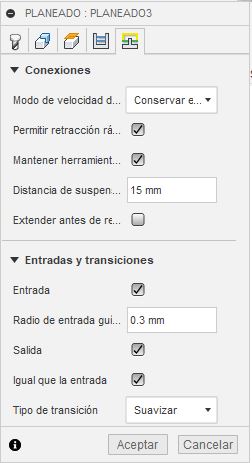
Selection and configuration of starting point and speeds for the finishing tool
Height settings for the tool
Pass settings and smoothing
End milling, with fine tool
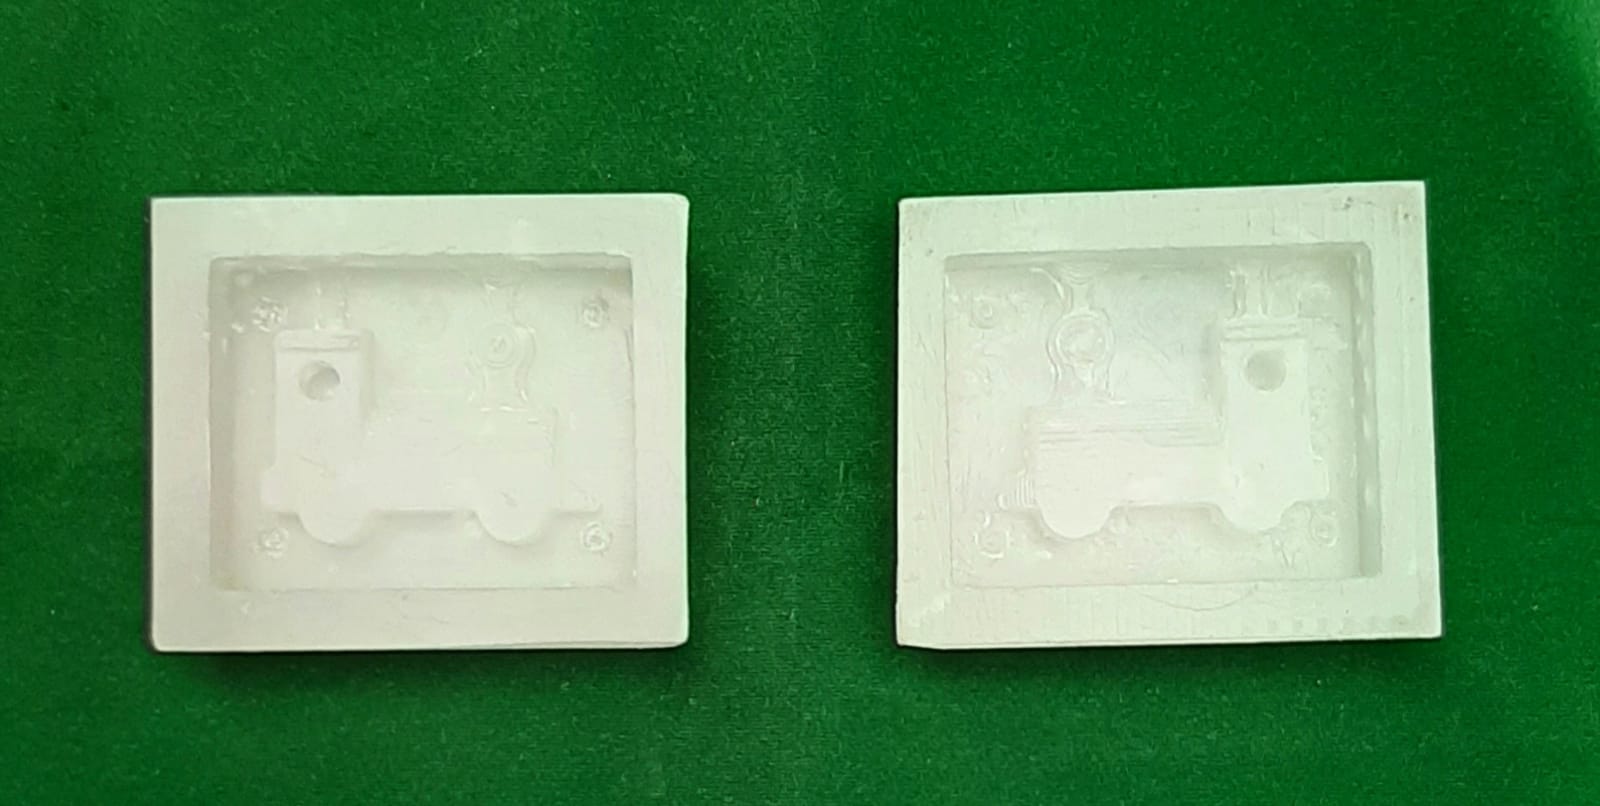
paraffin molds in two
Silicone mold casting
Silicone mold casting process
Unmolding the silicone mold
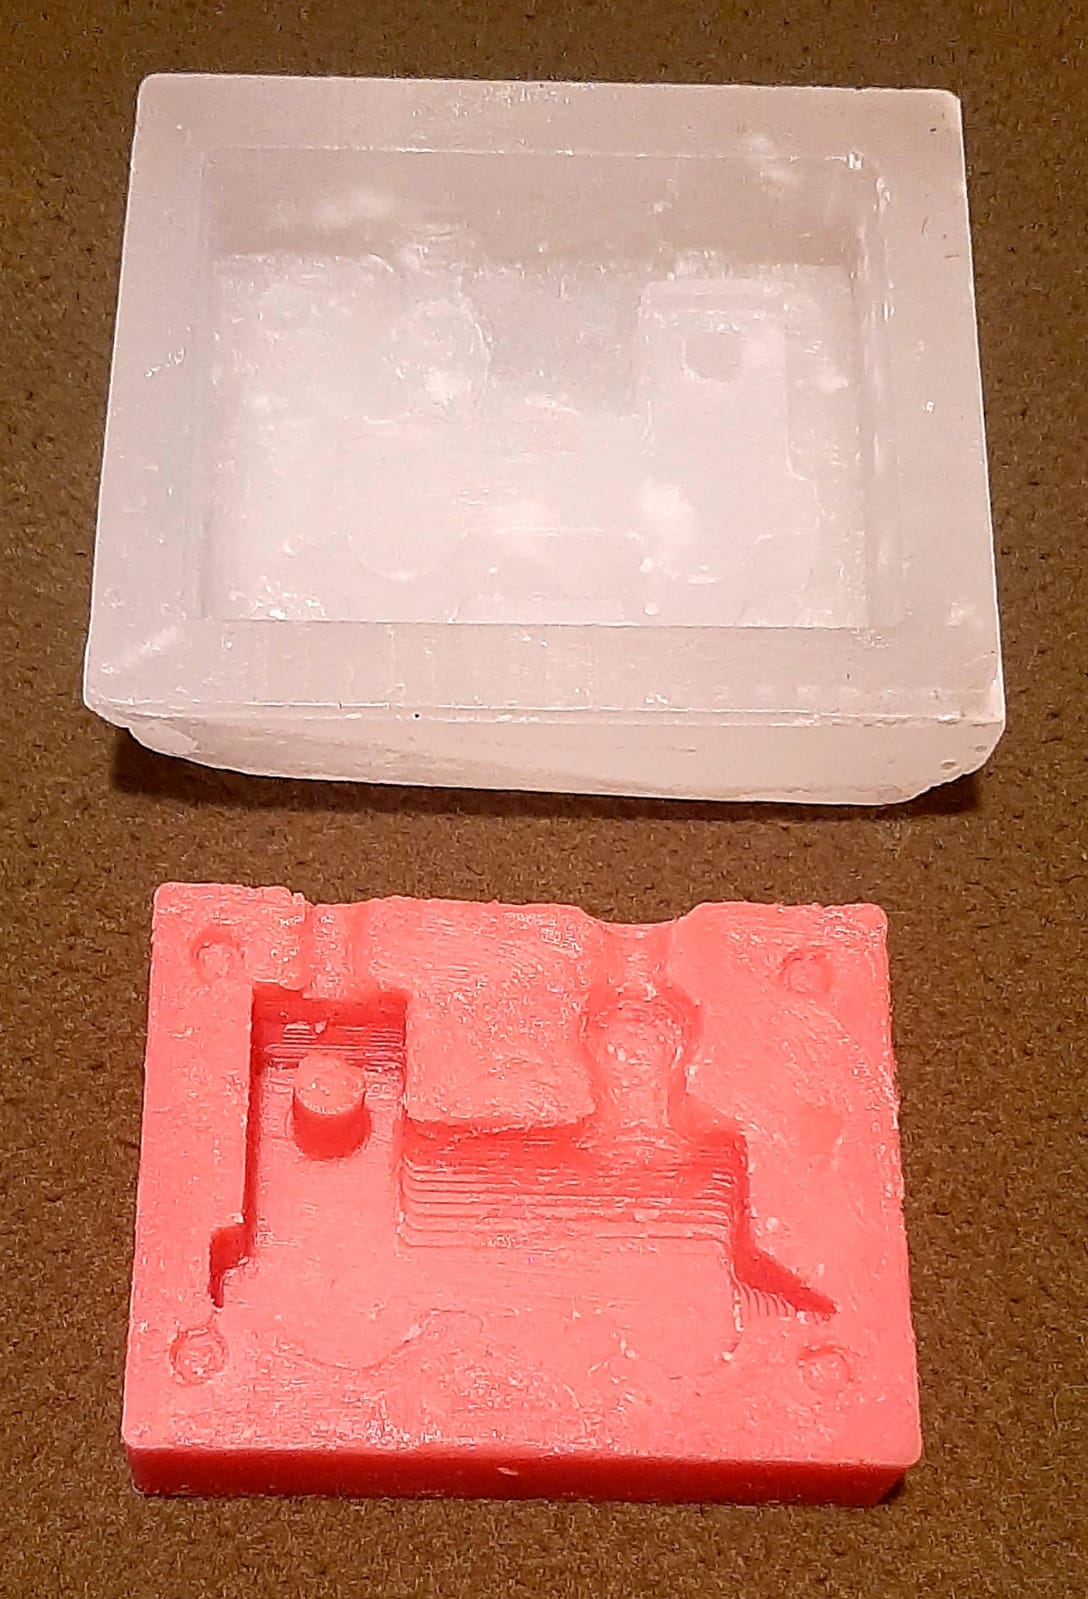
Paraffin mold and silicone mold
Unmolding the another silicone mold
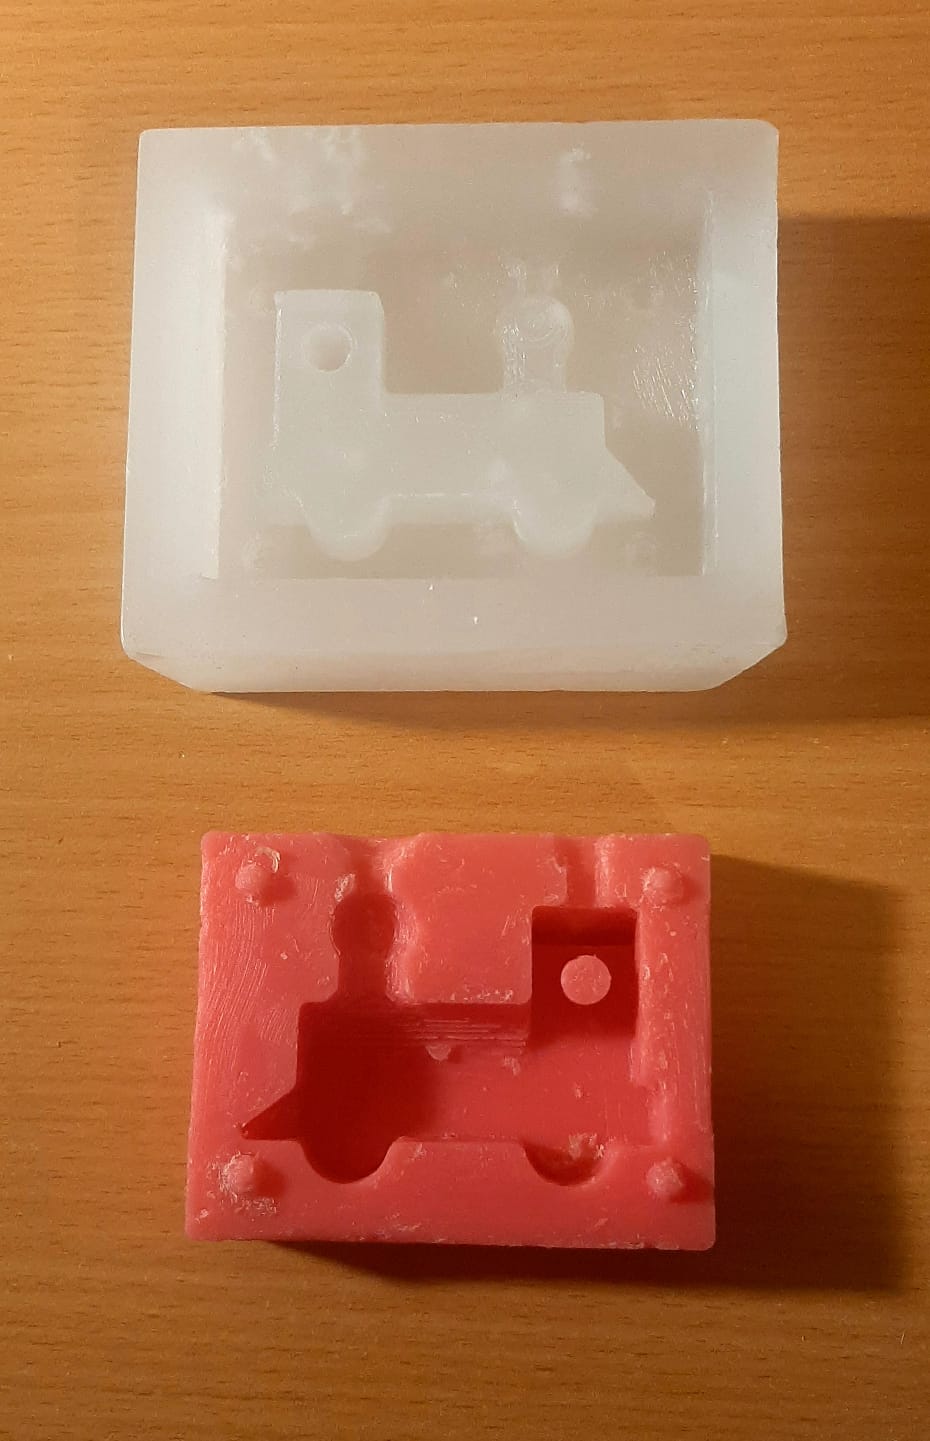
The other half, paraffin and silicone mold
Casting of the final piece in resin
Casting process of the final object
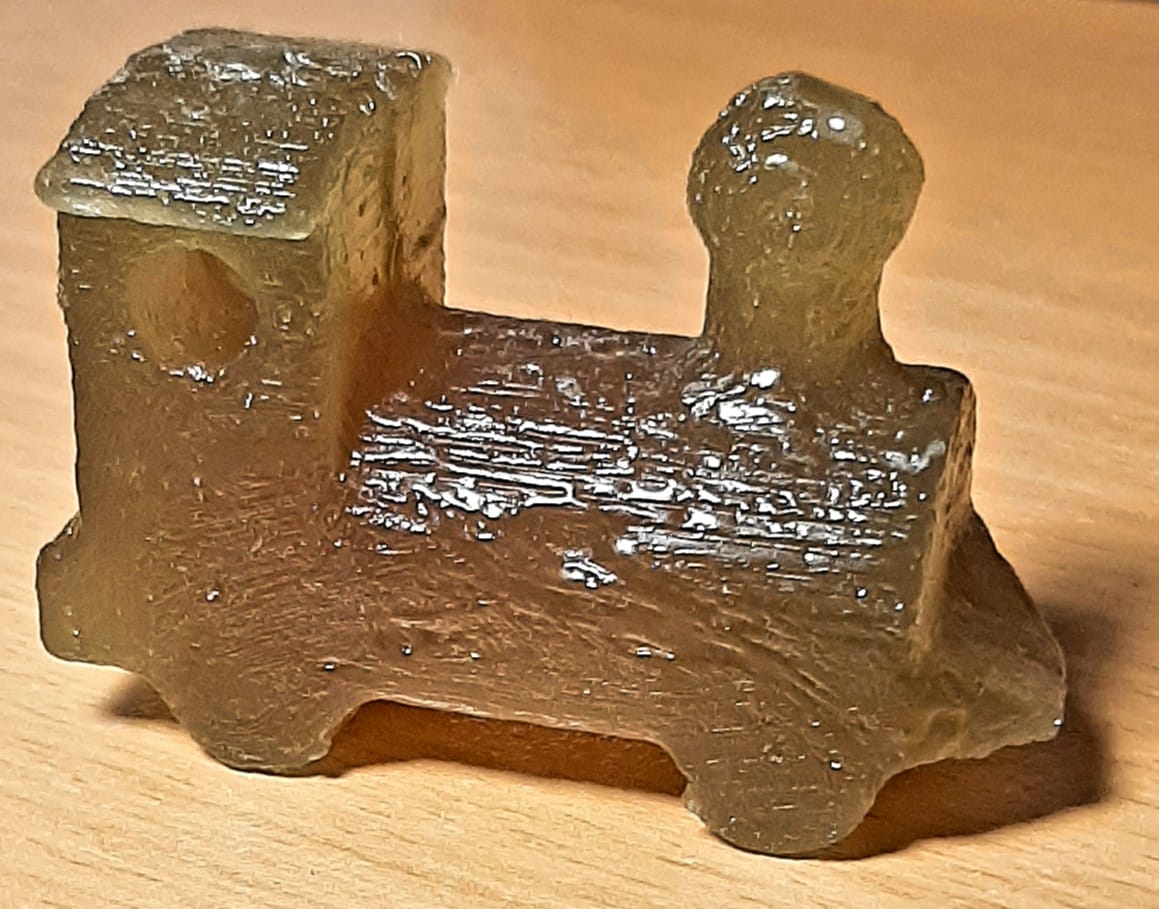
Unmolding the final object
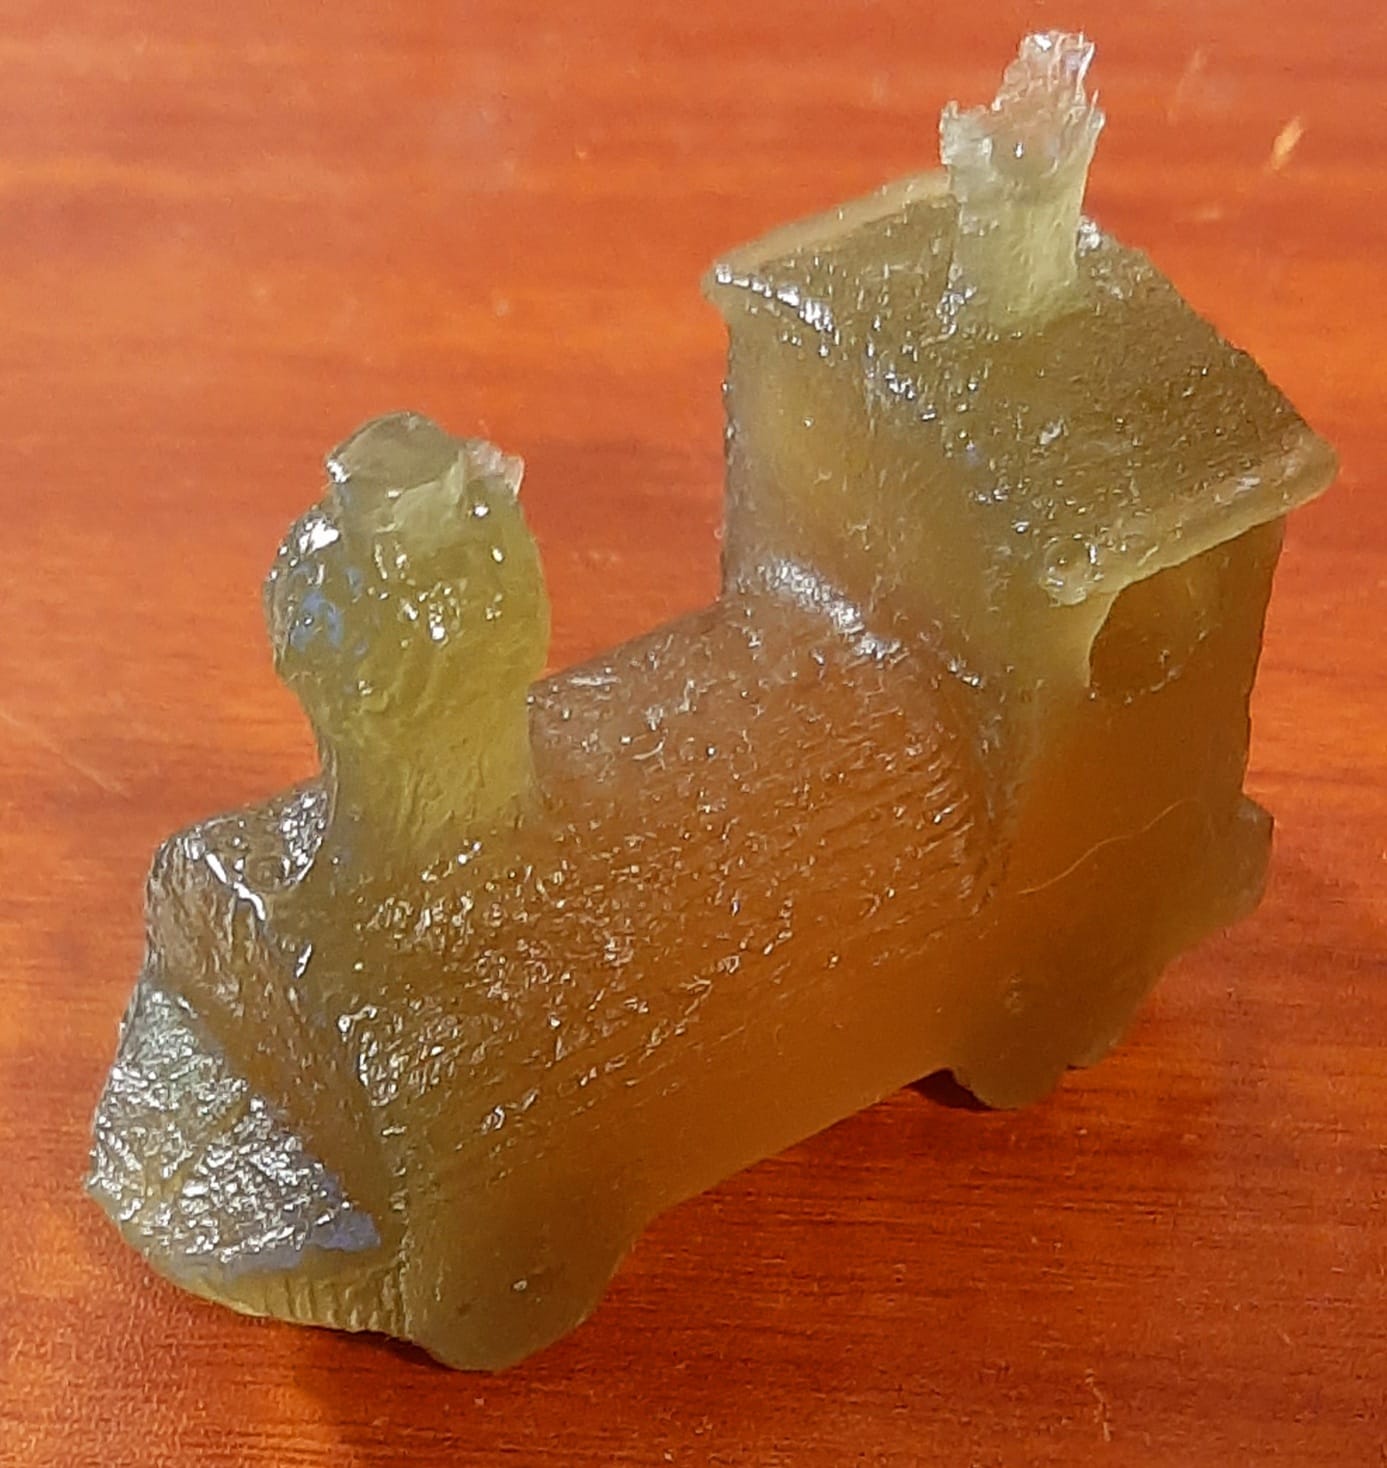
Final object recently unmolded, we notice that it has resin in the positions of the resin entry holes and in the relief hole
Objeto final después de ser archivado