8. Computer controlled machining
Group assignment
Do your lab’s safety training.
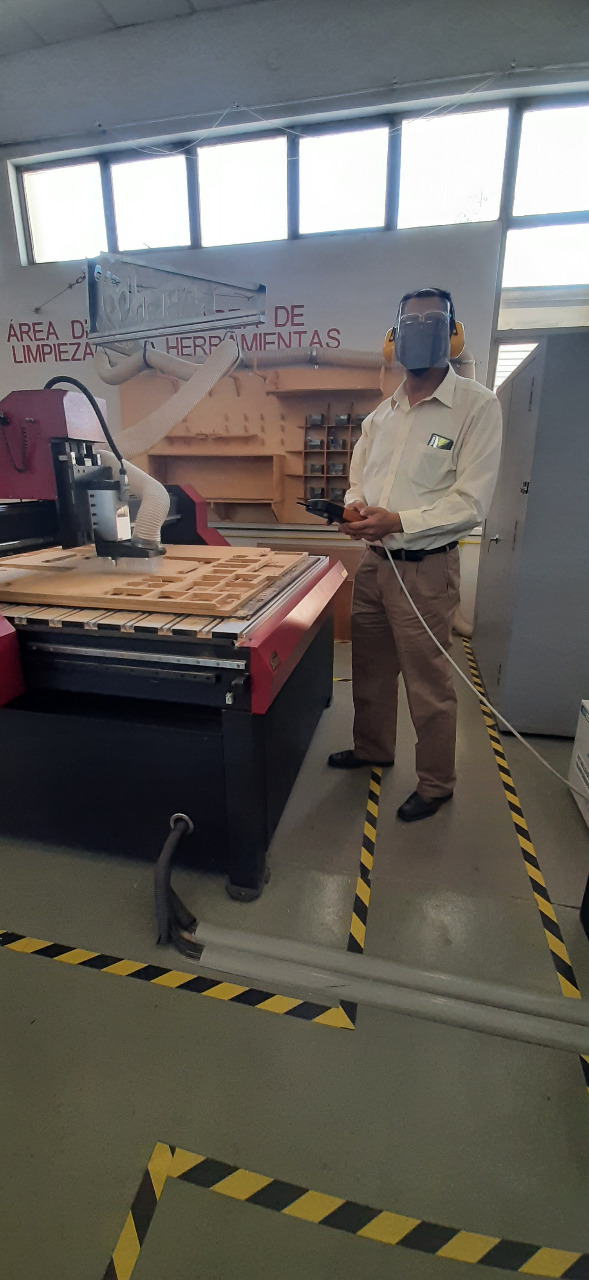
Near to machine, I have to use hear protector and face protector.
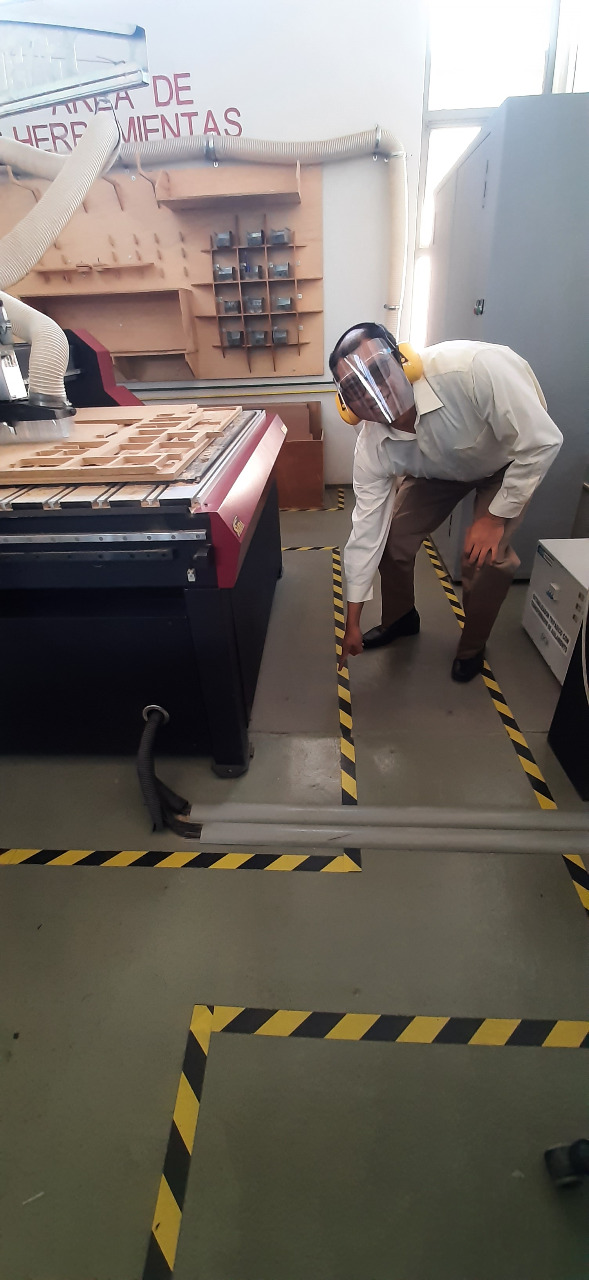
When I work with the machine, I have to respect areas to walk.
Test runout, alignment, fixturing, speeds, feeds, materials, and toolpaths for your machine.
Reference calibration for axis Z.
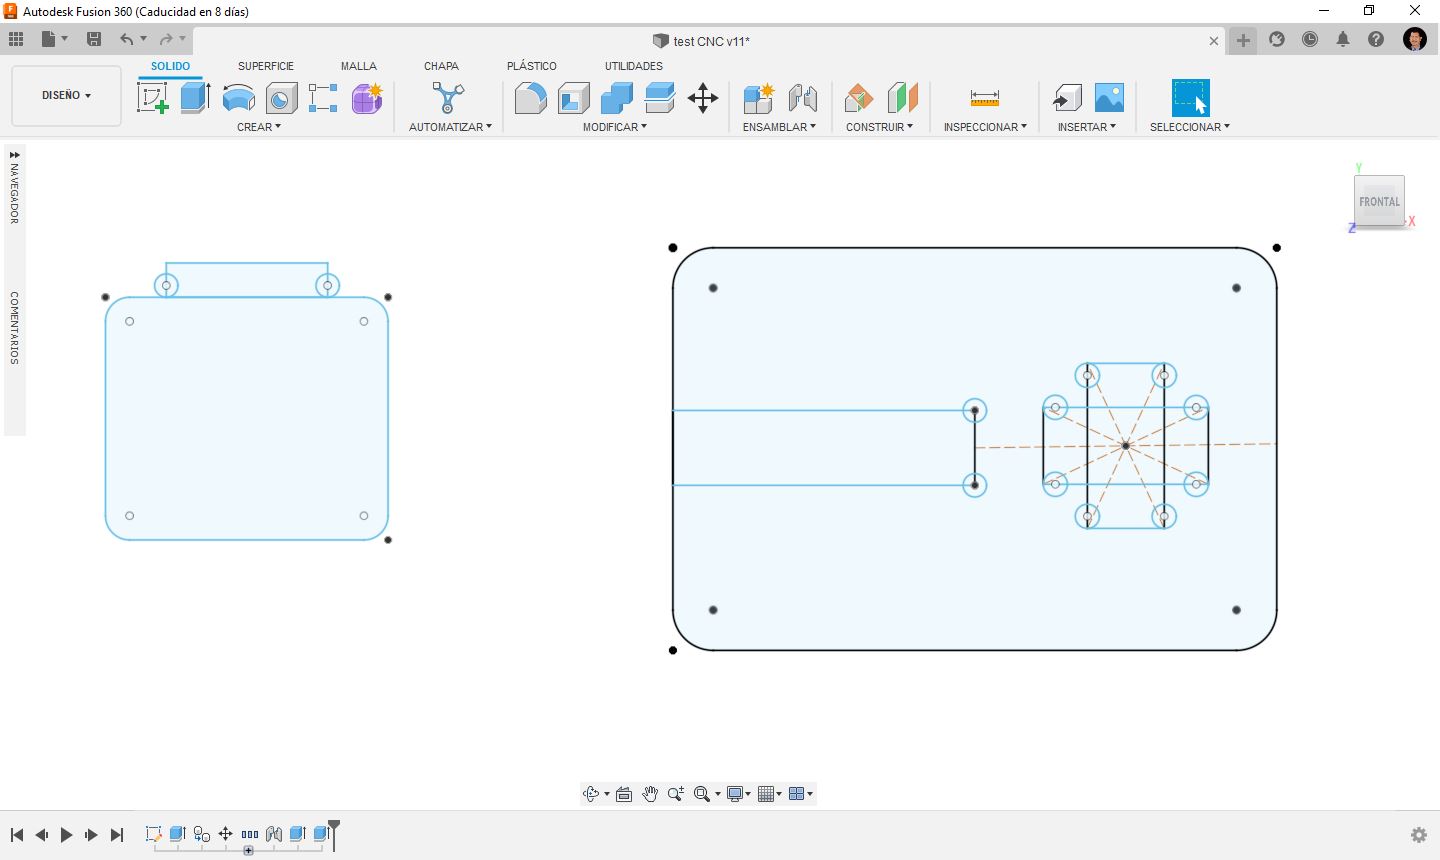
Design of pieces for assembly tests.
Machining start point setting.
The anatomy of drill bit
Overall Length (OAL) - This is the measurement from the base of the drill bit up to the cutting point.
Body - This definition may seem basic, but it actually only includes the length of the drill from the outer corner of the cutting lips just to the end of the flutes. In other words, the flute length, but slightly less.
Lead - The lead is the length of the actual cutting surface of the drill bit. This measurement is a tad shorter than the flute length.
Flute Length - This is basically the span of the flutes on the drill bit, from the leading edge of the cutting tip just to the end of where the flutes taper out.
Flutes - Flutes are the sharp slots that corkscrew upwards along the length of a drill bit. They are responsible for doing the cutting work when the drill bit is spinning.
Point Angle - The point angle, or cutting angle, is the angle between two lips when it is projected onto a plane parallel to the axis. More simply, it is the angle between the lips in the side view of a twist drill. The typical value of the point angle is 118°.
Drill Diameter - This term is pretty self-explanatory.
Neck - The neck is between the shank and the flute. The neck allows space for chip evacuation and prevents the shank from rubbing during deep-pocket milling applications.
Shank - This is the non-cutting end of the tool that is held by the tool holder, or chuck.
Shank Diameter - The shank diameter is the width of the shank. This measurement is essential to note when buying or choosing a tool, so that you can be sure to pick the correct shank size for the tool holder being used. Shank diameters require tight tolerances and concentricity in order to fit properly into any holder.
Shank Length - You know… the length of the shank.
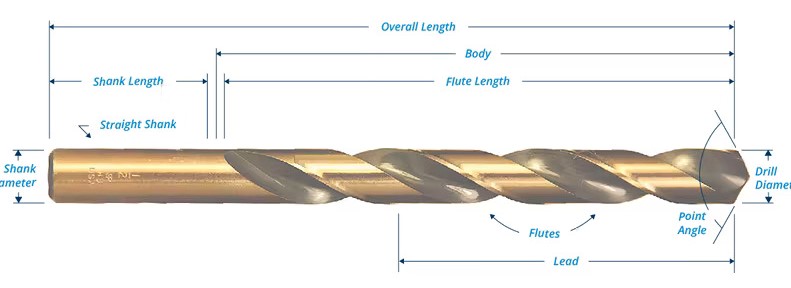
Anatomy drill bit.
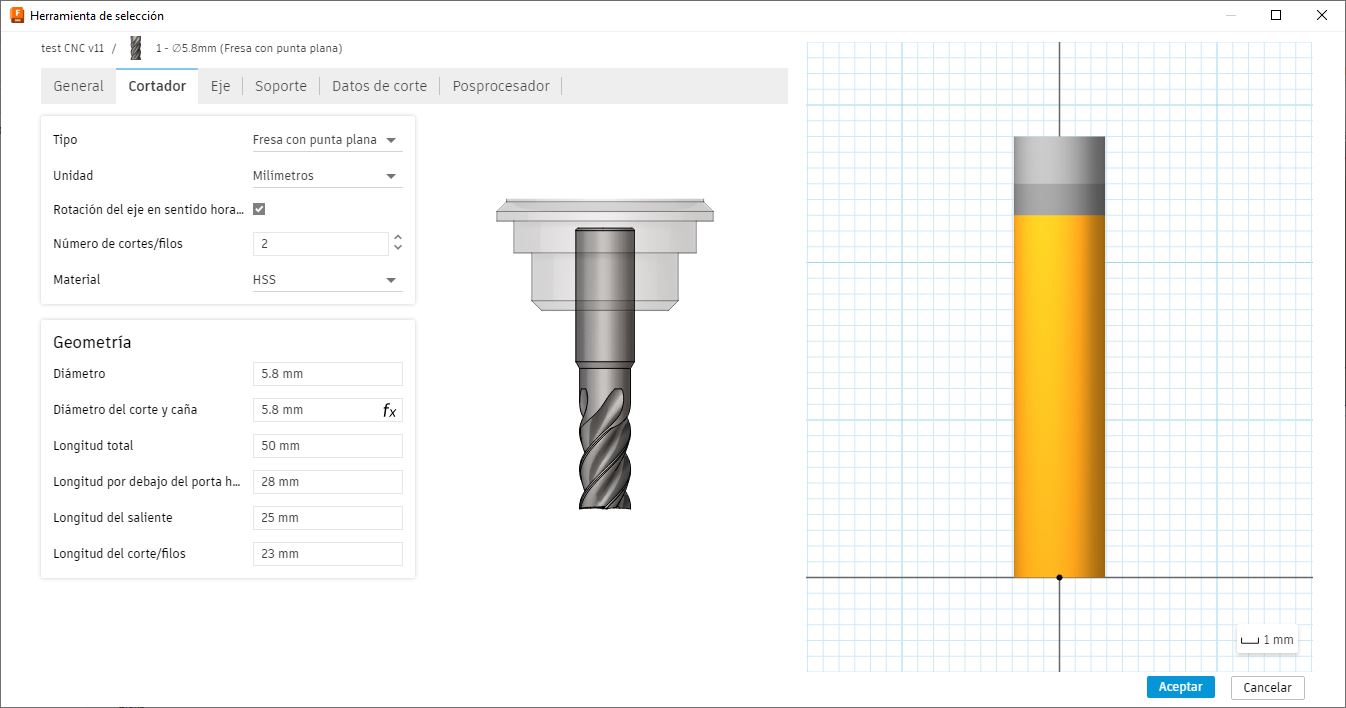
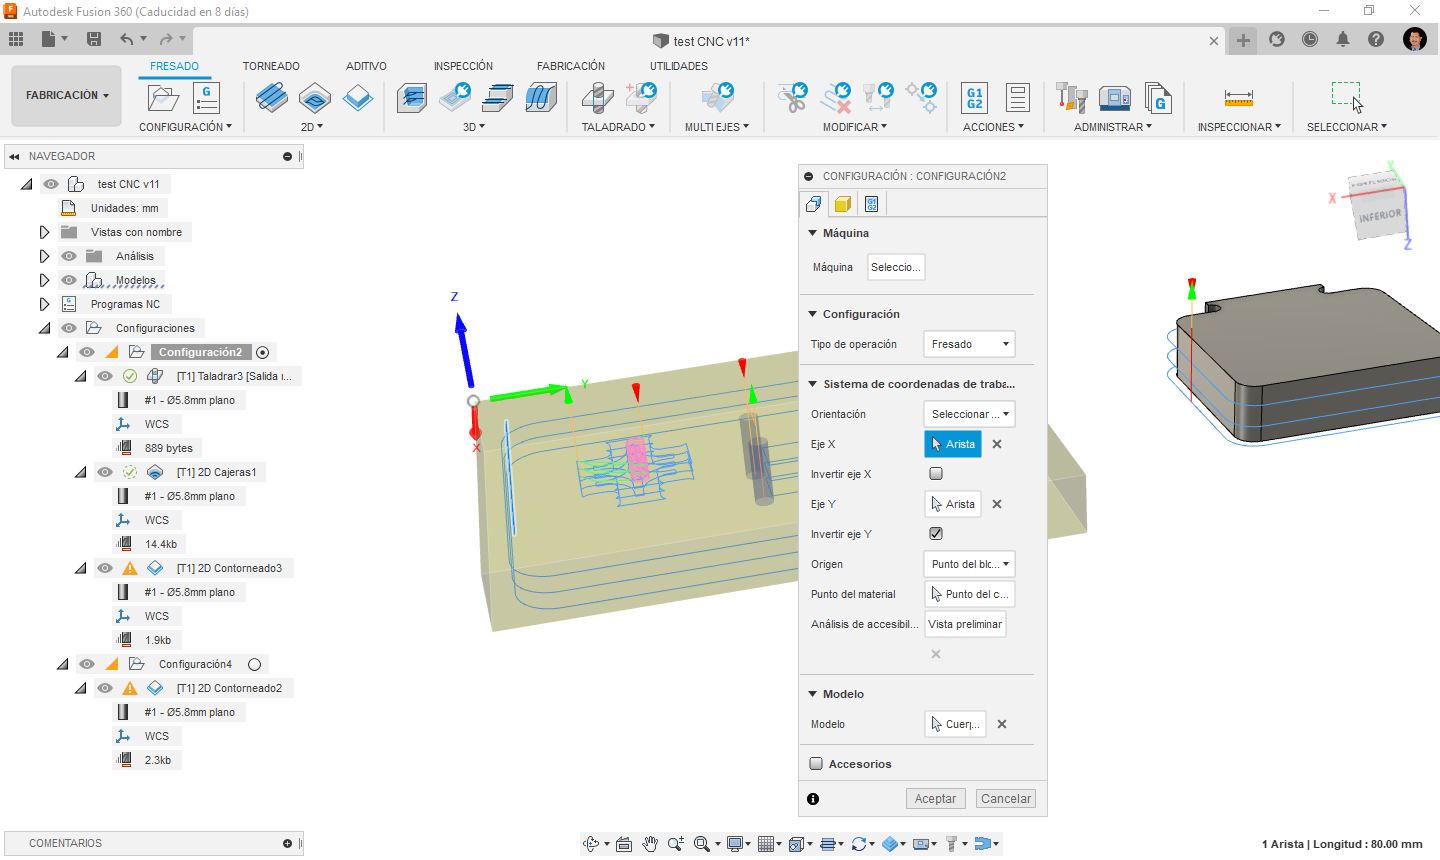
Milling tool setup in Fusion 360.
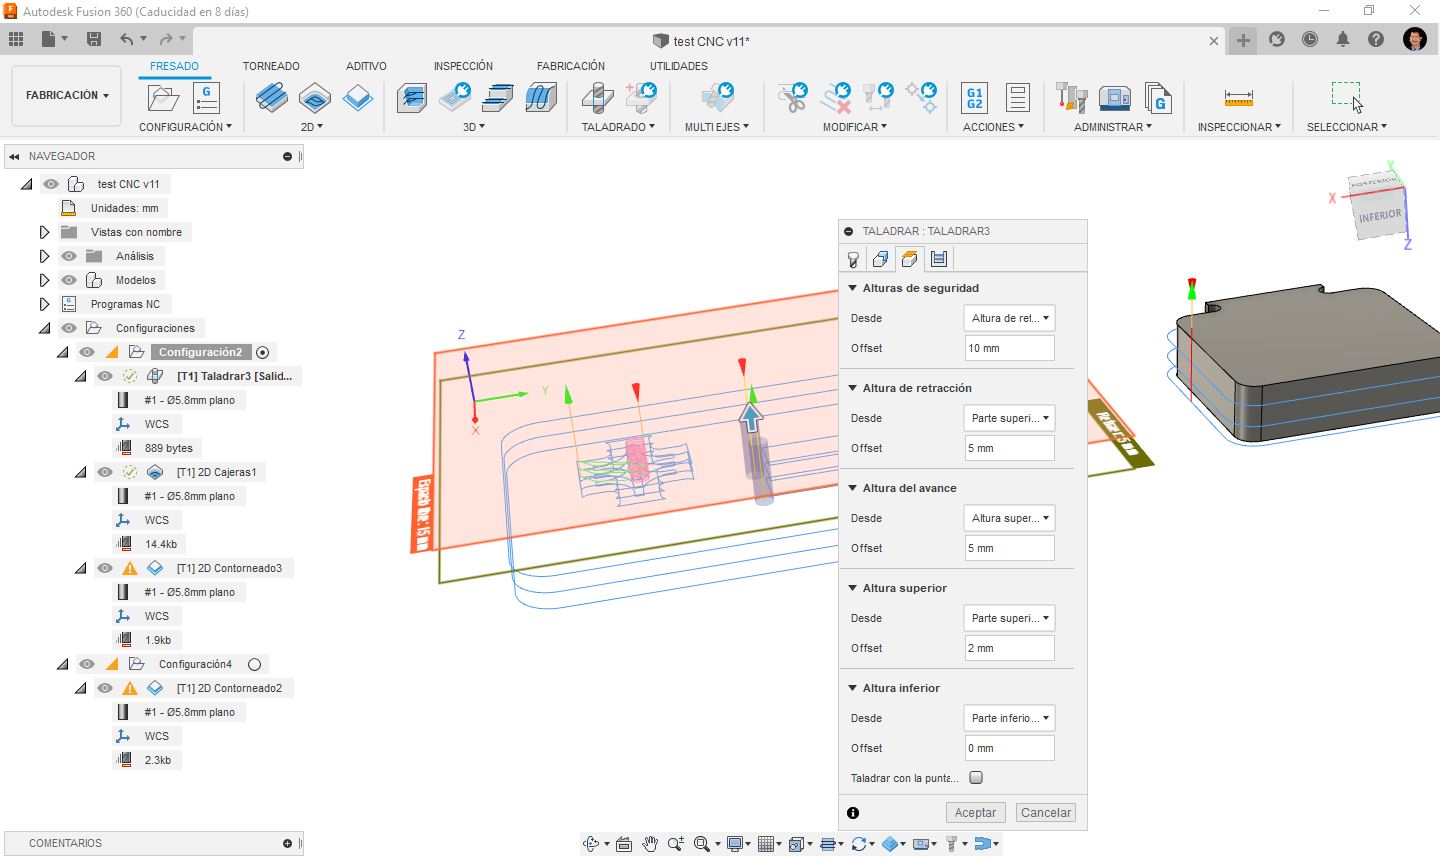
Configuration of machining types and layers in Fusion 360.
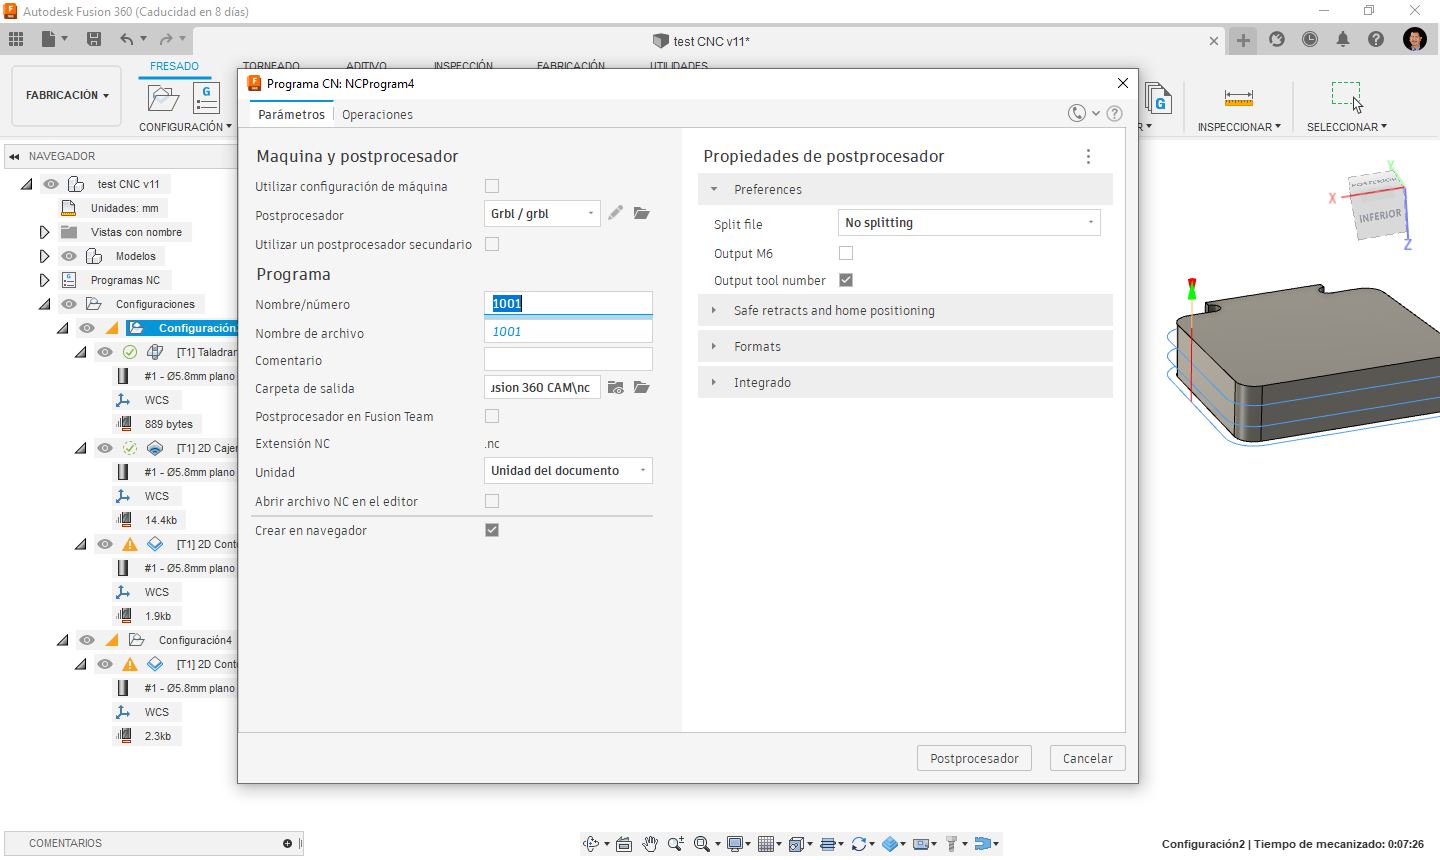
Post Processor Configuration for Machining File Creation in Fusion 360.
Toolpath simulation.
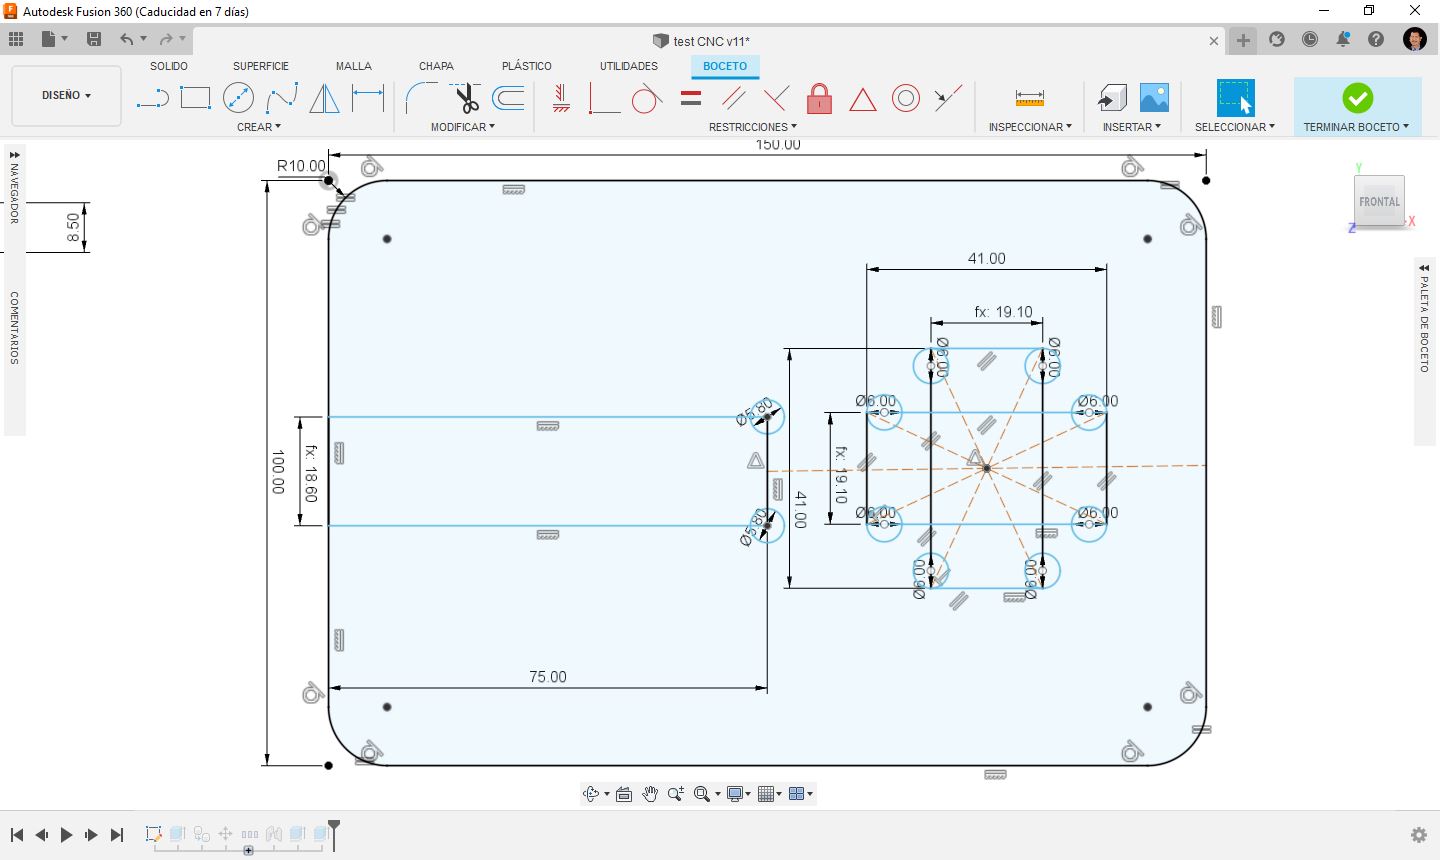
Final design with dimensions modification to achieve a better assembly.
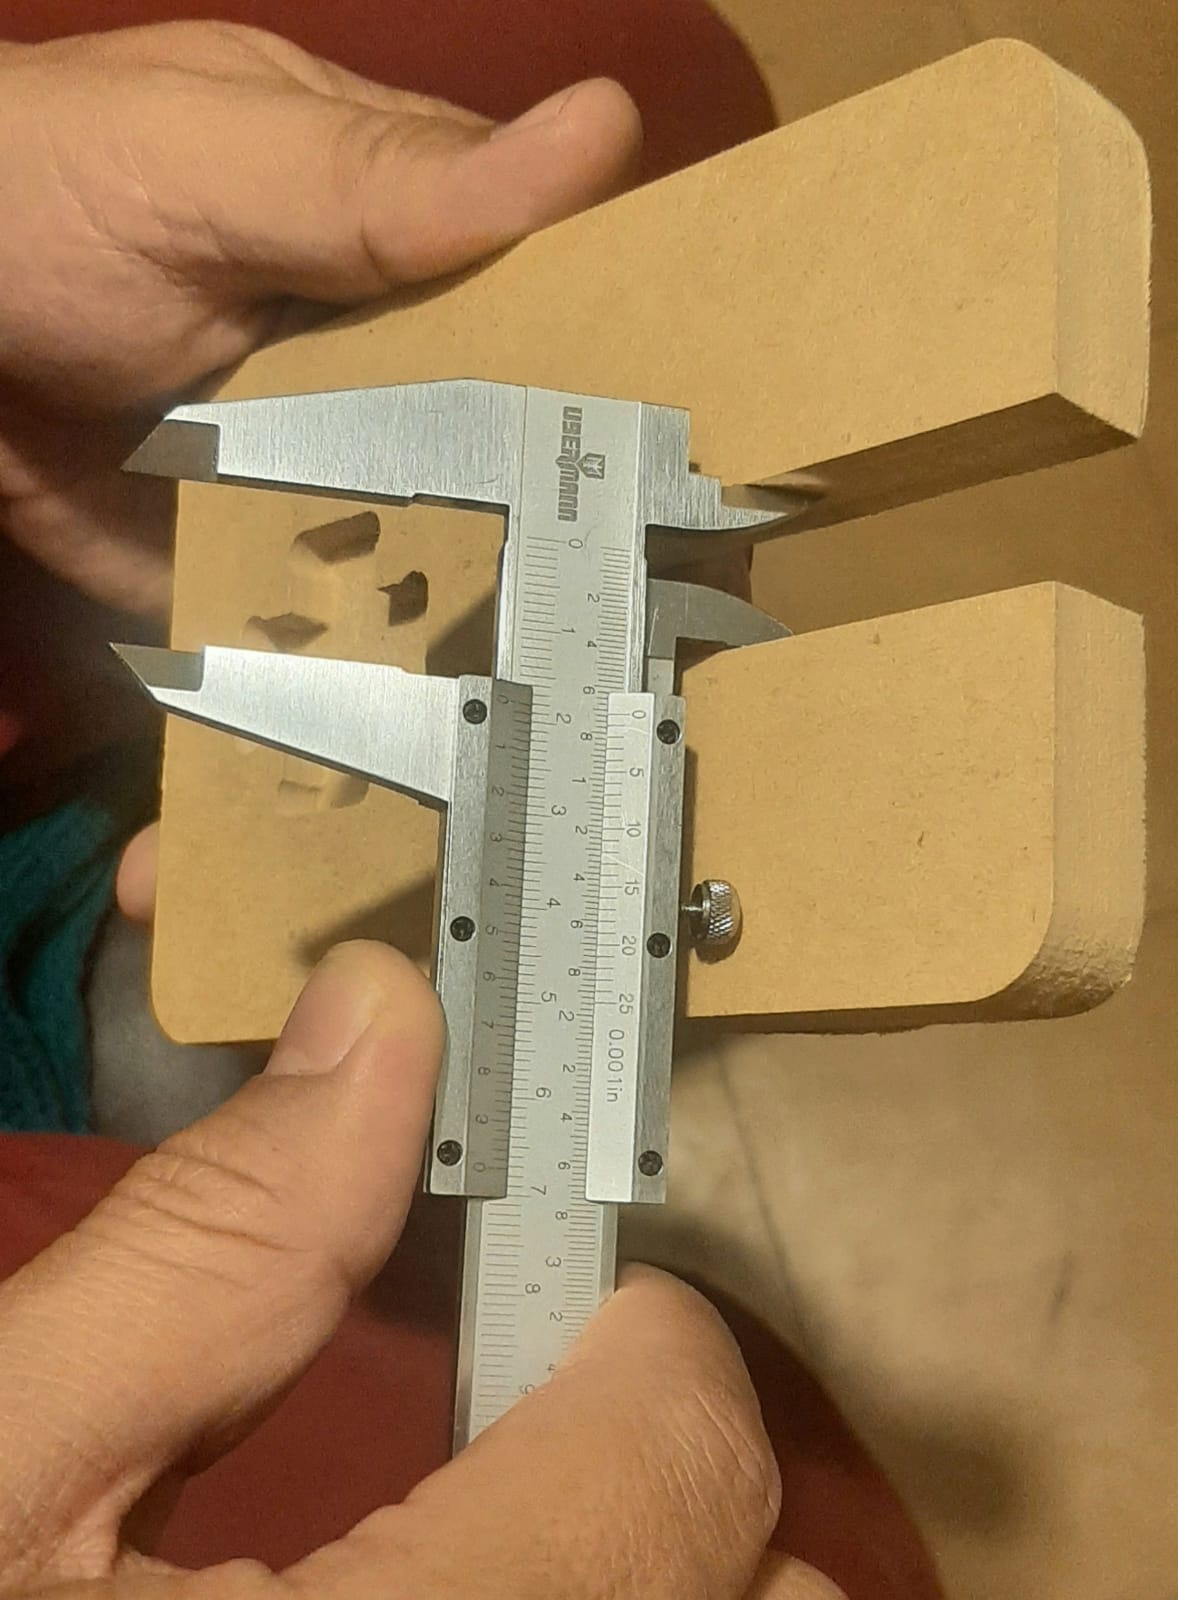
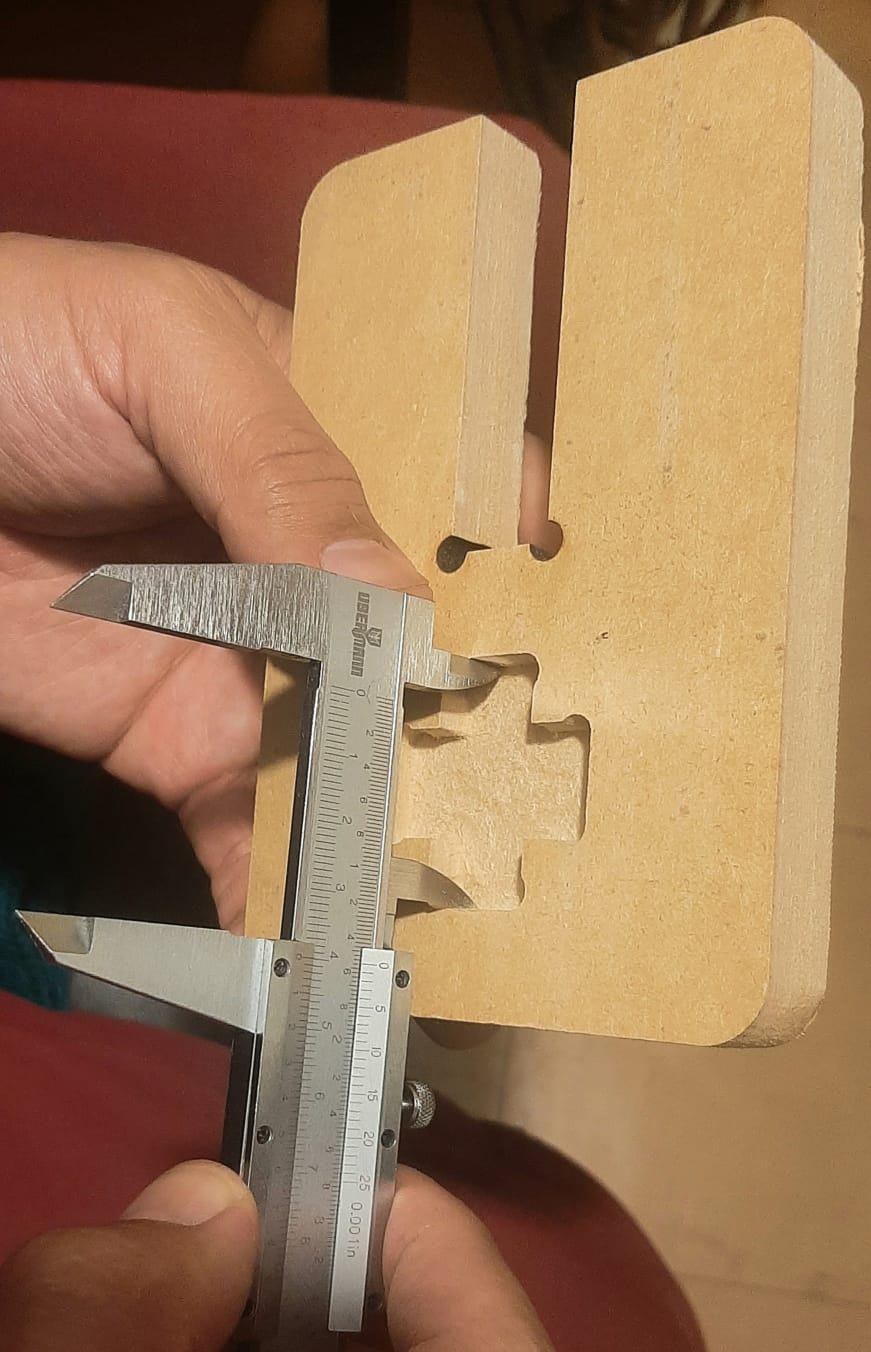
Verifying that the measures are the desired ones.
Testing the assembly between the pieces.
Before obtaining the perfect assembly of the pieces, a first attempt was made, which was not successful, because these pieces could not be assembled, both in the pockets and in the planned one. Dimensions were smaller than desired. Then, these margins of error were considered and the measurements were adjusted in the design. With this, the perfect assembly was achieved.
Individual assignment
Make (design+mill+assemble) something big (~meter-scale)
This week I worked on understanding the machining process on a cnc router, reviewed SUDA VG1325 CNC Router safety and operation issues, reviewed Fusion 360 CAM software, and machined my coffee table. I had problems with the leveling of the work surface, the machine has a sacrificial bed and it has an upward slope from left to right, so every time I set a new origin point moving to the right to machine a new piece, the drill when traveling to its first operation scratched the surface of the material. I fixed the problem by setting the z-axis to the highest point of the slaughter bed.
Extra credit: include curved surfaces. (no included curved surfaces)
Machining of the legs of my coffee table
Machining of my coffee table top
Extra credit: don’t use fasteners or glue.
Coffee table assembly without glue or fasteners
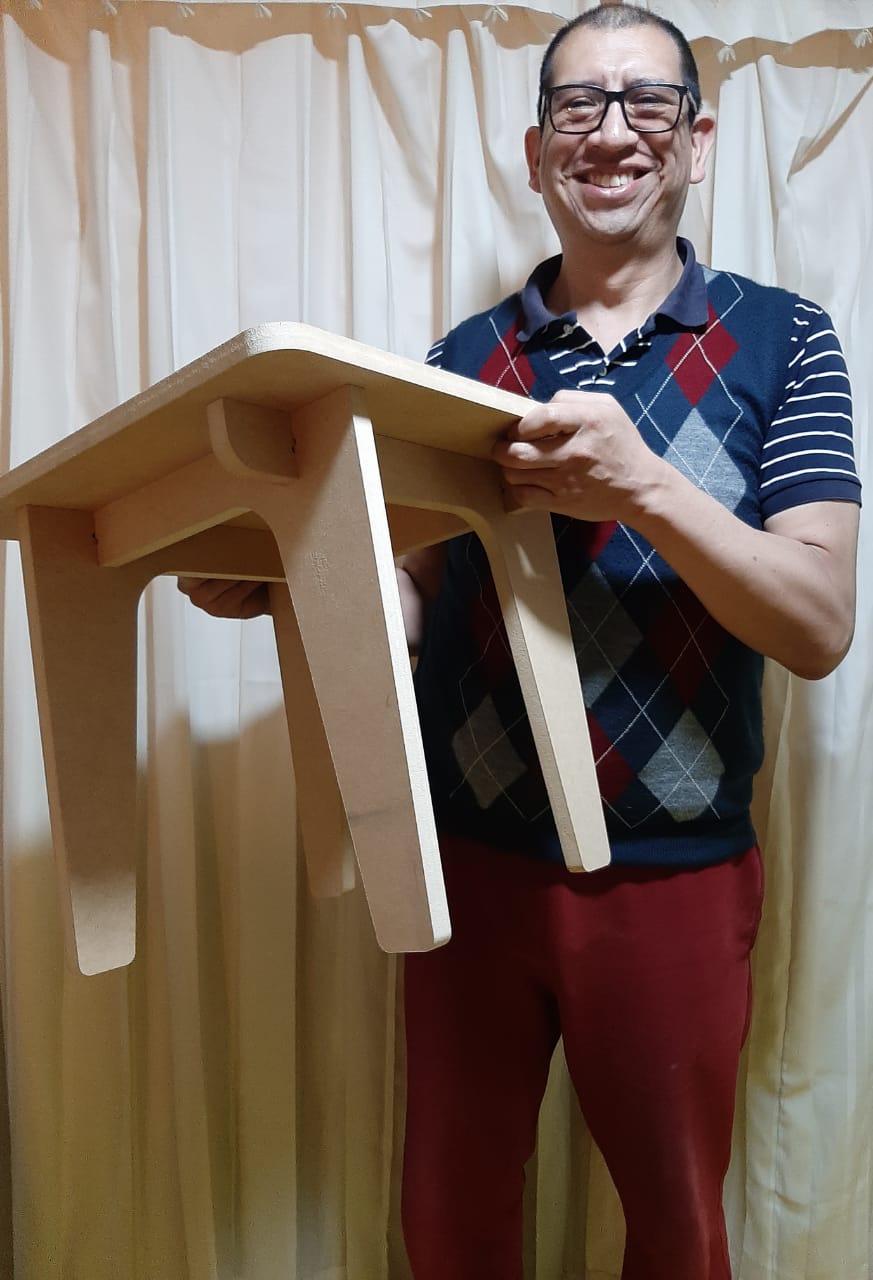
Showing off my coffee table.

My coffee table is strong.
Useful link
Files
- Coffee Table files (Fusion 360 files, nc files, jg files)