7. Computer controlled machining
Group assignment
- do your lab’s safety training, test runout, alignment, fixturing, speeds, feeds, materials, and toolpaths for your machine
Documentation at: Fablab Taipei
individual assignment
- make (design+mill+assemble) something big (~meter-scale)
- extra credit: don’t use fasteners or glue
- extra credit: include curved surfaces
This week I worked on creating bigger stuff, first I thought of a trash can with basket, which is cool but may leads to more trash.... Later I thought these week we created lots of tiny results, maybe a shelf will be great to exhibit them. Another pending idea is a computer shelf and able to transform into reading shelf!
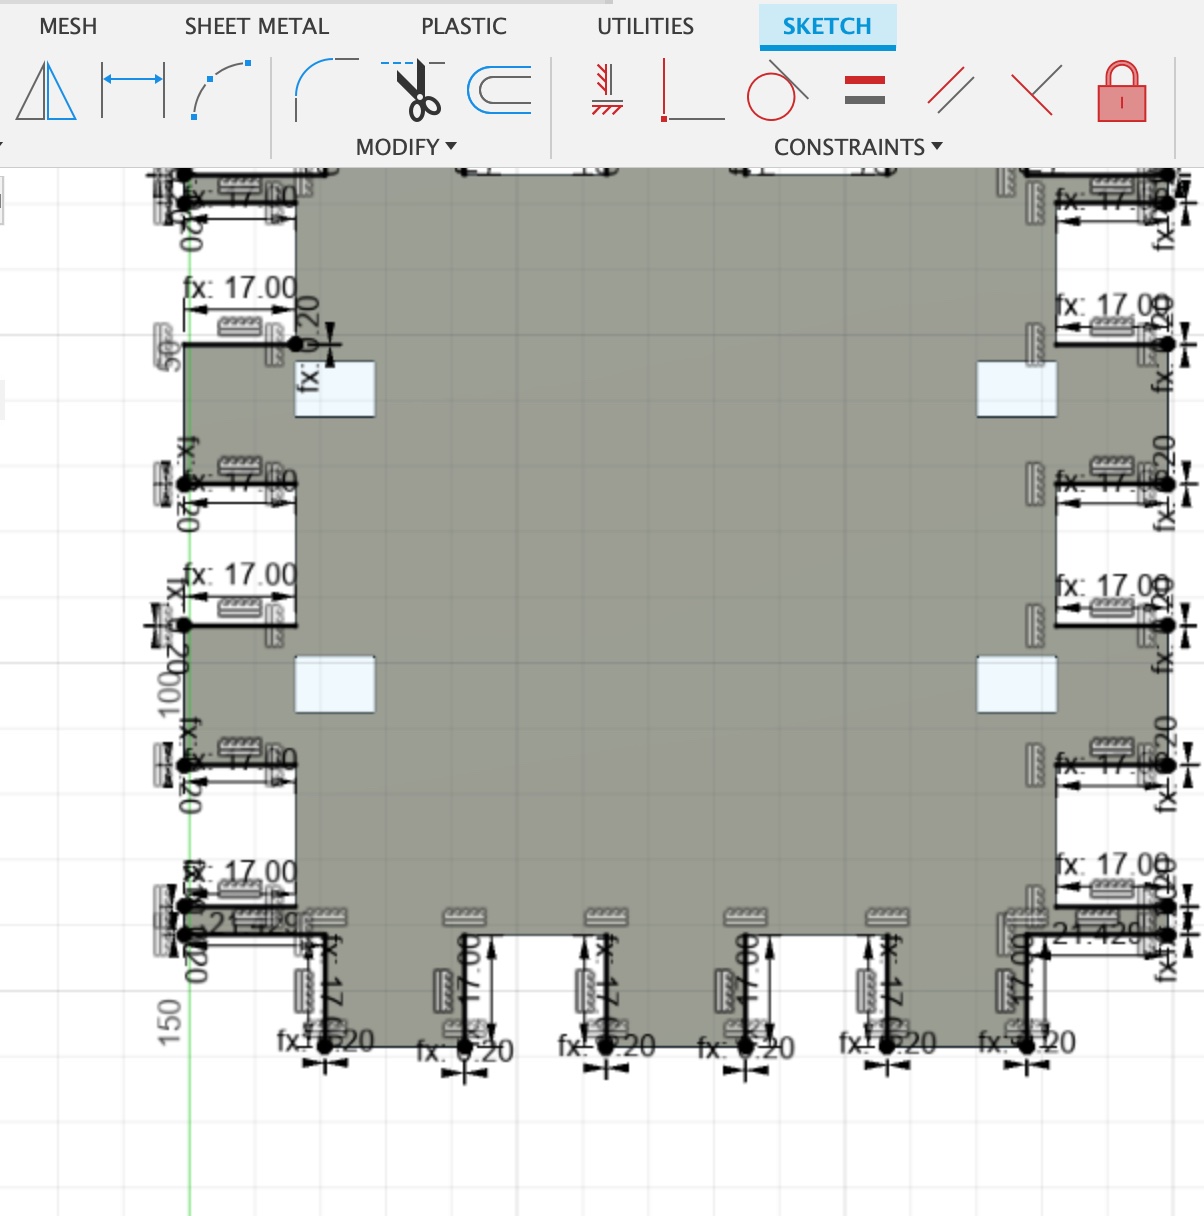
Box design with Fusion360
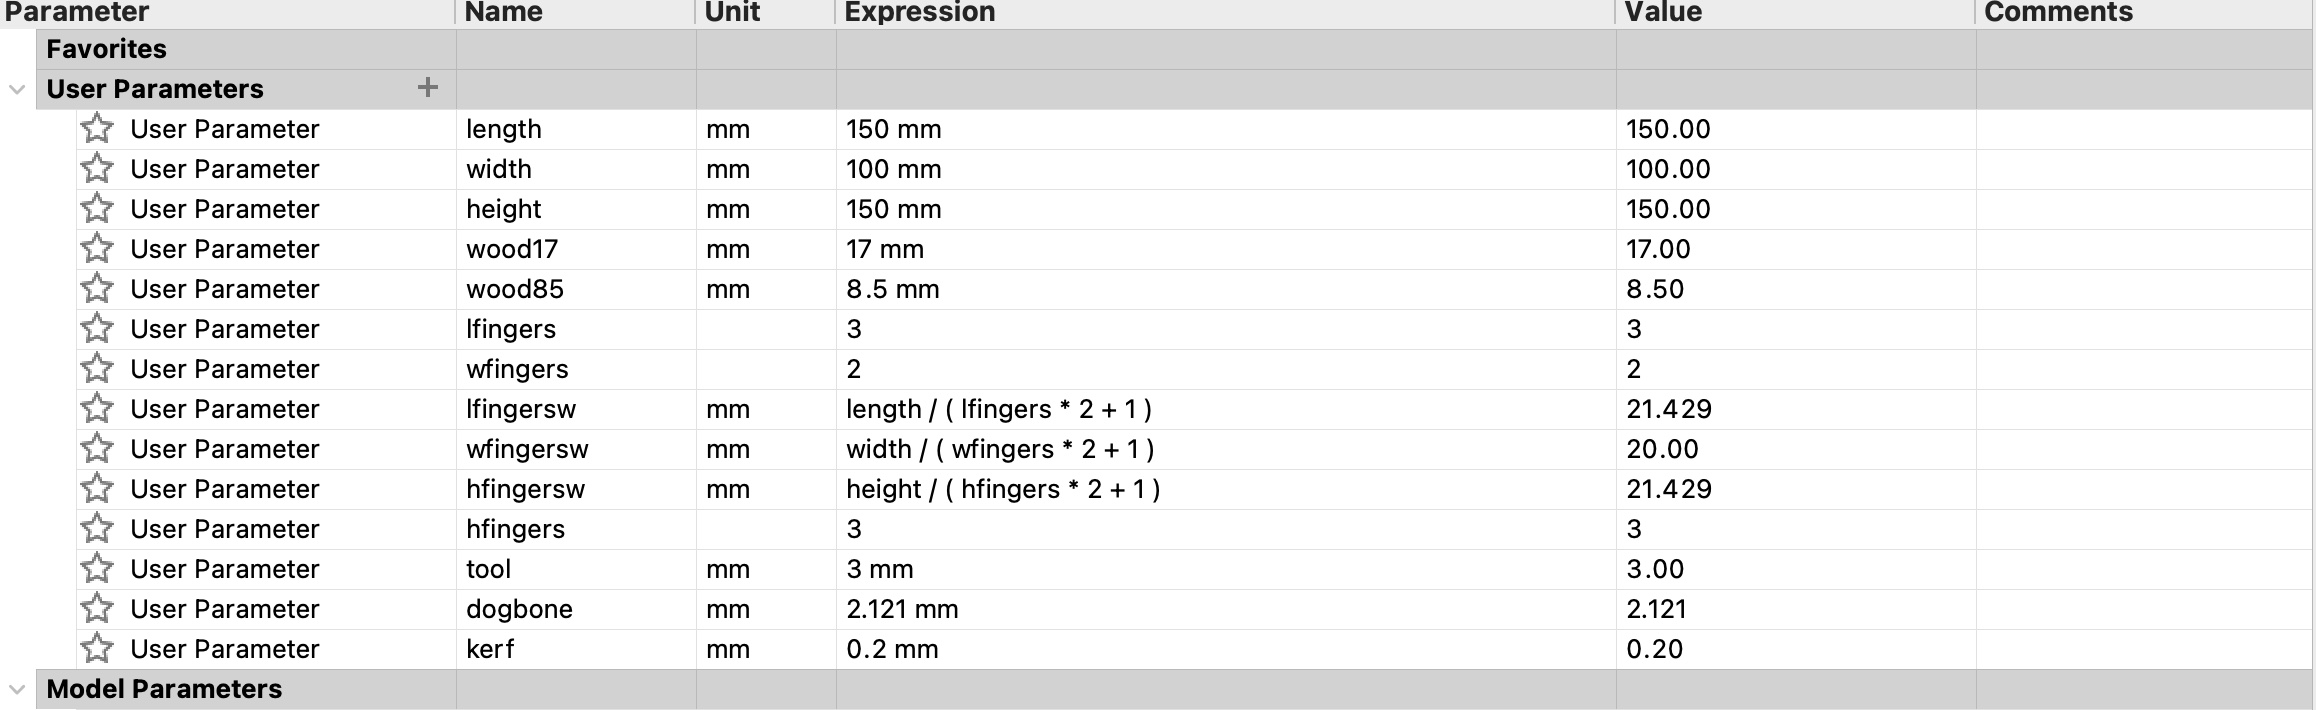
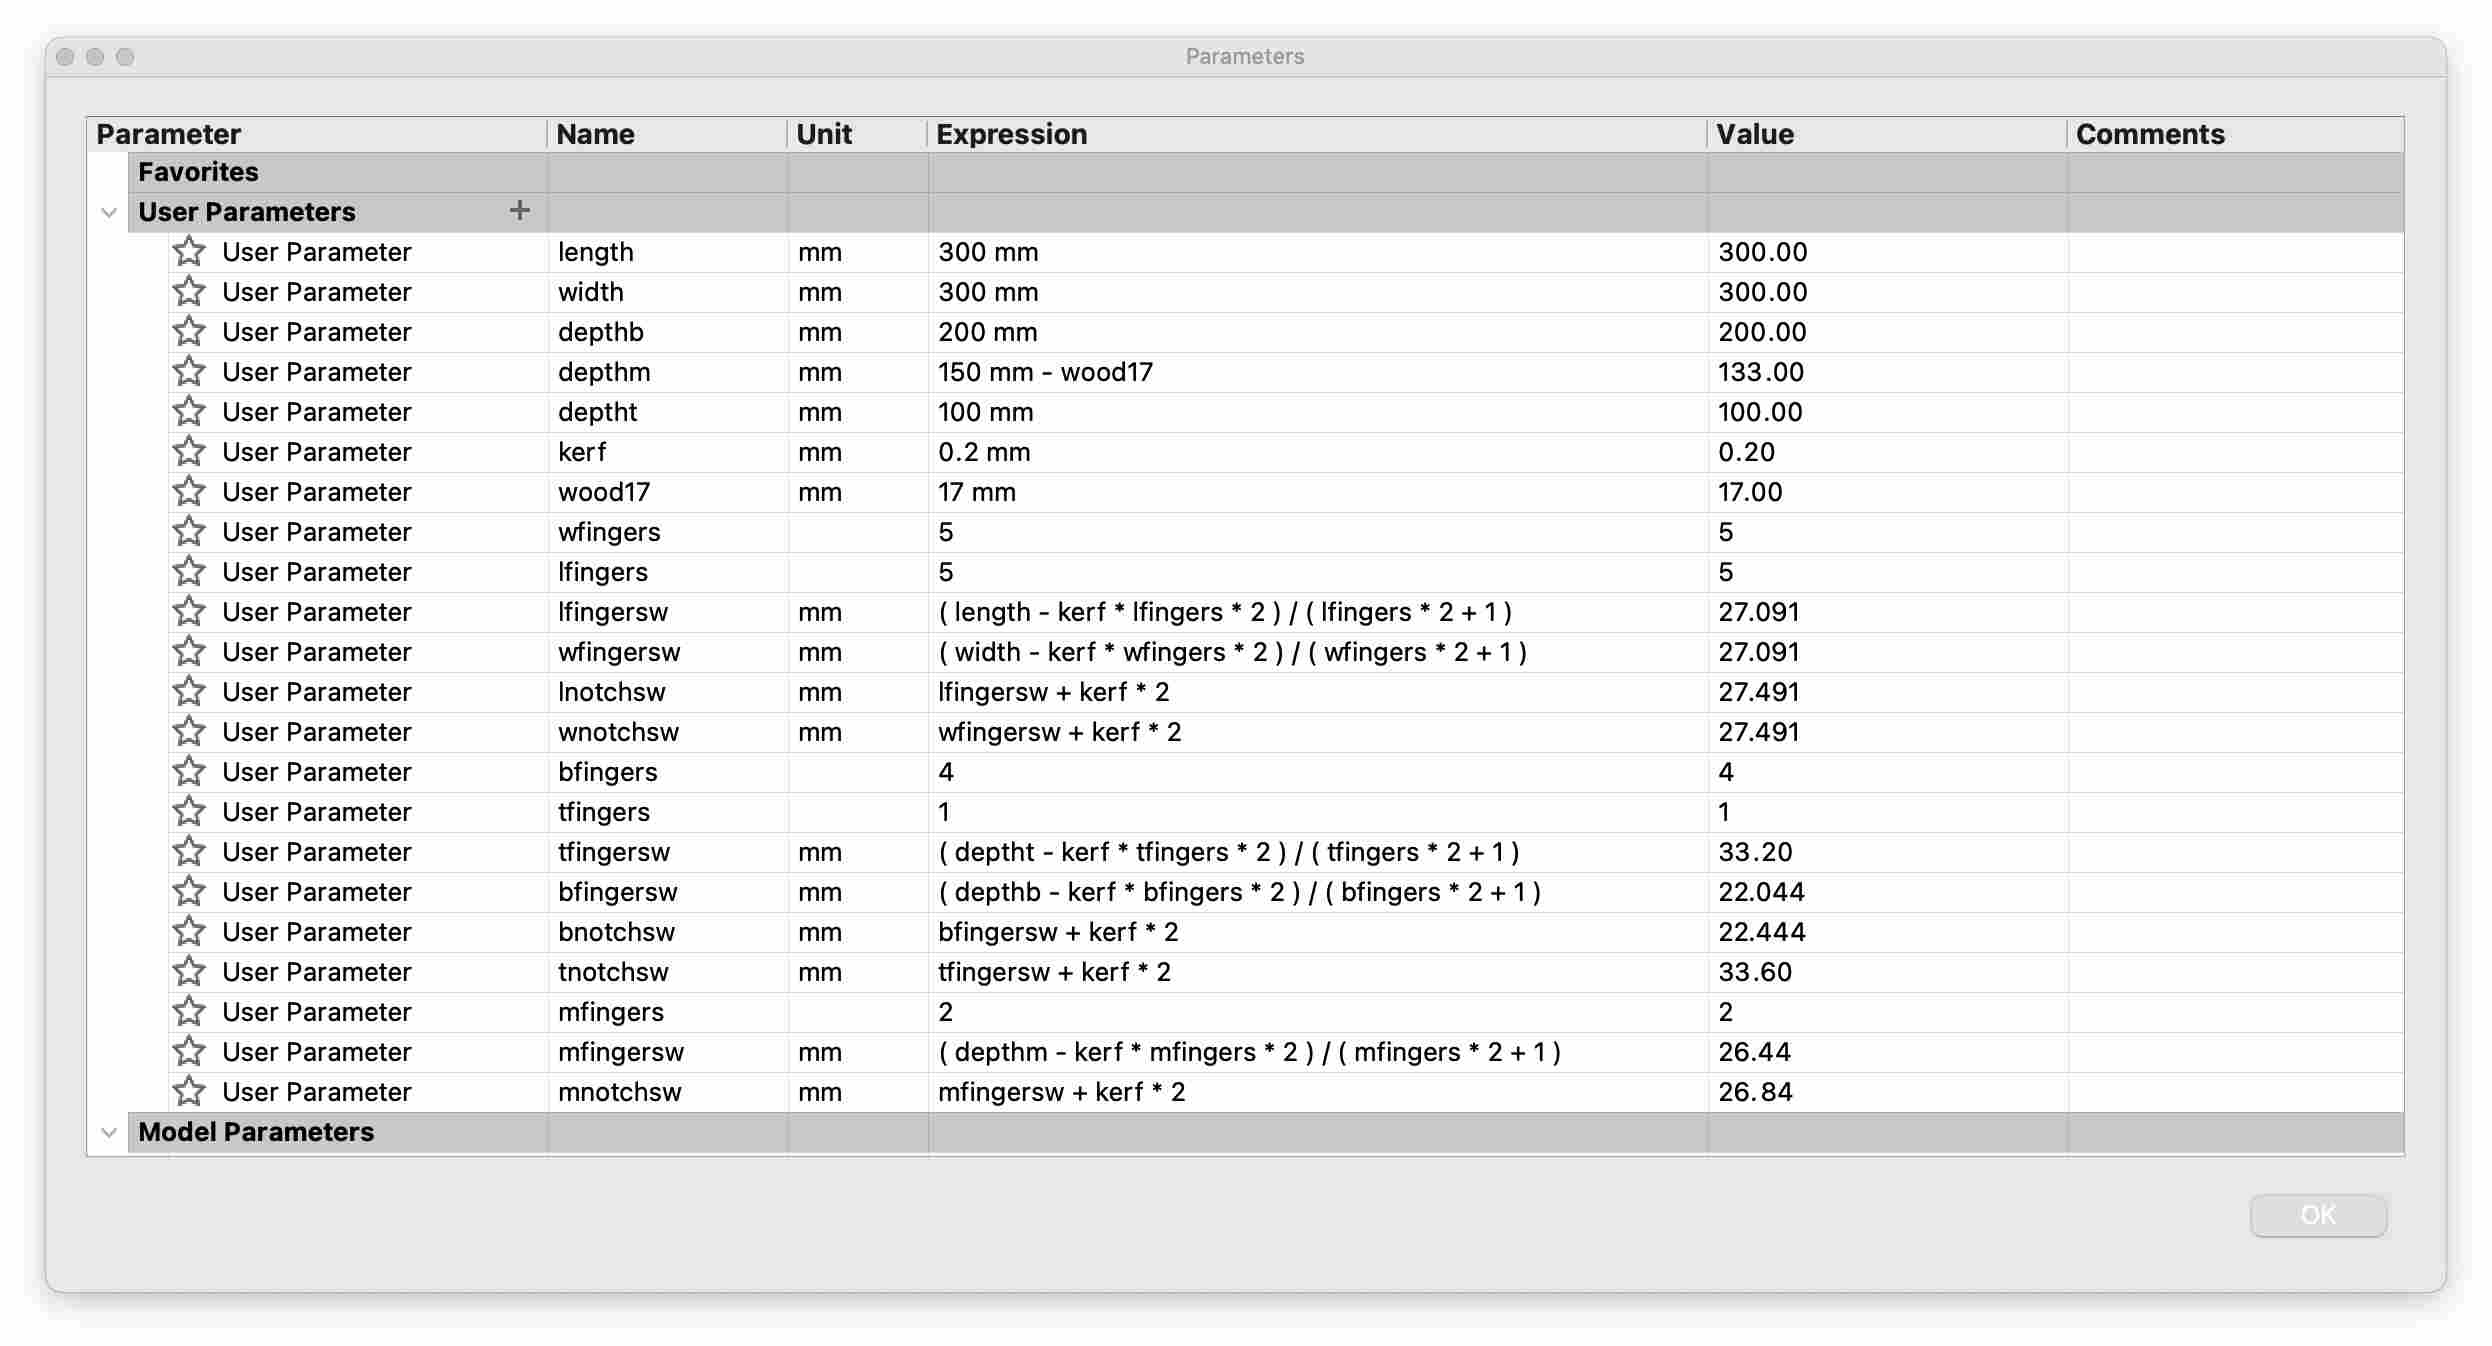
At first I found a video to teach how to build a box. The parameter set including finger numbers and finger width. Which is very helpful to create a box.
Video: Fusion360: Automatically sized finger-joints
New version video (but harder)
With this technique, I designed my first “box” with door, which is a treasure shelf! This still took quite a long time to solve the fingers problem and how to use a axis to hold the door and let it rotate. I start with a small size prototype and even use 2 different thickness wood.
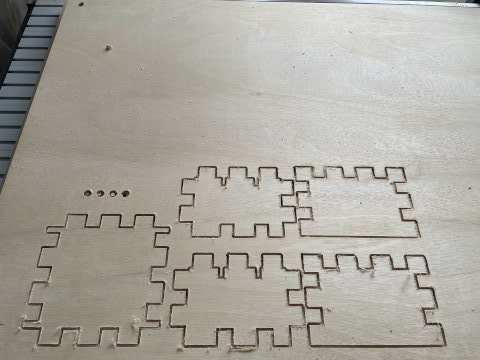
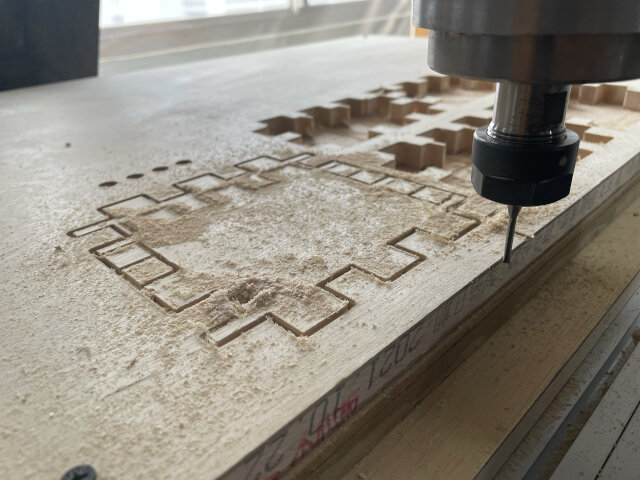
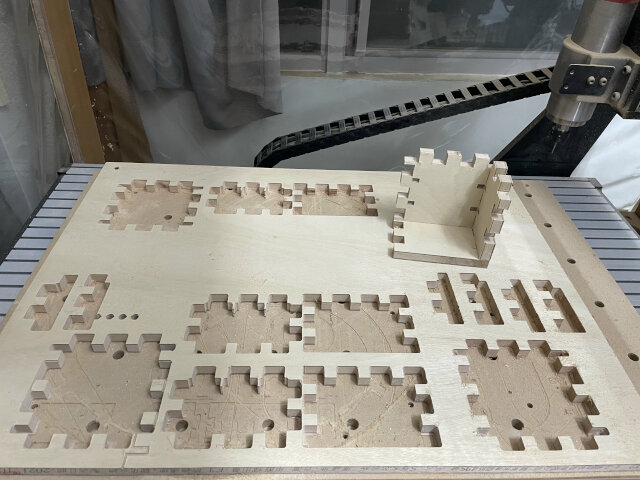
Milling first shelf
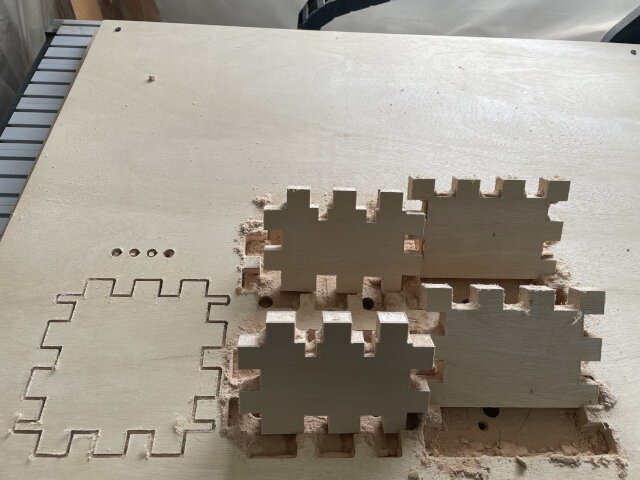
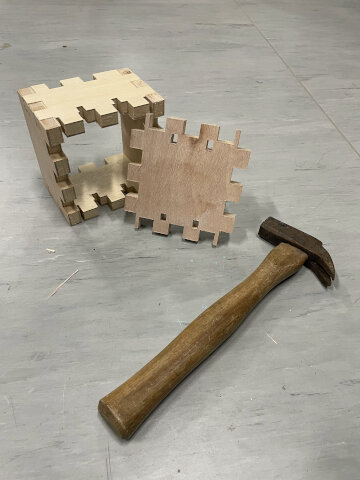
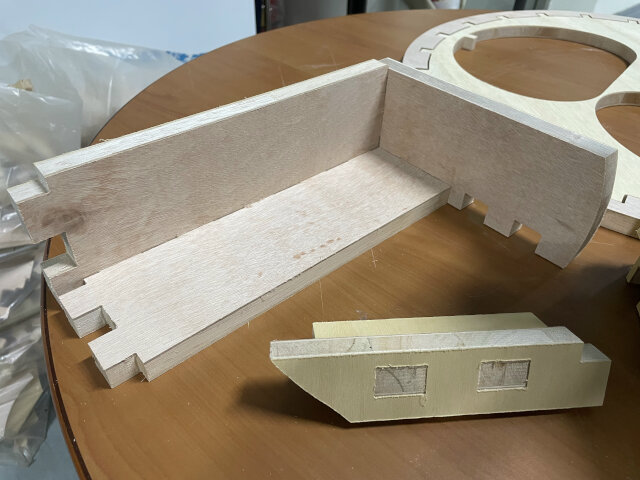
After setting up the machine and g-code, I did my first cutting, and the result was terrible… it’s too tight that even I used hammer cannot get them in. Plus I was still not sure how to set the cutting sequence.
Later when I want to try second time, the mini keybppard we usually used to control machoine did’t work. I tried to operate the machine with contral panel but not easy… for not to break the endmill I took it off but later the spindle touched the surface… Which was even worse because the machine may hurt (I did’t know that then). Luckily I tried to resatrt the computer and it works well again ~~~
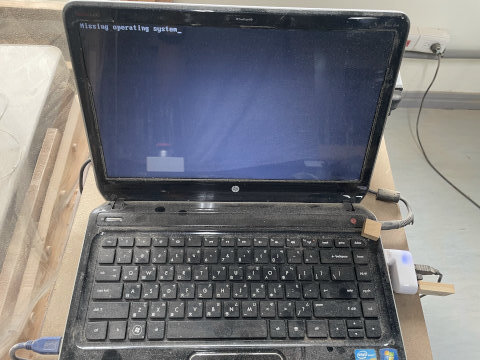 (Tips: if you find computer shows this, just unplug everything connect to it, especially USB)
I learned from Yoyo about how to use setup and different movements in it to set the cutting sequence. And try many times with small testing part to make sure it’s loose or tight enough.

Lessons learned here is I use extrude (cut) to generaate panels easily, but this way when I want to set kerfs it doesn’t help (even with parametrics), because when finger width change the other panel also changes. Anyway I still used the old method and successfully fixed the problem (took the whole day lol).
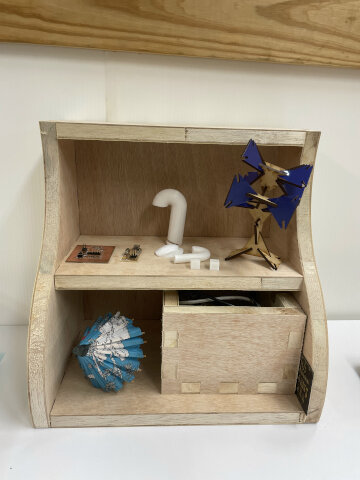
Finally I got my fit box (it should be a shlef). And waiting to do the rest part or a bigger shelf.
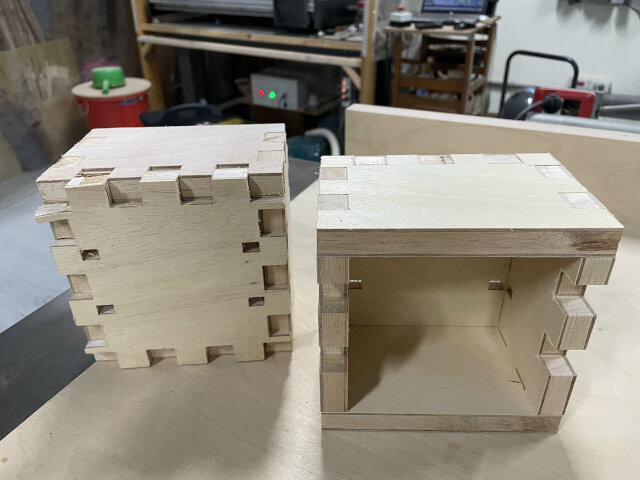

Also learned: Don’t try to cut a 3mm diameter door axis with 3mm endmill… it will mess up!
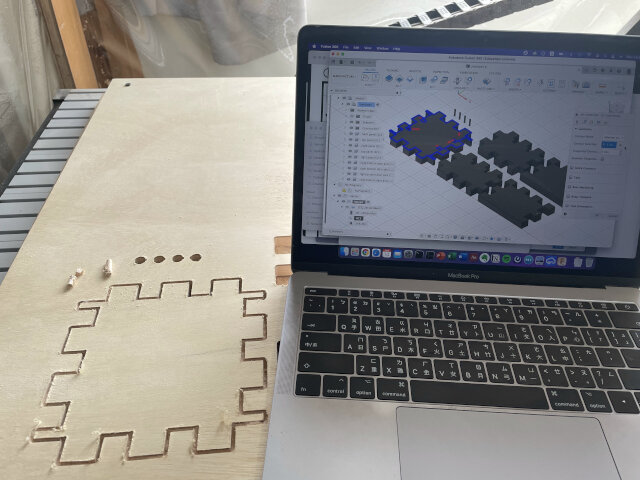
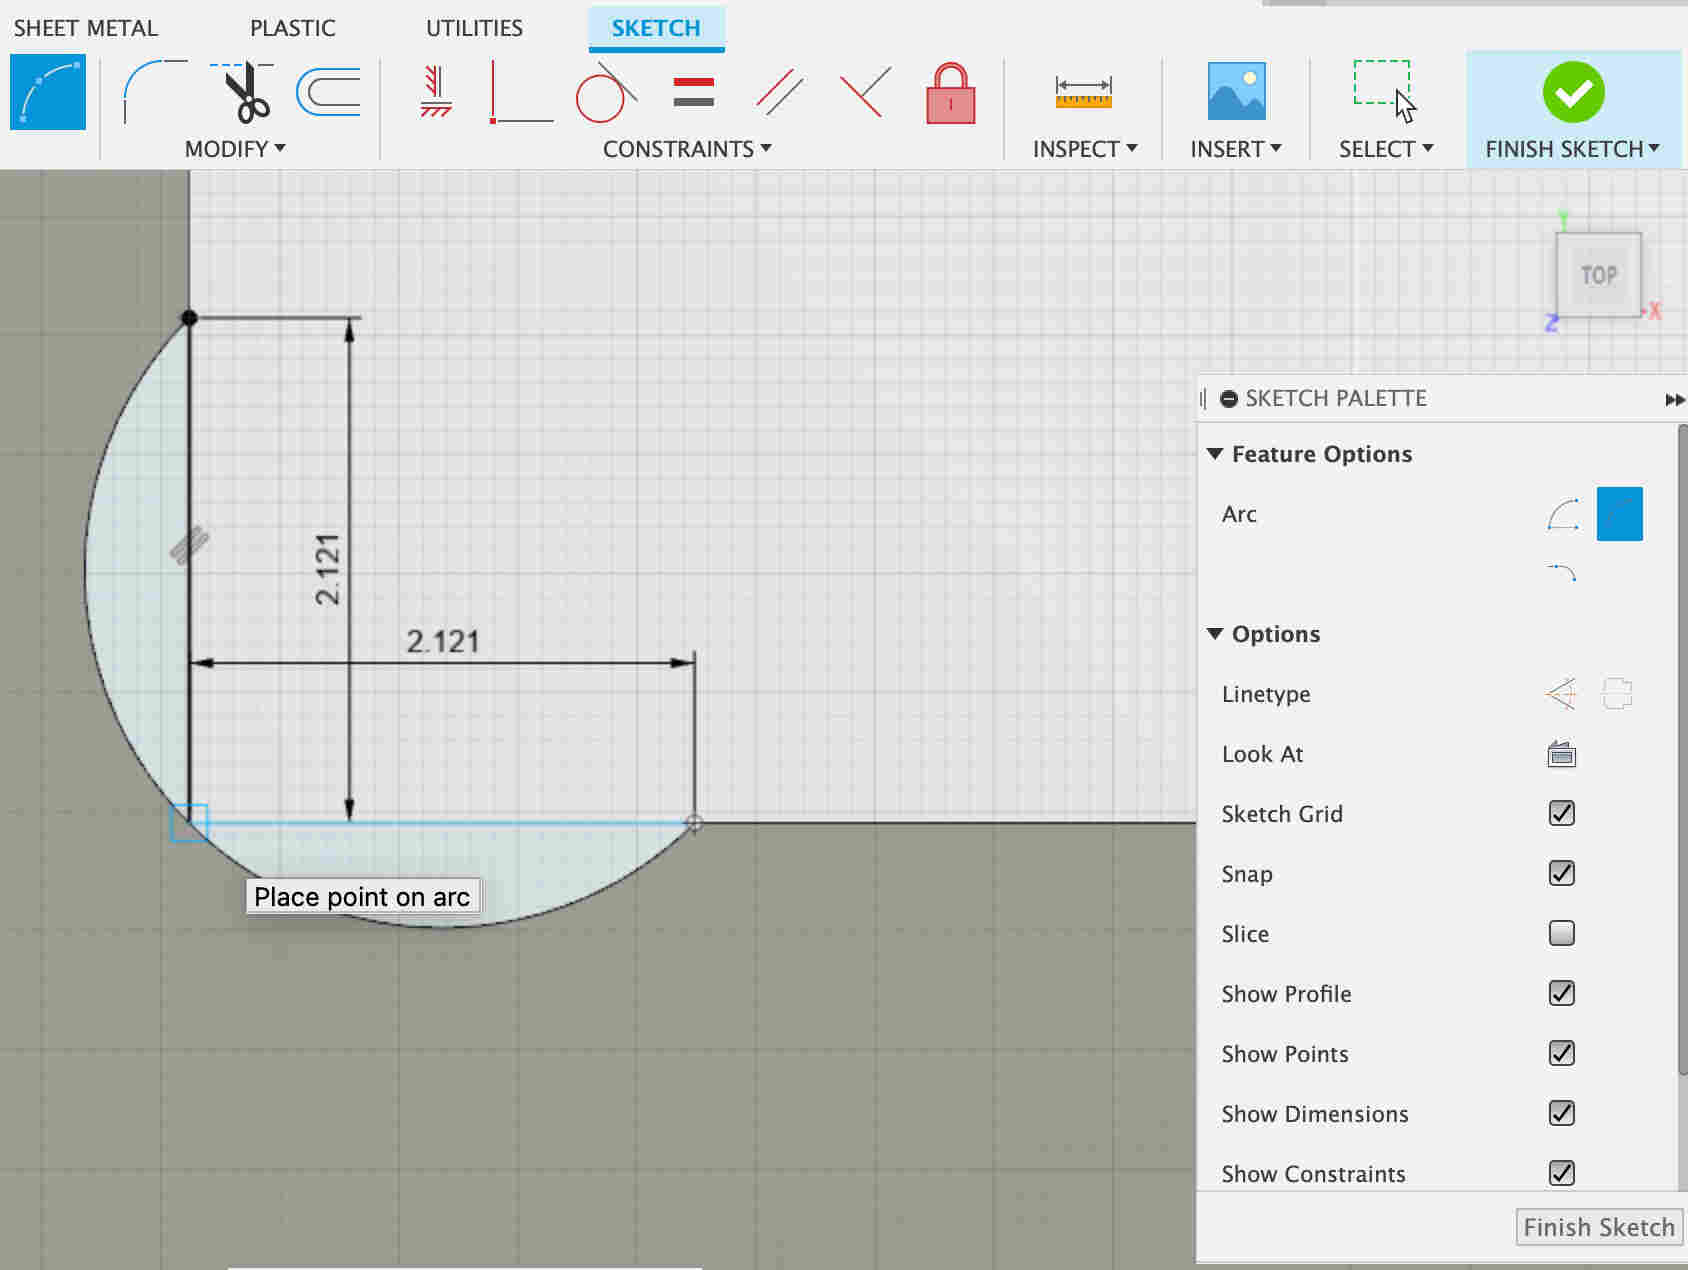
Recreate a curve shelf
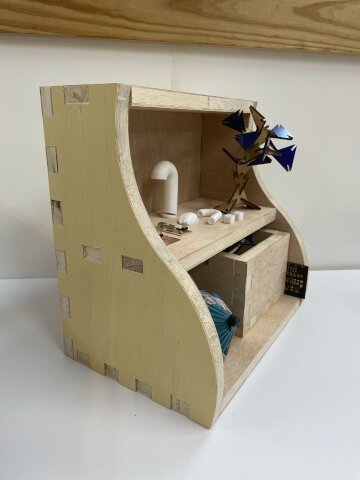
Day 2 I decided to recreate a bigger demo shelf, which is really able to demo things I create on my table.
The parameters are really much!
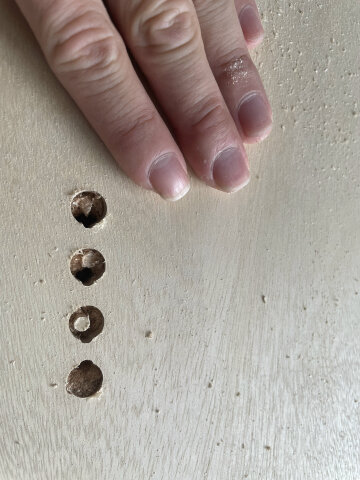
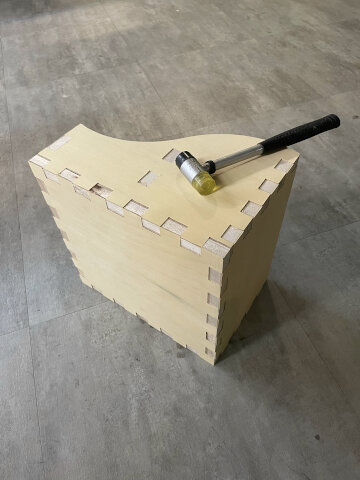
Still after a whole-day try, I finally work out! (Problem with fingers again, or forget to make dog bone halfway)
Suggest a dog bone add-in for fusion360, just remember you need to have bodies on X-Y plane, and without stange curve on it (can use dogbone first, and joint the curve parts)
If dog-bone creation failed, try to make it manually.
What happens weird is that I test earlier about the loose degree of fingers, but later the final works still too tight…, think maybe changing wood panel during cutting cause it. (I use some part from wood 1, and the rest from wood 2). So hammer on!!
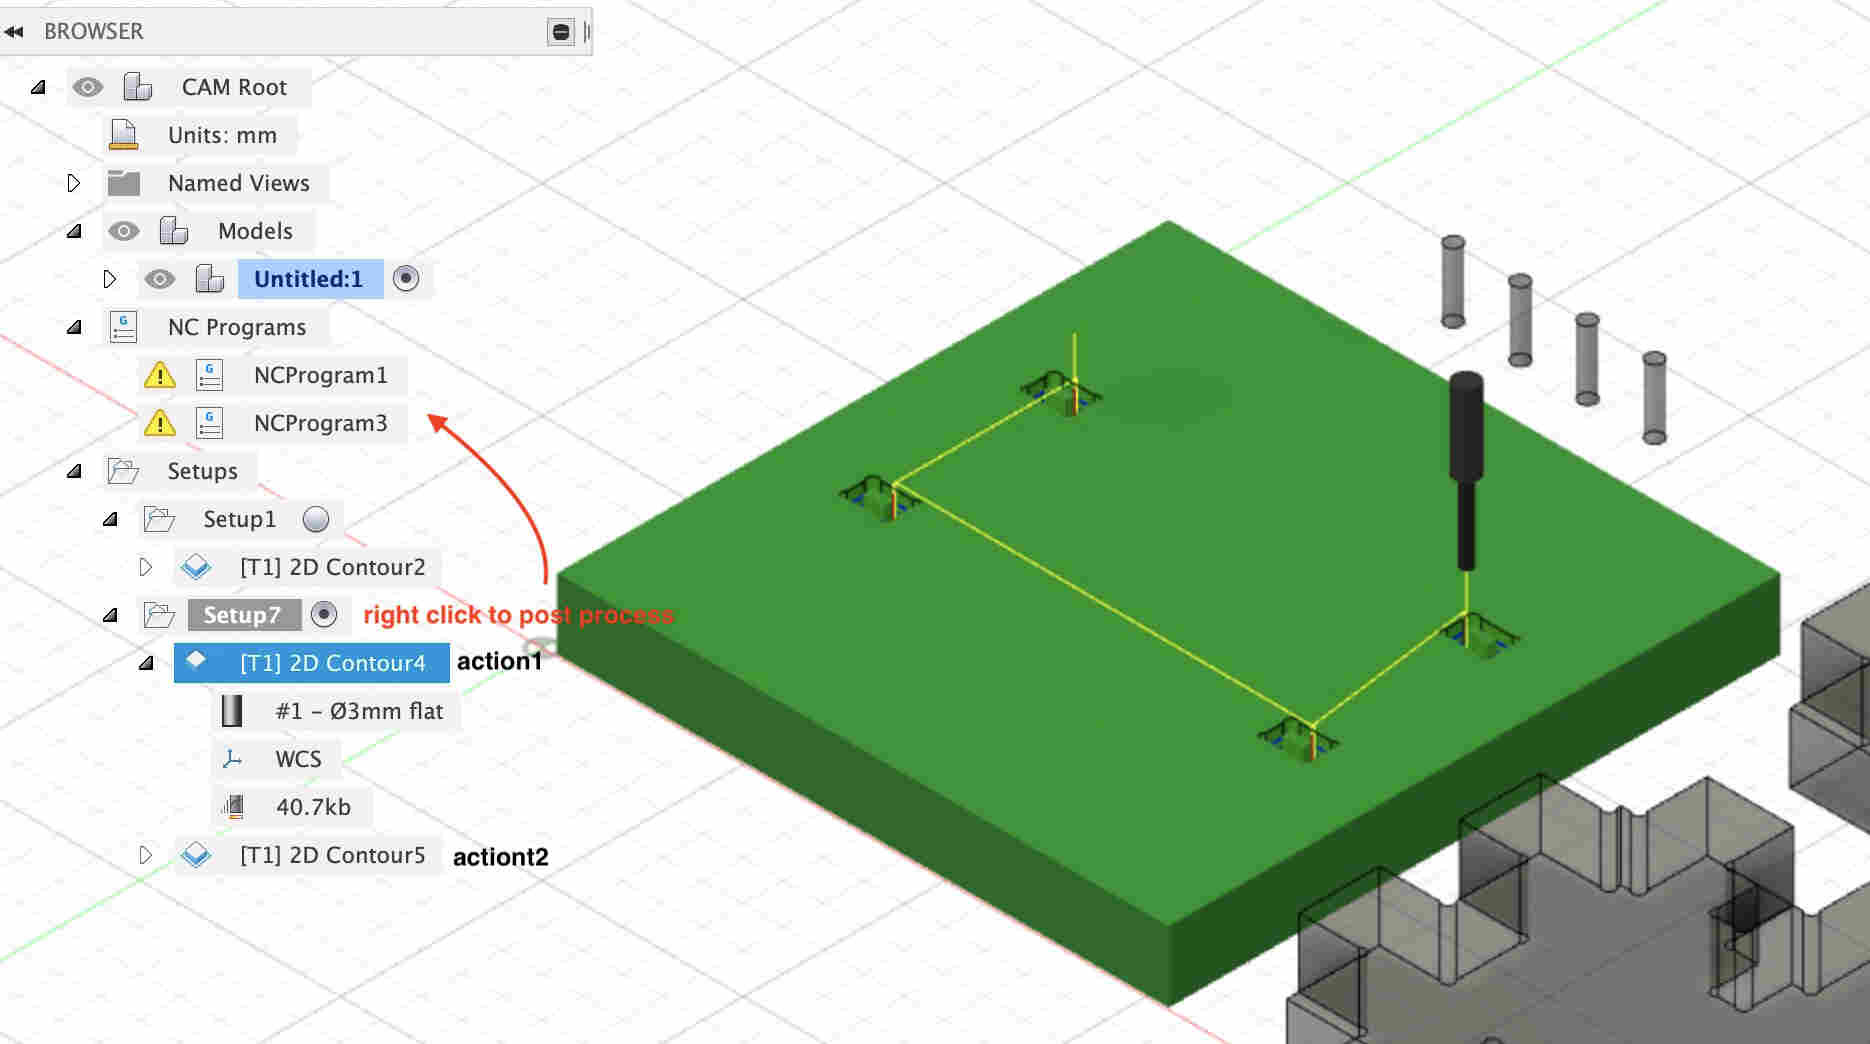
Settings of Fusion 360
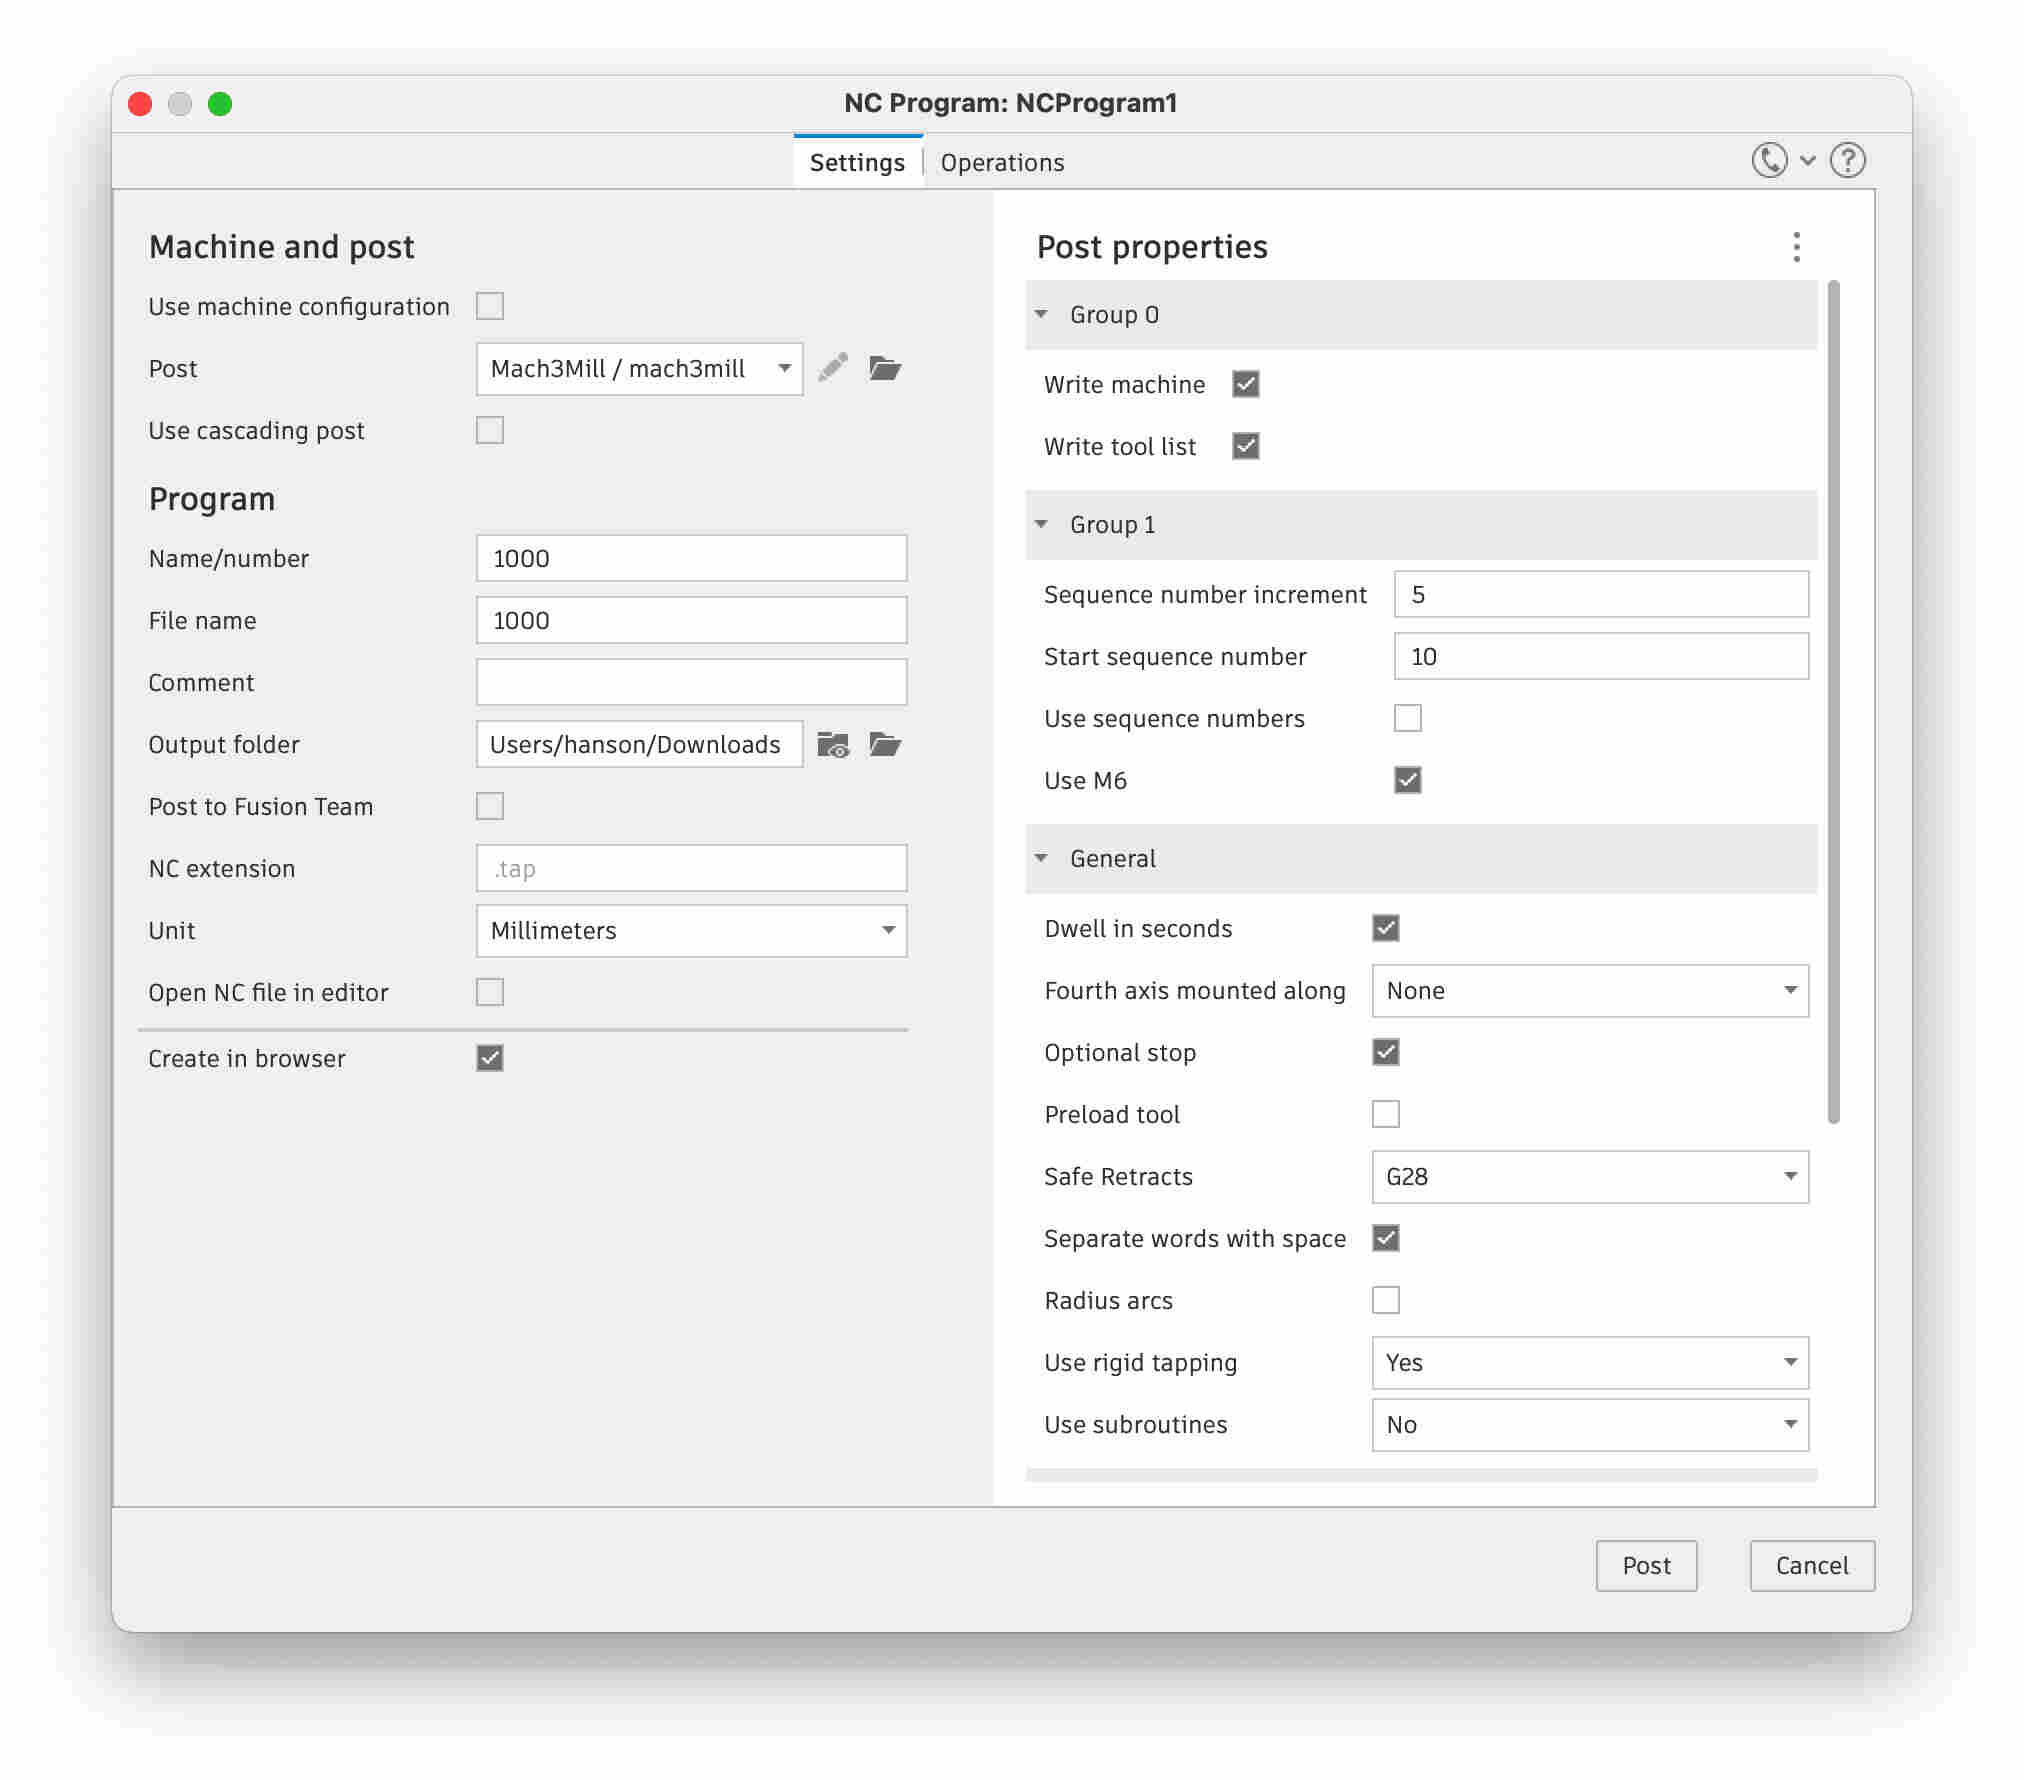
These are pictures about how to export .tap file for CNC in Fusion 360 “Manufacture” mode.
First, click setup > new setup.
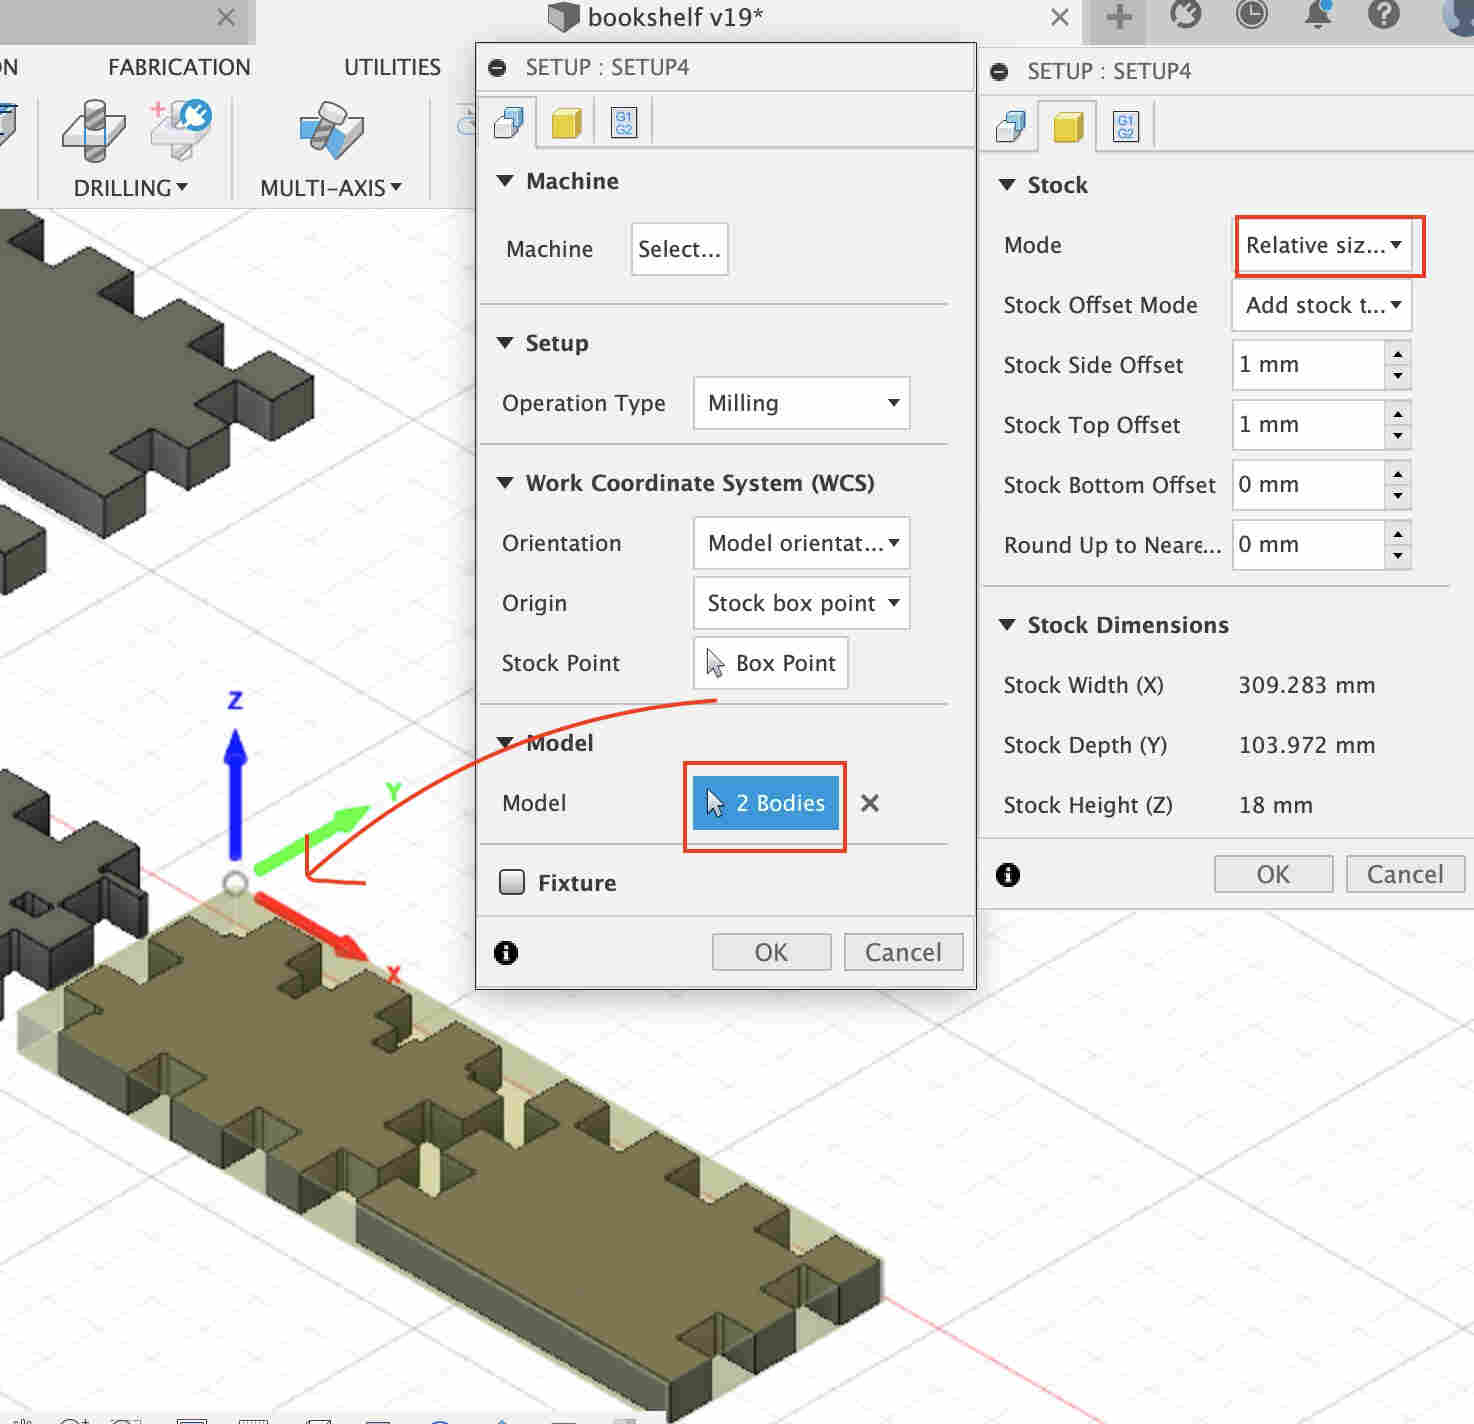
Second, select the setup you create on left list, and click 2D contour. Choose the “contour selection” carefully. If there are contours inside another contour, cut contour inside first (create a 2D contour), and cut contour outside (create another 2D contour). You can change the orders of 2D contours under one setup.
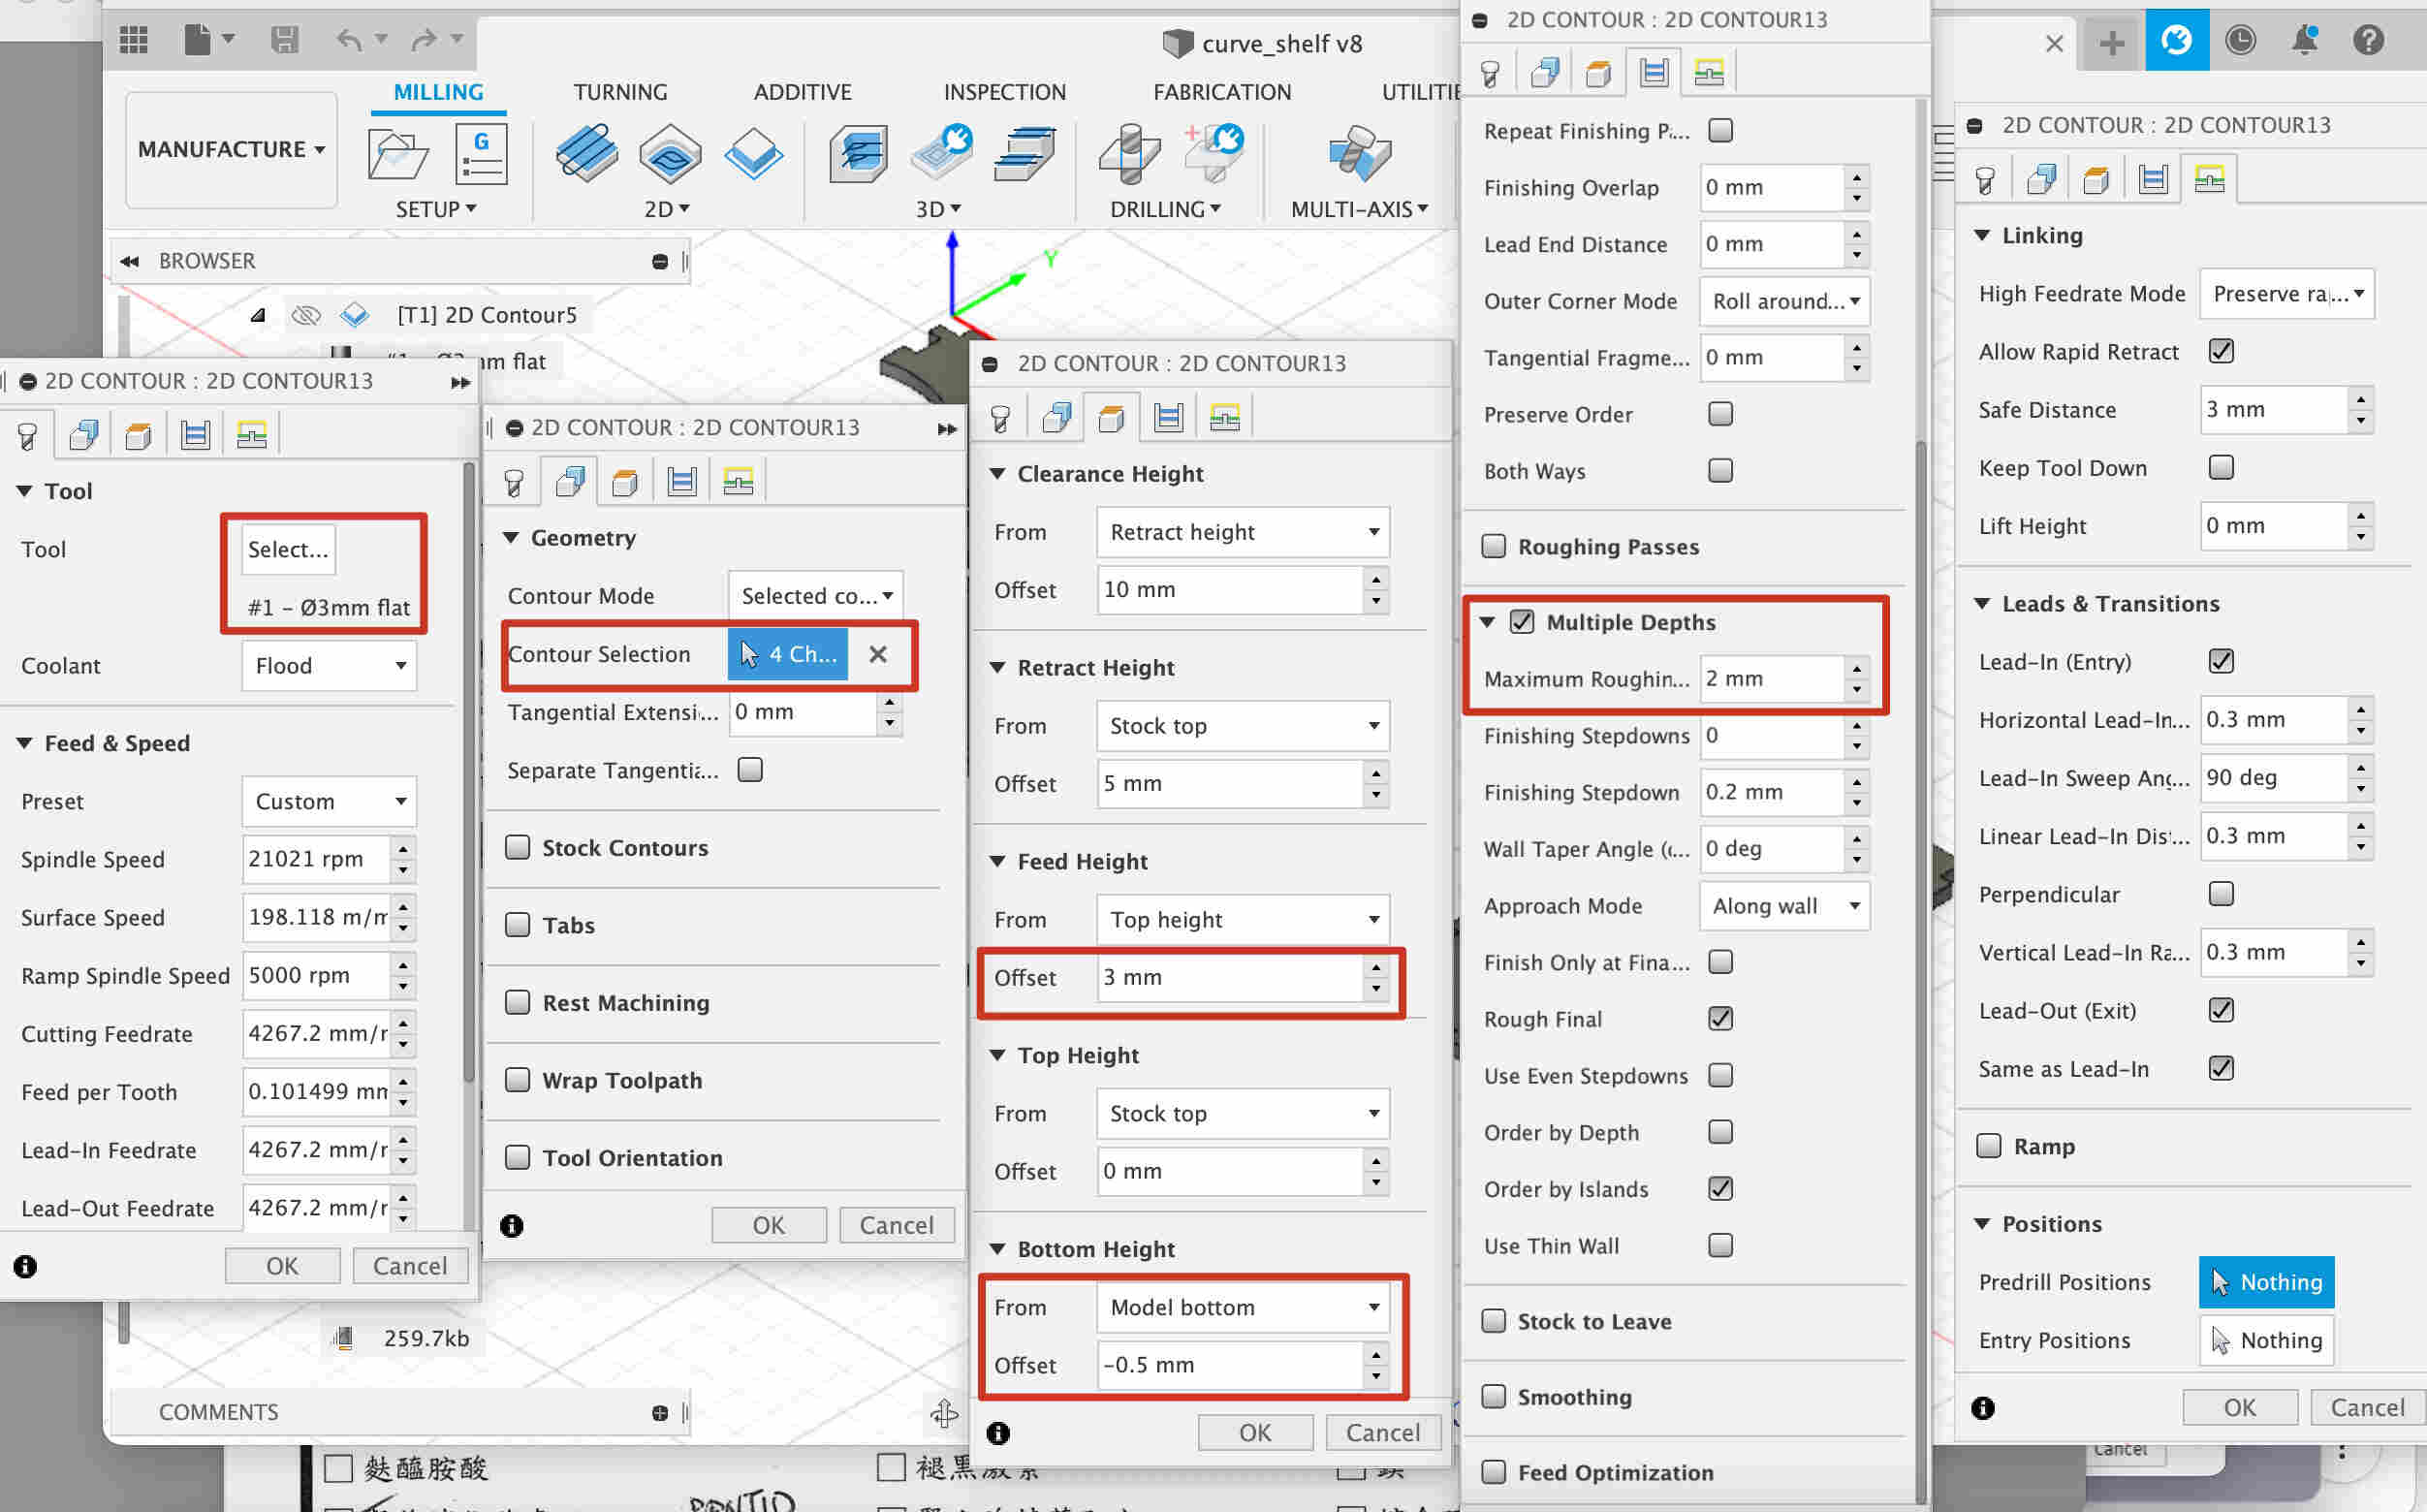
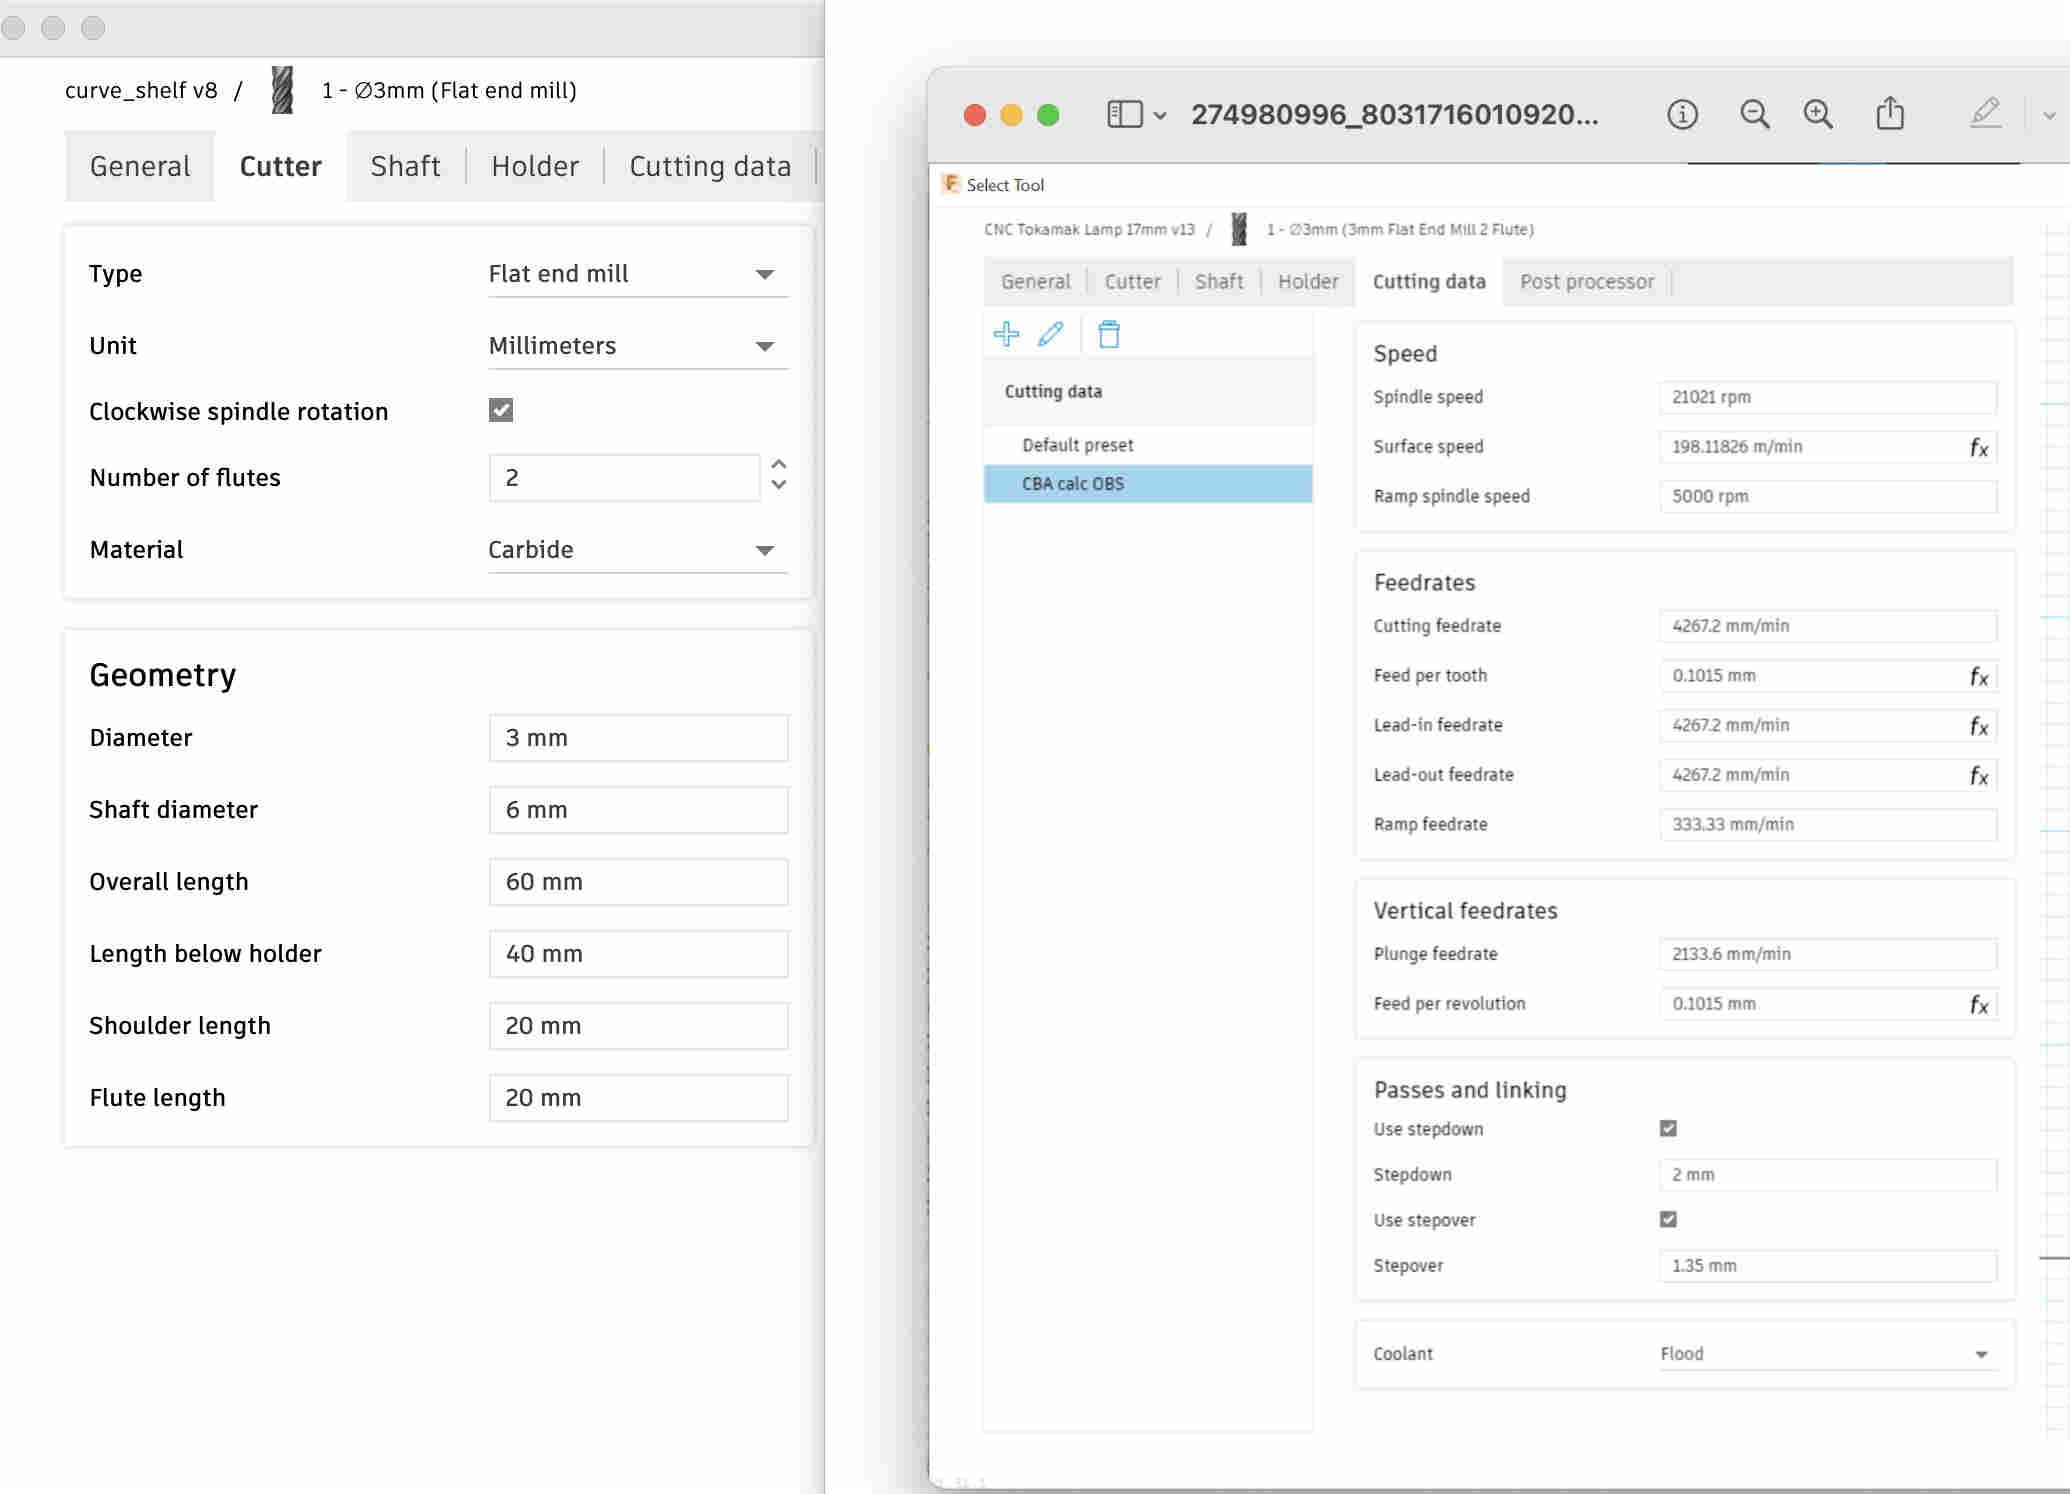
You need to setup tool first. click ‘select’, and click the cross on upper left to setup a new tool. (If tools settings in library are suitable, can use them too.)
Lastly, right click on the setup and clivk create NC program. That will export a .tap file includes all sub-programs (in this case those “2D contours”).
3D models
Design files
- curve_shelf.f3d (Fusion 360 file)
- curve_shelf.tap (CNC file)