16. Wildcard
Assignment
- Design and produce something with a digital fabrication process (incorporating computer-aided design and manufacturing) not covered in another assignment, documenting the requirements that your assignment meets, and including everything necessary to reproduce it.
This week my ooriginal goal is to try every machine in lab. 3 machines in list including vacuum forminm, Photopolymerization 3dprinting, and digital sewing. But each og them has some problem like lack of material, need repairing or firmware issue. So I started with what Neil spent most of time teaching: infuse composite.
Simpliest explanation of infuse composite: Mix more than 2 materials to create a stuff that inherit strengths from materials. So in my works I combine fabric (toughness) and resin (rigid) to make a composite mold. According to my instructor Ted, at least 3 layers will be strong enough.
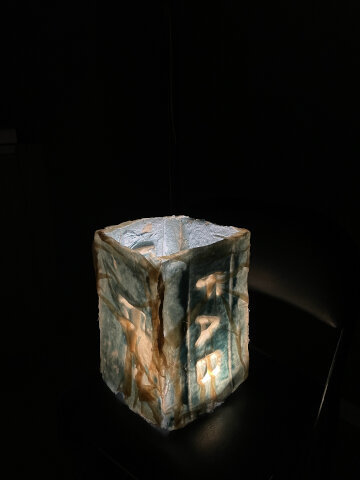
Hero shot: light up sky lantern lamp
Testing: create a lid for box
After having all materials needed, I want to do a quick test first.
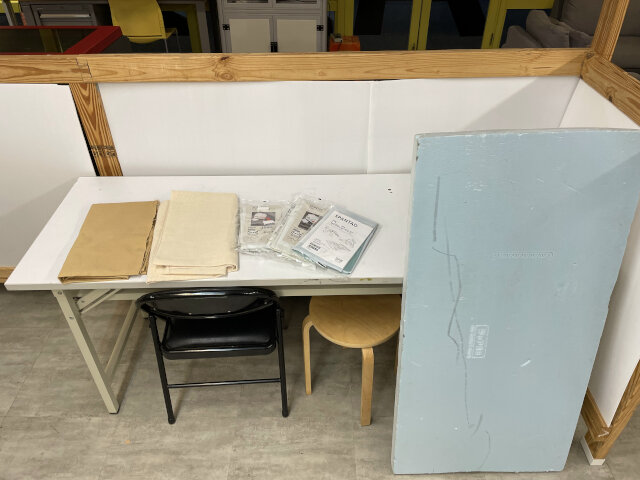
Must have: * Polystyrene board (found in lab) * Fabric (bought in market) * Vacuum storage bags (bought in IKEA) * Resin & hardening agent (left from molding and casting week)
Tools: * Gloves, glasses * Cups, Stiring stick, Plates, brushes * Release agent * Electronic scale
So I decided to make a simple lid for my wooden box made in week7 since it doesn’t require design but to mold and cast.
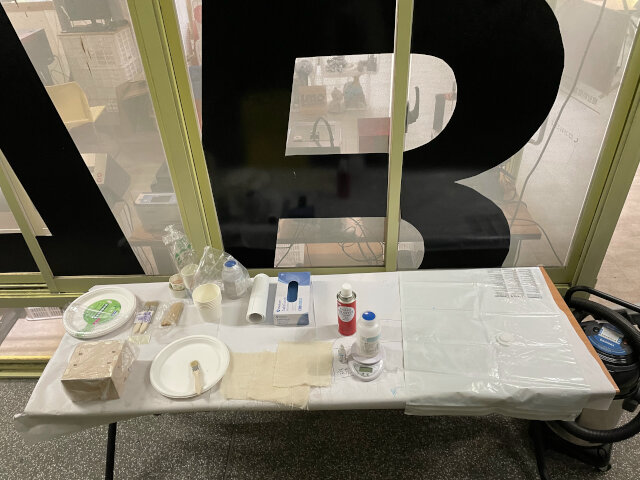
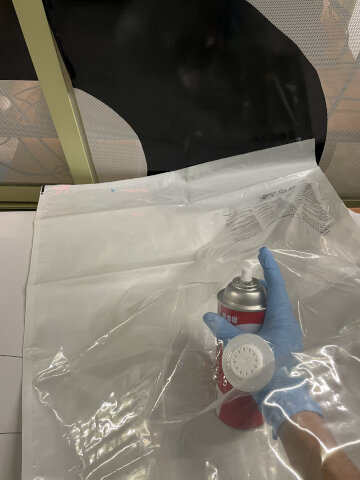
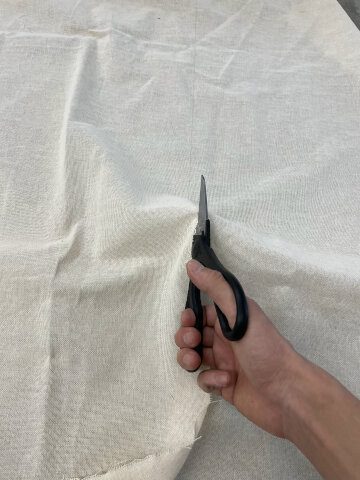
First step I cut 3 pieces of proper size fabric, and even prepared plastic plates and brushes for mixing evenly. Before starting, I spray everything that may contact resin with release agent including vacumn bag and plastic bag. (I used plastic bag to divid wooden box and composite material, that’s important!)
Tools are important…, be sure to find a nice big scissor to cut fabric or it’s tiring and not straight.
Note: always remember to take off things easily get dirty before starting molding and casting. Such as watch or anything you wear on hand, and wear cloth that is okay to get dirty.
After mixing resin with hardening agent and pour it into plate, I put fabric inside and surprising found it absorbs lots of resin! So Finally I got to put 3 fabrics together in plate and try to mix them with resin evenly (but not that successful).
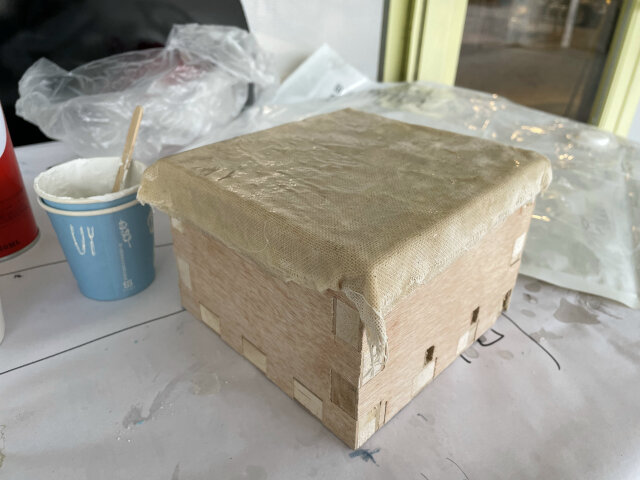
Next step is to cover fabric on wodden box (still divided by plastic bag) and sent them into vacumn bag. After sucking all air out with vacumn cleaner it’s done.
I was rushing to do it because after resin mixing with hardening agent, soon it’s going to lose liquility. update: after mixing resin with yellow painting, even 4g:1drop (hardening agent) make it comes to half solid within 10 mins. Try fewer hardening agent if using infuse composite (with vacuum bag).

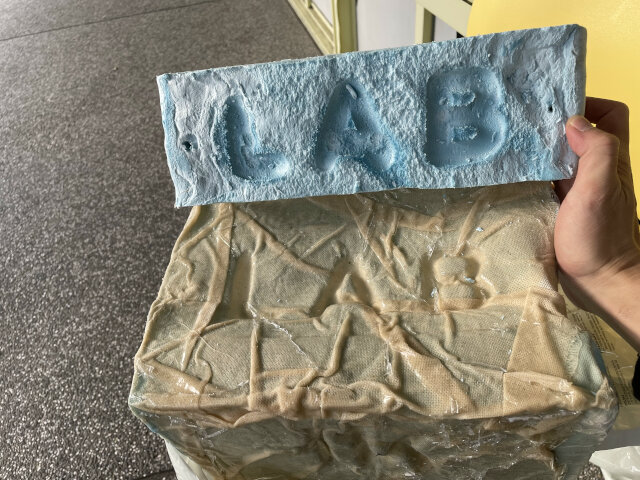
And the naxt day I got the lid of box! The surface is not smooth and some parts are not mixing with resin. But it fit perfextly with box~ Note: This one use 3 layers. It’s tough even to stay on that shaoe but you can still make it curve a bit with pretty much force on it
Sky lantern lamp
After the test, I want to make a “sky lantern” style lamp using infuse composite. (Inspire by this official bag)

Steps to make it as following:
- Prepare materials, tools and crop them into proper size
- Build model with words on it
- Turn model to CNC and mill polystyrene boards
- Set up work station and infuse composite
- Cover mold with divider and spray release agent
- mix resin and hardening agent
- soak fabric in resin / lay resin on fabric evenly
- cover composite material on mold
- put mold (with composite material) in vacumn bags and vacumn
- Wait till dry and release
Step 0~1: prepare materials and build model
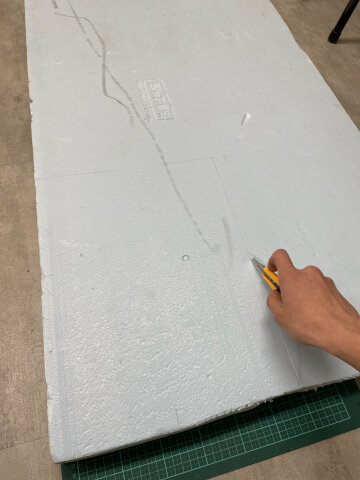
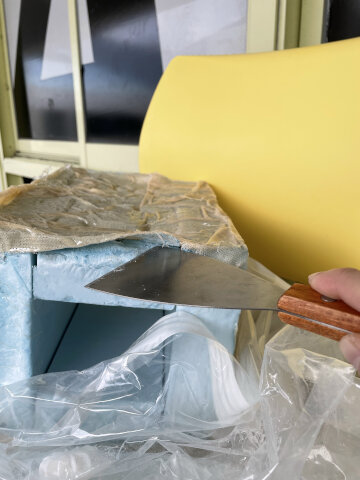
In step 0, I found the importance again of the tool, having a good utility knife can give you a smooth surface. And I don’t have it…
In step 1, I choose word style and proper word sizes, and something important is to right click and “Create Outline” before save in svg file. (Or you will find words collapse later) And than use “insert svg” in fusion360 to have words on surface. Note: words seems to be smaller in Fusion360 than in Ai, still not sure why
I chose to “cut in” the model for words this time since wanting to reduce CNC timing & clean up CNC easier (and my instructor also said the depth of cut in should be shollow for fabric to stick in easily). If you did this, can also try make a slope in edges or holes in the bottom of words, these can help fabric stick better when vacumning; But instructors also suggest to “extrude” words from the surface.
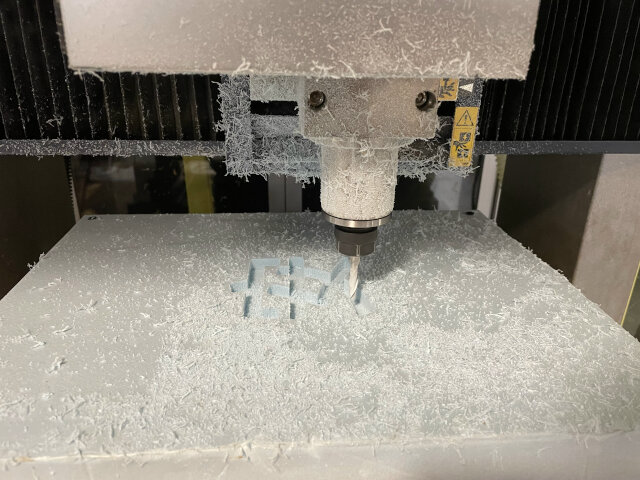
Step 2: turn model to CNC and mill polystyrene boards
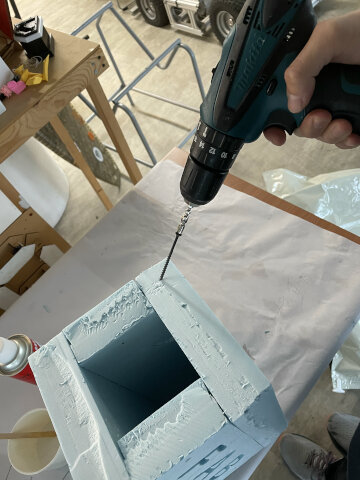
In step2, I save 4 bodies (sides) in stl (right click and save in mesh), and then using SRP player (mention in week9) to generate path. Things weird is the rough cut doesn’t cut in words, only final cuts did. And because if this I stoped the machine in “50%” progress each time to get only the rough cut result. (Again using screw to fix the polystyrene board in CNC)

Assemble these boards with screws. That’s the mold. (I have the ugly side because of bad knife, but also should consider do it in CNC)
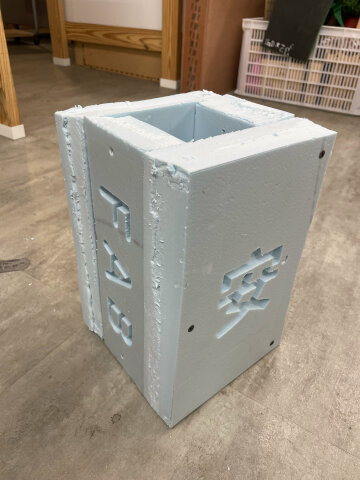
Also I found a mistake in time because my screws are on 4 sides, and they will be covered by materials later then how can I disassemble them? The way is to assemble from top and bottom. Also instrustors suggest to make it solid but not hollow and thus no need screw (vacumn can tight it).
To estimate what’s the size of fabric, I simply push fabric in mold and get a rough scale needed. But something better is to make it accurately like calculating it since building model. Or even Cut word shape of fabric, or using special way to cover fabric on mold.
 Red lins are the first layer of fabric to civer, and follow with the yellow line (second layer of fabric). And with these you can have all sides covered well without break. credit to Miriam
Step 3: set up work station and infuse composite
In step 3, with my sister’s help, we spray release agent on mold but didn’t put a divider because I want to keep the shape of words better (that’s a mistake) and infuse composite, cover it on mold. But this time because fabric just surround on 4 sides of mold, we had to kept in from falling and try to push it into the shape of words, that’s hard. So finally we only got 2 layers of fabric.
Something worse we maybe break the vacumn bag because kept pushing through it to make fabric in the shape of words. Luckily had a spare bag and just covered with another one.

Step 4: wait till dry and release
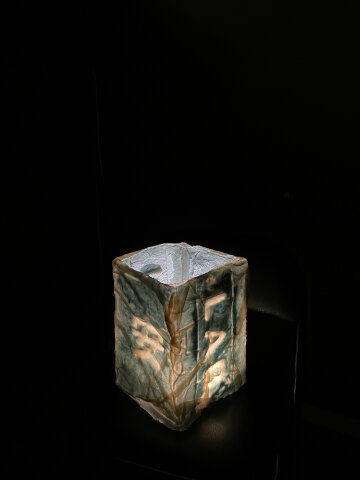
In step4, the next day when I came to release it, just fould mold stick with my lamps… OH NO!
I tried every way to divied them, finally the first side out. Note: because we only use 2 layers, lamp is rather soft and able to get off…

When look inside, you can see the polystyrene still sticks inside.., but the shape of word didn’t touch the mold so stay the same color. Somehow it helps make the lamps looks better!
My original idea includes a slope surface on 4 sides, since a lantern have bigger area on top and smaller area down bottom. But the way I came up woth is to create mold of slope and CNC it many times, which took lots of times… Maybe another better way?
Design files
four pieces of board, need to integrate them together.