9. Molding and casting
Group assignment
- review the safety data sheets for each of your molding and casting materials, then make and compare test casts with each of them
- extra credit: try other molding and casting processes
Documentation at: Fablab Taipei
Individual assignment
- design a mold around the stock and tooling that you’ll be using, mill it (rough cut + three-axis finish cut), and use it to cast parts
- extra credit: use more then two mold parts
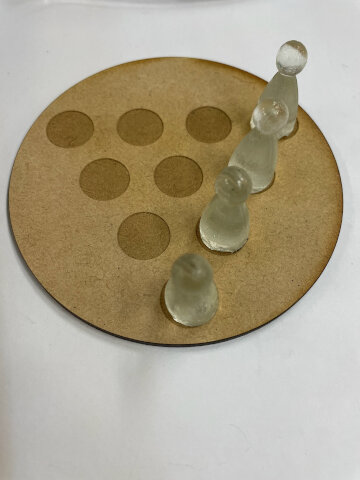
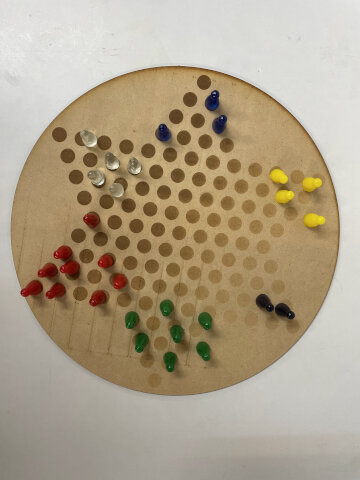
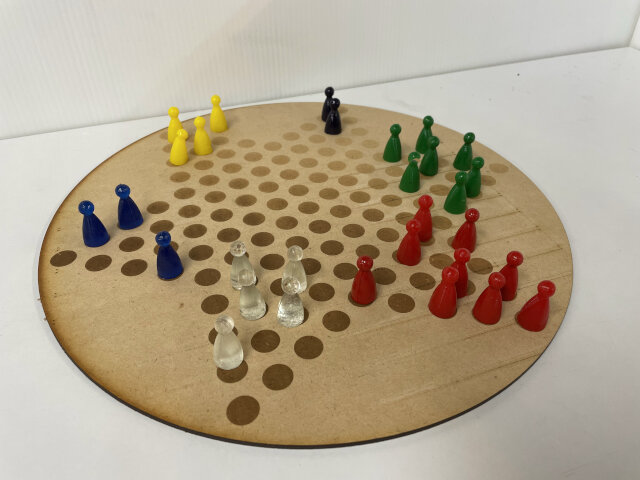
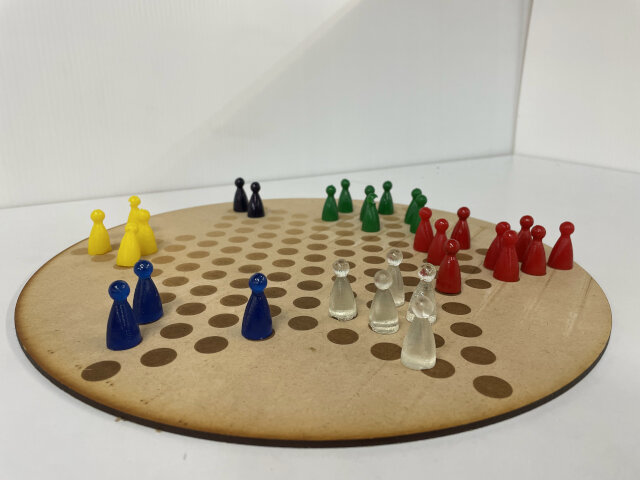
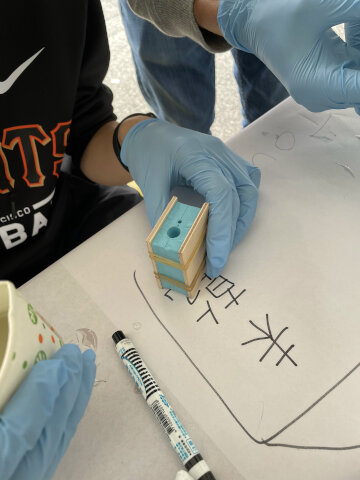
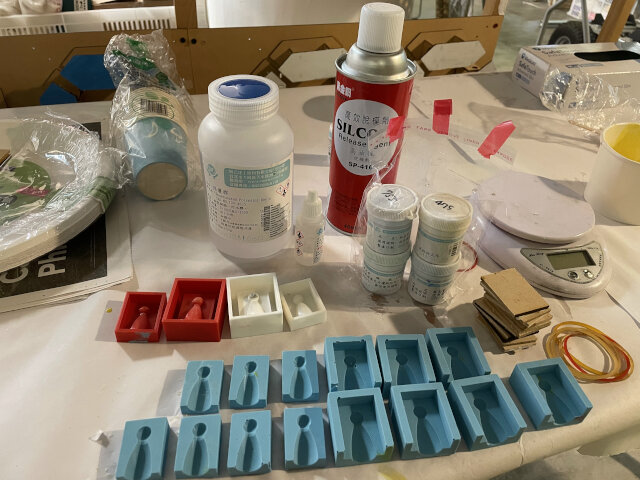
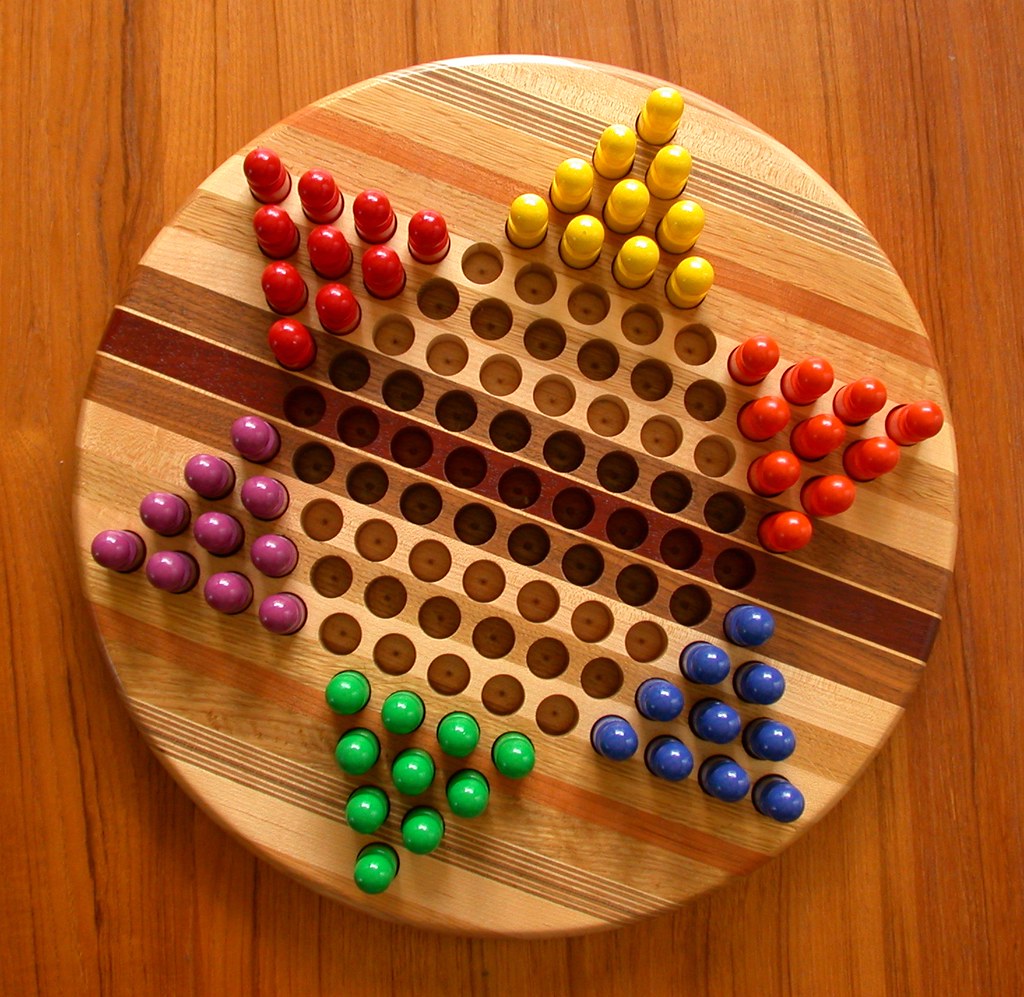
This week I worked on using mold to cast something many times (reduce cost and improve efficiency). I came up with many ideas such as food, ball and coin. But finally decided to make chessmen! I want to make my own Chinese checkers: they all look the same except colors~
Steps of this week:
- create 3D model
- convert to machine readable roadpath
- 3 steps mold and cast
- wax mold
- cast oomoo as mold
- cast resin (chessman!)
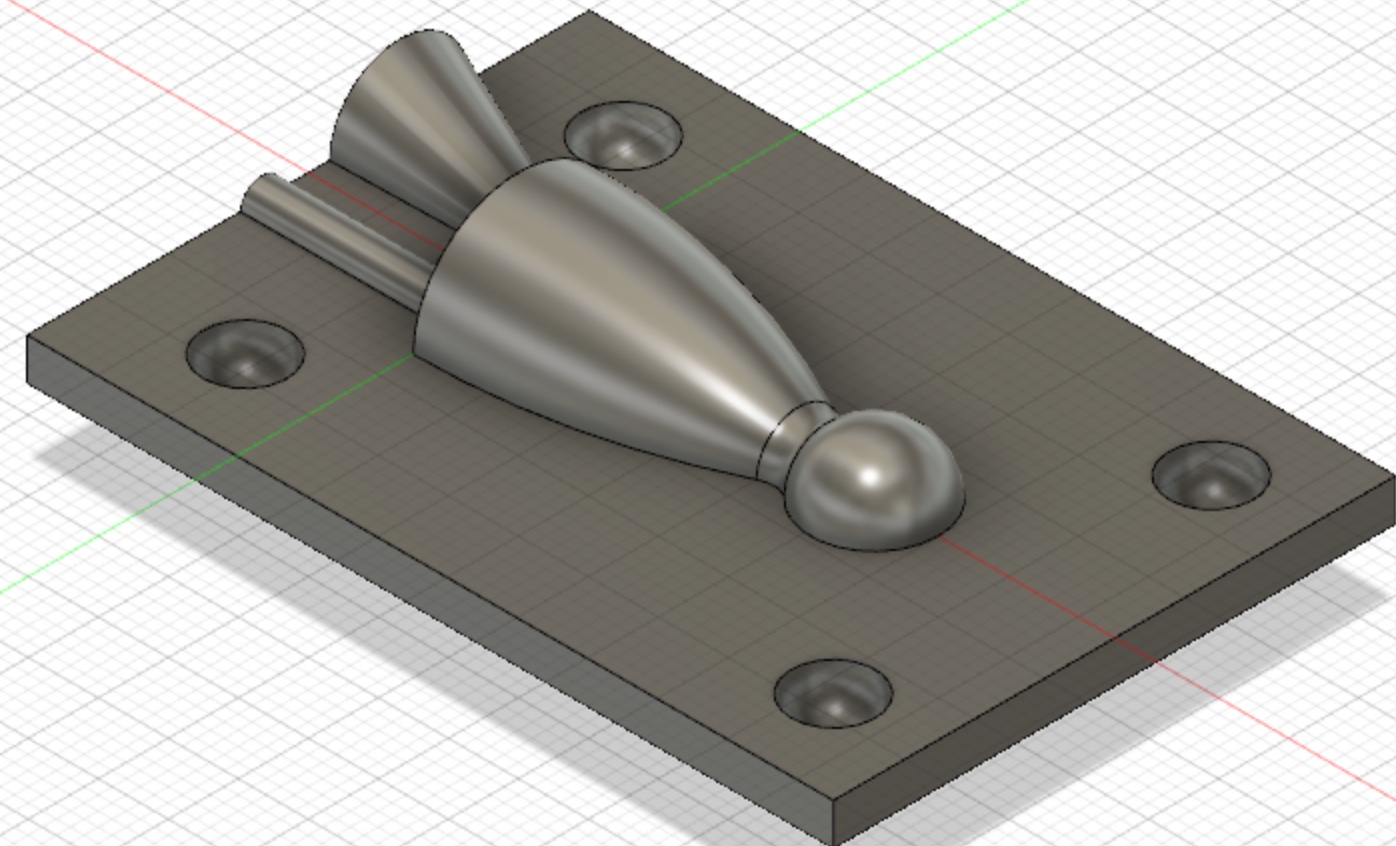
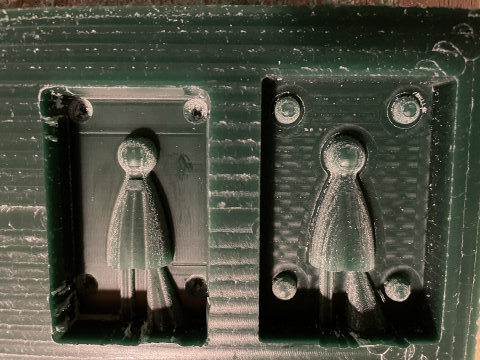
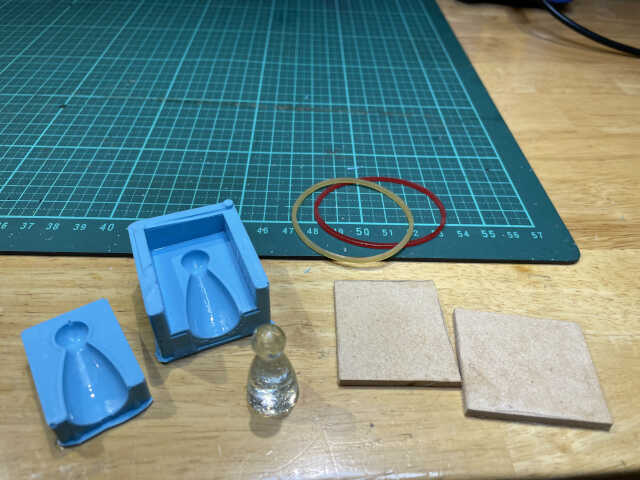
Create 3D model & Ready to CNC
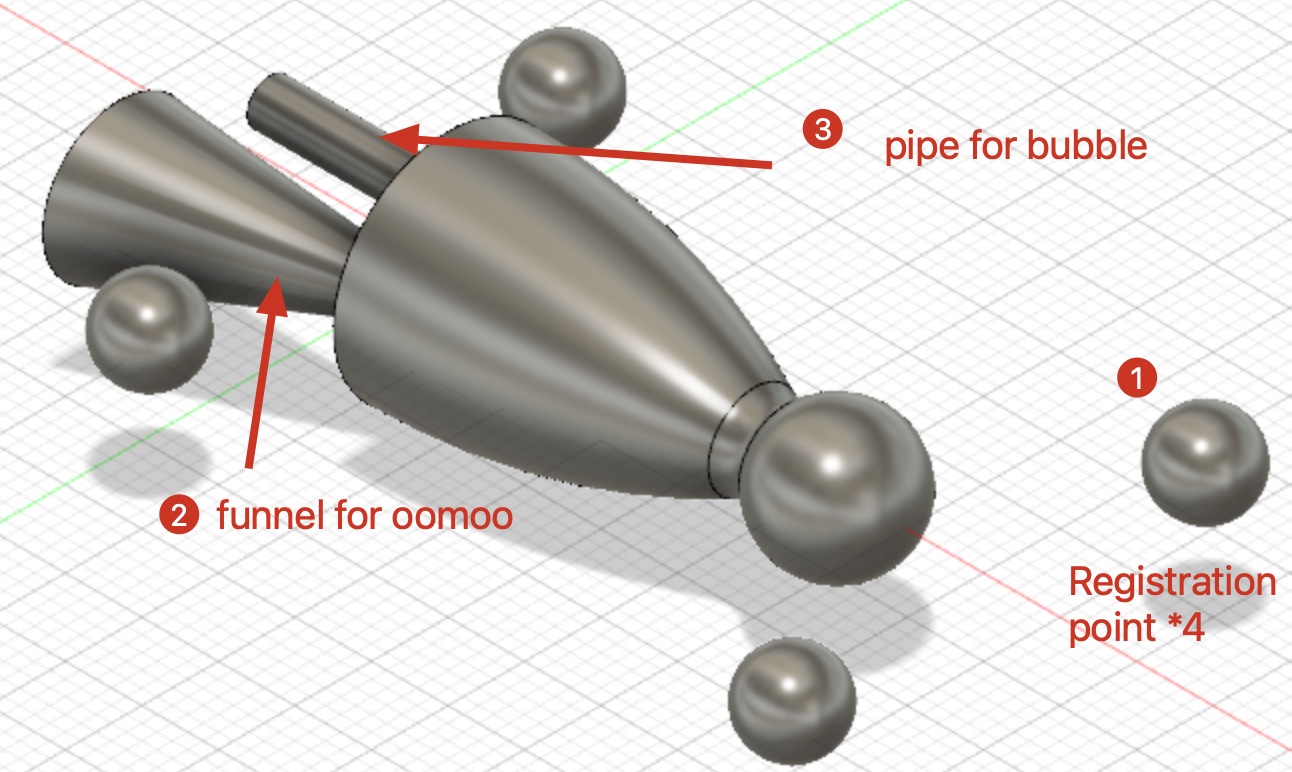
I just draw a simple chessman and brought it to lab. But refer to previous work, I knew that 3 things are missing:

- registration points
- funnel for oomoo in
- pipe for bubbles out
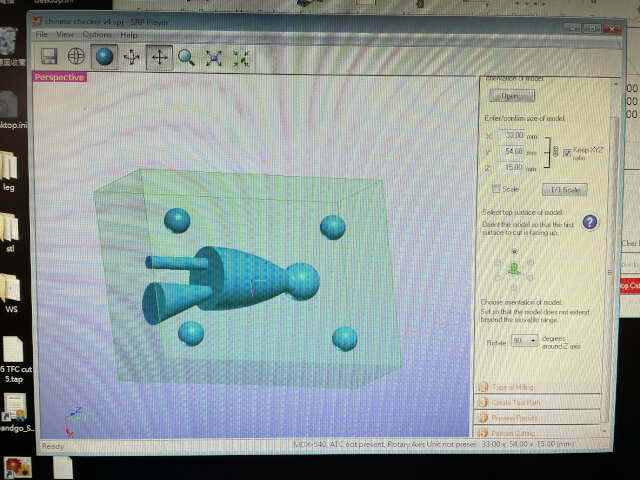
Then when I finished, Ted taught us a simple software “SRP Player” when is able to generate everything needed!
It’s able to input materials size and generate the empty box (space to mill off), and even smart to cut only the half top part of the model.
Using steps:
- Set model size and the orientation: size will be set automatically, just used to check. And do check the direction of your model toward machine, for this one Xaxis toward right and Yaxis toward inside when you’re standing in front of the machine.
- Set cutting preference: straight or curve surface, only top part or the whole model (can adjust later).
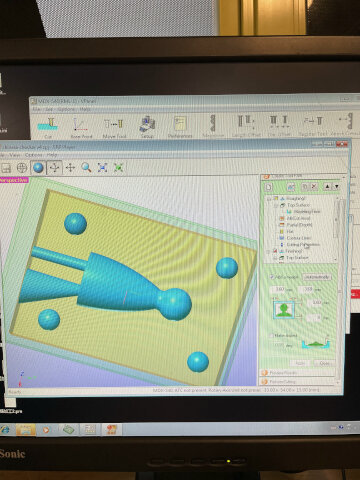
- Create path: Set up at least one rough cut and one finish cut. Click in “edit” and then “+” to see details.
- Change boarder width (not for the side you put oomoo in and bubble out)
- change depth to set the part you want to cut (0 is Zaxis middle of your model)
- Change tools and lastly cutting parameters (if you have materials and tool set right, it should be automatically fine).
- Lastly when finishing setting, close to get back and generate path, then edit again, press on each cut to see its road path.
- Preview: generate a simulation result for you to check.
- Cut: press cut and some windows will prompt (not starting immediately). Mind your length of endmill. Choose the origin to start (Well it’s actually only able to start from center! Even they provide options to start from the point, it doesn’t work).
Something to be aware of:
- don’t leave space between funnel/pipe and wall of box, or there’s no place for oomoo in or out.
- make sure the top of your model will be lower than box surface, or there will be a leak and oomoo comes out.
- be aware of distance between things in your model. You will have different diameter endmills for rough cut and final cut, so if the distance lay between these diameters, you will find unexpected stuff show up at the end.
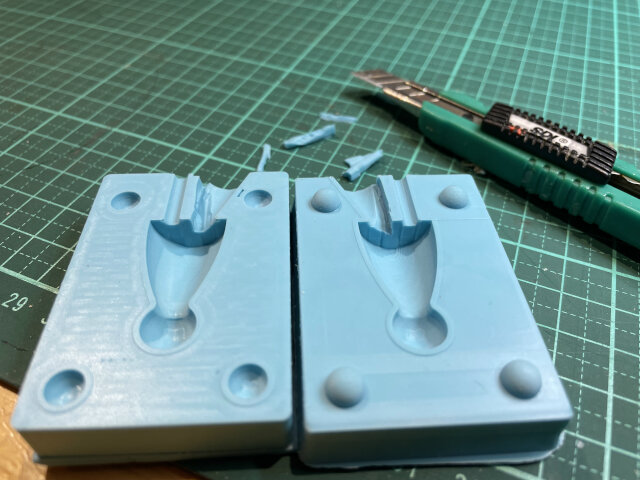
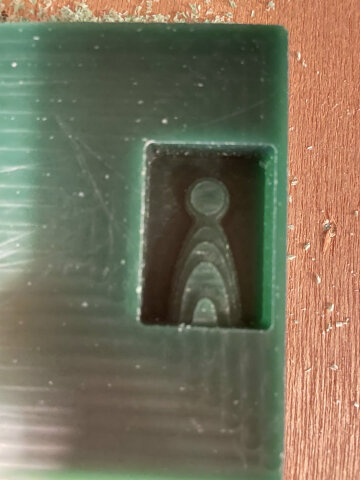
WARNING: Do remenmber the second mold is a mirror to the first one!
 The second model is different since the registration point are to be downwards, and to our software it’s better to draw the whole out, and even add solid borders to prevent finish cut make extra cut in border(so it become bigger)
Note: I did have some
.spjfiles created by SRP Player that are used to CNC checkers. But somehow we found that the computer had virus, and we got to clear USB every time after using it to generate these files. To make sure information safety, I let these files in the infected computer and not coming to cloud space.
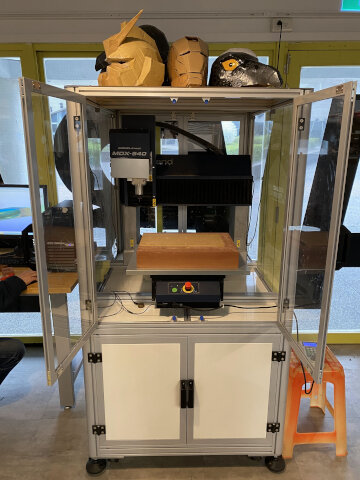
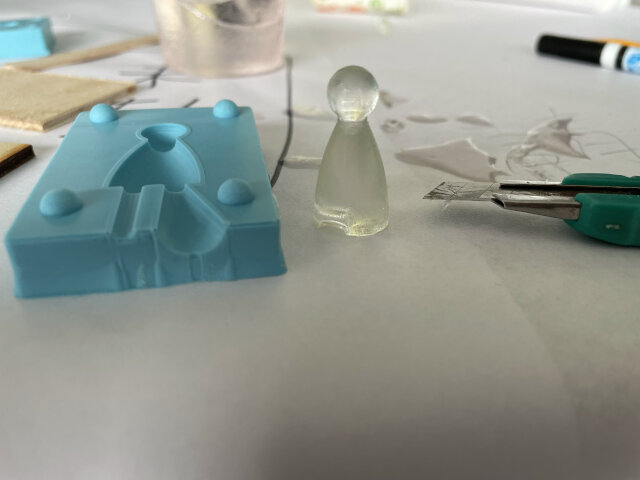
Milling to get wax mold
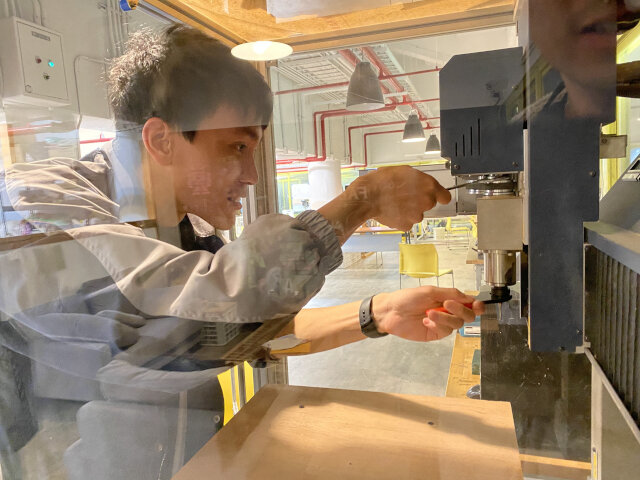
We use MDX-540 again.
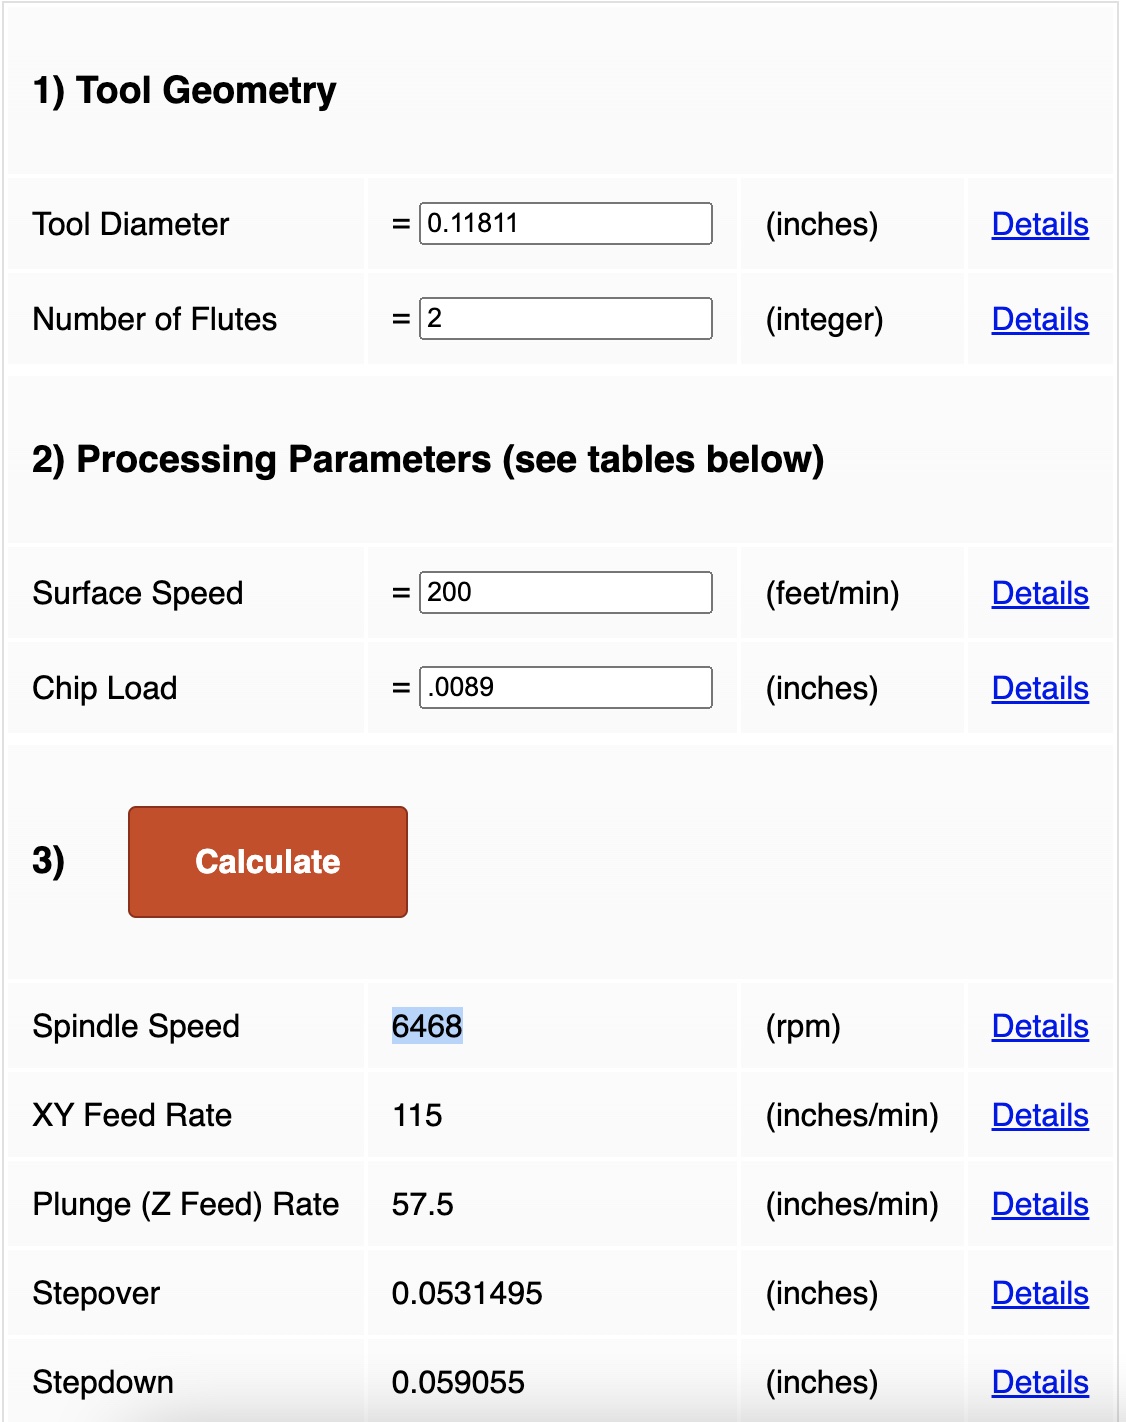
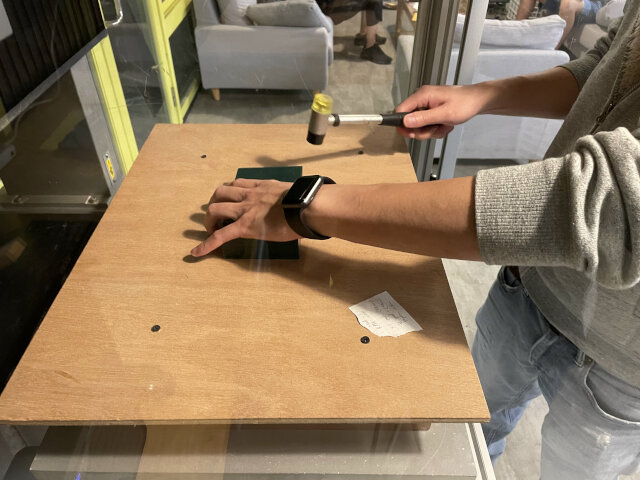
We came up with a way to fix the wax, which is cut a proper size in wood to place it! but unfortunately the wrong speed setting break an endmill… and also got to consider kerf (with a simple software in computer called Dr.engrave) so need the second cut to make it bigger.
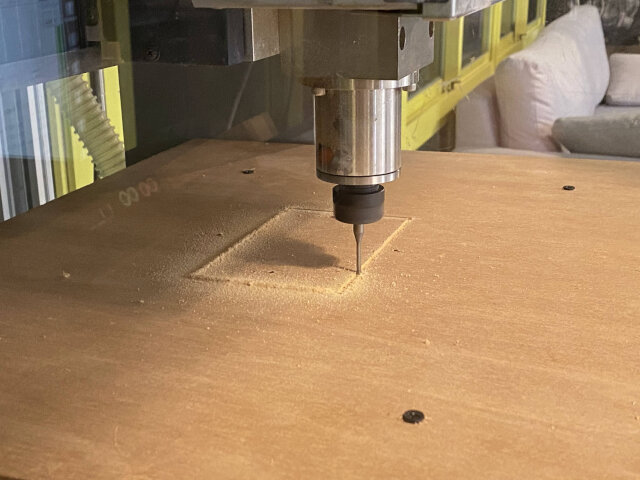
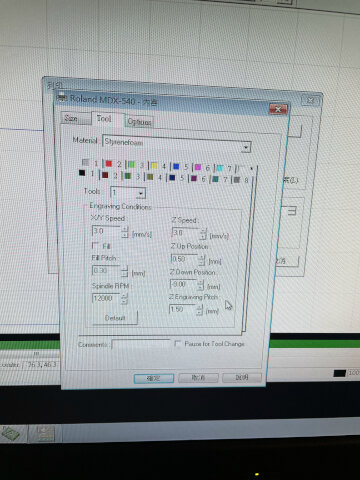
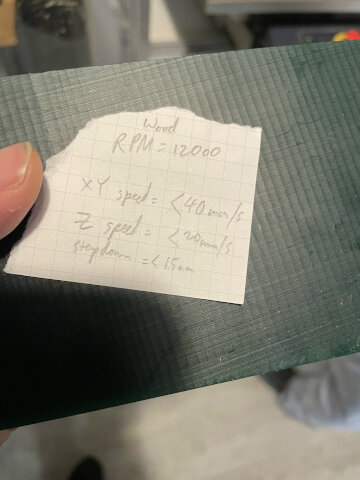
Using Fablab calculator again to make sure all speeds set right again. For example 3mm/Wax:
And when wax is on, we still need a hammer to let it in~
Note the wax surface may be smooth, but that’s not the definition for the CNC, so rememnber to face cut to make it parallel for CNC. (SRP player also have a built-in function in options > surfacing)
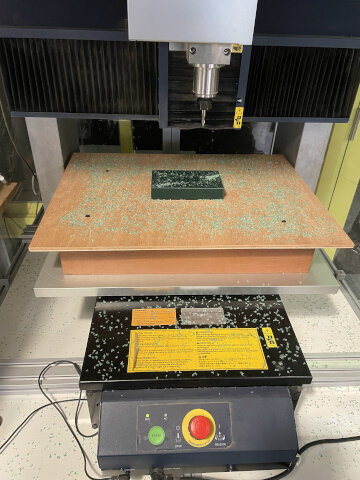

Cut 2 times for one mold:
- rough cut with 3mm endmill: really fast (<10min)
- finish cut with 1mm endmill: really slow (>1hr)
Plus, do these above twice for a pair of mold.
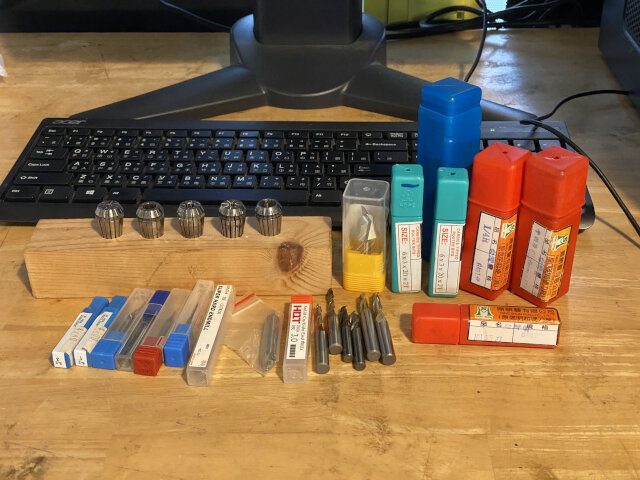
Need to change endmills many times (find out what you need first)
Like I said, do a mirror first before milling, or you will got to do it again like me… and also double check all dimensions are the same as the first one. Even 0.01mm difference may lead to unsmooth surface.
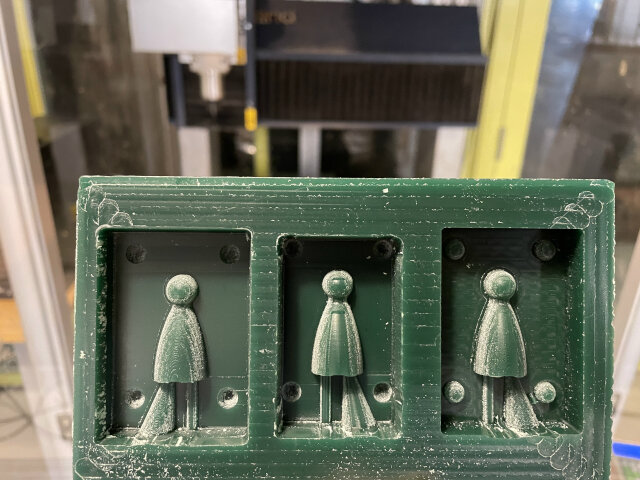
Finally, we recycled the wax mill out (they can be melt and reuse again)
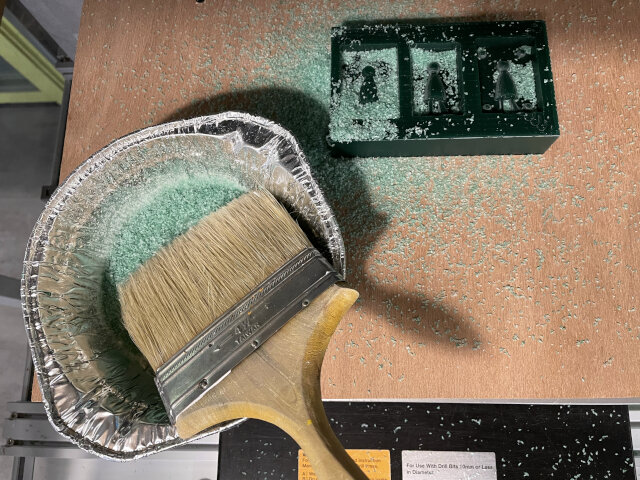
Casting to get oomoo mold
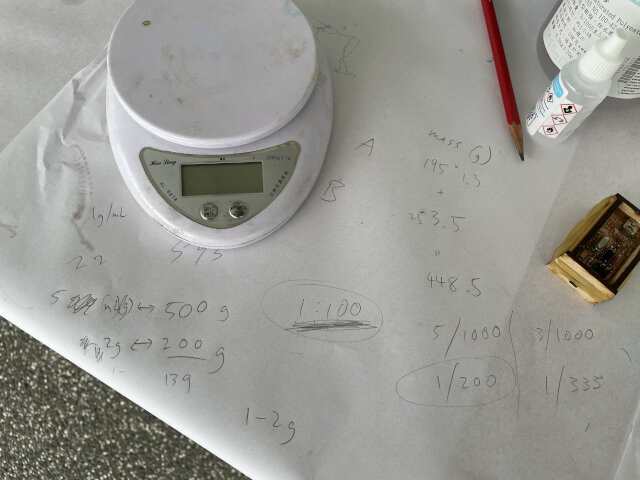
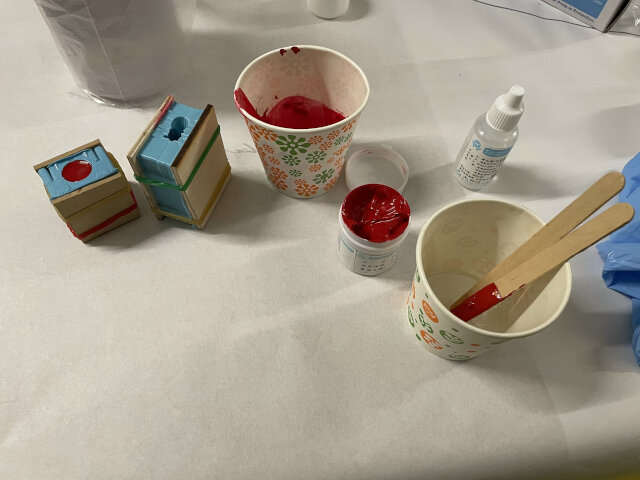
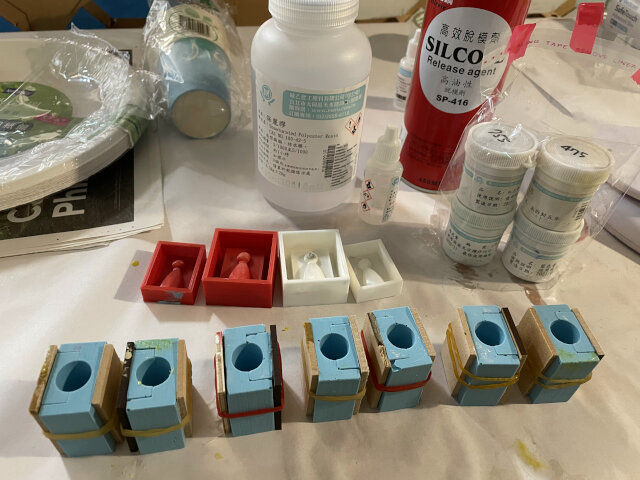
We set up a worktable, weared on gloves and glasses and started.
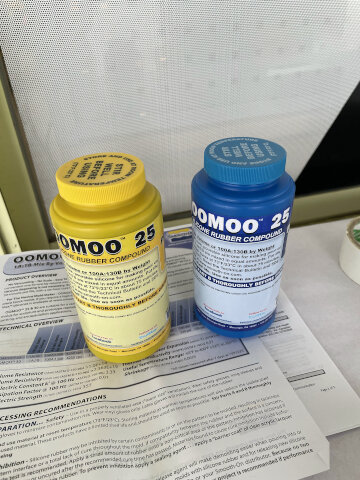
first have oomoo part A and part B mixed on a scale. (their intensity is different, and we need their mass to be 1:1, so have one times 1.35 then calculated the target weight to pour until then)

Next keep stiring 3 minutes until mixed well, and pour oomoo in our models. Try to vibrate when pouring to let bubble out.
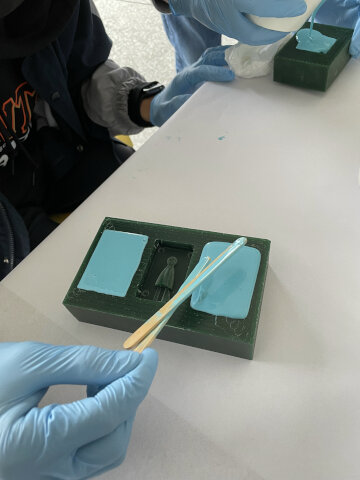
Finally we just need to wait. Set up a safety area with warning signal on it! (it is said to wait for 4 hours, but Ted said it takes even longer in rainy days…)

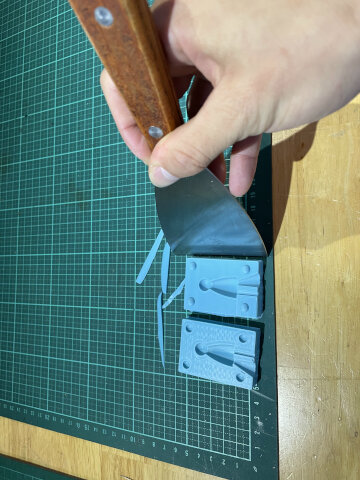
It looks good after a day dry. Just need to cut off the extra part (with a 3D printer spatula is good idea!)
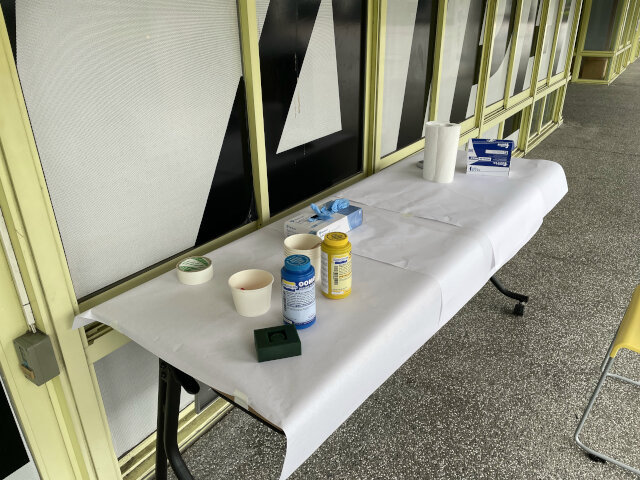
Casting resin and finish chessman
Next we went on to pour resin in oomoo mold, the fisrt step again is mixing with hardening agent. Then we had some problem because we only have the number of mixing portion (500:5), but not its unit. And when we called the store they said the hardening agent only measure with its mass, at the same time resin only with weight…
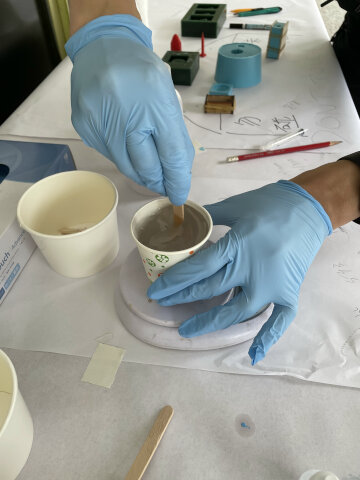
Anyway we assume resin density is about 1:1 and kept adding hardening agent until it is satisfied and string. When pouring resin this is harder than oomoo and also can see some bubble inside.
Better do the stiring faster because it becomes harden very fast! Regard to the store they said within 10 mins it will stop flowing. Also don’t forget to vibrate when pouring to let bubbles out.
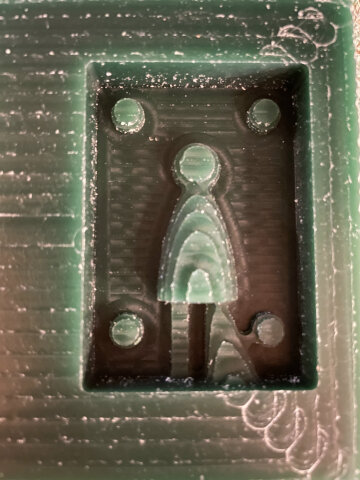
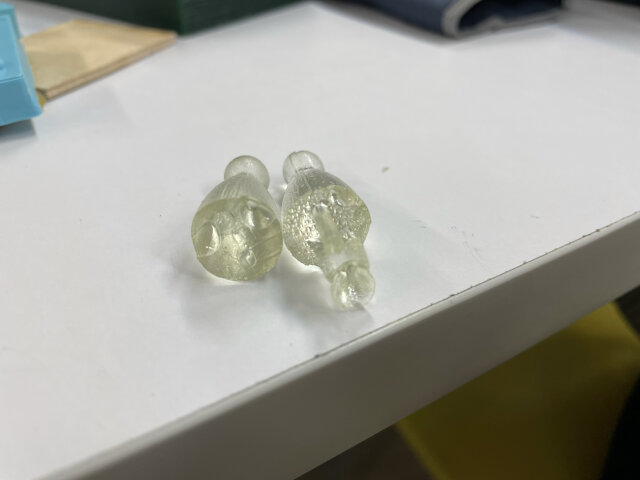
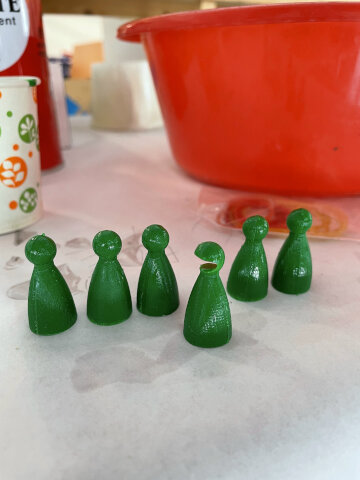
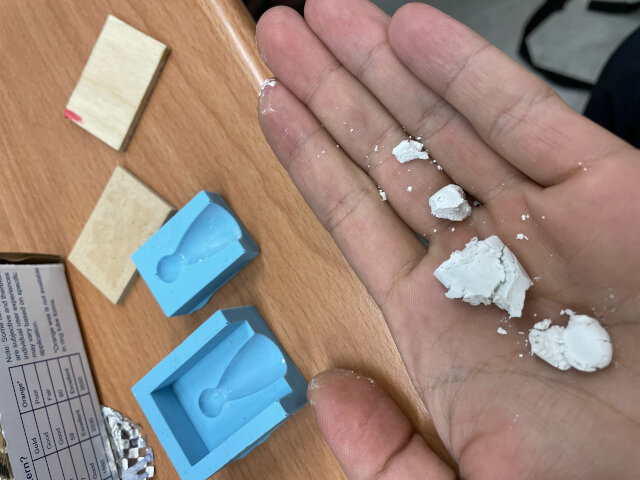
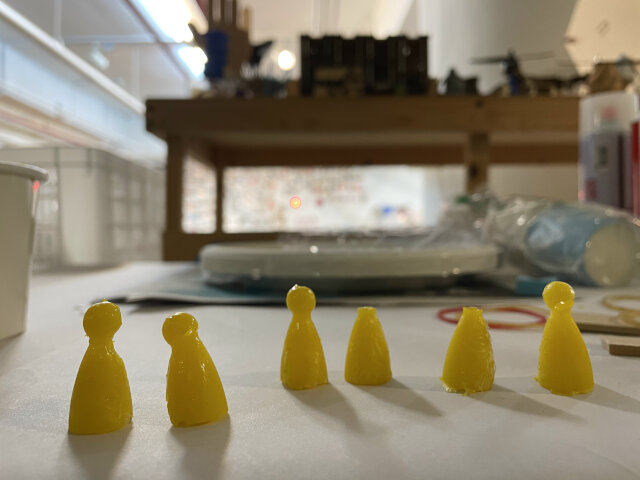
For about one hour later we had our fisrt result! It;s still a bit sticky, but can got them out. My chessman is perfect for its head and most body, but found two big bubble at the bottom! The reason may be the funnel, which is too small at the end and able to stuck.
Later I use utility knife to make the end of funnel bigger on oomoo mold, and then cast it again with resin (12g resin with 3 drops hardening agent), hope it works!
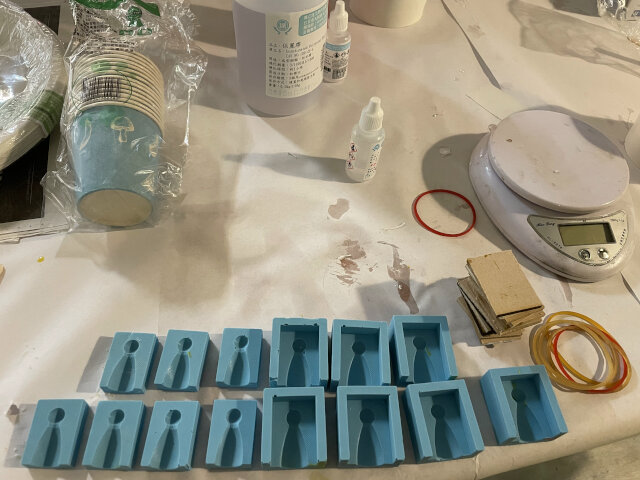
Portion record:
- oomoo partA:partB = 1:1.3 (weight)
- To fill a pair checker mold wwith oomoo: 40g
- To fill one checker mold with resin: 4g
- resin:colors = colors as little as possible (do it before adding gardening agent)
- resin:hardening agent = 3g(4g):1drop
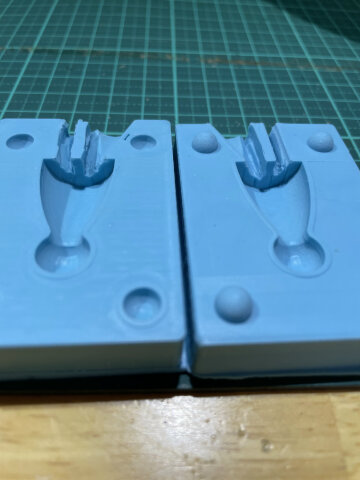
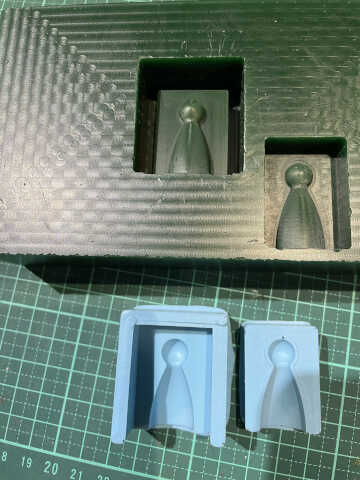
Update: Using “box” shape to create mold
The result above looks terrible because of several reasons, one is that pipes are too thin for oomoo in and air out, so I use utility knife to make it bigger (looks bad); second is after resin dry, I still have to cut these 2 pipes of oomoo out and it’s a bit hard to make the surface smooth and let checker stands well. Ted reminded me that I can even let gravity help to make the surface flat and doesn’t need those pipes!
Later in asia review, instructors suggested that I should use a “box” shape to fix 2 pieces of mold instead of “register” shape. Since oomoo is a soft material and register is more suitable in hard material.
So I made the second version of my checker mold with wax, but problem happened that because I flipped wax upside down to mill another side, it seems not very horizontal. To keep working I turn to 3D printing and make a mold for oomoo.
If sometimes find CNC result looks rough, check setting in how to scan lines for finish cut (try X+Y axis and preview results before starting), that’s critical.
Then just continue the process before: put oomoo inside and get oomoo mold, and then put resin inside… then this time it’s much better! I even tried to add colors inside (color only for resin usage, not transparent), and just a little bit can make it looks good, too much the color will be too deep.
Lastly I borrowed concrete powder from a partner Paul in lab, the portion of water to powder depends (make it wet enough to flow into your mold). But I kept failing several times since it;s too crispy. even though I wait for about one week for it to dry. Finally Paul told me that merely concrete is not ebough for my tiny checker, I can use a stick inside concrete (fix it before concrete dry, such as make a “T” shape with 2 sticks with the one below inside concrete, and get the upper one off when finished), that makes it much stronger.

Note: dot’t use resin opened for more than one month, or it will start to be sticky even without hardening agent. And turns out to bad results.
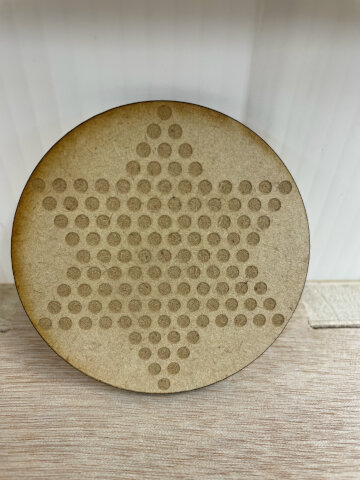
Chessboard
With the final project idea of interactive Chinese checkers, I started drawing a chessboard and creae lots of chessmen. Simple one refer to this:
 Reference