17. Wildcard week
This week I explored using an embroidery machine to stitch text and/or logos directly from Inkscape.
Embroidery Machine Setup
In our lab, we use a W6 N5000 sewing machine. The W6 N5000 can be coupled with a number of embroidery tables, which can be controlled using proprietary software delivered with the machine or using Inkscape with the Ink/Stitch plugin. Our embroidery table is the W6 EU-7, which has a maximum embroidery size of 150 mm x 250 mm.
From Digital Files to Embroidered Designs
The workflow for digital embroidering is very similar to laser cutting. Depending on the software used, different source formats can be used to generate the embroidery. Some softwares will take raster images and turn them into stitchable patterns, but generally speaking, vector file formats are preferable as due to their nature, being path-based already, they lend themselves much easier to generating tool paths. The source files are run through this software to generates machine code for controlling the stitching machine. A fabric is fixed into a stitching frame on the machine which can be moved relative to the stitching needle. When the program is run, the stitching table moves the fabric so as to follow the tool paths generated earlier (I have never seen an embroidery machine where the needle would move, it’s usually the fabric that moves).
Ink/Stitch: An Inkscape Embroidery Plugin
Ink/Stitch is a free and open source plugin for Inkscape that allows preparation of machine code for a variety of Stitching machines. It also supports a file format usable with the W6 N5000 and the EU-7 embroidery table (Tajima format, .dst files). Similar to how in laser cutting stroke types and colors in vector files can often be used to demark different processes (e.g. marking vs. cutting vs. engraving), the stroke type and width in Ink/Stitch determine what kind of stitch is performed and how wide it is (if it has any width at all). For a full description of which strokes are associated with which patterns, see the Stitch Library section of the Ink/Stitch webpage.
Setting up the Machine
First, the EU-7 embroidery table is connected to the N5000 sewing machine using a proprietary cable fixed to the EU-7 itself. The N5000 automatically detects that an embroidery table has been connected and switches to embroidery mode (normal sewing is not possible then), where the display only shows options for setting up string tension. Now comes the most important part in preparation: stretching the fabric to be embroidered over the embroidery frame. Stretching is actually maybe not the right term here, as stretchable fabrics cannot easily be embroidered and tend to rip in the process. Fabrics to be embroidered should best be of the non-stretch kind, and even then, thin fabrics should be strengthened by attaching an backing to them for the process of embroidering.
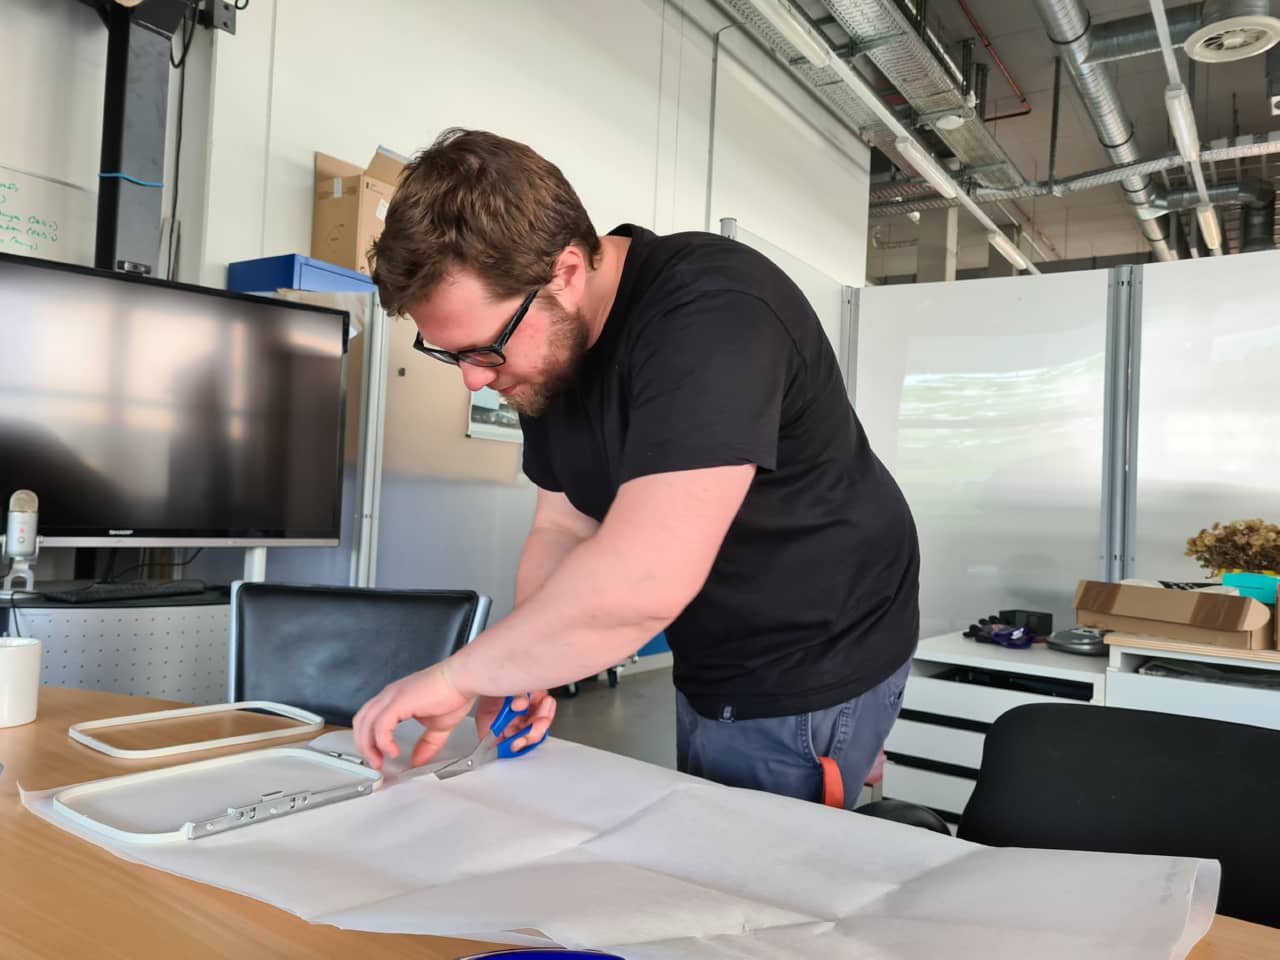
I started out by cutting both fabric to be embroidered and backing material to roughly the frame size (slight larger to allow for stretching over the frame):
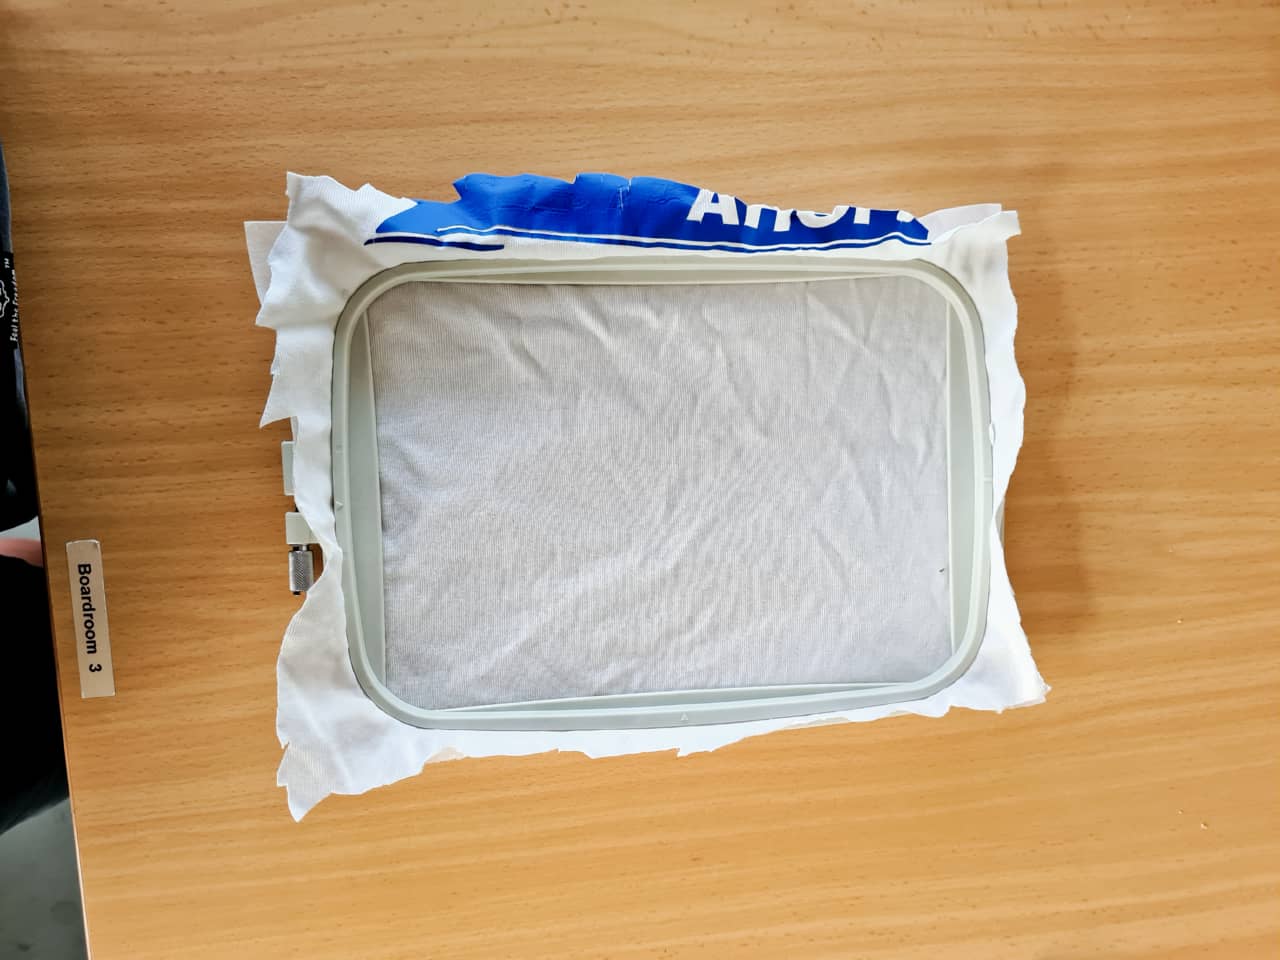
Here is the fabric I started out with stretched over the embroidery frame (with backing material):
Embroidering Process
The design in Inkscape can be converted to the .dst file format needed by our embroidery table by simply going File -> Save As... and selecting the Tajima .dst file format. The .dst file then goes on a USB pen drive and into the USB port on the embroidery table. On a display, the file can be loaded, previewed and started. Once the embroidery process is started, the machine works autonomously until the process is finished.
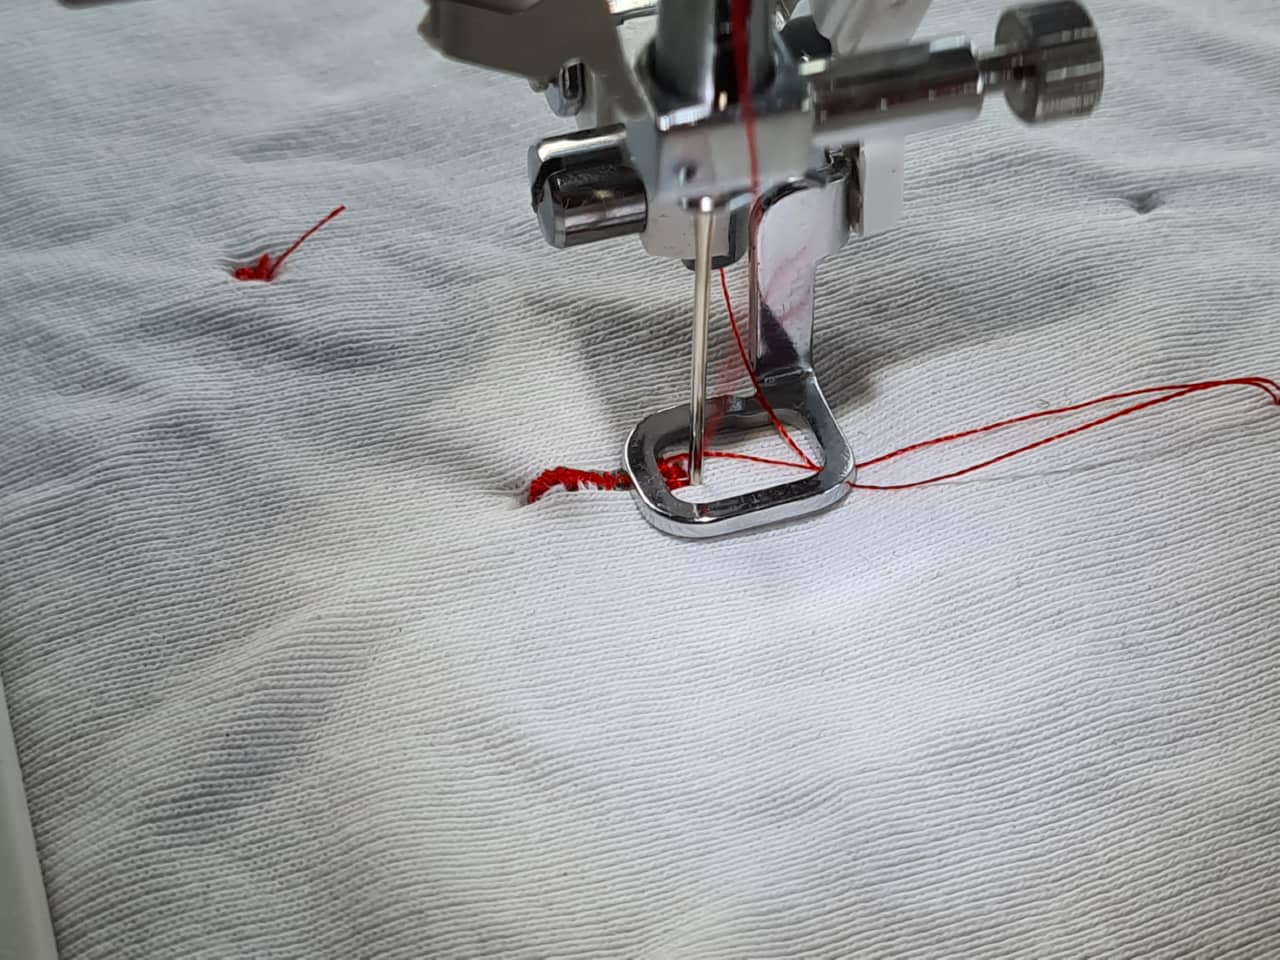
During embroidering, the needle automatically moves up and down and the embroidery table moves the frame with the fabric relative to the needle:
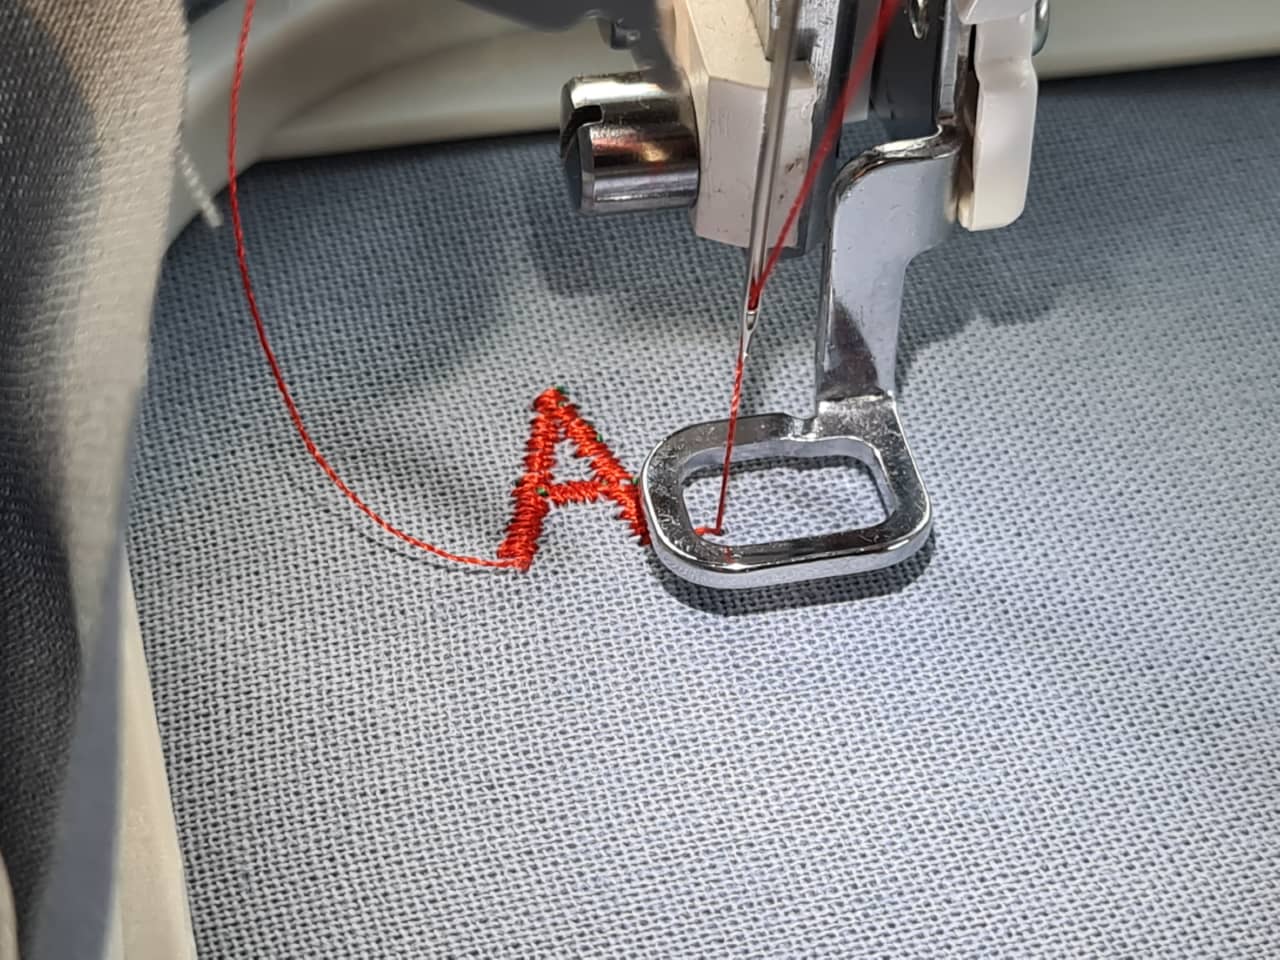
After failing a few times with the stretchier fabric (it totally got wrecked by the embroidering process), I prepared a new frame with firmer canvas fabric and backing. Here is a test letter done embroidering on that firmer fabric. Success!
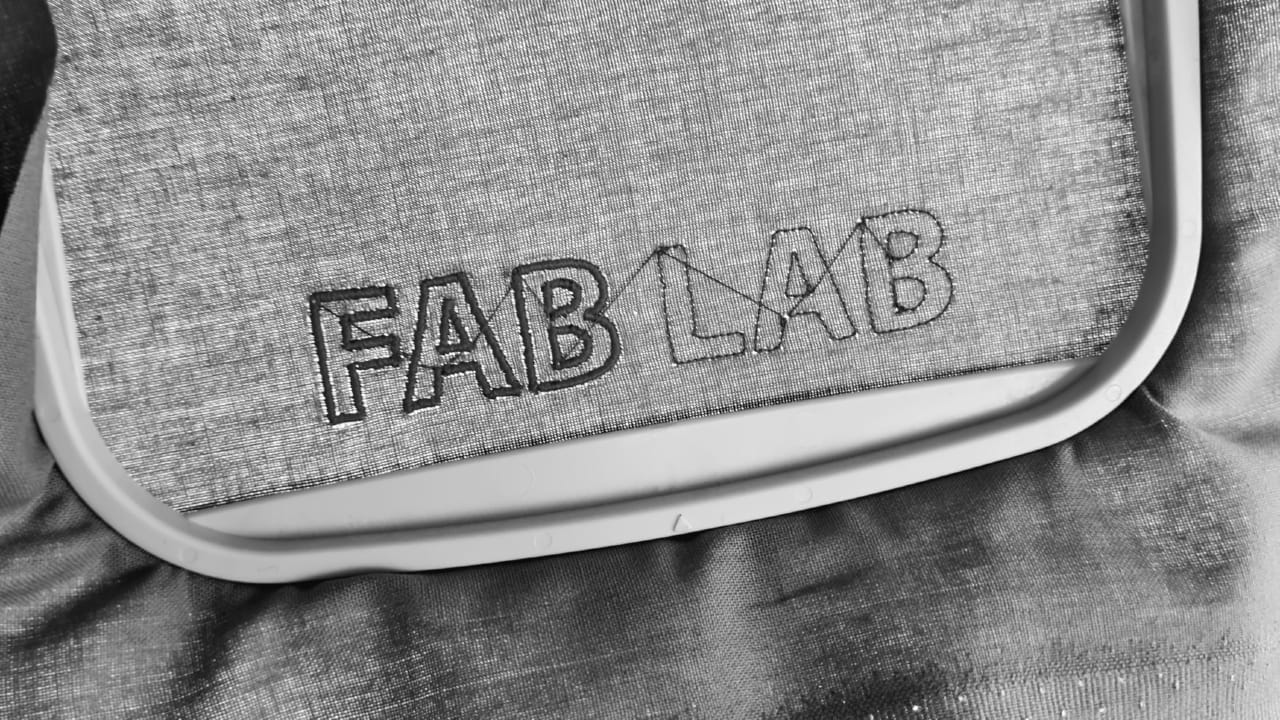
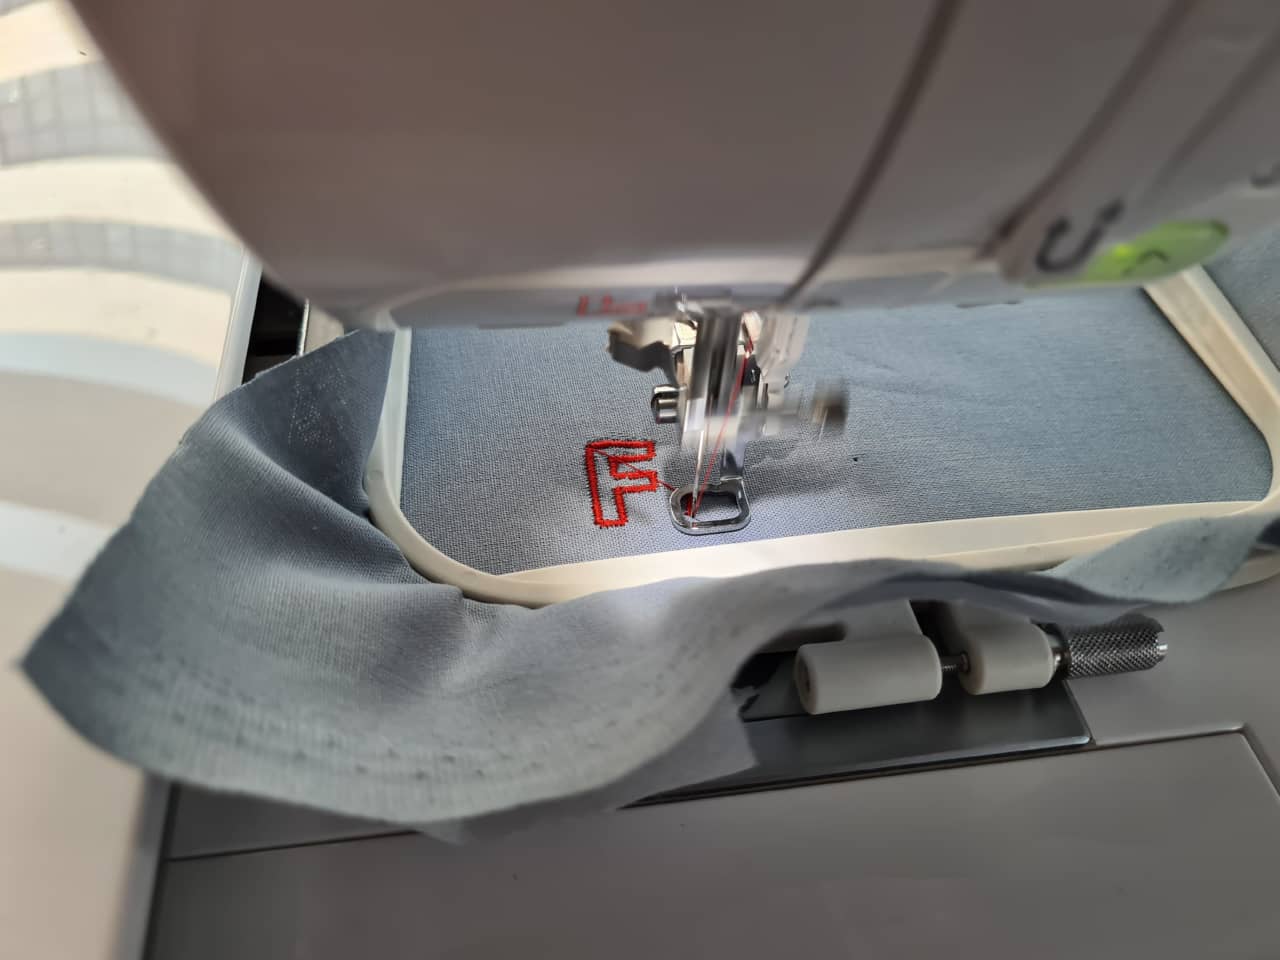
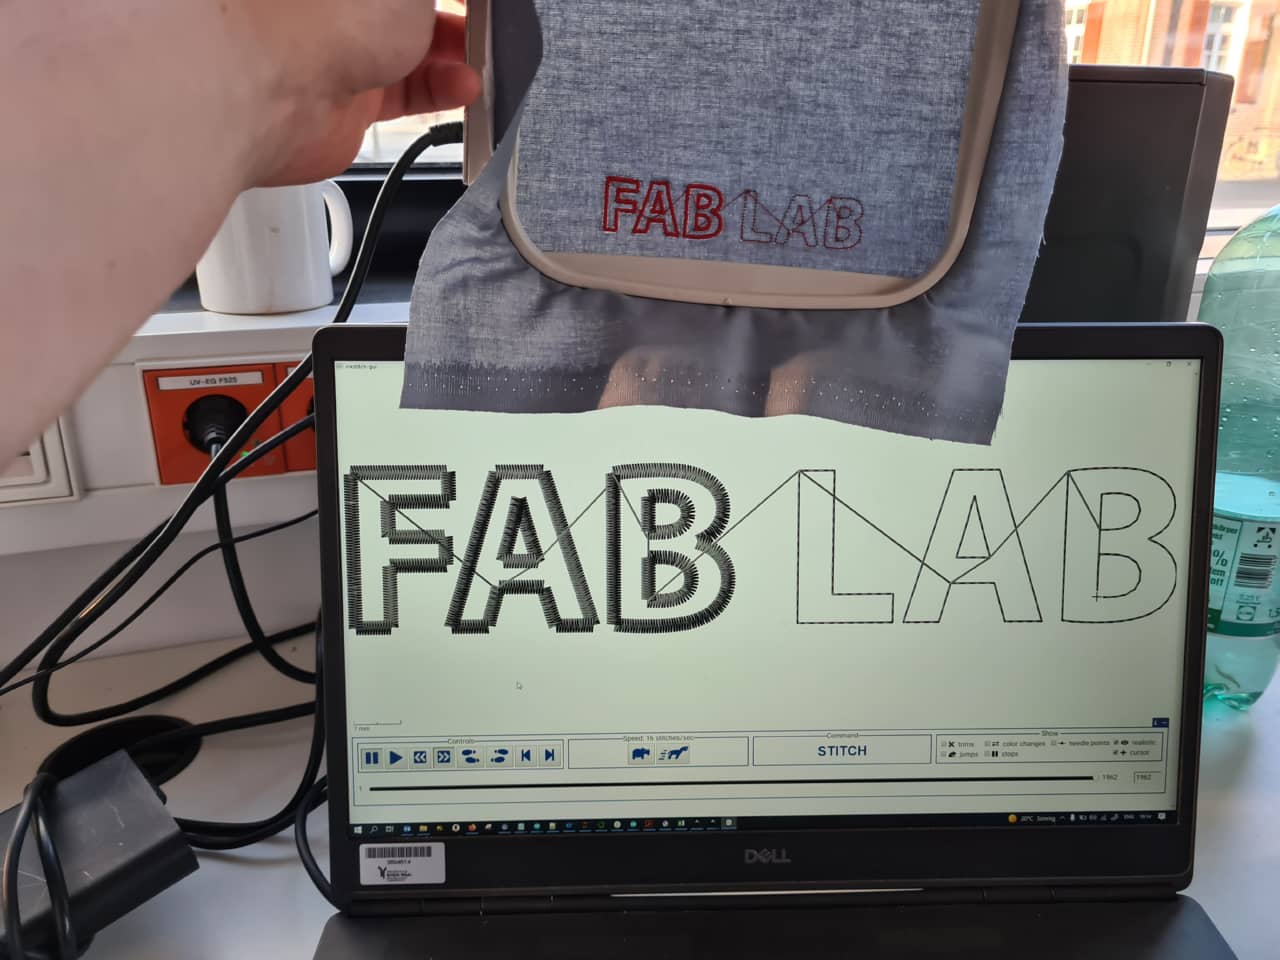
I then went on to embroider a larger “FabLab” text on the same fabric piece…
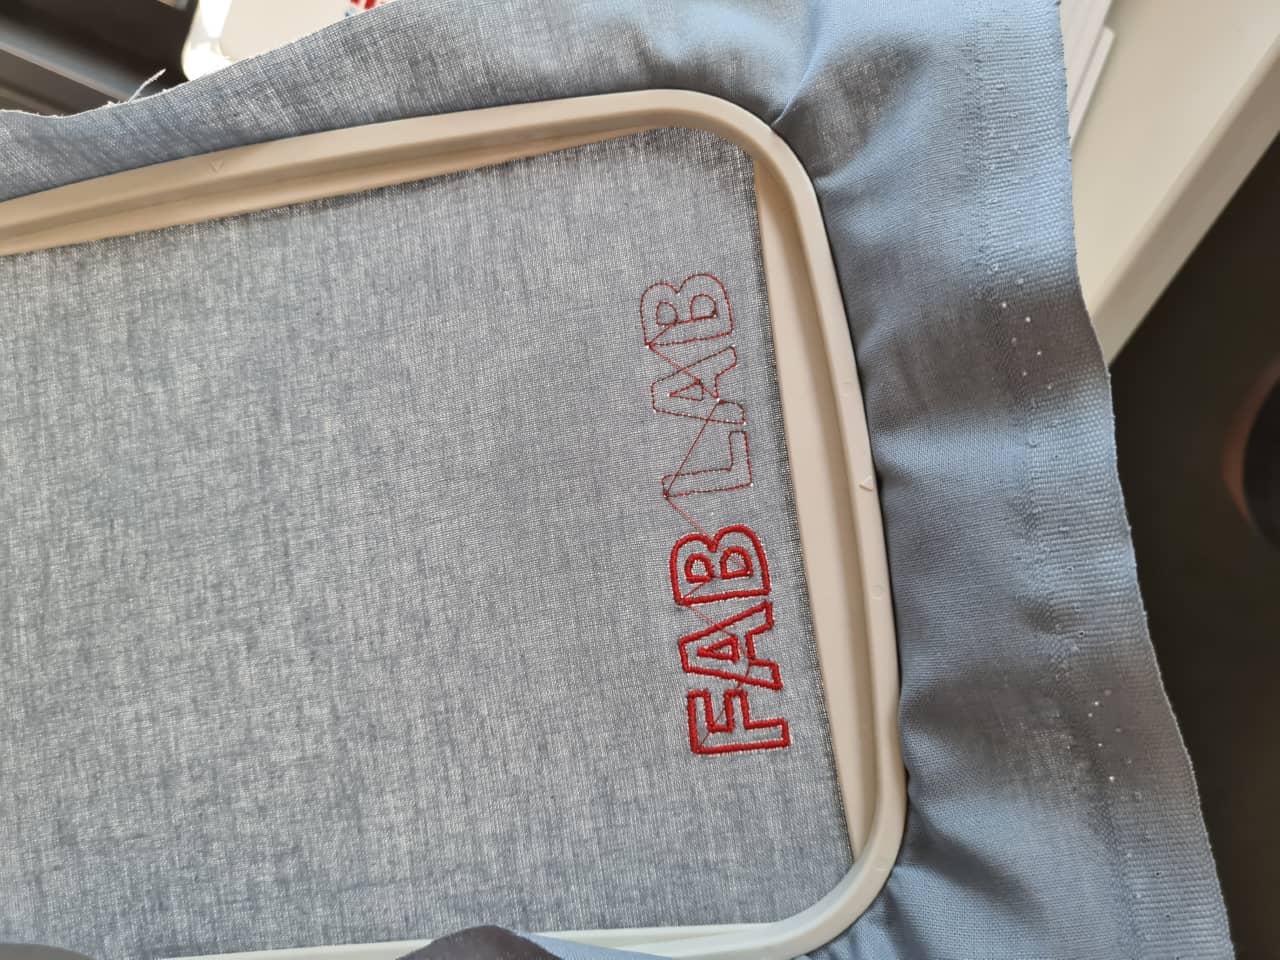
Which finished perfectly. Shown here with the connecting threads between letters still attached (they have to be removed manually later);
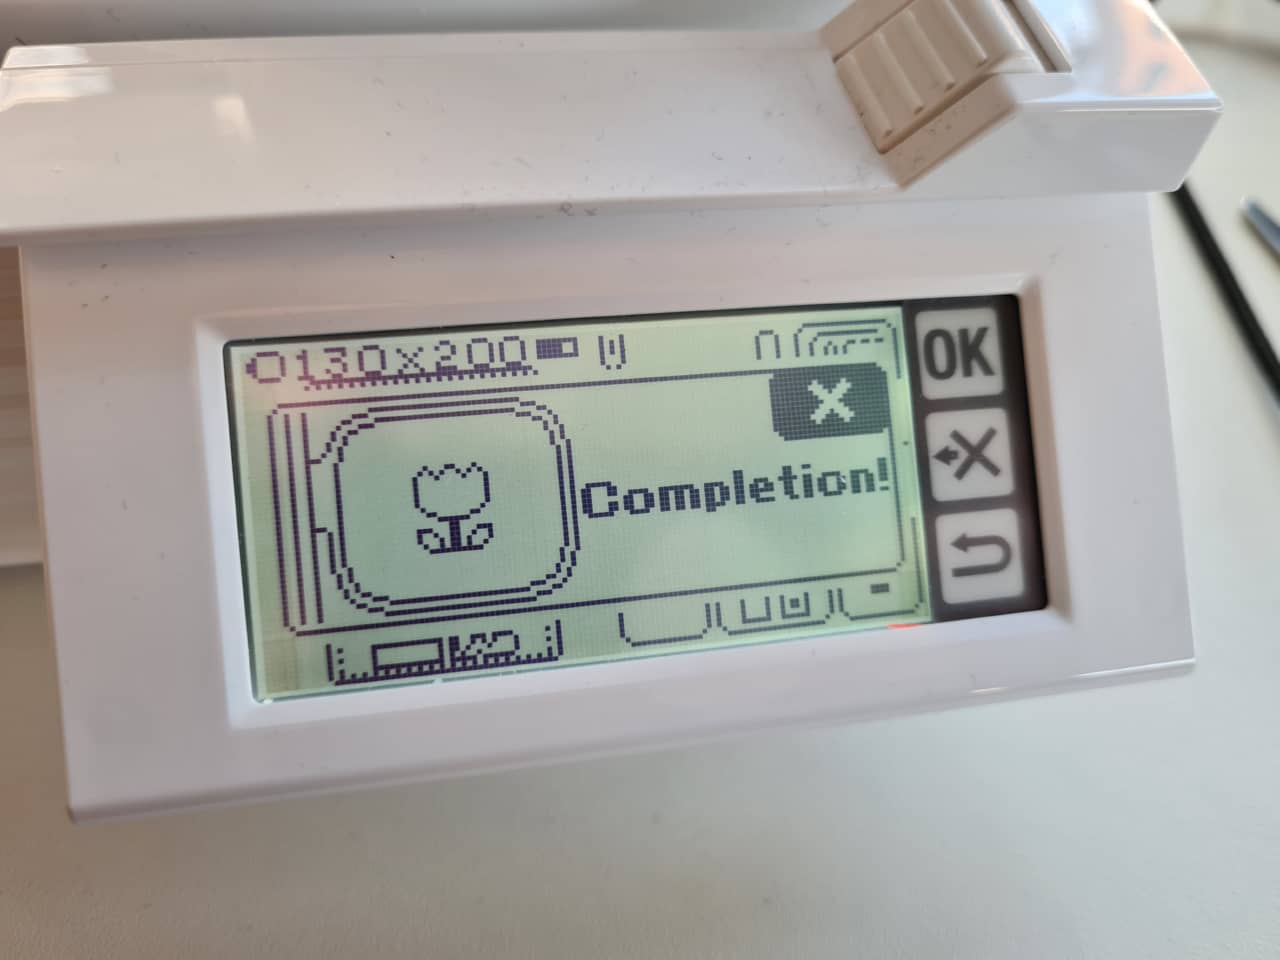
The machine acknowledges the finished job with a small text message:
Here is the embroidered design in direct comparison with the design opened in Inkscape (showing the embroidery preview in the Ink/Stitch plugin):
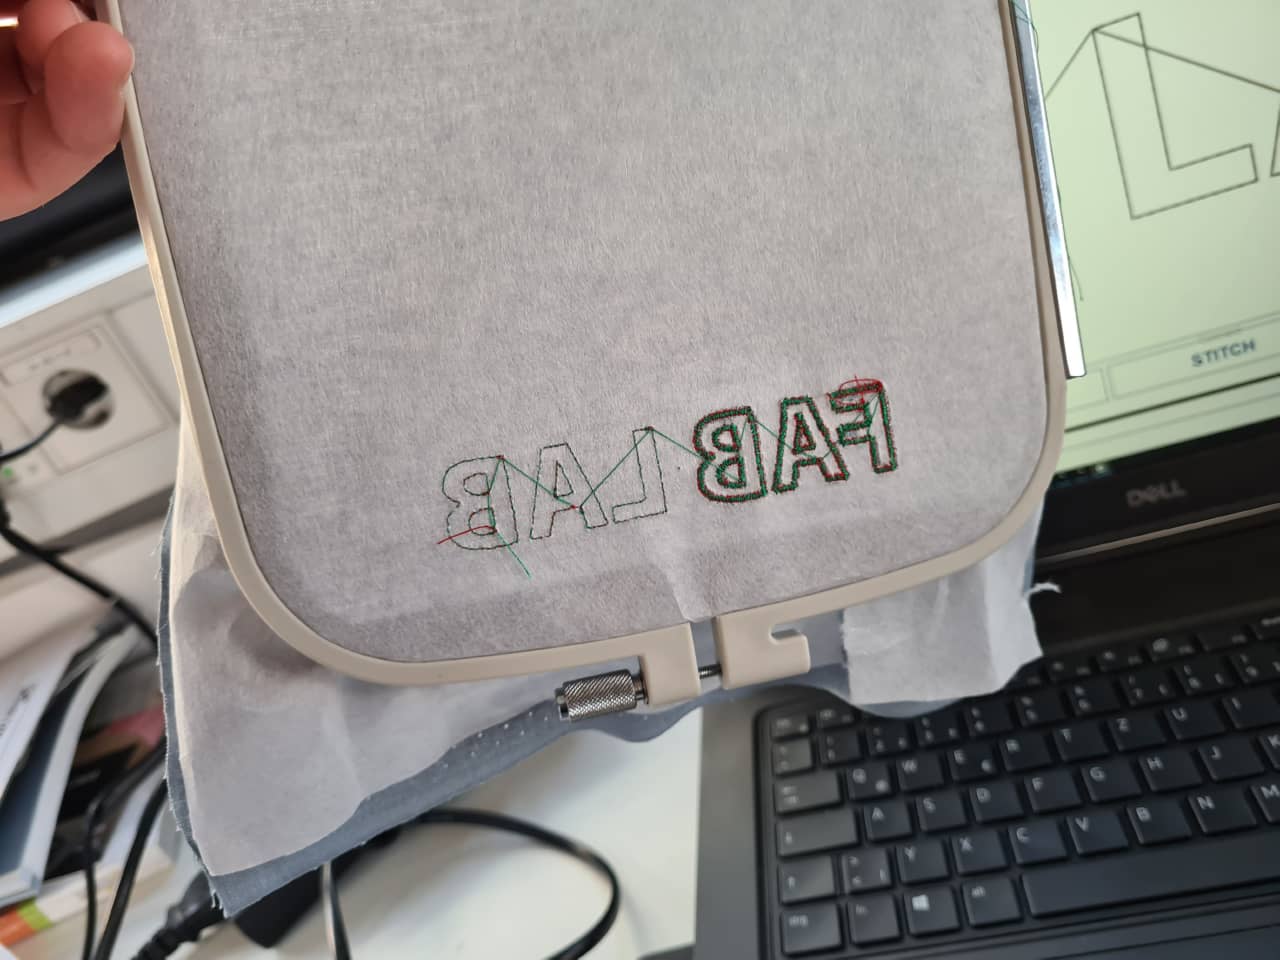
On the backside, we can see the backing material to stiffen up the material to be embroidered. This also shows the bobbin, which has a different color than the top, visible thread in our case:
Finishing Thoughts
This was a very useful exercise. I do have a little experience working with sewing machines, but none at all CNC-embroidering things. It was a good reminder of what quirks there are when working with soft, pliable materials like fabric when compared to what we usually work with - harder materials like wood and plastics.
Design Files
- embroidery design file (SVG, Inkscape)
- embroidery design machine code (DST, Tajima Format)