15. Wildcard Week
Week 15 : To do checklist
- Learn about Interface and application programming
- Individual Practice
- make mould with cardboard
- make composite mould
- make fiber composite
- make Wisker composite
- Continue the final Project Process
- Documentations
Assignment (week 15):
Design and produce something with a digital fabrication process (incorporating computer-aided design and manufacturing) not covered in another assignment, documenting the requirements that your assignment meets, and including everything necessary to reproduce it.
Learning Outcomes
- Demonstrate workflows used in the chosen process
- Select and apply suitable materials and processes to do your assignment.
This week I worked on Wildcard Week
This week I will try to make a composite to be used in my Final Project.
A composite material (also called a composition material or shortened to composite, which is the common name) is a material which is produced from two or more constituent materials. A composite material is defined as a macroscopic combination of two or more distinct materials having a finite interface between them (Karbhari, 2007; Aleksendrić & Carlone, 2015).
There are two types of composites that I will use to make the product that I will use to support my FP.
1. Laminated Composites

This part is a drum that will be used as a rotating mechanism to change litter automatically.
This composite consists of components in the form of a matrix and fiber (reinforcement). I use resin as matrix and fiberglass mat for reinforcement. I made a drum made with this composite fiber.
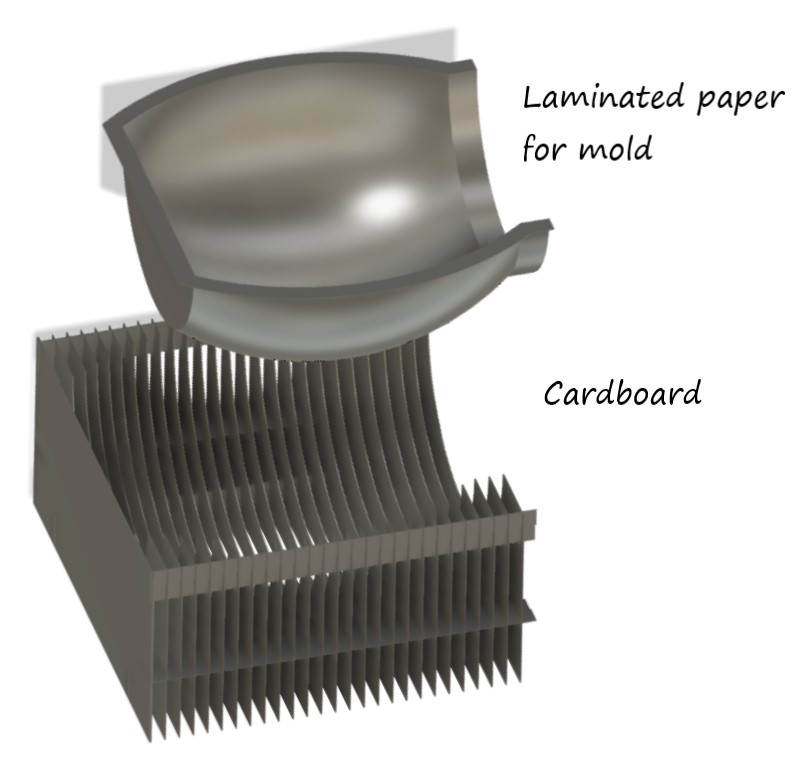
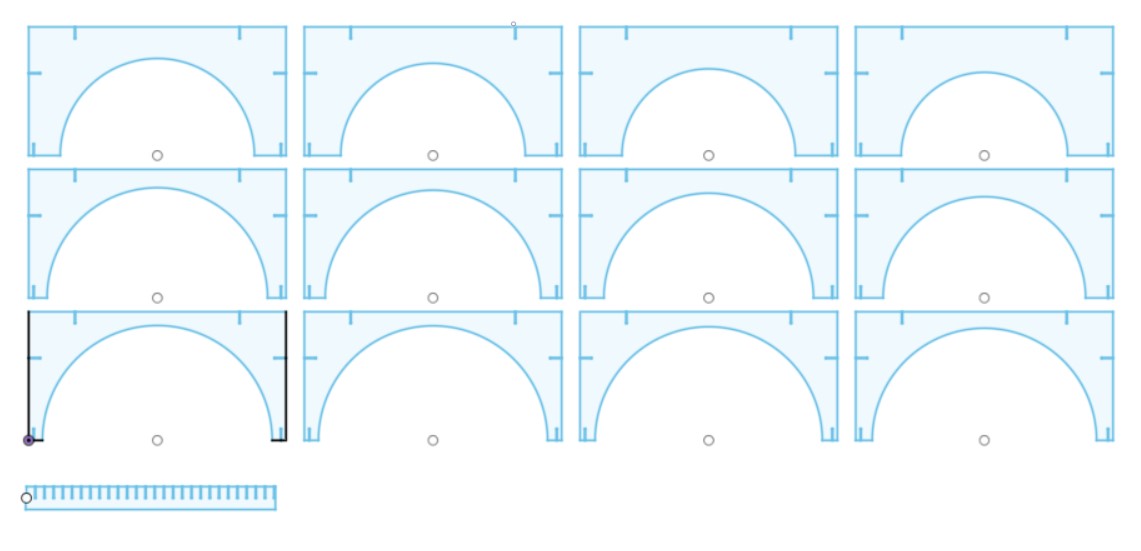
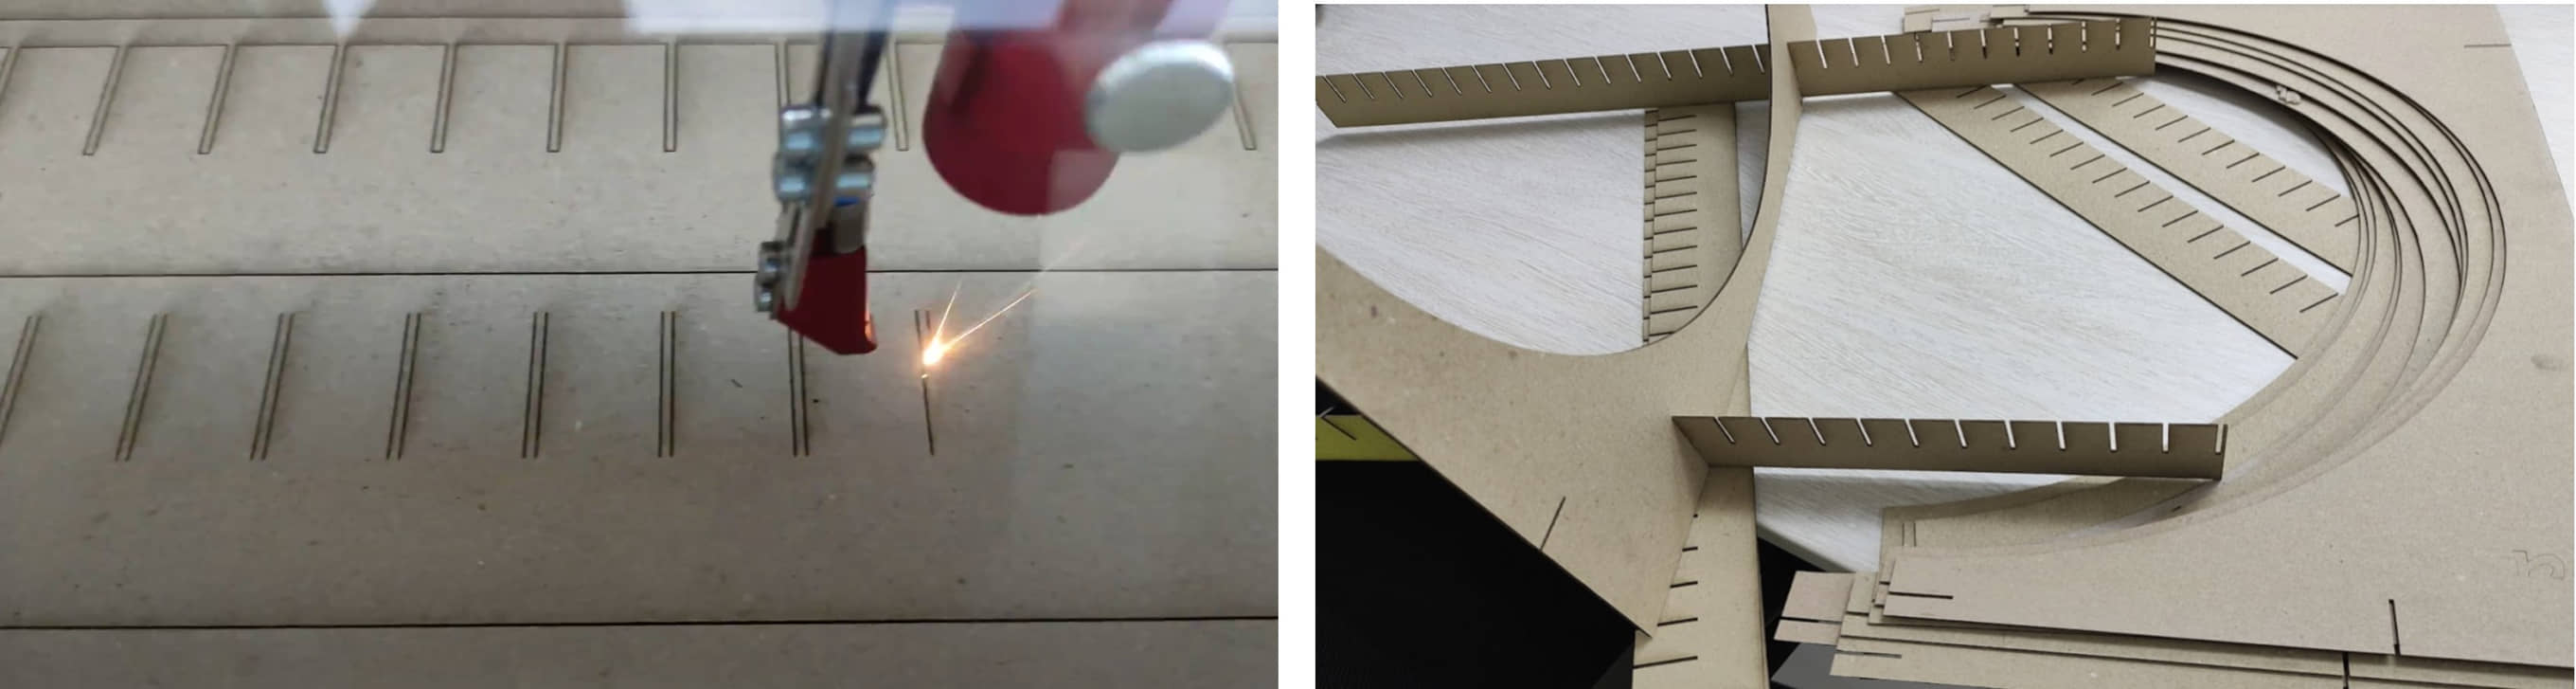
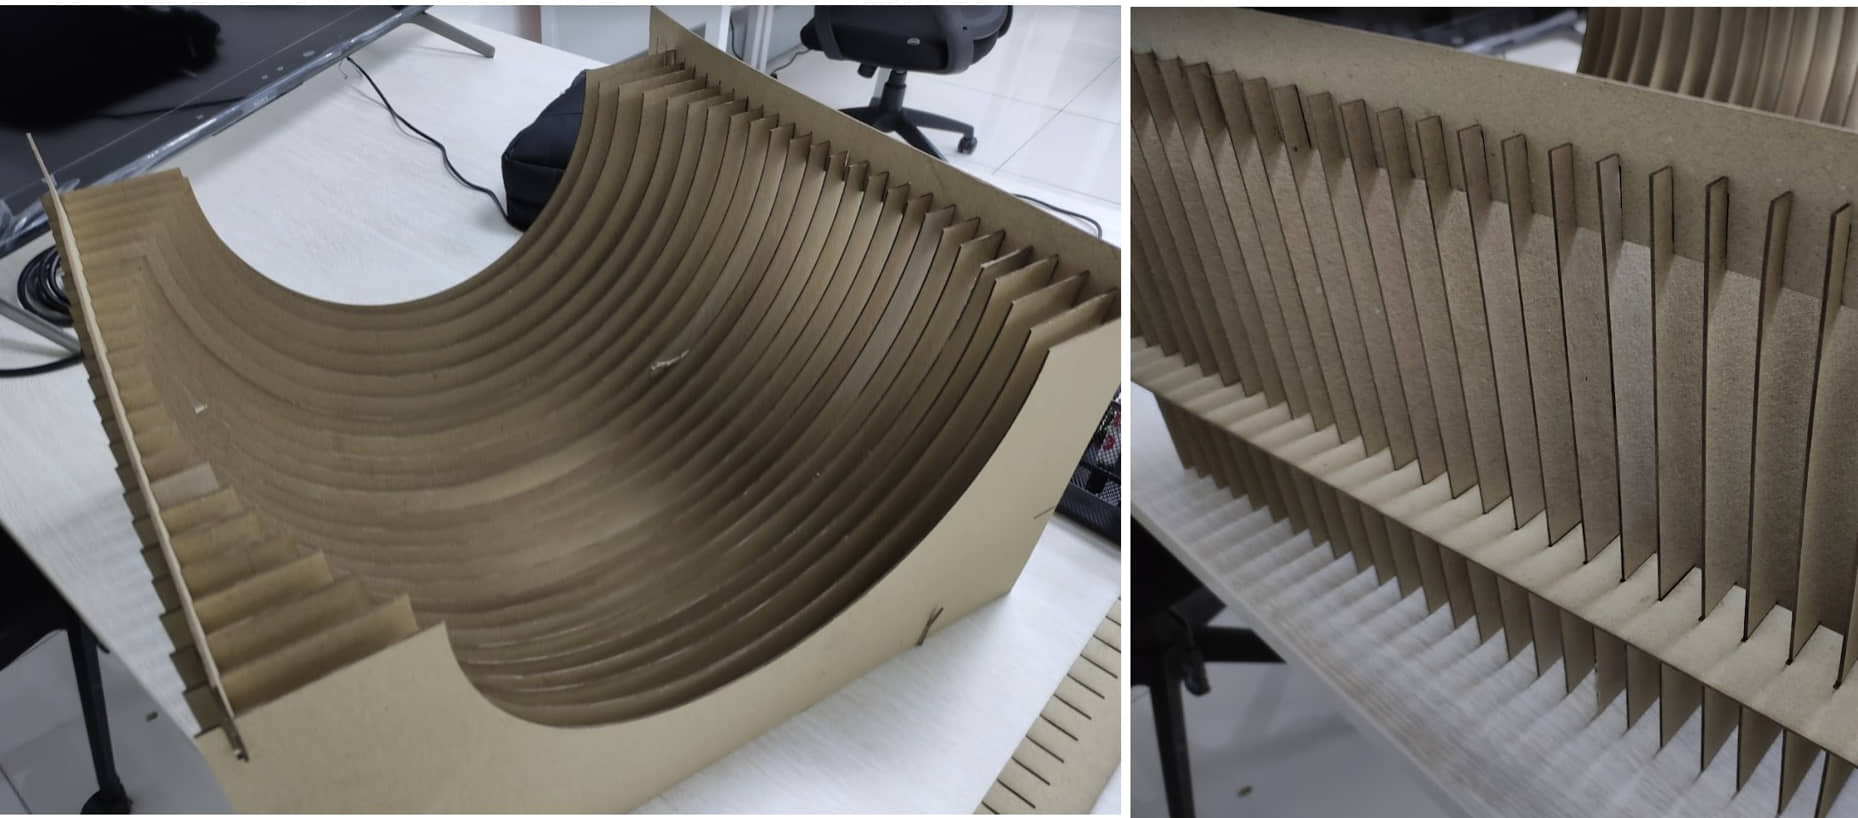
to make this drum composite I need to make a mold. The mold is made in half a tube using cardboard which is arranged to form a surface according to the surface of the drum.
sheet cardboard is made using laser cutting with a press fit design
the top of the cardboard will be coated with paper and plastic to form a flat surface.
Mold making
After the surface of the molding is evenly coated, a mold layer of composite with fiberglass reinforcement will be made, with the following stages:
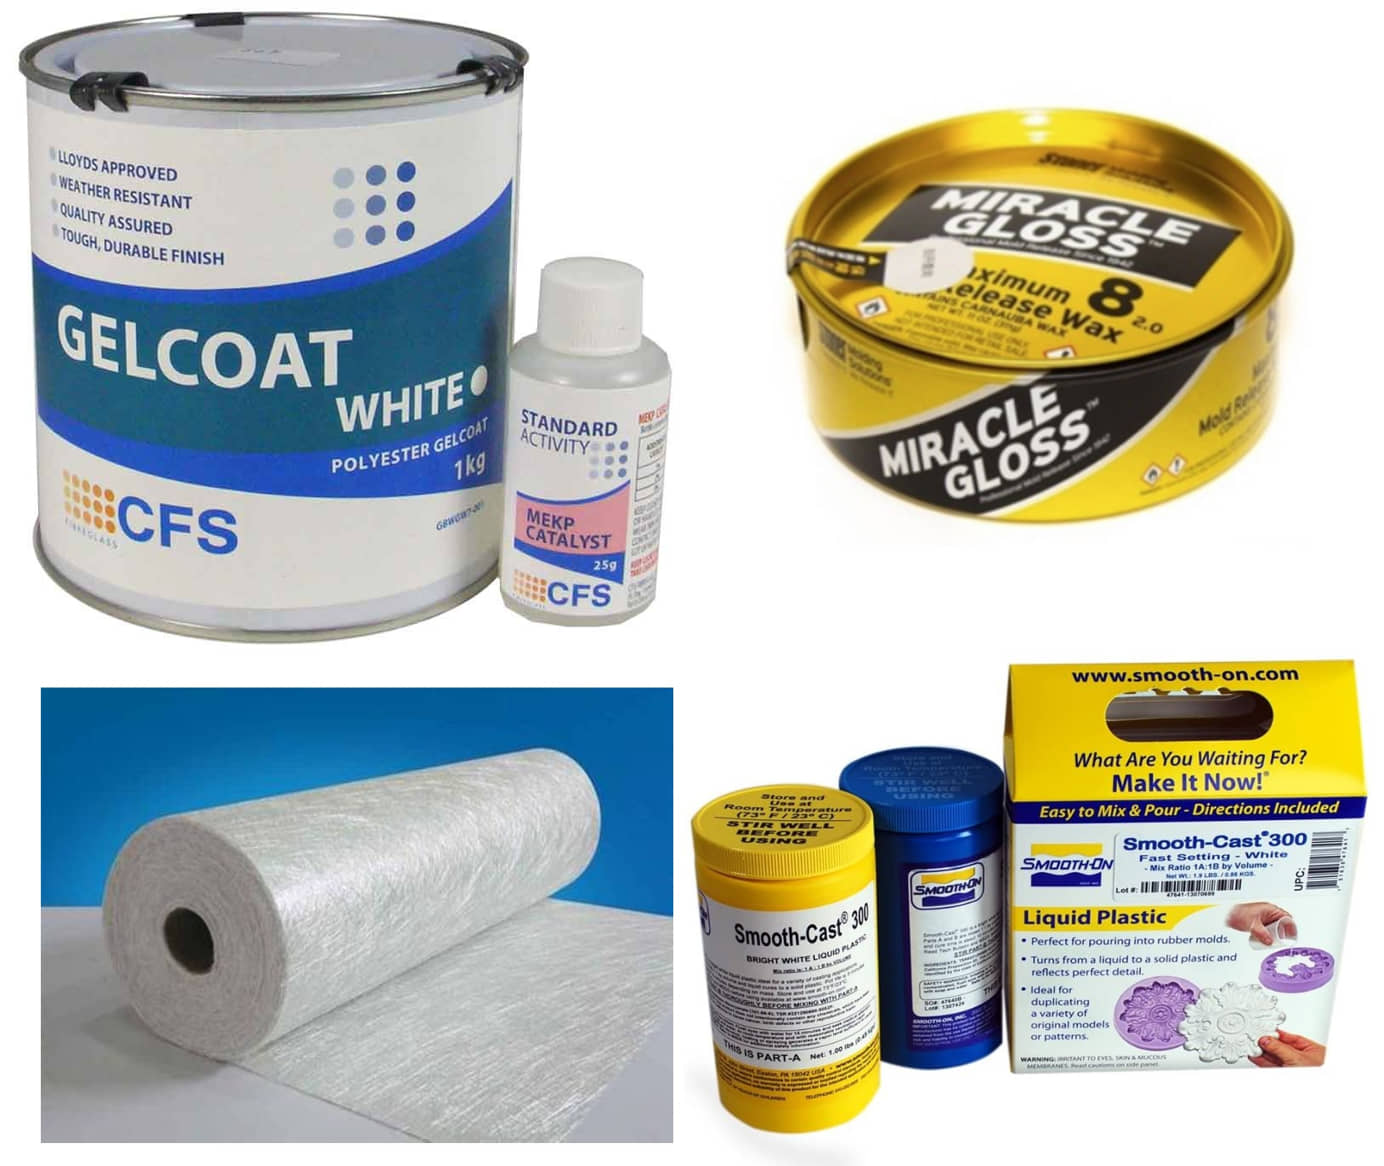
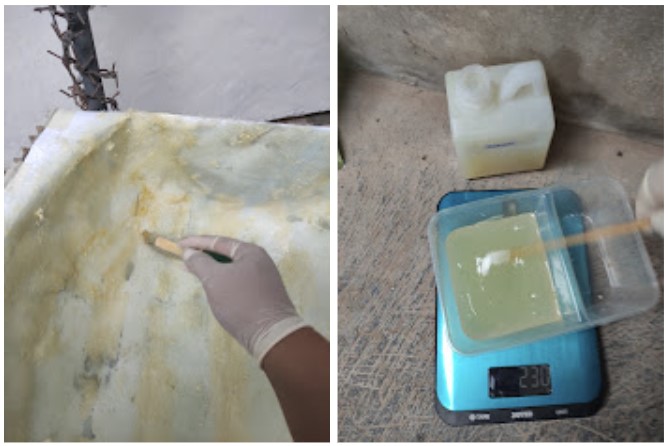
- the surface of the plastic mold is coated with gelcoat (printed resin). This gelcoat is an epoxy or resin layer that is used when joining fiberglass parts to give a smooth, shiny appearance. coating is done using a brush evenly on the surface of the mold.
- provide a fiberglass reinforcement layer on the gelcoat layer
- add alternate layers of resin and fiberglass as much as 4-6 layers
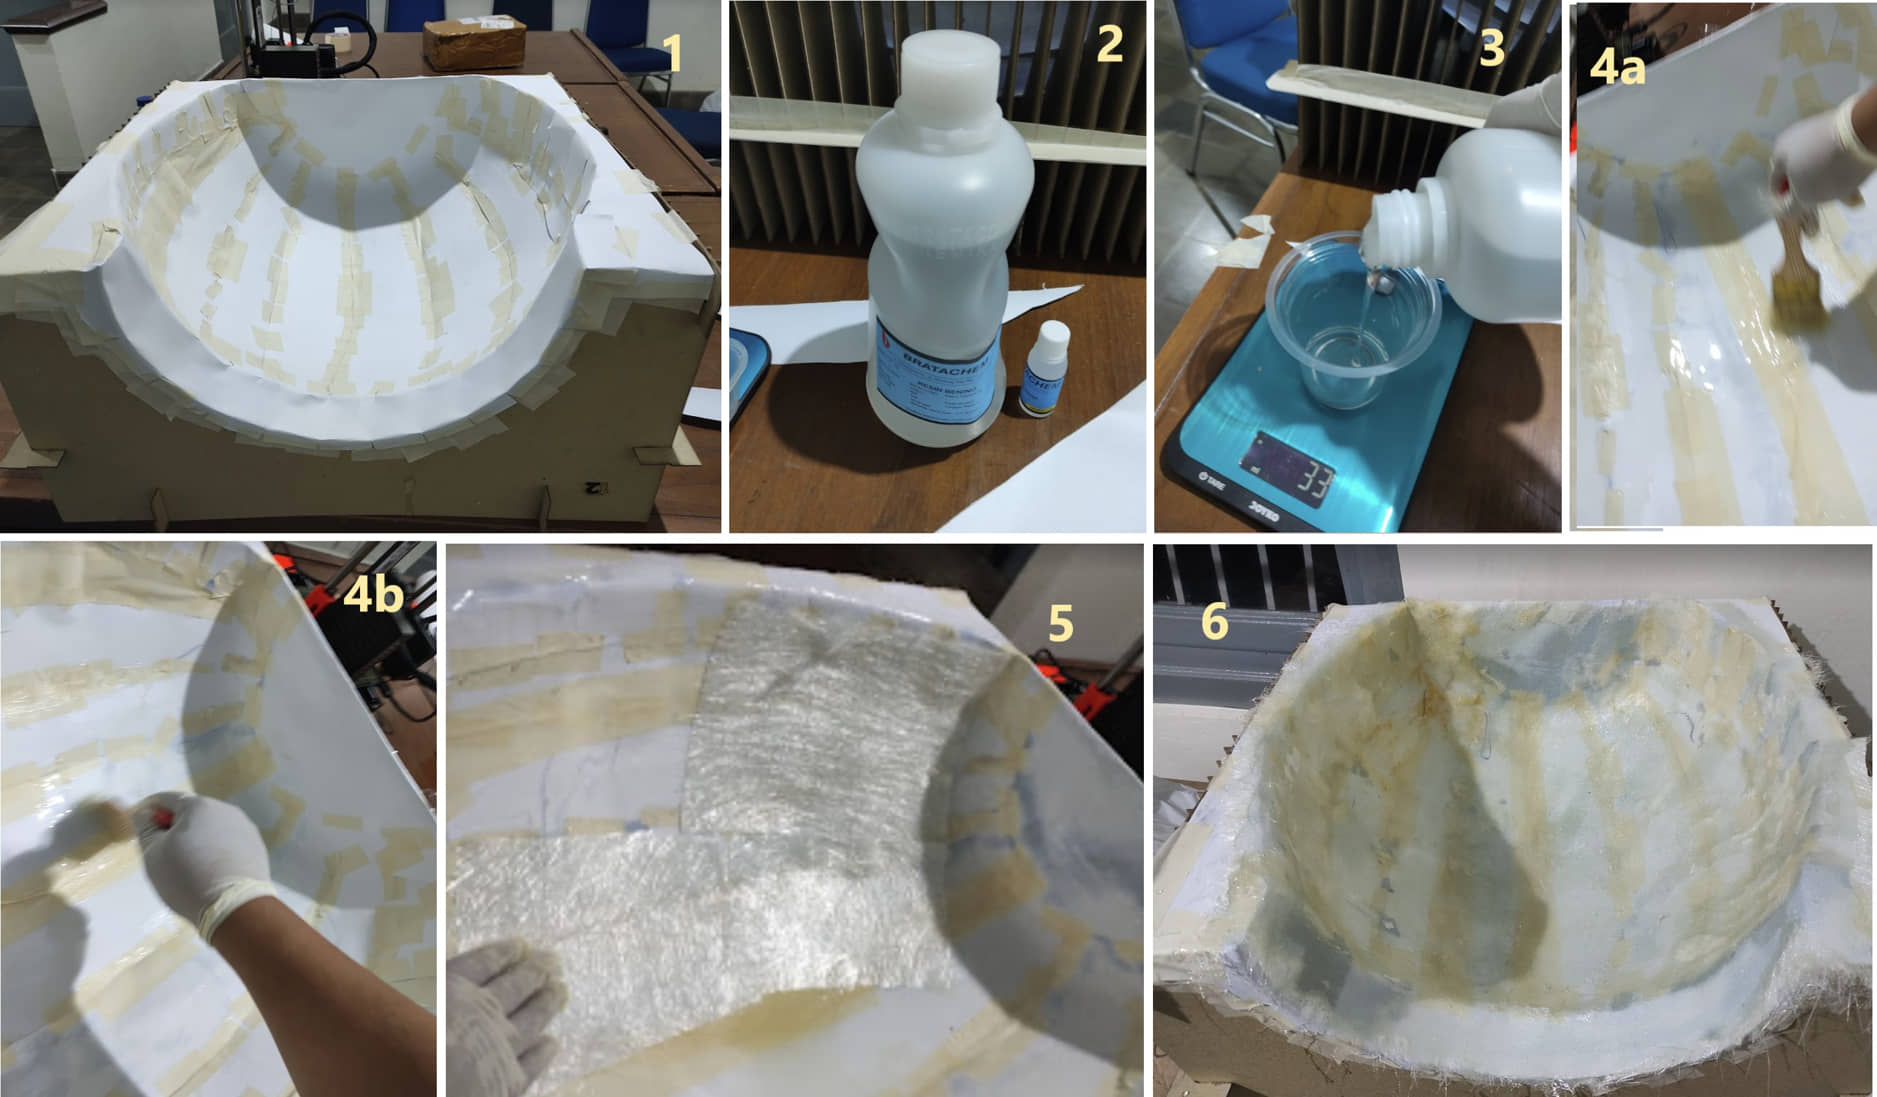
The mold for casting is ready, ready to be used for composite casting.
So that the results used for printing are good, I need to smooth the surface of the dies.
Composite making
some of the materials needed include: miracle gloss, resin and hardener, fiberglass.
I started the composite casting process with the following steps:
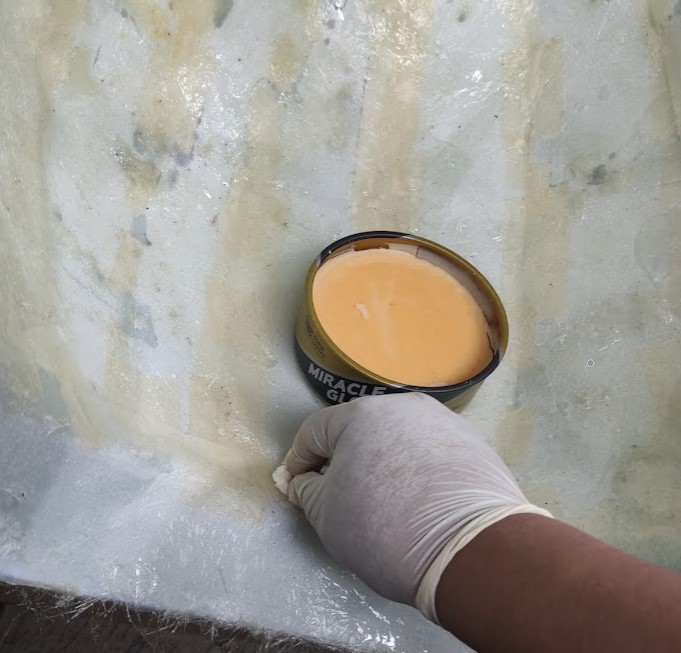
- apply a resin lubricant (miracle gloss) to the mold to make the print easy to remove.
- coat the surface with gelcoat for a smoother surface (add the hardener with 1:10 ratio)
- After all surfaces are smeared, then stick the fiberglass cloth until it is evenly distributed to all surfaces.

- coat the surface of the mold with resin that has been added hardener
- stick the fiberglass evenly
- add a layer of resin evenly
- repeat layers of fiberglass and resin as much as 3-4 layers

- laminate with fiberglass cloth
- Cover the fiberglass with plastic, tight on the edge of the plastic so no air can enter
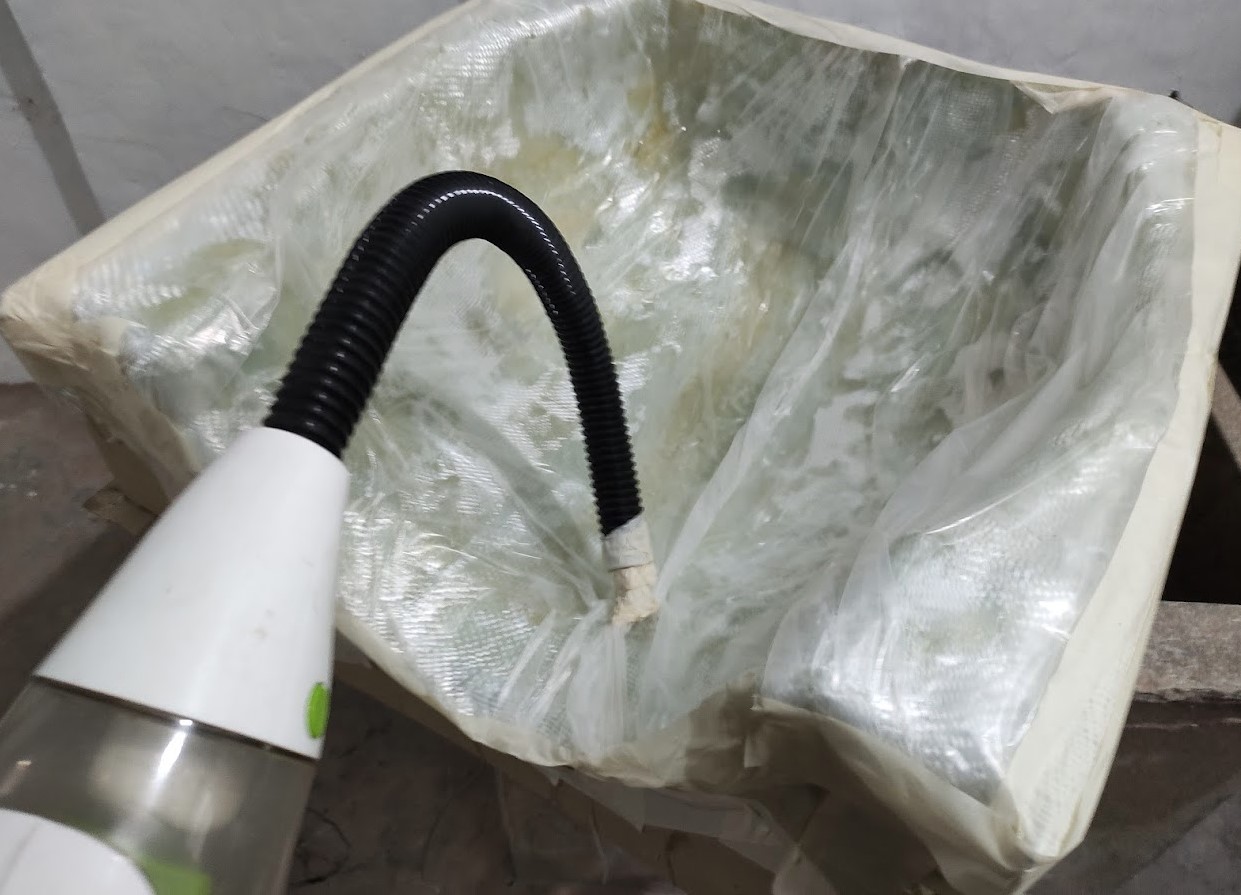
- Add a hole in the middle, give the hose and insulate it tightly (orange circle)
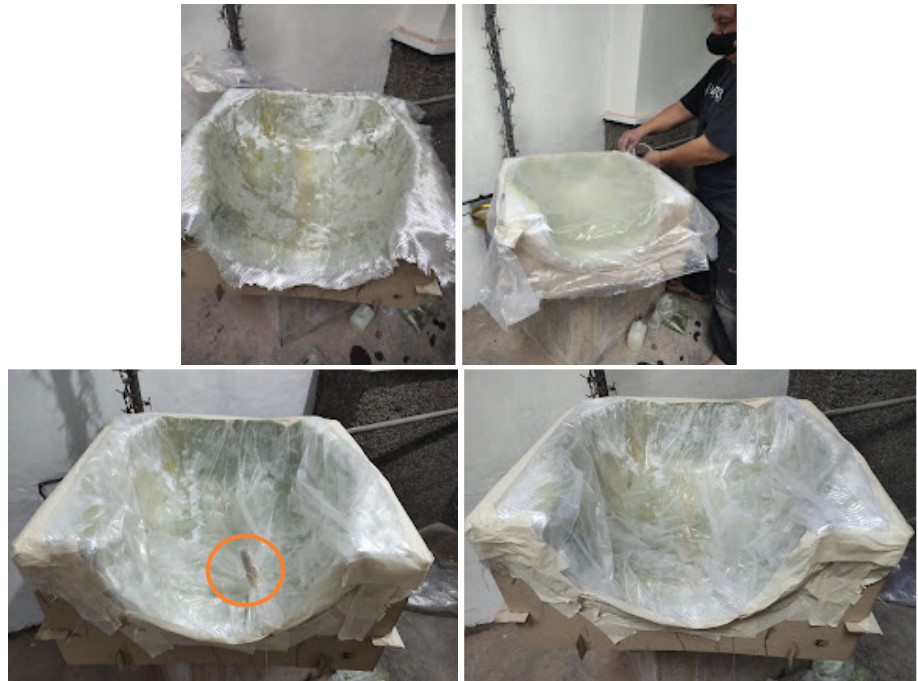
- Install the vacuum cleaner in the hole hose. Vacuum so that all the air in the mold comes out.
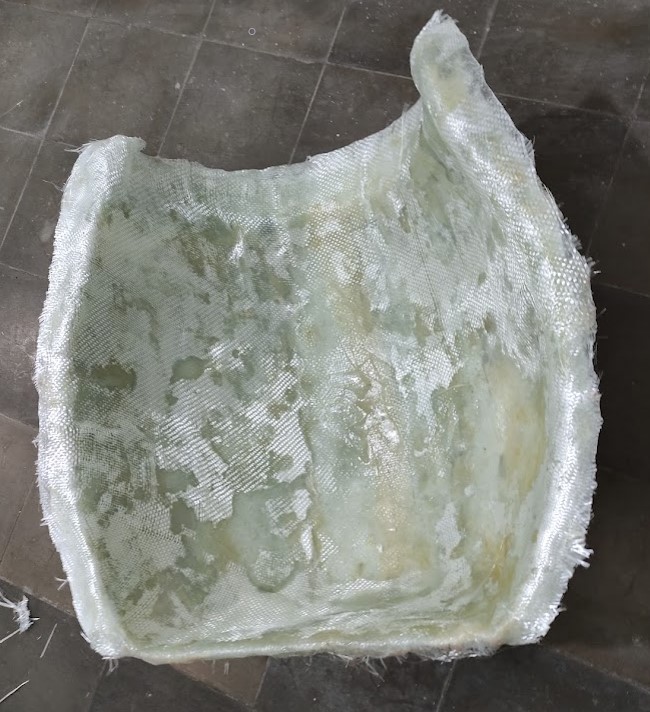
- remove the composite from the mold
And the result (half part) - not completely dry
2. Particulalate Composites
It is a composite that uses particles or powder as reinforcement and is evenly distributed in its matrix. I will use this type of composite for the feet pad building (Todd, 2006).
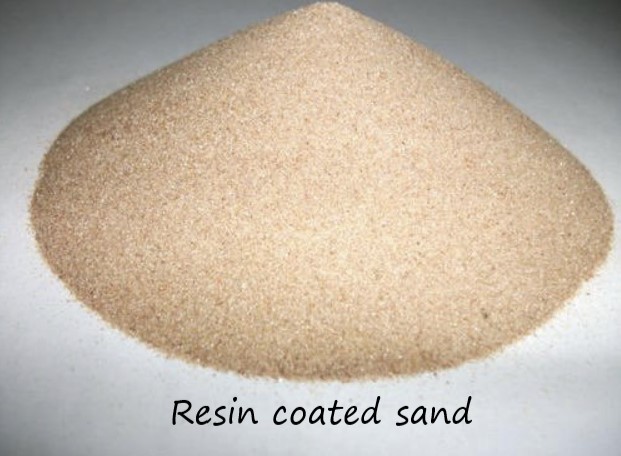
for material I used Resin coated sand
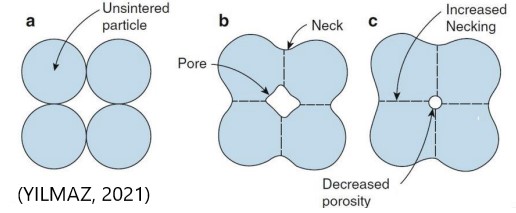
To unite these composites, a heating process is needed so that the sintering process occurs, which when heated the particles will experience melting so that each particle will melt. As an illustration of the sintering process can be seen in the following figure:
Some of the steps taken include:
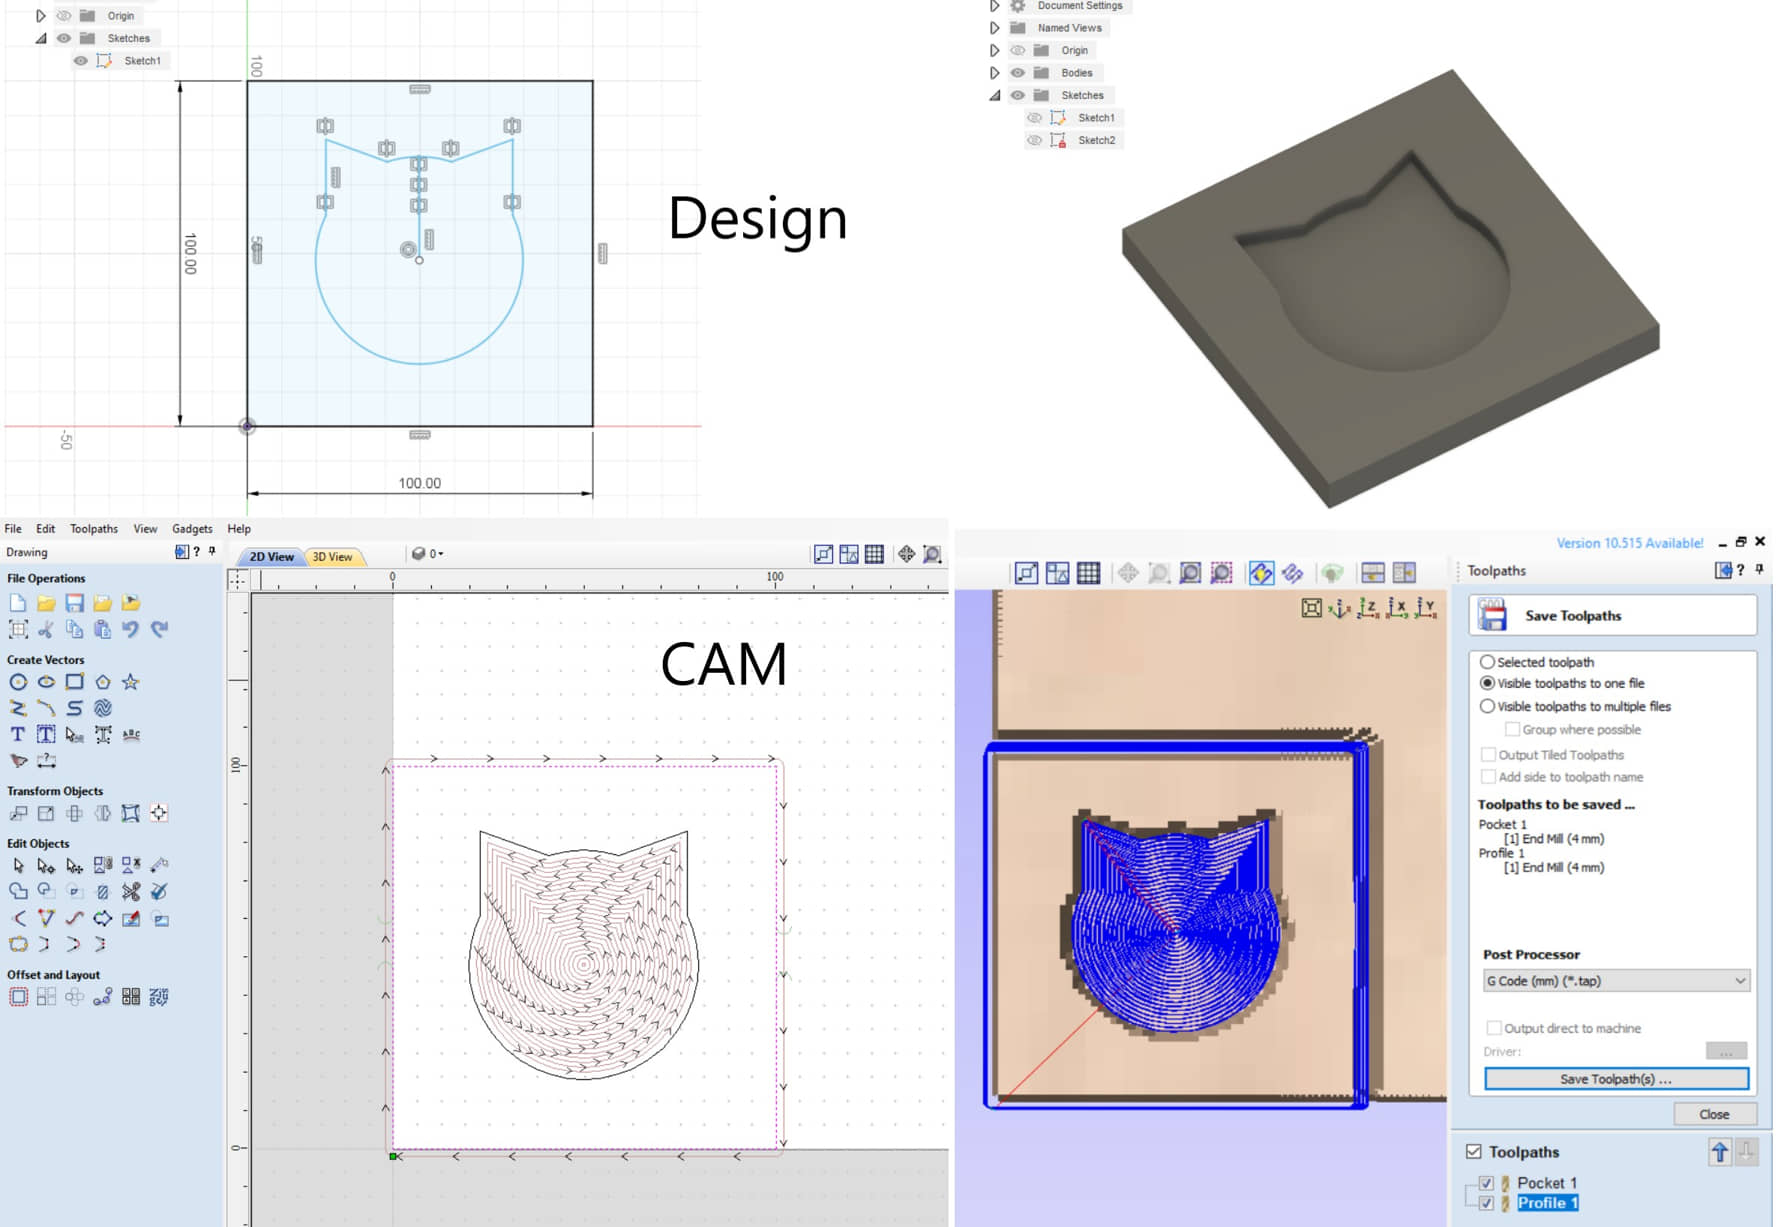
- Create designs using Fusion 360
- Generate G Code using CAM Manufacturing Fusion 360
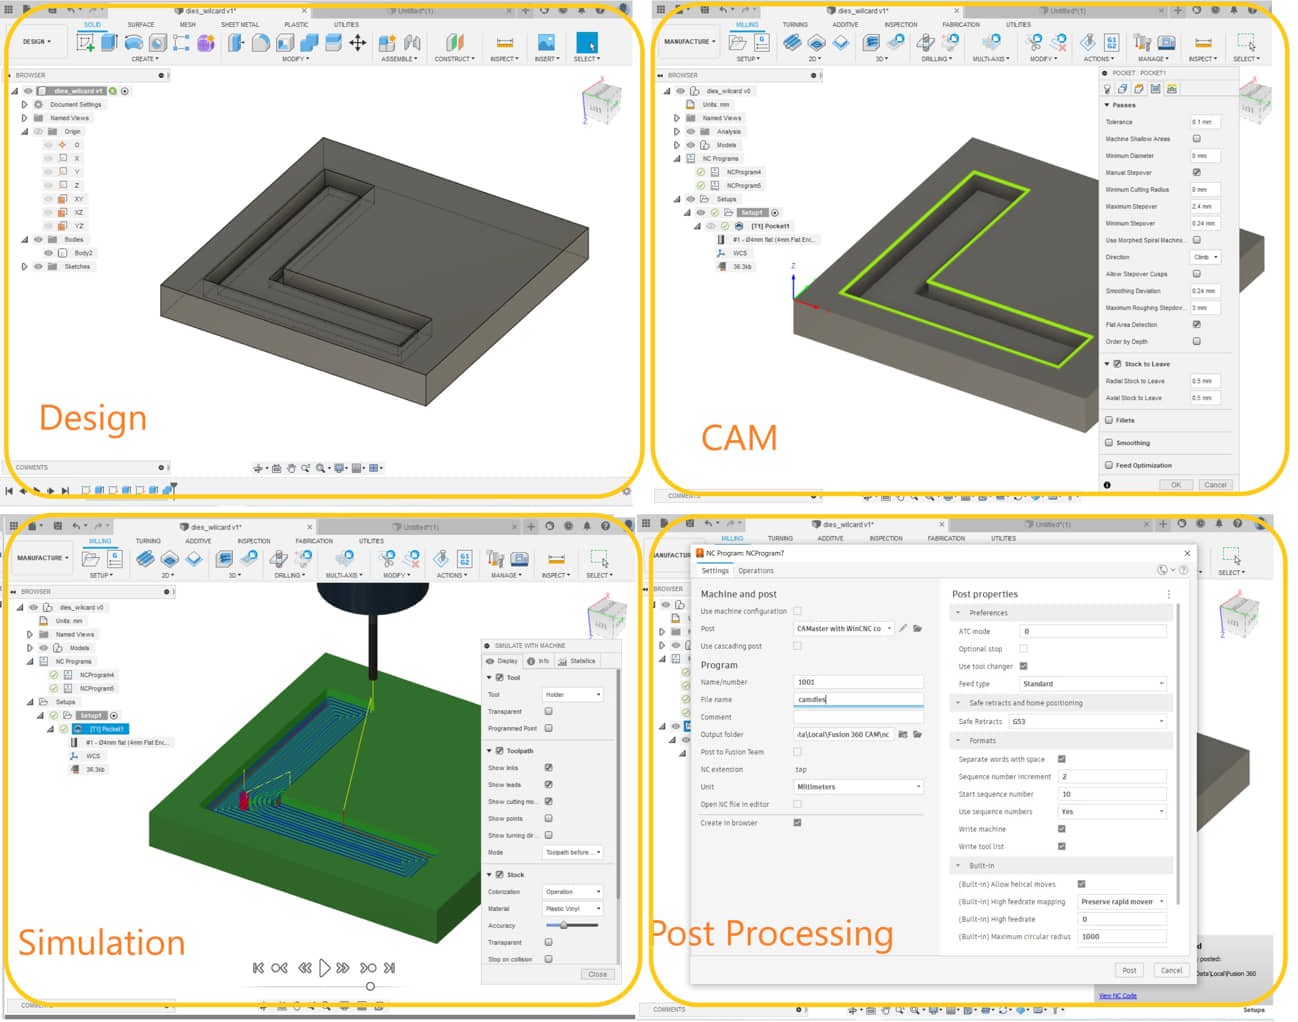
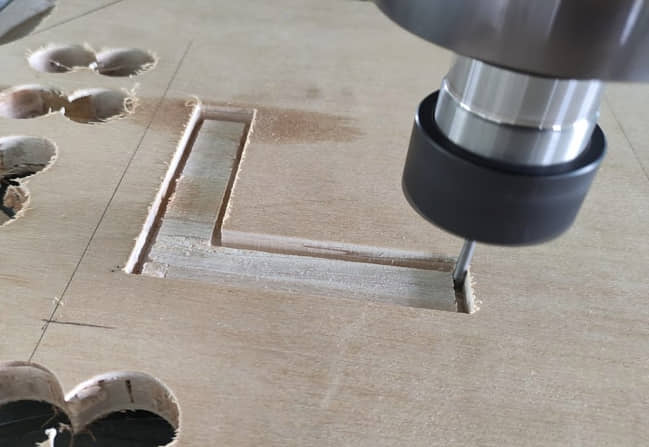
- Milling process
-
Making molds:
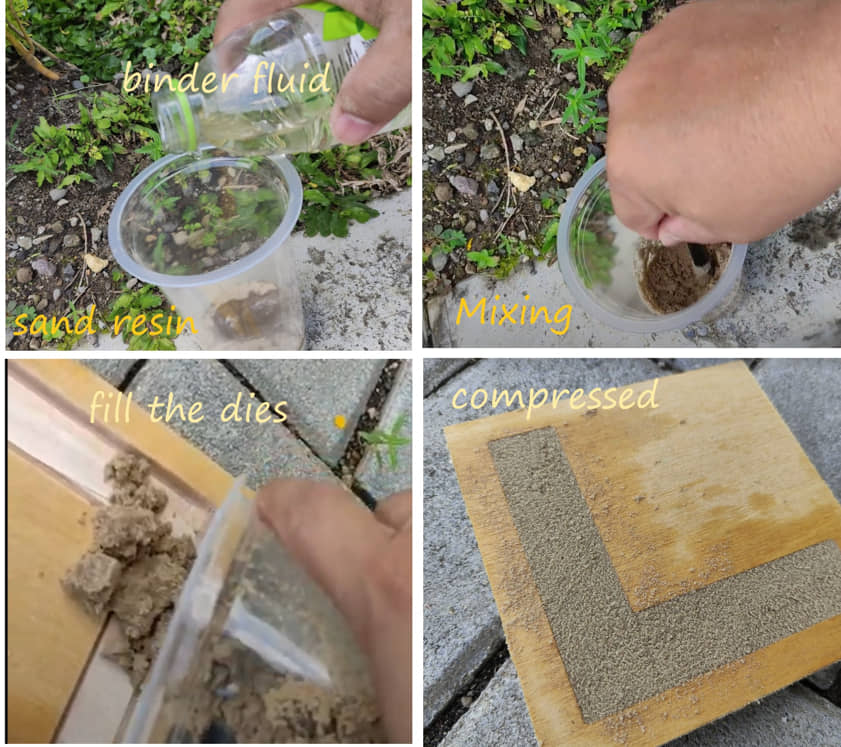
- Resin sand mixed with binder liquid (kerosine)
- After it is easy to agglomerate the sand is printed on wooden dies
- Mold sand is removed from the die
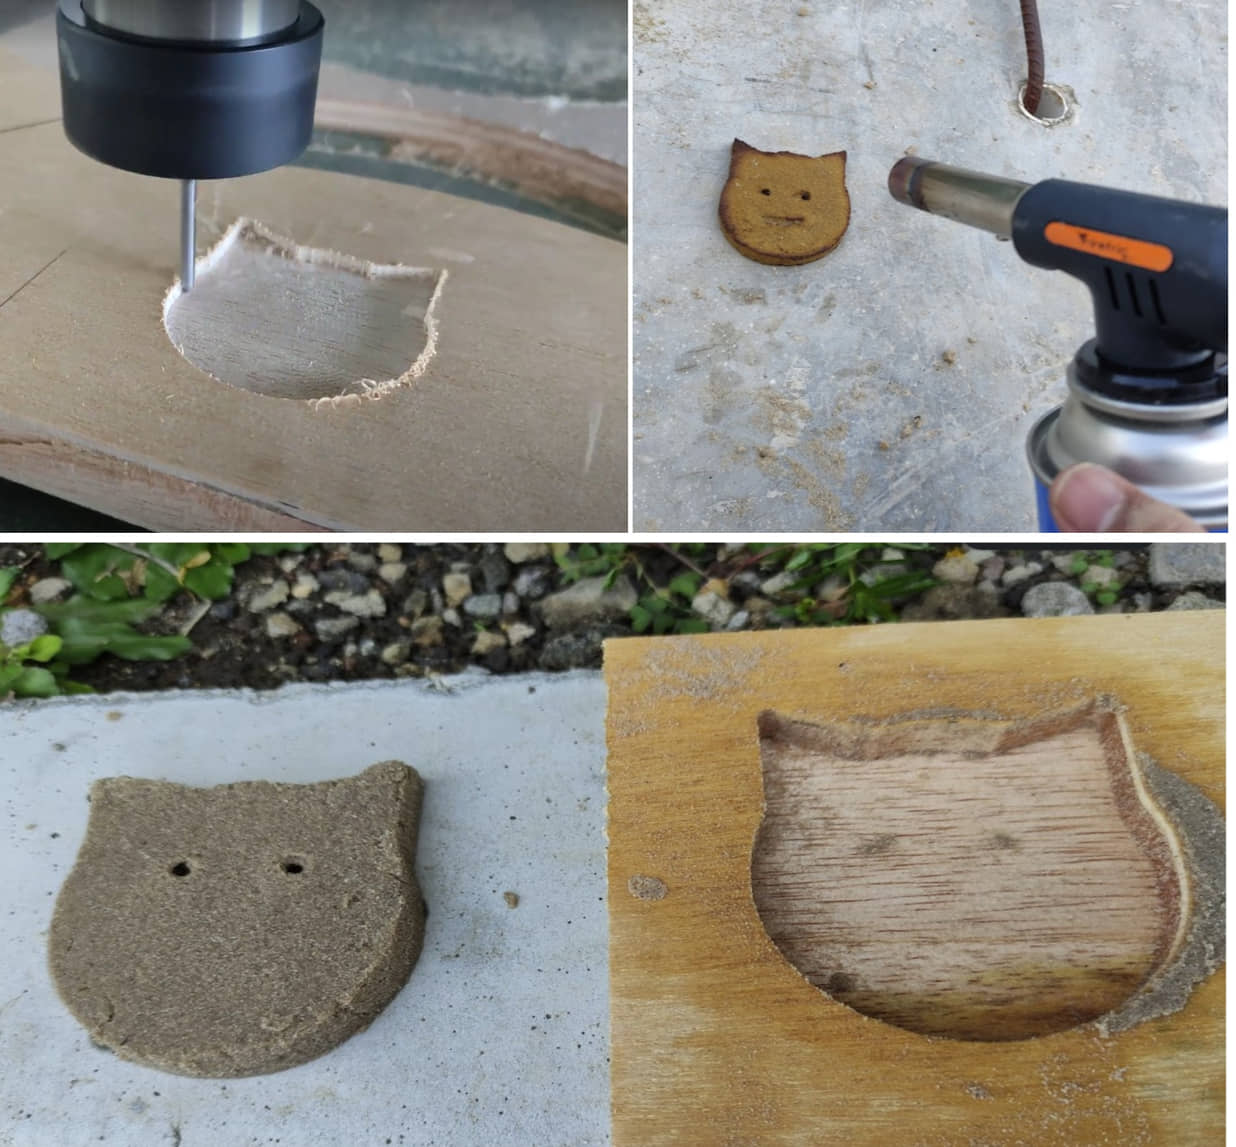
- The sand is heated or burned until it starts to melt or starts to turn yellow so that the sand mold becomes hard
When the mold is turned over to remove the wet resin mold, the sand is crushed because the feed pad slots are too small. I tried to heat the sand so that it hardens first and is easy to remove. After being heated, the mold was removed, it turned out that the sintering had not yet reached the bottom sand so that when it was removed the mold was broken.

This result FAILED
# Second Test
Note
The very small molding (slot) makes the resin sand difficult to remove. so that the molding model needs to be changed to another so that when printing the resin sand everything can be removed properly.
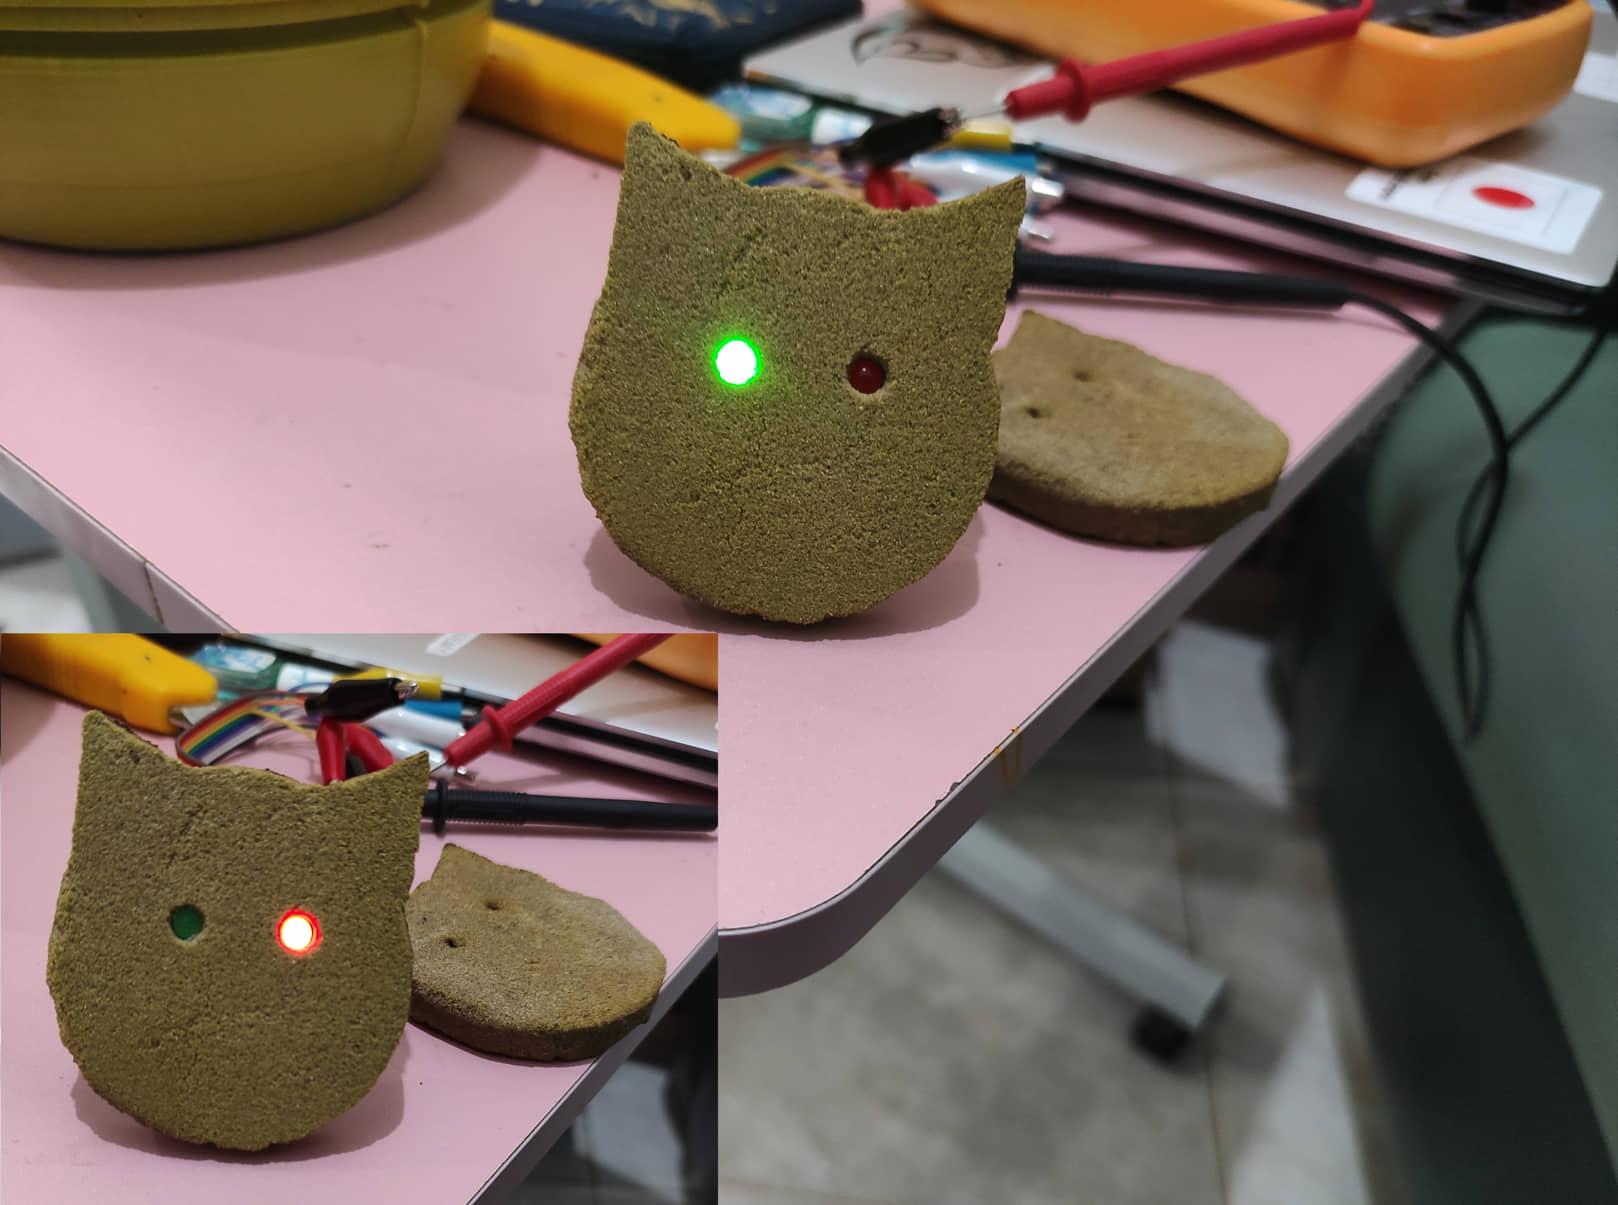
I’m trying to create an indicator dashboard for my final project, which is a cat head slab.
-
I started by creating a cat head design with Fusion 360, then generating GCode with CAM and milling it into a molded form.
-
Next is to make a composite for the cat’s head plate, using resin sand that has been mixed with a binder liquid. After that, the mold is sintered by heating the resin sand or burning it until the sand particles bind to each other due to the melting that occurs.
-
Composite molding results become hard and ready to use
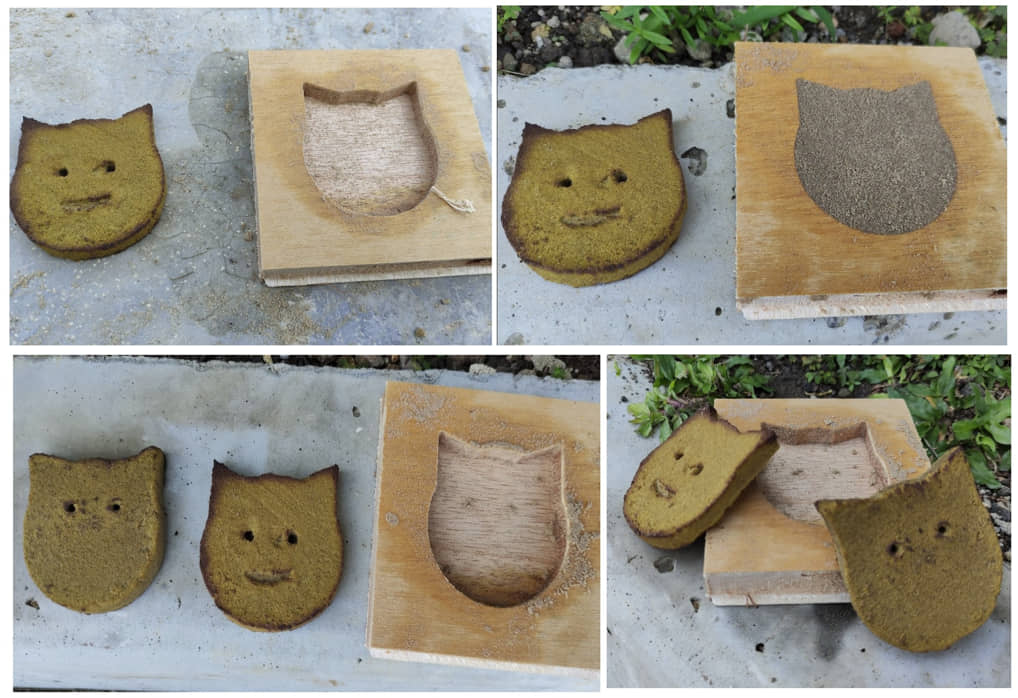
And… After being given an LED on the eye, the dashboard indicator can be used. It will be interesting if the front is painted or coated with vinyl.
Comment:
Particulalate Composites using a sintering technique will increase the strength of the previous material. The unification of the particles due to melting into one makes the final composite result very strong.
In my case, making resin sand molds is easy little bit difficult. need a binder liquid so that the sand can still form when removed from the mold. Kerosene is quite dangerous because it is flammable, but it is useful during the sintering process, where homogeneous materials are exposed to heat.
from my test results for small shapes it is very difficult to make resin sand molds. special compaction is needed or other suitable binder fluids can be found.
During the heating process, patience should be required, so that the sand does not burn but still reaches melting heat. It takes longer but the color results can be brighter (not black).
References
- Kamakura : Week 15 - Wildcard Week
- Wildcard Week - Kamakura local session
- Vistasp M. Karbhari, 2007, Fabrication, quality and service-life issues for composites in civil engineering, Durability of Composites for Civil Structural Applications,
- Dragan Aleksendrić, Pierpaolo Carlone, 2015, Introduction to composite materials, Soft Computing in the Design and Manufacturing of Composite Materials
- TODD, R. I. (2006). 4 - Particulate composites (I. M. B. T.-C.-M. C. Low (ed.); pp. 99–128). Woodhead Publishing. https://doi.org/https://doi.org/10.1533/9781845691066.1.99
- YILMAZ, Hüseyin 2021, SINTERING THEORY,Turkish Ceramic Society Lecture, Materials Science and Engineering Department, Gebze Technical University
Documentation Files
Lessons learned (week 4 : Interface and Application Programming):
- Understanding of programming language for interfacing
- Understanding to make the visualization of data from serial
- Understand how to program interface for data communication as Input or Output