8. Embedded programming
So, this week was about embedded programming. Below you can see our assignment.
Group assignment.
compare the performance and development workflows for other architectures
Individual assignment.
-
read the datasheet for your microcontroller
-
use your programmer to program your board to do something
-
extra credit: try other programming languages and development environments
Group Assignment
For the group assignment, we compared two different microcontrollers and their development workflows.
Samd11c and Arduino IDE
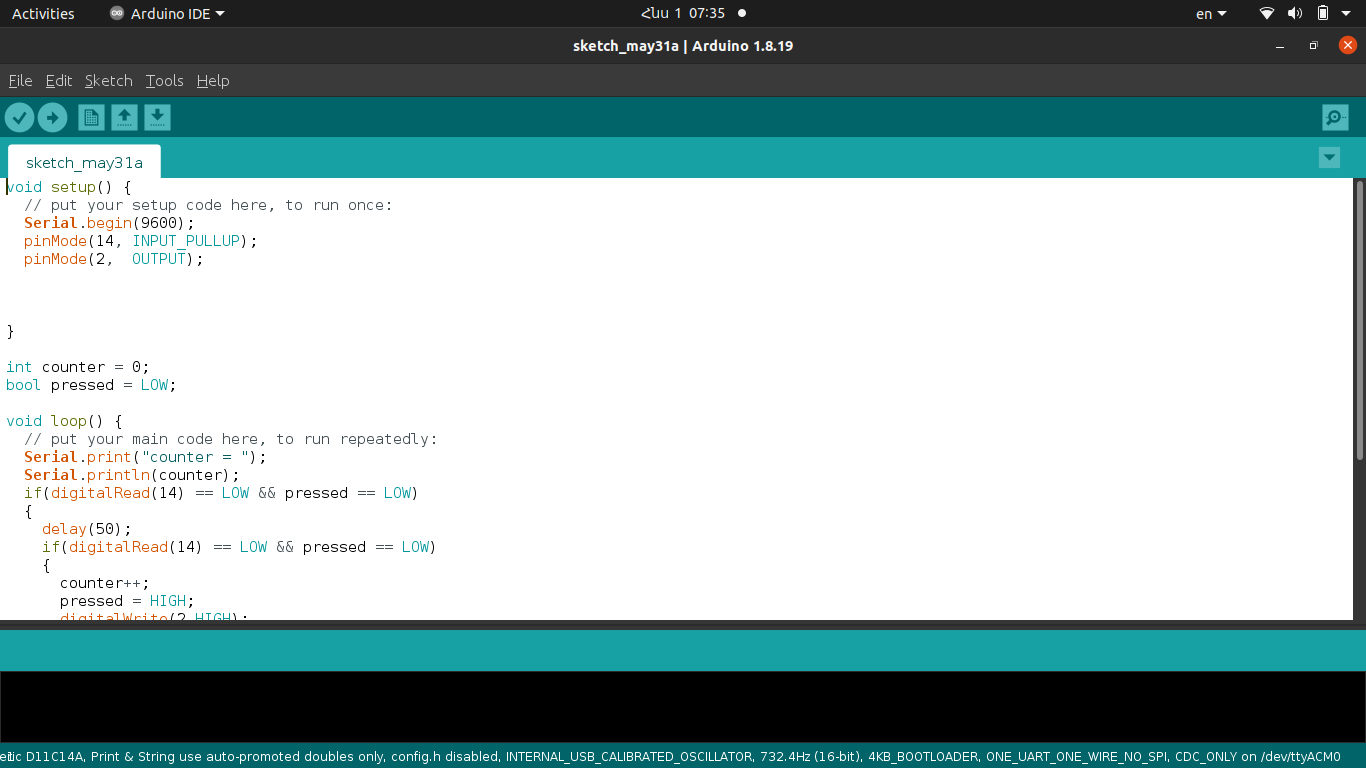
So, First, I start to program my hello world board from week six. It has a SAMD11C14A microcontroller, I burned the bootloader in it in the sixth week and for this week I read the datasheet and wrote a simple program that counts how many times I pressed the button and sends it to the computer. I didn’t use my programmer as I already have a bootloader on my board and I programmed it directly from Arduino IDE.
Then, I read the datasheet of my microcontroller and I take some screenshots of the most important parts of it. There is a lot of staff, but I highlighted the basics that I needed to program it.

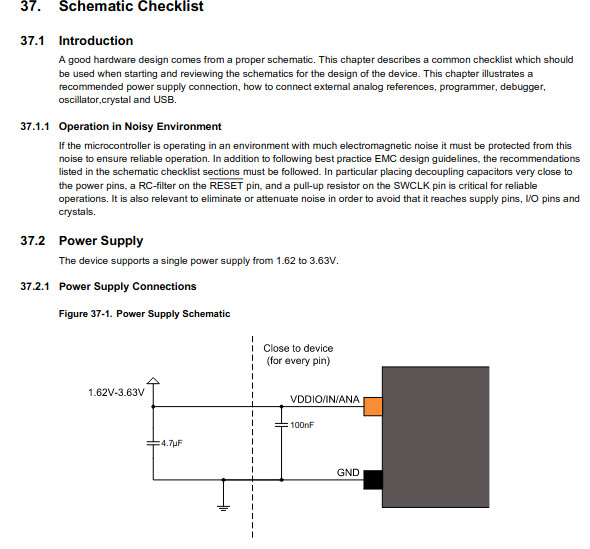
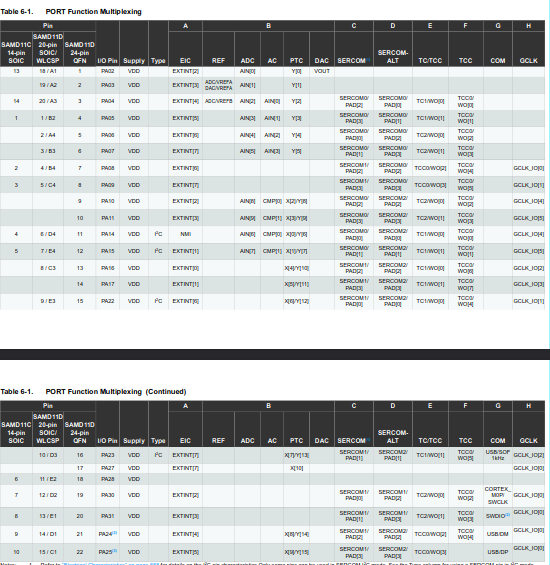
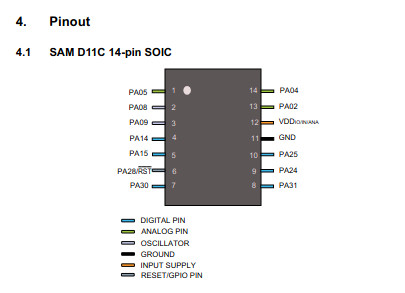

For me, the info in these pictures is essential to understand how it works, design a board with this microcontroller and program it. I have read the whole datasheet and it is really large and has a lot of different stuff in it. There is also important the register description if you are not using Arduino IDE and you want to program it in C. You need to know about control registers and of course how to configure clock registers. But, in my case, I didn’t go in that way. I used Arduino and in most cases, you don’t need to write a configuration code. Also, I want you to pay attention to the parameters of this microcontroller because I am going to compare it with another one.


HERO SHOT VIDEO
STM32 and ToolChain For It
I programmed my board, then I did some research at FabAcademy’s website. I can’t find much work with STM32 microcontrollers. I have a lot of experience with the STM32 MCUs, and I find them really useful and powerful. So, for me, it is not too hard to program them and use them as there is really good support from STMicroelectronics.
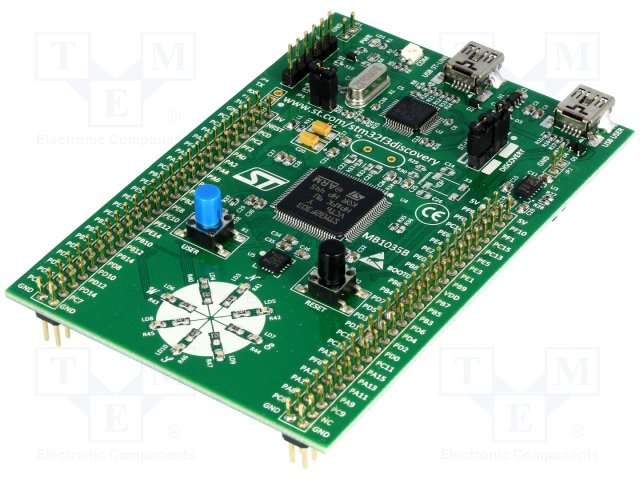
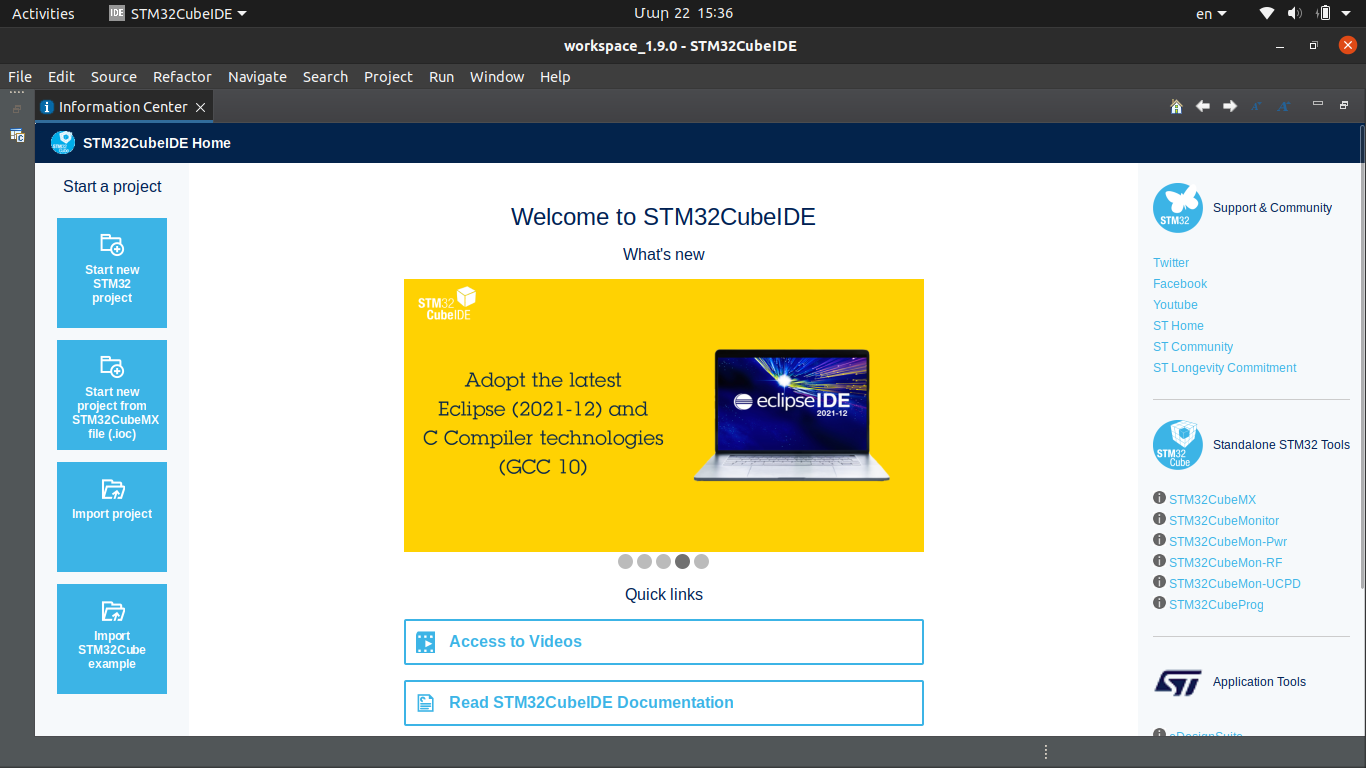


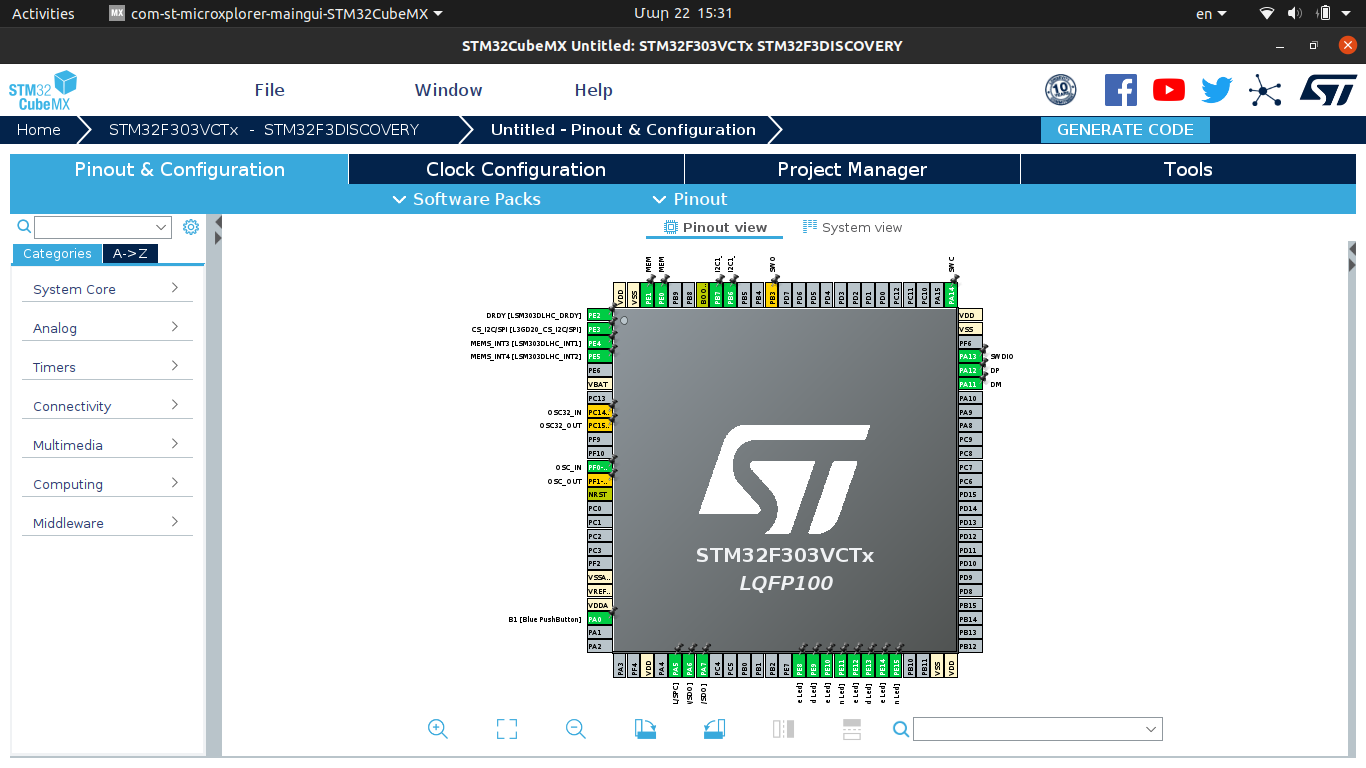

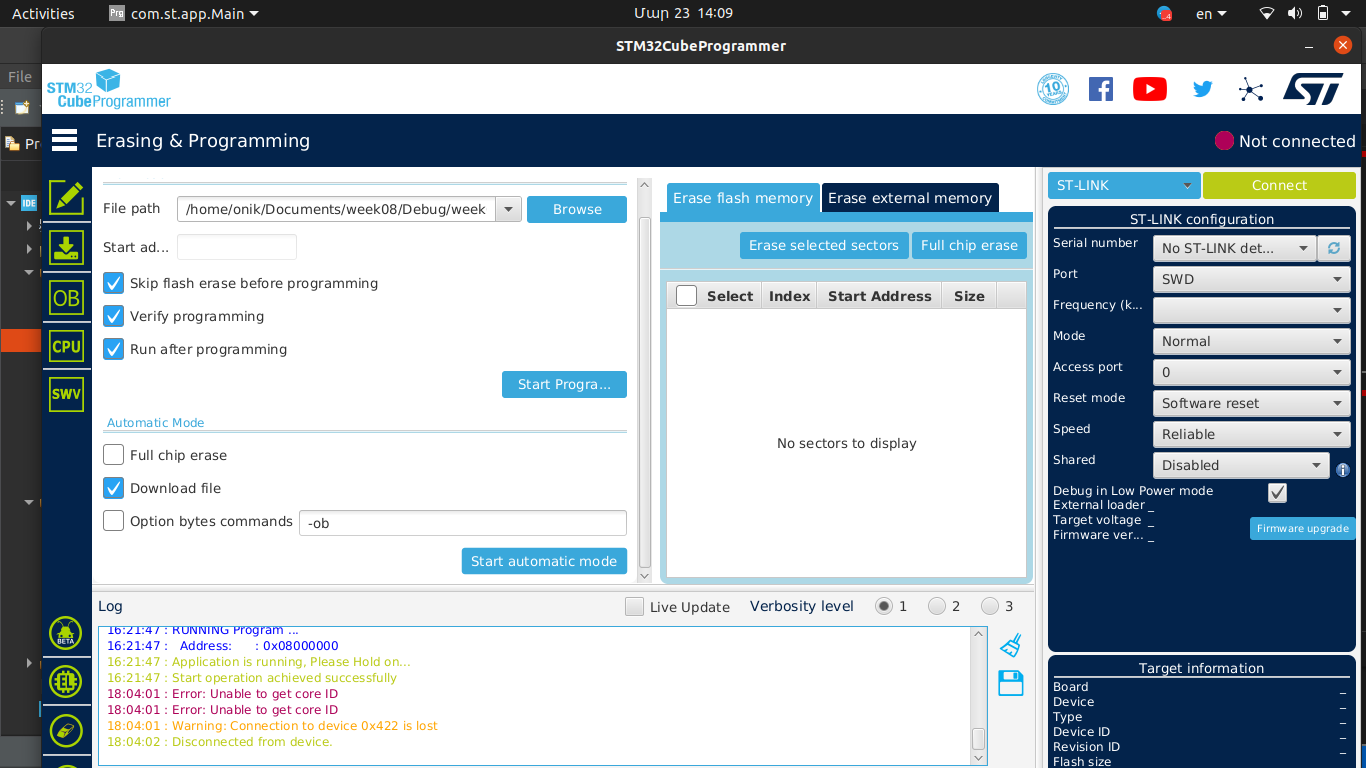
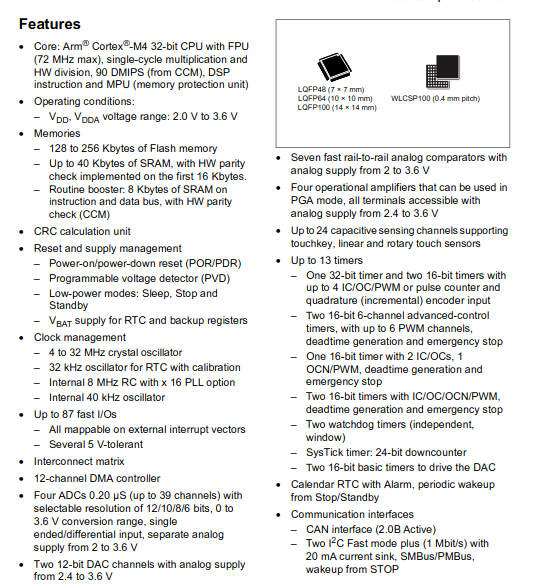
Here, I show the features of this microcontroller, and if we compare it with samd11c this one is really powerful. And the toolchain for it is more straightforward to use.
Useful links
Arduino Code
void setup() {
  // put your setup code here, to run once:
  Serial.begin(9600);
  pinMode(14, INPUT_PULLUP);
  pinMode(2,  OUTPUT);
}

int counter = 0;
bool pressed = LOW;

void loop() {

  // put your main code here, to run repeatedly:
  Serial.print("counter = ");
  Serial.println(counter);
  if(digitalRead(14) == LOW && pressed == LOW)
  {
    delay(50);
    if(digitalRead(14) == LOW && pressed == LOW)
    {
      counter++;
      pressed = HIGH;
      digitalWrite(2,HIGH);
    }
  }
  else if(digitalRead(14) == HIGH && pressed == HIGH)
  {
    delay(50);
    if(digitalRead(14) == HIGH && pressed == HIGH)
    {
      pressed = LOW;
      digitalWrite(2,LOW);
    }
}
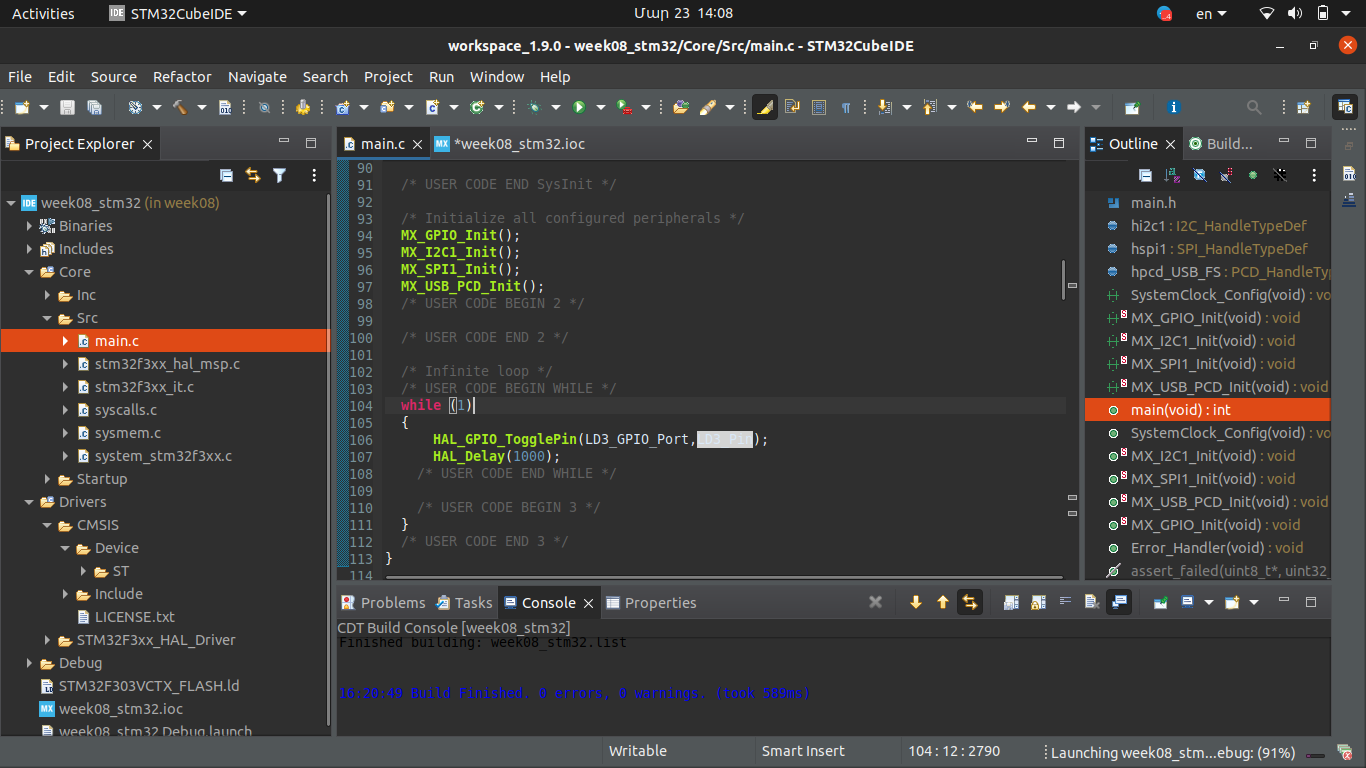
STM32 main.c
  int main(void)
  {
    /* USER CODE BEGIN 1 */

    /* USER CODE END 1 */

    /* MCU Configuration--------------------------------------------------------*/

    /* Reset of all peripherals, Initializes the Flash interface and the Systick. */
    HAL_Init();

    /* USER CODE BEGIN Init */

    /* USER CODE END Init */

    /* Configure the system clock */
    SystemClock_Config();

    /* USER CODE BEGIN SysInit */

    /* USER CODE END SysInit */

    /* Initialize all configured peripherals */
    MX_GPIO_Init();
    MX_I2C1_Init();
    MX_SPI1_Init();
    MX_USB_PCD_Init();
    /* USER CODE BEGIN 2 */

    /* USER CODE END 2 */

    /* Infinite loop */
    /* USER CODE BEGIN WHILE */
    while (1)
    {
      HAL_GPIO_TogglePin(LD3_GPIO_Port,LD3_Pin);
      HAL_Delay(1000);
      /* USER CODE END WHILE */

      /* USER CODE BEGIN 3 */
    }
    /* USER CODE END 3 */
  }