My maker experience began in mid 2009 with the MechMate, a large CNC router. Just few month before a friend of mine was looking for a land where you can put up a rudimentary shipyard to build a boat made entirely of wood, a 12-meter sailing boat. I had just moved to live out of town and I had the space needed available, I was amused to see how such a thing was possible. The first pieces to build the boat (bulkheads and reinforcements) were cut with a CNC in a large joinery equipped with an industrial machine that costs 100k-150k euros. The result dazzled me and I thought, "think about how many things I could do with a machine like this!". At that time I just had a classic carpenter/DIY hobbyist miter saw for my small project; a machine I later replaced with a used combo purchased on eBay.
At the time I was working as a photographer but I felt that it was probably going to end in a dead end. That's why I started looking around for alternatives and found that to have a working CNC machine and offering a wood cutting service with a high-tech and modern solution that also would have been used by emerging makers and artisans seemed really interesting.
The power of the Internet done the rest: first I wondered how these CNC machines were made and how much they would cost. Here in Italy we are the world's largest producers (with brands such as SCM, Bieffe, Morbidelli and so on) but budgets are challenging, and only for professionals with already active customers and established markets.
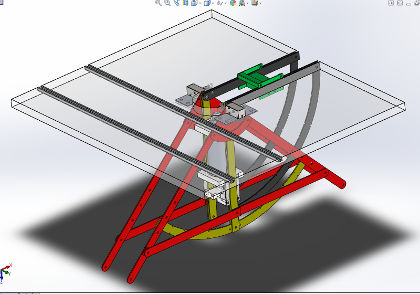
Digging more on the internet, I came to discover the Shopbot project. The costs in this case was about 20k-30k euro: not just companies, but maybe a group of friends could afford it, I thought. Even if the price was friendly enough it was still a bit challenging and so I came back again to the internet and, while searching for more, I stumbled upon forums with people discussing on how they actually built these machines on their own: wow! I thought that maybe I could have found the right place. It was a little delusional, later on, to discover that many of them had access to manufacturing shops in the surrounding area who had machine tools of all kinds. It was not my case.After a while, reading on Italian forums dedicated to CNC I heard about the MechMate project. The project had a good reputation, so I wanted to know more and I tried to be better informed. This project was very well documented and the machine had a nice and solid structure (I was a bit experienced at the time, after months of digging!). Also, and much more importantly, it did not need any special machinery and equipment to built. It was enough to know how to weld and, even if I didn't, I thought: "how's it possible that none of my friends knows how to do it?".
Without ever having seen a CNC machine physically, without having any experience with metal structures, however with a great passion and willingness to learn, I decided to start from scratch. In a few months I read pretty much all the forums and I started to sort out the pieces, in batches, depending on the budget I had available. I started with the most difficult thing, creating the rails, "if I can build the most difficult part is done," I thought.
After a week and a bit of hard work rails were ready! The longest part was finding the suppliers of the various pieces, but slowly I found everything. Shortly before the end of 2010, the machine was finished and it worked perfectly ...
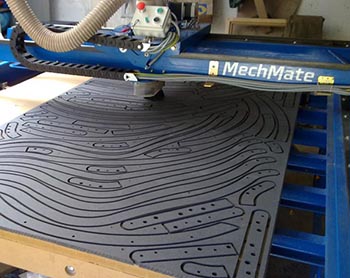
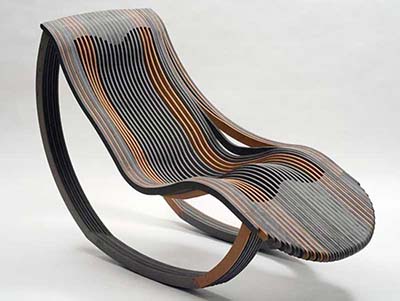
well almost: indeed, the machine worked great but I was not skilled to use it! I know nothing on how to setup, tune and operate! So, I spent three months of hell trying to get into my head the various concepts of CAD, CAM and CNC: I was a photoshop black belt, but with CAD and CAM I was precisely at newbie level. In short, and paradoxically, building the machine wasn't actually difficult, but learning how to use it was a real nightmare! But this is a result:
All About Woodworking ! The Electronic Controlled Router Table !
For as little as it takes to get set up, and the short time it takes to aquire skill at using a router table, it's easy to see why this venerable workhorse is often one of the first and most important tool purchases that a woodworker ever makes.
But maybe not all of you are familiar with so I will start to explain what is possible to do with a Router Table.
Below, a quick look at the common woodworking possibilities of a router table:
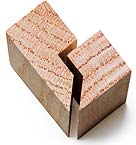
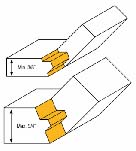
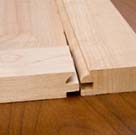

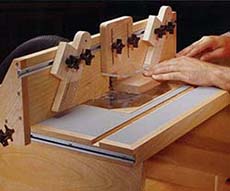
Borders are often a complicated work on CNC routers and very easy on a router table. For Example a miter lock router bit cuts matching tongues and grooves into a workpiece to create a strong angled joint. Not only does this bit increase the glueable surface area of a joint, but it also automatically aligns the opposite pieces, reducing the need for special clamps. Some of those procedures needs a precise alignement in two directions of the cutting tool and this is the reason why I choosed a Router Table for my final project. It will be a very usefull companion to my big CNC router. The building will require the use of knowledge of these assignments:
Now some example of similar tools:
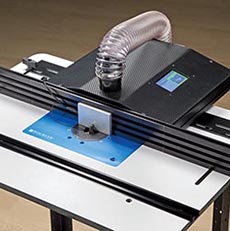
recently some commercial product started to be available, none of them has all the things I want and generally the price for a comlete sistem is high. The first and the second picture is an example of an Electronic Fence Positioner.

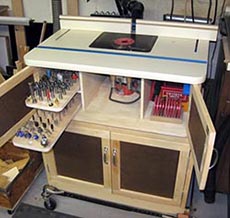
The third and fourth picture are about a traditional router bench, I like the idea of a cabinet with all accessory stored, and some accessory on the fence
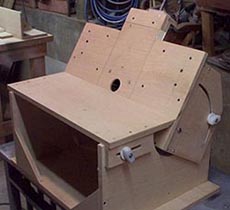
The fifth and sixth picture are some example to understand the inclination feature
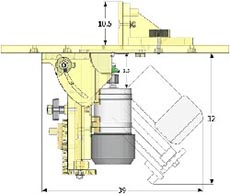
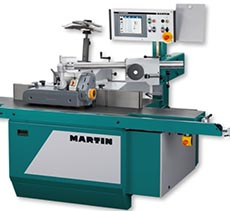
The seventh picture is a fully featured Wood Shaper, something that cost around 10k-20k $ .... obviously I am not going to build something with that structure ... but talking about electronic "features" .... YES ( I hope)!!! :-)
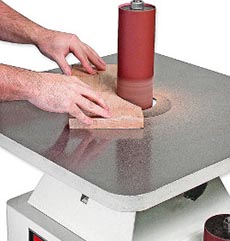
This project will also have the optional feature to work as an oscillating spindle sander (last pic).