
Week 17 - mechanical design, machine design (May 20)
Assignment
To week's assignment was both an individual and group project. It was to make a machine, including the end effector, build the passive parts and operate it manually and document the group project and your individual contribution. The second part was to automate your machine and document the group project and your individual contribution.
Initial ideas
As a group we brainstormed ideas for a suitable project, these included looking at previous year's projects - a 2-axis hot wire cutter, or a 3D scanner bed plaform. We decided upon a more achievable goal of a ball and maze game, which we named 'Fabyrinth'. The idea being to manoeuvre the ball throught a maze using keyboard controls or a joystick to reach a target.
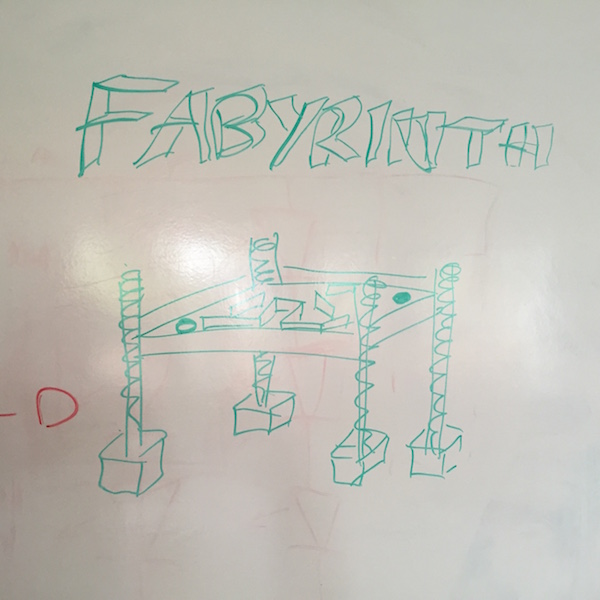
Initially we thought of using four linear stages one on each corner of the maze, but as there were only 2-degrees of freedom (the X-Y plane) we decided to use two stages. However we did not think through clearly how to balance the maze with two orthogonal pivot points.
Tasks
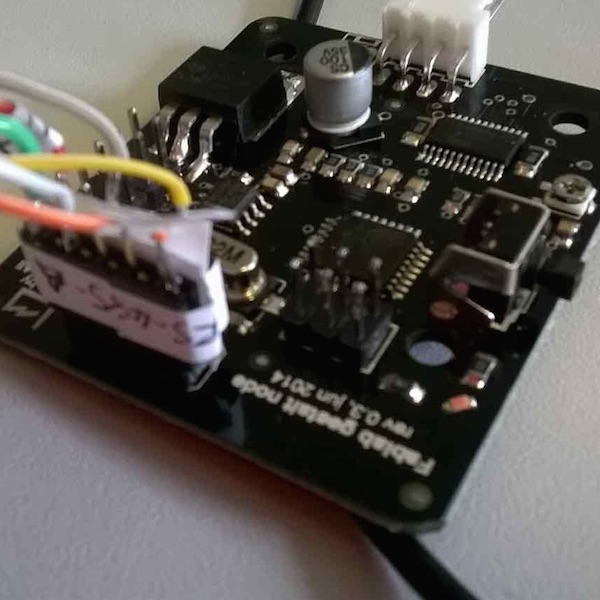
After unpacking the kits we set about dividing the tasks up. Sally milled and stuffed the FTDI board. David made up the FTDI cables and connected up the first node and power supply and set about coding. Kasper made the maze design and the fixture to fit the maze to the stages. I focused on assembling the carboard stages.
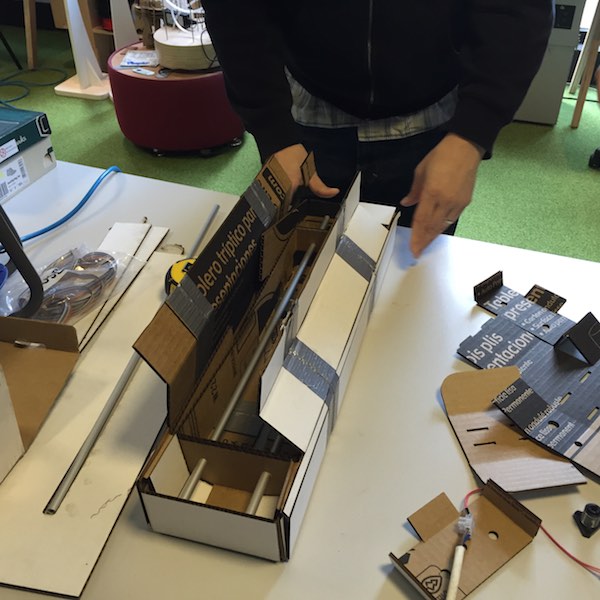
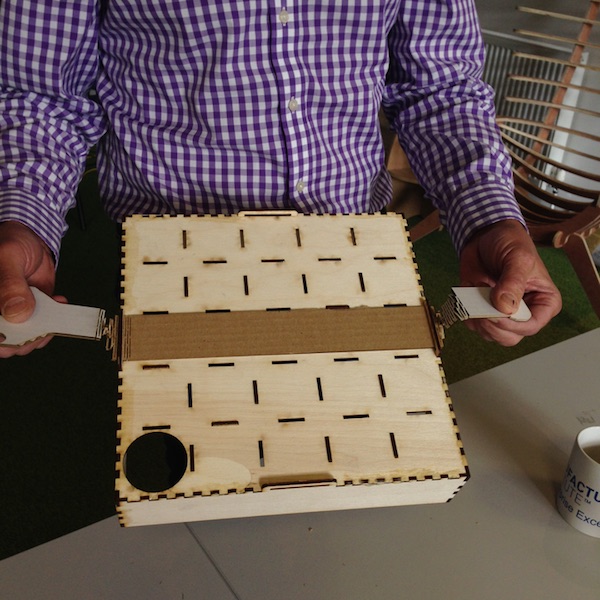
Assembling cardboard stages [Philip]
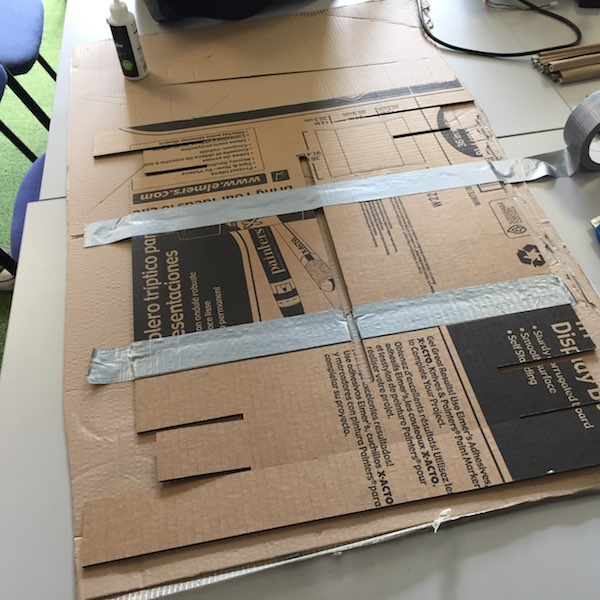
The project called for two linear stages. The cardboard cut files were downloaded and Pacon® 80% recycled spotlight single-walled tri-fold presentation board cut on the Epilog laser cutter.
The Epilog 2’x1’ bed meant the frame parts were cut in 3 parts with box joints and glued together using Gorilla glue, this didn’t work well as there was no cardboard in the box cut to glue, so the joints were gaffer taped together.
In Nadya’s instructions she recommends gluing all cardboard laminate parts to achieve maximum stiffness. In haste I omitted this step causing issues with robustness of the stages.
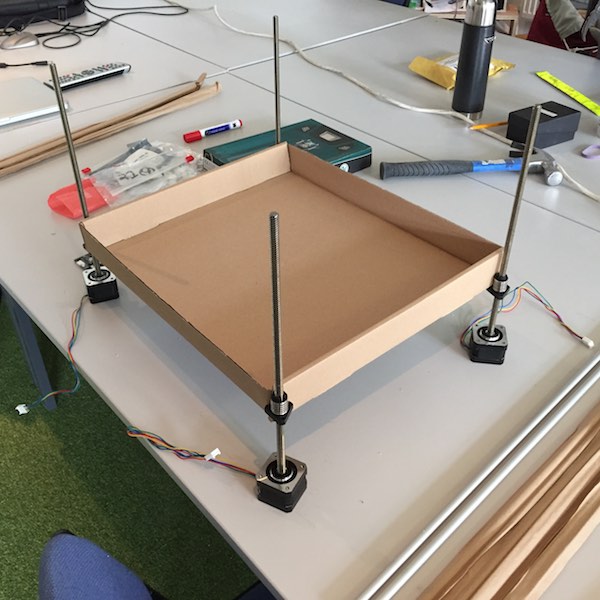
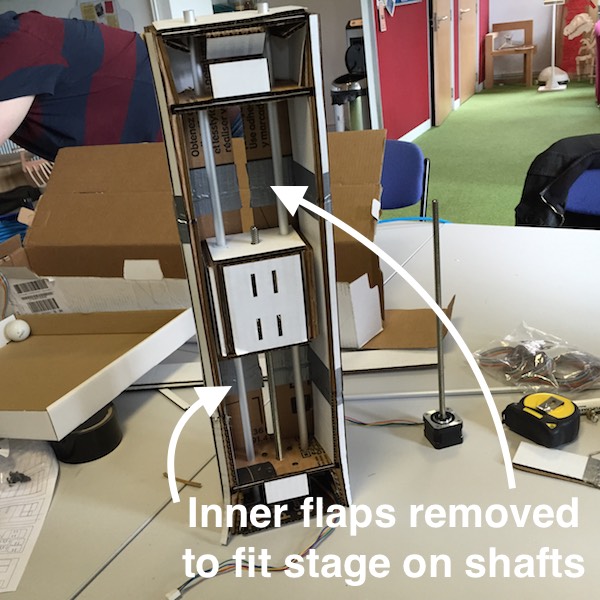
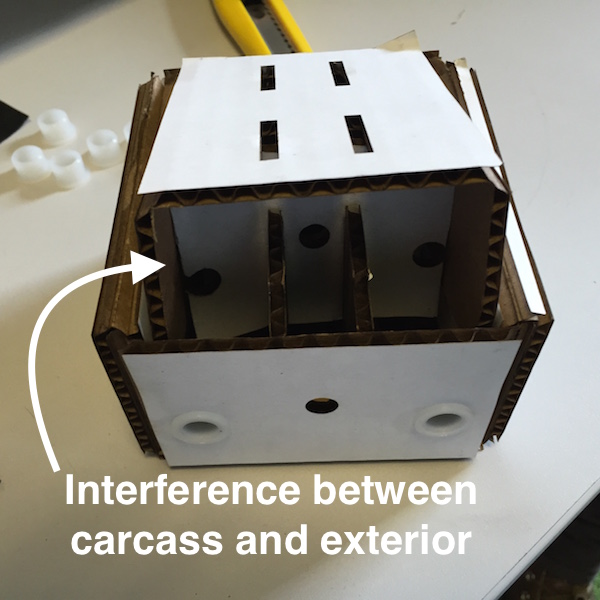
There was a problem assembling the frame, stage, shafts and stepper motor/leadscrew parts together - they didn’t fit! As a work around we removed the inner lengthways flaps from the frame to get the stage to fit with the aluminium shafts. Also the stage internal dividers interfered with the exterior cardboard so were trimmed to get the stage to fit together.
The second stage was assembled ready for the the maze assembly and fixing.
Work in progress
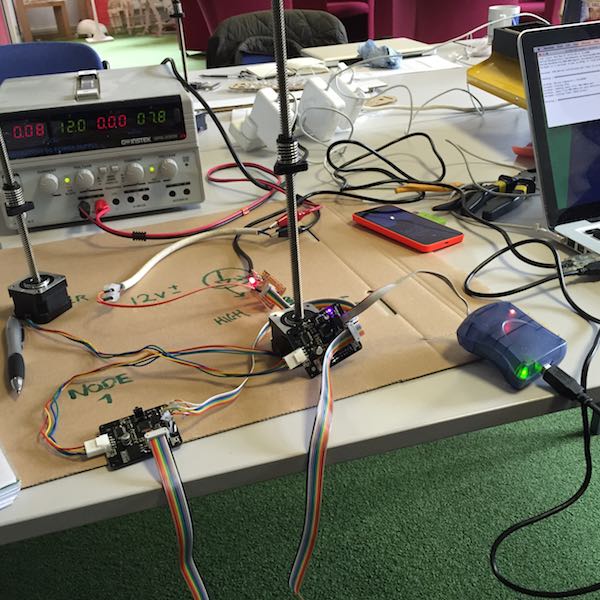
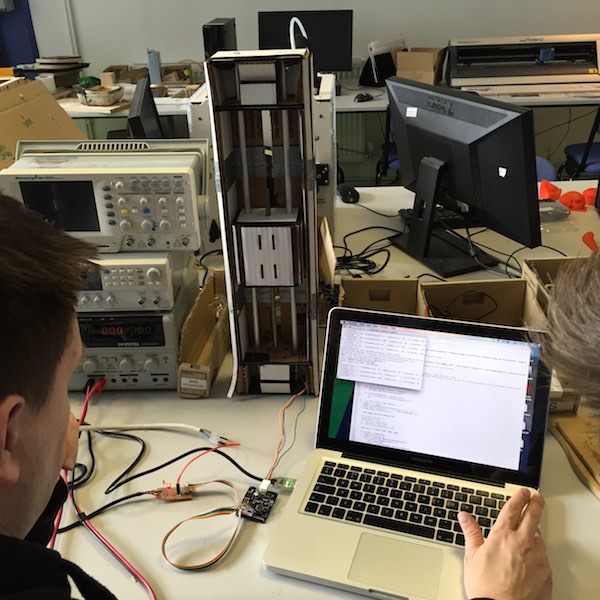
A power supply was set up to test the stepper motors.

David programmed the boards

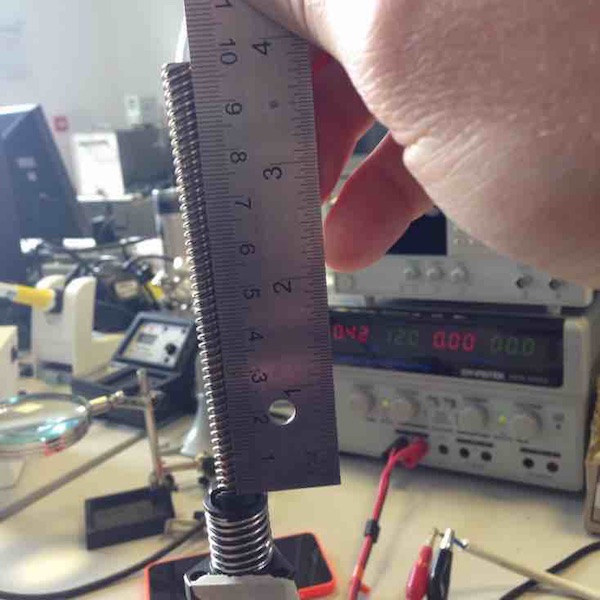
Calibrating the screw thread to distance travelled
Initial testing of linear stage
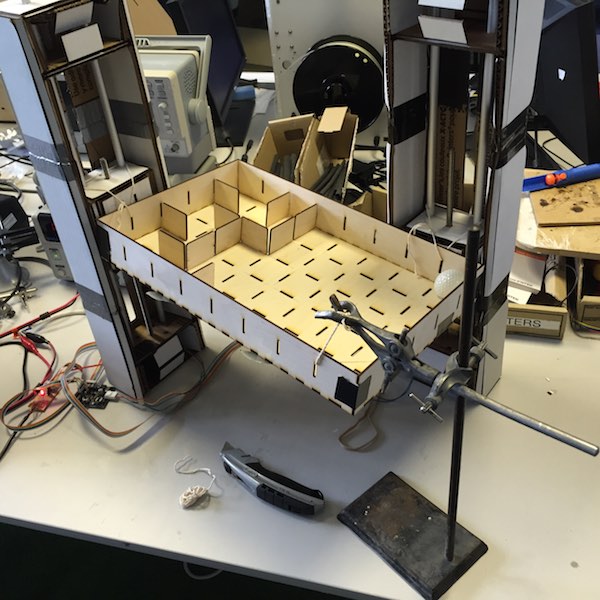
The first attempt at fixing the maze to the stages using string!
Further mechanical design [Philip]
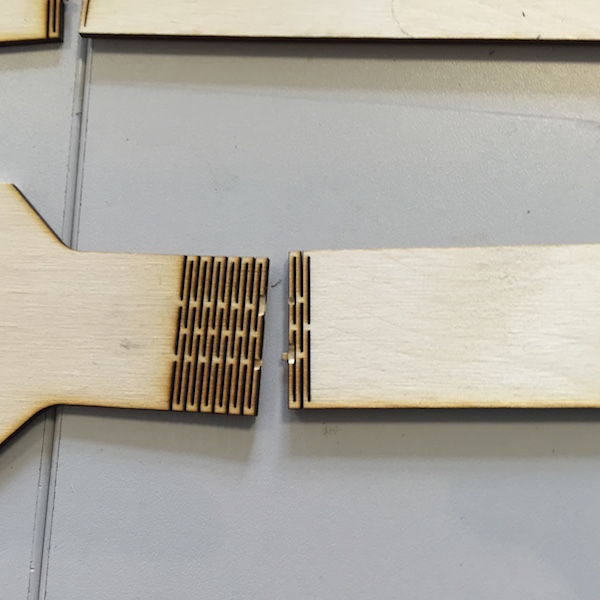
String was not a good solution to fix the maze to the stages, so Kasper set about designing a fixture with living hinges to support the maze and attach to the stages.
We cut out the fixtures in 3mm plywood on the laser cutter but soon found a problem - a small twist on the fixture snapped the living hinge.
We needed the hinges to work on two axes, it was like an aeroplane climbing and pitching at the same time.

We redesigned the living hinge to have wider slots giving more material at the connecting points, but the living hinge still failed with a small twist. So we tried using cardboard instead of plywood to see it it would be less prone to snapping.
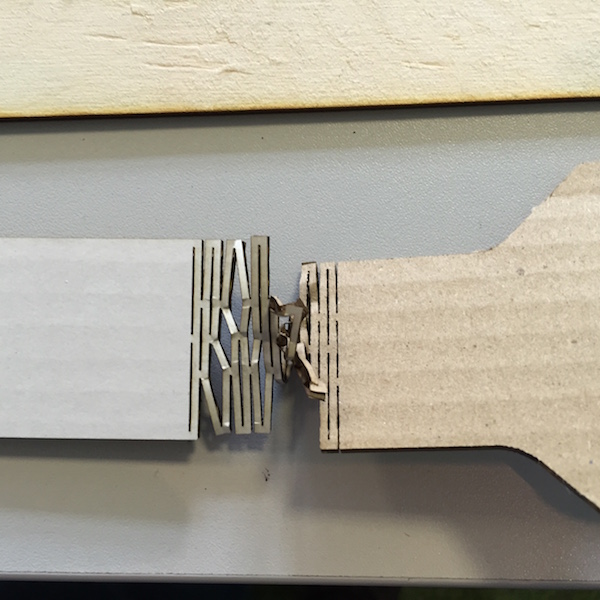
This resulted in the living hinge twisting over itself into a corkscrew!
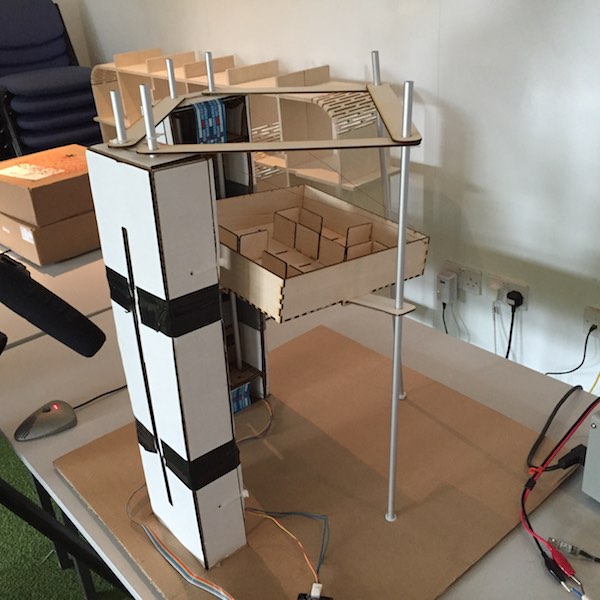
Finally we removed the living hinge from the fixture and used offcuts from the cardboard used to make the stages. Success - the fixtures worked in being able to flex up and down and also pitch when the orthogonal was moving up or down.
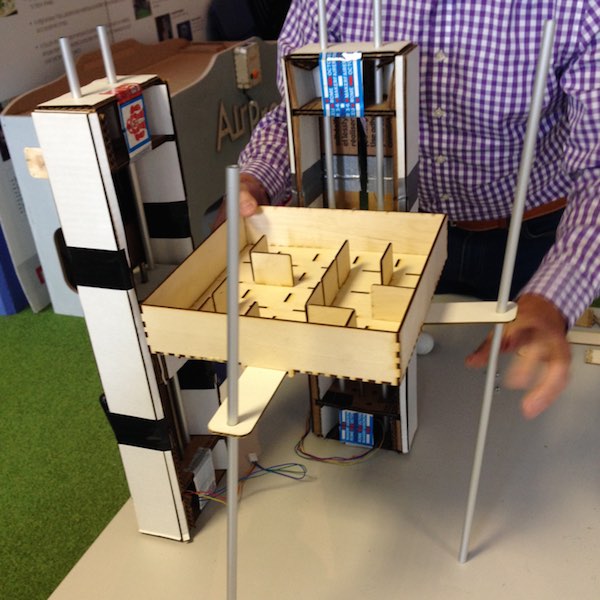
To make the fabyrinth machine rigid, we made a cardboard bed to sit the stages in, as this was 600x600mm we were unable to laser cut and did it manually, this could have been done on the Shopbit if more time had been availble before the presentation. We also make some spars which attached to the aluminium rods in the stages and guide posts.
Downloadable design files
Fixture3.pdfFixture-cardboard.pdf
Fixture-cardboard-noflex.pdf