


W9 ¦ molding and casting
Assignment for week 9
- Design a 3D mold, machine it, and cast parts from it
- Learn how to mill wax on the ShopBot
- Learn how to work in PartWorks
- Link to this week’s home work page
For this project I really wanted to use the opportunity to learn new ways of making molds and find new materials to work with.
I work a lot with silver but I have never experimented with metal casting so I found this the perfect opportunity to combine that interest with this weeks assignment. So I visited a good friend and a teacher and got a brilliant lesson in sand casting. With that newfound knowledge in mind I went ahead and started the process of designing for the machines.
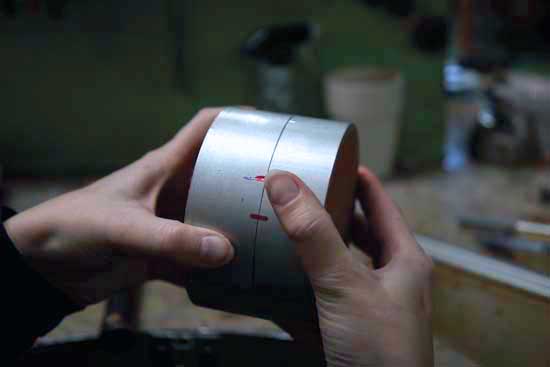
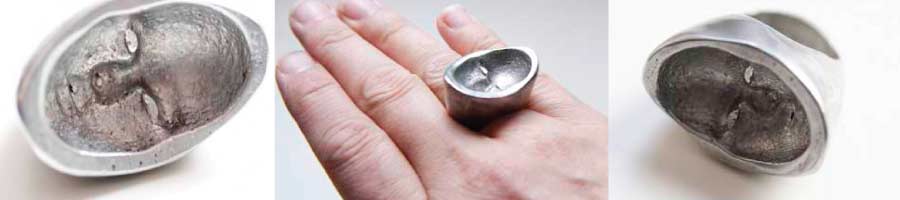
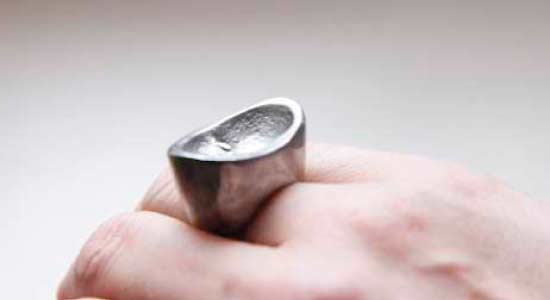
I decided on making a ring. Sand casting limits you to two sided molds so I wanted to make a three piece mold simply cos I could. I took my inspiration for the design of the ring from my long lived interest in optical illusions.
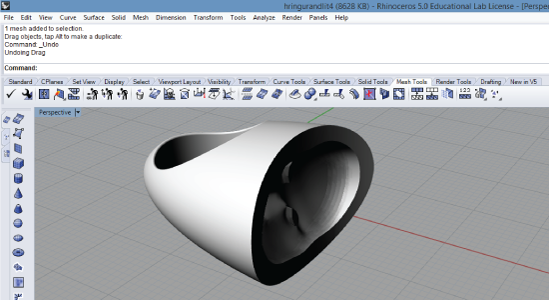
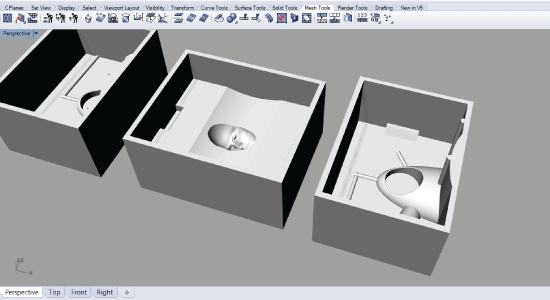
Designing in Rhino
Working in Rhino was a challenge. I spent almost 4 days designing in Rhino. In my frustration I often thought that I could have made the mold many times over with old fashioned conventional methods. But it was all well worth it in the end.
- The ring designed
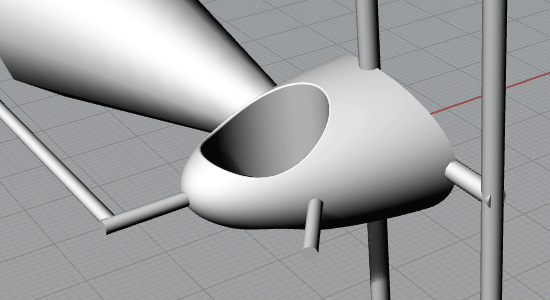
- The airways designed.
- The mold walls.
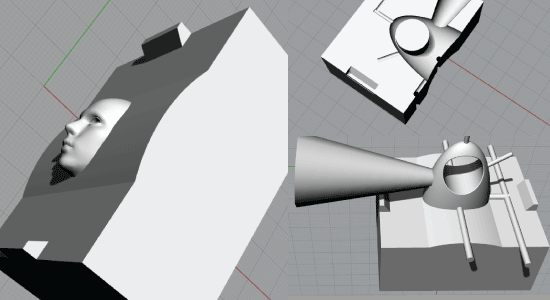
- The molds for the molds.
Part Works and the ShopBot
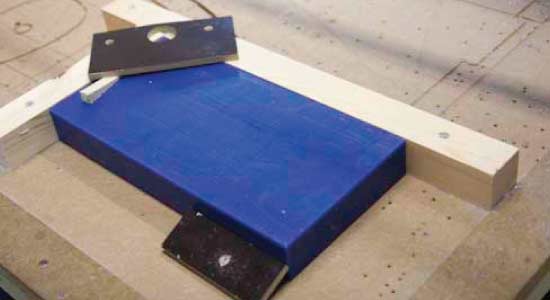
I used the shopBot to mill the wax.
- I started by securing the machinable wax. I used double tape underneath the wax block as well.
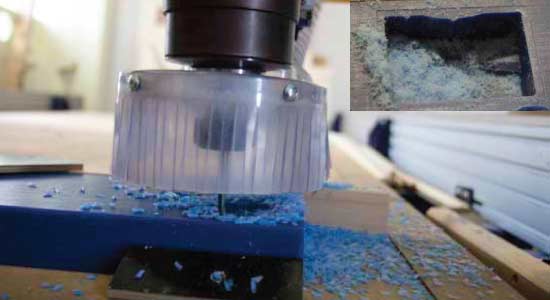
- Next step was milling.
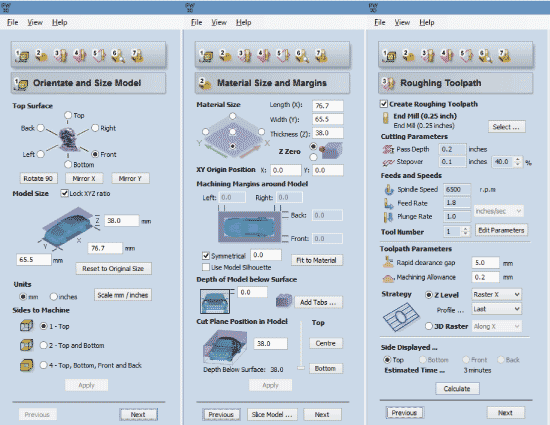
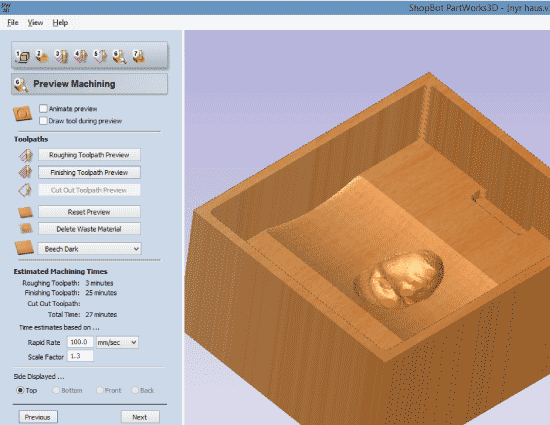
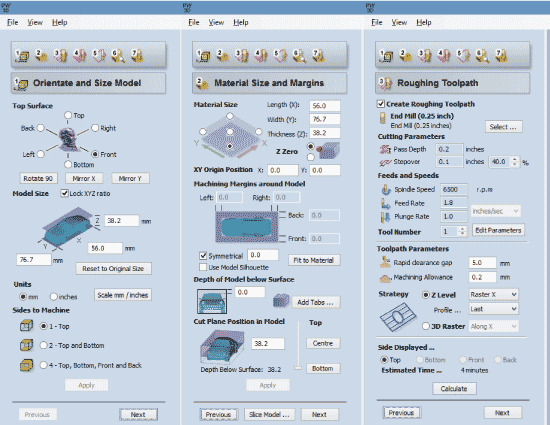
- I prepared the files in PartWorks3D for the ShopBot. First I exported a roughing toolpath for the face mold.
- I used these settings in PartWorks for the face mold. Here I selected the ¼” end mill bit and lowered the spindle speed to 6500.
- Next I exported a finishing toolpath for the face mold.
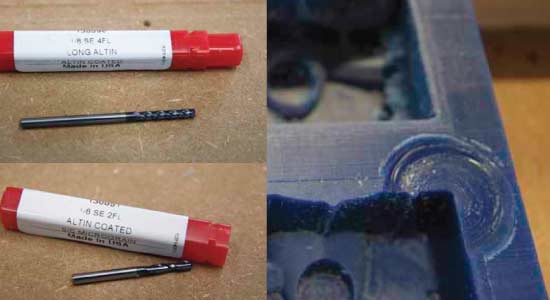
- I used the 1/8 inch end mill for this job
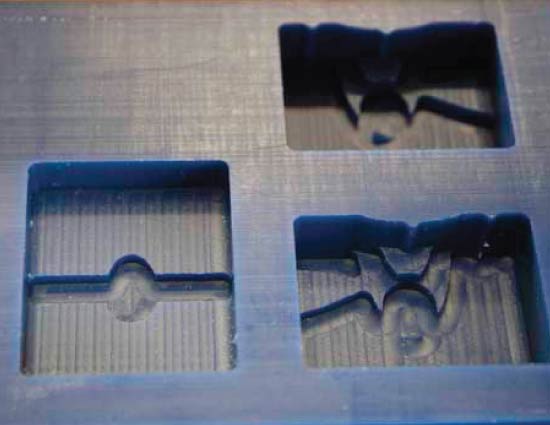
- I made a mistake when choosing tools. I didn’t know we had a long ⅛ inch end mill. So I started using the short one. The mold was too deep for it and the machine went right into the top surface of the wax.
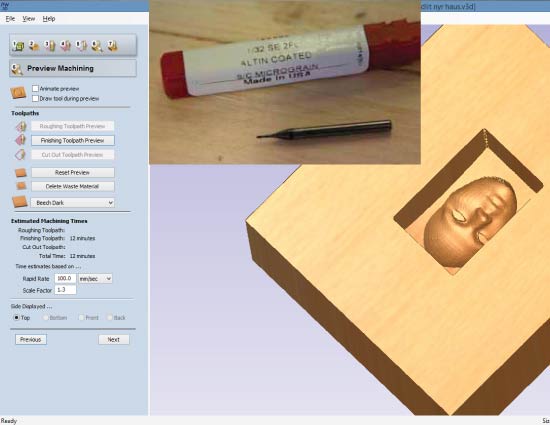
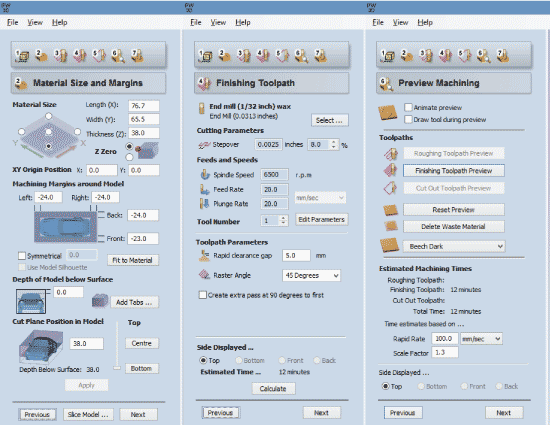
- As the ⅛ inc was too big to finish the face perfectly I prepared a cutting path only for the face itself. For this path I used 1/32 inch end mill.
- The setting for the "face only" path.
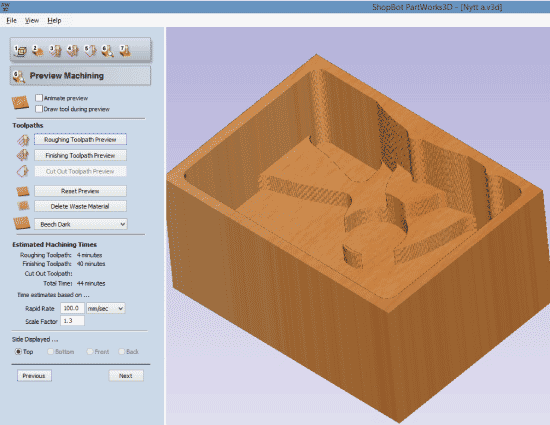
- The roughing toolpath preview for the sides of the mold.
- The Roughing toolpath settings.
- The rough cut.
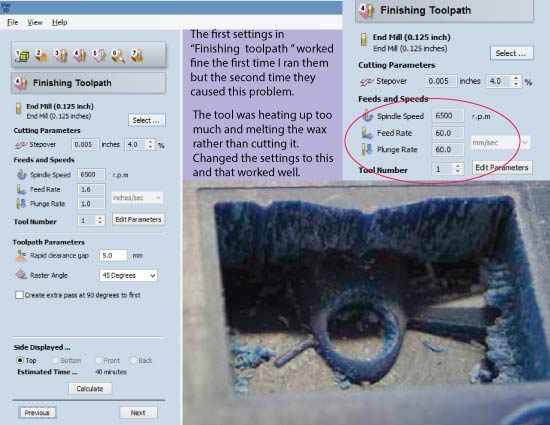
- The setting for the Finishing toolpath for the sides
- The end result


Making the mold
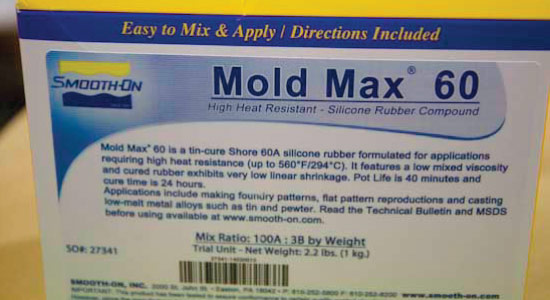
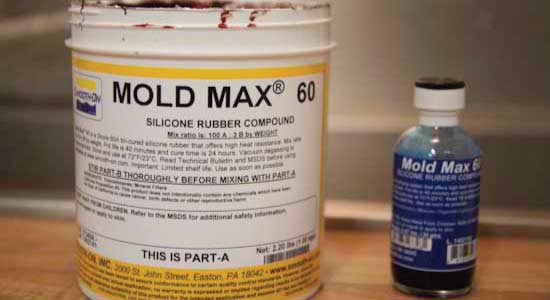
- Since I really wanted to cast metal in my mold I picked the heat resistant silicon rubber compound from Smooth-On: Mold Max 60.
- I followed the instructions from Smooth-On. They can be found here. I did not use a release agent like they recommend as I was told that that was not necessary when casting into wax.
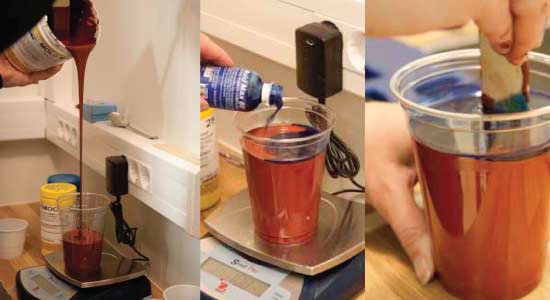
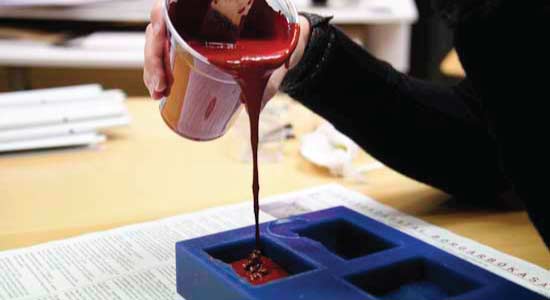
- The compound had to be mixed in the ratio 3/100. I used the gram scale for accurate measurement. I took care to pour it from a considerable height to avoid air bubbles forming. I stirred it for five minute. I took extra care to only stir like I was cutting through the material and not folding it in on itself, all to avoid air bubbles. We do not have any vacuum chamber at our lab. So I simply used the vibrating method by hand, where I tapped it lightly onto the table for few minutes.
- When pouring into the mold the mixture was slightly lumpy. That turned out to be nothing to worry about. I poured the mixture into the lowest point of my mold in a thin line from some height to avoid air bubbles forming. After I had poured all the mixture in I took a small stick and followed the innerside of my mold where the positive was lying to make sure no air bubbles were sticking to the surface.
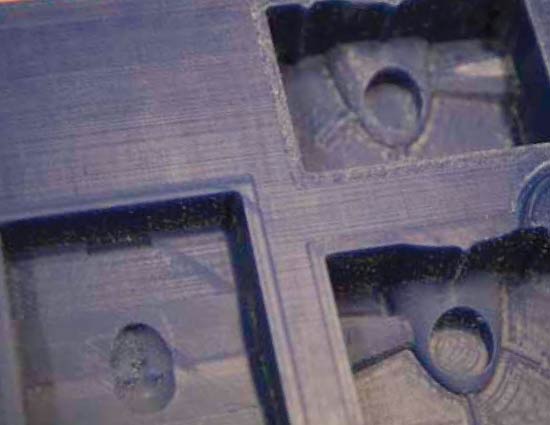
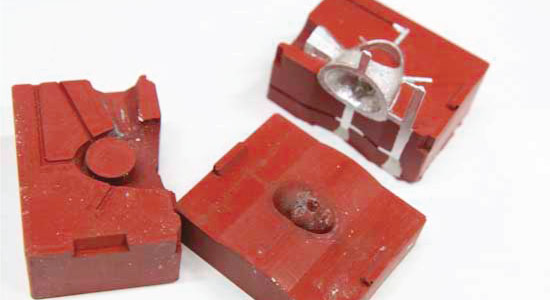
- I let the mold sit for 36 hours to cure. It took some team effort to get it out.
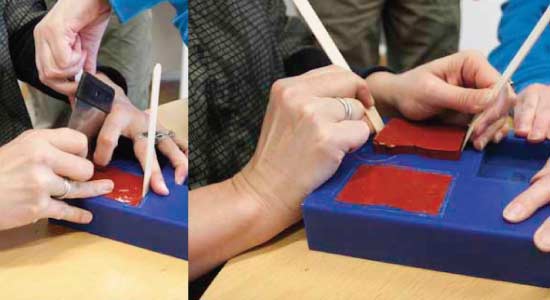
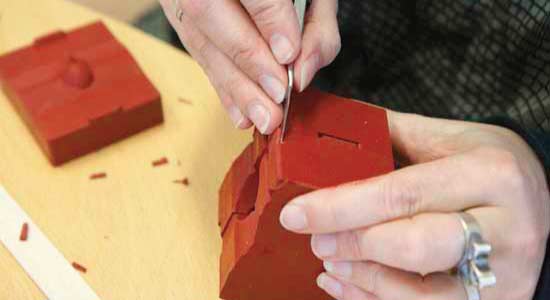
- I soon found out that I had made some mistakes on the Rhino model. For some reason or another I had not not booleaned two of the locks. But that was super simple to fix as it was extremely easy to cut into this material.
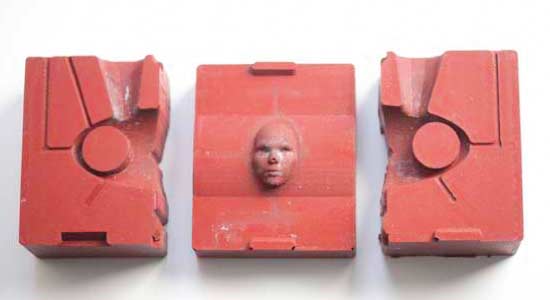
- The Mold turn out perfect apart from a tiny air bubble right on the tip of nose on the face. Apart from that there were no air bubbles to be seen.
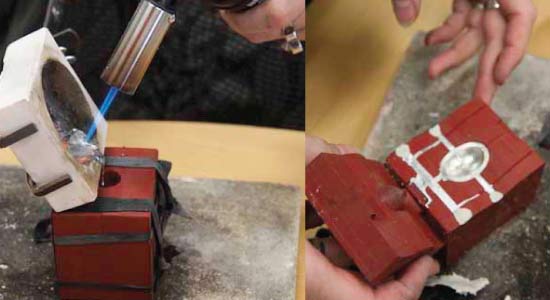
Casting the Tin
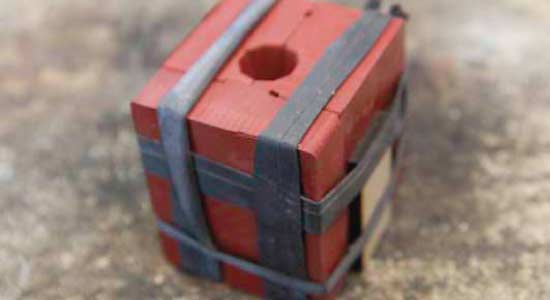
- To hold the mold together I used rubber from old tyres. In the beginning I used some pieces of mdf to tighten it further, but soon found out that by making the rubber bands super tight I did not need the wood.
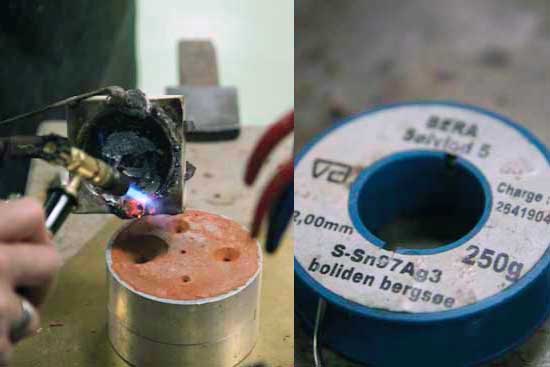
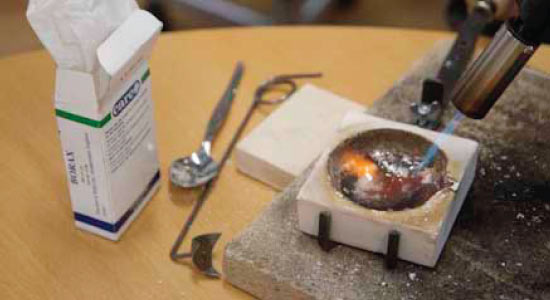
- I heated the crucible well and added borax. The borax acts as a purifier for the melted metal, plus it forms a thin layer of glass which protects the crucible and allows for better flow.
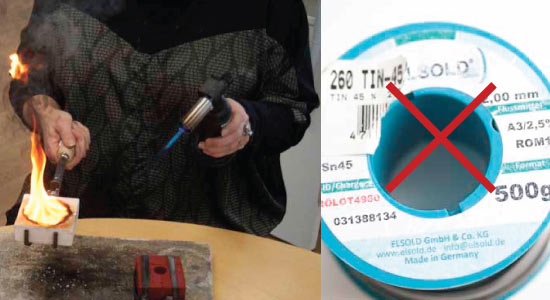
- I accidently bought the wrong tin. The tin I got had a soft flux center. When heated it bursted into flames with a lot of black smoke. I went back to the shop, and this time I brought back tin in small bars, or sticks. That turned out lot better.
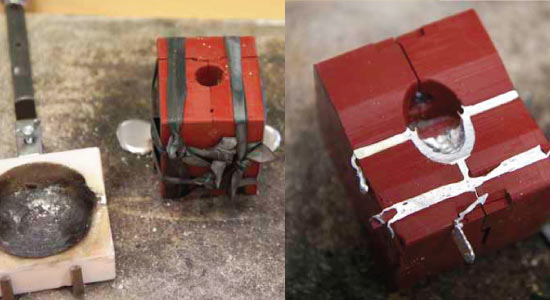
- The first pouring turn out to be a bit of a disaster. It soon revealed itself that I had underestimated the time it takes the tin to go back to solid form. Silver solidifies in seconds after pouring whereas the tin stays in liquid form for couple of minutes. The adherence of the silicone mold was also a lot less than in a sand mold. In a sand mold the smallest grain of sand can obstruct the flow of metal. This meant that my airways let the molten metal out on the sides. This had actually worried my while I was designing in Rhino. But I always had a backup plan at the back of my mind. I could always obstructing the airways with clay. I did that for the second pouring and it worked fine.
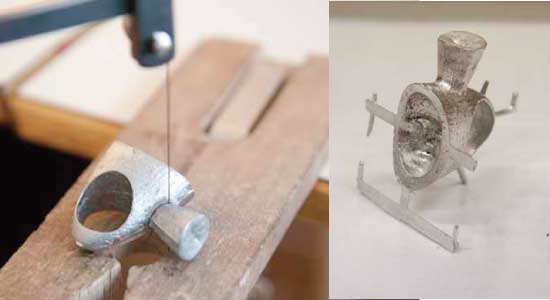
- All went well in the third attempt.
- I made further alteration to the mold after the second puring. I added an extra airway to the ring as a air trapped there. The silicon material cuts beautifully.
- Next was to saw the pouring hole off. I had made the hole way too big. Next time I will make it a lot smaller.
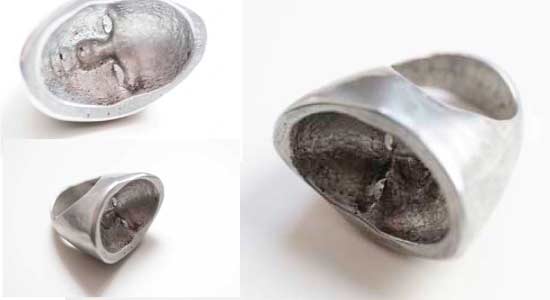
- I spent some time filing and then I polished it on a lathe. I was not careful enough when polishing. The tin is so much softer than silver, I accidently polished off too much material.
- The final result.
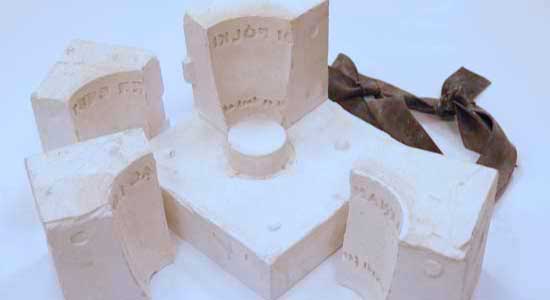
Five piece plaster mold
In week 5, 3D Scanning and Printing, I made a 3D test-print of a cup with different lettering on the surface. It was intended to be a model for plaster mold for ceramic casting. On the surface of the cup I put different fonts in different sizes, both embossed and engraved, tapered and untapered. I really wanted to see how detailed I could go in all of the processes. .
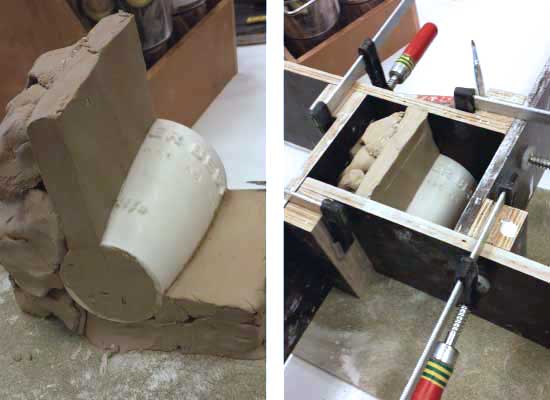
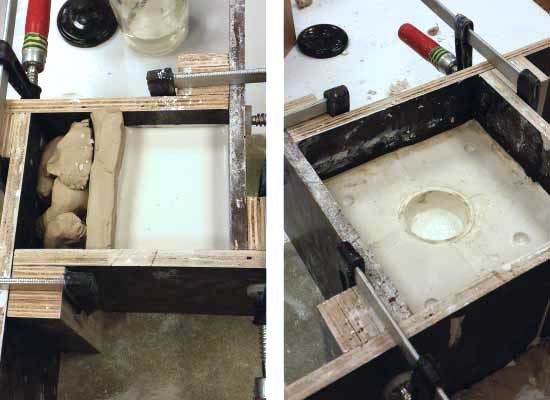
- I made the mold using traditional methods of packing the model in of clay and pouring plaster into the in different sections individually.
- The box I am using is very handy as it can be adjusted to any size.
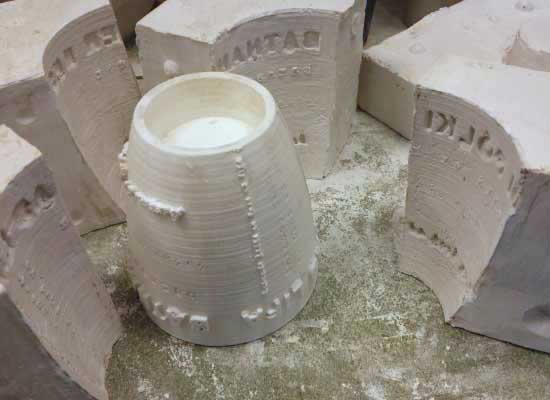
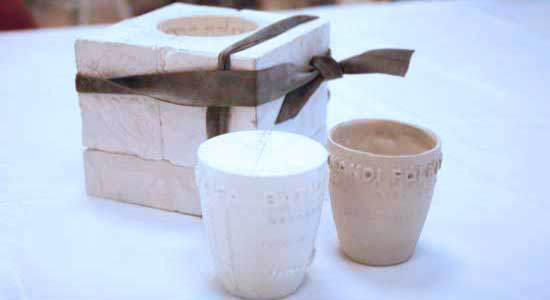
- The texture on the inside of the plaster mold was not to great. The texture of the printed object came through too much for my liking. The model was printed with standard settings. I will have to 3d print in higher quality as well as taking care that all the letters are more tapered.
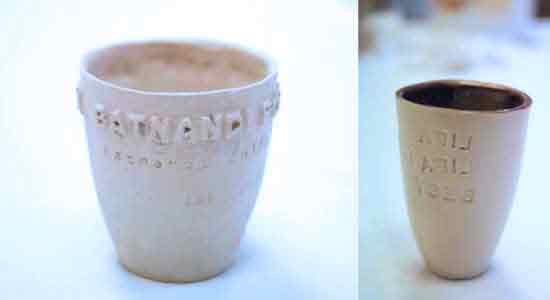
- This turn out to be a five piece mold since the lettering was all around the shape. The result was that all the embossed fine lettering were not readable in the final ceramic cast. The only embossment that worked was the really big one. I could not get away with any of the italic fonts, only the simple typefaces were readable.
- I found that the big letters affected the inner surface of the cup and left it wobbly looking. An effect I was not looking for. The engraved effect was much better but I would like it to be slightly bigger
- The surprize result of these experiments was the fact that the effect I liked the most was the simplest of them all. Simply stamping the letters on the surface. I intend therefore to 3D print different kinds of stamps to test further (with reversed lettering of course) That way I can have simple one piece plaster molds but still get all sorts of different sayings/decorations on to the cups.
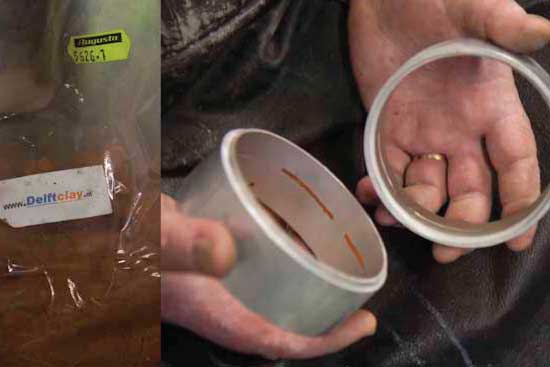
Sand casting
Like I said at the beginig of the page, I work a lot with silver but I have never experimented with metal casting so I found this the perfect opportunity to combine that interest with this weeks assignment. So I visited a good friend and a teacher and got a brilliant lesson in sand casting.
- The oily sand for sand casting is so fine that it is almost like clay. The mold walls can be made out of all sorts of material. Here is an example of aluminum frame. .
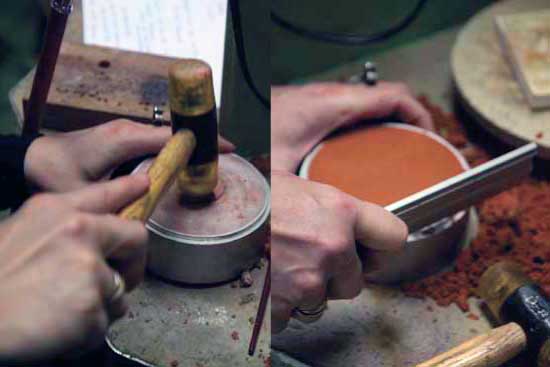
- It is important to break down the sand before packing it.
- Next step is to stuff the mold full of sand and really hammer on it to get it as tight as possible.
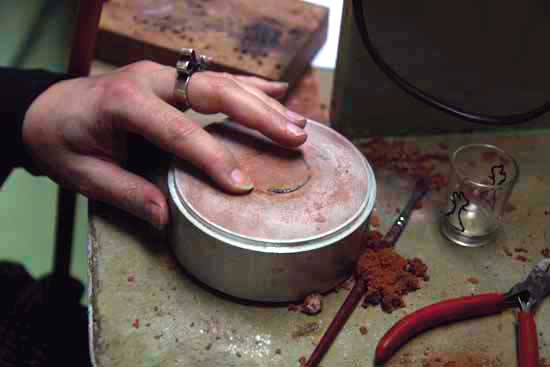
- When I was done packing the sand I dug out a hole for my model and pushed it in and packed it full of sand. I was using a small glass to cast from. It turned out to be too fragile, I managed to break it while hammering it in.
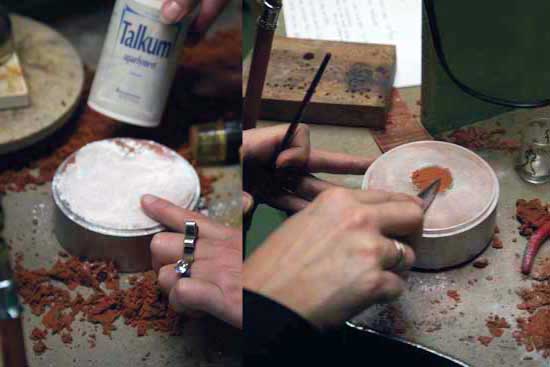
- Next I used talkum as a release agent . I almost forgot to scrape the talkum from the center of the glass
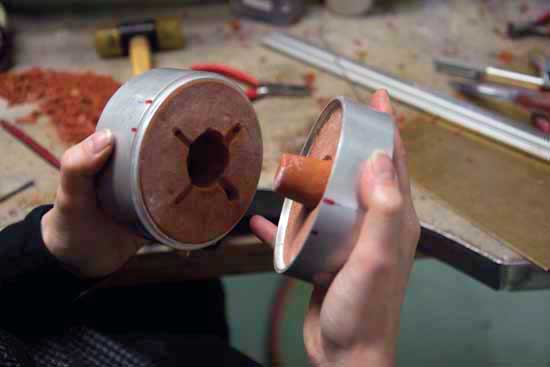
- It is really important to take good care when placing the two part together and use the guides.
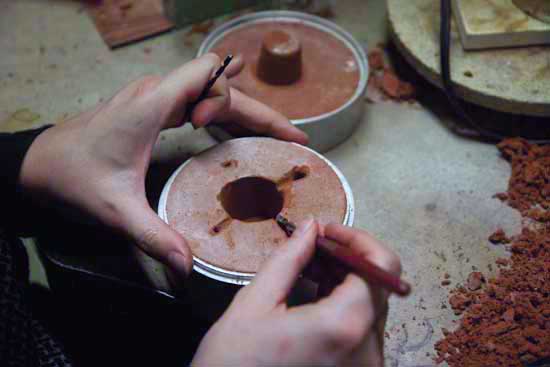
- After packing the second half of the mold full of sand it was time to carve out the airways. I used I small drill for the holes that went all the way through. For the others I used a smooth tool and took good care to pack all the sand in, as a single grain of sand can obstruct the flow.
- The mold ready for casting
- For the first experiment I used tin to test out the mold. The tin melts at 231.9 °C so it is very easy to overheat it.
- After little waiting it was time to open the mold. Since tin has such a low melting point it does not burn the sand as silver does. But if there is any burt sant it is important to remove it and throw it away.
- When the glass was out it was time to clean the airways off. The glass came out without a base for some reason. (I suspect it might have something to do with the fact that I accidently dropped the mold on to the table just before casting! :)