


W14 ¦ Interface and application programming
Assignment for week 14
- Write an application that interfaces with an input &/or output device
- Link to this week’s homeworkpage
Motion Detection
This week I managed to set up a html web page for the motion detection. After a good session of googling I found a nice javascript code from Benjamin Horn.
I managed to set it all up in Dreamweaver but I could not get it to work. It turned out that the javascript needed to run behind a web server. I downloaded XAMPP server for windows which runs Apache among other things. I followed their instructions and placed my site in the htdocs folder in the server's main folder. Then the motion detection started working fine.
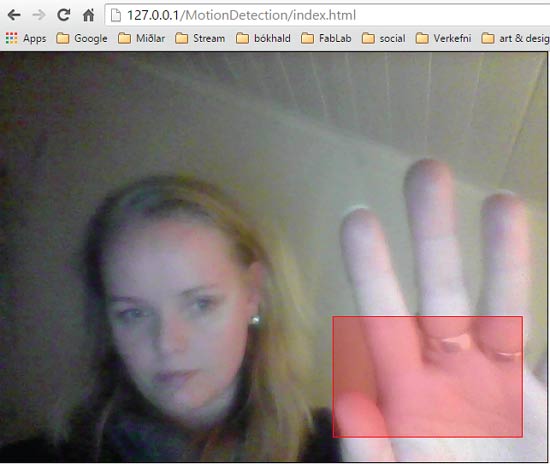
In his code Benjamin captures live video from a webcam, resizes each frame down to 64px x 48px and compares them against one another by going through each pixel to see if there is any difference. If there is difference then there is motion. I have been playing around with his code and managed to connect it to my stuff.
Connecting- setting up Node.JS
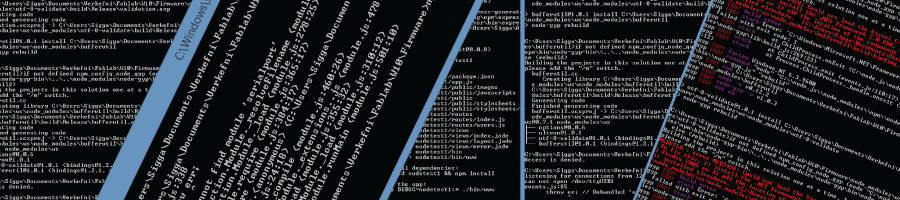
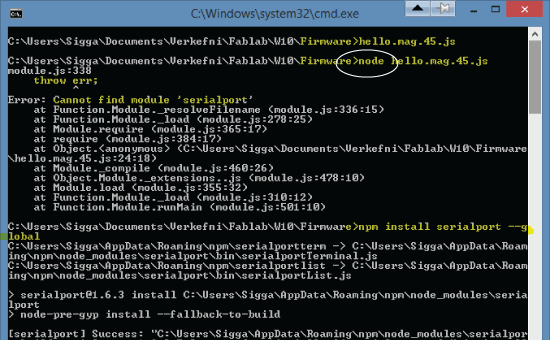
All my energy this week went into getting the connection from the computer to the motors up and running. Bas, my instructor, recommended to use the node.js server for communication. That way the website can talk to the motor’s microcontroller through the serial port using a javascript bridge. Sounds simple? Yeh right….. I have gained quite a few more gray hairs this week. I did learn a lot, but the learning curve was bit like climbing up an ice wall barehanded. But Bas was there for me, I could not have done this without him!
- I downloaded node.js. It needs to be set up directly on the C:/ drive so the path should look like this: c:/node.js, (learned that the hard way.) I used the installer that comes for windows.
Next was to get the npm to work. npm is the package manager for node.js. npm makes it easy to install JavaScript and it is used by developers to share and reuse code. The npm should come automatically when you install the node.js. In my case it did not. I had to install and uninstall few times before it worked.
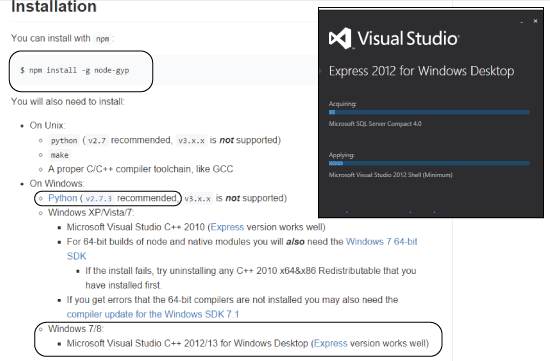
Next hurdle was setting up the serialport module needed for the node.js to talk to the serial port. - The serialport module needed a module called the node-gyp That package is a cross-platform command-line tool written in Node.js for compiling native addon modules for Node.js.
- And the node-gyp needed visual studio express, python. 2.7.3 and few other things some that I had already installed in past few weeks.
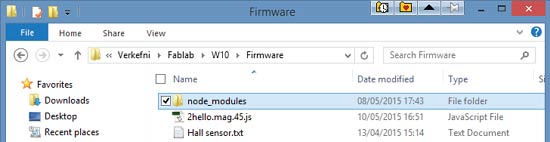
- Next up was setting up the websocket for node. It needs to be in the same folder as your javascript bridge, which is for the node.js server.
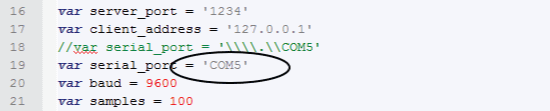
- Ok so finally everything should be working But No. I used Neil's example files from input week to test things. There are two files for this test. One is a javascript file that we need to run with node: hello.mag.45.js. That file act as the bridge between the browser and the serial port. In there I needed to change the serial port to the name of my own serial port
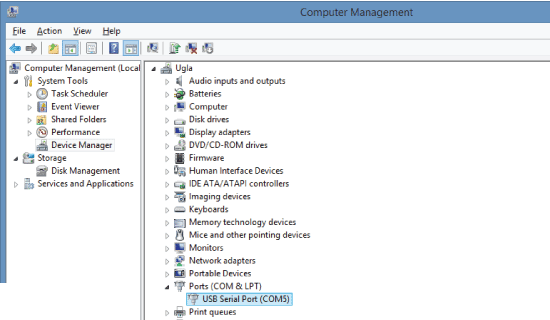
- To find out what your serial port is called, go to Device Manager and it is under Ports (COM).
- The second file we need is the html page and that we run in the browser: hello.mag.45.html
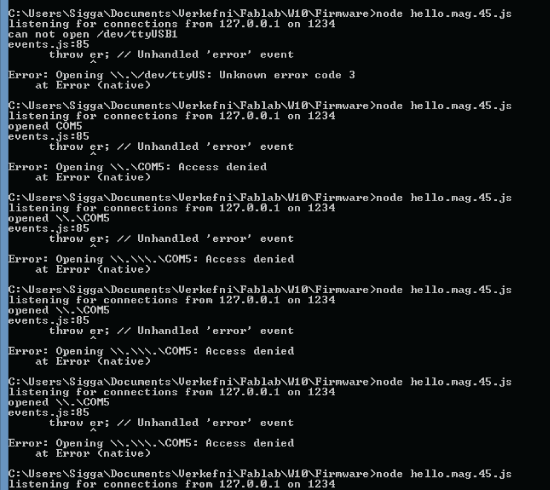
- No matter what I always got an error saying: Error: Opening \\.\COM5: Access denied. I downloaded a free serial analyszer and it spat this out all sorts of information. I did not help me alot in the end.
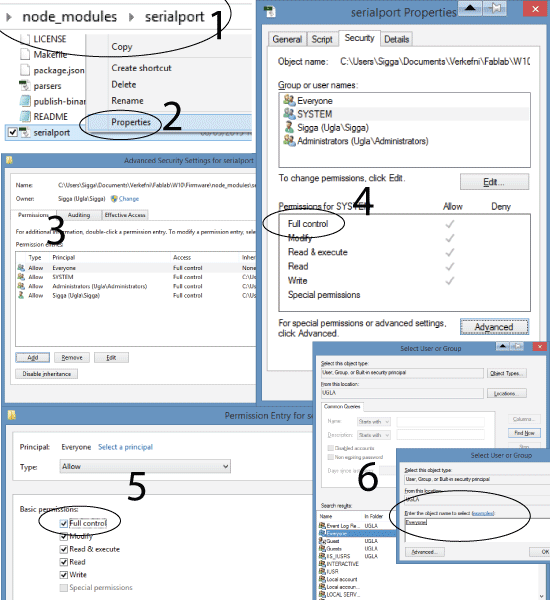
- I tried many things, one of them making sure that the serialport in node modules had full control, and all users had full control as well.
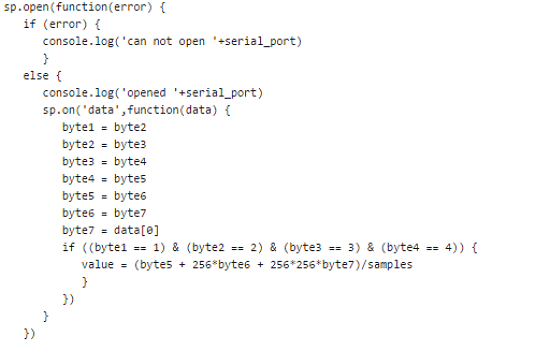
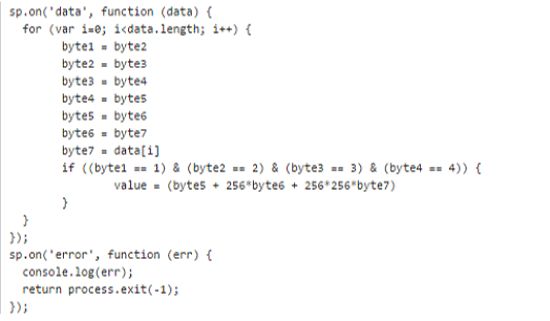
- Bas, my instructor found out what needed to be done. The code in the javascript bridge needed a little alteration. The node.js file for the magnet has a sp.open function
- turns out that it has to be replaced by this. After that it should work without having to be administrator, or setting permissions etc
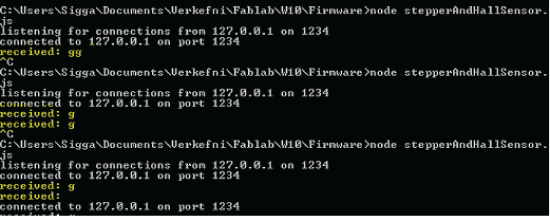
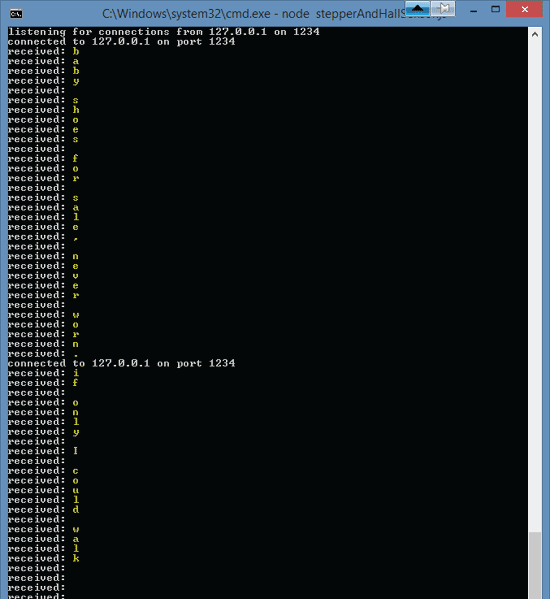
- Connection at last.


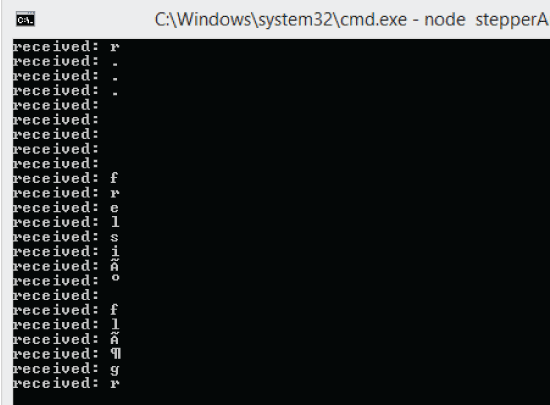
Communicating
- After the connection was established it was time for communications. Started by sending simple letter "g", then trying to send two letters with delay. The delay has to be written in the javascript bridge since the web page is no good at keeping time. This took some time for me since I am new to all of this.
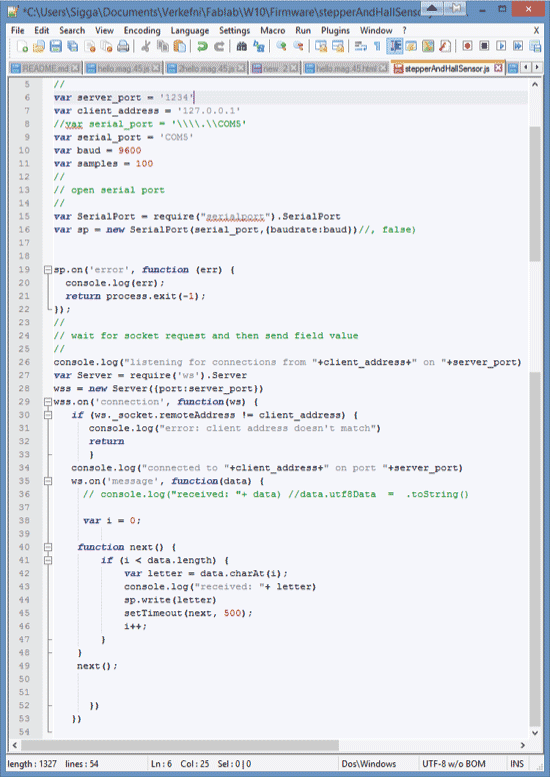
- The javascript bridge with alterations: stepperAndHallSensor.js
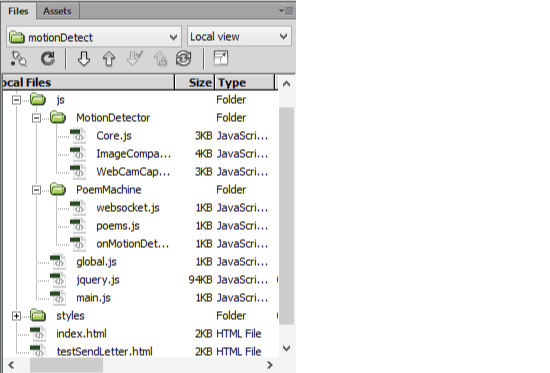
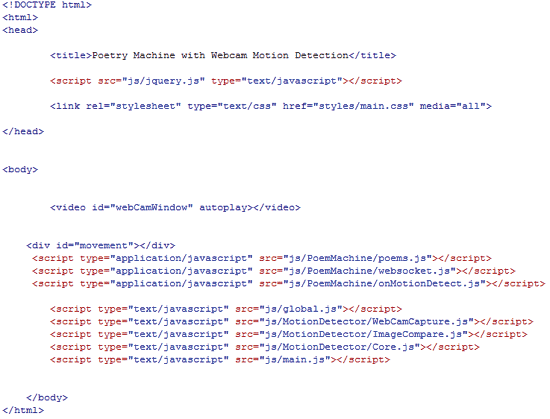
- The site map for the Poetry Machine
- The index page for the Poetry Machine: index.html
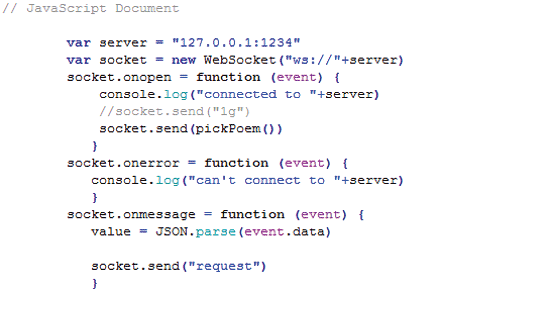
- The javascript file setting up the connection: websocket.js
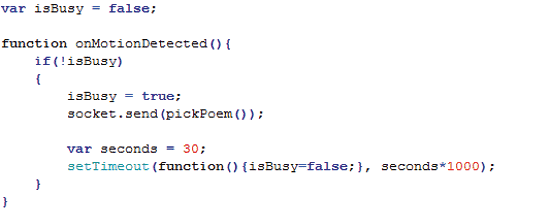
- The motion detection function: onMotionDetect.js
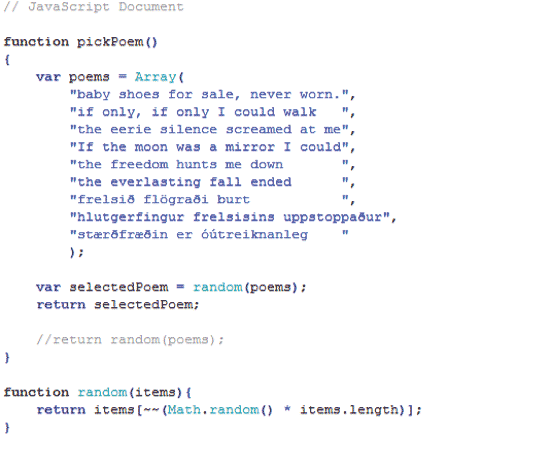
- The function to pick poems randomly: poems.js
- Here is a link to Benjamin´s brilliant motion detection javascript.
- Sending random poems.
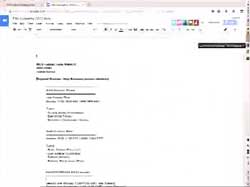
- Still struggling with the icelandic characters.(see the solution in the final project.