


W12 ¦ Composites
Assignment for week 12
- Design and make a 3D mold (~ft2), and produce a fiber composite part in it
- Learn how to mill 3D on the ShopBot
- Link to this week’s homeworkpage
3D milling on the Shopbot
I have been looking forward to this week for a long time, getting to work with composites. This week is also all about 3D milling on the ShopBot which I find very exciting. So even though our resins have still not arrived I had a excellent week learning to 3D mill.
Height Map in FabModules
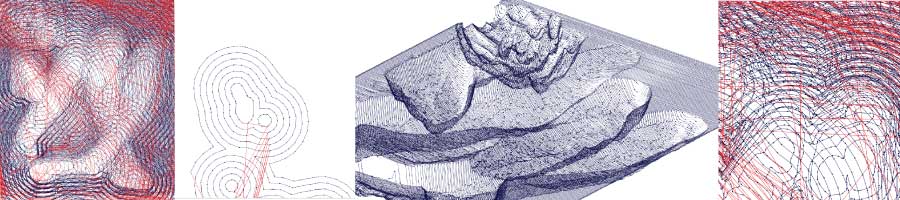
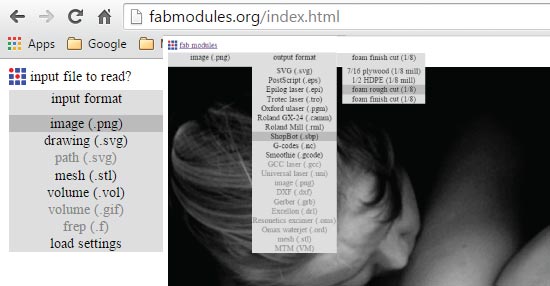
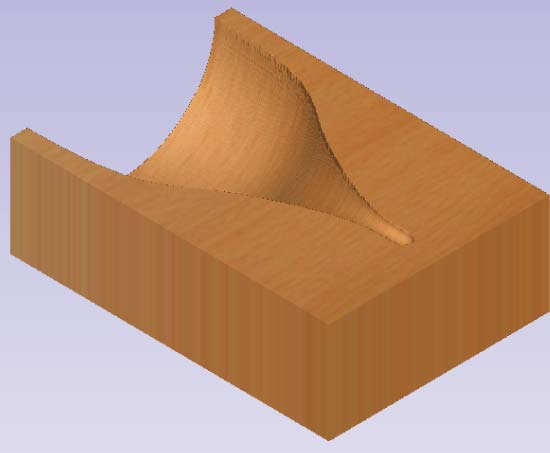
- I began this week by trying out the heightmap possibilities in Fab Modules. I imported a black and white photograph.
- The photograph is from a series I did few years ago. I was really excited to see how it would translate to 3D. I found the machine paths from Fab Modules mesmerizing and beautiful in their own right.
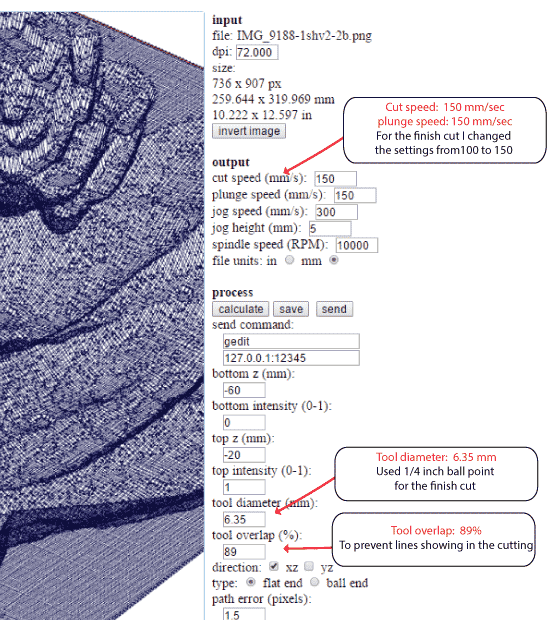
- Here are the settings I used in Fab Modules for the Rough Cut in foam. I used a ½ inch ball point. I could have increased the cut depth in this process. For wood, the cut depth should be the same as the tools diameter, for foam that can be as high as the flutes on the mill bit. To come to these settings I needed to pay with them in the cutting file it self, adjusting the TR, MS, JZ and JS. I therefore include my notes on that here as well.
- For the Foam Finish Cut I used ¼ inch ball point.
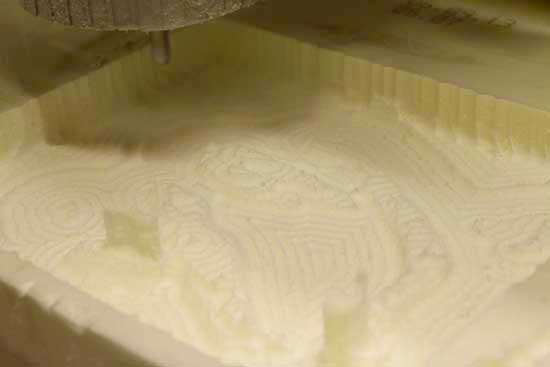
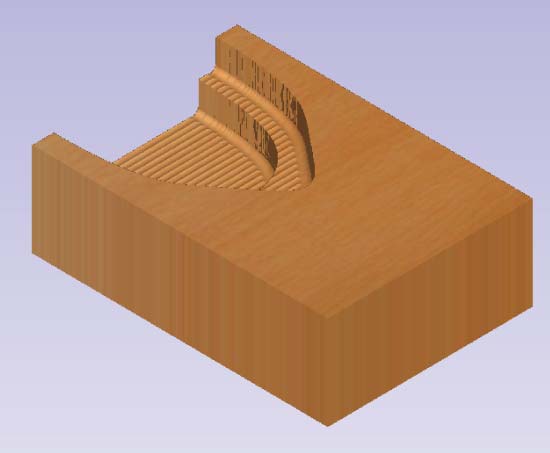
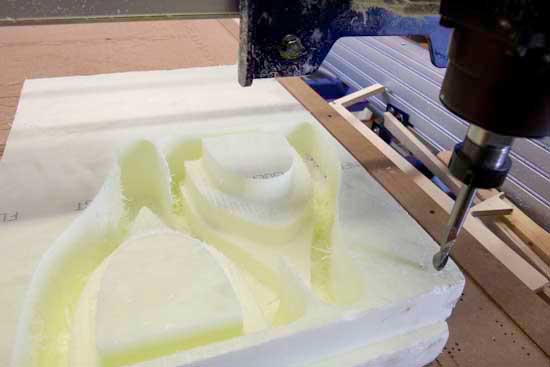
- Milling the foam.
- Here is the result. I was very impressed how the image came out in 3D, and I cant wait to try out the composites.


Working in PartWorks
Since our resins had not arrived I had time to play more with the 3D milling. I used this opportunity to make a model or a positive mold plus a two sided negative mold of a shape I intend to try to make a light out of. Since I have never tried this and don't know how this process is going to work I really wanted to be able to try out different things and make some experiments. .
- I began by drawing in Rhino. There I sliced the model and the made the mold and exported both as obj.
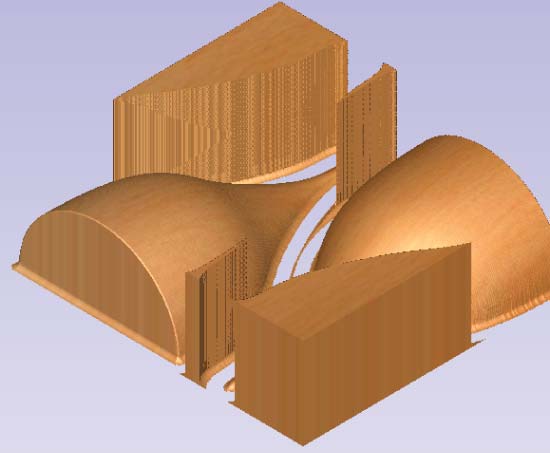
- I prepared the files in PartWorkes. Here is the preview for the Roughing Toolpath.
- Here are the settings for the Roughing Toolpath. Note that in Machining Margins around the model are set at Symmetrical at 15 mm.
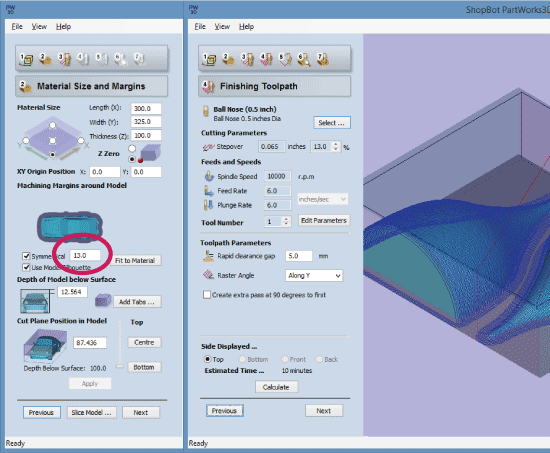
- The preview for the Finishing Toolpath.
- The settings for the Finishing Toolpath. Note here the Machining Margins around the model are set at Symmetrical at 13 mm not 15mm. This is done so that the mill bit does not hit the inside of the foam each time it turns. The foam is only fastened with double tape. By changing these settings the foam stays put on the table and does not come loose.
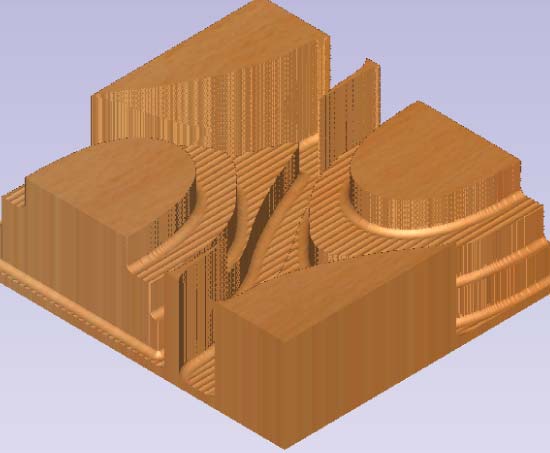
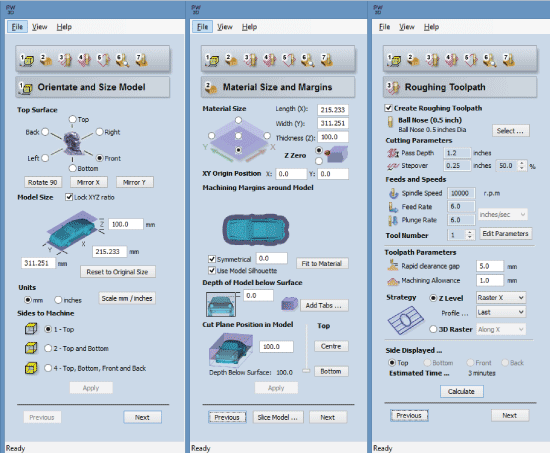
- The preview for the Roughing Toolpath of the mold.
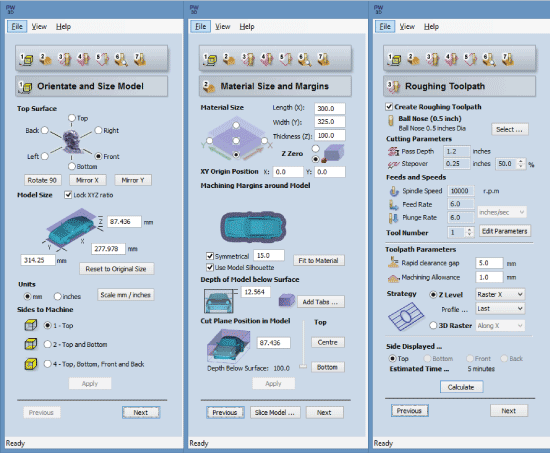
- The settings for the Roughing Toolpath.
- The preview for the Finishing Toolpath for the mold.
- The settings for the Finishing Toolpath. For this part I also needed to make a Cut Out toolpath


Milling 3D on the Shop
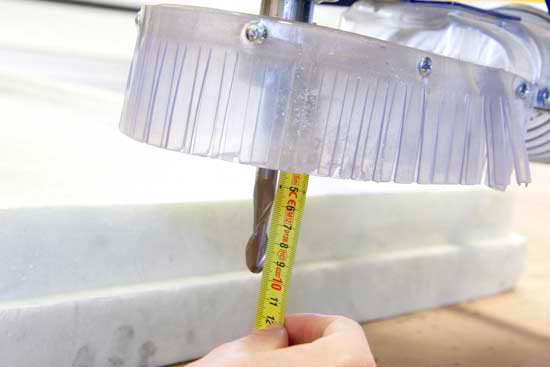
- The foam we are using is 10 cm. To be able to mill all the way through the 10 cm the tool needs to be that long as well.
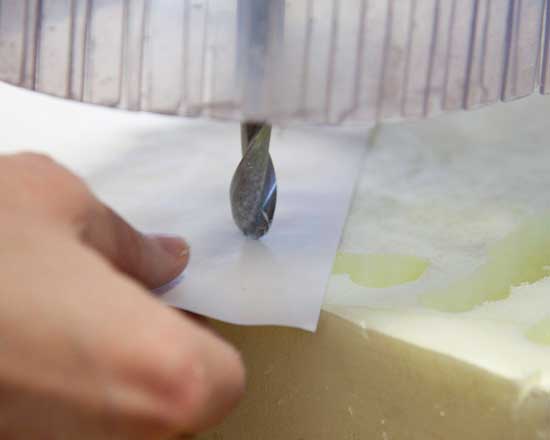
- The shopBot's height limits are just over 20 cm so there is not much room to move. This means that we can not set our Z- level using the traditional way with the plate since the machine moves 2,5 cm between measurements. And we do not have 2,5 cm. We need to set the Z-zero using manual methods. Then the paper trick comes in handy. Use the Fixed setting to only move one mm step at the time. To move in even smaller steps hold down the Shift key (1/10mm). When the paper can no longer be moved we set the Z to zero.
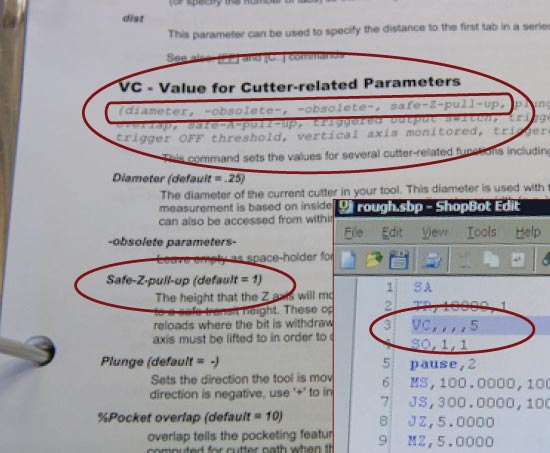
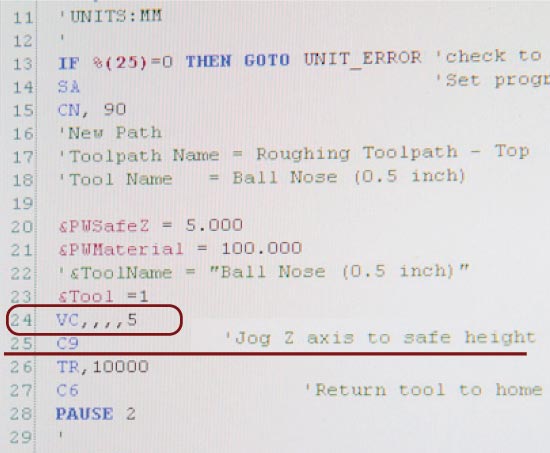
- With 10 cm thick foam and 10 cm mill bit we come to 20 cm, plus the tool needs to travel over the foam. We can set it so that the tools travels at 5 mm above the material (JZ,5). One problem is though that the machine pulls up 2,5 cm between various operations. When doing so it hits the height limit and the Z-zero is lost. To prevent this we need to add a line of code to the cutting file. In the manual for the ShopBot there is a list of operations called VC -Value for Cutter-related Parameters. Safe Z pull up is number four in that list, therefore we write: VC,,,,5 This translates as: change item number four in the VC list to 5mm. We also need to make sure to set the safe Z value back to normal by putting another line of code at the end: VC,,,,25.
- When putting the VC,,,,5 in the cutting file from PartWorks, it needs to be above the C9 command.
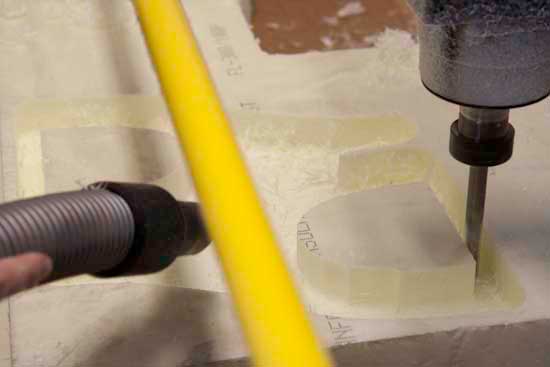
- Since I am cutting all the way through the foam there is no longer any room for the duster. To remove the duster, remove the screw at the back of the duster completely.
- Removing the duster also means that you need to hoover the whole time yourself to prevent the machine disappearing in foam dust.
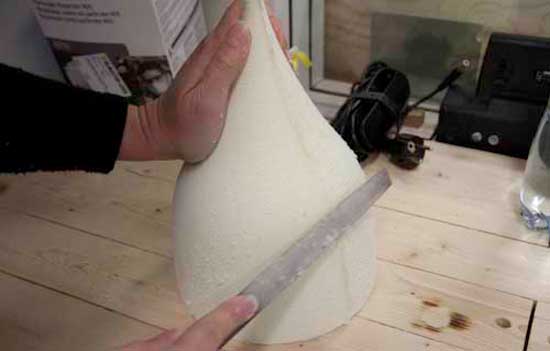
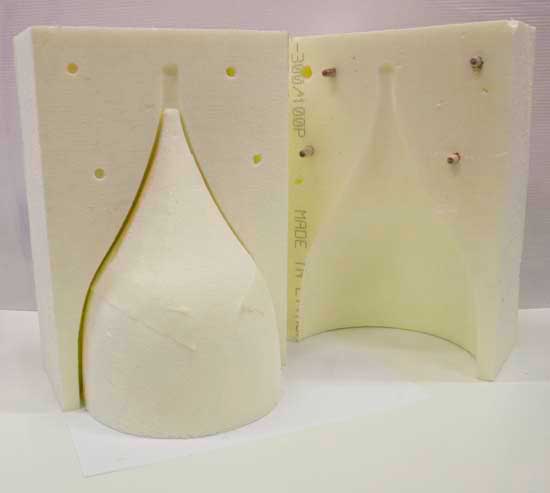
- The milling went well. A little cleaning with a file was need before gluing it together with the Gorilla glue.
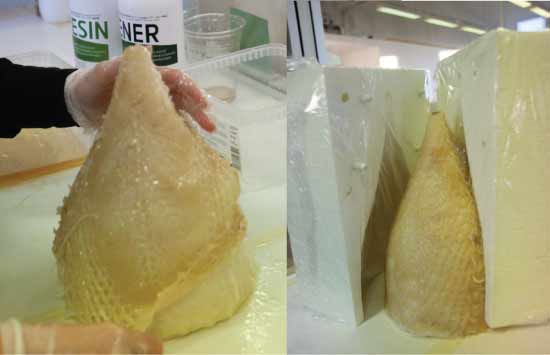
- Here the pieces are ready to be tested. I left a 5 mm wall thickness between the model and the mold. I’m looking forward to try it out with the composites and see if it will work or not. I am hoping to try out the vacuuming method using only the model. Then I also want to try to use the vacuuming method using the model and the two sided mold together.
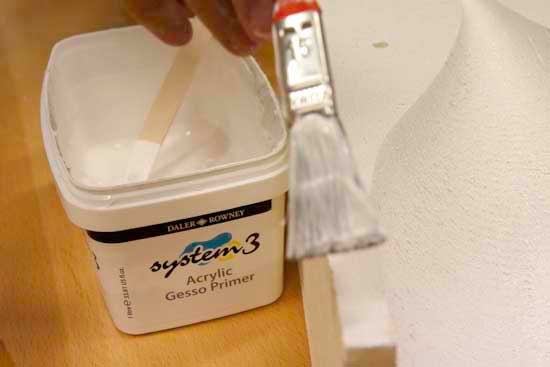
- Before we can use the molds we need to prime them with gesso, several coats.
Working wiith the Epoxy
Two weeks later the epoxy materials arrived and three of us worked together to help each other out. You sure need some extra pair of hands durning this process.
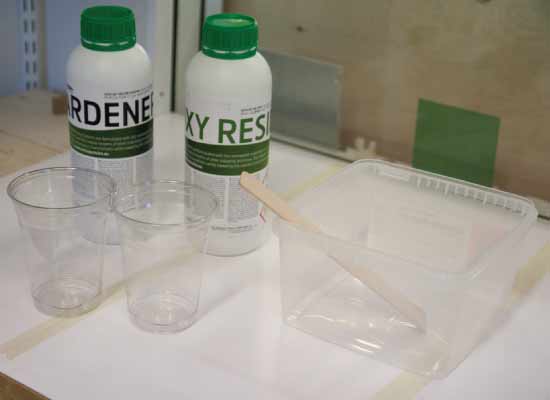
- SUPER SAP 100 is the material we are using, it is high biobased content epoxy resin system for composite, coating, and adhesive applications. Be careful when grabbinng a bottle, make sure it is the right bottles. There are two types in almost identical bottles. One is the clear epoxy and the other is not clear. You have to reat the small letter on the bottle neck to see which is what. The Epoxy ratio is measured by volume, 2 parts and 1 part hardener.
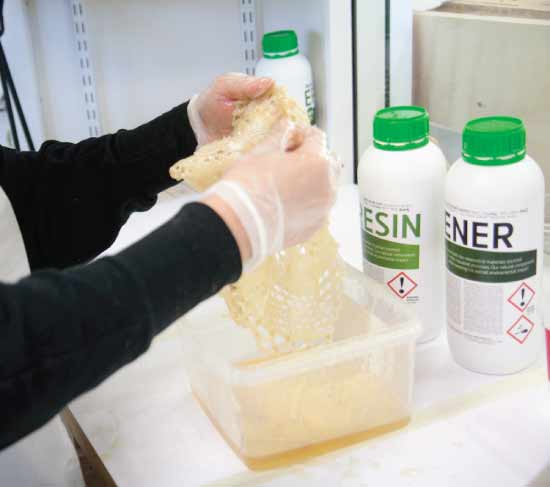
- We used a meathod of mixing the material together in a container and the dipping the burlap or the materials beeing used into the mixture. I Do NOT recommed that method for anyone as it was very cumbersome and messy. We later brushed the epoxy in with a brush and that worked a lot better.

The double sided mold
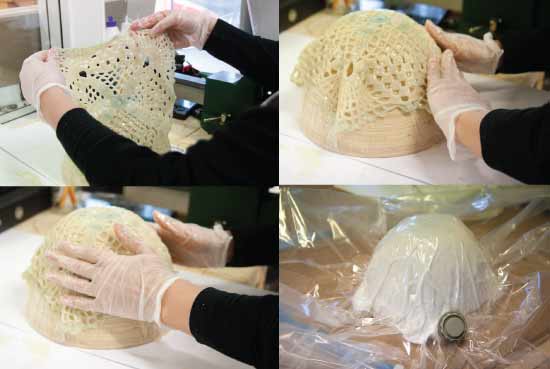
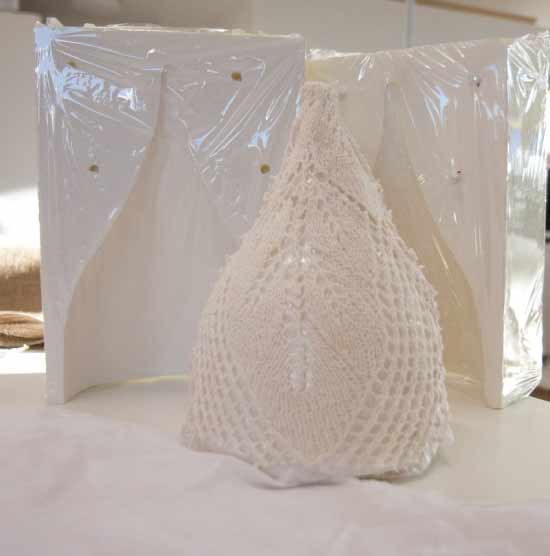
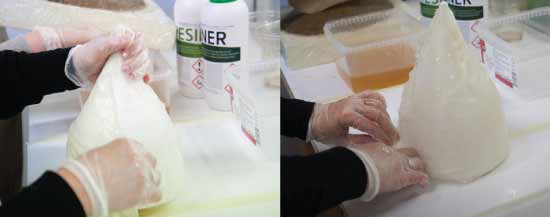
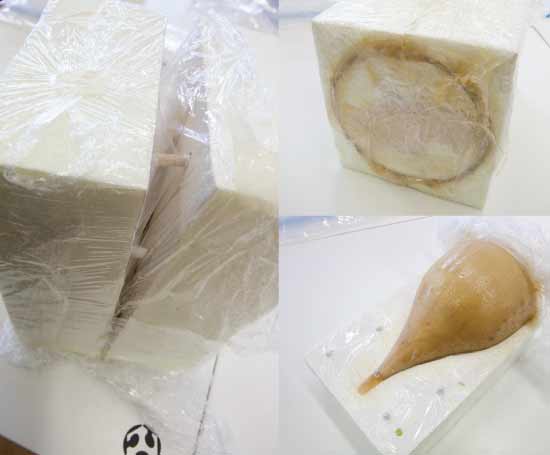
- To make sure the obects would not all stick together we used some release methods. First step in preperation was to cover the model and mold with plastic wrap. Next was to bruch th plastic down with vasilin. We heated the vasilin in the microwave for 3-4 min and then it was a lot easier
- For the light I prepaired the fabric. For the first five layers I used very thin white cotton. I cut that into a pattern that would allow me to cover the shape nicely. For the last layer I prepaired a shape out of old laced table cloth.
- Applying the first five layers.
- Dipping in the lace. I would do it diffrently next time, not dip but bruch the epoxy on.
- The model being dessed up and ready to go.
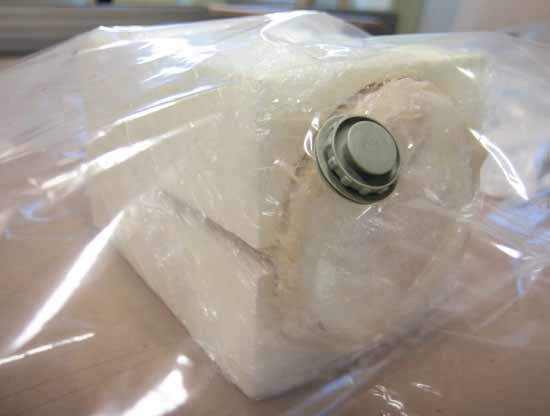
- For the vacuming process we used storage vacum bags intended for clothes and a hoover. That workd really well. But in the case of the doble sided mold I had put too much epoxy on the model and when it was vacumed the epoxy got sqased out.
- I opened the mold few days later with no problem. I guess I could have opened it up the next day but there was no time. The double sided mold came off easily but the inner foam model would simply not come out at all. Since there was too much epoxy which all ended up at the bottom during vacuming it is obstructing the model from sliding out. I know I can get it out by breaking parts away or breaking the foam model. That is still to come, I do not want to rush that process.
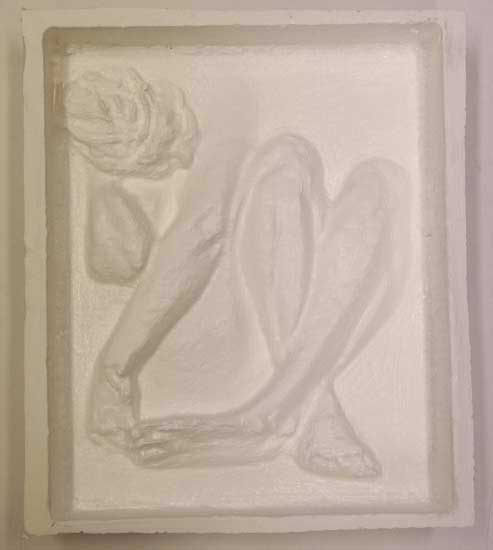
The figure
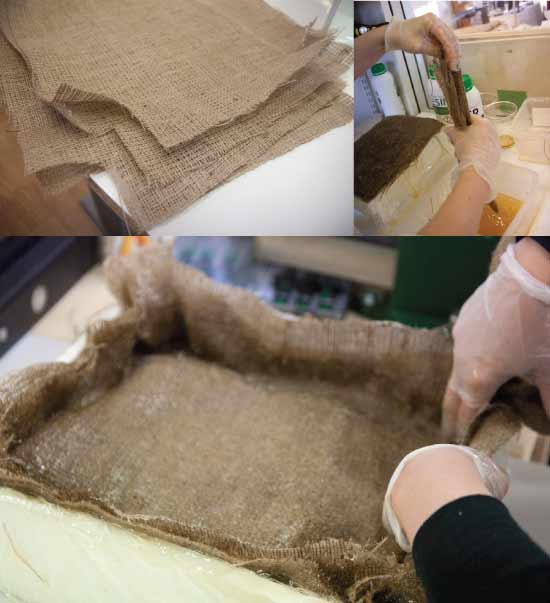
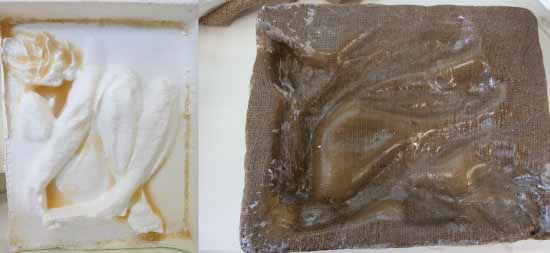
- For the figure I used burlap. I started by cutting the burlap down to size. I prepaired the mold exacly as the previous one, that is I fisrt covered the mold with plastic wrap and brushed on vacilin. I dipped every other layer of the burlap into the epoxy mixture but still it was way too much material. I found it real hard to control this process and it was messy beond words.
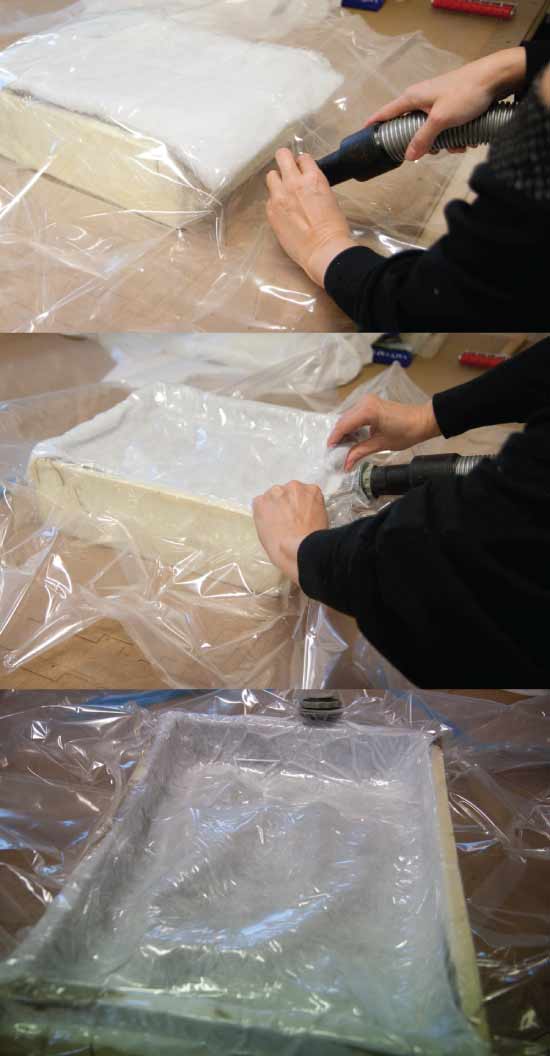
- After the epoxy soalked burlap was in place I covered the surface with one more layer of plastic wrap. Next was one layer of a filter material and on top of that was another layer of plastic wrap which I pinched holes in with special roll. Then it was time for vacuming. It was realy hard to get the suction into the inner corners of the mold. But by pushing it down by hand as I was hoovering it sort of worked.
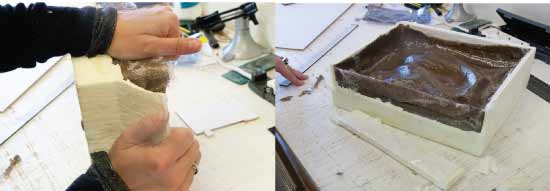
- When I opened up the mold few days later it was all stuck toghether. I ended up breaking the walls of the foam mold.
- The end result was really disapointing to me, there were puddles of epoxy and way to much material. There were no details what so ever to be found in the epoxy cast. So this experiment was a complete failure.
The surprize extra
- When we where finished there was a little bit left of mixed epoxy. So I used the oppertunity to dip in a lace table cloth I had left over. I prepered a wooden fruit bowl with plastic and vasilin. I then arranged the cloth on top. Next was a layer of plastic, then the filter material and finally a pinched plastic sheet on top of that. And I vacumed.
- When opening the mold it came of real easy and it looked really nice. This gave me some inspiration to experement further with this process in the future.