Computer-Controlled Machining
Designing something big
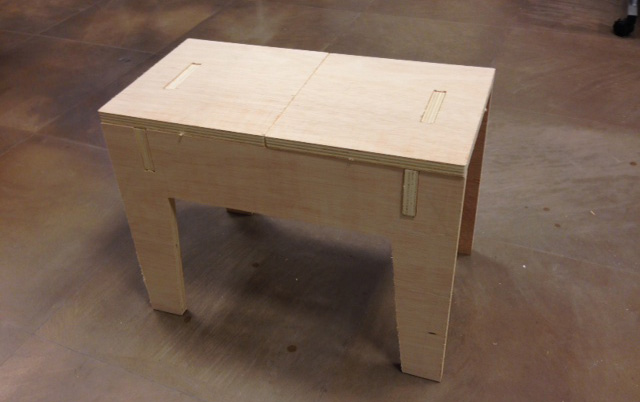
For this week assignment I want to make a stool as a prototype that I’m currently designing for the Fab Cafe Sitges with my partner James Brazil. I used Rhino for 3D model for all the furniture, the designs of the Fab Cafe were especially design for be made on CNC machines and as a open furniture, so everyone can get the files, hack them and off course fabricate them inside the Fab Lab.
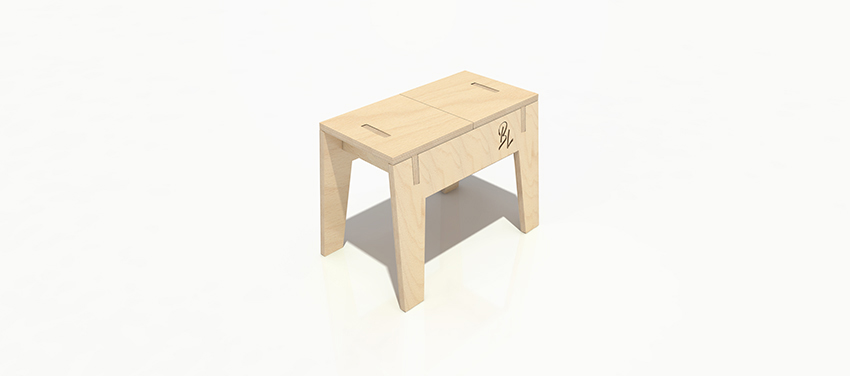
You can do it by yourself, the system is very easy to make it and does not need any screws or glue to fix the joints.
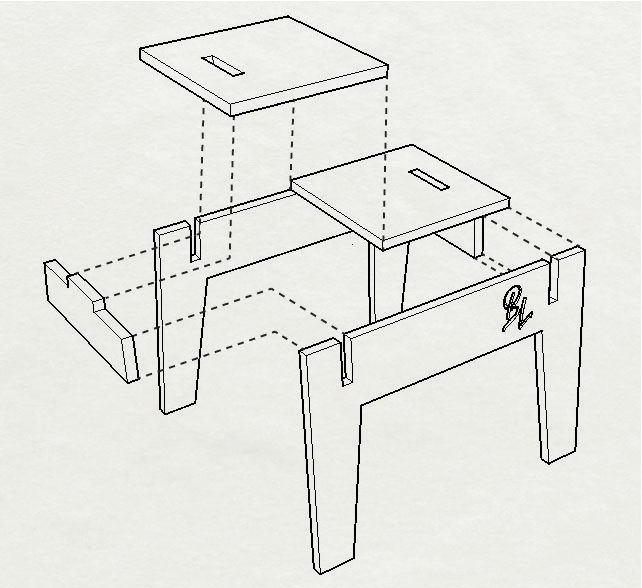
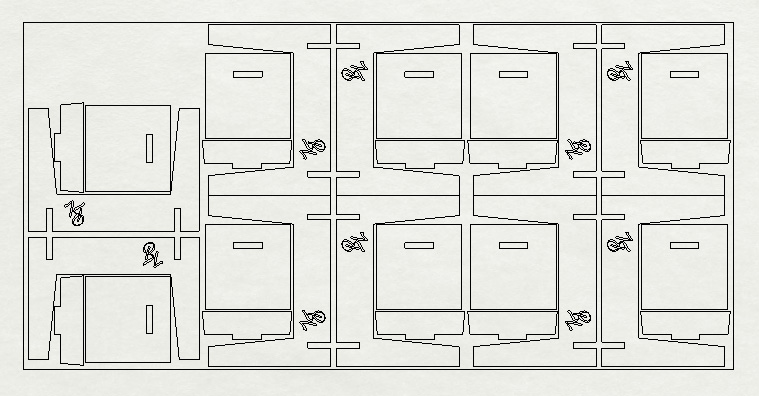
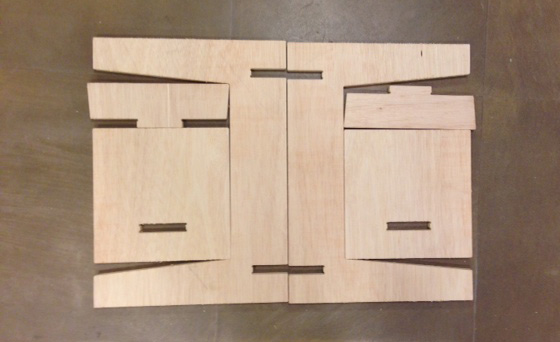
The stool contains six pieces and six joints.
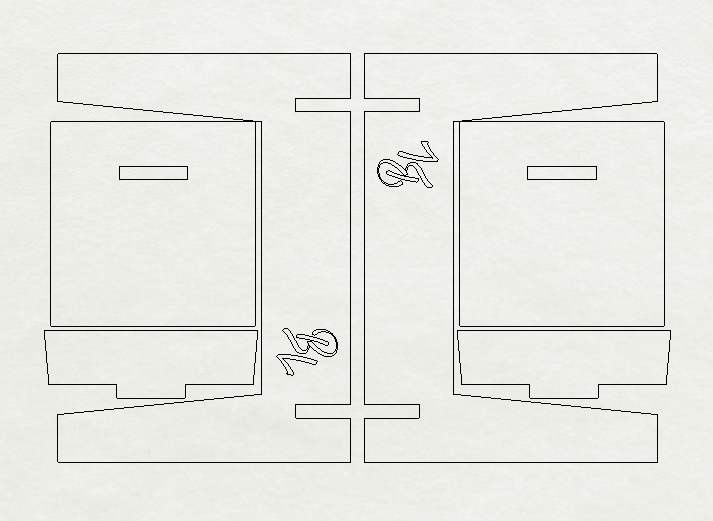
The designs were also thought to be very efficient in wastes, on the stool we have 4% of waste of a full sheet of wood (1200mm x 2440mm) that can be even less because on the left part without pieces can be included seat tops or other pieces to be cut.
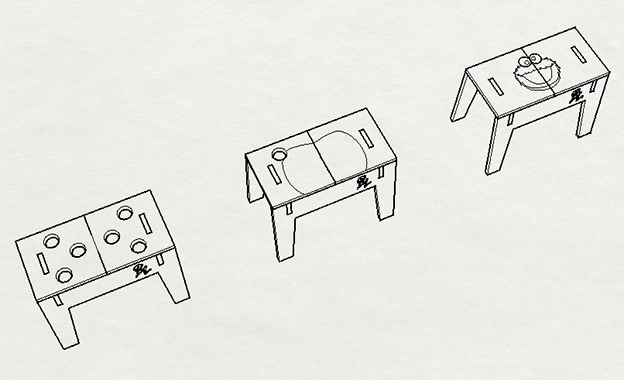
This stool will have seat tops like beers or coffee holders, chips bowl and kids patterns for play and draw so you can hack your favorite option.
Cutting with CNC Machine
This week assignment we are cutting with the Shopbot machine of Fab Lab Barcelona, we do not have a full size machine in the Fab Lab Sitges so all the group went to cut there.
First is prepare the cutting file, follow this recommendations:
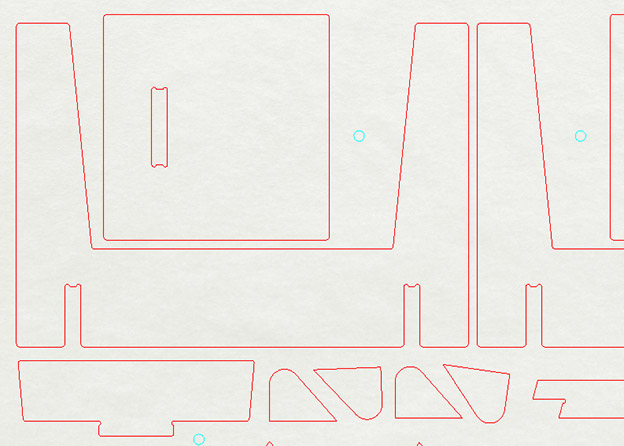
-The most important always in your drawings is to have polylines, or all the lines joint. Otherwise the machine would recognize every line disconnected instead to read it as a unit so will cut in disorder making more movements, that means your cutting times will be longer.
-Calculating tolerances, every material has a thickness and your design depends of it. So at the same time you think in the design think in the material. A good advice is to keep on mind that shops commercially sell materials with commercial measurements, that means 20mm is not true, if you measure with a caliber is more than or less than like 19.08mm or 20.06mm for example. That is my case with 20mm plywood by the way; I adjust the wood connections to 20.10 and the final result was the expected, everything fit properly.
-Think and design how the machine thinks and cut, that will save lots of time when you are preparing the cutting files and there is less probability to have mistakes when you assembly your design.The machine uses circular bits, so to reach 90ª corners the drawing will need some adjustments; you can take advantage of this and improve your designs to make them look nicer.
-Order on cutting files, is very important to know what you need to cut and how (internal - centre - external), what is pockets or what is 3D and what finish you need. Put the drawing on a clean file and draw your real cutting area leaving a small screw frame, then move it to 0,0. Divide your needs in layers and put them on different colors; add one extra layer for screw points, that will be the first task of the machine, and will help you to find where you need screw points that you already should have placed before on.
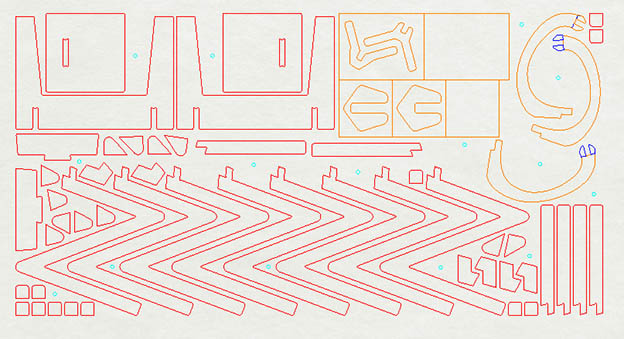
-Once you have done all export only what you need to cut as a .DXF, go to the machine computer and open the file with the Shopbot software. There you will see your file with colors and layers so is very easy to select what needs inner, external or on centre line cuttings, pockets, screw points, etc. First load the material you are going to cut in my case 20mm plywood, then align it and send the screw points work. Once is marked proceed to jump on the machine and screw all of them.
Second send first the work that has to be done before any deep cut like pockets and tricky cuts and then the other specified cuts. Make sure when you are telling the machine which ones are the pockets its deepness on Z.
The CNC worked with a 6mm wood bit, 12000 rpm spindle and 30 mm/sec speed.
-You should have found the machine clean before cut, but make sure it is sometimes chunks of wood stay on the bed and unlevel the material and we do not want that. When you finish cutting make sure too that you are leaving everything clean.
Final Project Application
I cut at the same time my final project because we have not done this assignment before, so it was great for me do it at the same time.
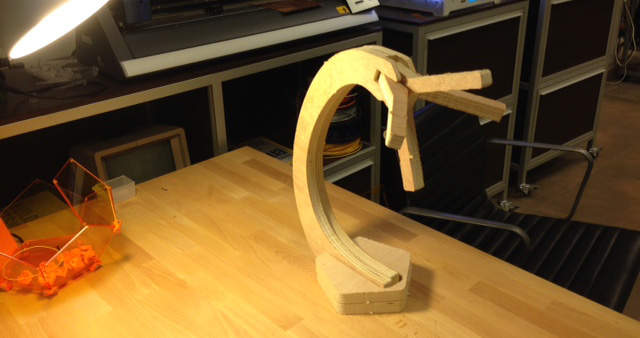
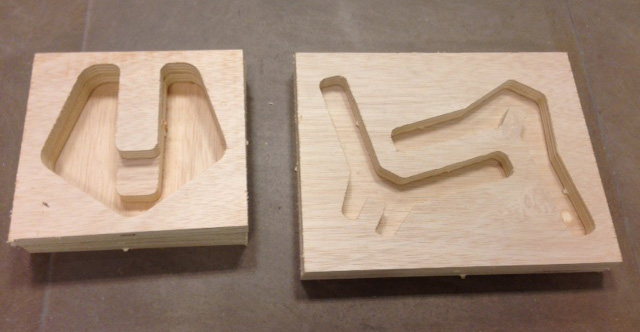
Basically is the same process but I am using the cuttings for the wooden structure of my Lamp and for the concrete cast of the base and shade.
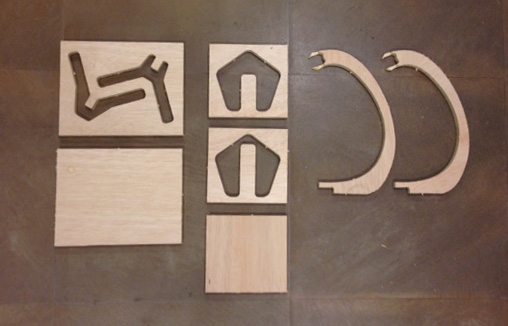
The especial settings were that Z for pockets go 10 mm deep, for the structure external cuts and for casts internal cuts. The CNC worked with a 6mm wood bit, 12000 rpm spindle and 30 mm/sec speed.