3D Scanning and Printing
3D Scanning
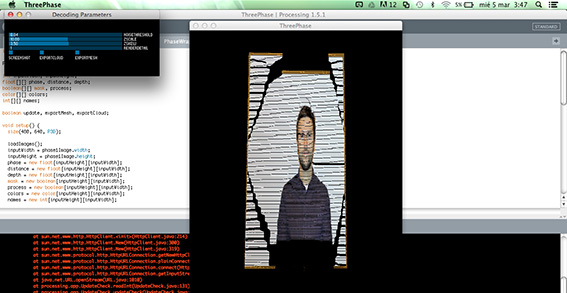
Three Phase
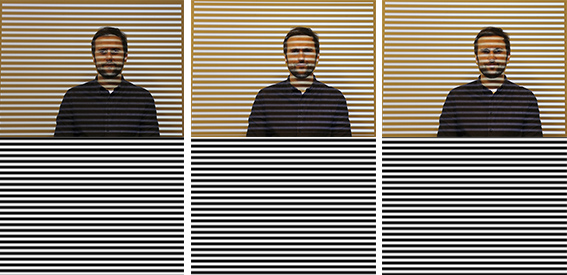
First I set up the “stage” I put a stool against the wall and project with the video beam the three .png images that content the stripes that reads the script, then I put the camera at the same level as the video beam.
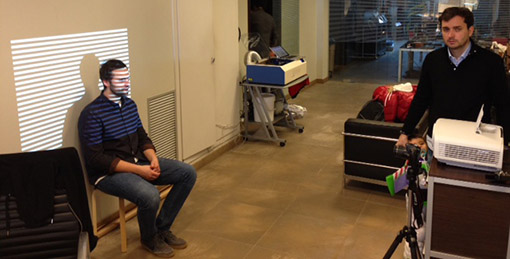
I shot my mate Miguel and took the photos alternating the images against him.
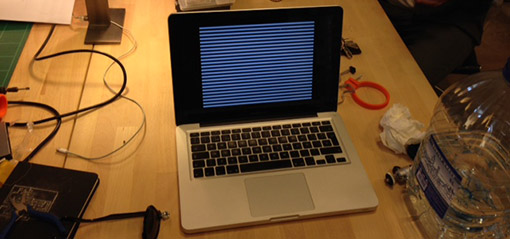
Once I had the pictures I downloaded Prossecing 2.1 and run the Three phase script I found on Francisco’s web page which is my Tutor and did the Fab Academy before. First occurred three errors, Prossecing showed me that I was needing to activate two libraries: Peasy Cam and Control IP5. I loaded them but then there was a problem on the code, something related with a java code, I tried searching on internet and checking on Prossecing but was unsuccessful. So I decided to download the version 1.5 the one that Francisco’s used before cause probably the error was on the old scripts I had because they could have been changed for the latest version.
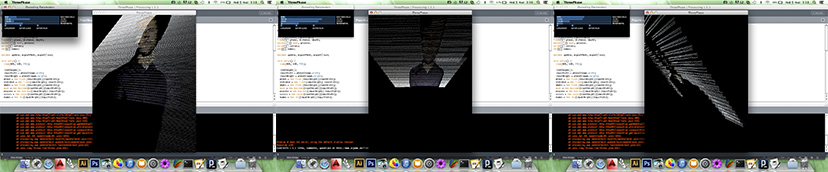
Then the worked out, “solved” but the result with was not the expected, the images did not get in 3D, I guess is probably was too bright, so for the program is more difficult to read and interpret them.
Scannect with Kinect
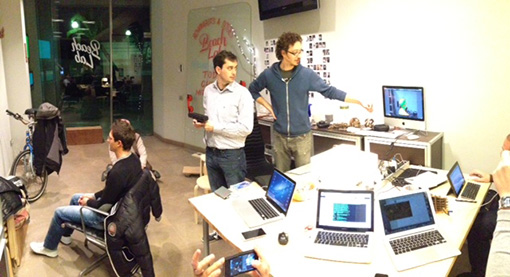
We tried with Scannet and Kinect but the software is too heavy to run it with ours computers, we finally could with one but then we realized the free trial do not let you export the scan, the rest were so good it really scan so good, it is a very powerful tool.
3D Scan and Printing
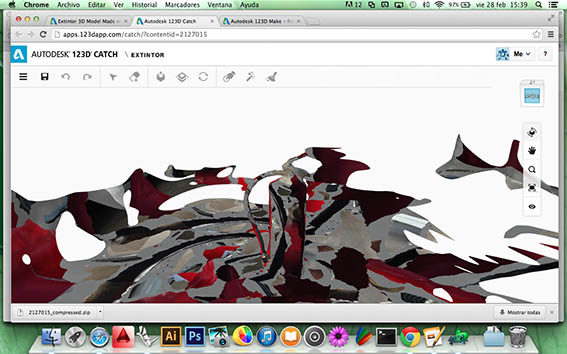
Printing 123D Catch scan
This application works very well on the mobile, it is amazing the final result when you take the time to shoot properly the object. The trick is to find a uniform surface with a neutral color that contrast the object, are about 40 but really worth it. The good thing is that is for free and also the package of software and application of Autodesk that complements the work very well.
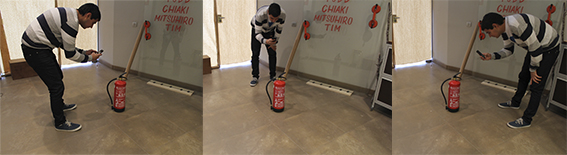
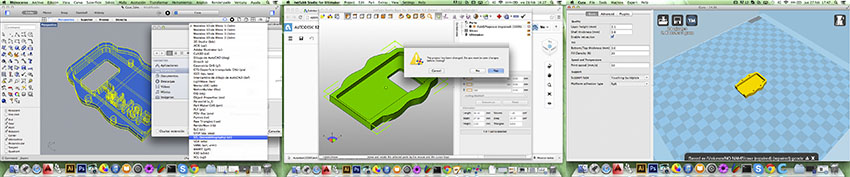
I shooted at the Fab Lab’s Extintor, then I uploaded the 3D model to the cloud because works like this, everything on the cloud. I used Rhino to modify the file as a .obj extension, normally I could edit and open the scan on 123D Catch and Make but doesn't work that good. Actually I have some problems trying to manipulate the file on 123D Catch because it is only an web app that works with Google Chrome.
Then I download the file and I ran it as a .stl and .obj, Rhino didn’t let me manipulate as a .stl but then I opened as a .obj and worked so good. I could fixed the file taking the parts out of floor that the app recognized as an object.
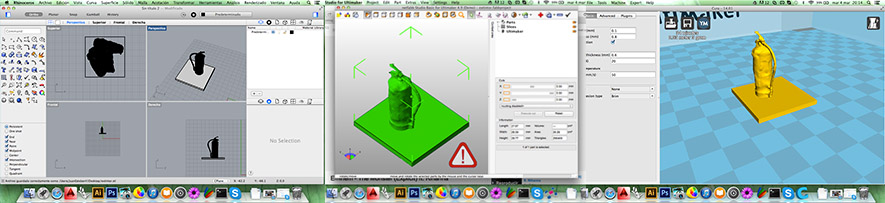
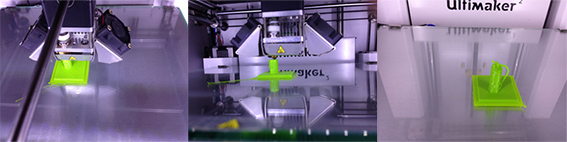
Then I proceed to do the normal protocol to 3D print that I am use to do: export the file as a .stl and open it with Netfab Ultimaker that allows me to repair the file and do some corrections basically then I exported the repaired file as .stl again and open it with Cura, the Ultimaker software 3D printer to save it as a Gcode to could print it out.
3D model design print.
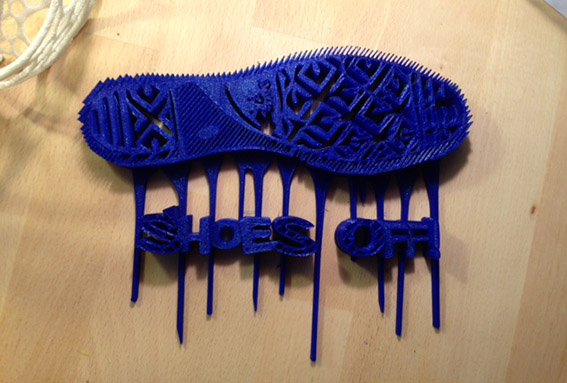
I designed a sign for my flat that says shoes off very graphically, I will hang it on the entrance. Then pictures.
I vectorized spots and the sole of a converse shoe and typed shoes off! with Illustrator, then I exported it to Rhino that let me edit and extrude the vectors to then make an entire object with these three things. I have to say although these two softwares are not open source they communicate very well each other and do the work excellent. But next time I will try to do something with Inkscape and Antimony.
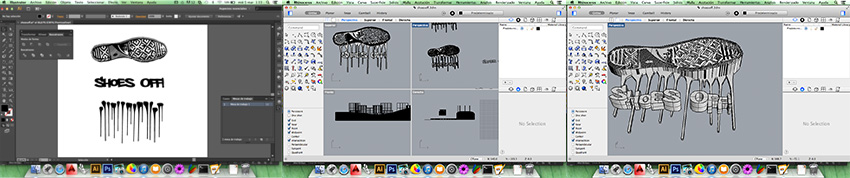
They are the ones the best I know, I tried before Inkscape but really did not let me do what I’m use to with Illustrator and I used Kokopelly which is great by I’m faster with Rhino but on the way I will get use to it and get that fast.
Once I had the design done I exported it as a .stl to then open it in Netfab Ultimaker to repair it and could export it to Cura to then 3D print it out. The result is awesome and by my short experience 3D printing I could adjust some things that I knew they were going to go bad, so I’m happy and feeling I’m improving my knowledge every week.
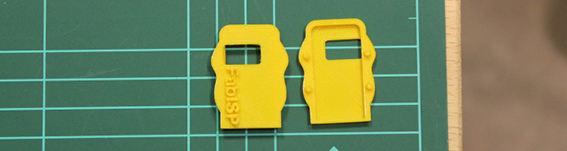
Fab ISP 3D print
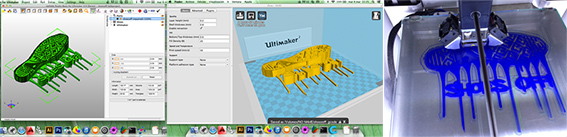
I tried as well designing a case for my Fab ISP, I measured the board with the caliber and did the design on Rhino. It is a case with lid that let connect it with the USB port and the cables on top the board.
First try I left the Fab ISP logo I created on top the lid case and I cleaned the support material but then the finish was not good and the male joints without a good definition.
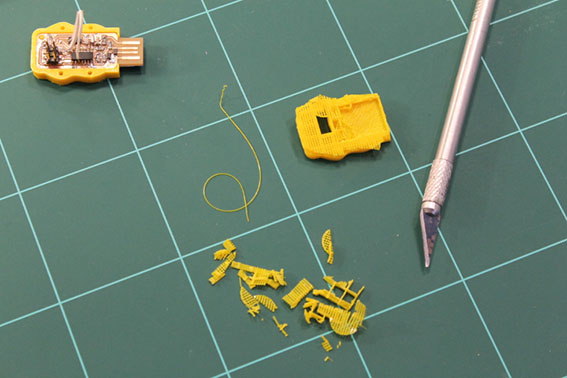

Then I realized was not the most efficient design because I have joints male - female and I needed support material to get the male joints and then on top get a better result with the logo. So I decided to eliminate the logo and flip out the lid and get the male joints more accurate because of the finish of the 3D printer.