|
Week 9: Molding and casting
This week assignment was to make a mold and after that cast in it. It was required to do a design in a 3D modelling program first and then machine it using a machinable wax. After that make a mold (I did it with silicone rubber) and then cast in it.
Designing the model
Once I had a workshop with guidance school student and one of them designed an infinity sign to be cut with laser cutter. I liked her design and decided to design something similar for this exercise.
I made the model and saved it as .stl file. I designed the model with the hight of 6 mm, then I made some sort of box for it and put the model at the bottom of the box. The distance between the highest part of the model to the top of the box is 13 mm based on the smooth-on recommendation.
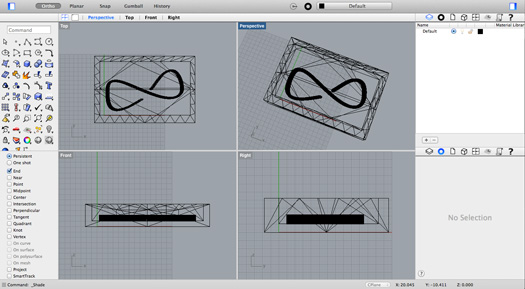
Rhino Design
Machining
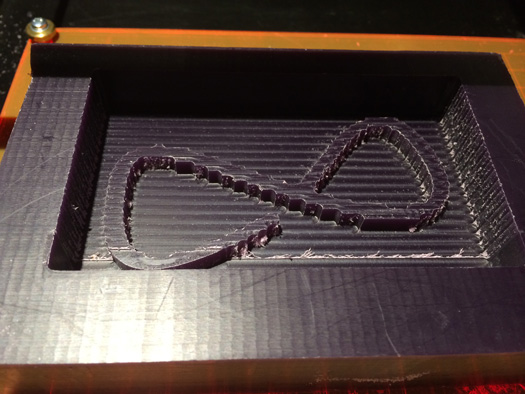
For machining I used Modela MX-20. The material I used was machinable wax. First I opened the model in Modela player and made one rough cut and and one finish cut. I used the 3 mm drill bit for roughing and 2 mm drill bit for finishing. In fact I did finishing with the same 3 mm drill bit but one part of the infinity could not be done with 3 mm so I redid the finishing with 2 mm drill bit.
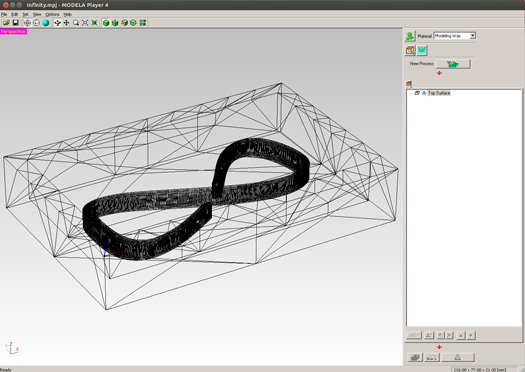
Modela player
In the Modela player it was possible to selecte the cutting area. I selected the cutting area, that it only cuts the inside box and the model but not the outer box.
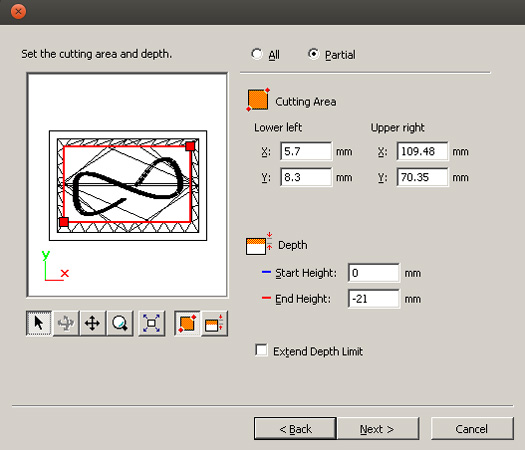
Cutting area
I also had to make the toolpath for the roughing and the finnishing. In the modela player you can select what material you are machining and it will set the speed and feedrate accordingling.
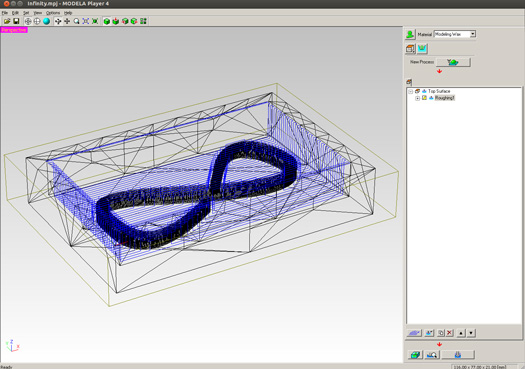
Tool path
roughing
finishing
Molding
After machining the machinable wax and before pouring the silicone runbber in it. I sprayed it with a mold release spray to let the mold get off easily once it dried.
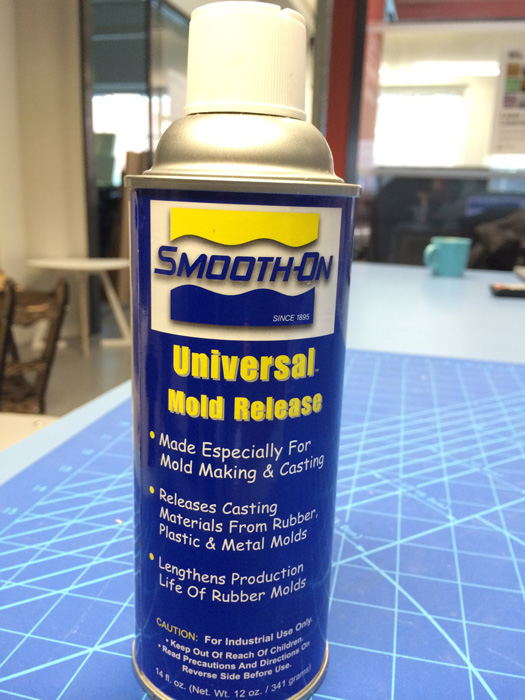
Mold release
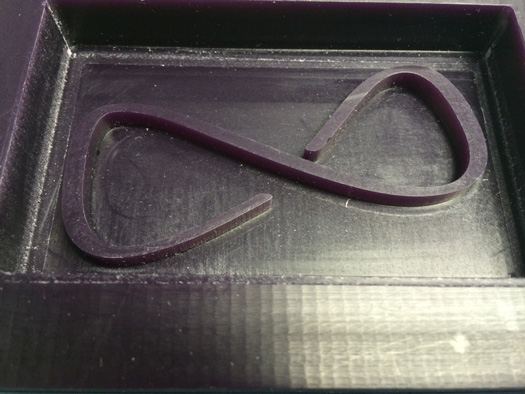
For the molding I used the oomoo 25 from the smooth-on. It was really easy to use. The were two materials that should be mixed together. The ratio was one to one. So no scale was needed. The pot life for oomoo 25 is 15 minutes and it takes 75 minutes for it to cure. There is another version of ooomoo which is called oomoo 30. The pot life for oomoo 30 is 30 minutes and it takes 6 hours to cure.
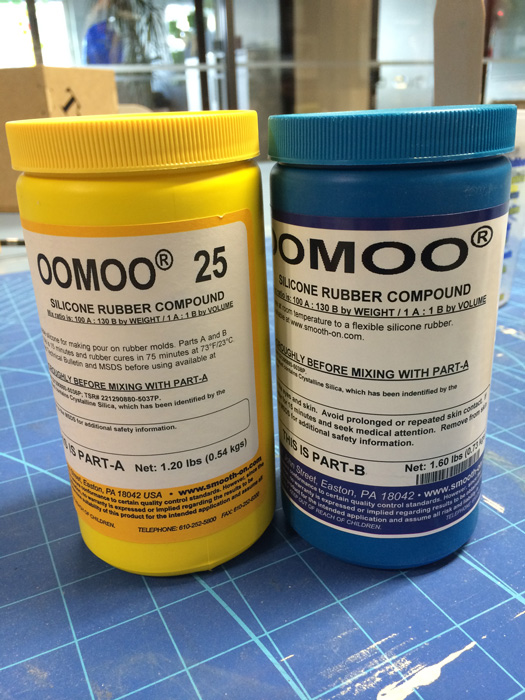
oomoo 25
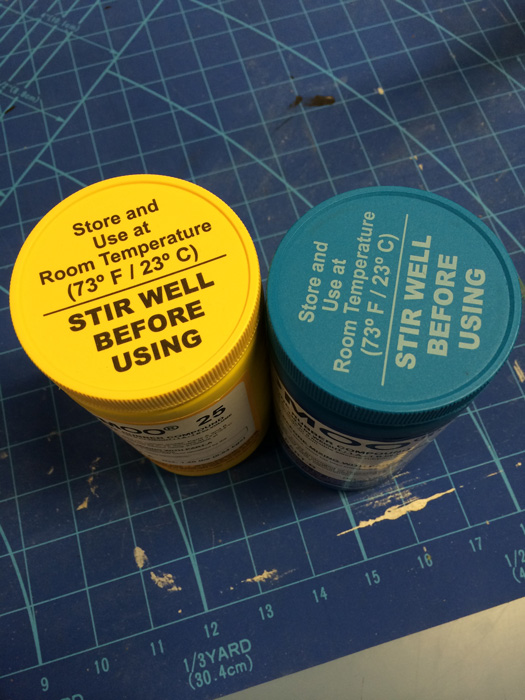
oomoo 25
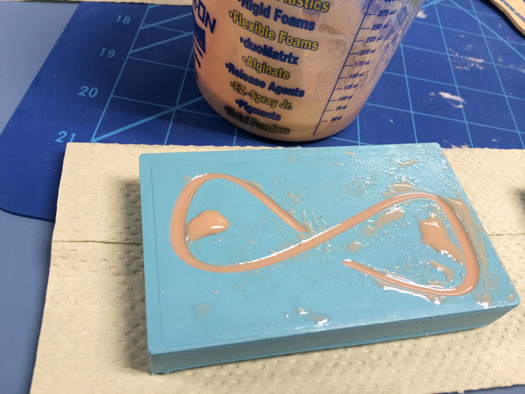
Before mixing partA and partB together. It was necessary to shake each of them very well. After that I poured the same amount of part A and B in a pot and stired it. Based on the instructions the stirring should be done for 3 minutes. If after 3 minutes some color streaks are seen the stirring should be continued until getting a uniform color.
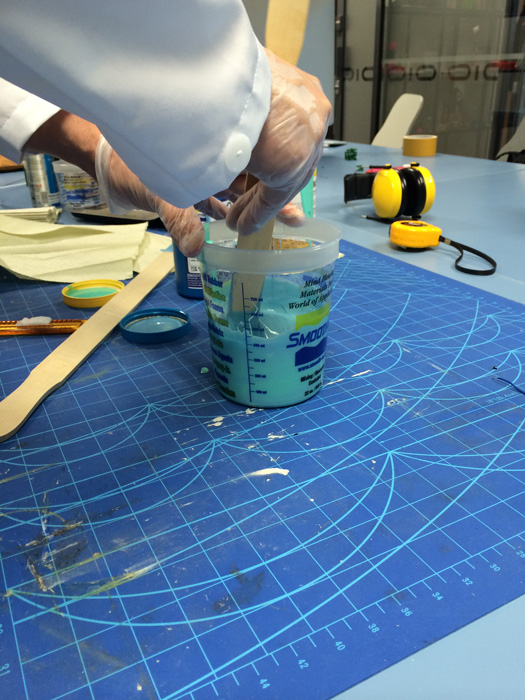
Mixing parts A and B
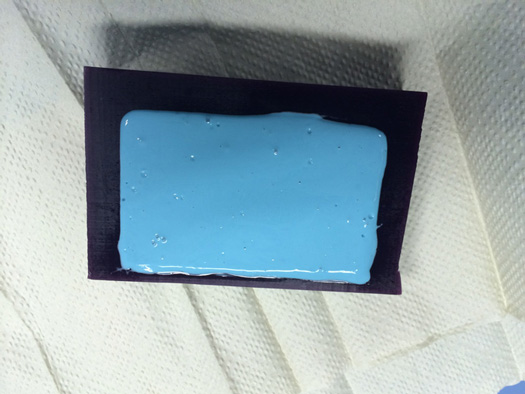
The mixture poured in wax
Based on the instructions the mixture should be poured from the lowest part of the model that it can find its level and come little by little on the top of the model.
I left the rubber to cure for 75 mins in the room temperature and here is the results.
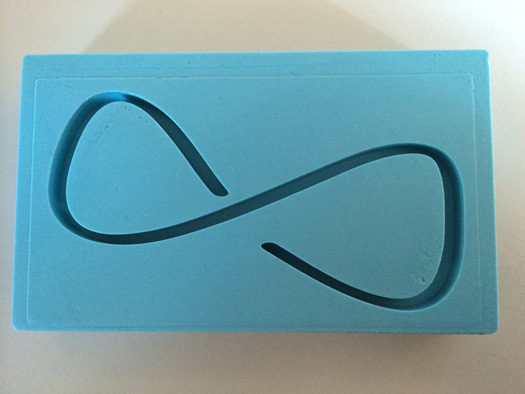
Mold
Casting
For the casting I used the smooth-cast 325. In this series it is possible to use some colours too.
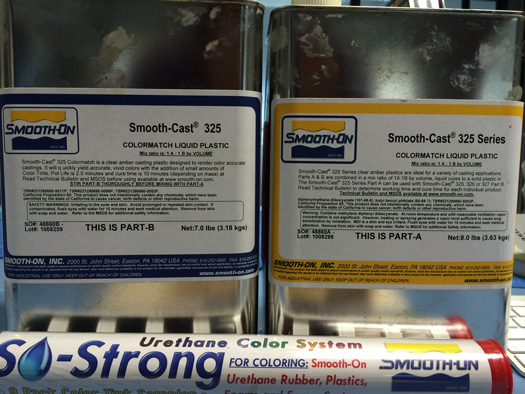
Smooth-cast 325
I poured some of the part B fist in a pot then added some color and mixed them. Then added some of the part A to that and Mixed them all together. After that I poured the Material in the Mold.
Casting
The final results
And here is the final result

Final result
Files:
3D design
|
 Fab Academy Class 2014