|
Week 13: Networking and Communications
This week assignment was to experiment with networkings and communications. I decided to do the wired communication with one bridge and two nodes, where the microcontrollers can talk to each other using the serial communication.
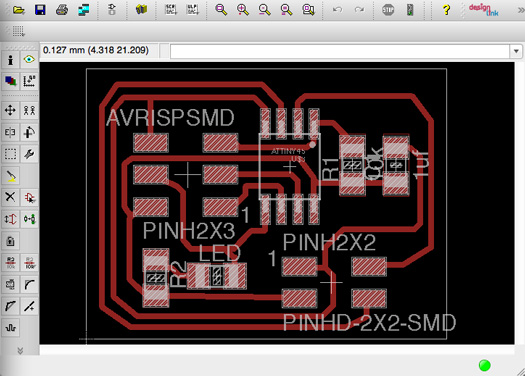
I started to design the board in Eaglecad. The boards for the Nodes and for the bridge are almost the same. The only difference is that the bridge board has the FTDI to be connected to computer. The bridge is powered from the FDTI port and the two other nodes get their power from the serial connections.
For making the part, the first problem I encountered was that I could not save the parts in the libraries. I searched for what it could be the reason and found out that I did not have the permission to write in my Eagle folder. I went to my eagle folder and gave the permission of read and write to it. The second problem was when I had made the part ready but I was getting an inconsistency error between sch and brd. I could place the part in schematics but when I was going the board view I could not see that. I did not understood why it was happening. Finally I did all the same in another computer and it worked.
Designing the board
I designed the board the same way as former weeks in Eagle cad. Then I exported it as a .png file from Egalecad with the resolution of 500 dpi while monochrome was checked. I opened this file in GIMP, cropped it in the size I made two files for traces and the interior.
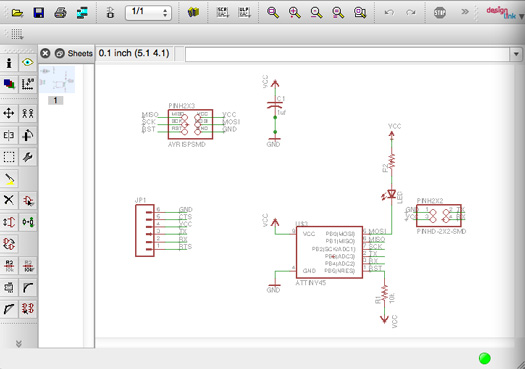
The schematics for the bridge
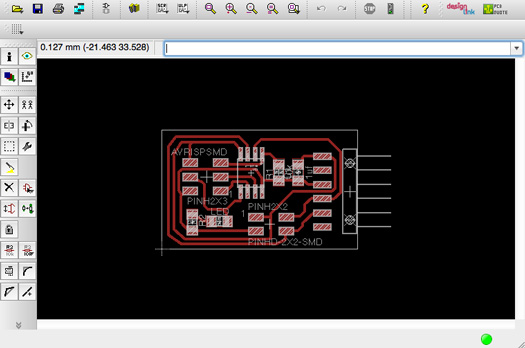
The layout for the bridge
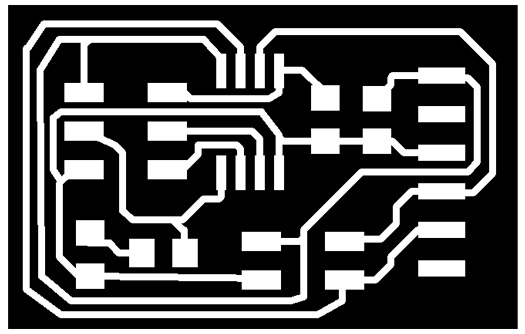
The traces for the Bridge

The interior for the Bridge
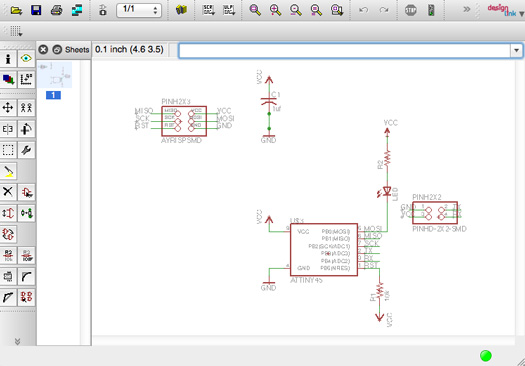
The schematics for the node
The layout for the node
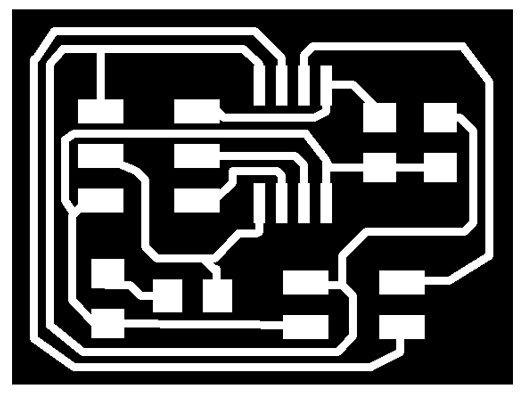
The traces for the Node

The interior for the Node
Making the boards
I made the board like former sessions and then soldered the componets.
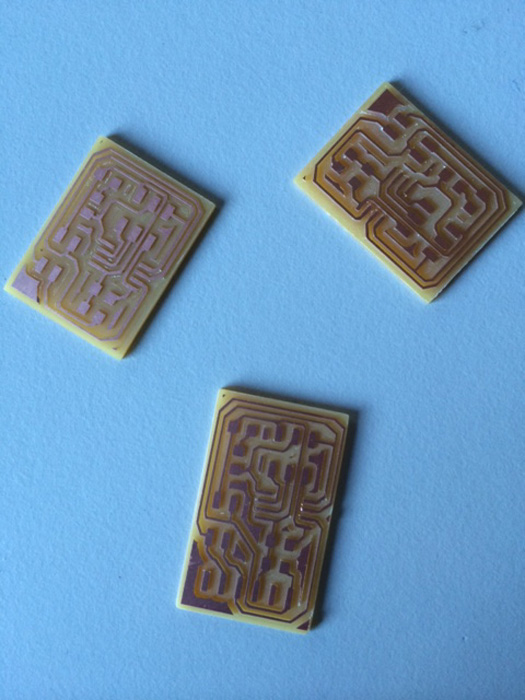
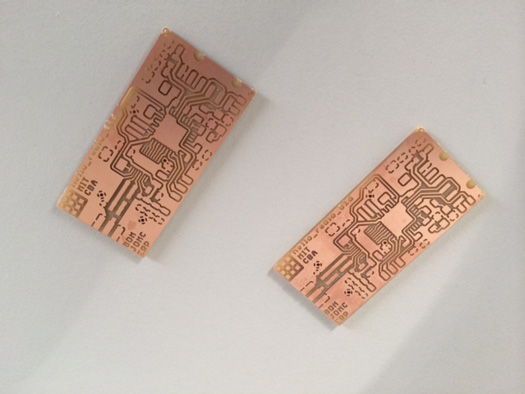
Boards for the bridge and nodes
Challenges
There was one problem for cutting the bridge board this time. One side of the board was not cut. I checked in the fab modules and the upper part of the interior was missing there too. I tried to close fab modules and run it again but the problem existed. I did not understand what was the problem yet. Because I made the board exactly similar to the boards fo the nodes. I break the board from the upper side and used a file to make the side and the edges smooth.
The connections
for connecting the boards I used flat cables as it is demonstrated in the following picture.

Connections
Programming from the command line
I started to modify the code from code . The simplest modification would be to change the id for each of the boards. For example for the bridge it can be used # define node_id '0', for the other nodes #define node_id '1' and #define node_id '2'.
Then I programmed each of the boards separately using the fabISP. Using the command "sudo make -f hello.bus.45.make program-usbtiny". This code shows you how one character from your keyboard can be sent from the bridge board to the last node. Because we have given the ids 0,1,2 to the boards. If we press any number from 0 to 2 first all the LEDs on the boards blink once and then the board with the that id number will blink again.
For testing, I used the Arduino IDE and went to the serial monitor section. There when I was typing the number for example 2, I could see firstly all the boards blinked once and the last board blinked twice. Also the id number of the board based on our input was printed in the serial monitor window. The baud rate should be set to 9600.
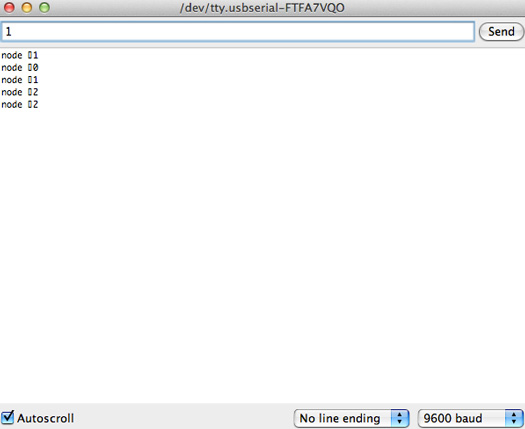
Showing how it works
Making the radios
I was very interested to make the radios for the networking and communication week. Therefore I decided to make the hello radio example.
The boards
I downloaded the boards from the link in the Neil's keynote and made them with Modela MDX-20 like former sessions. There are some components for this project that I do not have. I soldered the components that I had. For the rest My plan is to order them, do the rest and finnish the project
Radio boards.
Files:
Serial Node
Serial Bridge
|
 Fab Academy Class 2014