|
Week 11: Composites
This week assignment was to experiment with composites. I thought to do both the double sided mold and vacuum bagging for this week. I will start with double sided mold and if I get time I will try vacuum bagging too.
Designing
I prepared the file in Illustrator and took it to Rhino and extrude it, then I made a box shaped frame for it to make two sides of the mold. Discussing it with a friend of mine, he suggested that I can only mill one side and put a flat surface on the top side. Because my model had square edges. So I thought It was faster to practice that.
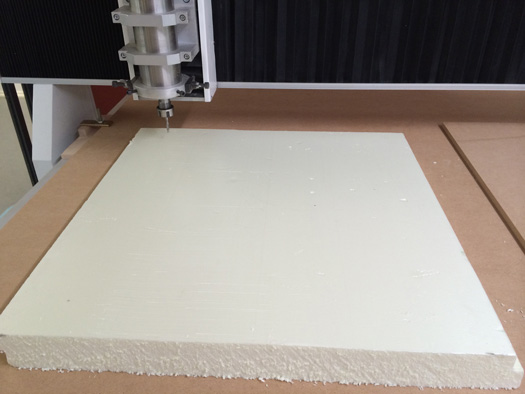
So I exported the illustrator design as a dxf file and went to the milling machine. I removed one layer of 5 mm from the top surface of the Styrofoam and then started to mill the real model.
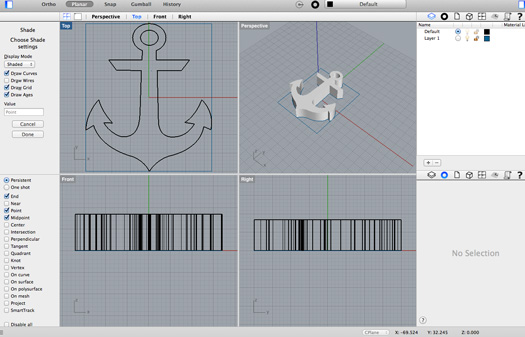
Anchor
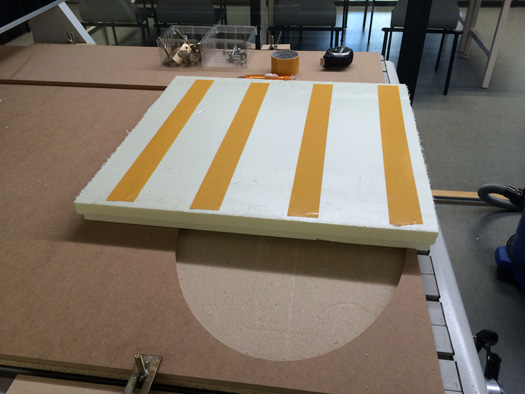
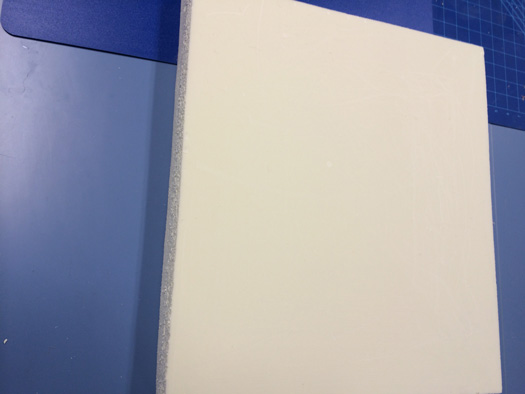
Fixing the Styrofoam with double sided taype
Styrofoam fixed on the Machine bed.
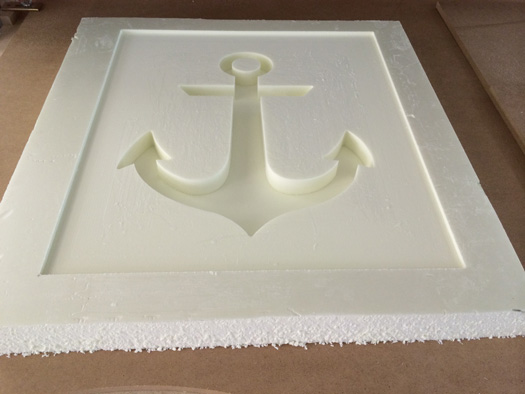
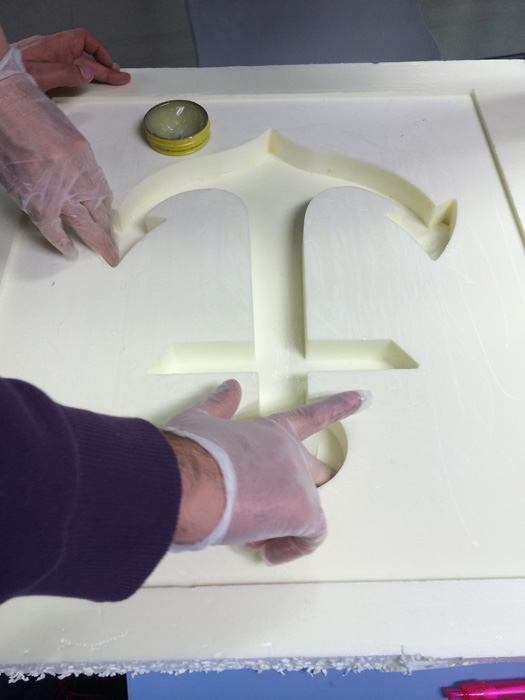
Bottom part of the Mold
The top part of the Mold
For the top part of the mold I was planning to make the same anchor shape positive to provide enough pressure, but then I thought having a flat surface might do the same. I milled the foam for 5 mm to give it a smooth surface and wanted to do that for the top part.
Top part of the mold
Burlap
I used burlap. I cut the burlap the same shape as anchors. I also cut some stipes.
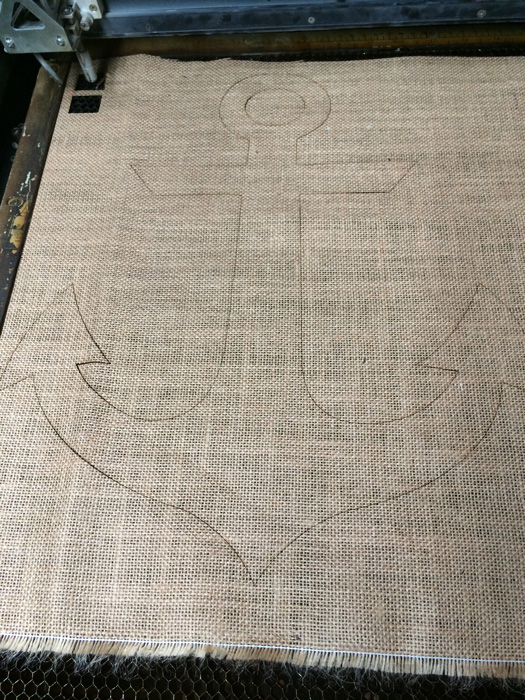
The anchor shape cut with laser cutter
Vaseline
I used vaseline to the mold that the composite can get out easily. I did not cover the mold with the plastic.
Applying vaseline to the mold
Resin and the hardener
I used the resin and hardner that I got from the local market in Finland. Everything is written in Finnish but the ratio of adding hardener is 1 percent. The pot life for the mixture is 10 minutes.
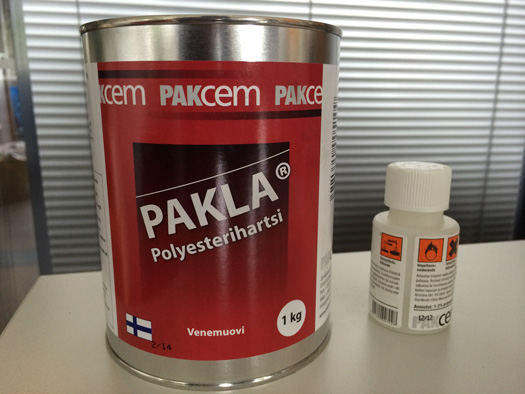
Resin and the hardner
The procedure
I mixed the resin with its hardener and dip the first anchor shaped burlap into it. Then I put it in the mold. I added more resin on top of that and then put the second layer and then the third layer. I was planning to pour resin then on top and apply some pressure with the top part of the mold and clamp it. But I saw the foam was melting while the resin was applied. I did not go any further from the 3 layers and then tried to cover the sides of the anchor with burlap strips. The foam in the side was melting too. After that to join the sides to the bottom, I used smaller pieces of stipes and put them to lower edge, then added some resins. The final shape was looking like this. As you can see in the picture the foam is melted. I also took a picture from back side of the foam. I saw the resin was nearly reaching to the back of the foam. I had reserved 17 mm in the back of the mold.
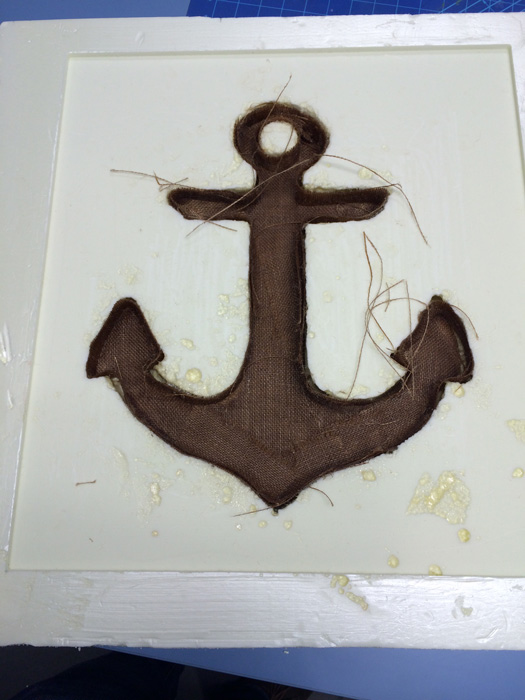
Burlap and Resin together in the mold
Back of the Foam
The Finanl result
At the end it was very difficult to get out the composite from the mold although I had covered the whole inner surface with vaseline. I had to break the mold and get the composite out. It was strong and rigid, but it was deformed abit because the mold was melted. As you can see there are foam pieces sticking to the composie
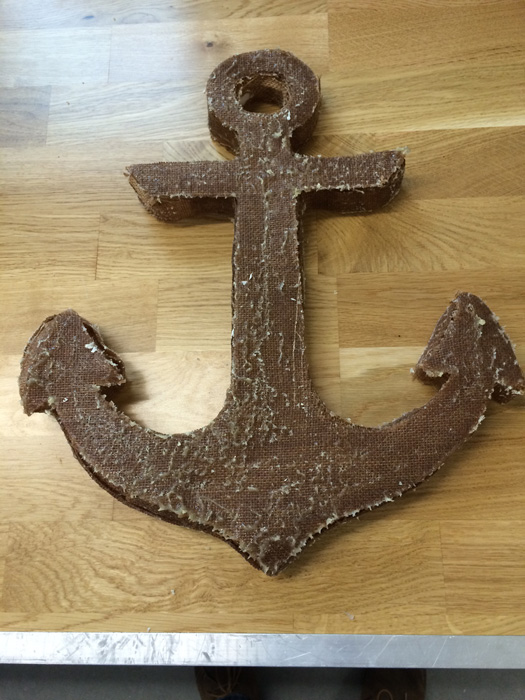
Final composite
Conclusion and learning
I learned why pressure is needed in this process. I got some vacum bag to try making composites later using vacum bagging. The foam was melting by applying the resin, so covering the mold with some plastic will be helpful.
Files:
3D Model
|
 Fab Academy Class 2014