
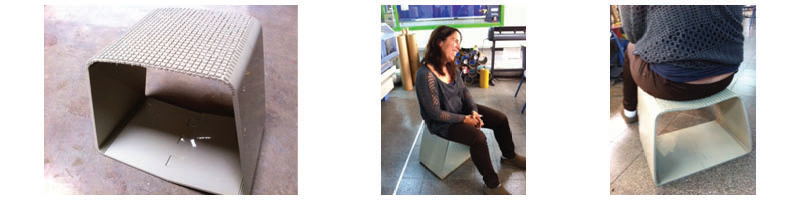
This week we discussed about computer controlled machining, like the ShopBot. I chose to create a stool, one strip of poly – Frophilan that folds to a stool, I have used the ”Dukta” technique, it’s a Japanese method to flax wood.
השבוע עסקנו בעיבוד הנשלט על ידי מחשב, למשל הכרסומת. בחרתי ליצר שרפרף, מפס אחד של פולי-פרופילאן המתקפל לשרפרף, התבססתי על טכניקת ת “דוקטה”, זוהי שיטה יפנית להגמשת עץ
Step 1: Preparing the file
-Before you begin preparing the file make sure the material thickness (10 mm)
-It is very important to work in layers.
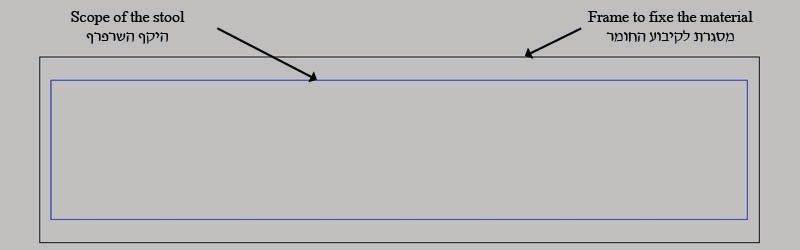
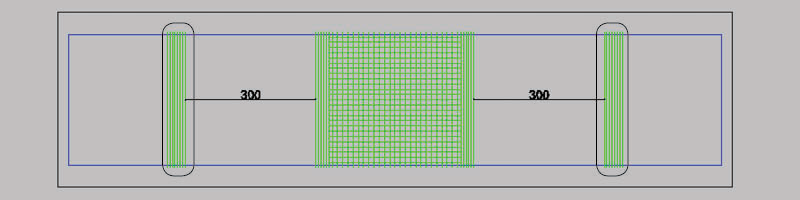
- First we need to sketch a framework that defines us the material (1500 * 400 mm)
Bandwidth +100 mm will define the width of the stool, and strip length + 50 mm will be the scope stool
-First layer: material frame – black.
- Second layer: work area - Blue.
שלב 1: הכנת הקובץ
.(לפני שמתחילים בהכנת הקובץ יש לוודא את עובי החומר (10 מ”מ -
.חשוב מאוד לעבוד בשכבות-
.(ראשית יש לשרטט מסגרת המגדירה לנו את החומר (1500*400 מ”מ -
רוחב הפס+100 מ”מ יהיה רוחב השרפרף -ואורך הפס+ 50 מ”מ יהיה היקף השרפרף
.שכבה ראשונה: מסגרת החומר-שחור-
.שכבה שנייה: תחום העבודה-כחול-
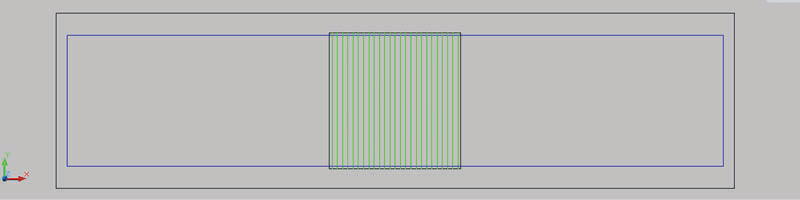
-Third layer: a top look (the inside of the stool) – green.
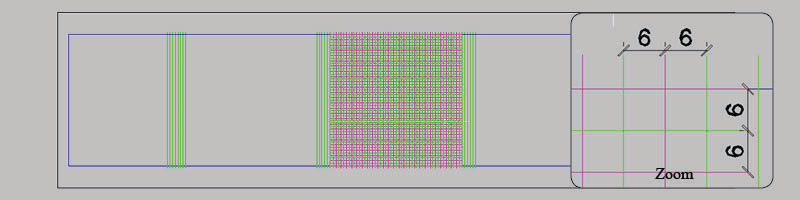
-Then we will draw a square, that define the seat and position it in the middle. within we will draw latitude, which surfers from the frame, spaced 12 mm apart.
-It is better to start from the center.
.שכבה שלישית: מבט על(החלק הפנימי של השרפרף)- ירוק-
לאחר מכן משרטטים ריבוע, המגדיר לנו את המושב וממקמים אותו באמצע. בתוכו נשרטט קווי רוחב אשר גולשים-
.ממסגרת הפס, במרווחים של 12 מ”מ אחד מהשני
רצוי להתחיל מהמרכז-
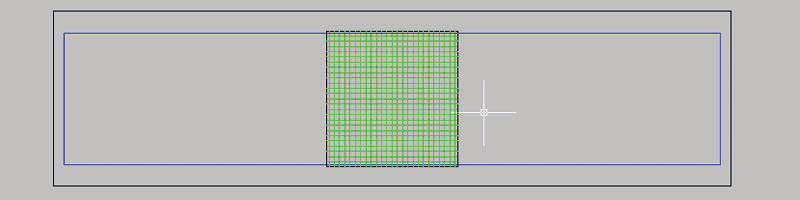
-Now We will draw also longitude within the square, also the space of 12 mm
עכשיו נשרטט גם קווי אורך בתוך הריבוע, גם כן במרווח של 12 מ”מ-
-Now we will create 6 latitudes space6 mm apart,from the seat frame to the right and to left also. These lines mark the first bending between the legs and the seat.
כעת נייצר 6 קווי רוחב במרווחים של 6 מ”מ, ממסגרת המושב ימנה ושמאלה. קווים אלה מסמנים את הכיפוף-
.הראשון בין המושב לרגליים
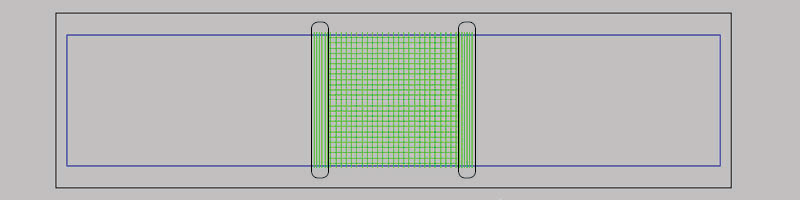
-In a distance of 300 mm, We will draw 8 additional latitudes also only 6 mm apart.
.במרחק של 300 מ”מ מהקווים הקודמים, נשרטט 8 קווי רוחב נוספים גם כן במרחק של 6מ”מ-
Fourth layer: Back View (the outside of the stool) - Pink.
- We will draw the same grid we drew earlier in the seat, but a deviation of 6 mm,meaning a pink line will be between two green lines.
.בשכבה רביעית: מבט תחתון(החלק החיצוני של השרפרף)-ורוד-
נשרטט את אותו הגריד ששרטטנו קודם על המושב אך בסטייה של 6 מ”מ, כלומר שקו ורוד יהיה בין שני-
.קווים ירוקים
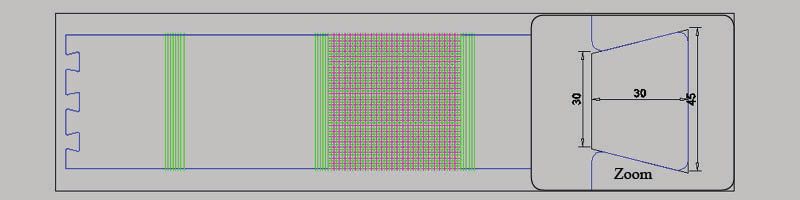
-Now back to the frame of the stripe, we need to create a locking. At the right-edge, We will draw three trapezoids, and copy them too the left-edge.
-It is very important to fillet the corners of the trapezoid, with a diameter of 3.08 mm (the thickness of the milling bit).
.כעת נחזור למסגרת של הפס כולו וניצור נעילה, בקצה הימני נשרטט 3 טרפזים, נעתיק אותם גם לקצה השמאלי-
.(חשוב מאוד לעגל את הפינות של הטרפז , בקוטר של 3.08 מ”מ (כעובי הכרסום-
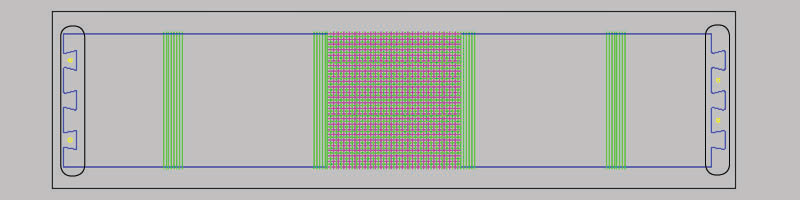
-Fifth and final Layer: align pockets – yellow.
-In order to milled the material on both sides, we need to create 4 pockets to put Finns, when we turn over the material to the other side we can place it in exactly the same place.
.שכבה חמישית וארונה: כיסים ליישור-צהוב-
כדי שנוכל לכרסם משני צידי החומר, אנו ניצור 4 כיסים שבהם נכניס פינים, כאשר נהפוך את החומר לצידו השני-
.נוכל למקם אותו בדיוק באותו מקום
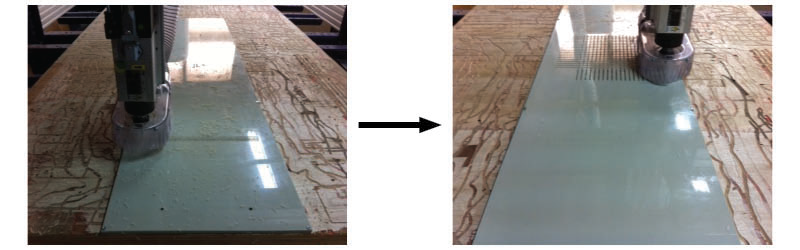
Step 2: Milling – Shopbot
The milling will be in several stages:
-The bit i used is: one flute, ball end, diameter of 3.08 mm
-First stage is affixing the material to the table, then milling the pockets layer, 13 mm depth
-Stage two is milling the top view layer, green, only 6 mm depth.
שלב 2: כרסום בשופ-בוט
:את הכרסום נבצע במספר שלבים
הכרסום שאיתו נעבור הוא: כנף אחת, קצה עגול, בקוטר של 3.08 מ”מ-
שלב ראשון נקבע את החומר לשולחן הכרסומת ונכרסם את הקובץ של הכיסים, בעומק של 13 מ”מ-
.שלב שני נכרסם את את מבט העל , השכבה הירוקה, בעומק של 6 מ”מ-
-Third stage put the pins in their pockets, then release the material, clean the table, and turn the material, using the pins we can place the material in the same place exactly.
-Stage four milling the back view, the pink layer, also the depth of 6 mm.
.שלב שלישי נשים את הפינים בכיסים, נשחרר את החומר,ננקה את השולחן משבבים ונסובב את החומר, בעזרת הפינים נוכל למקמם את הלוח באותו מקום בדיוק-
.שלב רביעי נכרסם את המבט התחתי , שכבה ורודה, גם כן העומק של 6מ”מ-
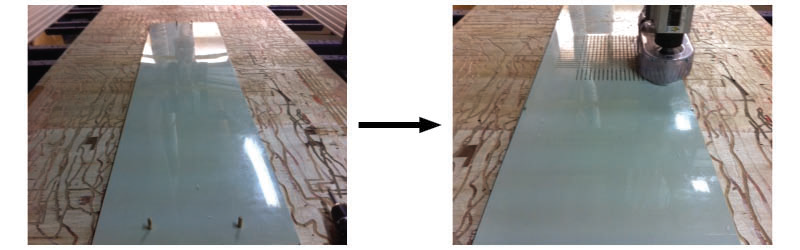
Fifth and final stage is the milling of the frame,I recommend to create at least 4 bridges on each side, so the material will not move
.השלב החמישי והאחרון הוא כרסום המסגרת, ממומלץ לעשות לפחות 4 גשרים בכל צד, כדי שהחומר לא יזוז-

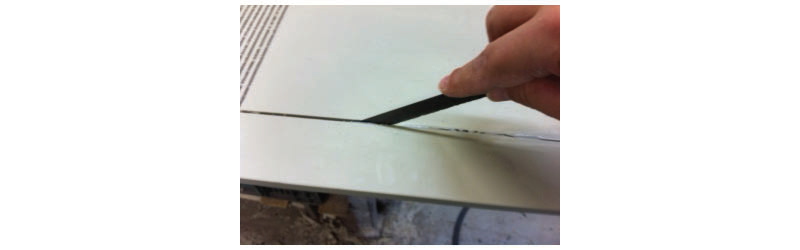
Step 3: Bending the stool
First extrication the left frame stool, using traditional
שלב 3: כיפוף השרפרף
.ראשית נחלץ את השרפרף מהמסגרת שנותרה, עזרת במסור-
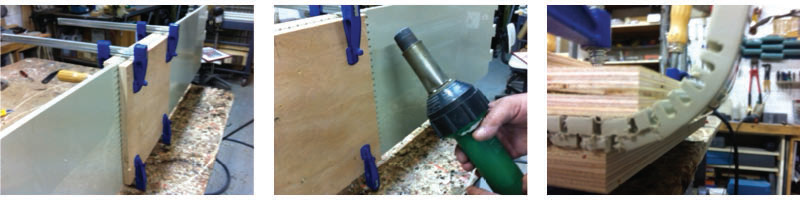
-afterwards with a hot air gun, heat the strips on both sides of the material for 5 minutes and bend. Then cool the band strip with a damp cloth.
-Should first bend the rails between the seat leg and then between the legs to the bottom.
-Addition, it is recommended to put wooden boards on both sides of the strip so that the heat will be targeted.
.לאחר מכן בעזרת פן תעשייתי, יש לחמם את פסי הכיפוף משני צידי החומר בערך כ-5 דק’ ולכופף. מידי אחר כך יש לקרר את פס הכיפוף בעזרת מטלית לחה-
.רצוי קודם כל לכופף את הפסים בין הרגל למושב ואחר כך בין הרגליים לתחתית-
.בנוסף מומלץ לשים לוחות עץ משני צידי הפס כדי שהחום יהיה ממוקד-
Now… just lock the stool…and sit…
….עכשיו רק להכניס את הנעילה…ולשבת
Final file:
:קובץ סופי
Attempts:
First attempt: Test was a square 100 * 100 mm in order to check how far has erode
:ניסיונות
ניסיון ראשון: היה טסט של ריבוע 100*100 מ”מ בכדי לבדוק באיזה עומק יש לכרסם
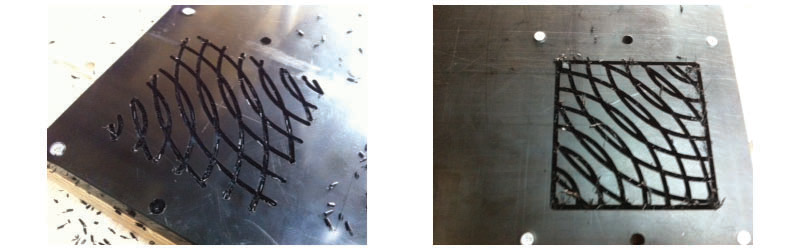
Conclusion: The thickness of the material – Diameter of the bit= depth of milling
מסקנה: עובי החומר-קוטר הביט=עומק הכרסום
Second experience: A 250 * 250 mm square to check if the surface can be bend to a double curved surface
ניסיון שני: היה טסט של ריבוע 250*250 מ”מ בכדי לבדוק באם אכן ניתן לקבל כיפוף דו עקמומי
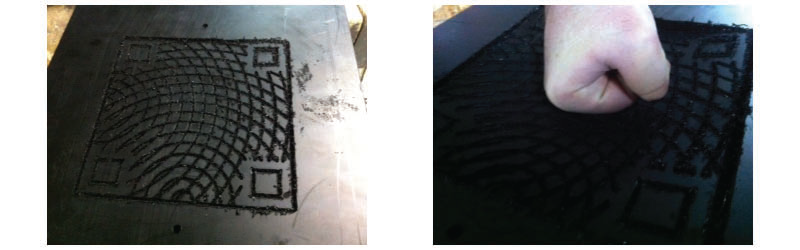
Conclusion: It can be done!!!
!!!מסקנה: זה אפשרי
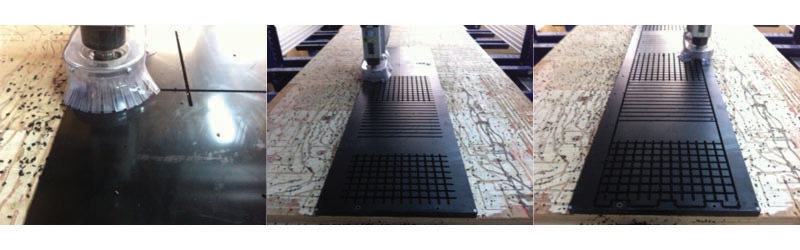
Third experience: Was the first attempt to miiied the all the way, but it failed because there was a movement of the material
ניסיון שלישי: היה ניסיון ראשון לכרסום כל הצורה, אבל הוא כשל כי הייתה תזוזה בכרסום של הצד השני
P.S.
Thank you very much Hiro(ya) Tanaka for amazing workshop
.נ.ב
תודה רבה להירו טאנקה על סדנא מדהימה