
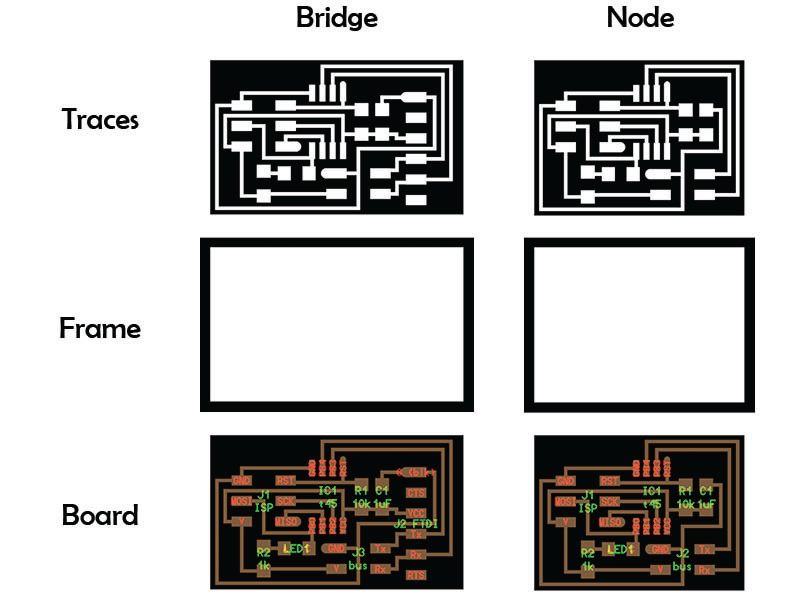
Step 1 : Milling the boards and solder all the components
We need one bridge and two nodes
שלב 1 : כרסום הלוחות והלחמת הרכיבים
אנו צריכים גשר אחד ושני נקודות מרכז
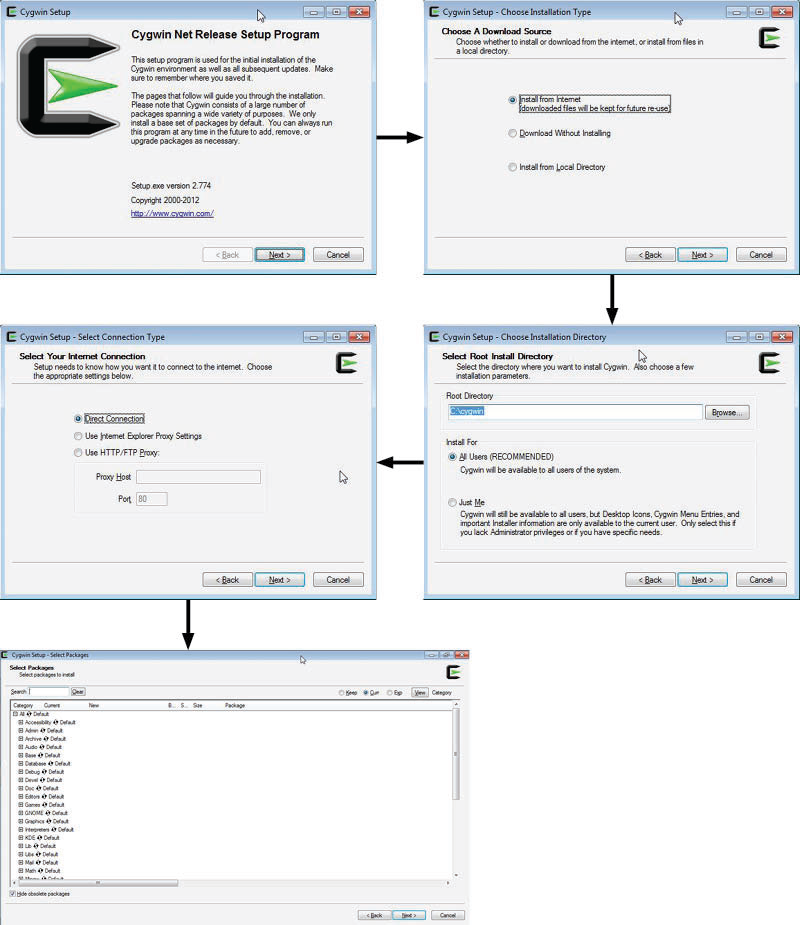
Step 2 : Download and install the software CYGWIN
To program in ”C”, I had to install the Linux environment on my computer on my PC-Windows 7
The installation is really simple …
CYGWIN-שלב 2 : הורדה והתקנה של תוכנת ה
PC-Windows 7 בכדי לתכנת בשפת “סי”, היה עליי להתקין סביבה של לינוקס על המחשב שלי
…ההתקנה ממש פשוטה
Step 3 : programming and connections
- connect the FTDI cable from a USB port of your laptop to the FTDI connector on the BRIDGE node. it is important not because of the serial communication, which we don’t need at first, but because it provoides the power to the system.
check:
שלב 3: תכנות וחיבורים
…לפני שממתחילים לתכנת יש לחבר את הכבלים כך
חבר את כבל אפ,טי,די,אי מיציאת ה-יו,אס,בי של המחשב הנייד שלך למחבר אפ,טי,די,אי על הגשר. זה חשוב לא בגלל התקשורת טורית, שאין לנו צורך בשלב זה, אלא בשביל לספק חשמל למערכת
:בדוק
BLACK = GROUND
connect the usb port of the AVRISP2 to an USB port of the laptop
חבר את יציאת ה-יו,אס,בי של ה-אי,וי,אר2 ליציאת היציאת ה-יו,אס,בי של המחשב הנייד
connect the flat cable of the AVRISP to the node (or bridge node) 6 pin connector.
check: you should see a green light in the avrisp programmer
חבר את הכבל השטוח של אי,וי,אר למחבר סיכה 6 הצומת
בדיקה: אתה תראה נורה ירוקה דולקת באי,וי,אר
connect all the nodes in series with a flat cable that runs through all the 4 pin connectors. the 4 pins allow for the communications but also provide power to the second and third nodes
חבר את כל הצמתים בסדרה עם כבל שטוח שעובר את כל 4 פיני המחברים. 4 פינים מאפשרים את התקשורת, אבל גם מספקים חשמל לצומת השנייה ושלישית
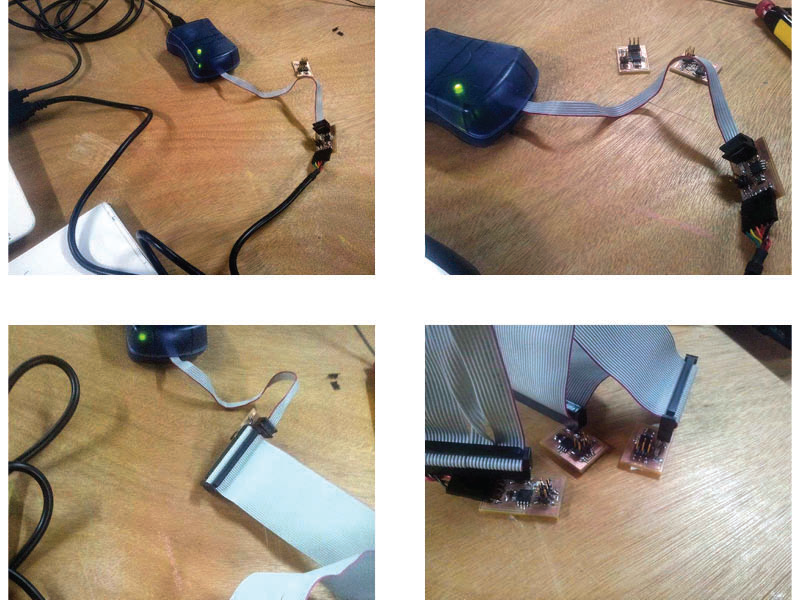
*as can be seen we didn’t have a 4 wire flat cable, so i used a wider cable scavenged from an old PC.
כפי שניתן לראות לא היה לנו 4 חוט כבל שטוח, אז השתמשתי בכבל רחב יותר שנאסף ממחשב ישן*
the programming of the nodes was done with an AVRISP programmer
at first i set to program node #0 which is also the bridge. i typed the line:
AVRISP תכנות של הנקודות מרכז נעשה עם מתכנת
:בהתחלה אני מגדיר לצומת תכנית # 0 שהוא גם הגשר. אני הקלדתי את השורה
make -f hello.bus.45.make program-avrisp2
it works!
!זה עובד
for each node that you program, you need to change the c-code with a unique ID so that they can be identified in the network.
i named the nodes “0″, “1″ and “2″.
לכל צומת שאתה מתכנת, אתה צריך לשנות את ה-סי קוד עם שם מזהה ייחודי, כך שהם יכולים להיות מזוהים ברשת
אני קראתי לצמתים 0 , 1 , ו-2
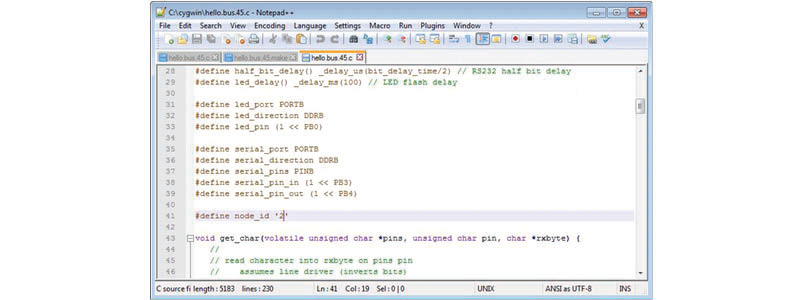
so… for each NODE you want to program , you should:
- change the ID in the c-code.
- connect the 6 wire cable from the programmer to the corresponding NODE board
- go to the LINUX terminal window and PROGRAM the node.
- test the network
*at this stage, the avrisp can be disconnected, we are done programming.
:אז…עבור כל צומת שאתה רוצה לתכנת , אתה צריך
לשנות את השם בסי-הקוד -
לחבר את כבל 6 מהמתכנת ללוח הצומת -
ללכת לחלון מסוף לינוקס ולתכנת את הצומת -
בדיקת הרשת -
בשלב זה, יכול המתכנת יכול להיות מנותק, אנחנו סיימנו לתכנת*
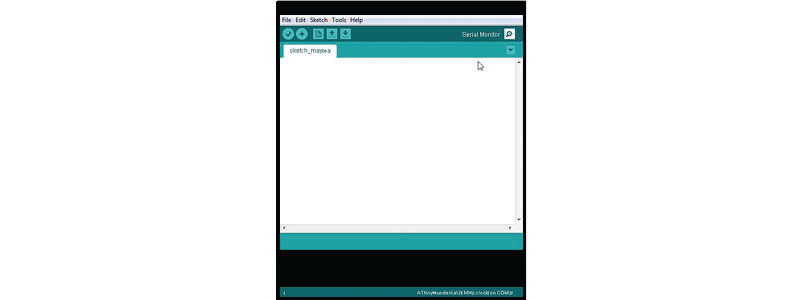
to test the network, open the arduino IDE:
go to tools and check the correct serial port. you can connect and disconnect the FTDI cable to see what is the correct serial port number. mine was port 14
:IDE כדי לבדוק את הרשת, לפתוח את ארדואינו
ללכת לכלים ולבדוק את היציאה טורית הנכונה. אתה יכול להתחבר ונתק את כבל אפ,טי,די,אי כדי לראות מה הוא מספר היציאה טורית הנכון. היציאה שלי הייתה 14
on the window that opens, you have a node text field, write the id number of one of the nodes (0, 1 or 2) and see what happens.
if everything is good, the window will echo the name of the node (e.g. “node 0″) and the nodes LEDs will light:
first all three leds blink together, and then the “0″ node blinks once again.
בחלון שנפתח, יש לך שדה טקסט לצומת, כתוב את שם של אחד מצומת (0, 1 או 2) וניראה מה קורה
אם הכל טוב, החלון יהדהד את השם של הצומת (למשל “צומת 0″) ואת נוריות הלד ידלקו
ראשית כל שלוש הנוריות מהבהבות ביחד, ולאחר מכן את הצומת “0″ מהבהבת שוב