
Step 1: Preparing the file
Select an image.
A profile picture preferably with a uniform background
שלב 1: הכנת הקובץ
בחירה של תמונה
רצוי תמונת פרופיל עם רקע אחיד

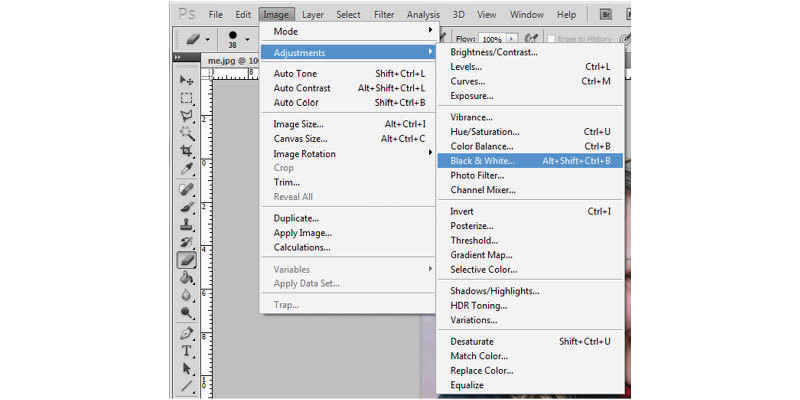
Open the images in Photoshop and turn it into black and white
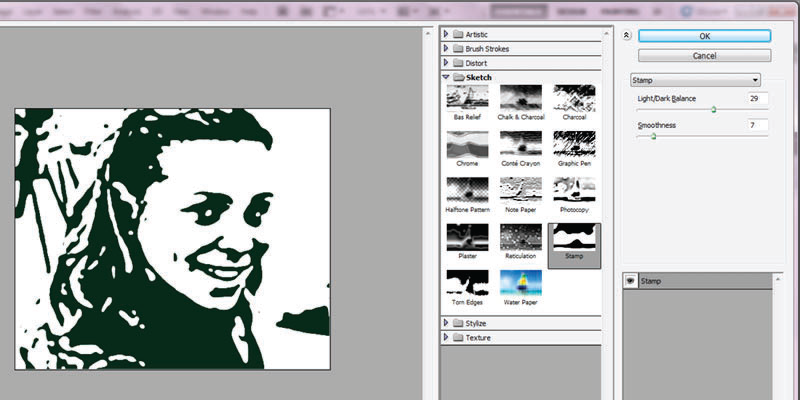
* You should play with the contrast to reach a uniform conflict of the face
הבאת התמונה לפוטושופ והפיכתה לשחור לבן
רצוי לשחק עם הקונטרסט כדי להגיע לניגוד אחיד של הפנים*

Then there are two options for creating stains:
playing with Photoshop filters and save as PDF
:לאחר כן יש שתי אפשרויות ליצירת הכתמים
PDF-משחק בפוטושופ עם פילטרים ולבסוף שמירה כ
bringing the image to Ilustritor and play with the parameters of Live Trace
Live Trace הבאת התמונה לאילוסטריטור ומשחק עם הפרמטרים של

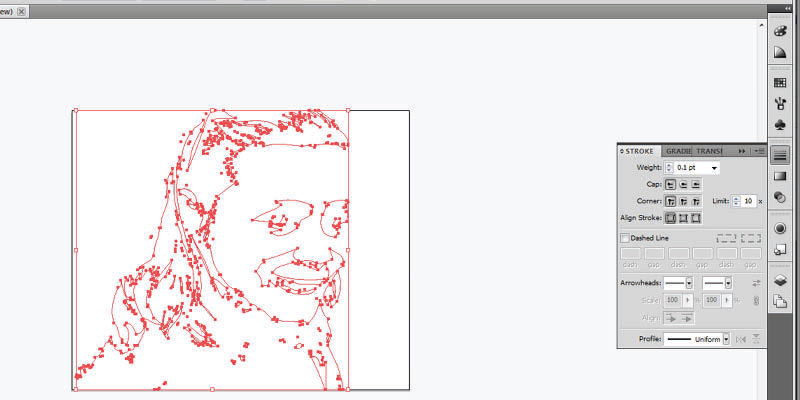
When the image has been composed of black and white stains perform the following commands
Twice to perform these steps several times
כאשר התמונה כבר מורכבת מכתמים של שחור לבן יש לבצע את הפקודות הבאות
לפעמיים כדי לבצע את הפעולות הללו מספר פעמים
Object – Expand
Object – Un Group
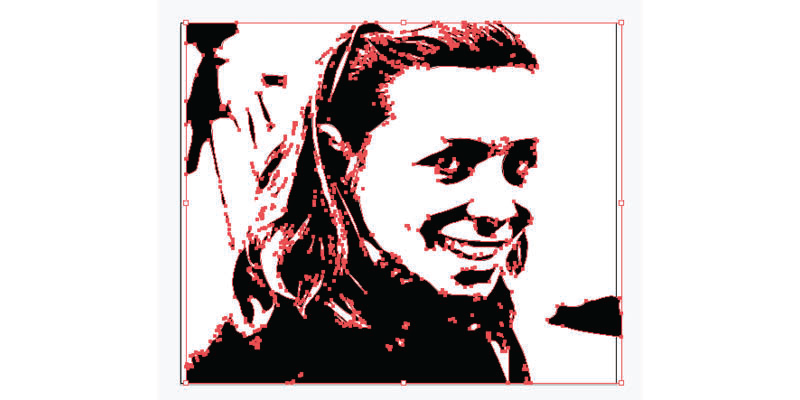
Now you have to clean some stains. Small stains do not come out well then it is advisable to delete them here
כעת יש לנקות קצת את הכתמים. הכתמים הקטנים לא יצאו טוב אז רצוי למחוק אותם כבר כאן

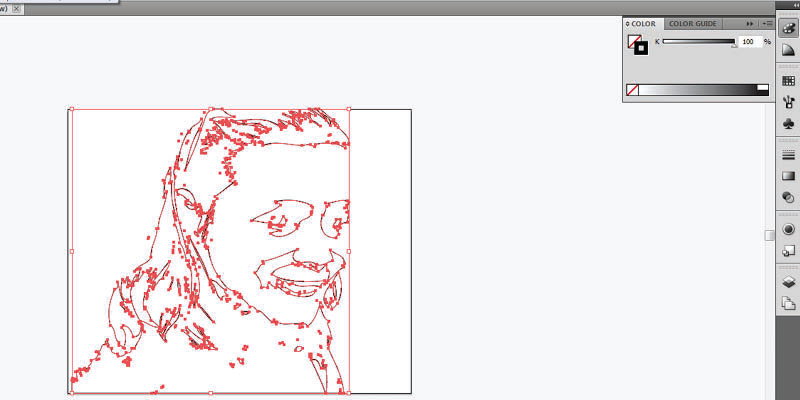
Finally, it should make the outlines spots thickness of 0.1
לבסוף יש להפוך את הכתמים לקווי מתאר בעובי של 0.1
Step 2: Move to the machine
The machine we have in the lab is:
שלב 2 : מעבר למכונה
:המכונה שיש לנו במעבדה היא
SAGA
Choose the color you want and put it in the machine, set it up and will adjust the 168 speed and the power 132
then set the start point (0,0) and now back to the computer and sent it ot print, Ctrl-P
132-נבחר את הצבע שאנו רוצים ונכניס אותו למכונה, נקבע אותו ונכוון את המהירות ל- 168ואת העוצמה ל
Ctrl-P לאחר מכן נקבע את נקודת ההתחלה (0,0) וכעת נחזור למחשב ונשלח להדפסה רגיל

Step 3: Paste the output
After the machine has finished cutting, you need to remove the cylinder from the rest of our piece and peel away the unwanted spots (you can choose between positive/ negativity). Suppose the traising – tape on the sticker and peeled it pasted where you want
שלב 3 : הדבקה של התוצר
לאחר שהמכונה סיימה לחתוך, נפריד את החתיכה שלנו משאר הגליל ונקלף ממנה את הכתמים הלא רצויים (ניתן לבחור בין פוזיטיב לנגטיב). נניח על המדבקה את הטרייסינג-טייפ נקלף ונדביק במקום הרצוי
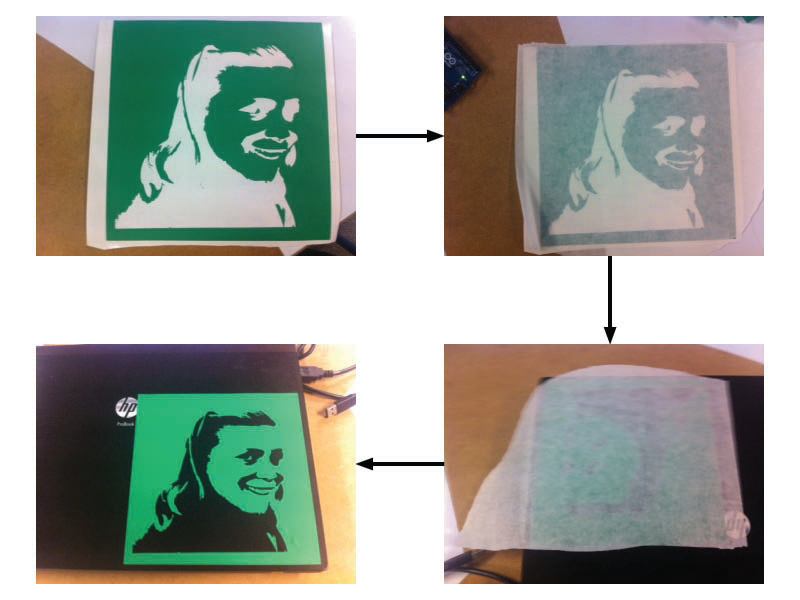
Final file:
:קובץ סופי