
This week we discussed abut Electronics Production, how to milled a board, stuff it with components and program it.
The FabISP is an in-system programmer for AVR microcontrollers. It allows you to program the microcontrollers on other boards you will make.
.השבוע עסקנו בייצור אלקטרוניקה, איך לכרסם לוח, להלחים את הרכיבים ולתכנת אותו
.הוא מאפשר לך לתכנת את הבקרים בלוחות אחרים שתעשה בעתיד .AVR הוא מתכנת במערכת למיקרו בקרי FabISP
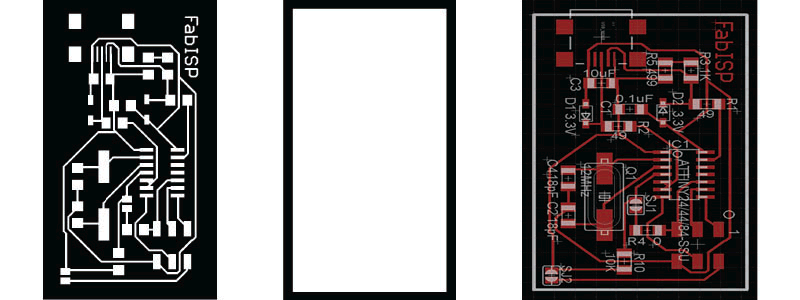
Step 1 : Download the Borard file and mill the board:
Download the traces png and Mill it using the fab modules and a 1/64″ bit.
.שלב 1: הורדה של הלוח וכרסומו
.הורד את התמונה של הלוח וכרסם אותו בעזרת הפאבמודולס ו- “1/64 ביט
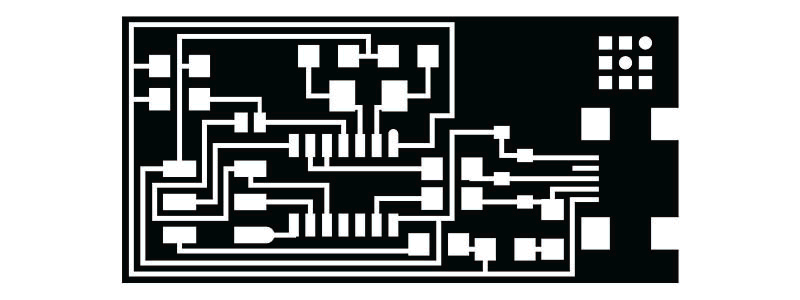
Download the outline png and Mill it using the fab modules and a 1/32″ bit.
.הורד את התמונה של המבגרת כרסם אותו בעזרת הפאבמודולס ו- “1/32 ביט

Step 2 : Start soldering the components on the board
Firstly download the diagram of the board, to know where to solder each component.
You should open the board using “Eagle” software, electronic boards design software.
שלב 2 : התחל בהלחמת הרכיבים על הלוח
.ראשית הורד את הדיאגרמה של הלוח, בכדי תדע לאן להלחים כל רכיב
.רצוי לפתוח את הלוח באמצעות תוכנת ה”איגל”, תוכנה לתכנון לוחות אלקטרונים
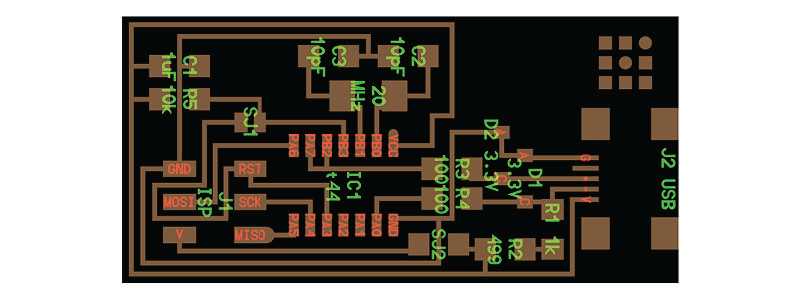
List of components:
:רשימת הרכיבים
- ATTiny 44
- Capacitor 1uF
- Capacitor 10 pF
- Resistor 100 ohm
- Resistor 499 ohm
- Resistor 1K ohm
- Resistor 10K
- 6 pin connector
- 6 pin header
- USB connector
- jumpers
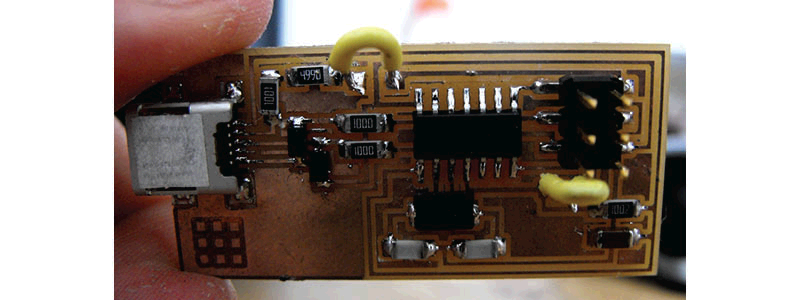
I think it is better to begin at the most difficult component the USB connection and then continue welding the other components from left to right in the order
After each soldering you have to stop and check that the electrical circuit is closed, using an Amfrmtr.
.ומשם להמשיך להלחים את שאר הרכיבים משמאל לימין לפי הסדר .USB-לדעתי רצוי להתחיל דווקא מהרכיב הכי קשה שזה חיבור ה
. (לאחר כל הלחמה יש לעצור ולבדוק שאכן נסגר מעגל חשמלי באמצעות מד זרם (אמפרמטר
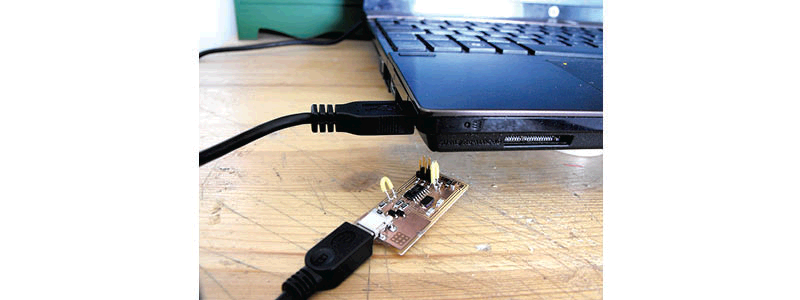
Smoke Test:
Connect the chip to your computer with USB cable.
If you get an error message from your computer, it means that there is a short, go back and recheck the circuit.
If you do not get any message, continue and program the board
:בדיקת עשן
. USB חבר את השבב למחשב באמצעות כבל
.אם אתה מקבל הודעת שגיאה מהמחשב סימן שיש קצר , חזור ובדוק את המעגלים
…אם אינך מקבל שום הודעה, המשך ותכנון הלוח
Step 3 : Download the Programs For PC:
To program the FabISP, you first need to install the WINAVR and download the firmware.
To open the makefile you will need to install Notepad++.
: PC שלב 3: הורד את התכנות למחשב
WINAVR כדי לתכנת את השבב צריך להתקין מספר תכנות, ראשית
firmware הורד את התיקייה
Notepad++ ובשביל לפתוח את התיקייה צריך תכנה נוספת
Step 4: Programming the FABISP
Open your terminal, and go to the firmware library
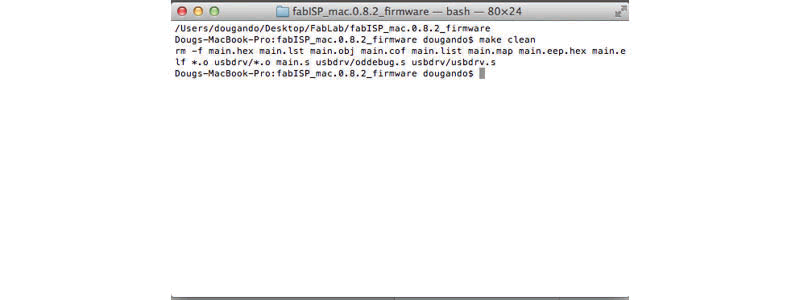
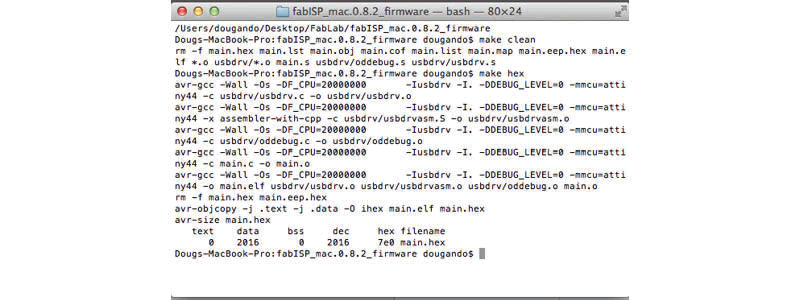
The first action is to clear … ie make sure there’s nothing on the chip
FABISP-שלב 4: תכנות של ה
firmware-פתח המסוף שלך, ולעבור לספריית ה
פעולה ראשונה היא לנקות…כלומר לוודא שאין כלום על הצ’יפ
MAKE CLEAN
MAKE HEX
MAKE FUSE
MAKE PROGRAM
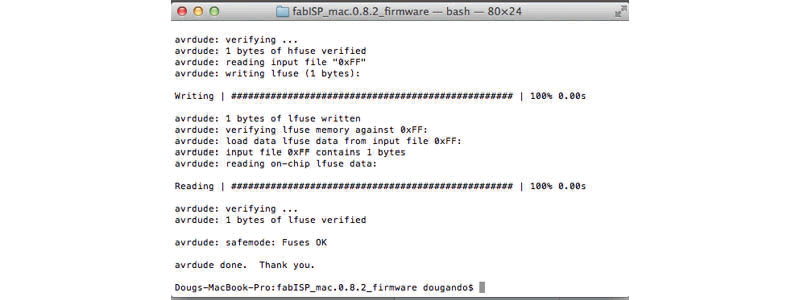
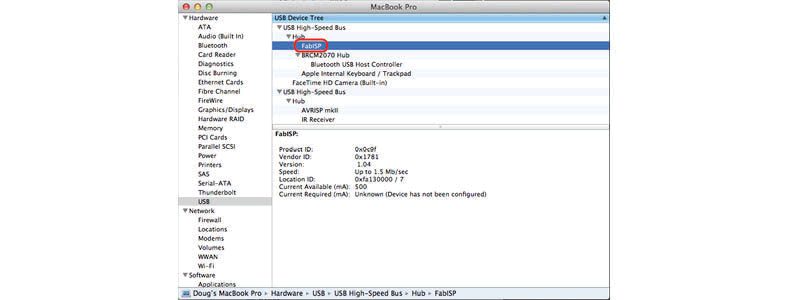
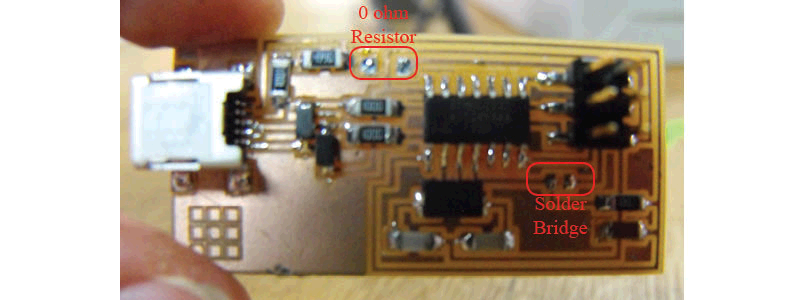
Step 5: Verify that your ISP is woorking and remove the bridges:
Connect the chip to the computer and check the computer actually reads it
:שלב 5: בדיקה של הציפ והורדת הגשרים
חבר את צ’יפ למחשב ובדוק שאכן המחשב קורא אותו
Remove the bridges
הורדת הגשרים
This is the end … finished successfully…
…וזהו…סיימתי בהצלחה
Attempts:
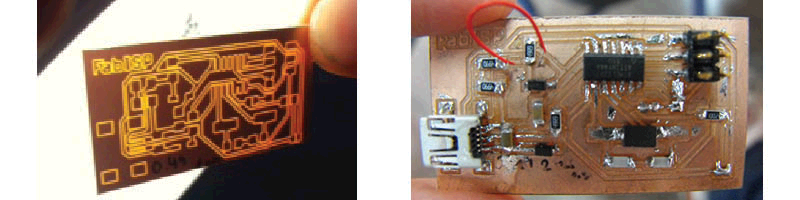
The first attempt was to mill the David design
:ניסיונות
הניסיון הראשון היה לכרסם את העיצוב של דויד
The milling was good, but my soldering was bad
הכרסום יצא טוב, אך ההלחמה לא הייתה טובה
Another problem was I could not program on my computer, so I programmed on another computer
The problem was the software installation
בעיה נוספת ,הייתה לא הצלחתי לתכנת על המחשב שלי, אז תכנתתי על מחשב של אחר
הבעיה הייתה בהתקנות של התוכנות